Page 123 of 513
123
1-7. Safety information
1
Before driving
Installation with LATCH syst
em (second outside seats only)
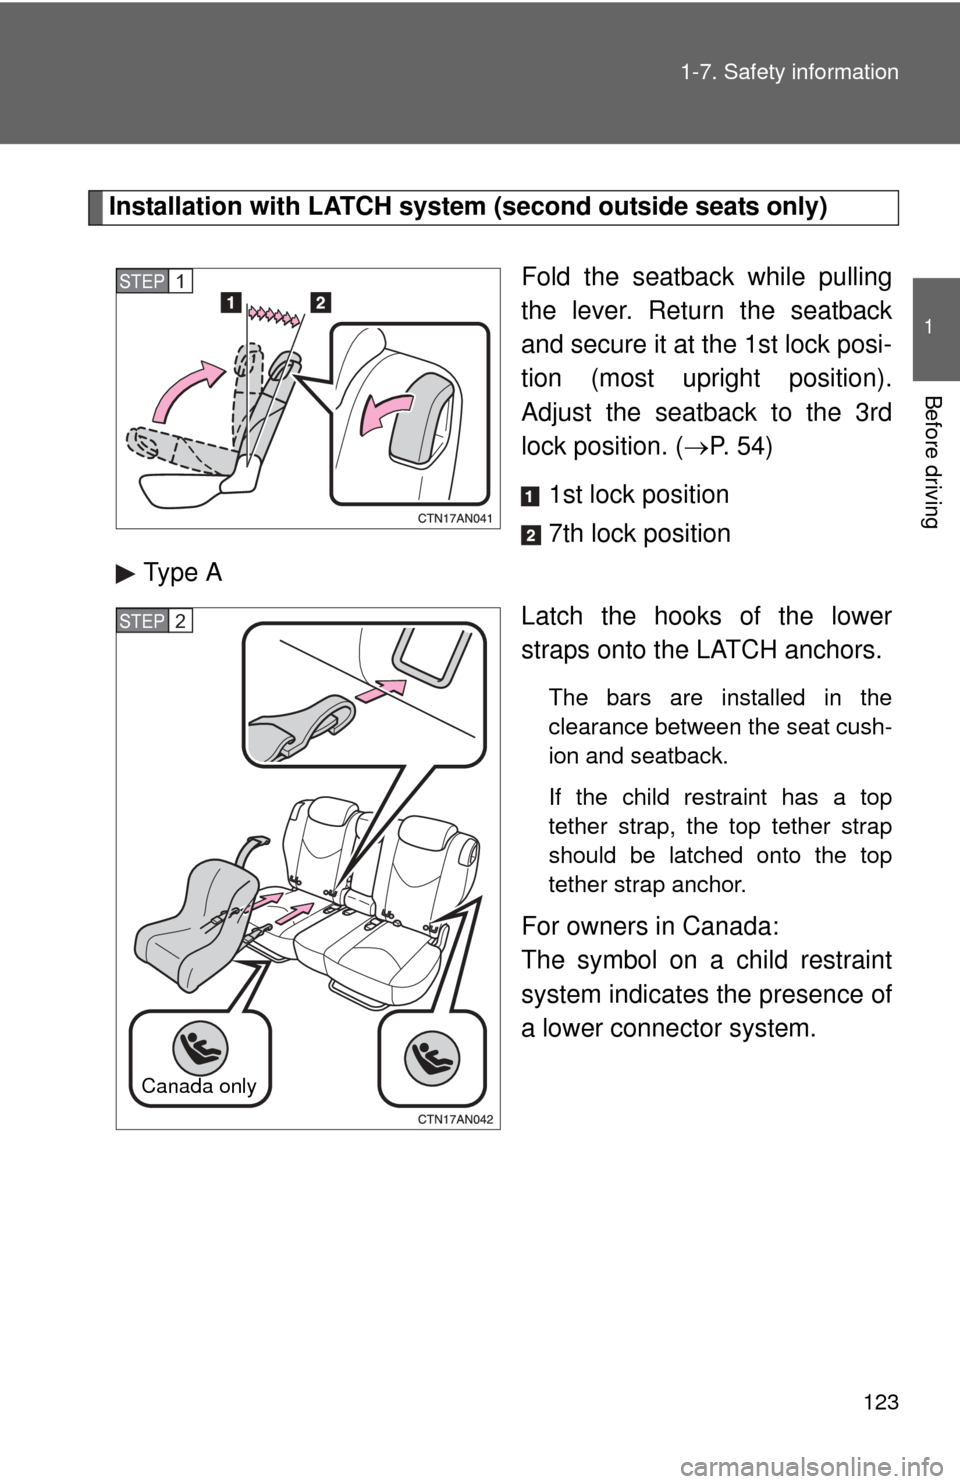
Fold the seatback while pulling
the lever. Return the seatback
and secure it at the 1st lock posi-
tion (most upright position).
Adjust the seatback to the 3rd
lock position. ( P. 54)
1st lock position
7th lock position
Type A
Latch the hooks of the lower
straps onto the LATCH anchors.
The bars are installed in the
clearance between the seat cush-
ion and seatback.
If the child restraint has a top
tether strap, the top tether strap
should be latched onto the top
tether strap anchor.
For owners in Canada:
The symbol on a child restraint
system indicates the presence of
a lower connector system.
STEP 1
STEP 2
Canada only
Page 131 of 513
131
1-7. Safety information
1
Before driving
CAUTION
■
When installing a booster seat
Do not fully extend the shoulder belt to prevent the belt from going to ALR
lock mode. ( P. 71)
ALR mode causes the belt to tighten only which could cause injury or dis-
comfort to the child.
■ When installing a child restraint system
Follow the directions given in the child restraint system installation manual
and fix the child restraint system securely in place.
If the child restraint system is not correctly fixed in place, the child or other
passengers may be seriously injured or even killed in the event of sudden
braking, sudden swerving or an accident.
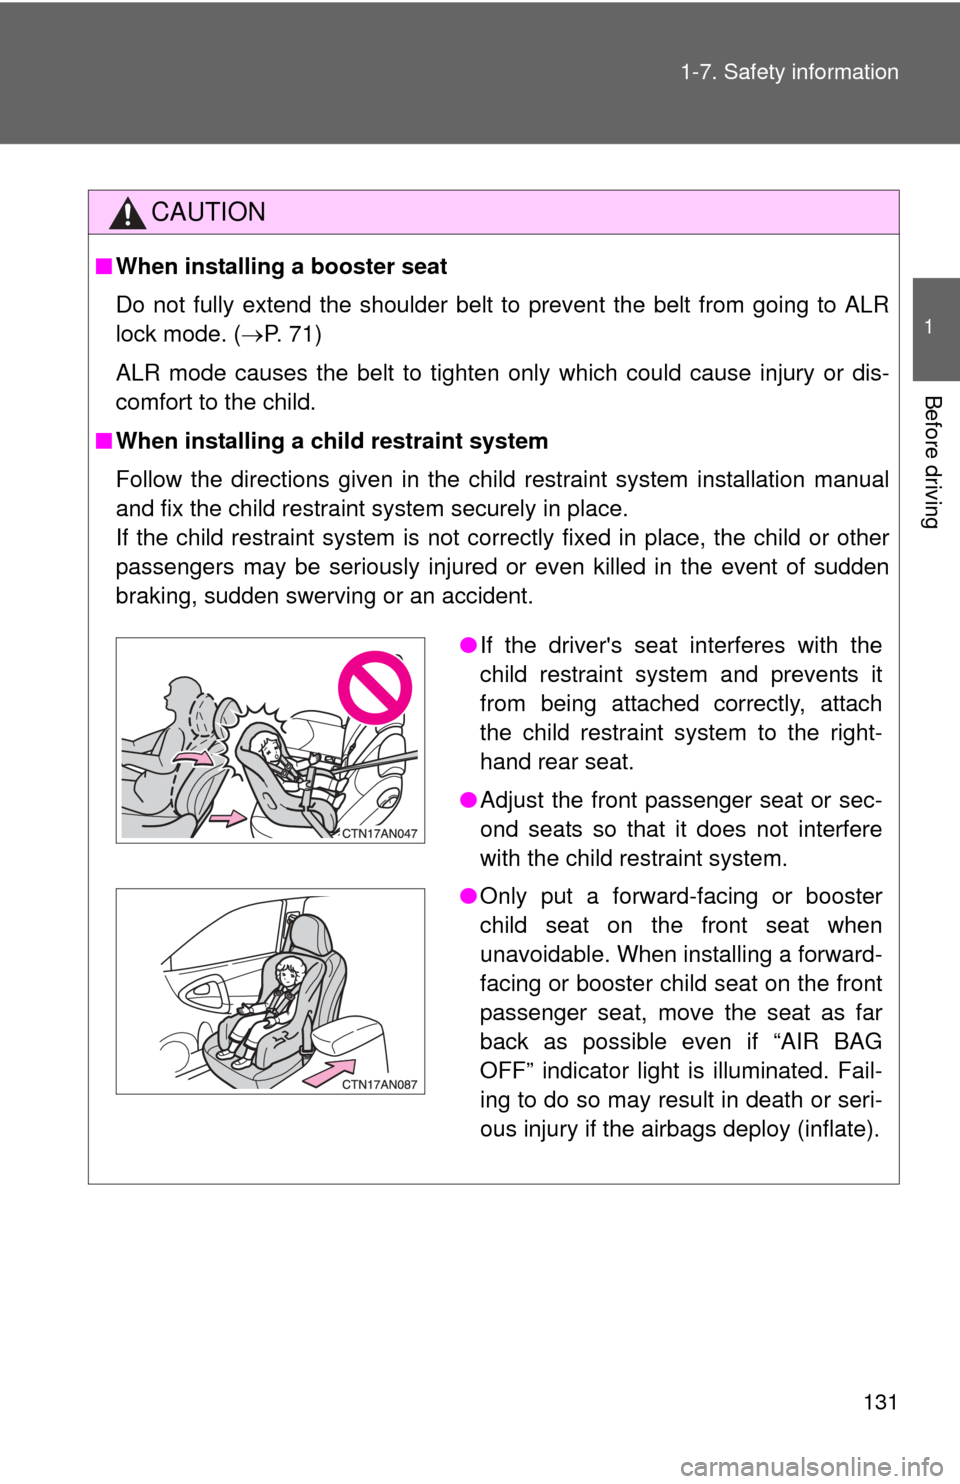
●If the driver's seat interferes with the
child restraint system and prevents it
from being attached correctly, attach
the child restraint system to the right-
hand rear seat.
● Adjust the front passenger seat or sec-
ond seats so that it does not interfere
with the child restraint system.
● Only put a forward-facing or booster
child seat on the front seat when
unavoidable. When installing a forward-
facing or booster child seat on the front
passenger seat, move the seat as far
back as possible even if “AIR BAG
OFF” indicator light is illuminated. Fail-
ing to do so may result in death or seri-
ous injury if the airbags deploy (inflate).
Page 132 of 513
132 1-7. Safety information
CAUTION
■When installing a child restraint system
●When installing a child restraint system in the rear center seat, adjust both
seat cushions to the same position and align seatbacks at the same angle.
Otherwise, the child restraint system cannot be securely restrained and
this may cause death or serious injuries in the event of sudden braking,
sudden swerving or an accident.
● When using the LATCH anchors for a child restraint system, move the seat
as far back as possible (second seat only), with the seatback close to the
child restraint system.
● When a booster seat is installed, always ensure that the shoulder belt is
positioned across the center of the child's shoulder. The belt should be
kept away from the child's neck, but not so that it could fall off the child's
shoulder. Failing to do so may result in death or serious injury in the event
of sudden braking, sudden swerving or an accident.
● Ensure that the belt and tab are securely locked and the seat belt is not
twisted.
● Push and pull the child seat from side to side and forward to be sure it is
secure.
● After securing a child restraint system, never adjust the seat.
● Follow all installation instructions provided by the child restraint system
manufacturer.
■ Do not use a seat belt extender
If a seat belt extender is used when installing a child restraint system, the
seat belt will not securely hold the child restraint system, which could cause
death or serious injury to the child or other passengers in the event of sud-
den braking, sudden swerving or an accident.
■ To correctly attach a child r estraint system to the anchors
When using the LATCH anchors, be sure that there are no foreign objects
around the anchors and that the seat belt is not caught behind the child
restraint. Make sure the child restraint system is securely attached, or it may
cause death or serious injury to the child or other passengers in the event of
a sudden stop, sudden swerve or accident.
Page 137 of 513

137
2-1. Driving procedures
2
When driving
CAUTION
●
Do not shift the shift lever to P while the vehicle is moving.
Doing so can damage the transmission and may result in a loss of vehicle\
control.
● Do not shift the shift lever to R while the vehicle is moving forward.
Doing so can damage the transmission and may result in a loss of vehicle\
control.
● Do not shift the shift lever to D while the vehicle is moving backward.
Doing so can damage the transmission and may result in a loss of vehicle\
control.
● Moving the shift lever to N while the vehicle is moving will disengage the
engine from the transmission. Engine braking is not available when N is
selected.
● During normal driving, do not turn off the engine. Turning the engine off
while driving will not cause loss of steering or braking control, but the
power assist to these systems will be lost. This will make it more difficult to
steer and brake, so you should pull over and stop the vehicle as soon as it
is safe to do so.
However, in the event of an emergency, such as if it becomes impossible
to stop the vehicle in the normal way: P. 418
● Use engine braking (downshift) to maintain a safe speed when driving
down a steep hill.
Using the brakes continuously may cause the brakes to overheat and lose
effectiveness. ( P. 151)
● Do not adjust the position of the steering wheel, the seat, or the inside or
outside rear view mirrors while driving.
Doing so may result in a loss of vehicle control that can cause accidents
that may result in death or serious injury.
● Always check that all passengers' arms, heads or other parts of their bod-
ies are not outside the vehicle, as this may result in death or serious injury.
● Do not drive the vehicle off-road.
This is not a 4WD vehicle designed for real off-road driving. Proceed with
all due caution if it becomes unavoidable to drive off-road.
● Do not drive across river crossings or through other bodies of water.
This may cause electric/electronic components to short circuit, damage
the engine or cause other serious damage to the vehicle.
Page 221 of 513
221
3-1. Using the air conditioning system
and defogger
3
Interior features
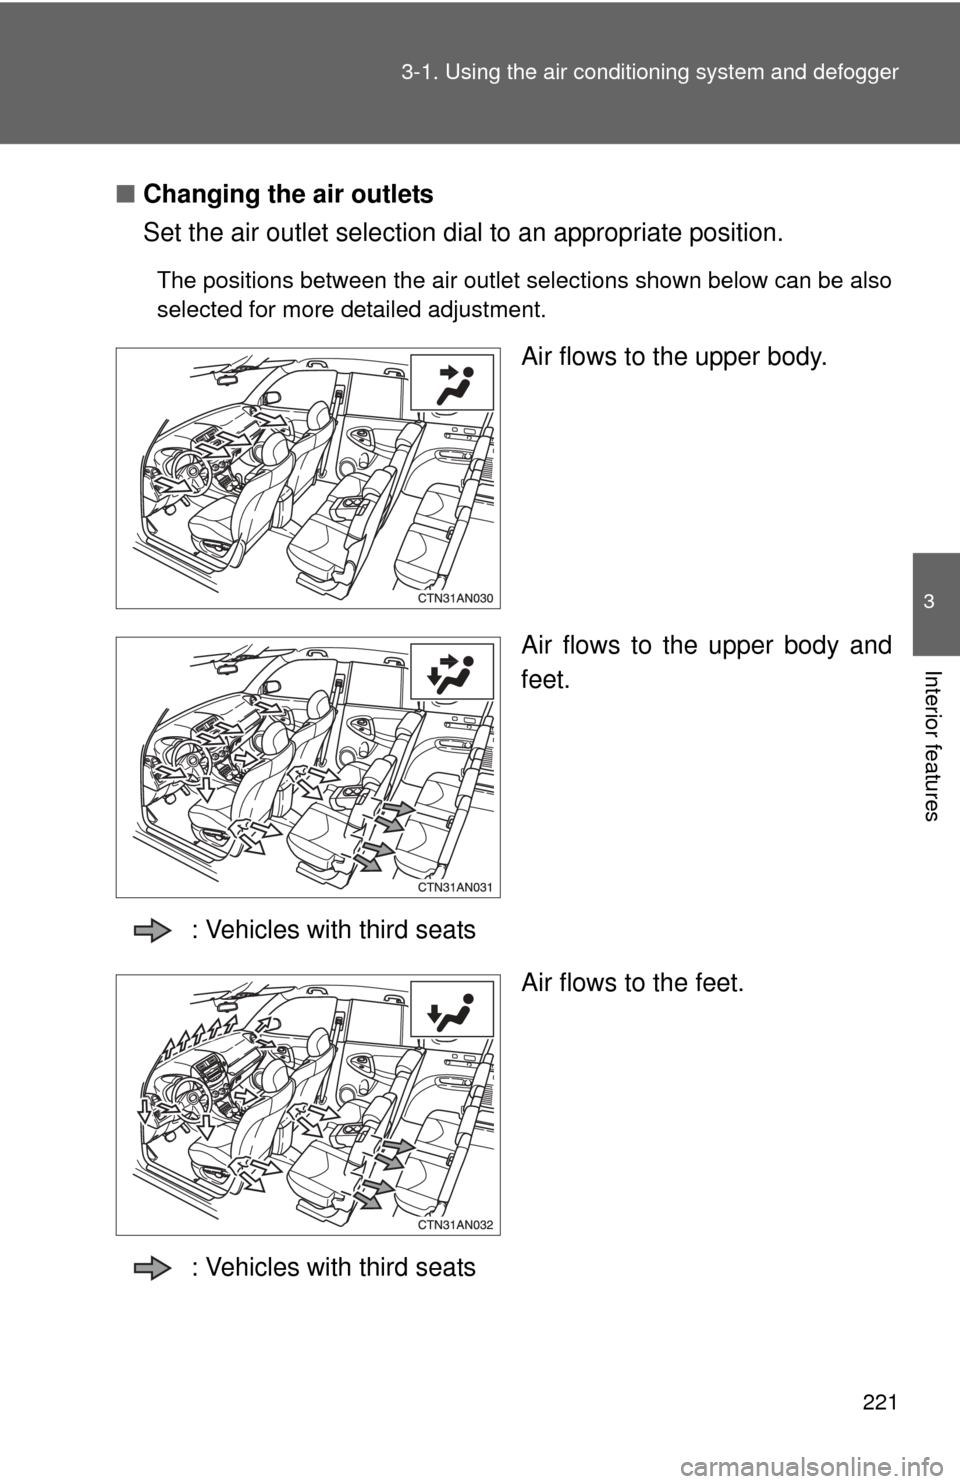
■Changing the air outlets
Set the air outlet selection di al to an appropriate position.
The positions between the air outlet selections shown below can be also
selected for more detailed adjustment.
Air flows to the upper body.
Air flows to the upper body and
feet.
: Vehicles with third seats Air flows to the feet.
: Vehicles with third seats
Page 226 of 513
226
3-1. Using the air conditioning system and defogger
Automatic air conditioning system
Using the automatic modePress .
The air conditioning system begins to operate. Air outlets and fan
speed are automatically adjusted according to the temperature set-
ting.
Press “” on to increase the temperature and “ ” to
decrease the temperature.
Air outlets and fan speed for the driver and passenger seats may be
set separately depending on the temperature setting.
Airflow and outlets are automatica lly adjusted according to the tem-
perature setting.
Fan speed Air conditioning
on/off switch
Changes the air outlets used
Off
Driver's side
temperature control
Automatic mode
Windshield defogger
Outside air or
recirculated air modeAir flow display
Micro dust and pollen filter Passenger’s side
temperature control
STEP 1
STEP 2
: If equipped
Page 227 of 513
227
3-1. Using the air conditioning system
and defogger
3
Interior features
Adjusting the settings
■ Adjusting the temperature setting
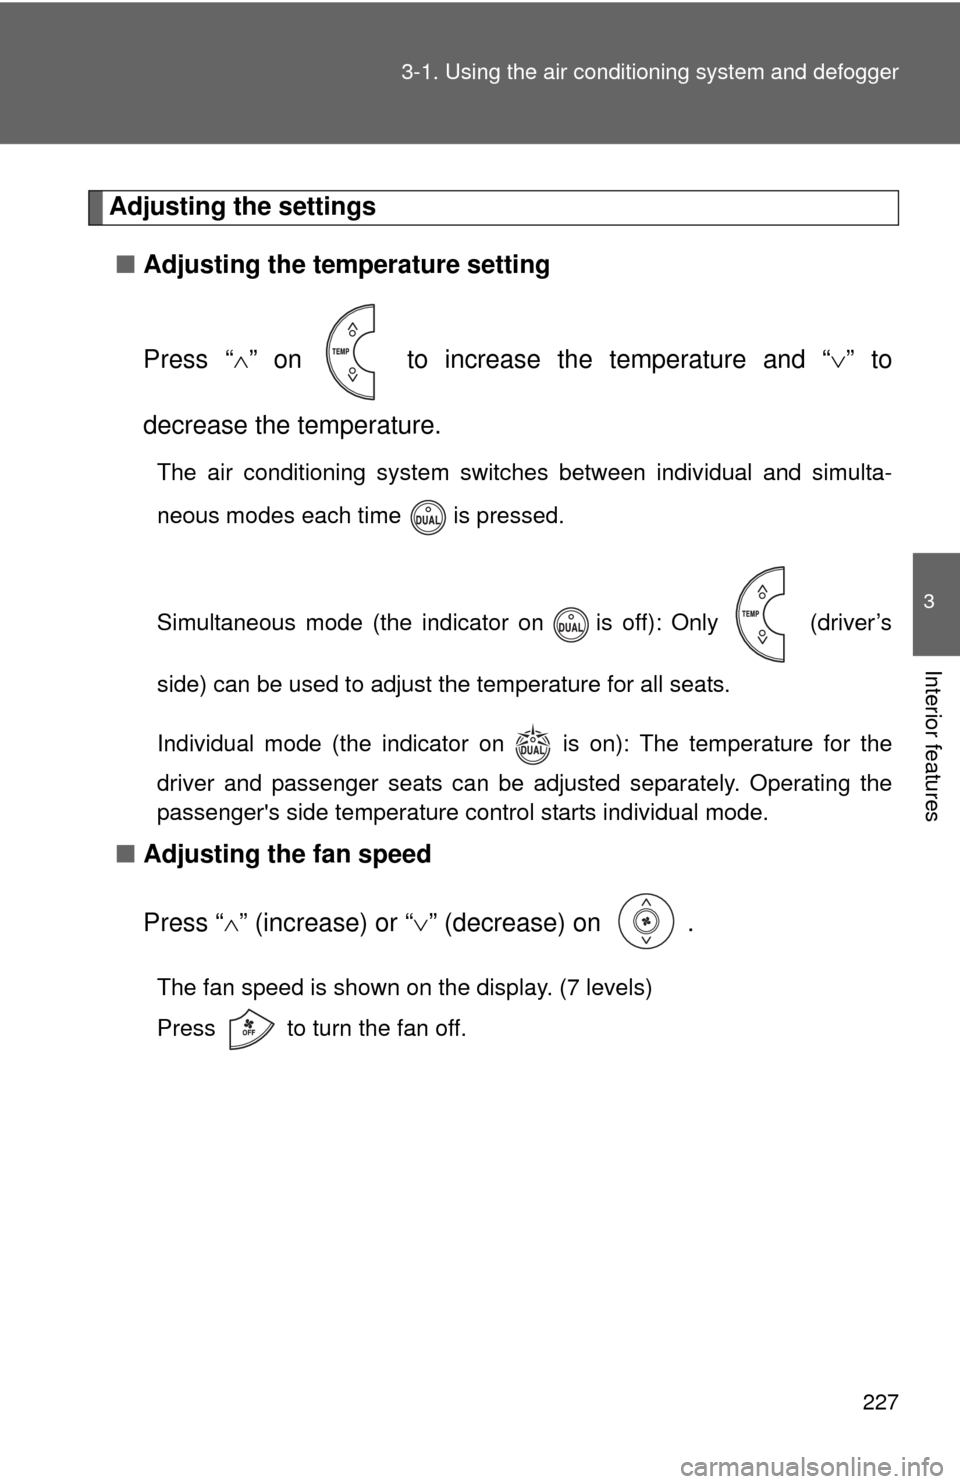
Press “ ” on to increase the temperature and “ ” to
decrease the temperature.
The air conditioning system switc hes between individual and simulta-
neous modes each time is pressed.
Simultaneous mode (the indicator on is off): Only (driver’s
side) can be used to adjust the temperature for all seats.
Individual mode (the indicator on is on): The temperature for the
driver and passenger seats can be adjusted separately. Operating the
passenger's side temperature control starts individual mode.
■ Adjusting the fan speed
Press “ ” (increase) or “ ” (decrease) on .
The fan speed is shown on the display. (7 levels)
Press to turn the fan off.
Page 309 of 513
308 3-5. Using the storage features
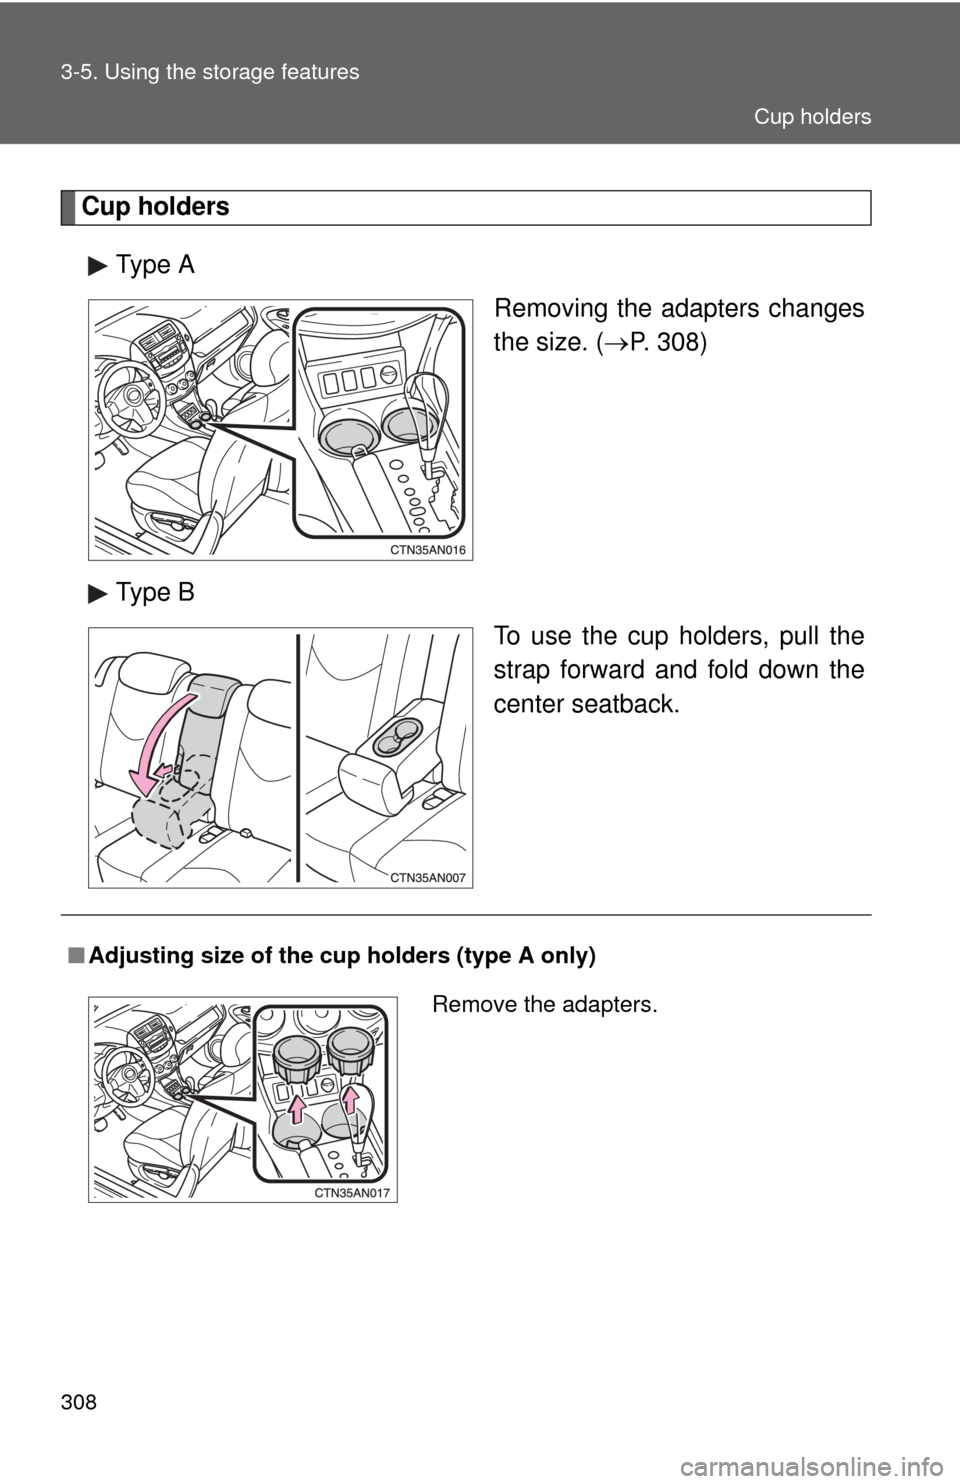
Cup holdersType A Removing the adapters changes
the size. (P. 308)
Type B To use the cup holders, pull the
strap forward and fold down the
center seatback.
■Adjusting size of the cup holders (type A only)
Remove the adapters.
Cup holders