Page 58 of 195

DESTINATION SEARCH
58
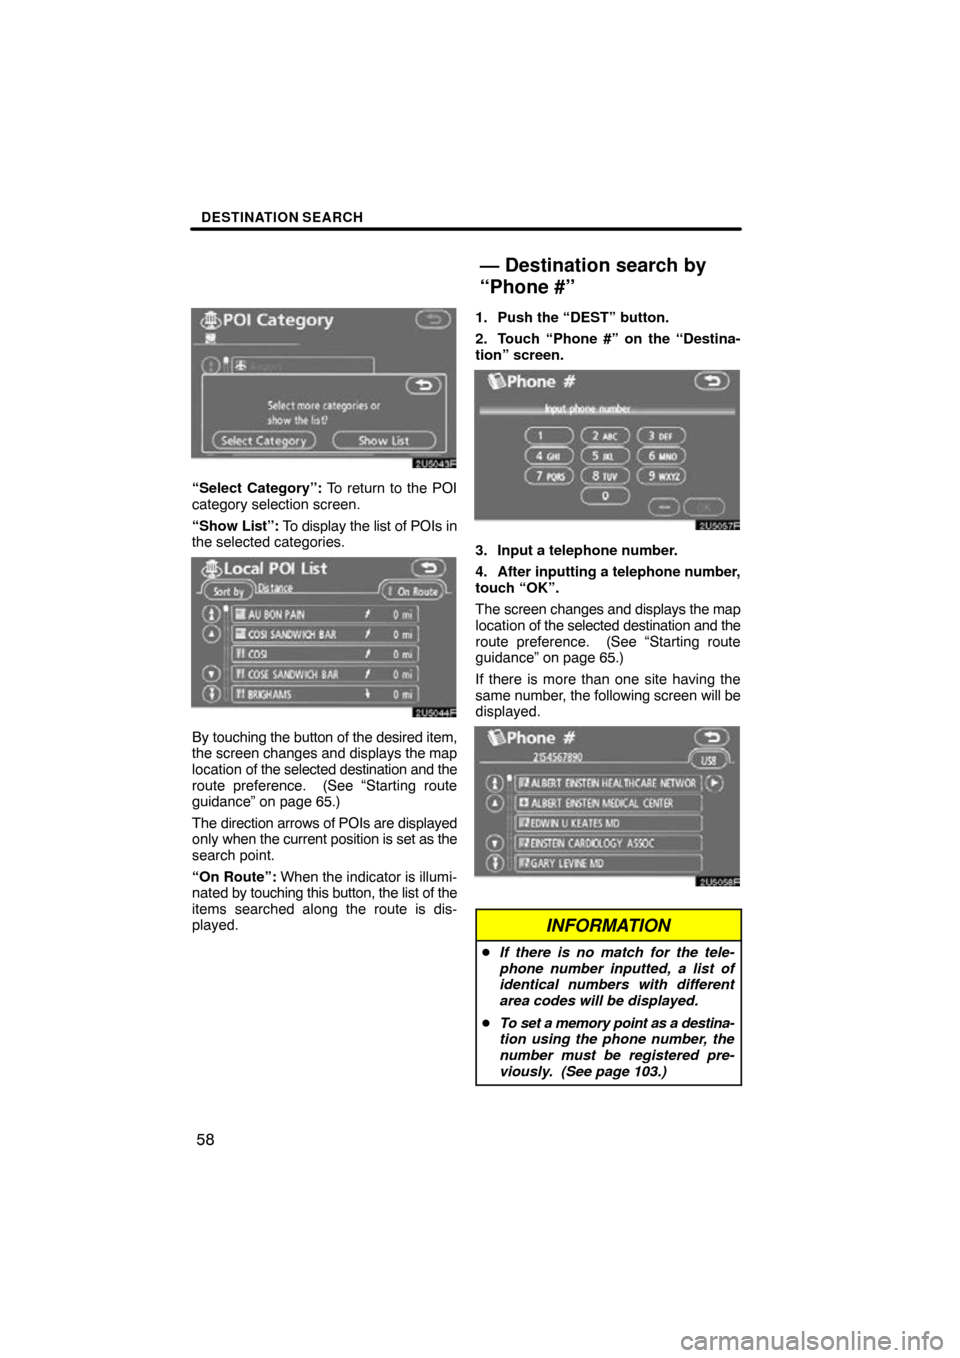
“Select Category”: To return to the POI
category selection screen.
“Show List”: To display the list of POIs in
the selected categories.
By touching the button of the desired item,
the screen changes and displays the map
location of the selected destination and the
route preference. (See “Starting route
guidance” on page 65.)
The direction arrows of POIs are displayed
only when the current position is set as the
search point.
“On Route”: When the indicator is illumi-
nated by touching this button, the list of the
items searched along the route is dis-
played. 1. Push the “DEST” button.
2. Touch “Phone #” on the “Destina-
tion” screen.
3. Input a telephone number.
4. After inputting a telephone number,
touch “OK”.
The screen changes and displays the map
location of the selected destination and the
route preference. (See “Starting route
guidance” on page 65.)
If there is more than one site having the
same number, the following screen will be
displayed.
INFORMATION
�
If there is no match for the tele-
phone number inputted, a list of
identical numbers with different
area codes will be displayed.
� To set a memory point as a destina-
tion using the phone number, the
number must be registered pre-
viously. (See page 103.)
— Destination search by
“Phone #”
Page 65 of 195

DESTINATION SEARCH
65
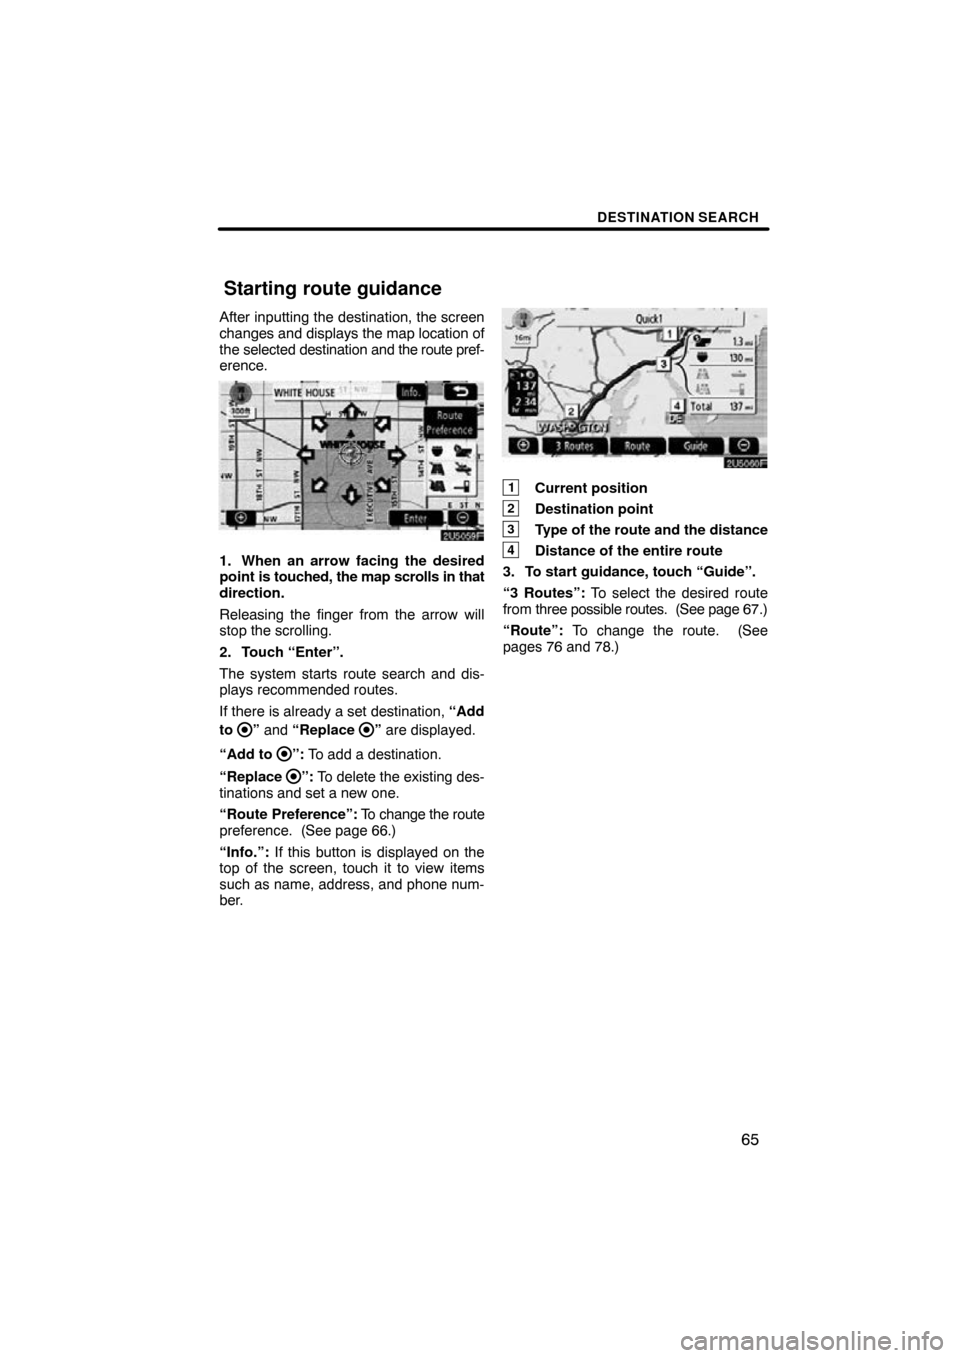
After inputting the destination, the screen
changes and displays the map location of
the selected destination and the route pref-
erence.
1. When an arrow facing the desired
point is touched, the map scrolls in that
direction.
Releasing the finger from the arrow will
stop the scrolling.
2. Touch “Enter”.
The system starts route search and dis-
plays recommended routes.
If there is already a set destination, “Add
to
” and “Replace ” are displayed.
“Add to
”: To add a destination.
“Replace
”: To delete the existing des-
tinations and set a new one.
“Route Preference”: To change the route
preference. (See page 66.)
“Info.”: If this button is displayed on the
top of the screen, touch it to view items
such as name, address, and phone num-
ber.
1Current position
2Destination point
3Type of the route and the distance
4Distance of the entire route
3. To start guidance, touch “Guide”.
“3 Routes”: To select the desired route
from three possible routes. (See page 67.)
“Route”: To change the route. (See
pages 76 and 78.)
Starting route guidance
Page 98 of 195
ADVANCED FUNCTIONS
98
5. Touch “OK”.
To edit registered information, see “ —
Editing memory points” on page 98.
INFORMATION
Up to 106 memory points can be reg-
istered.
The icon, attribute, name, location and/or
telephone number of a registered memory
point can be edited.
1. Push the “MENU” button.
2. Touch “My Places” on the “Menu”
screen.
3. Touch “Edit”.
4. Touch the desired memory point
button.
— Editing memory points
Page 99 of 195
ADVANCED FUNCTIONS
99
5. Touch the button to be edited.
“Icon”: To select icons to be displayed on
the map. (See page 99.)
“Quick Access”: To set an attribute.
Memory points with a set attribute can be
used as a “Quick access” or “Home” but-
ton. (See page 100.)
“Name”: To edit memory point names.
The names can be displayed on the map.
(See page 101.)
“Location”: To edit location information.
(See page 102.)
“Phone #”: To edit telephone numbers.
(See page 103.)
6. Touch “OK”.
�To change “Icon”
1. Touch “Icon” on the “Memory
Point” screen.
2. Touch the desired icon.
Turn the page by touching “Page 1”,
“Page 2” or “with Sound”.
Page 103 of 195
ADVANCED FUNCTIONS
103
�
To change “Phone #” (telephone
number)
1. Touch “Phone #” on the “Memory
Point” screen.
2. Enter the number using number
keys.
3. Touch “OK”.
The previous screen will be displayed. 1. Push the “MENU” button.
2. Touch “My Places” on the “Menu”
screen.3. Touch “Delete”.
4. Touch the button to be deleted.
“Delete All”: To delete all memory points
in the system.
5. To delete the memory point, touch
“Yes”. To cancel the deletion, touch
“No”.
— Deleting memory points
Page 130 of 195
OTHER FUNCTIONS
130
It is possible to register a dealer in the sys-
tem. With dealer information registered,
route guidance to the dealer is available.
1. Push the “INFO” button.
2. Touch “Maintenance” on the “Infor-
mation” screen.
3. Touch “Set Dealer” on the “Mainte-
nance” screen.
4. If the dealer has not been registered,
enter the location of the dealer in the
same way as for a destination search.
(See “Destination search” on page 43.)
When “Set Dealer” registration is finished,
the “Edit Dealer” screen will be displayed.
5. Touch the button to be edited.
“Dealer”: To enter the name of a dealer.
(See page 131.)
“Contact”: To enter the name of a dealer
member. (See page 131.)
“Location”: To set a location. (See page
131.)
“Phone #”: To set a telephone number.
(See page 132.)
“Delete Dealer”: To delete the dealer in-
formation displayed on the screen.
“Enter
”: To set the displayed dealer as
a destination. (See “Starting route guid-
ance” on page 65.)
— Dealer setting
Page 132 of 195
OTHER FUNCTIONS
132
�
To edit “Phone #” (telephone num-
ber)
1. Touch “Phone #” on the “Edit Deal-
er” screen.
2. Enter the number using number
keys.
3. Touch “OK”.
The previous screen will be displayed. It is possible to enter memos for particular
dates on the calendar.
The system informs
you of the memo entry when the system is
turned on. (See page 25.)
Memos can also be used for route guid-
ance if the memo has been registered with
location information.
1. Push the “INFO” button.
2. Touch “Calendar”.
Calendar with memo —
Page 170 of 195

AUDIO SYSTEM
170
NOTICE
To ensure correct audio system op-
erations:
�Be careful not to spill beverages
over the audio system.
�Do not put anything other than ap-
propriate discs into the CD player.
�The use of a cellular phone inside
or near the vehicle may cause a
noise from the speakers of the
audio system which you are
listening to. However, this does
not indicate a malfunction.
Radio reception
Usually, the problem with radio reception
does not mean there is a problem with your
radio − it is just the normal result of condi-
tions outside the vehicle.
For example, nearby buildings and terrain
can interfere with FM reception. Power
lines or telephone wires can interfere with
AM signals. And of course, radio signals
have a limited range, and the farther you
are from a station, the weaker its signal will
be. In addition, reception conditions
change constantly as your vehicle moves.
Here are some common reception prob-
lems that probably do not indicate a prob-
lem with your radio: FM
Fading and drifting stations — General-
ly, the ef
fective range of FM is about 40 km
(25 miles). Once outside this range, you
may notice fading and drifting, which in-
crease with the distance from the radio
transmitter. They are often accompanied
by distortion.
Multi�path — FM signals are reflective,
making it possible for two signals to reach
your antenna at the same time. If this hap-
pens, the signals will cancel each other
out, causing a momentary flutter or loss of
reception.
Static and fluttering — These occur
when signals are blocked by buildings,
trees, or other large objects. Increasing
the bass level may reduce static and flut-
tering.
Station swapping — If the FM signal you
are listening to is interrupted or weakened,
and there is another strong station nearby
on the FM band, your radio may tune in the
second station until the original signal can
be picked up again.
AM
Fading — AM broadcasts are reflected by
the upper atmosphere — especially at
night. These reflected signals can inter-
fere with those received directly from the
radio station, causing the radio station to
sound alternately strong and weak.
Station interference — When a reflected
signal and a signal received directly from
a radio station are very nearly the same
frequency, they can interfere with each
other, making it difficult to hear the broad-
cast.
Static — AM is easily affected by external
sources of electrical noise, such as high
tension power lines, lightening, or electri-
cal motors. This results in static.
Audio system operating
hints