Page 147 of 476
147
2-2. Instrument cluster
2
When driving
Indicators and warning lights
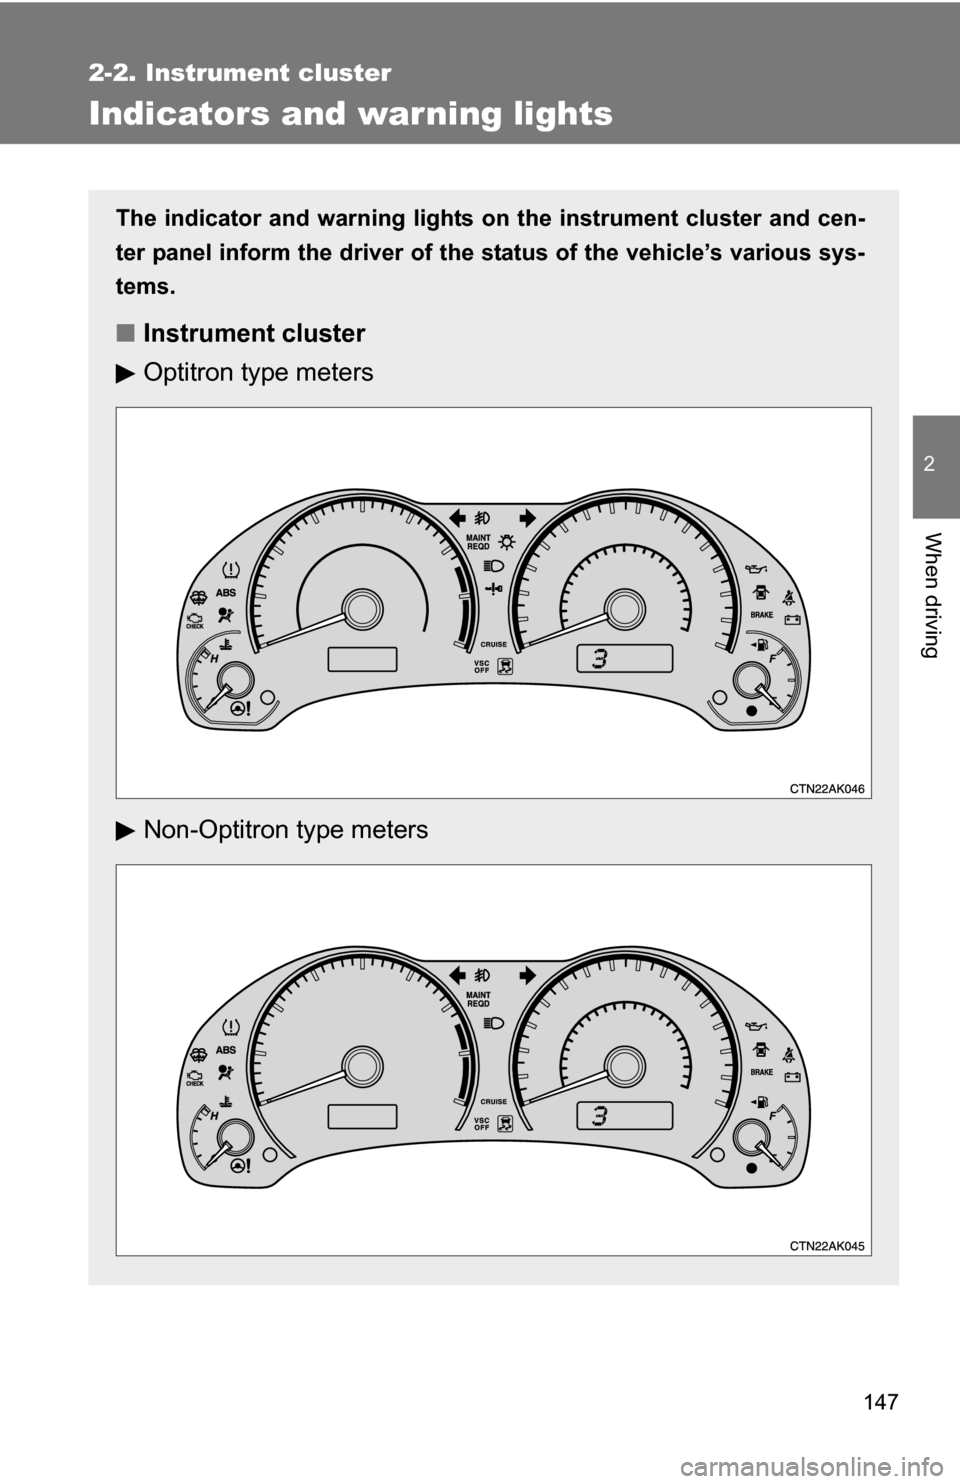
The indicator and warning lights on the instrument cluster and cen-
ter panel inform the driver of the status of the vehicle’s various sys-
tems.
■ Instrument cluster
Optitron type meters
Non-Optitron type meters
Page 148 of 476
148 2-2. Instrument cluster
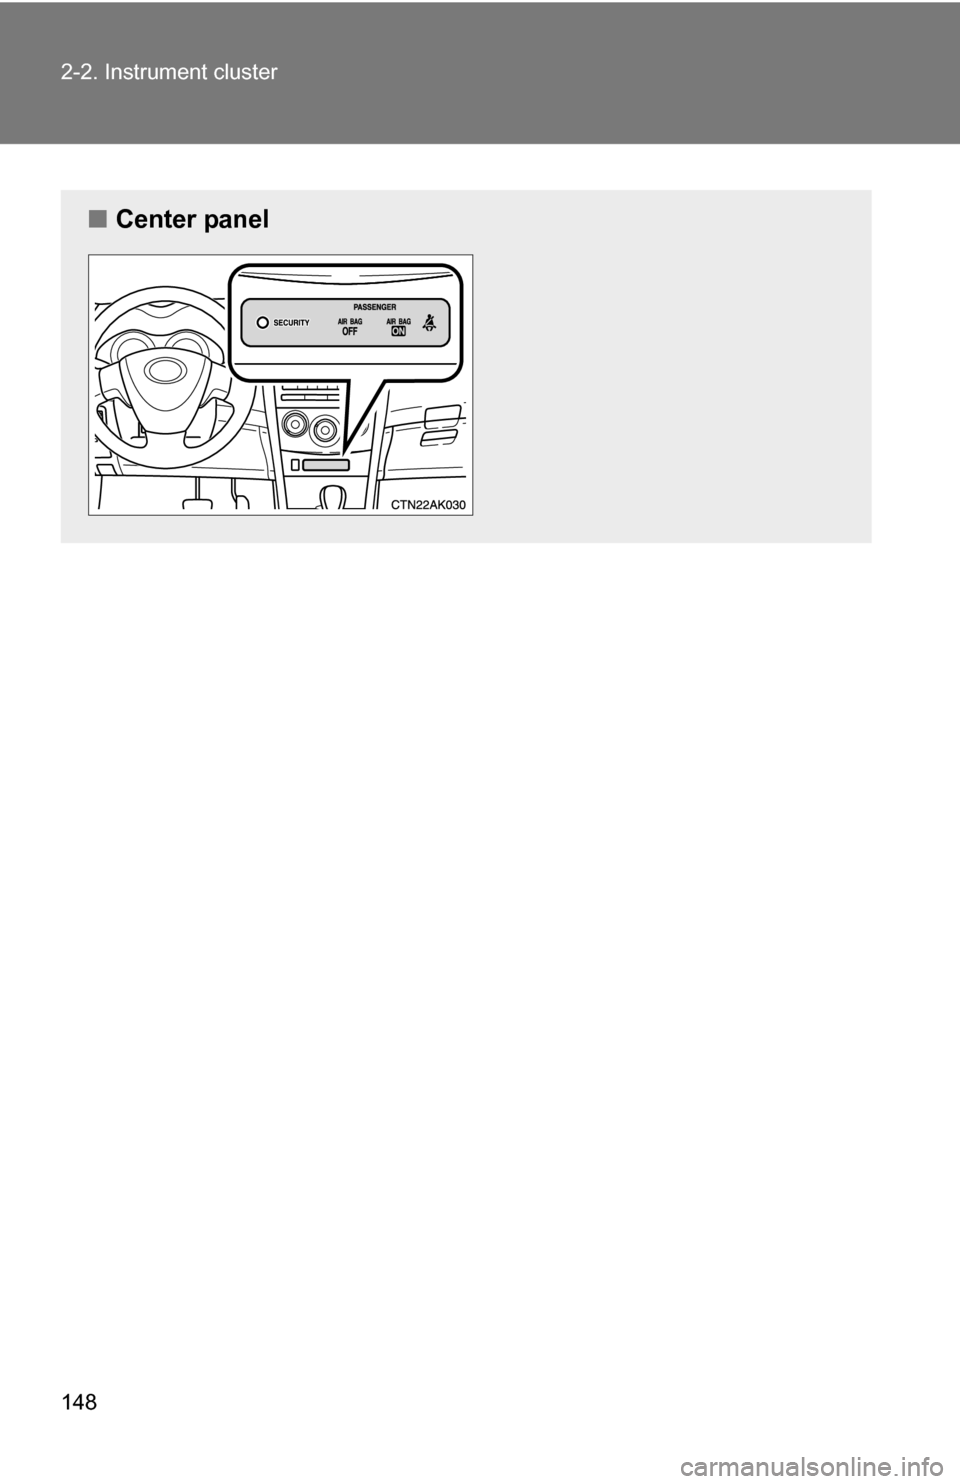
■Center panel
Page 155 of 476
155
2
When driving
2-3. Operating the lights and wipers
Headlight switch
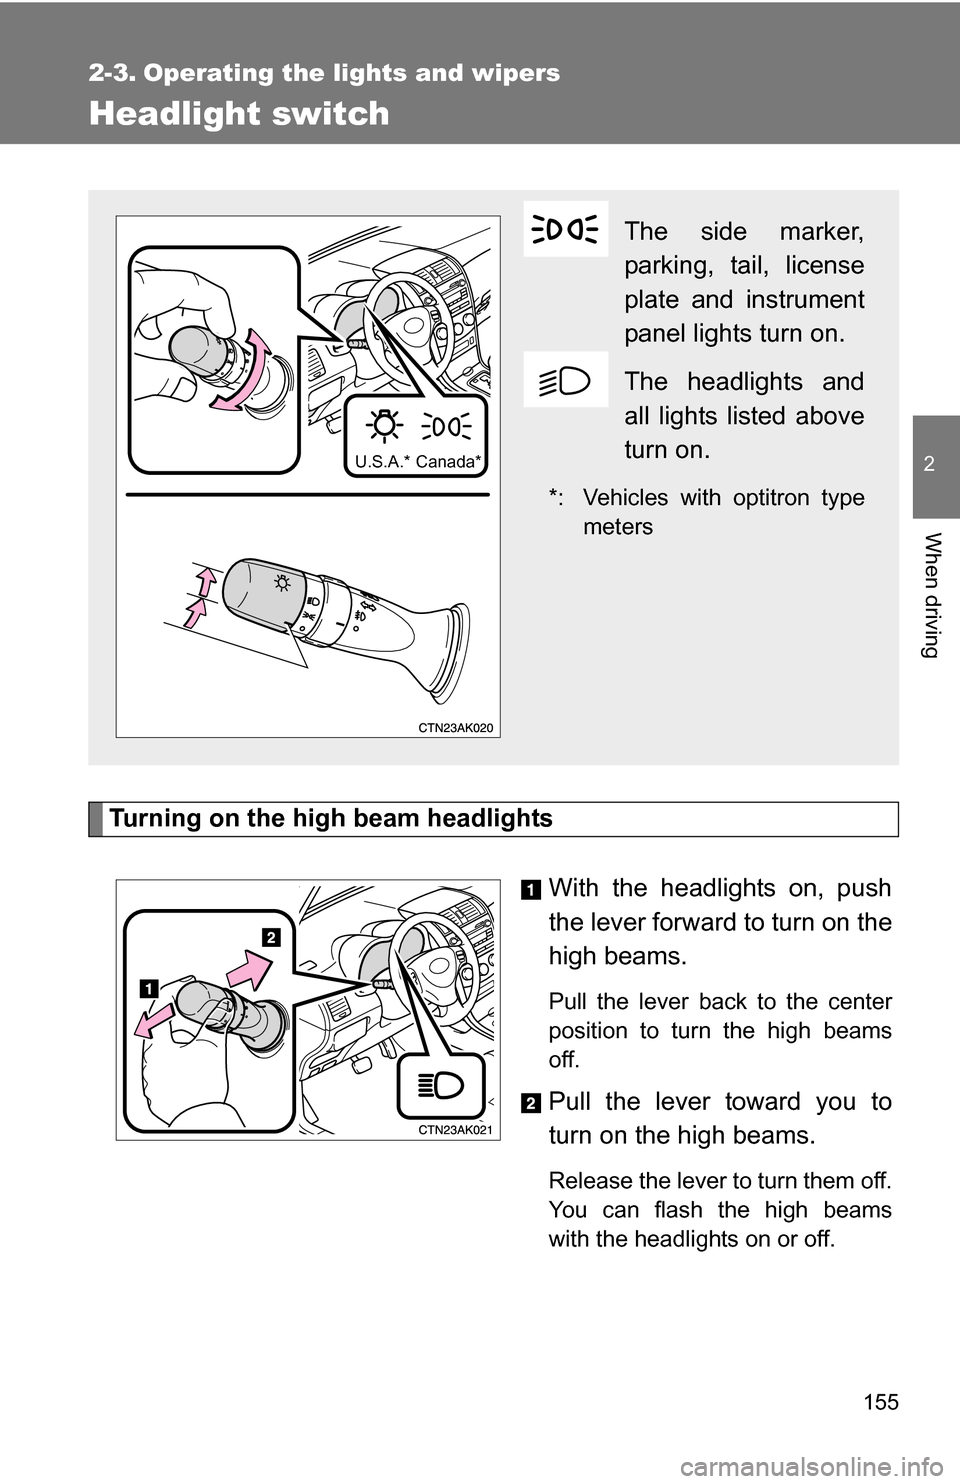
Turning on the high beam headlightsWith the headlights on, push
the lever forward to turn on the
high beams.
Pull the lever back to the center
position to turn the high beams
off.
Pull the lever toward you to
turn on the high beams.
Release the lever to turn them off.
You can flash the high beams
with the headlights on or off.
The side marker,
parking, tail, license
plate and instrument
panel lights turn on.
The headlights and
all lights listed above
turn on.
*: Vehicles with optitron typemeters
U.S.A.* Canada*
Page 156 of 476

156 2-3. Operating the lights and wipers
■Daytime running light system
To make your vehicle more visible to other drivers, the headlights turn on
automatically whenever the engine is started and the parking brake is
released.
The brightness of headlights will automatically change depending on the
darkness of the surroundings. The other exterior lights and instrument panel
lights automatically turn on or off.
■ Daytime running light control sensor
■ Light reminder buzzer
Vehicles without smart key system
A buzzer sounds when the engine switch is turned OFF and the driver's door
is opened with the key removed from the engine switch while the lights are
turned on. Vehicles with smart key system
A buzzer sounds when the “ENGINE START STOP” switch is turned OFF or
to ACCESSORY mode and the driver's door is opened while the lights are
turned on.
NOTICE
■ To prevent battery discharge
Do not leave the lights on longer than necessary when the engine is not run-
ning.
The sensor may not function properly if
an object is placed on the sensor, or any-
thing that blocks the sensor is affixed to
the windshield.
Doing so interferes with the sensor
detecting the level of ambient light and
may cause the daytime running light sys-
tem to malfunction.
Page 169 of 476
169
2-5. Driving information
2
When driving
CAUTION
■Storage precautions
Observe the following precautions.
Failing to do so may result in death or serious injury.
●To prevent cargo and luggage from sliding forward during braking, do
not stack anything in the enlarged trunk. Keep cargo and luggage low,
as close to the floor as possible.
●Never allow anyone to ride in the enlarged trunk. It is not designed for
passengers. They should ride in their seats with their seat belts prop-
erly fastened. Otherwise, they are much more likely to suffer death or
serious bodily injury, in the event of sudden braking or an accident.
●Do not place cargo or luggage in or on the following locations as the
item may get under the clutch, brake or accelerator pedal and prevent
the pedals from being depressed properly, block the driver’s vision, or
hit the driver or passengers, causing an accident.
• Driver’s feet
• Front passenger or rear seats (when stacking items)
• Package tray
• Instrument panel
• Dashboard
●Secure all items in the occupant compartment, as they may shift and
injure someone during an accident or sudden braking.
■Capacity and distribution
●Do not exceed the maximum axle weight rating or the total vehicle
weight rating.
●Even if the total load of occupant's weight and the cargo load is less
than the total load capacity, do not apply the load unevenly.
Improper loading may cause deterioration of steering or braking con-
trol which may cause death or serious injury.
Page 350 of 476
350
4-3. Do-it-yourself maintenance
Checking and replacing fuses
If any of the electrical components do not operate, a fuse may have
blown. If this happens, check and replace the fuses as necessary.
Vehicles with smart key system: Turn the “ENGINE START
STOP” switch OFF.
Vehicles without smart key system: Turn the engine switch
OFF.
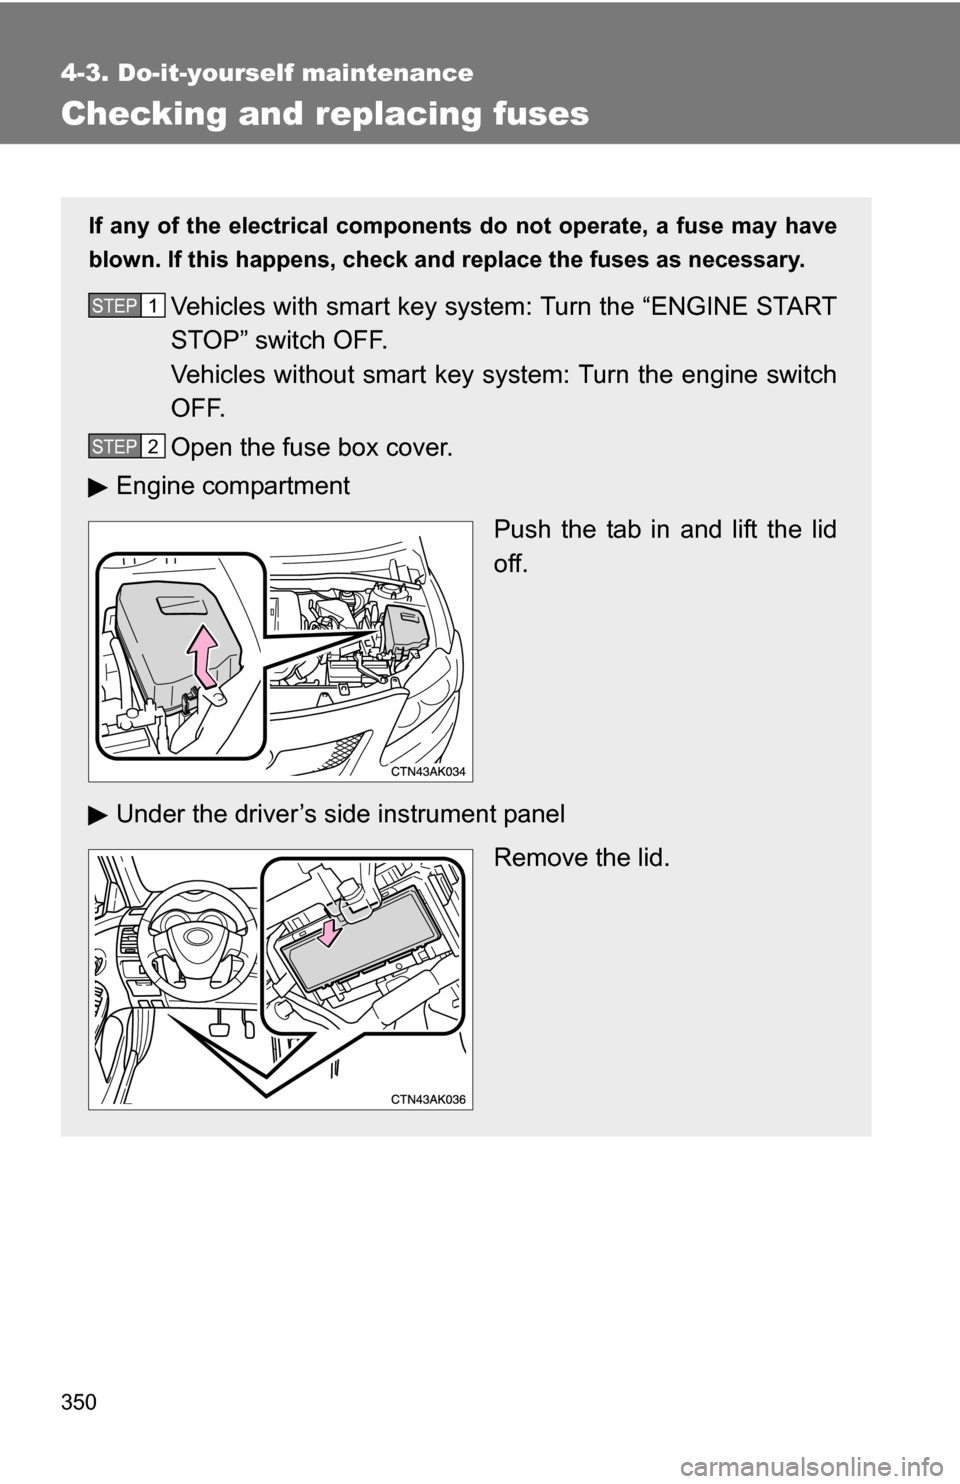
Open the fuse box cover.
Engine compartment
Push the tab in and lift the lid
off.
Under the driver’s side instrument panel Remove the lid.STEP 1
STEP 2
Page 351 of 476
351
4-3. Do-it-yourself maintenance
4
Maintenance and care
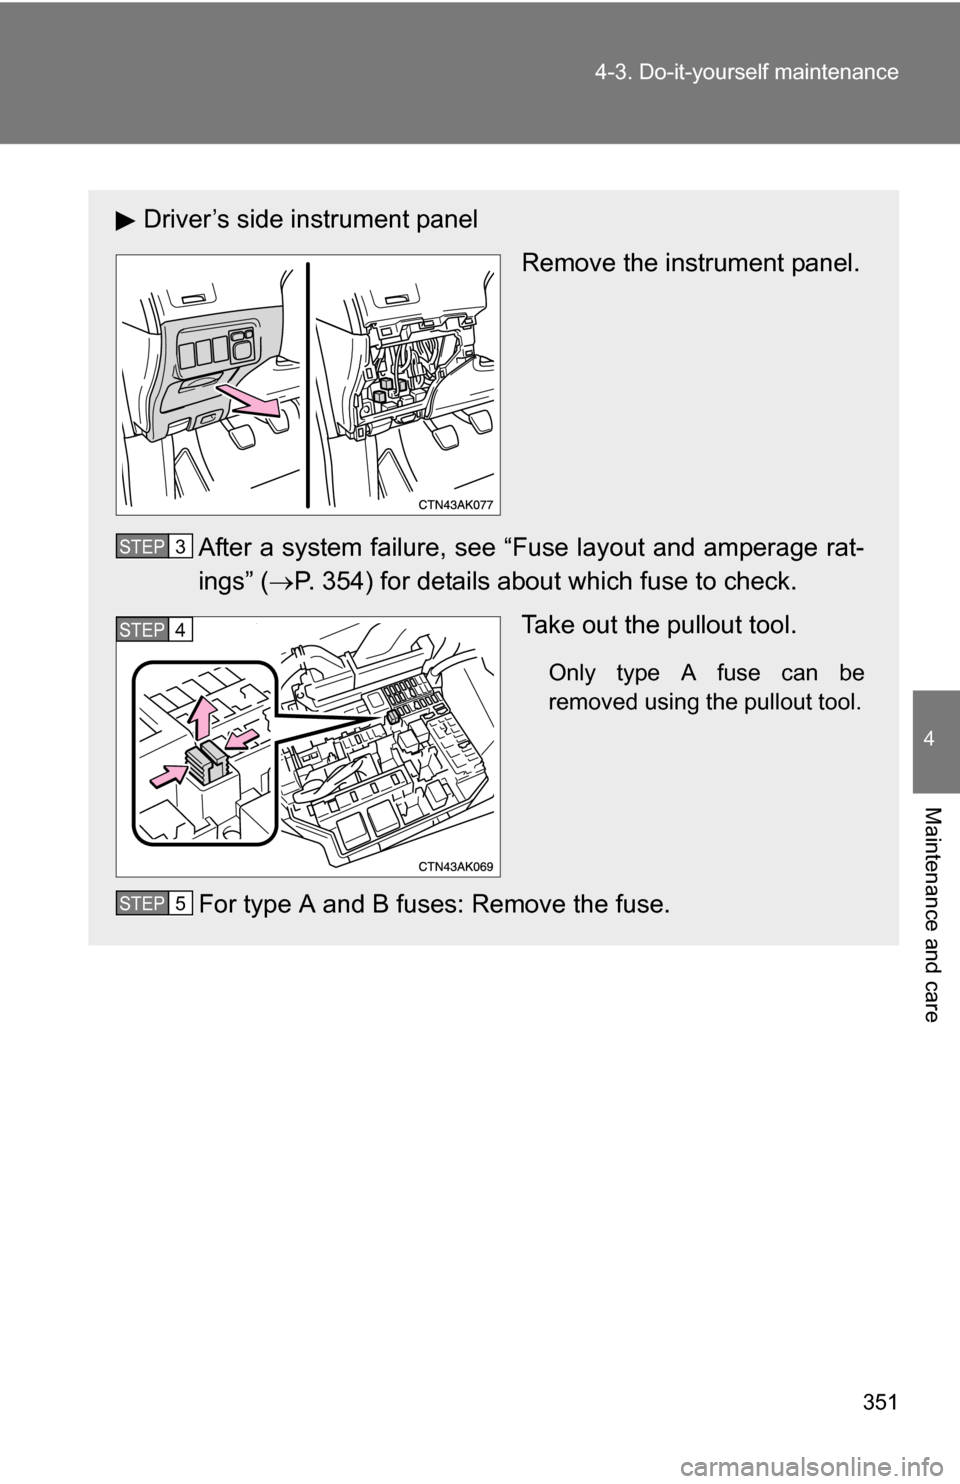
Driver’s side instrument panel
Remove the instrument panel.
After a system failure, see “Fuse layout and amperage rat-
ings” ( P. 354) for details about which fuse to check.
Take out the pullout tool.
Only type A fuse can be
removed using the pullout tool.
For type A and B fuses: Remove the fuse.
STEP 3
STEP 4
STEP 5
Page 357 of 476
357
4-3. Do-it-yourself maintenance
4
Maintenance and care
■
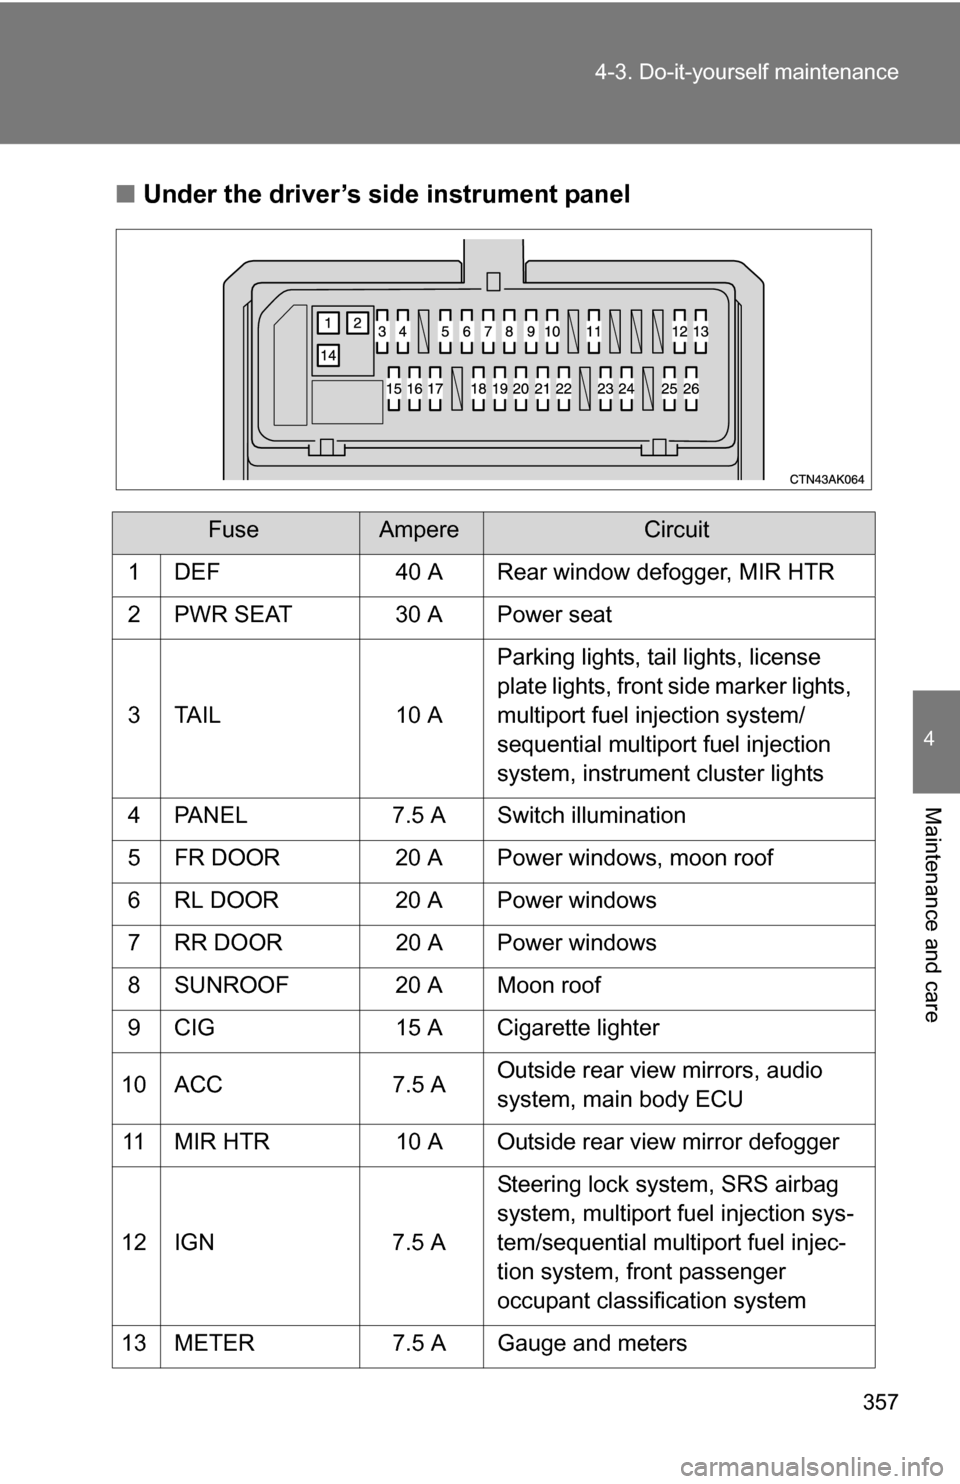
Under the driver’s side instrument panel
FuseAmpereCircuit
1 DEF 40 A Rear window defogger, MIR HTR
2 PWR SEAT 30 A Power seat
3 TAIL 10 A Parking lights, tail lights, license
plate lights, front side marker lights,
multiport fuel injection system/
sequential multiport fuel injection
system, instrument cluster lights
4 PANEL 7.5 A Switch illumination
5 FR DOOR 20 A Power windows, moon roof
6 RL DOOR 20 A Power windows
7 RR DOOR 20 A Power windows
8 SUNROOF 20 A Moon roof
9 CIG 15 A Cigarette lighter
10 ACC 7.5 A Outside rear view mirrors, audio
system, main body ECU
11 MIR HTR 10 A Outside rear view mirror defogger
12 IGN 7.5 A Steering lock system, SRS airbag
system, multiport fuel injection sys-
tem/sequential multiport fuel injec-
tion system, front passenger
occupant classification system
13 METER 7.5 A Gauge and meters