2010 SUZUKI SX4 air condition
[x] Cancel search: air conditionPage 75 of 297
2-58
BEFORE DRIVING
80J23-03E
Servicing the Air Bag SystemIf the air bags inflate, have the air bags and
related components replaced by an autho-
rized SUZUKI dealer as soon as possible.
If your vehicle ever gets in deep water and
the driver’s floor is submerged, the air bag
controller could be damaged. If this hap-
pens, have the air bag system inspected
by the SUZUKI dealer as soon as possible.
Special procedures are required for servic-
ing or replacing an air bag. For that reason,
only an authorized SUZUKI dealer should
be allowed to service or replace your air
bags. Please remind anyone who services
your SUZUKI that it has air bags.
Service on or around air bag components
or wiring must be performed only by an
authorized SUZUKI dealer. Improper ser-
vice could result in unintended air bag
deployment or could render the air bags
inoperative. Either of these two conditions
may result in severe injury.To prevent damage or unintended inflation
of the air bag system, be sure the battery
is disconnected and the ignition switch has
been in the “LOCK” position for at least 90
seconds before performing any electrical
service work on your SUZUKI. Do not
touch air bag system components or wires.
The wires are wrapped with yellow tape or
yellow tubing, and the couplers are yellow
for easy identification.
Scrapping a car that has an undeployed air
bag can be hazardous. Ask your dealer,
body repair shop or scrap yard for help
with disposal.If it is necessary to modify the advanced
front air bag system to accommodate a
person with disabilities, owners in the con-
tinental United States can call American
Suzuki toll-free at 1-800-934-0934, or write
to:
American Suzuki Motor Corporation
Automotive Customer Relations
3251 East Imperial Highway
Brea, CA 92821-6795
If you purchased your SUZUKI in Canada
please contact the Suzuki Canada Cus-
tomer Relations Department by telephone
at 1-905-889-2677 extension 2254 or in
writing at:
Suzuki Canada Inc.
Customer Relations
100 East Beaver Creek Road
Richmond Hill, On
L4B 1J6
Page 77 of 297

2-60
BEFORE DRIVING
80J23-03E
Warning and Indicator LightsLow Tire Pressure Warning Light
52D305
As an added safety feature, your vehicle
has been equipped with a tire pressure
monitoring system (TPMS) that uses a low
tire pressure warning light to inform you
when one or more of your tires is signifi-
cantly under-inflated.
When the ignition switch is turned to the
“ON” position, this light comes on briefly so
you can check that the light is working.
When the low tire pressure warning light is
lit, one or more of your tires is significantly
under-inflated. You should stop and check
your tires as soon as possible, and inflate
them to the proper pressure as indicated
on the vehicle’s tire information placard.
Driving on a significantly under-inflated tire
causes the tire to overheat and can lead to
tire failure. Under-inflation also reduces
fuel efficiency and tire tread life, and may
affect the vehicle’s handling and stopping
ability. Each tire, including the spare,
should be checked at least once a month
when cold and set to the recommendedinflation pressure as specified in the vehi-
cle placard and owner’s manual.
The low tire pressure warning light is also
used to inform you of a TPMS malfunction.
When the system detects a malfunction,
this light will flash for approximately one
minute and then remain continuously illu-
minated. This sequence will be repeated
approximately ten minutes after subse-
quent the ignition switch is turned on as
long as the malfunction exists.
NOTE:
The low tire pressure warning light may not
come on immediately if you have a sudden
loss of air pressure.
WARNING
If the low tire pressure warning light
does not come on when the ignition
is turned to the “ON” position, or
comes on and blinks while driving
there may be a problem with the tire
pressure monitoring system. Have
your vehicle inspected by an autho-
rized SUZUKI dealer. Even if the light
turns off after blinking, indicating
that monitoring system has recov-
ered, make sure to have an autho-
rized SUZUKI dealer check the
system.
WARNING
The load rating of your tires is
reduced at lower inflation pressures.
If your tires become even moderately
under-inflated, the vehicle load may
exceed the load rating of the tires,
which can lead to tire failure. The low
tire pressure warning light will not
alert you of this condition. The warn-
ing light will only come on when one
or more of your tires become signifi-
cantly under-inflated. Check and
adjust your tire inflation pressure at
least once a month. Refer to “Tires”
in the “INSPECTION AND MAINTE-
NANCE” section.
Page 79 of 297

2-62
BEFORE DRIVING
80J23-03E
1) Pull off the road and stop carefully.
2) Test the brakes by carefully starting and
stopping on the shoulder of the road.
3) If you determine that it is safe, drive
cautiously at low speed to the nearest
dealer for repairs,
or
4) Have the vehicle towed to the nearest
dealer for repairs.NOTE:
Because the disc brake system is self-
adjusting, the fluid level will drop as the
brake pads become worn.
Replenishing the brake fluid reservoir is
considered normal periodic maintenance.
Anti-Lock Brake System (ABS)
Warning Light
65D529
When the ignition switch is turned to the
“ON” position, the light comes on briefly so
you can check that the light is working. If
the light stays on, or comes on when driv-
ing, there may be something wrong with
the ABS.
If the ABS light and the brake system
warning light stay on, or come on simulta-
neously when driving, then there may be
something wrong with both the rear brake
proportioning valve function and anti-lock
function of the ABS.
If one of these happens, have the system
inspected by your SUZUKI dealer. If the
ABS becomes inoperative, the brake sys-
tem will function as an ordinary brake sys-
tem that has no ABS.For details of the ABS, refer to “Anti-Lock
Brake System (ABS)” in the “OPERATING
YOUR VEHICLE” section.
SLIP Indicator Light (if equipped)
52KM133
ESP
® is a registered trademark of Daimler
AG.
This light blinks 5 times per second when
one of the ESP
® systems other than ABS
is activated. If this light blinks, drive care-
fully.
When the ignition switch is turned to the
“ON” position, the light comes on briefly so
you can check that the light is working. If
the light stays on, or comes on when driv-
ing and remains on, there may be some-
thing wrong with the ESP
® systems (other
than ABS). You should have the system
inspected by an authorized SUZUKI
dealer.
WARNING
Remember that stopping distance
may be longer, you may have to push
harder on the pedal, and the pedal
may go down farther than normal.
WARNING
If any of the following conditions
occur, you should immediately ask
your SUZUKI dealer to inspect the
brake system.
If the brake system warning light
does not go out after the parking
brake has been fully released.
If the brake system warning light
does not come on when the igni-
tion switch is turned to the “ON”
position.
If the brake system warning light
comes on at any time during vehi-
cle operation.
Page 102 of 297
3-1OPERATING YOUR VEHICLE
80J23-03E
Exhaust Gas Warning
52D334
Daily Inspection ChecklistBefore Driving1) Make sure that windows, mirrors, lights
and reflectors are clean and unob-
structed.
2) Visually check the tires for the following
points:
– the depth of the tread groove
– abnormal wear, cracks and damage
– loose wheel nuts
– existence of foreign material such as
nails, stones, etc.
Refer to “Tires” in “INSPECTION AND
MAINTENANCE” section for details.
3) Look for fluid, oil leaks.
NOTE:
It is normal for water to drip from the air
conditioning system after use.
4) Make sure the hood is fully closed and
latched.
5) Check the headlights, turn signal lights,
brake lights and horn for proper opera-
tion.
6) Lock all doors.
7) Adjust the seat and adjustable head
restraints (if equipped).
8) Check the brake pedal.
9) Adjust the mirrors.
10)Make sure that you and all passengers
have properly fastened your seat belts.
11)Make sure that all warning lights come
on as the key is turned to the “ON” posi-
tion.
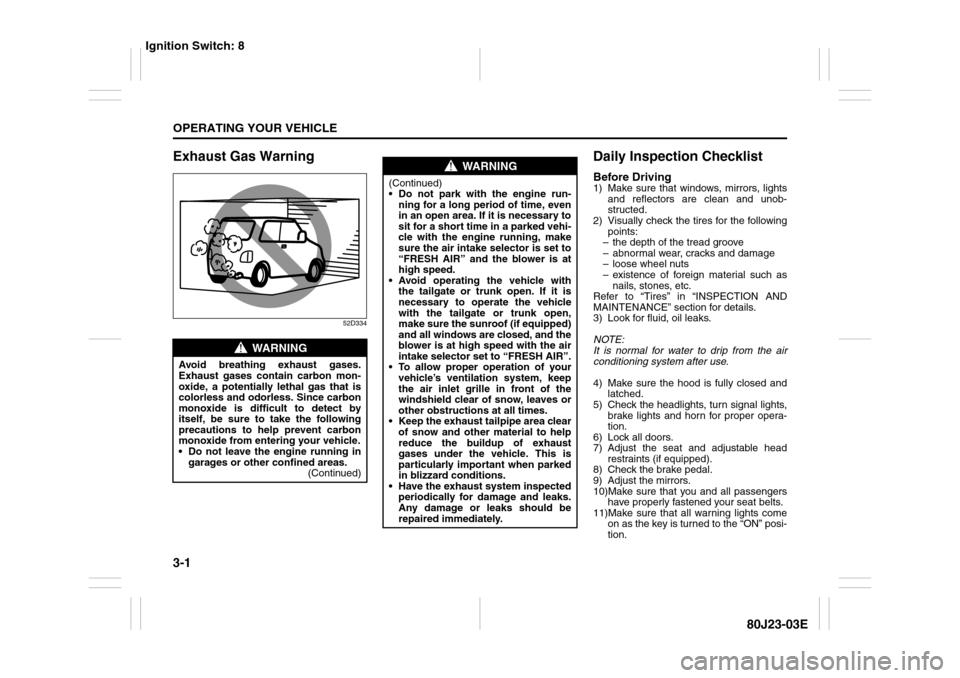
WARNING
Avoid breathing exhaust gases.
Exhaust gases contain carbon mon-
oxide, a potentially lethal gas that is
colorless and odorless. Since carbon
monoxide is difficult to detect by
itself, be sure to take the following
precautions to help prevent carbon
monoxide from entering your vehicle.
Do not leave the engine running in
garages or other confined areas.
(Continued)
WARNING
(Continued)
Do not park with the engine run-
ning for a long period of time, even
in an open area. If it is necessary to
sit for a short time in a parked vehi-
cle with the engine running, make
sure the air intake selector is set to
“FRESH AIR” and the blower is at
high speed.
Avoid operating the vehicle with
the tailgate or trunk open. If it is
necessary to operate the vehicle
with the tailgate or trunk open,
make sure the sunroof (if equipped)
and all windows are closed, and the
blower is at high speed with the air
intake selector set to “FRESH AIR”.
To allow proper operation of your
vehicle’s ventilation system, keep
the air inlet grille in front of the
windshield clear of snow, leaves or
other obstructions at all times.
Keep the exhaust tailpipe area clear
of snow and other material to help
reduce the buildup of exhaust
gases under the vehicle. This is
particularly important when parked
in blizzard conditions.
Have the exhaust system inspected
periodically for damage and leaks.
Any damage or leaks should be
repaired immediately.
Ignition Switch: 8
Page 116 of 297
3-15OPERATING YOUR VEHICLE
80J23-03E
Canceling the manual mode
To cancel the manual mode, shift the gear-
shift lever from “M” to “D”.
Temporary manual mode
Pull the shift paddle (if equipped) toward
you when driving with the gearshift lever in
the “D” position. The information display
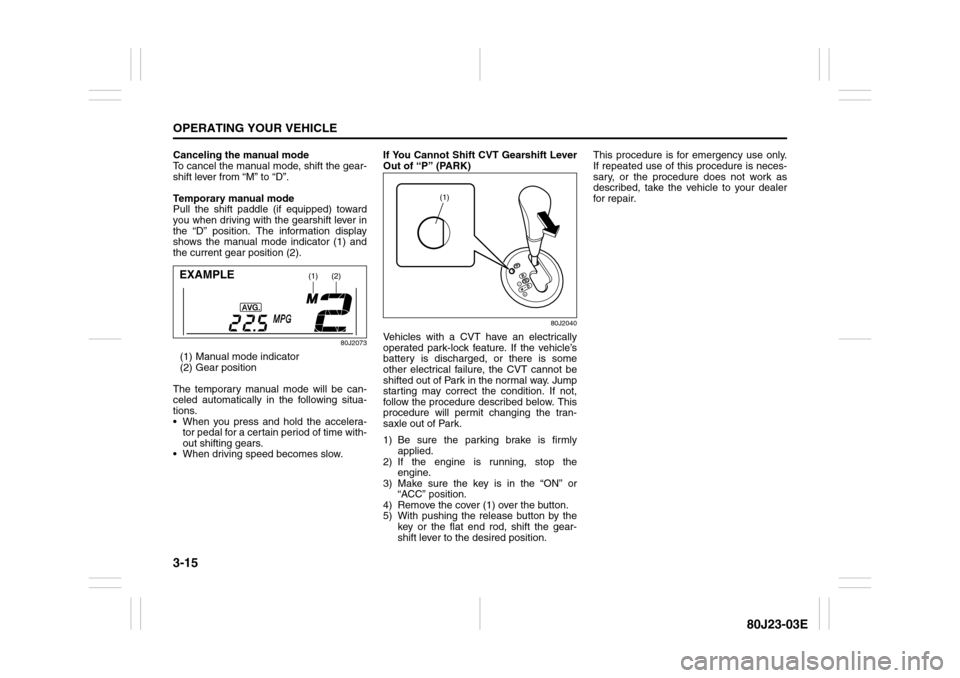
shows the manual mode indicator (1) and
the current gear position (2).
80J2073
(1) Manual mode indicator
(2) Gear position
The temporary manual mode will be can-
celed automatically in the following situa-
tions.
When you press and hold the accelera-
tor pedal for a certain period of time with-
out shifting gears.
When driving speed becomes slow.If You Cannot Shift CVT Gearshift Lever
Out of “P” (PARK)
80J2040
Vehicles with a CVT have an electrically
operated park-lock feature. If the vehicle’s
battery is discharged, or there is some
other electrical failure, the CVT cannot be
shifted out of Park in the normal way. Jump
starting may correct the condition. If not,
follow the procedure described below. This
procedure will permit changing the tran-
saxle out of Park.
1) Be sure the parking brake is firmly
applied.
2) If the engine is running, stop the
engine.
3) Make sure the key is in the “ON” or
“ACC” position.
4) Remove the cover (1) over the button.
5) With pushing the release button by the
key or the flat end rod, shift the gear-
shift lever to the desired position.This procedure is for emergency use only.
If repeated use of this procedure is neces-
sary, or the procedure does not work as
described, take the vehicle to your dealer
for repair.
(1)
(2)
EXAMPLE
(1)
Page 118 of 297
3-17OPERATING YOUR VEHICLE
80J23-03E
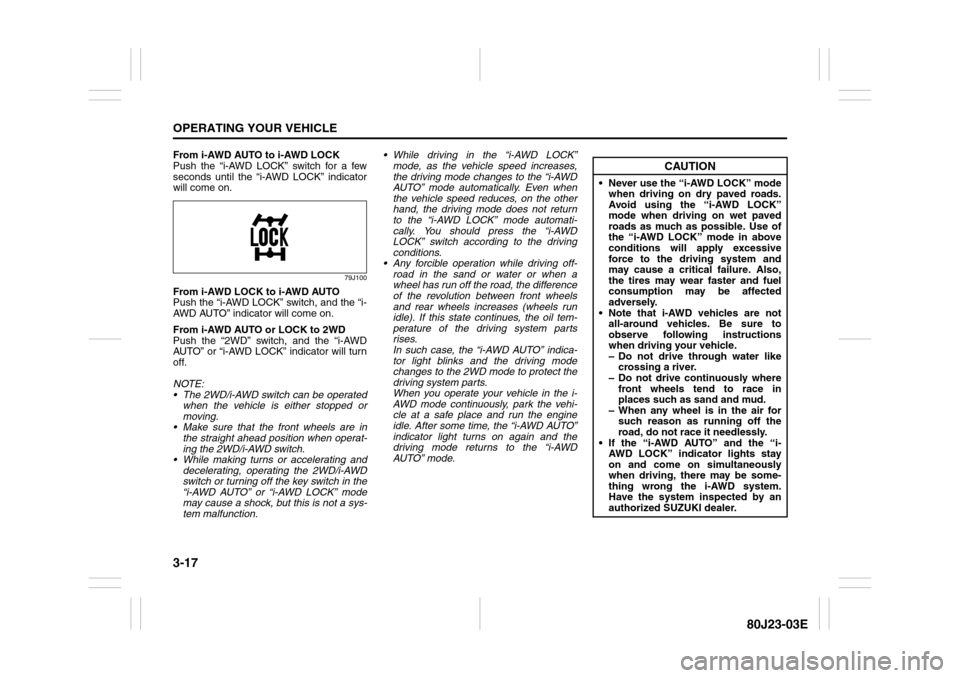
From i-AWD AUTO to i-AWD LOCK
Push the “i-AWD LOCK” switch for a few
seconds until the “i-AWD LOCK” indicator
will come on.
79J100
From i-AWD LOCK to i-AWD AUTO
Push the “i-AWD LOCK” switch, and the “i-
AWD AUTO” indicator will come on.
From i-AWD AUTO or LOCK to 2WD
Push the “2WD” switch, and the “i-AWD
AUTO” or “i-AWD LOCK” indicator will turn
off.
NOTE:
The 2WD/i-AWD switch can be operated
when the vehicle is either stopped or
moving.
Make sure that the front wheels are in
the straight ahead position when operat-
ing the 2WD/i-AWD switch.
While making turns or accelerating and
decelerating, operating the 2WD/i-AWD
switch or turning off the key switch in the
“i-AWD AUTO” or “i-AWD LOCK” mode
may cause a shock, but this is not a sys-
tem malfunction. While driving in the “i-AWD LOCK”
mode, as the vehicle speed increases,
the driving mode changes to the “i-AWD
AUTO” mode automatically. Even when
the vehicle speed reduces, on the other
hand, the driving mode does not return
to the “i-AWD LOCK” mode automati-
cally. You should press the “i-AWD
LOCK” switch according to the driving
conditions.
Any forcible operation while driving off-
road in the sand or water or when a
wheel has run off the road, the difference
of the revolution between front wheels
and rear wheels increases (wheels run
idle). If this state continues, the oil tem-
perature of the driving system parts
rises.
In such case, the “i-AWD AUTO” indica-
tor light blinks and the driving mode
changes to the 2WD mode to protect the
driving system parts.
When you operate your vehicle in the i-
AWD mode continuously, park the vehi-
cle at a safe place and run the engine
idle. After some time, the “i-AWD AUTO”
indicator light turns on again and the
driving mode returns to the “i-AWD
AUTO” mode.
CAUTION
Never use the “i-AWD LOCK” mode
when driving on dry paved roads.
Avoid using the “i-AWD LOCK”
mode when driving on wet paved
roads as much as possible. Use of
the “i-AWD LOCK” mode in above
conditions will apply excessive
force to the driving system and
may cause a critical failure. Also,
the tires may wear faster and fuel
consumption may be affected
adversely.
Note that i-AWD vehicles are not
all-around vehicles. Be sure to
observe following instructions
when driving your vehicle.
– Do not drive through water like
crossing a river.
– Do not drive continuously where
front wheels tend to race in
places such as sand and mud.
– When any wheel is in the air for
such reason as running off the
road, do not race it needlessly.
If the “i-AWD AUTO” and the “i-
AWD LOCK” indicator lights stay
on and come on simultaneously
when driving, there may be some-
thing wrong the i-AWD system.
Have the system inspected by an
authorized SUZUKI dealer.
Page 141 of 297
OTHER CONTROLS AND EQUIPMENT
5
80J23-03E
60G407
OTHER CONTROLS AND EQUIPMENTHeating and Air Conditioning System ............................... 5-1
Radio Antenna ..................................................................... 5-15
Audio Systems .................................................................... 5-15
Fuel Filler Cap ..................................................................... 5-43
Engine Hood ........................................................................ 5-44
Sun Visor ............................................................................. 5-45
Interior Light Switch ........................................................... 5-45
Luggage Compartment Light (SX4) ................................... 5-46
Trunk Light (SX4 SEDAN) ................................................... 5-46
Spot Light ............................................................................ 5-47
Accessory Socket (if equipped) ......................................... 5-47
Cigarette Lighter and Ashtray (if equipped) ..................... 5-47
Assist Grips (if equipped) .................................................. 5-48
Glove Box ............................................................................ 5-49
Cup Holder and Storage Area (if equipped) ..................... 5-49
Front Seat Back Pocket (if equipped) ............................... 5-50
Armrest (if equipped) .......................................................... 5-51
Shopping Hook (if equipped) ............................................. 5-51
Floor Mats (if equipped) ..................................................... 5-51
Luggage Compartment Cover (if equipped) ..................... 5-52
Luggage Compartment Board (if equipped) ..................... 5-53
Roof Rails or Roof Rack Anchors (if equipped) ............... 5-55
Frame Hooks ....................................................................... 5-56
Page 142 of 297
5-1OTHER CONTROLS AND EQUIPMENT
80J23-03E
Heating and Air Conditioning
SystemThere are three types of heating and air
conditioning systems as follows:
Heating System
Manual Heating and Air Conditioning
System
Automatic Heating and Air Conditioning
System (Climate Control)
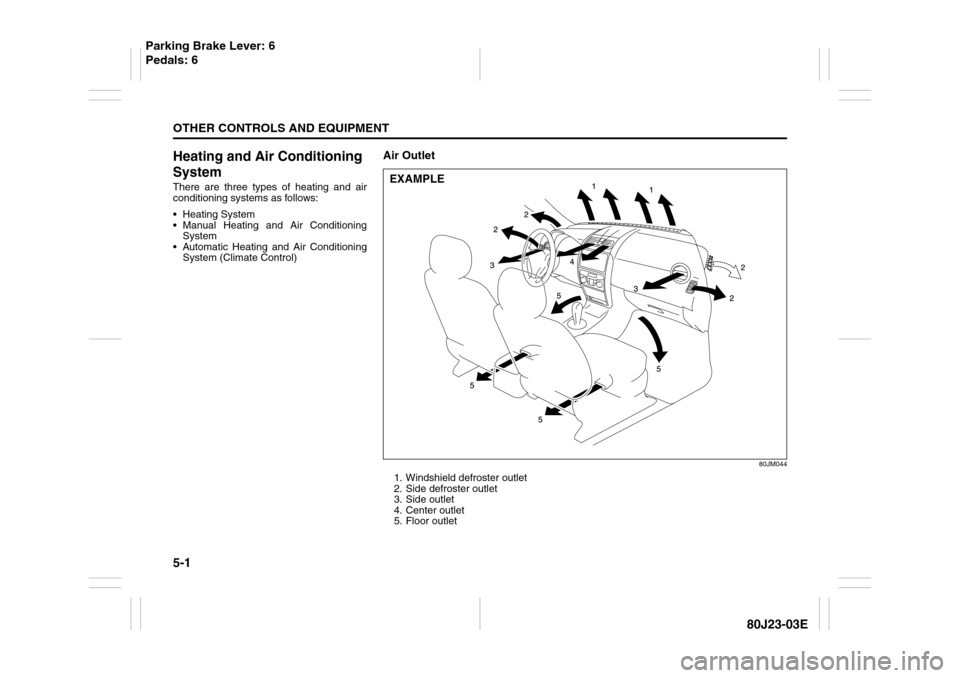
Air Outlet
80JM044
1. Windshield defroster outlet
2. Side defroster outlet
3. Side outlet
4. Center outlet
5. Floor outletEXAMPLE
Parking Brake Lever: 6
Pedals: 6