2010 SUZUKI KIZASHI steering wheel lock
[x] Cancel search: steering wheel lockPage 13 of 388

ILLUSTRATED TABLE OF CONTENTS
57L20-03E
INSTRUMENT PANEL1. Front Fog Light Switch (if equipped)(P.2-105)
2. Lighting Control Lever (P.2-100)/ Turn Signal Control Lever (P.2-105)
3. Shift Paddles (if equipped) (P.3-17)
4. Instrument Cluster (P.2-68)
5. Windshield Wiper and Washer Lever (P.2-107)
6. Front Seat Heater Switch (if equipped) (P.2-28)
7. Hazard Warning Switch (P.2-106)
8. ESP
® OFF Switch (P.3-33)
9. Parking Sensor Switch (if equipped) (P.3-26)
10. 2WD/i-AWD (intelligent All Wheel Drive) Switch (if equipped) (P.3-19)
11. Trunk lid unlatch switch (P.2-5)
12. Engine Hood Release Handle (P.5-75)
13. Tilt/Telescoping/Steering Lock Lever (P.2-110)
14. Engine Switch (P.3-2)
15. Universal Serial Bus (USB) Socket (P.5-81)
16. Accessory Socket (P.5-80)/ Cigarette Lighter (if equipped) (P.5-81)
17. Heated Rear Window and Heated Outside Rearview Mirrors Switch
(if equipped) (P.2-111)
57L1F006
1
3
2
4
7
6
14
13
12
11
9 10
17
16
15
8 5
3
6
Page 89 of 388

2-70
BEFORE DRIVING
57L20-03E
Refer to “Tire Pressure Monitoring System”
in the “OPERATING YOUR VEHICLE” sec-
tion for additional details on the tire pres-
sure monitoring system. Refer to “Tires” in
the “INSPECTION AND MAINTENANCE”
section for information on maintaining
proper tire pressure.
Brake System Warning Light
65D477
This light comes on briefly when you press
the engine switch to change the ignition
mode to “ON”. The light also comes on
under the following conditions: 1) when the
parking brake is engaged and 2) when the
fluid in the brake fluid reservoir falls below
the specified level. The light should go out
after fully releasing the parking brake, if the
fluid level in the brake fluid reservoir is
adequate.
If this light and the ABS warning light stay
on, or come on simultaneously when driv-
ing, then there may be something wrong
with both the rear brake proportioning
valve function and anti-lock function of the
ABS.
If the brake system warning light comes on
while you are driving the vehicle, it may
mean that there is something wrong with
the vehicle’s brake system. If this happens,
you should:
WARNING
If the low tire pressure warning light
comes on and stays on, reduce your
speed and avoid abrupt steering and
braking. Stop in a safe place as soon
as possible and check your tires.
If you have a flat tire, replace it with
the spare tire. Refer to “Jacking
Instructions” in the “EMERGENCY
SERVICE” section. Refer to
“Replacing Tires and/or Wheels”
for instructions on how to restore
normal operation of the tire pres-
sure monitoring system after you
have had a flat tire.
If one or more of your tires is
under-inflated, adjust the inflation
pressure in all of your tires to the
recommended inflation pressure as
soon as possible.
Be aware that driving on a signifi-
cantly under-inflated tire can cause
the tire to overheat and can lead to
tire failure, and may affect steering
control and brake effectiveness. This
could lead to an accident, resulting in
severe injury or death.
Page 112 of 388

2-93BEFORE DRIVING
57L20-03E
(#1) This message will disappear for a while even if the problem that caused the message to appear is not corrected.Warning and Indicator
MessageMaster Warning
IndicatorSound Cause and Remedy
57L21097
Off “Ping” (one time from interior
buzzer)Fuel is low. Refill immediately. (#1)
57L21101
Blinks “Ping” (one time from interior
buzzer)The steering lock is not disengaged. While
lightly turning the steering wheel in both
directions, press the engine switch again.
Page 124 of 388

2-105BEFORE DRIVING
57L20-03E
NOTE:
Be sure to turn the headlights on at night
or at any time of the day when driving or
weather conditions require the headlights
to operate at full brightness and the tail-
lights to be on.
Lights “On” reminder
A buzzer sounds to remind you to turn off
the lights if they are left on when you press
the engine switch to change the ignition
mode to “LOCK” (OFF) and the driver’s
door is opened.
NOTE:
The warning and indicator message and
the illumination indicator light (2) will be
shown on the information display when this
reminder is activated.
Front Fog Light Switch
(if equipped)
64J058
The front fog light comes on when the fog
light switch is pushed in with the headlights
are on and the beams set to the low beam
position.
Turn Signal Control Lever
57L21128
WARNING
To avoid possible injury, do not oper-
ate controls by reaching through the
steering wheel.
Page 129 of 388

2-110
BEFORE DRIVING
57L20-03E
Tilt/Telescoping/Steering
Lock Lever (if equipped)
57L21074
(1) LOCK
(2) UNLOCK
The lock lever is located under the steering
column. To adjust the steering wheel
height and fore-aft position:
1) Push down the lock lever to unlock the
steering column.
2) Adjust the steering wheel to the desired
height and fore-aft position and lock the
steering column by pulling up the lock
lever.
3) Try moving the steering wheel up and
down and back and forth to make sure
it is securely locked in position.
CAUTION
To help prevent damage to the wind-
shield wiper and washer system
components, you should take the fol-
lowing precautions:
Do not continue to hold in the lever
when there is no windshield
washer fluid being sprayed or the
washer motor can be damaged.
Do not attempt to remove dirt from
a dry windshield with the wipers or
you can damage the windshield
and the wiper blades. Always wet
the windshield with washer fluid
before operating the wipers.
Clear ice or packed snow from the
wiper blades before using the wip-
ers.
Check the washer fluid level regu-
larly. Check it often when the
weather is bad.
Only fill the washer fluid reservoir
3/4 full during cold weather to allow
room for expansion if the tempera-
ture falls low enough to freeze the
solution.
(1)
(2)
EXAMPLE
WARNING
Never attempt to adjust the steering
wheel while the vehicle is moving or
you could lose control of the vehicle.
Page 134 of 388

3-3OPERATING YOUR VEHICLE
57L20-03E
TION SWITCH POSITION “ACC”. Refer to
“Information Display” in the “Before Driv-
ing” section for details.
ON
• With the engine off You can use such electric equipment as
the power windows and wipers with the
engine off. When this ignition mode is
selected by pressing the engine switch,
the information display in the instrument
cluster shows the following message:
IGNITION SWITCH POSITION “ON”.
With the engine on All electric equipment is operational. The
vehicle can be driven when you have
selected this ignition mode by pressing
the engine switch.
START
CVT – Provided you have the keyless start
system remote controller with you, the
engine automatically starts when you
press the engine switch to select this igni-
tion mode after placing the gearshift lever
in the “P” position and depressing the
brake pedal. (If you need to re-start the
engine while the vehicle is moving, shift
into “N”.)
Manual Transaxle – Provided you have the
keyless start system remote controller with
you, the engine automat ically starts when
you press the engine switch to select this
ignition mode after shifting to “N” (Neutral) and depressing the brake and clutch ped-
als.
NOTE:
You do not need to keep the engine switch
pressed to start the engine.
NOTE:
The steering lock may not be released if
some load is acting on the steering
wheel. If this happens, turn the steering
wheel to the right or left to relieve it from
the load before you press the engine
switch again to change to the desired
ignition mode.
In the presence of strong radio signals or
noise, you may not be able to change
the ignition mode to “ACC” or “ON” or to
start the engine using the engine switch.
In this case, the information display on
the instrument cluster will show the fol-
lowing message: KEY FOB NOT
DETECTED.
Unreleased Steering Lock WarningIf the steering lock remains engaged when
you press the engine switch to change the
ignition mode to “ON”, the information dis-
play in the instrument cluster will show a
message to alert you to that condition.
Refer to “Information display” in the “Before
Driving” section for details.
CAUTION
Do not leave the engine switch in the
“ACC” or “ON” mode when the
engine is not running. Avoid using
the radio or other electric accesso-
ries for a long time when the engine
switch is in the “ACC” or “ON” mode
when the engine is not running, oth-
erwise the battery may discharge.
Lighting/Turn Signal Control Lever: 8
Page 149 of 388

3-18
OPERATING YOUR VEHICLE
57L20-03E
57L40011
To shift down, pull the “–” side shift paddle,
located on left side of the steering wheel,
toward you. When you remove your finger
from the switch, the switch will return to the
original position.
NOTE:
To shift gears continuously, remove your
finger from the shift paddle, then pull the
shift paddle again. You cannot shift
gears continuously while holding the
shift paddle toward you.
When you pull the both “+” and “–” shift
paddle simultaneously, the gear may not
shift.Canceling the manual mode
To cancel the manual mode, shift the gear-
shift lever from “M” to “D”.
Temporary manual mode
Pull the shift paddle (if equipped) toward
you when driving with the gearshift lever in
the “D” position. The information display
shows the manual mode indicator (1) and
the current gear position (2).
57L31012
(1) Manual mode indicator
(2) Gear position
The temporary manual mode will be can-
celed automatically in the following situa-
tions.
When you press and hold the accelera-
tor pedal for a certain period of time with-
out shifting gears.
When driving speed becomes slow.If You Cannot Shift CVT Gearshift Lever
Out of “P” (PARK)
57L31015
Vehicles with a CVT have an electrically
operated park-lock feature. If the vehicle’s
battery is discharged, or there is some
other electrical failure, the CVT cannot be
shifted out of Park in the normal way. Jump
starting may correct the condition. If not,
follow the procedure described below. This
procedure will permit changing the tran-
saxle out of Park.
1) Be sure the parking brake is firmly
applied.
2) If the engine is running, stop the
engine.
3) Remove the cover (1) over the button.
4) With pushing the release button by the
key or the flat end rod, shift the gear-
shift lever to the desired position.
(1)(2)
(1)
Page 160 of 388
3-29OPERATING YOUR VEHICLE
57L20-03E
Anti-Lock Brake System (ABS)
(if equipped)ABS will help you avoid skidding by elec-
tronically controlling braking pressure. It
will also help you maintain steering control
when braking on slippery surfaces or when
braking hard.
The ABS works automatically, so you do
not need any special braking technique.
Just push the brake pedal down without
pumping. The ABS will operate whenever it
senses that the wheels are locking up.
You may feel the brake pedal pulsate while
the ABS is operating.
NOTE:
The ABS will not work if vehicle speed is
under about 10 km/h (6 mph).
65D451
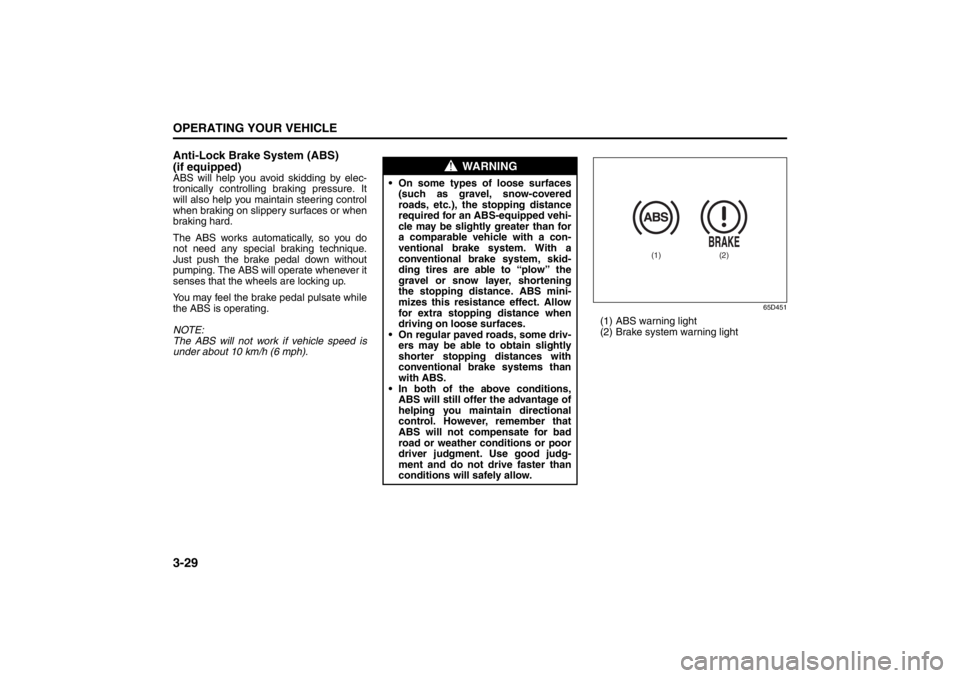
(1) ABS warning light
(2) Brake system warning light
WARNING
On some types of loose surfaces
(such as gravel, snow-covered
roads, etc.), the stopping distance
required for an ABS-equipped vehi-
cle may be slightly greater than for
a comparable vehicle with a con-
ventional brake system. With a
conventional brake system, skid-
ding tires are able to “plow” the
gravel or snow layer, shortening
the stopping distance. ABS mini-
mizes this resistance effect. Allow
for extra stopping distance when
driving on loose surfaces.
On regular paved roads, some driv-
ers may be able to obtain slightly
shorter stopping distances with
conventional brake systems than
with ABS.
In both of the above conditions,
ABS will still offer the advantage of
helping you maintain directional
control. However, remember that
ABS will not compensate for bad
road or weather conditions or poor
driver judgment. Use good judg-
ment and do not drive faster than
conditions will safely allow.
(1)
(2)