2010 SUZUKI GRAND VITARA check
[x] Cancel search: checkPage 214 of 337

5-61OTHER CONTROLS AND EQUIPMENT
79K21-03E
Error display
This unit has a number of self-diagnostic functions to protect the system.
If a problem should occur, the display shows the type of error. Refer to the table below and take proper measures to correct the problem.
If the problem is corrected, the unit will operate normally.
If an error display not listed above appears, turn off the unit and contact your SUZUKI dealer. Error display Measures to be taken
CD/CD changer “Mechanical error”.
This error display indicates a mechanical failure in the CD changer
(failure to change or eject a disc).
The mechanism is probably damaged. Contact your authorized
SUZUKI dealer.
CD/CD changer “Focus error”.
The pick-up-focus is not properly functioning during playback due to
damage on the disc or for other reasons.
Check disc for damage.
CD/CD changer “Disc error”.
The CD is inserted upside down or only an eight-centimeter CD
adapter is equipped.
Check disc for correct loading.
Page 232 of 337
5-79OTHER CONTROLS AND EQUIPMENT
79K21-03E
You can use the roof rails or the roof rack
anchors to attach the optional roof rack
which is available at your SUZUKI dealer. If
you use a roof rack, observe the instruc-
tions and precautions in this section and
provided with the roof rack.
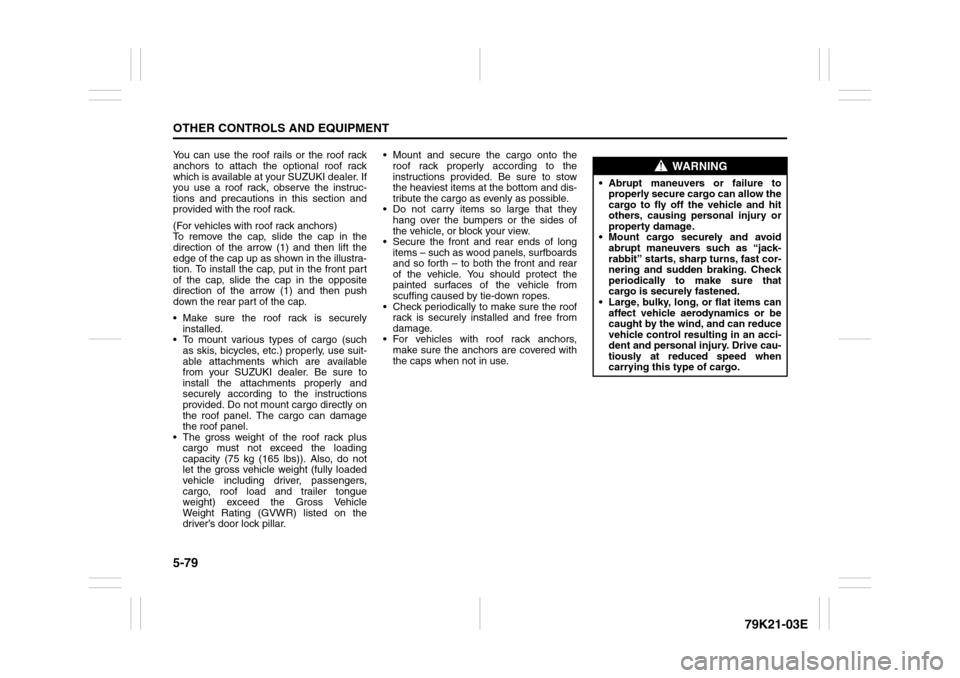
(For vehicles with roof rack anchors)
To remove the cap, slide the cap in the
direction of the arrow (1) and then lift the
edge of the cap up as shown in the illustra-
tion. To install the cap, put in the front part
of the cap, slide the cap in the opposite
direction of the arrow (1) and then push
down the rear part of the cap.
Make sure the roof rack is securely
installed.
To mount various types of cargo (such
as skis, bicycles, etc.) properly, use suit-
able attachments which are available
from your SUZUKI dealer. Be sure to
install the attachments properly and
securely according to the instructions
provided. Do not mount cargo directly on
the roof panel. The cargo can damage
the roof panel.
The gross weight of the roof rack plus
cargo must not exceed the loading
capacity (75 kg (165 lbs)). Also, do not
let the gross vehicle weight (fully loaded
vehicle including driver, passengers,
cargo, roof load and trailer tongue
weight) exceed the Gross Vehicle
Weight Rating (GVWR) listed on the
driver’s door lock pillar. Mount and secure the cargo onto the
roof rack properly according to the
instructions provided. Be sure to stow
the heaviest items at the bottom and dis-
tribute the cargo as evenly as possible.
Do not carry items so large that they
hang over the bumpers or the sides of
the vehicle, or block your view.
Secure the front and rear ends of long
items – such as wood panels, surfboards
and so forth – to both the front and rear
of the vehicle. You should protect the
painted surfaces of the vehicle from
scuffing caused by tie-down ropes.
Check periodically to make sure the roof
rack is securely installed and free from
damage.
For vehicles with roof rack anchors,
make sure the anchors are covered with
the caps when not in use.
WARNING
Abrupt maneuvers or failure to
properly secure cargo can allow the
cargo to fly off the vehicle and hit
others, causing personal injury or
property damage.
Mount cargo securely and avoid
abrupt maneuvers such as “jack-
rabbit” starts, sharp turns, fast cor-
nering and sudden braking. Check
periodically to make sure that
cargo is securely fastened.
Large, bulky, long, or flat items can
affect vehicle aerodynamics or be
caught by the wind, and can reduce
vehicle control resulting in an acci-
dent and personal injury. Drive cau-
tiously at reduced speed when
carrying this type of cargo.
Page 239 of 337

6-2
VEHICLE LOADING AND TOWING
79K21-03E
Trailer TowingYou can use your SUZUKI to tow a trailer,
but you should always observe the require-
ments and recommendations in this sec-
tion. If you intend to tow a trailer, it is
essential to select a trailer and trailer tow-
ing equipment which are compatible. A
reputable trailer dealer can help you.
For Automatic transmission vehicles, shift
into “3” (Low 2) or “L” (Low 1) (if necessary)
and frequently monitor the coolant temper-
ature gauge when towing up a steep hill. If
the gauge indicates overheating, park the
vehicle in a safe place and let the enginecool down. Refer to “If the Engine Over-
heats” section for details on how to deal
with overheating.
HitchesUse only a trailer hitch bracket that is
designed to bolt to the frame of your vehi-
cle, and a hitch that is designed to bolt to
this bracket. We recommend that you use
a genuine SUZUKI trailer hitch bracket and
trailer hitch (available as options), or equiv-
alent.Safety ChainsAlways attach safety chains between your
vehicle and trailer. Cross safety chains
under the tongue of the trailer so that the
tongue will not drop to the road if the trailer
becomes separated from the hitch. Follow
the manufacturer’s recommendation for
attaching safety chains. Always leave just
enough slack to permit full turning. Never
allow safety chains to drag on the road.
Trailer LightsMake sure your trailer is equipped with
lights which meet federal, state and local
requirements. Always check for the proper
operation of all trailer lights before you
start to tow.Brakes CAUTION
Trailer towing puts additional stress
on the engine, drive train and brakes
of your vehicle. Never tow a trailer
during the first 960 km (600 miles) of
vehicle operation.
CAUTION
Because towing a trailer puts addi-
tional stress on your vehicle, more
frequent maintenance will be
required than under normal driving
conditions. Follow the schedule for
Maintenance Recommended Under
Severe Driving Conditions or perform
more frequent maintenance as nec-
essary.
CAUTION
Towing in “D” range up a steep hill
can cause coolant overheating which
may result in engine/automatic trans-
mission damage.
WARNING
Never use a bumper hitch or a hitch
which attaches to the axle of your
vehicle.
WARNING
Never attach safety chains to the
bumper of your vehicle. Secure con-
nections so that they can’t come
loose.
WARNING
Never splice trailer lights directly into
your vehicle’s electrical system, or
electrical system damage may occur.
WARNING
If trailer brakes are used, you should
follow all instructions provided by the
manufacturer. Never tap into the
brake system of your vehicle.
Trailer Towing: 5, 11, 13
Page 240 of 337

6-3VEHICLE LOADING AND TOWING
79K21-03E
Tires
MirrorsCheck to see if your vehicle’s mirrors meet
federal, state and local requirements for
mirrors used on towing vehicles. If they do
not, you must install required mirrors
before you tow.Vehicle/Trailer Weight LimitsBefore towing, you must make sure that
gross trailer weight, gross combined
weight, trailer tongue weight, gross vehicle
weight and gross axle weight (front and
rear) are within specified limits as
described below. You can measure vehicle
and trailer weights using a vehicle scale
and can measure tongue weight using a
bathroom scale.Gross Trailer Weight
60A378
Gross Trailer Weight is the weight of the
trailer plus all cargo in it (measured with
the trailer disconnected from the towing
vehicle). Gross trailer weight must never
exceed 1360 kg (3000 pounds).
If you intend to tow a trailer having a gross
trailer weight greater than 450 kg (1000
pounds), the trailer must be equipped with
trailer brakes.Gross Combined Weight
60A381
Gross Combined Weight is the weight of
the fully loaded vehicle (including all the
occupants, accessories and cargo) plus
the weight of the fully loaded trailer. Gross
combined weight must never exceed:
2.4 L – 3460 kg (7628 pounds)
3.2 L – 3530 kg (7782 pounds)
WARNING
When towing a trailer, it is very
important for your vehicle and trailer
to have properly inflated tires. Your
vehicle’s tires should be inflated to
the recommended pressures listed
on your vehicle’s Tire Inflation Pres-
sure label. Inflate trailer tires accord-
ing to the specifications provided by
the trailer manufacturer.
Trailer Towing: 5, 11, 13
Page 252 of 337

7-3INSPECTION AND MAINTENANCE
79K21-03E
Periodic Maintenance ScheduleR: Replace or change
I : Inspect, clean, adjust, lubricate or replace as necessary
#2: Be sure to perform the engine coolant level check under the daily inspection in “OPERATING YOUR VEHICLE” section.
If you replace the engine coolant other than the SUZUKI LLC: Super (Blue), follow the schedule of SUZUKI LLC: Standard (Green).Interval: This interval should be judged by
odometer reading or months, whichever comes
first.miles (x 1000) 7.5 15 22.5 30 37.5 45 52.5 60 67.5 75
km (x 1000) 12.5 25 37.5 50 62.5 75 87.5 100 112.5 125
months 7.5 15 22.5 30 37.5 45 52.5 60 67.5 75ENGINE & EMISSION CONTROL
1. Drive belt
Inspect for damage
–
–
–
I
–
–
–
I
–
–
*2. Valve lash (clearance) (for 2.4 L engine) – – – – – – – I – –
3.Engine oil and oil filter
R
R
R
R
R
R
R
R
R
R
*4. Cooling system hoses and connections – – – I – – – I – –
5.Engine coolant
SUZUKI LLC: Standard (Green)
–
–
–
R
–
–
–
R
–
–
SUZUKI LLC: Super (Blue) (#2) First time only: Replace at 150000 km (90000 miles) or 90 months
Second time and after: Replace every 75000 km (45000 miles) or 45 months
*6. Exhaust pipes and mountings – – – I – – – I&(R) – –
*7.
EVAP canister
Replace every 250000 km (150000 miles) or 180 months
*8. Emission-related hoses & tubes – – – – – – – I – –
9.Spark plugs
–
–
–
–
–
–
–
R
–
–
*10. Ignition coil (Plug cap) – – – I – – – I – –
*11.
Fuel tank & cap
–
–
–
I
–
–
–
I
–
–
12. Air cleaner filter element – – – R – – – R – –
*13.
Fuel filter
–
–
–
–
–
–
–
–
–
–
*14. Fuel lines and connections – – – I – – – I – –
*15.
Canister air suction filter
Replace every 250000 km (150000 miles) or 180 months
Periodic Maintenance Schedule: 1, 2, 3, 4, 5, 6, 9, 10
Page 253 of 337

7-4
INSPECTION AND MAINTENANCE
79K21-03E
R: Replace or change
I : Inspect, clean, adjust, lubricate or replace as necessary
#1: Inspect at 250000 km (150000 miles) or 180 months.
#2: Be sure to perform the engine coolant level check under the daily inspection in “OPERATING YOUR VEHICLE” section.
If you replace the engine coolant other than the SUZUKI LLC: Super (Blue), follow the schedule of SUZUKI LLC: Standard (Green).
NOTE:
The maintenance services enclosed with rectangle are recommended maintenance items.
Item 6 (R) is applicable to the exhaust mounting rubber only.Interval: This interval should be judged by
odometer reading or months, whichever comes
first.miles (x 1000) 82.5 90 97.5 105 112.5 120 127.5 135 142.5 150
km (x 1000) 137.5 150 162.5 175 187.5 200 212.5 225 237.5 250
months 82.5 90 97.5 105 112.5 120 127.5 135 142.5 150ENGINE & EMISSION CONTROL
1. Drive beltInspect for damage
–
I
–
–
–
I
–
–
–
I
*2. Valve lash (clearance) (for 2.4 L engine) – – – – – I – – – –3.Engine oil and oil filter
R
R
R
R
R
R
R
R
R
R
*4. Cooling system hoses and connections – I – – – I – – – I5.Engine coolant
SUZUKI LLC: Standard (Green)
–
R
–
–
–
R
–
–
–
R
SUZUKI LLC: Super (Blue) (#2) First time only: Replace at 150000 km (90000 miles) or 90 months
Second time and after: Replace every 75000 km (45000 miles) or 45 months
*6. Exhaust pipes and mountings – I – – – I&(R) – – – I
*7.
EVAP canister
Replace every 250000 km (150000 miles) or 180 months
*8. Emission-related hoses & tubes – – – – – I – – – I9.Spark plugs
–
–
–
–
–
R
–
–
–
–
*10. Ignition coil (Plug cap) – I – – – I – – – I*11.
Fuel tank & cap
–
I
–
–
–
I
–
–
–
I (#1)
12. Air cleaner filter element – R – – – R – – – R*13.
Fuel filter
–
–
–
–
–
–
–
–
–
R
*14. Fuel lines and connections – I – – – I – – – I (#1)*15.
Canister air suction filter
Replace every 250000 km (150000 miles) or 180 months
The U.S. Environmental Protection Agency or the California Air Resources Board has determined that the failure to perform recom-
mended maintenance items enclosed with a rectangle will not nullify the emission warranty or limit recall liability prior to the completion
of the vehicle’s useful life. SUZUKI, however, urges that all recommended maintenance services be performed at the indicated inter-
vals and the maintenance recorded.
Periodic Maintenance Schedule: 1, 2, 3, 4, 5, 6, 9, 10
Page 254 of 337

7-5INSPECTION AND MAINTENANCE
79K21-03E
R: Replace or change
I : Inspect, clean, adjust, lubricate or replace as necessaryInterval: This interval should be judged by
odometer reading or months, whichever comes
first.miles (x 1000) 7.5 15 22.5 30 37.5 45 52.5 60 67.5 75
km (x 1000) 12.5 25 37.5 50 62.5 75 87.5 100 112.5 125
months 7.5 15 22.5 30 37.5 45 52.5 60 67.5 75CHASSIS AND BODY
1. Clutch (for manual transmission)
Pedal and fluid level
–
I
–
I
–
I
–
I
–
I
*2. Brake discs and pads (front, rear) – I – I – I – I – I
Brake drums and shoes (if equipped)
–
I
–
I
–
I
–
I
–
I
*3. Brake hoses and pipes – I – I – I – I – I
4.Brake fluid level check, *replacement
–
I
–
I
–
I
–
R
–
I
5. Brake pedal stroke check, *adjustment – I – I – I – I – I
6.Parking brake lever and *cableLever movement check, *adjustment – I – I – I – I – I7.Tires (including tire rotation)
I
I
I
I
I
I
I
I
I
I
*8. Wheel discs I I I I I I I I I I
*9.
Wheel bearings
–
I
–
*I
–
I
–
*I
–
I
*10. Suspension system – I – I – I – I – I
*11.
Propeller shafts/Drive shafts
–
I
–
I
–
I
–
I
–
I
*12. Manual transmission oil I – – R – I – R – I
13.
Automatic transmission (A/T)
Fluid level
–
I
–
I
–
I
–
I
–
I
*Fluid change Replace every 175000 km (105000 miles)-----4-speed A/T or 5-speed A/T
*Fluid hose
–
–
–
–
–
I
–
–
–
–
*14. Transfer oil I – – I – I – R – I
*15.
Differential & Extension (for 2WD) oil
R
–
–
I
–
I
–
I
–
I
16. Steering system
Steering wheel movement,
*linkage
I
I
I
I
I
I
I
I
I
I
*17. Power steering (if equipped) I I I I I I I I I I
18.
All Latches, Hinges and Locks
I
I
I
I
I
I
I
I
I
I
19. Air conditioner filter (if equipped) – I – R – I – R – I
Periodic Maintenance Schedule: 1, 2, 3, 4, 5, 6, 9, 10
Page 255 of 337

7-6
INSPECTION AND MAINTENANCE
79K21-03E
R: Replace or change
I : Inspect, clean, adjust, lubricate or replace as necessary
NOTE:
This table shows the service schedule up to 250000 km (150000 miles).
Beyond 250000 km (150000 miles), perform the same services at the same intervals shown in the chart.
Beyond 250000 km (150000 miles), the maintenance services enclosed with a rectangle are required.
Item 9 *I - inspect for wear.Interval: This interval should be judged by
odometer reading or months, whichever comes
first.miles (x 1000) 82.5 90 97.5 105 112.5 120 127.5 135 142.5 150
km (x 1000) 137.5 150 162.5 175 187.5 200 212.5 225 237.5 250
months 82.5 90 97.5 105 112.5 120 127.5 135 142.5 150CHASSIS AND BODY
1. Clutch (for manual transmission)
Pedal and fluid level
–
I
–
I
–
I
–
I
–
I
*2. Brake discs and pads (front, rear) – I – I – I – I – I
Brake drums and shoes (if equipped)
–
I
–
I
–
I
–
I
–
I
*3. Brake hoses and pipes – I – I – I – I – I
4.Brake fluid level check, *replacement
–
I
–
I
–
R
–
I
–
I
5. Brake pedal stroke check, *adjustment – I – I – I – I – I
6.Parking brake lever and *cableLever movement check, *adjustment – I – I – I – I – I7.Tires (including tire rotation)
I
I
I
I
I
I
I
I
I
I
*8. Wheel discs I I I I I I I I I I
*9.
Wheel bearings
–
*I
–
I
–
*I
–
I
–
I
*10. Suspension system – I – I – I – I – I
*11.
Propeller shafts/Drive shafts
–
I
–
I
–
I
–
I
–
I
*12. Manual transmission oil – R – I – R – I – R
13.
Automatic transmission (A/T)
Fluid level
–
I
–
I
–
I
–
I
–
I
*Fluid change Replace every 175000 km (105000 miles)-----4-speed A/T or 5-speed A/T
*Fluid hose
–
I
–
–
–
–
–
I
–
–
*14. Transfer oil – I – I – R – I – I
*15.
Differential & Extension (for 2WD) oil
–
I
–
I
–
I
–
I
–
I
16. Steering system
Steering wheel movement,
*linkage
I
I
I
I
I
I
I
I
I
I
*17. Power steering (if equipped) I I I I I I I I I I
18.
All Latches, Hinges and Locks
I
I
I
I
I
I
I
I
I
I
19. Air conditioner filter (if equipped) – R – I – R – I – R
Periodic Maintenance Schedule: 1, 2, 3, 4, 5, 6, 9, 10