2010 SUBARU TRIBECA check oil
[x] Cancel search: check oilPage 342 of 422
Cooling system
WARNING
Never attempt to remove the radia-
tor cap until the engine has been
shut off and has cooled down
completely. Since the coolant is
under pressure, you may suffer
serious burns from a spray of boil-
ing hot coolant when the cap isremoved.
CAUTION
. Vehicles are filled at the factory
with SUBARU Super Coolant that
does not require the first change
for 11 years/137,500 miles (11
years/220,000 km). This coolant
should not be mixed with any
other brand or type of coolant
during this period. Mixing with a
different coolant will reduce the
life of the coolant. Should it be
necessary to top off the coolant
for any reason, use only
SUBARU Super Coolant.
If the SUBARU Super Coolant is
diluted with another brand or
type, the maintenance interval is shortened to that of the mixingcoolant.
. Do not splash the engine coolant
over painted parts. The alcohol
contained in the engine coolant
may damage the paint surface.
& Hose and connections
Your vehicle employs an electric cooling
fan which is thermostatically controlled to
operate when the engine coolant reaches
a specific temperature.
If the radiator cooling fan does not operate
even when the engine coolant tempera-
ture gauge exceeds the normal operating
range, the cooling fan circuit may be
defective. Check the fuse and replace it
if necessary. If the fuse is not blown, have
the cooling system checked by your
SUBARU dealer.
If frequent addition of coolant is neces-
sary, there may be a leak in the engine
cooling system. It is recommended that
the cooling system and connections be
checked for leaks, damage, or looseness. &
Engine coolant
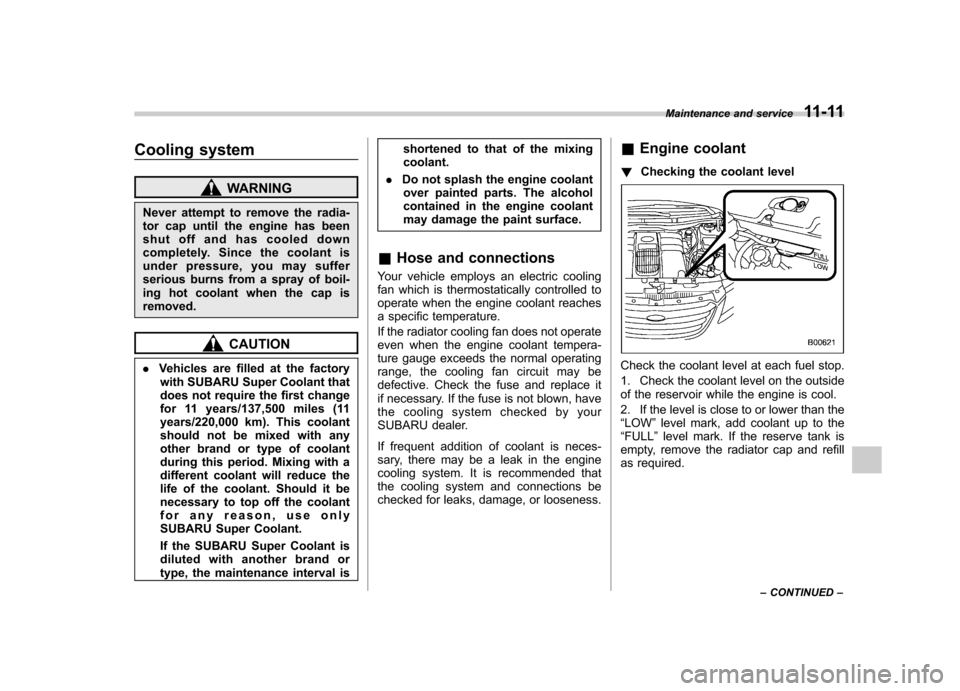
! Checking the coolant level
Check the coolant level at each fuel stop.
1. Check the coolant level on the outside
of the reservoir while the engine is cool.
2. If the level is close to or lower than the “LOW ”level mark, add coolant up to the
“ FULL ”level mark. If the reserve tank is
empty, remove the radiator cap and refill
as required. Maintenance and service
11-11
– CONTINUED –
Page 343 of 422
11-12Maintenance and service
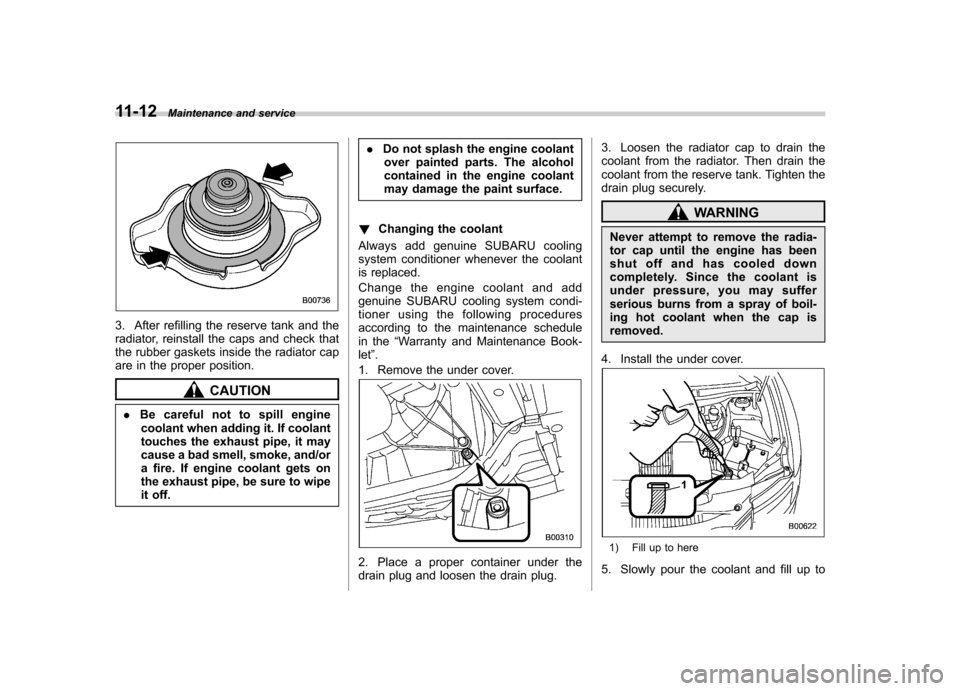
3. After refilling the reserve tank and the
radiator, reinstall the caps and check that
the rubber gaskets inside the radiator cap
are in the proper position.
CAUTION
. Be careful not to spill engine
coolant when adding it. If coolant
touches the exhaust pipe, it may
cause a bad smell, smoke, and/or
a fire. If engine coolant gets on
the exhaust pipe, be sure to wipe
it off. .
Do not splash the engine coolant
over painted parts. The alcohol
contained in the engine coolant
may damage the paint surface.
! Changing the coolant
Always add genuine SUBARU cooling
system conditioner whenever the coolant
is replaced.
Change the engine coolant and add
genuine SUBARU cooling system condi-
tioner using the following procedures
according to the maintenance schedule
in the “Warranty and Maintenance Book-
let ”.
1. Remove the under cover.
2. Place a proper container under the
drain plug and loosen the drain plug. 3. Loosen the radiator cap to drain the
coolant from the radiator. Then drain the
coolant from the reserve tank. Tighten the
drain plug securely.
WARNING
Never attempt to remove the radia-
tor cap until the engine has been
shut off and has cooled down
completely. Since the coolant is
under pressure, you may suffer
serious burns from a spray of boil-
ing hot coolant when the cap isremoved.
4. Install the under cover.
1) Fill up to here
5. Slowly pour the coolant and fill up to
Page 348 of 422
&Recommended fluid
Use one of the following types of auto-
matic transmission fluid. SUBARU ATF
IDEMITSU ATF HP
NOTE
Using any non-specified type of auto-
matic transmission fluid could result in
damage inside the transmission. When
replacing the automatic transmission
fluid, be sure to use a fluid of the types
specified above. Front differential gear oil &
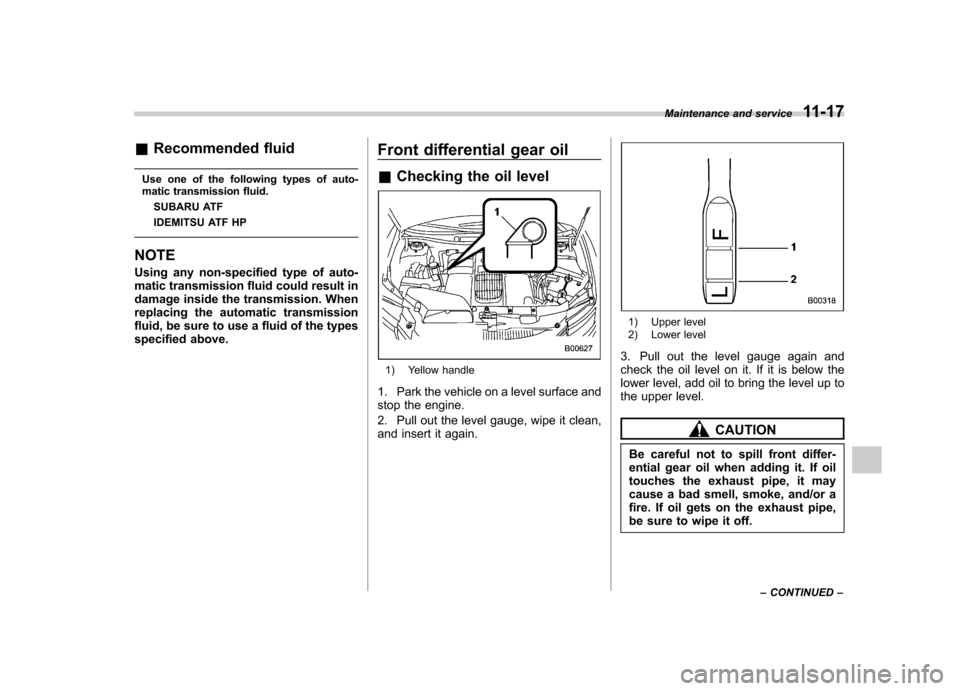
Checking the oil level
1) Yellow handle
1. Park the vehicle on a level surface and
stop the engine.
2. Pull out the level gauge, wipe it clean,
and insert it again.
1) Upper level
2) Lower level
3. Pull out the level gauge again and
check the oil level on it. If it is below the
lower level, add oil to bring the level up to
the upper level.
CAUTION
Be careful not to spill front differ-
ential gear oil when adding it. If oil
touches the exhaust pipe, it may
cause a bad smell, smoke, and/or a
fire. If oil gets on the exhaust pipe,
be sure to wipe it off. Maintenance and service
11-17
– CONTINUED –
Page 349 of 422
11-18Maintenance and service
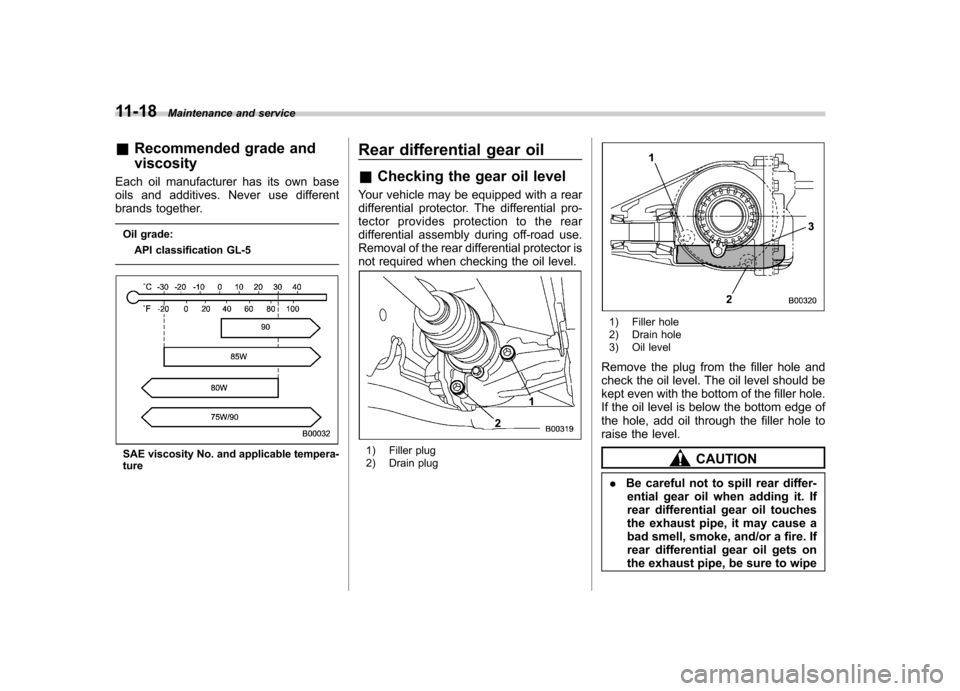
&Recommended grade and viscosity
Each oil manufacturer has its own base
oils and additives. Never use different
brands together.
Oil grade: API classification GL-5
SAE viscosity No. and applicable tempera- ture Rear differential gear oil &
Checking the gear oil level
Your vehicle may be equipped with a rear
differential protector. The differential pro-
tector provides protection to the rear
differential assembly during off-road use.
Removal of the rear differential protector is
not required when checking the oil level.1) Filler plug
2) Drain plug
1) Filler hole
2) Drain hole
3) Oil level
Remove the plug from the filler hole and
check the oil level. The oil level should be
kept even with the bottom of the filler hole.
If the oil level is below the bottom edge of
the hole, add oil through the filler hole to
raise the level.
CAUTION
. Be careful not to spill rear differ-
ential gear oil when adding it. If
rear differential gear oil touches
the exhaust pipe, it may cause a
bad smell, smoke, and/or a fire. If
rear differential gear oil gets on
the exhaust pipe, be sure to wipe
Page 350 of 422
it off.
. If the vehicle requires frequent
refilling, there may be an oil leak.
If you suspect a problem, have
the vehicle checked at your
SUBARU dealer.
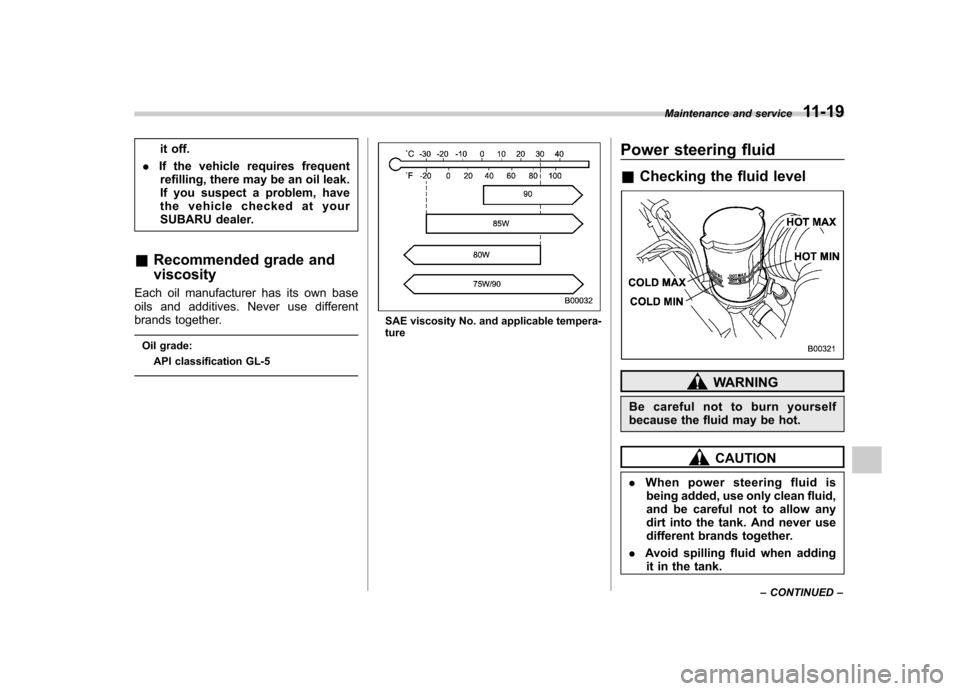
& Recommended grade and viscosity
Each oil manufacturer has its own base
oils and additives. Never use different
brands together.
Oil grade: API classification GL-5
SAE viscosity No. and applicable tempera- ture Power steering fluid &
Checking the fluid level
WARNING
Be careful not to burn yourself
because the fluid may be hot.
CAUTION
. When power steering fluid is
being added, use only clean fluid,
and be careful not to allow any
dirt into the tank. And never use
different brands together.
. Avoid spilling fluid when adding
it in the tank. Maintenance and service
11-19
– CONTINUED –
Page 351 of 422
11-20Maintenance and service
.Be careful not to spill power
steering fluid when adding it. If
power steering fluid touches the
exhaust pipe, it may cause a bad
smell, smoke, and/or a fire. If
power steering fluid gets on the
exhaust pipe, be sure to wipe itoff.
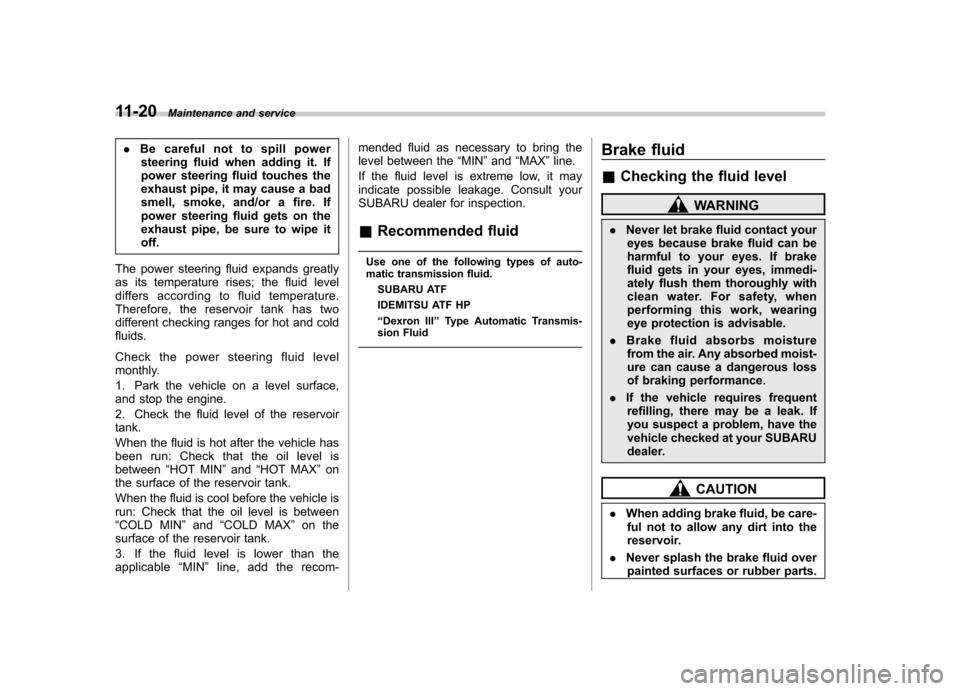
The power steering fluid expands greatly
as its temperature rises; the fluid level
differs according to fluid temperature.
Therefore, the reservoir tank has two
different checking ranges for hot and coldfluids.
Check the power steering fluid level
monthly.
1. Park the vehicle on a level surface,
and stop the engine.
2. Check the fluid level of the reservoir tank.
When the fluid is hot after the vehicle has
been run: Check that the oil level isbetween “HOT MIN ”and “HOT MAX ”on
the surface of the reservoir tank.
When the fluid is cool before the vehicle is
run: Check that the oil level is between“ COLD MIN ”and “COLD MAX ”on the
surface of the reservoir tank.
3. If the fluid level is lower than the
applicable “MIN ”line, add the recom- mended fluid as necessary to bring the
level between the
“MIN ”and “MAX ”line.
If the fluid level is extreme low, it may
indicate possible leakage. Consult your
SUBARU dealer for inspection.
& Recommended fluid
Use one of the following types of auto-
matic transmission fluid. SUBARU ATF
IDEMITSU ATF HP “Dexron III ”Type Automatic Transmis-
sion Fluid Brake fluid &
Checking the fluid level
WARNING
. Never let brake fluid contact your
eyes because brake fluid can be
harmful to your eyes. If brake
fluid gets in your eyes, immedi-
ately flush them thoroughly with
clean water. For safety, when
performing this work, wearing
eye protection is advisable.
. Brake fluid absorbs moisture
from the air. Any absorbed moist-
ure can cause a dangerous loss
of braking performance.
. If the vehicle requires frequent
refilling, there may be a leak. If
you suspect a problem, have the
vehicle checked at your SUBARU
dealer.
CAUTION
. When adding brake fluid, be care-
ful not to allow any dirt into the
reservoir.
. Never splash the brake fluid over
painted surfaces or rubber parts.
Page 362 of 422
as well. Always use a wheel nut
wrench for an aluminum wheel. If
you use a wrench for a chrome
plated wheel, you cannot tighten it
to the specified torque.
. When any of the wheels are removed
and replaced for tire rotation or to change
a flat tire, always check the tightness of
the wheel nuts after driving approximately
600 miles (1,000 km). If any nut is loose,
tighten it to the following specified torque.
A tightening sequence specification for the
wheel nuts can be found in “Flat tires ”F 9-
6.
Wheel nuts tightening torque for alu-
minum wheel:
74 to 89 lbf·ft (100 to 120 N·m, 10 to 12 kgf·m)
This torque is equivalent to applying
approximately 88 to 110 lbs (40 to 50 kg)
at the top of the wheel nut wrench. . Never apply oil to the threaded parts,
wheel nuts, or tapered surface of the wheel. . Never let the wheel rub against sharp
protrusions or curbs.. When wheel nuts, balance weights, or
the center cap is replaced, be sure to
replace them with genuine SUBARU parts
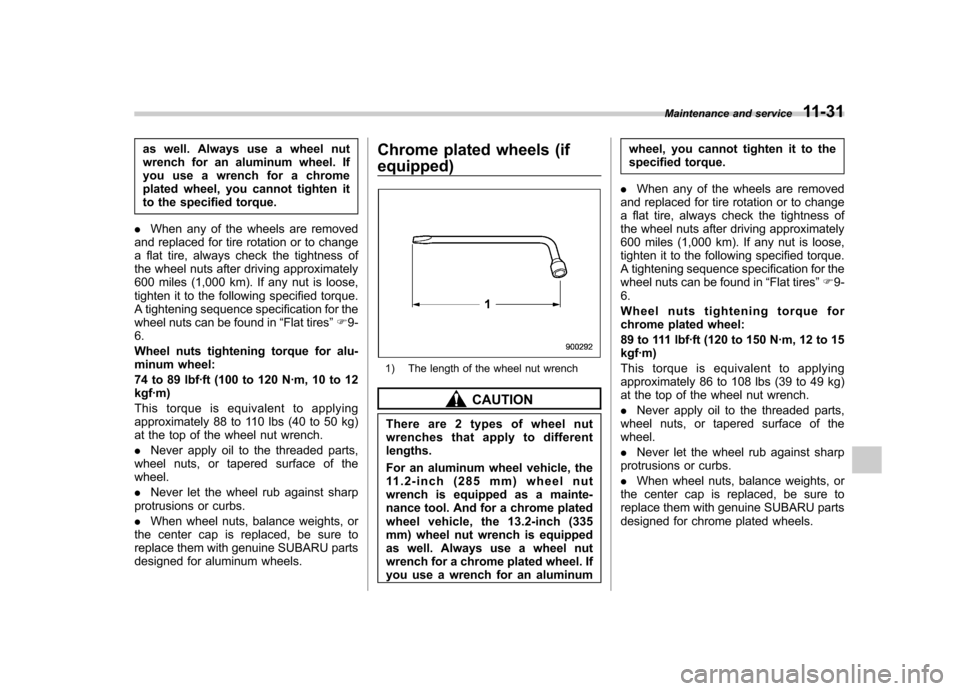
designed for aluminum wheels. Chrome plated wheels (if equipped)
1) The length of the wheel nut wrench
CAUTION
There are 2 types of wheel nut
wrenches that apply to differentlengths.
For an aluminum wheel vehicle, the
11.2-inch (285 mm) wheel nut
wrench is equipped as a mainte-
nance tool. And for a chrome plated
wheel vehicle, the 13.2-inch (335
mm) wheel nut wrench is equipped
as well. Always use a wheel nut
wrench for a chrome plated wheel. If
you use a wrench for an aluminum wheel, you cannot tighten it to the
specified torque.
. When any of the wheels are removed
and replaced for tire rotation or to change
a flat tire, always check the tightness of
the wheel nuts after driving approximately
600 miles (1,000 km). If any nut is loose,
tighten it to the following specified torque.
A tightening sequence specification for the
wheel nuts can be found in “Flat tires ”F 9-
6.
Wheel nuts tightening torque for
chrome plated wheel:
89 to 111 lbf·ft (120 to 150 N·m, 12 to 15 kgf·m)
This torque is equivalent to applying
approximately 86 to 108 lbs (39 to 49 kg)
at the top of the wheel nut wrench. . Never apply oil to the threaded parts,
wheel nuts, or tapered surface of the wheel. . Never let the wheel rub against sharp
protrusions or curbs.. When wheel nuts, balance weights, or
the center cap is replaced, be sure to
replace them with genuine SUBARU parts
designed for chrome plated wheels. Maintenance and service
11-31
Page 412 of 422
Braking..................................................................... 7-19
Tips...................................................................... 7-19
Breaking-in of new brake pads and linings ................... 11-23
Bulb Chart .................................................................... 12-8
Replacing ............................................................. 11-40
C Capacities ................................................................. 12-3
Cargo area
Cover ................................................................... 6-14
Light ....................................................................... 6-3
Tie-down hooks ..................................................... 6-16
Catalytic converter ....................................................... 8-3
Center Console .................................................................. 6-6
Ventilators ............................................................... 4-4
Changing Coolant ................................................................ 11-12
Flat tire ................................................................... 9-6
Oil and oil filter ...................................................... 11-8
Charge warning light .................................................. 3-13
CHECK ENGINE warning light/Malfunction indicator lamp ...................................................................... 3-12
Checking Brake pedal free play ............................................ 11-22
Brake pedal reserve distance ................................. 11-22
Coolant level ........................................................ 11-11
Fluid level (automatic transmission fluid) .................. 11-16
Fluid level (brake fluid) .......................................... 11-20
Fluid level (power steering fluid) .............................. 11-19 Fluid level (washer fluid)
........................................ 11-32
Oil level (engine oil) ................................................ 11-7
Oil level (front differential gear oil) .......................... 11-17
Oil level (rear differential gear oil) ........................... 11-18
Child restraint systems ................................................ 1-31
Installation of a booster seat .................................... 1-37
Installation with A/ELR seatbelt ... ............................. 1-34
Lower and tether anchorages ................................... 1-38
Top tether anchorages ............................................ 1-41
Child safety ................................................................... 5
Locks .................................................................... 2-21
Chime Key........................................................................ 3-4Light ..................................................................... 3-26
Seatbelt. ........................................................ 1-18, 3-10
Chrome plated wheels .............................................. 11-31
Cleaning Aluminum wheels ................................................... 10-3
Interior .................................................................. 10-5
Ventilation grille ...................................................... 4-10
Climate control system
Automatic ............................................................... 4-5
Clock ........................................................................ 3-21
Coat hook. ................................................................. 6-12
Coolant ................................................................... 11-11
Cooling system ........................................................ 11-11
Corrosion protection .................................................... 10-4
Cruise control ............................................................ 7-30
Indicator light ................................................. 3-20, 7-33
Set indicator light ............................................ 3-21, 7-33 Index
14-3