2010 SUBARU LEGACY buttons
[x] Cancel search: buttonsPage 190 of 448

5-14Audio
mode –Switching to the other band
– Press the “A.S ”button
– Press the “SCAN ”button
– Press the “SEEK ”button
– Press any of the preset buttons
– Turn the “TUNE/TRACK/CH ”dial
– Turn off the audio system
– Turn off the ignition switch
. When you use the Auto-store func-
tion while selecting the FM mode, even
if you have selected the FM1 or FM2
station, the new stations are stored in
the FM3 station. . If it is only possible to receive less
than 6 stations, the available stations
are stored from preset 1 in order by
frequency and the unused preset but-
tons are not registered to a station.
Also, the previously registered station
memories of the unused preset buttons
are cleared. . If no stations can be received, the
previously stored stations are not re- placed. . After pressing the “A.S ”button, if
more than 1 station is stored, the radio
receives the station stored in preset 1. . After pressing the “A.S ”button, if no
stations are stored, the radio receives
the band and station that the radio received before pressing the button.
Satellite radio operation (if
equipped)
To receive satellite radio, it is necessary to
install the SUBARU genuine satellite
receiver (dealer option) and to enter into
a contract. For details, please contact your
SUBARU dealer. &XM
TMsatellite radio
XMTMis a continental U.S. based satellite
radio service, including music, news,
sports, talk and children ’s programming.
XM
TMprovides digital quality audio and
text information, including song title and
artist name. A service fee is required to
receive the XM
TMservice. For more
information, contact XMTMatwww.xmradio.com or call 1-800-XM-
RADIO (1-800-967-2346) for U.S.,
www.xmradio.ca or 1-877-GET-XMSR (1-
877-438-9677) for Canada. & Sirius satellite radio
Sirius satellite radio is a recent innovation
that allows the listener to experience
digital sound quality and to have a greater
variety of channels.
Use of satellite radio (Sirius) requires a
tuner, antenna and a service contract. For
details, please contact your SUBARU
Page 193 of 448

pressing the“FOLDER ”button “”
changes the category up by one step. Pressing “
”changes the category down
by one step.
When a category is selected, pressing the “ SEEK ”button selects channels only with-
in the selected category.
The control function returns to the normal
mode after approximately 10 seconds. ! Channel scan
If you press the “SCAN ”button while the
radio is in the category search mode, the
radio turns to the category SCAN mode. In
the category SCAN mode, the radio scans
only channels in the selected category.
If you press the “SCAN ”button while the
radio is not in the category search mode,
the radio turns to the ALL SCAN mode. In the ALL SCAN mode, the radio scans allchannels.
In both SCAN modes, the radio will stop at
the station for 5 seconds while displaying
the channel number, after which scanning
will continue until the entire channel has
been scanned from the low end to the highend.
Press the
“SCAN ”button again to cancel
the SCAN mode and to stop on any
displayed channel.
& Channel preset
Preset buttons !
How to preset channels
1. Press the “SAT ”button to select SAT1,
SAT2 and SAT3 reception.
2. Select the desired channel.
3. Press one of the preset buttons for
more than 1.5 seconds to store the
channel. If the button is pressed for less
than 1.5 seconds, the preceding selection
will remain in memory.
NOTE
If the connection between the radio and
battery is broken for any reason such
as vehicle maintenance or radio re-
moval, all channels stored in the preset
buttons are cleared. If this occurs, it is
necessary to reset the preset channels. ! Selecting preset channels
Presetting a channel with a preset button
allows you to select that channel in a
single operation. Up to six SAT1, SAT2
and SAT3 channels each may be preset. Audio
5-17
– CONTINUED –
Page 195 of 448

If no indicator blinks, it means that there is
no idle position in the magazine.
2. When the“LOAD ”indicator illumi-
nates, insert the disc. Once you have
inserted the disc, the “LOAD ”indicator will
turn off and the “LOADING ”indicator will
illuminate. The disc will then be automa-
tically drawn in, the player will begin to
play back the first track of the disc, the“ LOADING ”indicator will turn off and the
“ READING ”indicator will illuminate.
. To insert more discs in succession,
repeat steps 1 and 2. The magazine will
be loaded with discs in the ascending
order of position number. . If you do not insert any disc in 15
seconds after you have pressed the “ LOAD ”button, the player will return to
the original mode that was selected beforethe “LOAD ”button was pressed.
. The disc indicator steadily lights up if a
disc is already inserted in the correspond-
ing position of the magazine. . While the player is in the loading mode,
if you press “FM ”, “AM ”or “SAT ”button,
the player will enter the standby mode.
Press the “CD/AUX ”button to start play-
back. !
Inserting a disc in a desired posi-tion
1. Briefly press the “LOAD ”button. If the
magazine in the player has an idle
position where you can insert a disc, the
disc number indicator associated with the
idle position will blink.
The positions in the magazine the indica-
tor of which steadily lights up are already
loaded with discs.
Disc select buttons
2. Press the disc select button at the
position where you want to insert a disc.
3. When the “LOAD ”indicator illumi-
nates, insert the disc. Once you have
inserted the disc, the “LOAD ”indicator will
turn off. The disc will then be automatically
drawn in, and the player will begin to play
the first track on the disc. . If you wish to insert another disc,
repeat the procedure beginning with step 1. . If you do not insert any disc in 15
seconds after you have pressed the “ LOAD ”button, the player will return to
the original mode that was selected beforethe “LOAD ”button was pressed.
. While the player is in the loading mode, Audio
5-19
– CONTINUED –
Page 197 of 448

!When selecting a CD to play (type B)
Disc select buttons
Press a desired one of the disc select
buttons the disc number indicator of which
steadily lights up. The player will then start
playback of the selected CD, beginning
with the first track. &
To select a track from its beginning
! Forward direction
Turn the “TUNE/TRACK/CH ”dial clock-
wise to skip to the beginning of the next
track/file (track). Each time the dial is
turned, the indicated track/file (track)
number will increase. NOTE
In an MP3, WMA or AAC folder, skip-
ping past the last track/file (track) will
take you back to the first track/file
(track) in the folder. !
Backward direction
Turn the “TUNE/TRACK/CH ”dial counter-
clockwise to skip to the beginning of the
current track/file (track). Each time the dial
is turned, the indicated track/file (track)
number will decrease. NOTE
In an MP3, WMA or AAC folder, skip-
ping past the first track/file (track) will
take you to the last track/file (track) in
the folder. Audio
5-21
– CONTINUED –
Page 202 of 448

5-26Audio
“ FOLDER ”button starts playback be-
ginning with the first track/file (track).
& How to eject a CD from the
player (type A)
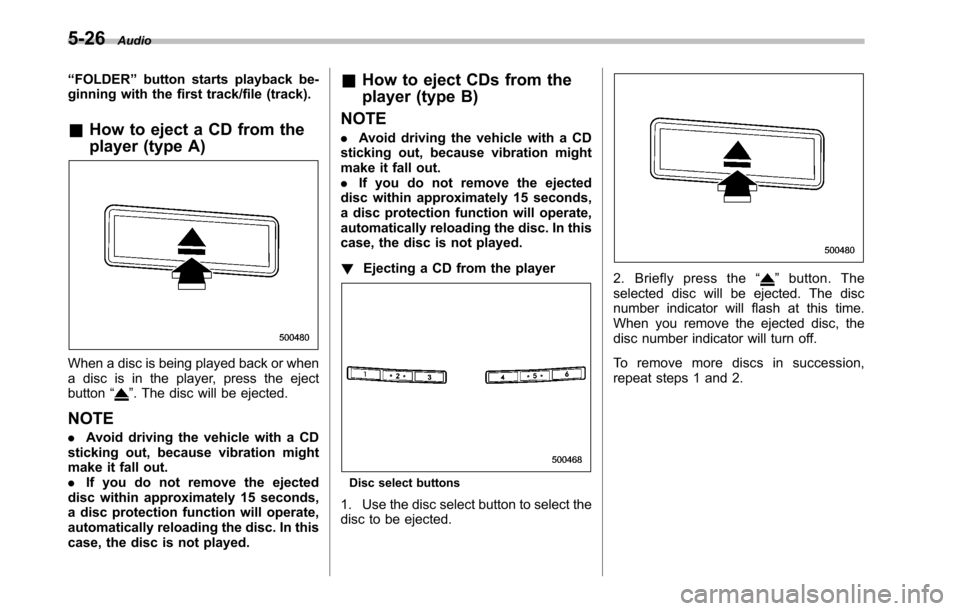
When a disc is being played back or when
a disc is in the player, press the ejectbutton “
”. The disc will be ejected.
NOTE . Avoid driving the vehicle with a CD
sticking out, because vibration might
make it fall out.. If you do not remove the ejected
disc within approximately 15 seconds,
a disc protection function will operate,
automatically reloading the disc. In this
case, the disc is not played. &
How to eject CDs from the
player (type B)
NOTE . Avoid driving the vehicle with a CD
sticking out, because vibration might
make it fall out.. If you do not remove the ejected
disc within approximately 15 seconds,
a disc protection function will operate,
automatically reloading the disc. In this
case, the disc is not played. ! Ejecting a CD from the player
Disc select buttons
1. Use the disc select button to select the
disc to be ejected.
2. Briefly press the “”button. The
selected disc will be ejected. The disc
number indicator will flash at this time.
When you remove the ejected disc, the
disc number indicator will turn off.
To remove more discs in succession,
repeat steps 1 and 2.
Page 206 of 448

5-30Audio
there are deposits, wipe the disc surface
from the center outward with a dry, soft
cloth. Be sure not to use a rough cloth,
thinner, benzine, alcohol, etc. .Do not use any disc that is scratched,
deformed, or cracked. Also, do not use
any disc that has a non-standard shape
(for example, a heart shape). Malfunctions
or problems might result. . A disc is vulnerable to heat. Never
keep it either in places exposed to direct
sunlight, near heaters or in vehicles
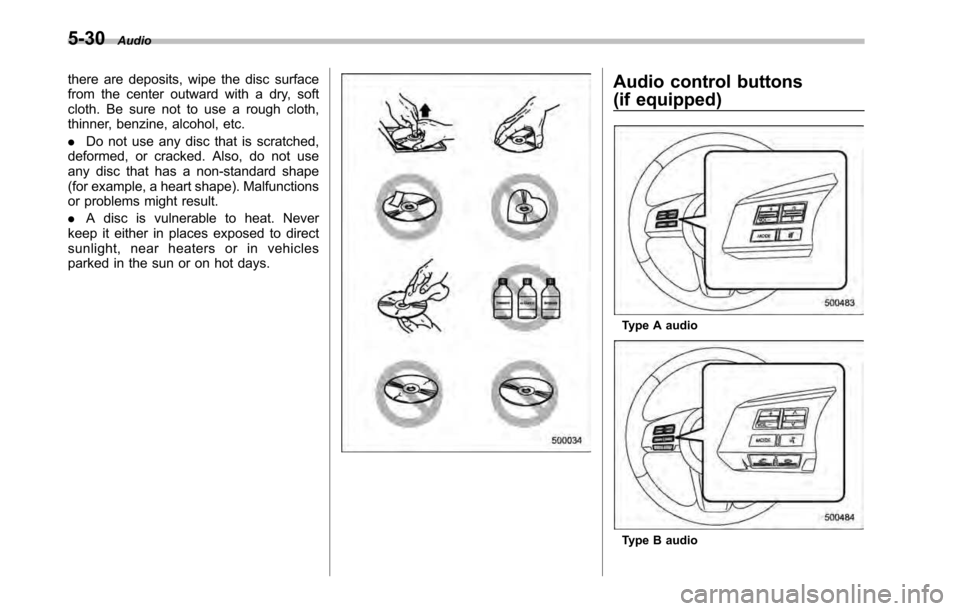
parked in the sun or on hot days.Audio control buttons
(if equipped)
Type A audio
Type B audio
Page 207 of 448

These buttons are located on the spokes
of the steering wheel. They allow the
driver to control audio functions without
taking his/her hands off the steeringwheel. &MODE button
This button is used to select the desired
audio mode. Each time it is pressed, the
mode changes to the next one in the
following sequence.
*1: The frequency last received in the selected
waveband will be displayed.
*2: Only when a CD is in the player. *3: Only when an auxiliary audio product is
connected.
*4: Only when an iPod is connected using the
iPod adapter that is available as a dealeroption.
& “
”and “”switch
! With radio mode selected
Press the switch to the “
”or “”side
briefly to skip to a preset channel. Press
the switch to the “
”or “”side for more
than 0.5 second to seek the next recei-
vable station and stop at it.
That station ’s frequency will be indicated
on the audio display. ! With CD mode selected
Press the switch to the “
”side to skip
forward in the track/file (track) order. Press the switch to the
“
”side to skip back-
ward in the track/file (track) order.
The track/file (track) number will be shown
on the audio display. ! With SAT mode selected
Press the switch to the “
”side to skip
forward in the channel order. Press the
switch to the “
”side to skip backward in
the channel order. When the switch is
briefly pressed, the channel will skip every
1 channel. When the switch is pressed for
more than 0.5 second, the channel will
skip every 10 channels. The channel will
be shown on the audio display.
& Volume control switch
Press the switch to the “+ ”side to increase
the volume. Press the switch to the “� ”
Audio
5-31
– CONTINUED –
Page 211 of 448

“TUNE/TRACK/CH ”dial.
4. Select “Pair phone ”by operating the
“ TUNE/TRACK/CH ”dial.
5. Press the talk switch. Refer to “Voice
command system ”F 5-40.
6. Say the name to be registered.
7. Select “Confirm ”by operating the
“ TUNE/TRACK/CH ”dial or say “Confirm ”.
Then a pass key is displayed.
8. Input the displayed pass key into the
cell phone while “PASS KEY: **** ”is
displayed. If you input the correct pass
key, “Paired ”is displayed and the register-
ing procedure is finished. If you input an
incorrect pass key, “Failed ”is displayed
and the registering procedure was not successful. ! Inputting the phone number
1. Press the OFF hook switch.
2. Select “Phonebook ”by operating the
“ TUNE/TRACK/CH ”dial.
3. Select “Add Entry ”by operating the
“ TUNE/TRACK/CH ”dial.
4. Select “Manual Input ”by operating the
“ TUNE/TRACK/CH ”dial.
5. Input the phone number to be regis- tered. NOTE
While inputting the phone numbers, if “
Go Back ”is chosen using the “TUNE/
TRACK/CH ”dial, the character that was
input last is deleted. ! Registering the phonebook data.
1. Input the phone number to be regis-
tered. Refer to “Inputting the phone
number ”F 5-35.
2. Say the name to be registered. 3. “Confirm ”is displayed.
4. Press the “TUNE/TRACK/CH ”dial.
5. “Stored ”is displayed.
6. Select “Speed Dial ”by operating the
“ TUNE/TRACK/CH ”dial.
7. Select the phone number to be regis- tered.
Preset buttons
8. Press the preset button in which you
want to register the number. The number
is then registered. ! Page scroll
Audio 5-35
– CONTINUED –