2010 Seat Ibiza 5D buttons
[x] Cancel search: buttonsPage 74 of 266
Unlocking and locking
72Unlocking and lockingCentral l ocking Description
The central locking system enables you to lock and unlock all
doors by just pushing the button.Central locking can be activated by using any of the following options:•the key , by inserting it into the driver door cylinder and rotating it in the
opening direction. Depending on the vehicle version, either all doors will be
unlocked or only the driver door will be unlocked. All doors will be locked on
locking the vehicle using the key.•the interior central locking button ⇒ page 75.•the remote control , using the buttons on the key ⇒ page 78.
Various functions are available to improve the vehicle safety:
- Safe* security system
- Selective unlocking system*
- Self-locking system to prevent involuntary unlocking
- Automatic speed-dependent locking and unlocking system*
- Emergency unlocking systemWARNING
•Locking from the outside carelessly or without good visibility may lead
to bruising, particularly in the case of children.•When locking a vehicle, never leave children unaccompanied inside, as
from the outside it will be difficult to provide assistance if required.
•Having the doors locked prevents an intrusion from getting in, for
example when stopped at a traffic light.Note
For anti-theft security, only the driver door is fitted with a lock cylinder.Safe security system*
This is an anti-theft device that consists of a double lock for
the door locks and a disabling function for the luggage
compartment in order to prevent a forced entry (depending
on country).Activation
The “safe” system is activated when the vehicle is locked using the key or the
remote control.
To activate it with the key, rotate once it is inserted in the door lock cylinder
in the locking direction.
To activate the system using the remote control, press the lock button once on the remote.
Once this system is activated, opening doors from the outside and the inside
is not possible. The tailgate can not be opened. The central locking button
does not work.
WARNING (continued)
Ibiza_EN.book Seite 72 Mittwoch, 1. September 2010 5:24 17
Page 80 of 266
Unlocking and locking
78Radio frequency remote control*Locking and unlocking the vehicle
The remote control key is used to lock and unlock the vehicle
from a distance.
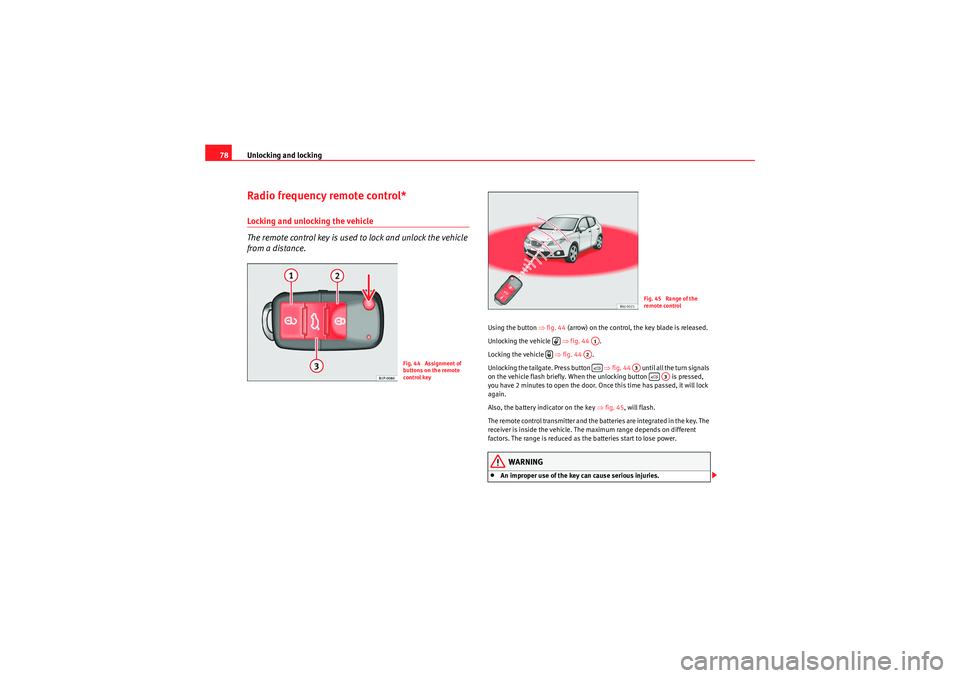
Using the button ⇒fig. 44 (arrow) on the control, the key blade is released.
Unlocking the vehicle ⇒fig. 44 .
Locking the vehicle ⇒fig. 44 .
Unlocking the tailgate. Press button ⇒fig. 44 until all the turn signals
on the vehicle flash briefly. When the unlocking button is pressed,
you have 2 minutes to open the door. Once this time has passed, it will lock
again.
Also, the battery indicator on the key ⇒fig. 45 , will flash.
The remote control transmitter and the batteries are integrated in the key. The
receiver is inside the vehicle. The maximum range depends on different
factors. The range is reduced as the batteries start to lose power.
WARNING
•An improper use of the key can cause serious injuries.
Fig. 44 Assignment of
buttons on the remote
control key
Fig. 45 Range of the
remote control
A1
A2
A3
A3
Ibiza_EN.book Seite 78 Mittwoch, 1. September 2010 5:24 17
Page 81 of 266

Unlocking and locking79
Safety First
Operating Instructions
Practical Tips
Technical Specifications
•Never leave children or disabled persons in the vehicle. In case of emer-
gency, they may not be able to leave the vehicle and not manage on their
own.•Never forget the keys inside the vehicle. Otherwise, this could result in
serious injuries, accidents or even the theft of your vehicle. Always take the
key with you when you leave the vehicle.•An uncontrolled use of the key could start the engine or activate any
electric equipment (e.g. electric windows), causing risk of accident. The
vehicle can be locked when using the remote control key. This could
complicate the aid in case of emergency.Note
•The remote control key functions only when you are within range
⇒ page 78, fig. 45.•If the vehicle cannot be unlocked or locked by using the radio-frequency
remote control, the remote control key will have to be re-synchronised. For
this, go to your Technical Service.Changing the batteryIf the battery indicator does not flash when the buttons are pushed, the
battery must be replaced.
Caution
The use of inappropriate batteries may damage the radio frequency remote
control. For this reason, always replace the dead battery with another of the
same size and power.
For the sake of the environment
Used batteries must be disposed of at an appropriate waste facility or
through an authorised service, given that their components can affect the
environment.Synchronising the remote control key
If it is not possible to unlock or lock the door with the remote
control, it should be re-synchronised.While the vehicle is open:
– Press the button ⇒page 78, fig. 44 on the remote control.
– Then close the vehicle using the key bit within one minute.
While the vehicle is closed:
– Press the button ⇒page 78, fig. 44 on the remote control.
– Then close the vehicle using the key bit within one minute.It is possible that the vehicle could no longer be opened and closed with the
remote control if the button is repeatedly pressed outside of the effective
range of the radio frequency remote control. The remote control key will have
to be resynchronised.
Spare remote control keys are available in your Authorised Service Centres,
where they must be matched to the locking system.
Up to five remote control keys can be used.
WARNING (continued)
A2
A1
Ibiza_EN.book Seite 79 Mittwoch, 1. September 2010 5:24 17
Page 86 of 266
Unlocking and locking
84Windows Opening or closing the windows electrically*
The front and rear electric windows can be operated by using
the controls on the driver door. The other doors each have a
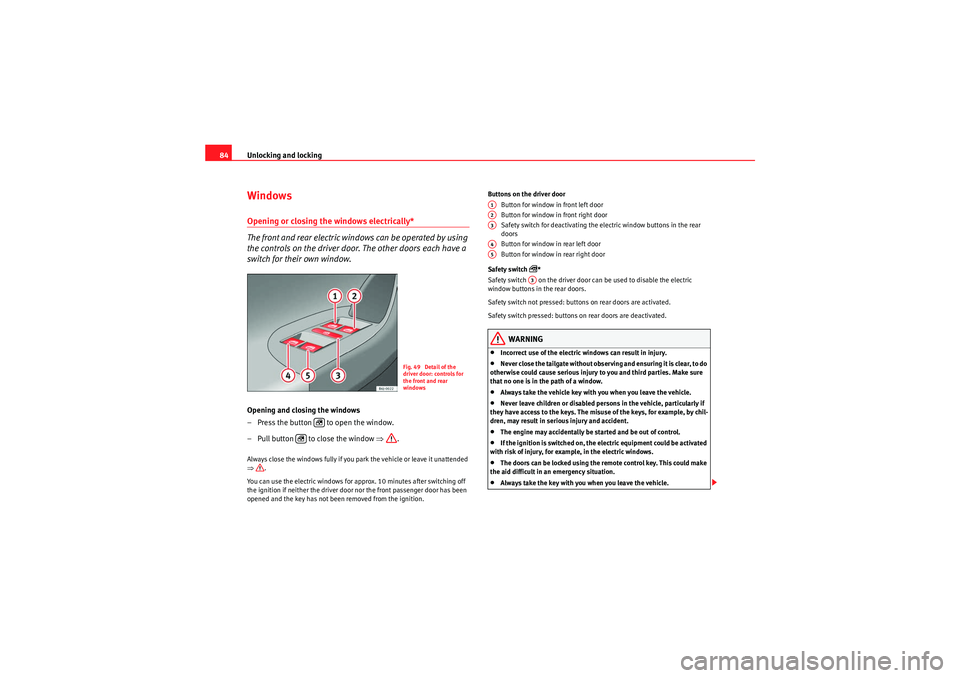
switch for their own window.Opening and closing the windows
– Press the button to open the window.
– Pull button to close the window ⇒.Always close the windows fully if you park the vehicle or leave it unattended
⇒.
You can use the electric windows for approx. 10 minutes after switching off
the ignition if neither the driver door nor the front passenger door has been
opened and the key has not been removed from the ignition. Buttons on the driver door
Button for window in front left door
Button for window in front right door
Safety switch for deactivating the electric window buttons in the rear
doors
Button for window in rear left door
Button for window in rear right door
Safety switch
*
Safety switch on the driver door can be used to disable the electric
window buttons in the rear doors.
Safety switch not pressed: buttons on rear doors are activated.
Safety switch pressed: buttons on rear doors are deactivated.
WARNING
•Incorrect use of the electric windows can result in injury.•Never close the tailgate without observing and ensuring it is clear, to do
otherwise could cause serious injury to you and third parties. Make sure
that no one is in the path of a window.•Always take the vehicle key with you when you leave the vehicle.•Never leave children or disabled persons in the vehicle, particularly if
they have access to the keys. The misuse of the keys, for example, by chil-
dren, may result in serious injury and accident.•The engine may accidentally be started and be out of control.•If the ignition is switched on, the electric equipment could be activated
with risk of injury, for example, in the electric windows.•The doors can be locked using the remote control key. This could make
the aid difficult in an emergency situation.•Always take the key with you when you leave the vehicle.
Fig. 49 Detail of the
driver door: controls for
the front and rear
windows
�p
�p
A1A2A3A4A5
A3
Ibiza_EN.book Seite 84 Mittwoch, 1. September 2010 5:24 17
Page 87 of 266

Unlocking and locking85
Safety First
Operating Instructions
Practical Tips
Technical Specifications
•The electric windows will work until the ignition has been switched off
and one of the front doors has been opened.•If necessary, use the safety switch to disable the rear electric windows.
Make sure that they have been disabled.Note
If the window is not able to close because it is stiff or because of an obstruc-
tion, the window will automatically open again ⇒ page 85. If this happens,
check why the window could not be closed before attempting to close it
again.One-touch opening and closing*
One-touch opening and closing means you do not have to
hold down the button.Buttons ⇒page 84, fig. 49 , , and have two positions
for opening windows and two for closing them. This makes it easier
to open and close windows to the desired position.
One-touch closing
– Pull up the window button briefly up to the second position. The window closes fully.
One-touch opening
– Push down the window button briefly up to the second position. The window opens fully. Restoring one-touch opening and closing
– The automatic open and close function will not work if the battery
has been temporarily disconnected. The function can be restored
as follows:
– Close the window as far as it will go by lifting and holding the window switch.
– Release the switch and then lift it again for one second. This will re-enable the automatic function.
If you push (or pull) a button to the first stage, the window will open (or close)
until you release the button. If you push or lift the button briefly to the second
stage, the window will open (one-touch opening) or close (one-touch closing)
automatically. If you operate the button while the window is opening or
closing, it stops at this position.
The one-touch opening and closing function will not function once the igni-
tion has been switched off.
The one-touch function and roll-back function will not work if there is a
malfunction in the electric windows. Contact a specialised workshop.Roll-back function
The roll-back function reduces the risk of injury when the elec-
tric windows close.•If a window is obstructed when closing automatically, the window stops
at this point and lowers immediately ⇒.•Next, check why the window does not close before attempting it again.
WARNING (continued)
A1A2A4
A5
Ibiza_EN.book Seite 85 Mittwoch, 1. September 2010 5:24 17
Page 88 of 266
Unlocking and locking
86•If you try within the following 10 seconds and the window closes again
with difficulty or there is an obstruction, the automatic closing will stop
working for 10 seconds.•If the window is still obstructed, the window will stop at this point.•If there is no obvious reason why the window cannot be closed, try to
close it again by pulling the tab within ten seconds. The window closes with
maximum force. The roll-back function is now deactivated.
If more than 10 seconds pass, the window will open fully when you operate
one of the buttons. One-touch closing is reactivated.
The one-touch function and roll-back function will not work if there is a
malfunction in the electric windows. Contact a specialised workshop.WARNING
•Incorrect use of the electric windows can result in injury.•Always take the key with you when leaving the vehicle, even if you only
intend to be gone for a short time. Please ensure that children are never left
alone inside the vehicle.•The electric windows will work until the ignition has been switched off
and one of the front doors has been opened.•Closing the windows without observing and ensuring it is clear could
cause serious injury to you and third parties. Make sure that no one is in
the path of a window.•Never allow people to remain in the vehicle when you close the vehicle
from the outside. The windows cannot be opened even in an emergency.•The roll-back function does not prevent fingers or other parts of the
body from getting pinched against the window frame, causing injury.
Convenience opening and closing* Using the door lock*
– Hold the key in the door lock of the driver door in either the locking or the unlocking position until all windows are either
opened or closed.
– Release the key to interrupt this function.
Using the remote control
– Keep the locking/unlocking button pressed for the electrical window risers to open/close; if you stop pressing the button, the
window raising/lowering function is stopped.
– If the automatic raising is stopped and immediately after, the opening button is kept pressed, the window risers will lower.
– Once the windows are completely closed, the turn signals will flash.
Ibiza_EN.book Seite 86 Mittwoch, 1. September 2010 5:24 17
Page 127 of 266

Air conditioning125
Safety First
Operating Instructions
Practical Tips
Technical Specifications
•If the function is not deactivated by pressing the button, this will deacti-
vate after approx. 20 min.Economic use of the air conditioningWhen the air conditioning is switched on, the compressor consumes engine
power and has influence on fuel consumption. Consider the following points
in order to have the system operating in the minimum possible time.•If the vehicle interior has overheated due to an excessive solar radiation,
it is best to open the windows or doors to allow the hot air to escape.•While in motion, the air conditioning should not be switched on if the
windows or the sunroof are open.*
ClimatronicControl switchesFig. 93 Climatronic controls on the dash panelThe air conditioner only works when the engine is running and the
blower is switched on.
–Press keys and ⇒ fig. 93 to adjust temperature.
– The functions will be switched on when its buttons are pressed. When the function is activated, a symbol is displayed on the
screen. Press the button again to switch off the function.
Blower level indicator.
Air recirculation display:
Display AUTO (Automatic operation)
Demisting indicator
A10
A11
A1A2A3A4
Ibiza_EN.book Seite 125 Mittwoch, 1. September 2010 5:24 17
Page 128 of 266
Air conditioning
126
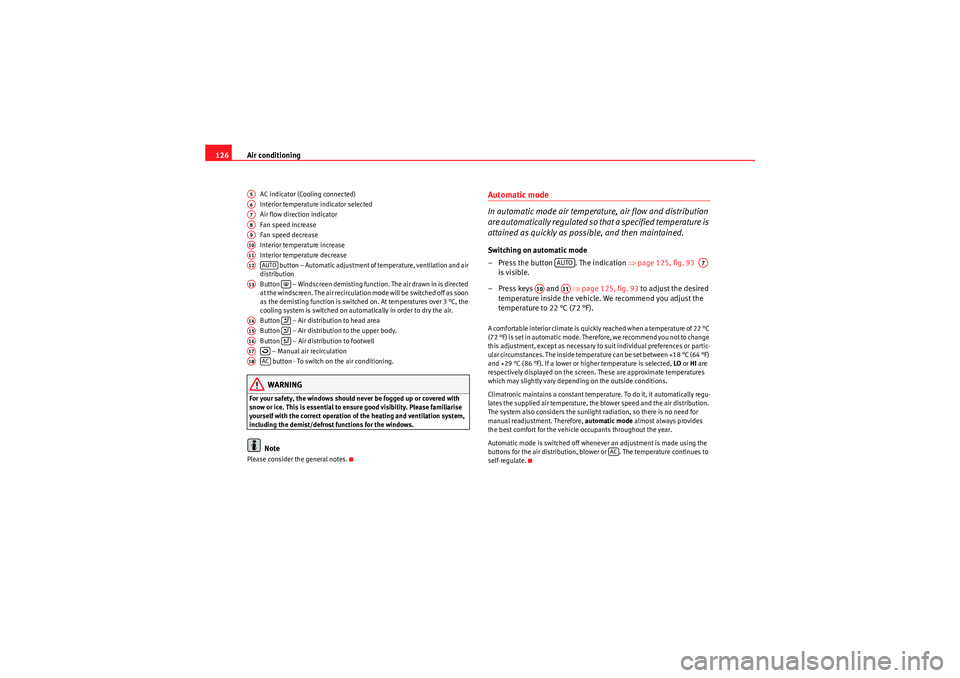
AC indicator (Cooling connected)
Interior temperature indicator selected
Air flow direction indicator
Fan speed increase
Fan speed decrease
Interior temperature increase
Interior temperature decrease
button – Automatic adjustment of temperature, ventilation and air
distribution
Button – Windscreen demisting function. The air drawn in is directed
at the windscreen. The air recirculation mode will be switched off as soon
as the demisting function is switched on. At temperatures over 3 °C, the
cooling system is switched on automatically in order to dry the air.
Button – Air distribution to head area
Button – Air distribution to the upper body.
Button – Air distribution to footwell
– Manual air recirculation
button - To switch on the air conditioning.WARNING
For your safety, the windows should never be fogged up or covered with
snow or ice. This is essential to ensure good visibility. Please familiarise
yourself with the correct operation of the heating and ventilation system,
including the demist/defrost functions for the windows.
Note
Please consider the general notes.
Automatic mode
In automatic mode air temperature, air flow and distribution
are automatically regulated so that a specified temperature is
attained as quickly as possible, and then maintained.Switching on automatic mode
– Press the button . The indication ⇒page 125, fig. 93
is visible.
–Press keys and ⇒page 125, fig. 93 to adjust the desired
temperature inside the vehicle. We recommend you adjust the
temperature to 22 °C (72 °F).A comfortable interior climate is quickly reached when a temperature of 22 °C
(72 °F) is set in automatic mode. Therefore, we recommend you not to change
this adjustment, except as necessary to suit individual preferences or partic-
ular circumstances. The inside temperature can be set between +18 °C (64 °F)
and +29 °C (86 °F). If a lower or higher temperature is selected, LO or HI are
respectively displayed on the screen. These are approximate temperatures
which may slightly vary depending on the outside conditions.
Climatronic maintains a constant temperature. To do it, it automatically regu-
lates the supplied air temperature, the blower speed and the air distribution.
The system also considers the sunlight radiation, so there is no need for
manual readjustment. Therefore, automatic mode almost always provides
the best comfort for the vehicle occupants throughout the year.
Automatic mode is switched off whenever an adjustment is made using the
buttons for the air distribution, blower or . The temperature continues to
self-regulate.
A5A6A7A8A9A10A11A12
AUTO
A13
�<
A14
A15
A16
A17
A18
AC
AUTO
A7
A10
A11
AC
Ibiza_EN.book Seite 126 Mittwoch, 1. September 2010 5:24 17