2010 SATURN OUTLOOK remove seats
[x] Cancel search: remove seatsPage 94 of 444

3-40 Seats and Restraints
recline the vehicle seatback and
adjust the seat cushion,
if adjustable, to make sure that
the vehicle seatback is not
pushing the child restraint into
the seat cushion.
Also make sure the child
restraint is not trapped under the
vehicle head restraint. If this
happens, adjust the head
restraint. SeeHead Restraints
on page 3‑2.
6. Restart the vehicle.
The passenger sensing system
may or may not turn off the
airbag for a child in a child
restraint depending upon the
child’s seating posture and body
build. It is better to secure the
child restraint in a rear seat.
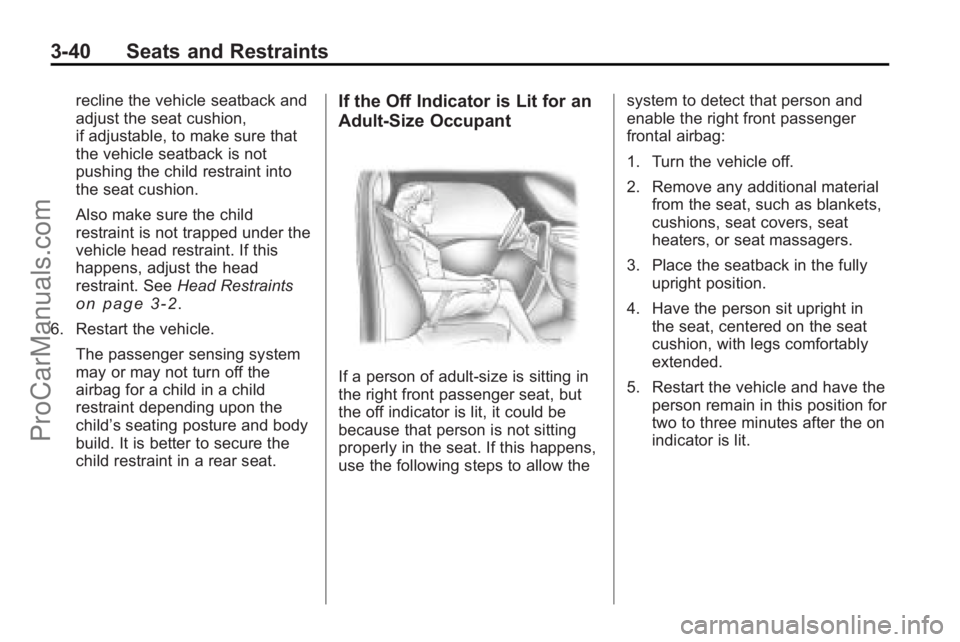
If the Off Indicator is Lit for an
Adult-Size Occupant
If a person of adult-size is sitting in
the right front passenger seat, but
the off indicator is lit, it could be
because that person is not sitting
properly in the seat. If this happens,
use the following steps to allow the system to detect that person and
enable the right front passenger
frontal airbag:
1. Turn the vehicle off.
2. Remove any additional material
from the seat, such as blankets,
cushions, seat covers, seat
heaters, or seat massagers.
3. Place the seatback in the fully upright position.
4. Have the person sit upright in the seat, centered on the seat
cushion, with legs comfortably
extended.
5. Restart the vehicle and have the person remain in this position for
two to three minutes after the on
indicator is lit.
ProCarManuals.com
Page 95 of 444

Seats and Restraints 3-41
Additional Factors Affecting
System Operation
Safety belts help keep the
passenger in position on the seat
during vehicle maneuvers and
braking, which helps the passenger
sensing system maintain the
passenger airbag status. See
“Safety Belts”and“Child Restraints”
in the Index for additional
information about the importance of
proper restraint use.
A thick layer of additional material,
such as a blanket or cushion,
or aftermarket equipment such as
seat covers, seat heaters, and seat
massagers can affect how well the
passenger sensing system
operates. We recommend that you
not use seat covers or other
aftermarket equipment except when
approved by GM for your specific
vehicle. See Adding Equipment to
the Airbag-Equipped Vehicle
on
page 3‑42for more information
about modifications that can affect
how the system operates. A wet seat can affect the
performance of the passenger
sensing system. Here is how:
.The passenger sensing system
may turn off the passenger
airbag when liquid is soaked into
the seat. If this happens, the off
indicator will be lit, and the
airbag readiness light on the
instrument panel will also be lit.
.Liquid pooled on the seat that
has not soaked in may make it
more likely that the passenger
sensing system will enable (turn
on) the passenger airbag while a
child restraint or child occupant
is on the seat. If the passenger
airbag is turned on, the on
indicator will be lit.
If the passenger seat gets wet, dry
the seat immediately. If the airbag
readiness light is lit, do not install a
child restraint or allow anyone to
occupy the seat. See Airbag
Readiness Light
on page 5‑15for
important safety information. The on indicator may be lit if an
object, such as a briefcase,
handbag, grocery bag, laptop or
other electronic device, is put on an
unoccupied seat. If this is not
desired remove the object from
the seat.
{WARNING
Stowing of articles under the
passenger seat or between the
passenger seat cushion and
seatback may interfere with the
proper operation of the passenger
sensing system.
Servicing the
Airbag-Equipped Vehicle
Airbags affect how the vehicle
should be serviced. There are parts
of the airbag system in several
places around the vehicle.
ProCarManuals.com
Page 114 of 444

3-60 Seats and Restraints
5. To tighten the belt, push downon the child restraint, pull the
shoulder portion of the belt to
tighten the lap portion of the belt
and feed the shoulder belt back
into the retractor. When installing
a forward-facing child restraint, it
may be helpful to use your knee
to push down on the child
restraint as you tighten the belt. 6. If the child restraint has a top
tether, follow the child restraint
manufacturer's instructions
regarding the use of the top
tether. See Lower Anchors and
Tethers for Children (LATCH
System)
on page 3‑52for more
information.
7. Push and pull the child restraint in different directions to be sure
it is secure.
To remove the child restraint,
unbuckle the vehicle safety belt and
let it return to the stowed position.
If the top tether is attached to a top
tether anchor, disconnect it.
Securing Child Restraints
(Right Front
Passenger Seat)
The vehicle has airbags. A rear seat
is a safer place to secure a
forward-facing child restraint. See
Where to Put the Restraint
on
page 3‑50.
In addition, the vehicle has a
passenger sensing system which is
designed to turn off the right front
passenger frontal airbag under
certain conditions. See Passenger
Sensing System
on page 3‑37and
Passenger Airbag Status Indicator
on page 5‑16for more information,
including important safety
information.
A label on the sun visor says,
“Never put a rear-facing child seat in
the front.” This is because the risk to
the rear-facing child is so great,
if the airbag deploys.
ProCarManuals.com
Page 117 of 444

Seats and Restraints 3-63
If the airbags are off, the off
indicator in the passenger airbag
status indicator will come on and
stay on when the vehicle is started.
If a child restraint has been installed
and the on indicator is lit, see“If the
On Indicator is Lit for a Child
Restraint” underPassenger Sensing
System
on page 3‑37for more
information.
To remove the child restraint,
unbuckle the vehicle safety belt and
let it return to the stowed position.
ProCarManuals.com
Page 183 of 444

Lighting 6-7
Delayed Exit Lighting
Delayed exit lighting illuminates the
interior for a period of time after the
key is removed from the ignition.
The ignition must be off for delayed
exit lighting to work. When the key
is removed, interior illumination
activates and remains on until one
of the following occurs:
.The ignition is in ON/RUN.
.The power door locks are
activated.
.An illumination period of
20 seconds has elapsed.
If during the illumination period a
door is opened, the timed
illumination period will be canceled
and the interior lamps will remain on
because a door is open.
Parade Dimming
This feature automatically prohibits
the dimming of the instrument panel
displays in daylight while the
headlamps are on so that the
displays are still able to be seen.
Battery Load
Management
The vehicle has Electric Power
Management (EPM) that estimates
the battery's temperature and state
of charge. It then adjusts the voltage
for best performance and extended
life of the battery.
When the battery's state of charge
is low, the voltage is raised slightly
to quickly bring the charge back up.
When the state of charge is high,
the voltage is lowered slightly to
prevent overcharging. If the vehicle has a voltmeter gage or a voltage
display on the Driver Information
Center (DIC), you may see the
voltage move up or down. This is
normal. If there is a problem, an
alert will be displayed.
The battery can be discharged at
idle if the electrical loads are very
high. This is true for all vehicles.
This is because the generator
(alternator) may not be spinning fast
enough at idle to produce all the
power that is needed for very high
electrical loads.
A high electrical load occurs when
several of the following are on, such
as: headlamps, high beams, fog
lamps, rear window defogger,
climate control fan at high speed,
heated seats, engine cooling fans,
trailer loads, and loads plugged into
accessory power outlets.
ProCarManuals.com
Page 220 of 444

7-36 Infotainment System
The headphones may automatically
turn off after four hours of
continuous use.
To adjust the volume on the
headphones, use the volume control
located on the right side.
Infrared transmitters are located at
the rear of the RSE overhead
console. The headphones shut off
automatically to save the battery
power if the RSE system and RSA
are shut off or if the headphones are
out of range of the transmitters for
more than three minutes. Moving too
far forward or stepping out of the
vehicle, can cause the headphones
to lose the audio signal.
For optimal audio performance, the
headphones must be worn correctly.
Headphones should be worn with
the headband over the top of the
head for best audio reception. The
symbol L (Left) appears on the
upper left side, above the ear pad
and should be positioned on the left
ear. The symbol R (Right) appearson the upper right side, above the
ear pad and should be positioned
on the right ear.
Notice:
Do not store the
headphones in heat or direct
sunlight. This could damage the
headphones and repairs will not
be covered by the warranty.
Storage in extreme cold can
weaken the batteries. Keep the
headphones stored in a cool, dry
place.
If the foam ear pads attached to the
headphones become worn or
damaged, the pads can be replaced
separately from the headphone set.
See your dealer/retailer for more
information.
Headphones should be stored in the
front floor console and not in the
front seat back pocket. Headphone
damage can occur when the second
row seats are folded forward. Battery Replacement
To change the batteries on the
headphones:
1. Turn the screw to loosen the
battery door located on the left
side of the headphones. Slide
the battery door open.
2. Replace the two batteries in the compartment. Make sure that
they are installed correctly, using
the diagram on the inside of the
battery compartment.
3. Replace the battery door and tighten the door screw.
If the headphones are to be stored
for a long period of time, remove the
batteries and keep them in a cool,
dry place.
ProCarManuals.com