Page 23 of 338
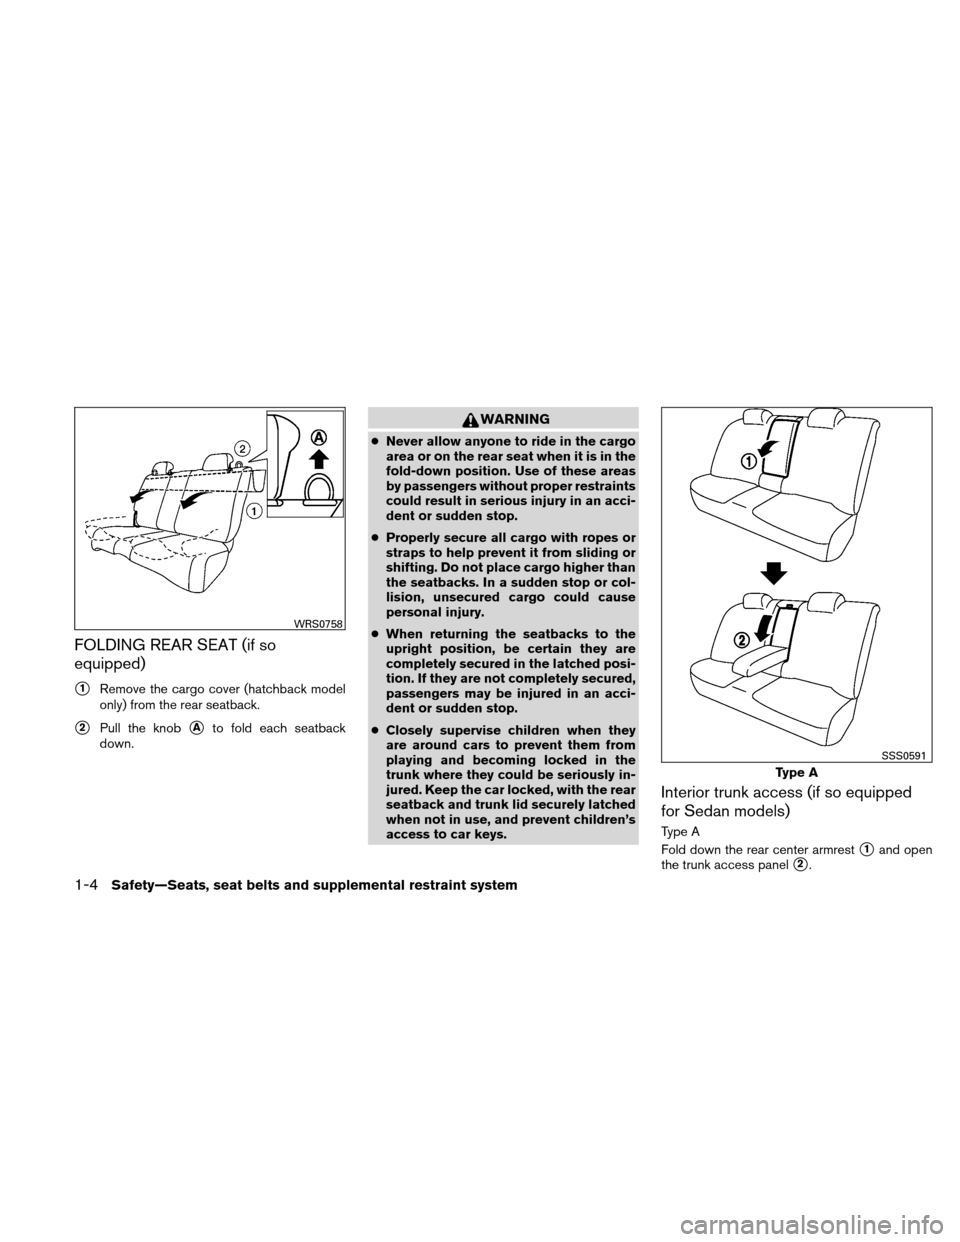
FOLDING REAR SEAT (if so
equipped)
�1Remove the cargo cover (hatchback model
only) from the rear seatback.
�2Pull the knob�Ato fold each seatback
down.
WARNING
● Never allow anyone to ride in the cargo
area or on the rear seat when it is in the
fold-down position. Use of these areas
by passengers without proper restraints
could result in serious injury in an acci-
dent or sudden stop.
● Properly secure all cargo with ropes or
straps to help prevent it from sliding or
shifting. Do not place cargo higher than
the seatbacks. In a sudden stop or col-
lision, unsecured cargo could cause
personal injury.
● When returning the seatbacks to the
upright position, be certain they are
completely secured in the latched posi-
tion. If they are not completely secured,
passengers may be injured in an acci-
dent or sudden stop.
● Closely supervise children when they
are around cars to prevent them from
playing and becoming locked in the
trunk where they could be seriously in-
jured. Keep the car locked, with the rear
seatback and trunk lid securely latched
when not in use, and prevent children’s
access to car keys.
Interior trunk access (if so equipped
for Sedan models)
Type A
Fold down the rear center armrest
�1and open
the trunk access panel
�2.
WRS0758
Type A
SSS0591
1-4Safety—Seats, seat belts and supplemental restraint system
Page 25 of 338
HEAD RESTRAINTS
WARNING
Head restraints supplement the other ve-
hicle safety systems. They may provide
additional protection against injury in cer-
tain rear end collisions. Adjust the head
restraints properly, as specified in this
section. Check the adjustment after
someone else uses the seat. Do not attach
anything to the head restraint stalks or
remove the head restraint. Do not use the
seat if the head restraint has been re-
moved. If the head restraint was removed,
reinstall and properly adjust the head re-
straint before an occupant uses the seat-
ing position. Failure to follow these in-
structions can reduce the effectiveness of
the head restraints. This may increase the
risk of serious injury or death in a
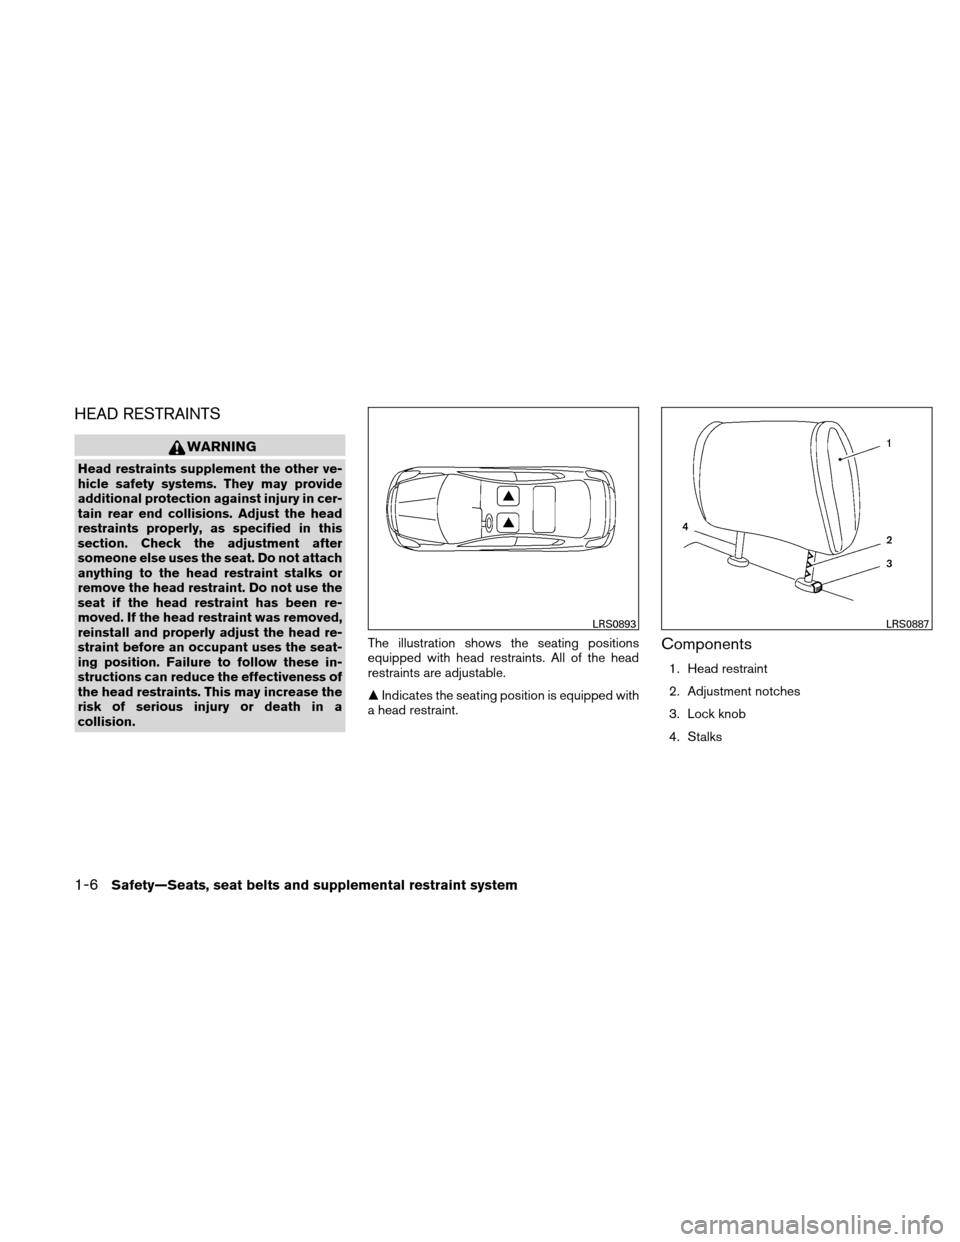
collision.The illustration shows the seating positions
equipped with head restraints. All of the head
restraints are adjustable.
�
Indicates the seating position is equipped with
a head restraint.
Components
1. Head restraint
2. Adjustment notches
3. Lock knob
4. Stalks
LRS0893LRS0887
1-6Safety—Seats, seat belts and supplemental restraint system
Page 27 of 338
Removal
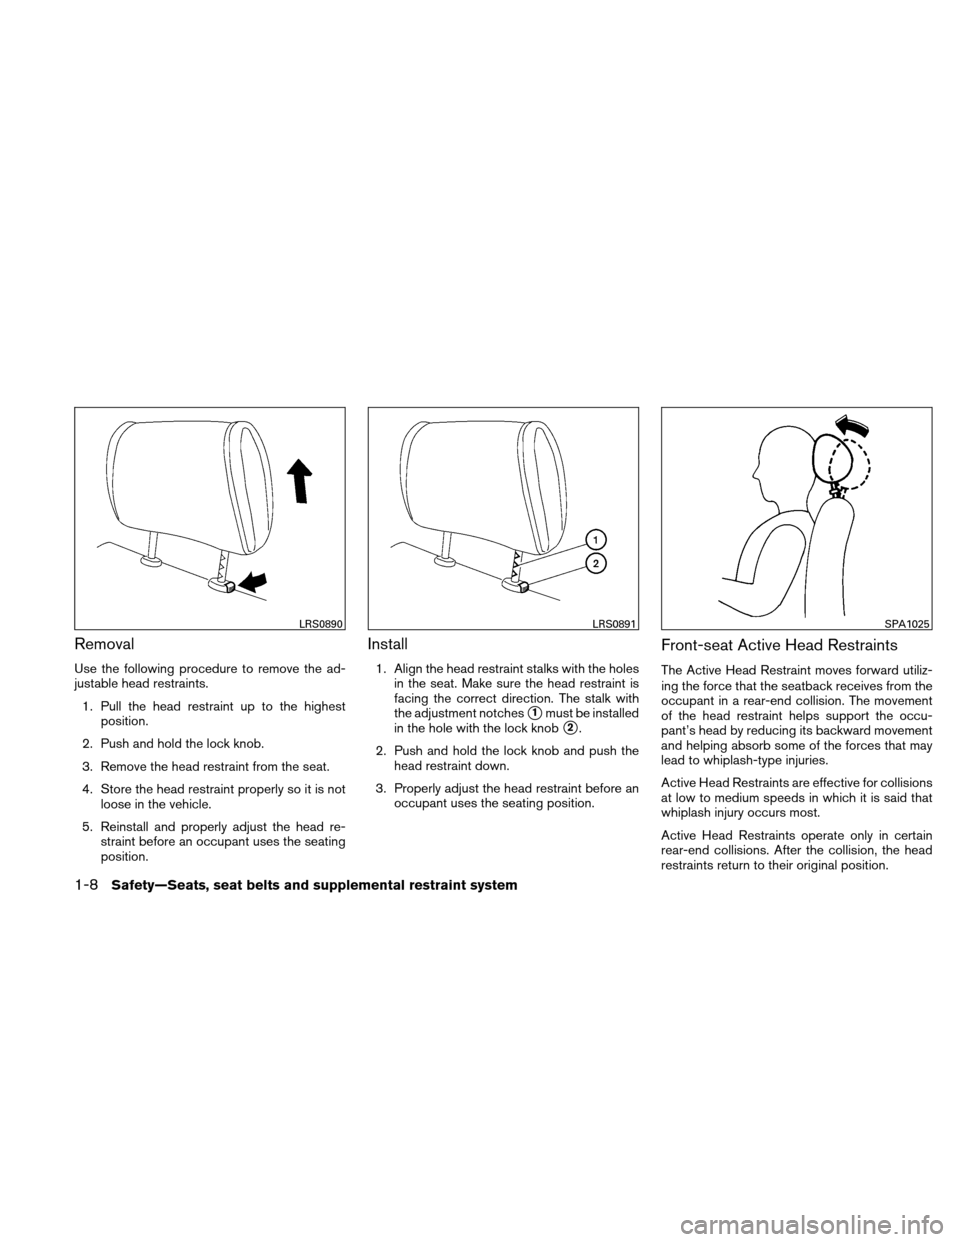
Use the following procedure to remove the ad-
justable head restraints.1. Pull the head restraint up to the highest position.
2. Push and hold the lock knob.
3. Remove the head restraint from the seat.
4. Store the head restraint properly so it is not loose in the vehicle.
5. Reinstall and properly adjust the head re- straint before an occupant uses the seating
position.
Install
1. Align the head restraint stalks with the holesin the seat. Make sure the head restraint is
facing the correct direction. The stalk with
the adjustment notches
�1must be installed
in the hole with the lock knob
�2.
2. Push and hold the lock knob and push the head restraint down.
3. Properly adjust the head restraint before an occupant uses the seating position.
Front-seat Active Head Restraints
The Active Head Restraint moves forward utiliz-
ing the force that the seatback receives from the
occupant in a rear-end collision. The movement
of the head restraint helps support the occu-
pant’s head by reducing its backward movement
and helping absorb some of the forces that may
lead to whiplash-type injuries.
Active Head Restraints are effective for collisions
at low to medium speeds in which it is said that
whiplash injury occurs most.
Active Head Restraints operate only in certain
rear-end collisions. After the collision, the head
restraints return to their original position.
LRS0890LRS0891SPA1025
1-8Safety—Seats, seat belts and supplemental restraint system
Page 28 of 338
Adjust the Active Head Restraints properly as
described in this section.
ADJUSTABLE HEADREST (if so
equipped)
WARNING
The adjustable headrests supplement the
other vehicle safety systems. They may
provide additional protection against in-
jury in certain rear end collisions. Adjust
the headrests properly, as specified in this
section. Check the adjustment after
someone else uses the seat. Do not attach
anything to the adjustable headrest stalks
or remove the adjustable headrests. Do
not use the seat if the adjustable head-
rests have been removed. If the headrest
was removed, reinstall and properly adjust
the headrest before an occupant uses the
seating position. Failure to follow these
instructions can reduce the effectiveness
of the adjustable headrests. This may in-
crease the risk of serious injury or death in
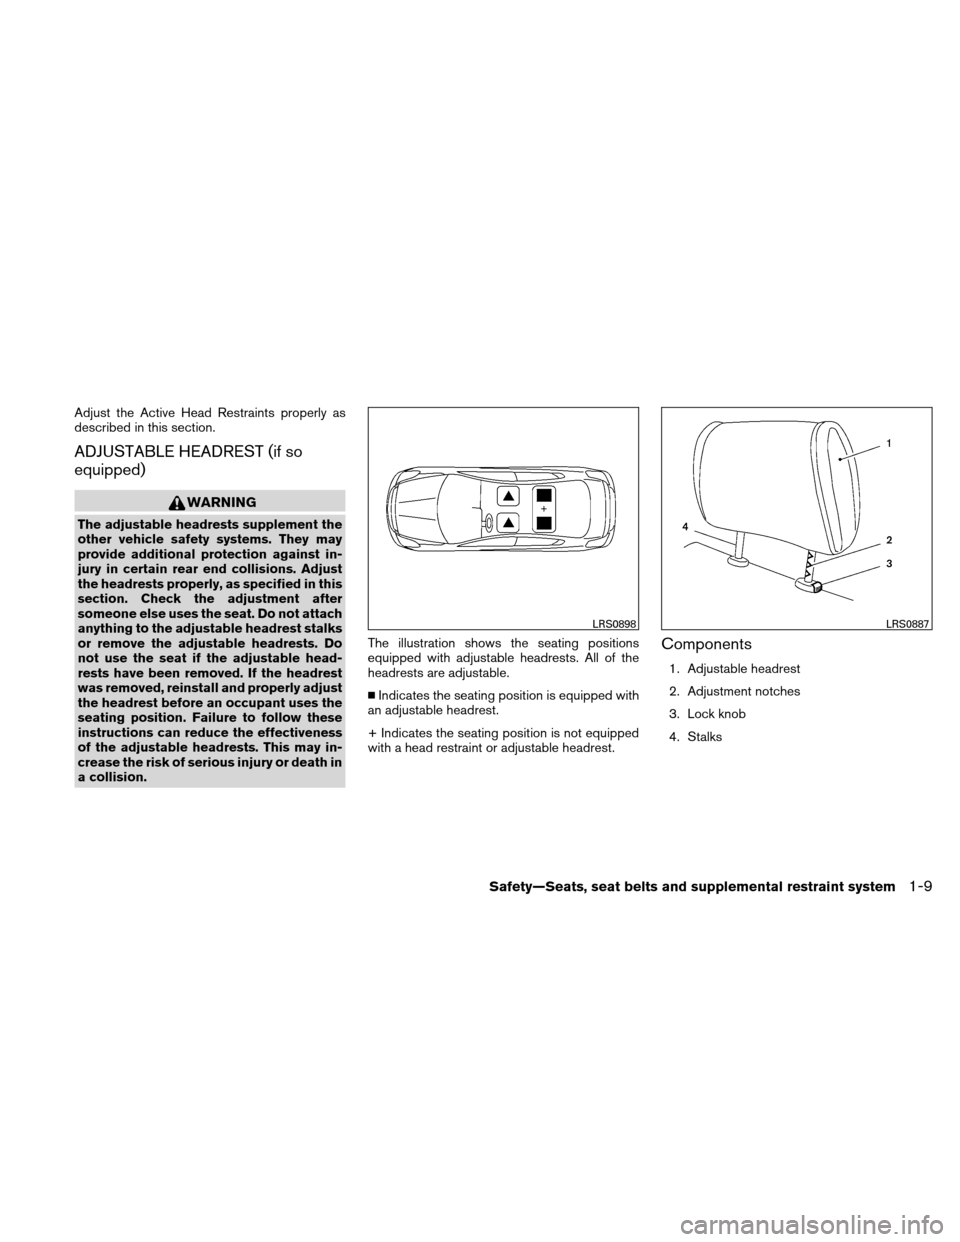
a collision.The illustration shows the seating positions
equipped with adjustable headrests. All of the
headrests are adjustable.
�
Indicates the seating position is equipped with
an adjustable headrest.
+ Indicates the seating position is not equipped
with a head restraint or adjustable headrest.
Components
1. Adjustable headrest
2. Adjustment notches
3. Lock knob
4. Stalks
LRS0898LRS0887
Safety—Seats, seat belts and supplemental restraint system1-9
Page 30 of 338
Removal
Use the following procedure to remove the ad-
justable headrests.1. Pull the headrest up to the highest position.
2. Push and hold the lock knob.
3. Remove the headrest from the seat.
4. Store the headrest properly so it is not loose in the vehicle.
5. Reinstall and properly adjust the headrest before an occupant uses the seating posi-
tion.
Install
1. Align the headrest stalks with the holes inthe seat. Make sure the headrest is facing
the correct direction. The stalk with the ad-
justment notches
�1must be installed in the
hole with the lock knob
�2.
2. Push and hold the lock knob and push the headrest down.
3. Properly adjust the headrest before an oc- cupant uses the seating position.
LRS0890LRS0891
Safety—Seats, seat belts and supplemental restraint system1-11
Page 45 of 338
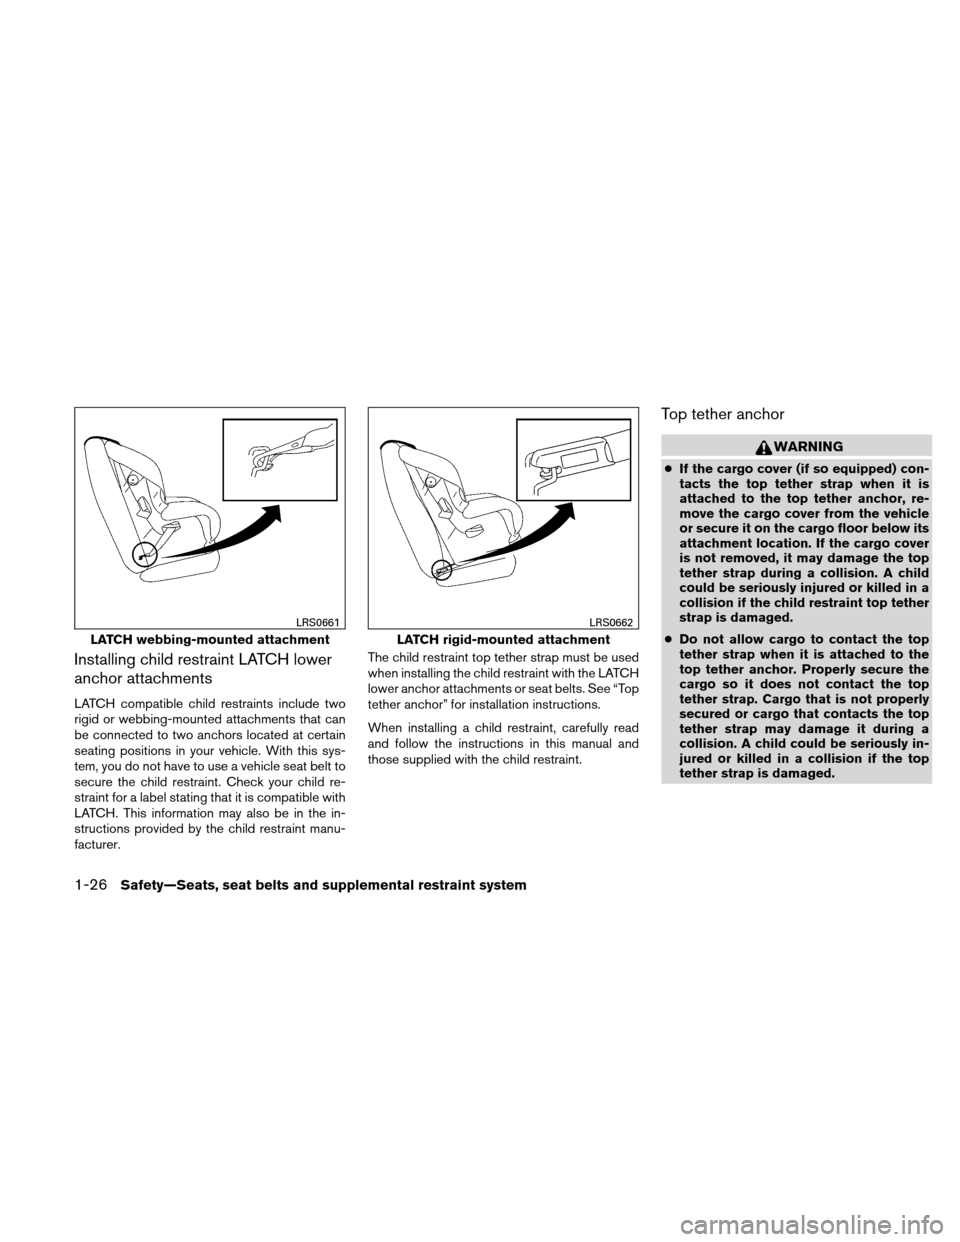
Installing child restraint LATCH lower
anchor attachments
LATCH compatible child restraints include two
rigid or webbing-mounted attachments that can
be connected to two anchors located at certain
seating positions in your vehicle. With this sys-
tem, you do not have to use a vehicle seat belt to
secure the child restraint. Check your child re-
straint for a label stating that it is compatible with
LATCH. This information may also be in the in-
structions provided by the child restraint manu-
facturer.The child restraint top tether strap must be used
when installing the child restraint with the LATCH
lower anchor attachments or seat belts. See “Top
tether anchor” for installation instructions.
When installing a child restraint, carefully read
and follow the instructions in this manual and
those supplied with the child restraint.
Top tether anchor
WARNING
●
If the cargo cover (if so equipped) con-
tacts the top tether strap when it is
attached to the top tether anchor, re-
move the cargo cover from the vehicle
or secure it on the cargo floor below its
attachment location. If the cargo cover
is not removed, it may damage the top
tether strap during a collision. A child
could be seriously injured or killed in a
collision if the child restraint top tether
strap is damaged.
● Do not allow cargo to contact the top
tether strap when it is attached to the
top tether anchor. Properly secure the
cargo so it does not contact the top
tether strap. Cargo that is not properly
secured or cargo that contacts the top
tether strap may damage it during a
collision. A child could be seriously in-
jured or killed in a collision if the top
tether strap is damaged.
LATCH webbing-mounted attachment
LRS0661
LATCH rigid-mounted attachment
LRS0662
1-26Safety—Seats, seat belts and supplemental restraint system
Page 47 of 338
2. Secure the child restraint anchor attach-ments to the LATCH lower anchors. Check
to make sure the LATCH attachment is prop-
erly attached to the lower anchors. 3. For child restraints that are equipped with
webbing-mounted attachments, remove any
additional slack from the anchor attach-
ments. Press downward and rearward firmly
in the center of the child restraint with your
hand to compress the vehicle seat cushion
and seatback while tightening the webbing
of the anchor attachments.
Rear-facing web-mounted – step 2
WRS0801
Rear-facing rigid-mounted – step 2
WRS0802
Rear-facing – step 3
LRS0673
1-28Safety—Seats, seat belts and supplemental restraint system
Page 50 of 338
3. Pull the shoulder belt until the belt is fullyextended. At this time, the seat belt retractor
is in the Automatic Locking Retractor (ALR)
mode (child restraint mode) . It reverts to the
Emergency Locking Retractor (ELR) mode
when the seat belt is fully retracted. 4. Allow the seat belt to retract. Pull up on the
shoulder belt to remove any slack in the belt. 5. Remove any additional slack from the seat
belt; press downward and rearward firmly in
the center of the child restraint to compress
the vehicle seat cushion and seatback while
pulling up on the seat belt.
Rear-facing – step 3
LRS0669
Rear-facing – step 4
LRS0670
Rear-facing – step 5
WRS0762
Safety—Seats, seat belts and supplemental restraint system1-31