Page 139 of 338
WARNING
The rear hatch must be closed securely
before driving. An open rear hatch could
allow dangerous exhaust gases to be
drawn inside the vehicle. See “Exhaust
gas” in the “Starting and driving” section
of this manual.
OPENING THE REAR HATCH
To open the rear hatch, unlock it with one of the
following operations, then push the opener
switch
�A.
● Push the power door lock switch to the
unlock position.
● Unlock all doors using the key.
● Press the
button on the keyfob (if
equipped) twice. See “Remote keyless entry
system” earlier in this section. ●
Push the rear hatch request switch or door
handle request switch (if equipped) twice.
See “NISSAN Intelligent Key™” earlier in this
section.
● Press the
button on the Intelligent Key
(if equipped) twice. See “NISSAN Intelligent
Key™” earlier in this section.
SPA2048
REAR HATCH (Hatchback)
3-24Pre-driving checks and adjustments
Page 140 of 338

REAR HATCH RELEASE
The rear hatch release mechanism allows the rear
hatch to be opened in the event of a discharged
battery.
To release the rear hatch from the inside of the
vehicle, perform the following operations:1. Fold the rear seats down. See “Folding rear seat” in the “Safety — seats, seat belts and
supplemental restraint system” section of
this manual. 2. Put a hand or a suitable tool in the underside
of the rear hatch to access the release lever
�A. Move the release lever to the right. The
rear hatch will be unlatched.
3. Push the rear hatch up to open.
NOTE:
If you had to open the rear hatch using this
lever, have your vehicle checked by a
NISSAN dealer as soon as possible.
WARNING
● Do not drive with the trunk lid open. This
could allow dangerous exhaust gases
to be drawn into the vehicle. See “Ex-
haust gas” in the “Starting and driving”
section of this manual.
● Closely supervise children when they
are around cars to prevent them from
playing and becoming locked in the
trunk where they could be seriously in-
jured. Keep the car locked, with the rear
seatback and trunk lid securely latched
when not in use, and prevent children’s
access to car keys.
LPD0352
TRUNK LID (Sedan)
Pre-driving checks and adjustments3-25
Page 141 of 338
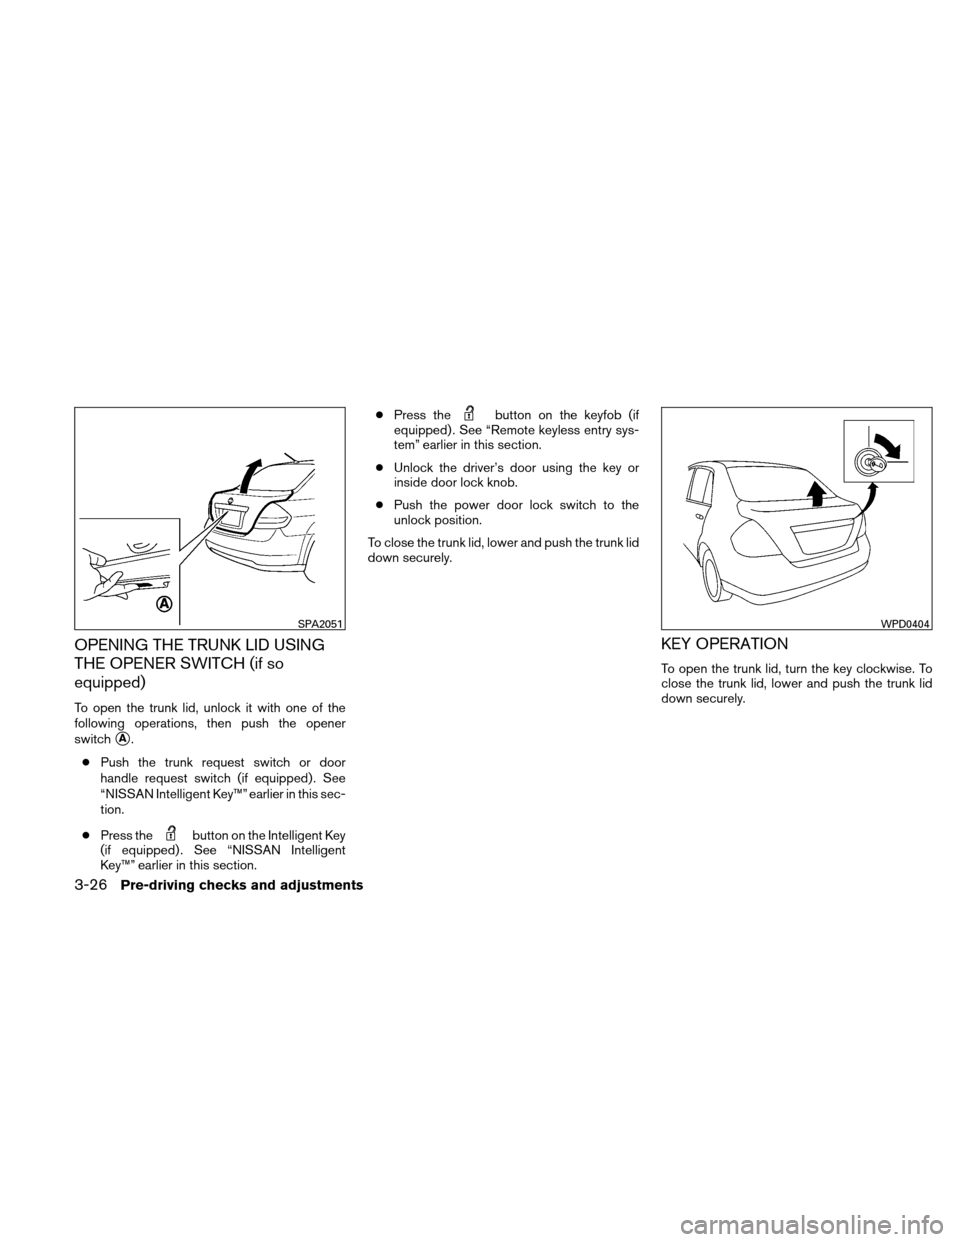
OPENING THE TRUNK LID USING
THE OPENER SWITCH (if so
equipped)
To open the trunk lid, unlock it with one of the
following operations, then push the opener
switch
�A.
● Push the trunk request switch or door
handle request switch (if equipped) . See
“NISSAN Intelligent Key™” earlier in this sec-
tion.
● Press the
button on the Intelligent Key
(if equipped) . See “NISSAN Intelligent
Key™” earlier in this section. ●
Press the
button on the keyfob (if
equipped) . See “Remote keyless entry sys-
tem” earlier in this section.
● Unlock the driver’s door using the key or
inside door lock knob.
● Push the power door lock switch to the
unlock position.
To close the trunk lid, lower and push the trunk lid
down securely.
KEY OPERATION
To open the trunk lid, turn the key clockwise. To
close the trunk lid, lower and push the trunk lid
down securely.
SPA2051WPD0404
3-26Pre-driving checks and adjustments
Page 142 of 338

INTERIOR TRUNK LID RELEASE
WARNING
Closely supervise children when they are
around cars to prevent them from playing
and becoming locked in the trunk where
they could be seriously injured. Keep the
car locked, with the rear seatback and
trunk lid securely latched when not in use,
and prevent children’s access to car keys.
The interior trunk lid release mechanism provides
a means of escape for children and adults in the
event they become locked inside the trunk. To open the trunk from the inside, rotate the
illuminated lever
�1until the lock releases and
push up on the trunk lid. The release lever is made
of a material that glows in the dark after a brief
exposure to ambient light.
The handle is located inside the trunk compart-
ment on the trunk lock at the center of the trunk
lid.
OPENER OPERATION
The fuel-filler lid release is located below the
instrument panel. To open the fuel-filler lid, pull
the release. To lock, close the fuel-filler lid se-
curely.
WPD0405
Rear tank opener
WPD0372
FUEL-FILLER DOOR
Pre-driving checks and adjustments3-27
Page 143 of 338

FUEL-FILLER CAP
The fuel-filler cap is a ratcheting type. Turn the
cap counterclockwise to remove. To tighten, turn
the cap clockwise until ratcheting clicks are
heard.
Put the fuel-filler cap on the cap holder
�1while
refueling.
WARNING
● Gasoline is extremely flammable and
highly explosive under certain condi-
tions. You could be burned or seriously
injured if it is misused or mishandled.
Always stop the engine and do not
smoke or allow open flames or sparks
near the vehicle when refueling.
● Do not attempt to top off the fuel tank
after the fuel pump nozzle shuts off
automatically. Continued refueling may
cause fuel overflow, resulting in fuel
spray and possibly a fire.
● Use only an original equipment type
fuel-filler cap as a replacement. It has a
built-in safety valve needed for proper
operation of the fuel system and emis-
sion control system. An incorrect cap
can result in a serious malfunction and
possible injury. It could also cause the
malfunction indicator light to come on.
● Never pour fuel into the throttle body to
attempt to start your vehicle. ●
Do not fill a portable fuel container in
the vehicle or trailer. Static electricity
can cause an explosion of flammable
liquid, vapor or gas in any vehicle or
trailer. To reduce the risk of serious
injury or death when filling portable fuel
containers:
– Always place the container on the ground when filling.
– Do not use electronic devices when filling.
– Keep the pump nozzle in contact with the container while you are fill-
ing it.
– Use only approved portable fuel con- tainers for flammable liquid.
WPD0470
3-28Pre-driving checks and adjustments
Page 144 of 338

CAUTION
●If fuel is spilled on the vehicle body,
flush it away with water to avoid paint
damage.
● Insert the fuel-filler cap straight into the
fuel-filler tube, then tighten until the
fuel-filler cap clicks. Failure to tighten
the fuel-filler cap properly may cause
the
Malfunction Indicator Light
(MIL) to illuminate. If the
light
illuminates because the fuel-filler cap
is loose or missing, tighten or install the
cap and continue to drive the vehicle.
The
light should turn off after a
few driving trips. If the
light
does not turn off after a few driving
trips, have the vehicle inspected by a
NISSAN dealer
● For additional information, see the
“Malfunction Indicator Light (MIL)” in
the “Instruments and Controls” section
in this manual.
TILT OPERATION
Push the lock lever�1down and adjust the
steering wheel up or down
�2to the desired
position.
Pull the lock lever up to lock the steering wheel in
place.
WARNING
Do not adjust the steering wheel while
driving. You could lose control of your
vehicle and cause an accident. To block out glare from the front, swing down the
sun visor�1.
To block glare from the side, disconnect the sun
visor from the center mount and swing it to the
side
�2.
LPD0355
SIC2872
STEERING WHEEL SUN VISORS
Pre-driving checks and adjustments3-29
Page 154 of 338

Clock:
Select the “Clock” key to adjust the time and the
appearance of the clock on the display. The fol-
lowing settings can be adjusted:
Time Format
The clock can be set to 12 hours or 24 hours.
Use GPS Clock
When this setting is activated, the clock is set
and continually updated via the GPS used by the
Navigation System.Set Clock Manually
When this setting is activated, the clock can be
set manually. Touch the “+” or “-” key to adjust the
hours and minutes up or down.
Daylight Savings Time
When this setting is activated, daylight savings
time is on. Touch the “Daylight Savings Time” key
to toggle the setting on or off.
Time Zone
Choose the applicable time zone from the list.
Language:
Select the “Language” key to adjust the language
used by the system. The language can be set to
English, Français or Español.
Touch click:
Select the “Touch Click” key to toggle the touch
click feature on or off. When activated, a click
sound will be heard every time a key on the
screen is touched.
LHA1483LHA1484LHA1485
Display screen, heater, air conditioner, audio and phone systems4-7
Page 165 of 338

When the satellite radio is used for the first time
or the battery has been replaced, the satellite
radio may not work properly. This is not a mal-
function.")
SATELLITE RADIO RECEPTION (if so
equipped)
When the satellite radio is used for the first time
or the battery has been replaced, the satellite
radio may not work properly. This is not a mal-
function. Wait more than 10 minutes with satellite
radio ON and the vehicle outside of any metal or
large building for satellite radio to receive all of
the necessary data.
No satellite radio reception is available unless
there is an active XM�satellite radio service
subscription. Satellite radio is not available in
Alaska, Hawaii and Guam. If satellite radio is not
operational then pressing the RADIO button will
switch between FM and AM bands.
Satellite radio performance may be affected if
cargo carried on the roof blocks the satellite radio
signal.
If possible, do not put cargo over the satellite
antenna.
A build up of ice on the satellite radio antenna can
affect satellite radio performance. Remove the
ice to restore satellite radio reception.
AUDIO OPERATION PRECAUTIONS Compact disc (CD) player
CAUTION
●
Do not force a compact disc into the CD
insert slot. This could damage the CD
and/or CD player.
● Trying to load a CD with the CD door
closed could damage the CD and/or CD
player.
● Only one CD can be loaded into the CD
player at a time.
● Only use high quality 4.7 in (12 cm)
round discs that have the “COMPACT
disc DIGITAL AUDIO” logo on the disc
or packaging.
● During cold weather or rainy days, the
player may malfunction due to the hu-
midity. If this occurs, remove the CD
and dehumidify or ventilate the player
completely.
● The player may skip while driving on
rough roads.
● The CD player sometimes cannot func-
tion when the compartment tempera-
ture is extremely high or low.
Decrease/increase the temperature
before use.
LHA0099
4-18Display screen, heater, air conditioner, audio and phone systems