2010 NISSAN QASHQAI warning lights
[x] Cancel search: warning lightsPage 73 of 297

Downloaded from www.Manualslib.com manuals search engine OUTSIDE MIRROR DEFOGGER
(where fitted)
The outside rear-view mirrors will be defogged when
the defogger switch is activated.
XENON HEADLIGHTS (where fitted)
WARNING
HIGH VOLTAGE
When xenon headlights are on, they produce
a high voltage. To prevent an electric shock,
never attempt to modify or disassemble. Al-
ways have your xenon headlights replaced at
an authorised NISSAN dealer or qualified
workshop.
Xenon headlights provide considerably more
light than conventional headlights. If they are
not correctly aimed, they might temporarily
blind an oncoming driver or the driver ahead
of you and cause a serious accident. If head-
lights are not aimed correctly, immediately
take your vehicle to a NISSAN dealer or quali-
fied workshop and have the headlights ad-
justed correctly.
When the xenon headlight is initially turned on, its
brightness or colour varies slightly. However, the
colour and brightness will soon stabilise.
The life of xenon headlights will be shortened by
frequent on-off operation. It is generally desir-
able not to turn off the headlights for short inter-
vals (for example, when the vehicle stops at a
traffic signal).
If the xenon headlight bulb is close to burning
out, the brightness will drastically decrease, the
light will start blinking, or the colour of the light will become reddish. If one or more of the above
signs occur, contact a NISSAN dealer or quali-
fied workshop.
NISSAN recommends you to consult the local regu-
lations concerning the use of lights.
HEADLIGHT SWITCH
Lighting
Turn the switch to themposition:
j1 The front side, tail, number plate and instru- ment lights will come on. The indicator light
min the instrument panel will come on.
Turn the switch to the
mposition:
j2 The headlights will come on and all the other lights remain on.
CAUTION
Never leave the light switch on for extended peri-
ods of time while the engine is not running.
NIC1302Z
HEADLIGHT AND TURN SIGNAL
SWITCH
2-24Instruments and controls
Page 76 of 297
Downloaded from www.Manualslib.com manuals search engine tion and turn the fog light switch to thepositionj1 . The front fog lights and indicator light will come
on. For additional information, see “Warning/indica-
tor lights and audible reminders” earlier in this sec-
tion.
To turn the front fog lights off, turn the fog light
switch to the OFF position.
REAR FOG LIGHT
The rear fog light should only be used when visibility
is seriously reduced – generally, to less than 100 m
(328 ft).
TypejA (without front fog lights)
To turn the rear fog light on:
1. Turn the headlight switch to the
position.
2. Turn the fog light switch to the
positionj1:
– The rear fog light and indicator light will come on
– The fog light switch will return to the “OFF” posi- tion ( —)
To turn the rear fog light off:
Turn the fog light switch to the
positionj1 again:
– The rear fog light and indicator light will switch off
– The fog light switch will return to the “OFF” posi- tion ( —) NOTE
If the headlight switch is turned from the
position, the rear fog light will switch off auto-
matically.
TypejB (with front fog lights)
To turn the rear fog light on:
1. Turn the headlight switch to the
orposition.
2. Turn the fog light switch to the
positionj2:
– The rear and front fog lights and both indicator lights will come on
– The fog light switch will return to the
positionj1
To turn the rear fog light off:
Turn the fog light switch to the
positionj2
again:
– The rear fog light and indicator light will switch off
– The fog light switch will return to the
position
NOTE
If the headlight switch is turned to the OFF posi-
tion, the rear fog light will switch off automati-
cally.
For additional information, see “Warning/indicator
lights and audible reminders” earlier in this section.
HEADLIGHT AIMING CONTROL
SWITCH (where fitted)
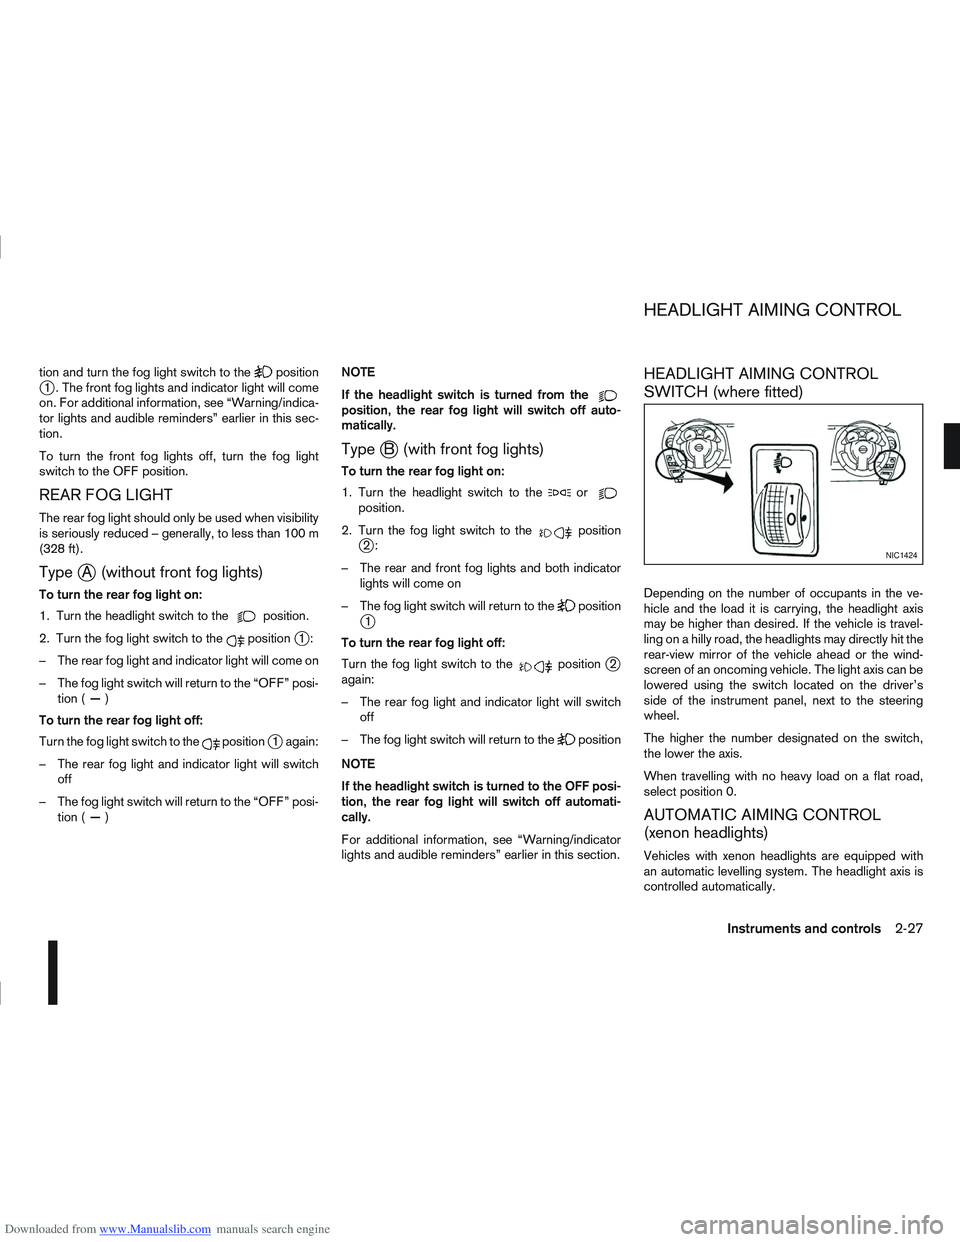
Depending on the number of occupants in the ve-
hicle and the load it is carrying, the headlight axis
may be higher than desired. If the vehicle is travel-
ling on a hilly road, the headlights may directly hit the
rear-view mirror of the vehicle ahead or the wind-
screen of an oncoming vehicle. The light axis can be
lowered using the switch located on the driver’s
side of the instrument panel, next to the steering
wheel.
The higher the number designated on the switch,
the lower the axis.
When travelling with no heavy load on a flat road,
select position 0.
AUTOMATIC AIMING CONTROL
(xenon headlights)
Vehicles with xenon headlights are equipped with
an automatic levelling system. The headlight axis is
controlled automatically.
NIC1424
HEADLIGHT AIMING CONTROL
Instruments and controls2-27
Page 77 of 297
Downloaded from www.Manualslib.com manuals search engine NISSAN recommends consulting local regulations
on the use of lights.To clean the headlights, pull the windscreen washer
switch towards you while the headlight switch is in
the
position and the ignition switch is in the ON
position.
NOTE
The headlight cleaner will automatically operate
every fifth operation of the wiper and washer
switch.
See “Wiper and washer switch” earlier in this sec-
tion
CAUTION
Do not operate the cleaner continuously for
more than 15 seconds.
Do not operate the cleaner if the washer fluid
reservoir is empty or frozen.
See “Window washer fluid/headlight cleaner fluid
(where fitted)” in the “8. Maintenance and
do-it-yourself” section for details on refilling the res-
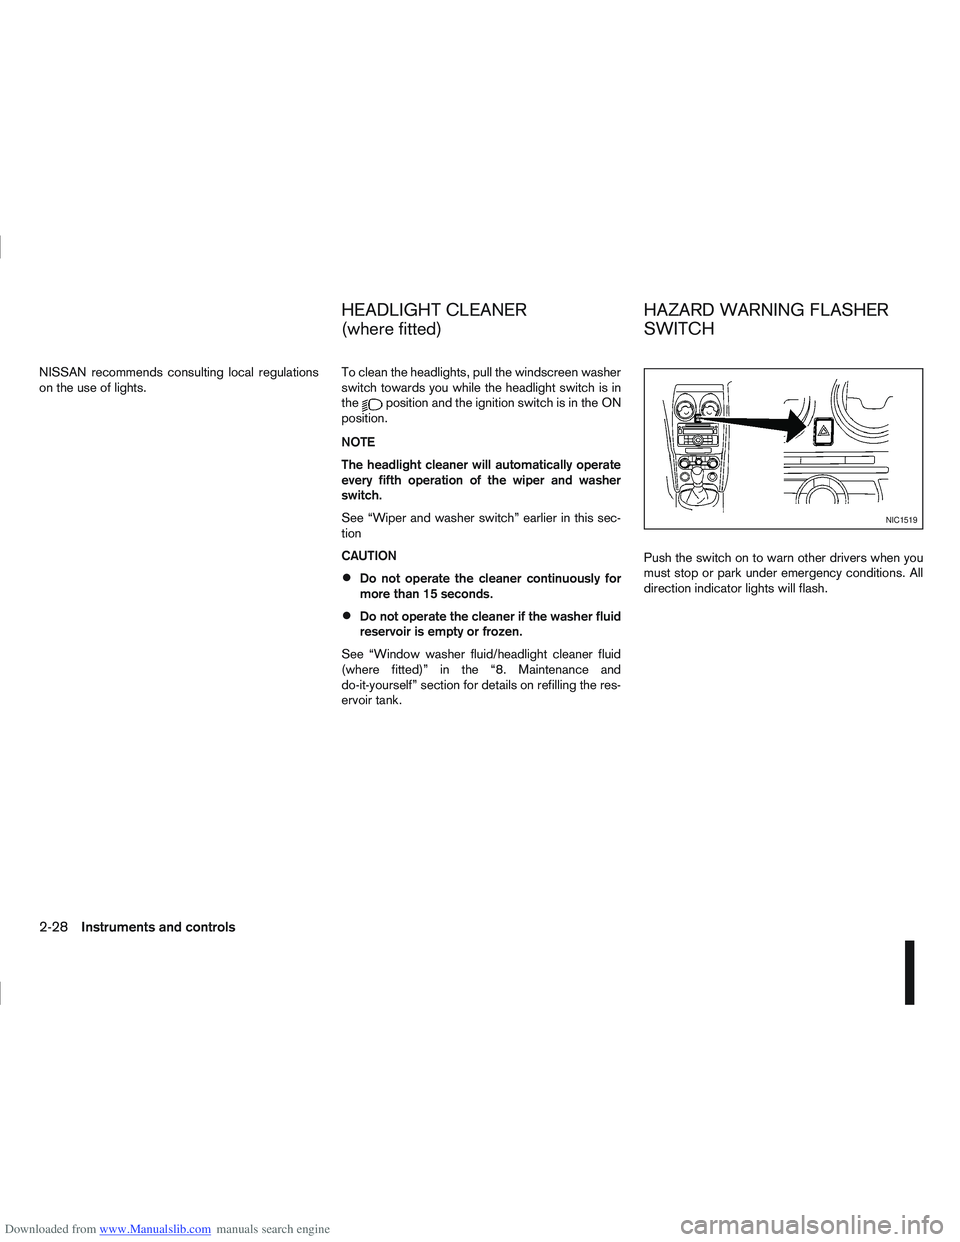
ervoir tank. Push the switch on to warn other drivers when you
must stop or park under emergency conditions. All
direction indicator lights will flash.
NIC1519
HEADLIGHT CLEANER
(where fitted)
HAZARD WARNING FLASHER
SWITCH
2-28Instruments and controls
Page 79 of 297
Downloaded from www.Manualslib.com manuals search engine WARNING
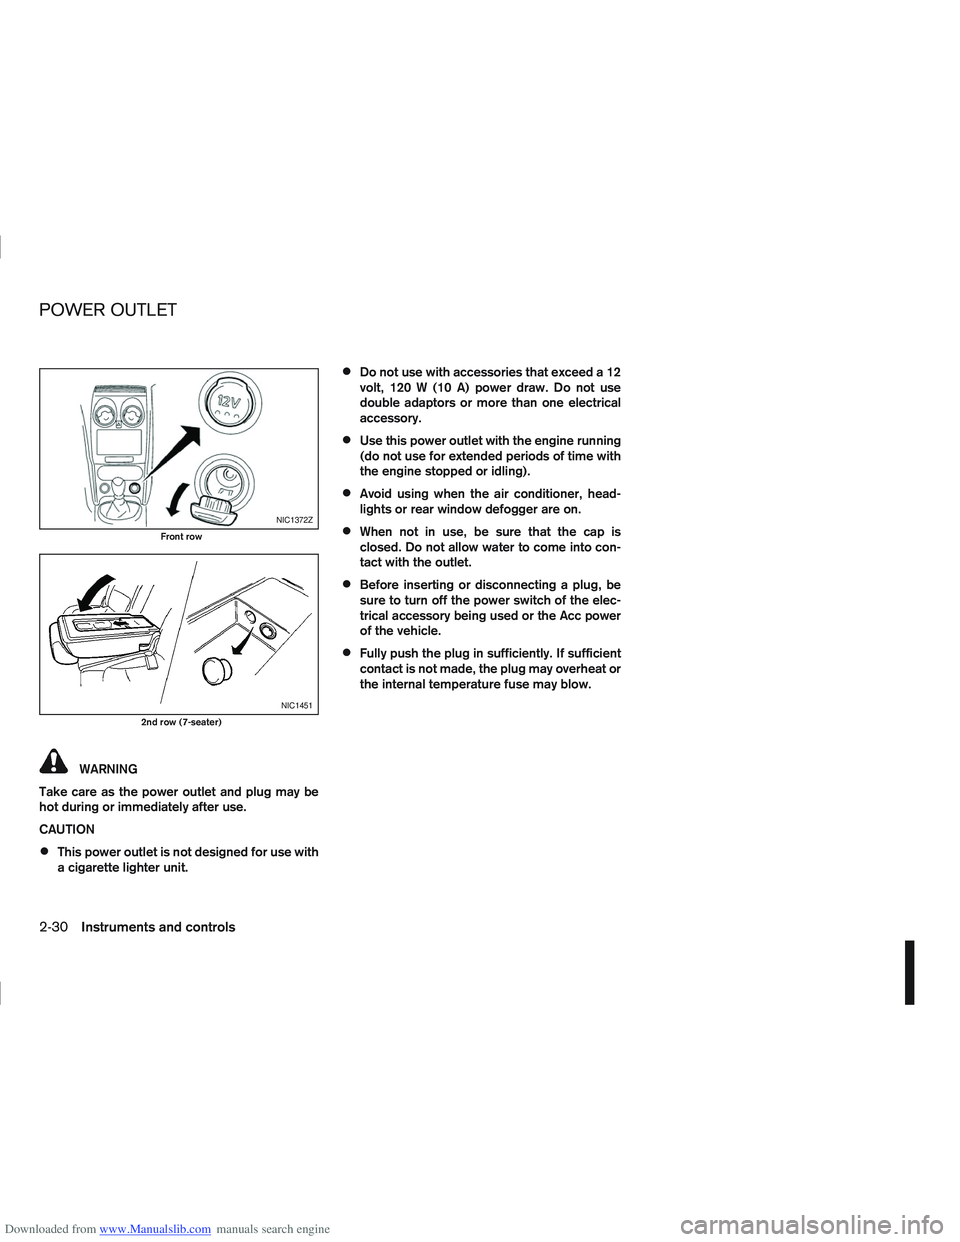
Take care as the power outlet and plug may be
hot during or immediately after use.
CAUTION
This power outlet is not designed for use with
a cigarette lighter unit.
Do not use with accessories that exceed a 12
volt, 120 W (10 A) power draw. Do not use
double adaptors or more than one electrical
accessory.
Use this power outlet with the engine running
(do not use for extended periods of time with
the engine stopped or idling).
Avoid using when the air conditioner, head-
lights or rear window defogger are on.
When not in use, be sure that the cap is
closed. Do not allow water to come into con-
tact with the outlet.
Before inserting or disconnecting a plug, be
sure to turn off the power switch of the elec-
trical accessory being used or the Acc power
of the vehicle.
Fully push the plug in sufficiently. If sufficient
contact is not made, the plug may overheat or
the internal temperature fuse may blow.
NIC1372Z
Front row
NIC1451
2nd row (7-seater)
POWER OUTLET
2-30Instruments and controls
Page 92 of 297
Downloaded from www.Manualslib.com manuals search engine door outside lock switch until the direction indi-
cators flash to confirm the setting mode. Then
release the driver’s door outside lock switch.
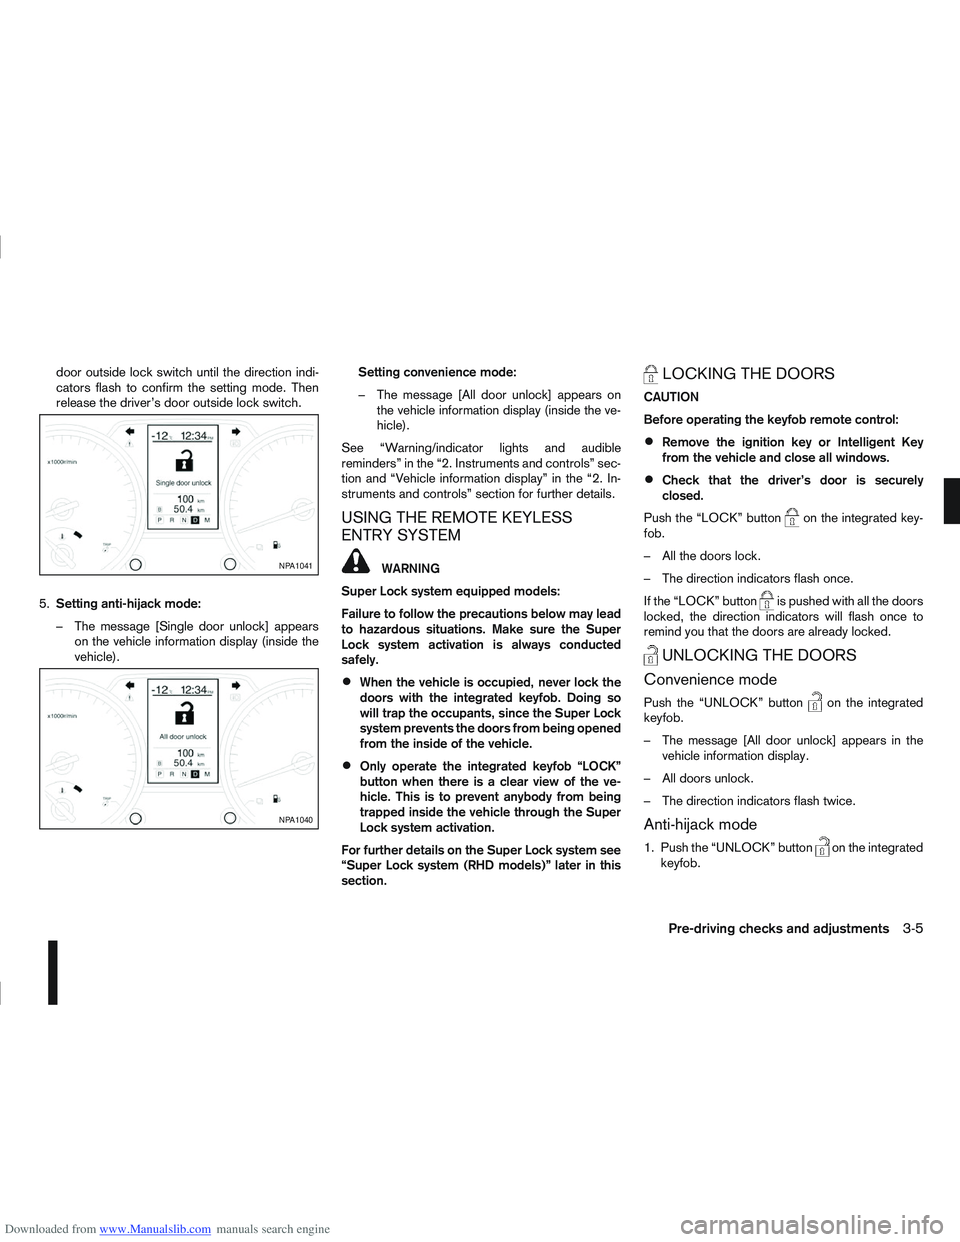
5. Setting anti-hijack mode:
– The message [Single door unlock] appears on the vehicle information display (inside the
vehicle). Setting convenience mode:
– The message [All door unlock] appears on
the vehicle information display (inside the ve-
hicle).
See “Warning/indicator lights and audible
reminders” in the “2. Instruments and controls” sec-
tion and “Vehicle information display” in the “2. In-
struments and controls” section for further details.
USING THE REMOTE KEYLESS
ENTRY SYSTEM
WARNING
Super Lock system equipped models:
Failure to follow the precautions below may lead
to hazardous situations. Make sure the Super
Lock system activation is always conducted
safely.
When the vehicle is occupied, never lock the
doors with the integrated keyfob. Doing so
will trap the occupants, since the Super Lock
system prevents the doors from being opened
from the inside of the vehicle.
Only operate the integrated keyfob “LOCK”
button when there is a clear view of the ve-
hicle. This is to prevent anybody from being
trapped inside the vehicle through the Super
Lock system activation.
For further details on the Super Lock system see
“Super Lock system (RHD models)” later in this
section.
LOCKING THE DOORS
CAUTION
Before operating the keyfob remote control:
Remove the ignition key or Intelligent Key
from the vehicle and close all windows.
Check that the driver’s door is securely
closed.
Push the “LOCK” button
on the integrated key-
fob.
– All the doors lock.
– The direction indicators flash once.
If the “LOCK” button
is pushed with all the doors
locked, the direction indicators will flash once to
remind you that the doors are already locked.
UNLOCKING THE DOORS
Convenience mode
Push the “UNLOCK” buttonon the integrated
keyfob.
– The message [All door unlock] appears in the vehicle information display.
– All doors unlock.
– The direction indicators flash twice.
Anti-hijack mode
1. Push the “UNLOCK” buttonon the integrated
keyfob.
NPA1041
NPA1040
Pre-driving checks and adjustments3-5
Page 103 of 297
Downloaded from www.Manualslib.com manuals search engine the fuel system and emission control system.
An incorrect cap can result in a serious mal-
function and possible injury.
CAUTION
If fuel is spilled on the vehicle body, flush it away
with water to avoid paint damage.
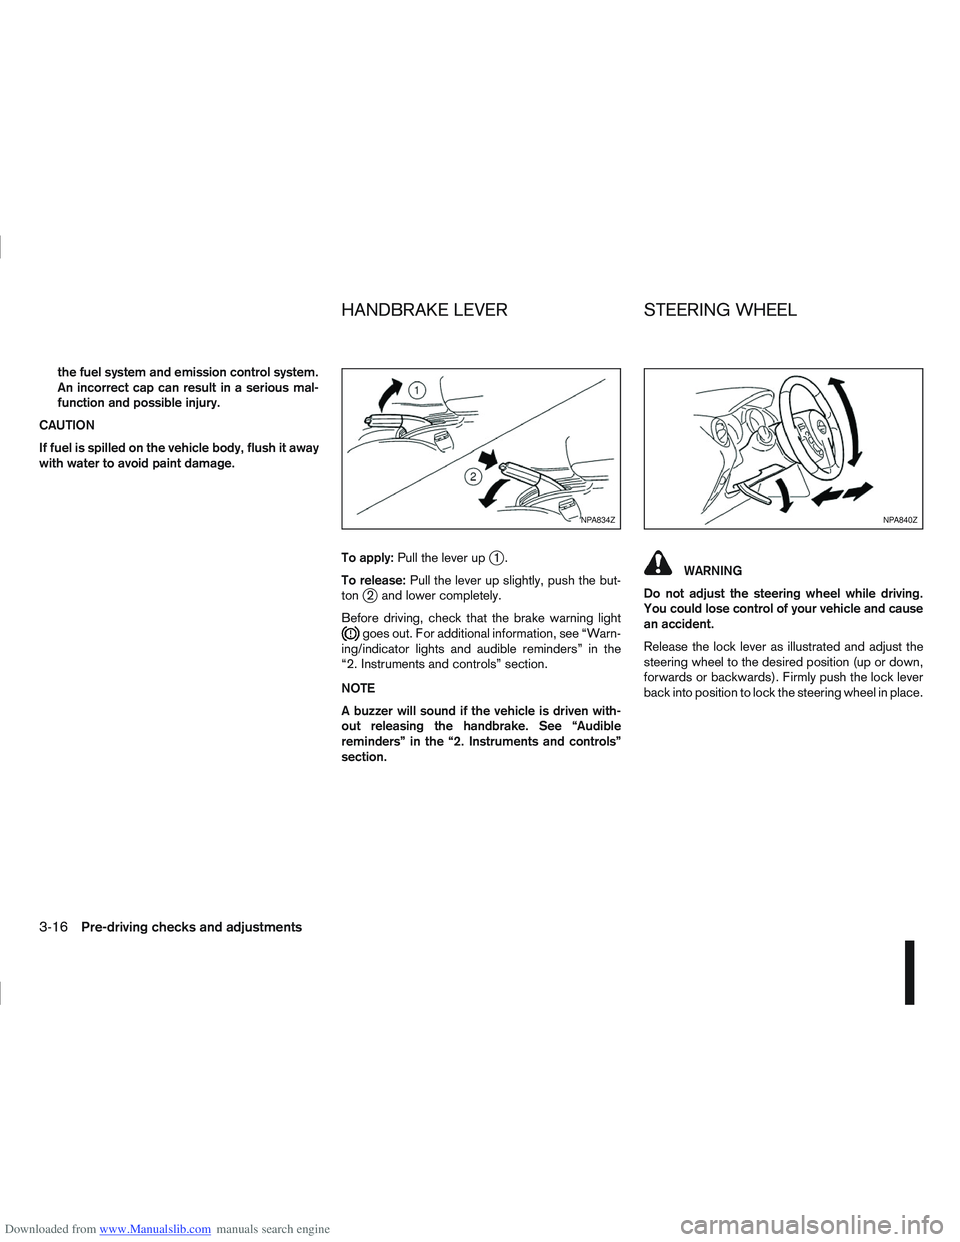
To apply:Pull the lever up
j1.
To release: Pull the lever up slightly, push the but-
ton
j2 and lower completely.
Before driving, check that the brake warning light
goes out. For additional information, see “Warn-
ing/indicator lights and audible reminders” in the
“2. Instruments and controls” section.
NOTE
A buzzer will sound if the vehicle is driven with-
out releasing the handbrake. See “Audible
reminders” in the “2. Instruments and controls”
section.
WARNING
Do not adjust the steering wheel while driving.
You could lose control of your vehicle and cause
an accident.
Release the lock lever as illustrated and adjust the
steering wheel to the desired position (up or down,
forwards or backwards). Firmly push the lock lever
back into position to lock the steering wheel in place.
NPA834ZNPA840Z
HANDBRAKE LEVER STEERING WHEEL
3-16Pre-driving checks and adjustments
Page 104 of 297

Downloaded from www.Manualslib.com manuals search engine CAUTION
Do not store the sun visor before returning it to
its original position.
1. To block out glare from the front, move the mainsun visor downwards.
2. To block glare from the side, remove the main sun visor from the centre mount and move it to
the side.
INSIDE REAR-VIEW MIRROR
j
1 Night position
j2Day position
jA Front of the vehicle
The night position
j1 will reduce glare from the
headlights of vehicles behind you at night.
WARNING
Only use the night position
j1 when necessary,
as it reduces rear-view clarity.
AUTOMATIC ANTI-DAZZLING INSIDE
MIRROR (where fitted)
The inside mirror is designed so that it automatically
adjusts the reflection according to the intensity of
the following vehicle’s headlights.
CAUTION
Do not hang any object on the mirror or spray
glass cleaner directly on the mirror. Doing so will
reduce the sensitivity of the sensor, resulting in
improper operation.
OUTSIDE REAR-VIEW MIRRORS
WARNING
Check the position of all mirrors before driv-
ing. Altering their position while driving could
distract your attention from the driving opera-
tion.
Objects viewed in the outside mirrors are
closer than they appear.
NPA839Z
NPA862Z
NPA829Z
SUN VISORS MIRRORS
Pre-driving checks and adjustments3-17
Page 139 of 297

Downloaded from www.Manualslib.com manuals search engine mPower ON/OFF button
Press thebutton to switch on the audio unit. If
the audio unit was switched off using the ignition
switch, it can also be switched on with the ignition
switch. The source that was playing immediately
before the unit was switched off will resume playing
and the volume will be set to the previous volume
level.
The audio unit can be switched off by pressing
,
or by turning the ignition switch to the “OFF” or
LOCK position.
mVolume (VOL) level control
Turn the
adjust the volume level.
The audio unit is equipped with a speed control vol-
ume function, this means that the audio system au-
tomatically adjusts the volume level in relation to
vehicle speed. For details, see “SPD VOL (Speed
volume) control” later in this section.
Mute button (where fitted)
Press thebutton to mute the sound and [MUTE]
appears in the display. To cancel the mode, use any
of the following options:
– Press
again.
– Turn the
– Press the
Day/Night button (where fitted)
The illumination brightness level is linked to the
headlight switch. When the headlights are switched
“ON” the brightness is dimmed automatically. Press
the button to toggle illumination brightness levels
between daytime setting and nighttime setting inde-
pendent of headlamp status.
RADIO OPERATION
When the(power ON/OFF) button is pressed,
the audio unit will switch on with the last received
radio station, if the audio unit was previously
switched off in radio mode.
Radio band select
buttons
Press the button to change the reception
wave band as follows:
FM1 →FM2 →FMT →AM →FM1
When button is pressed, the radio will
come on at the last received radio station. If the CD
or AUX source mode is already playing, pressing
the button will switch off the playing
source mode and the last received radio station will
be selected.
FM Auto store
When the button is pressed for more
than 1.5 seconds the six stations with the strongest
signals are stored in the preset (1 to 6) buttons of
the FMT band. During the search, a notification mes-
sage [AUTOSTORE] appears in the display and the sound is muted until the operation is complete. Once
completed, the radio selects preset button
j1.
Manual tuning
When adjusting the broadcasting station frequency
manually, turn the
sired station is tuned in.
The frequency increases or decreases in steps of
100 kHz on the FM band, and 9 kHz on the AM
band.
WARNING
The radio should not be tuned while driving in
order for full attention to be given to the driving
operation.
SEEK tuning buttons
Pressing the <>or <>button starts the tun-
ing mode. The radio tuner seeks from low to high or
high to low frequencies and stops at the next broad-
casting station. During seek mode, the audio output
is muted. If no broadcasting station can be found
within the complete band cycle, it will return to the
initial frequency.
Preset station buttonsj1j2j3j4j5j6
Pressing a preset button for less than 2 seconds will
select the stored radio station.
Pressing a preset button for more than 2 seconds
will cause the station currently being received to be
stored against that preset button.
4-32Display screen, heater and air conditioner, and audio system