2010 NISSAN MURANO instrument panel
[x] Cancel search: instrument panelPage 287 of 425
Black plate (283,1)
Model "Z51-D" EDITED: 2009/ 8/ 3
SAA1783
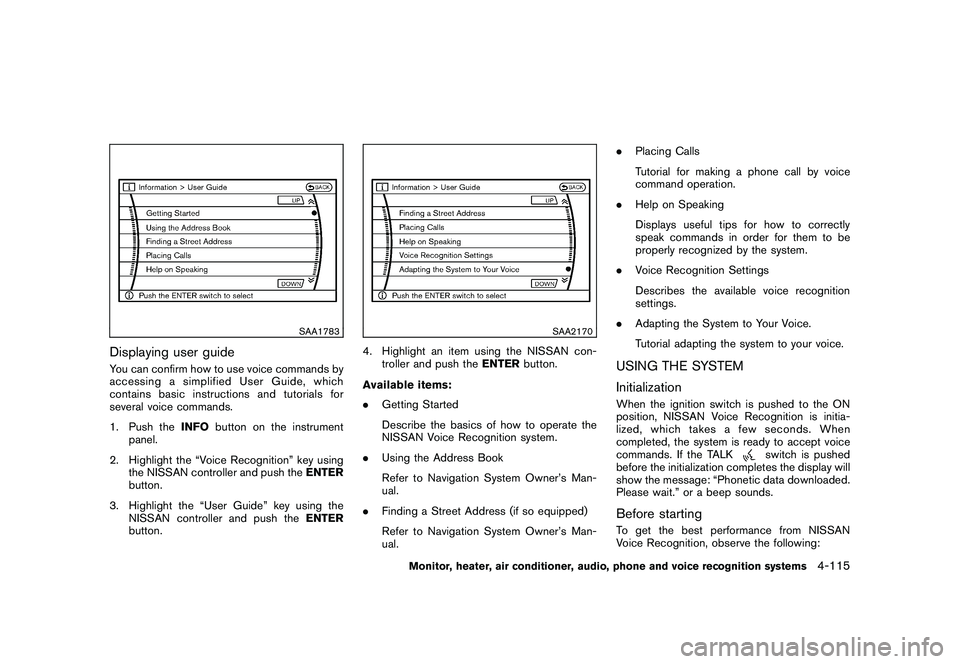
Displaying user guideYou can confirm how to use voice commands by
accessing a simplified User Guide, which
contains basic instructions and tutorials for
several voice commands.
1. Push theINFObutton on the instrument
panel.
2. Highlight the “Voice Recognition” key using the NISSAN controller and push the ENTER
button.
3. Highlight the “User Guide” key using the NISSAN controller and push the ENTER
button.
SAA2170
4. Highlight an item using the NISSAN con- troller and push the ENTERbutton.
Available items:
. Getting Started
Describe the basics of how to operate the
NISSAN Voice Recognition system.
. Using the Address Book
Refer to Navigation System Owner’s Man-
ual.
. Finding a Street Address (if so equipped)
Refer to Navigation System Owner’s Man-
ual. .
Placing Calls
Tutorial for making a phone call by voice
command operation.
. Help on Speaking
Displays useful tips for how to correctly
speak commands in order for them to be
properly recognized by the system.
. Voice Recognition Settings
Describes the available voice recognition
settings.
. Adapting the System to Your Voice.
Tutorial adapting the system to your voice.
USING THE SYSTEM
InitializationWhen the ignition switch is pushed to the ON
position, NISSAN Voice Recognition is initia-
lized, which takes a few seconds. When
completed, the system is ready to accept voice
commands. If the TALK
switch is pushed
before the initialization completes the display will
show the message: “Phonetic data downloaded.
Please wait.” or a beep sounds.
Before startingTo get the best performance from NISSAN
Voice Recognition, observe the following:
Monitor, heater, air conditioner, audio, phone and voice recognition systems
4-115
Page 289 of 425
Black plate (285,1)
Model "Z51-D" EDITED: 2009/ 8/ 3
Repeat the command in a clear voice.
. Push the BACKbutton once to return to the
previous screen.
. If you want to cancel the command, push
and hold the TALK
switch for 1 second.
The message “Voice canceled” will be
announced.
. Push the TALKswitch again to pause
the operation. Push the TALK
switch to
restart the operation.
. If you want to adjust the volume of the
system feedback, push the volume control
buttons (+ or �) on the steering wheel or
use the audio system volume knob while the
system is making an announcement.
How to speak numbers:
NISSAN Voice Recognition requires a certain
way to speak numbers when giving voice
commands. Refer to the following examples.
General rule
Only single digits 0 (zero) to 9 can be used. (For
example, if you would like to say 500, “five zero
zero” can be used, but “five hundred” cannot.) Phone numbers
Speak phone numbers according to the follow-
ing examples:
.
1-800-662-6200
— “Dial one eight zero zero six six two zero zero.”
Note 1: For the best voice recognition phone
dialing results, say phone numbers as single
digits.
Note 2: You cannot say 555-6000 as “five five
five six thousands”.
Note 3: When speaking a house number, speak
the number “0” as “zero”. If the letter “o (Oh)” is
included in the house number, it will not be
recognized as the number “0 (zero)” even if you
speak “oh” instead of “zero”. You can only say
“zero” for “0 (Zero)”.
SAA1907
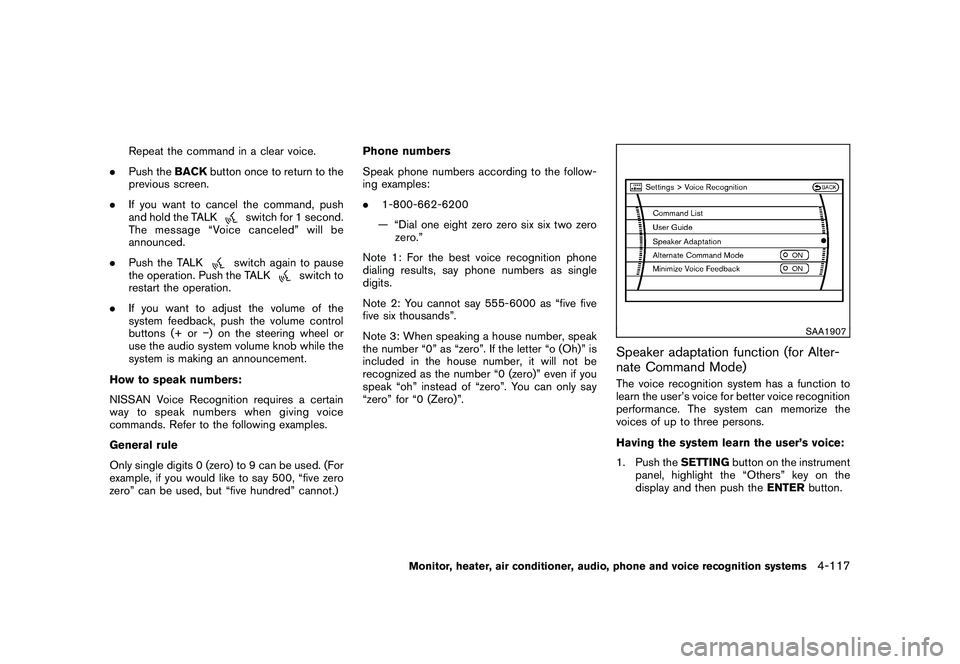
Speaker adaptation function (for Alter-
nate Command Mode)The voice recognition system has a function to
learn the user’s voice for better voice recognition
performance. The system can memorize the
voices of up to three persons.
Having the system learn the user’s voice:
1. Push the SETTINGbutton on the instrument
panel, highlight the “Others” key on the
display and then push the ENTERbutton.
Monitor, heater, air conditioner, audio, phone and voice recognition systems
4-117
Page 292 of 425
Black plate (288,1)
Model "Z51-D" EDITED: 2009/ 8/ 3
Continuous Learning
When this item is turned to ON, you can have
the system learn the voice commands in
succession, without selecting commands one
by one.Minimize voice feedback (for Alternate
Command Mode)To minimize the voice feedback from the system,
perform the following steps.
1. Push theSETTINGbutton on the instrument
panel.
2. Highlight the “Others” key using the NISSAN controller and push the ENTER
button.
3. Highlight the “Voice Recognition” key and then push the ENTERbutton.
4. Highlight the “Minimize Voice Feedback” key and push the ENTERbutton.
5. The item is turned to ON and the vocal feedback is reduced if the voice recognition
system is activated.4-120
Monitor, heater, air conditioner, audio, phone and voice recognition systems
Page 304 of 425
Black plate (300,1)
Model "Z51-D" EDITED: 2009/ 8/ 3
.The cargo area is not included in the
operating range, but the Intelligent Key may
function.
. If the Intelligent Key is placed on the
instrument panel, inside the glove box or
door pocket, the Intelligent Key may not
function.
. If the Intelligent Key is placed near the door
or window outside the vehicle, the Intelligent
Key may function.
SSD0910
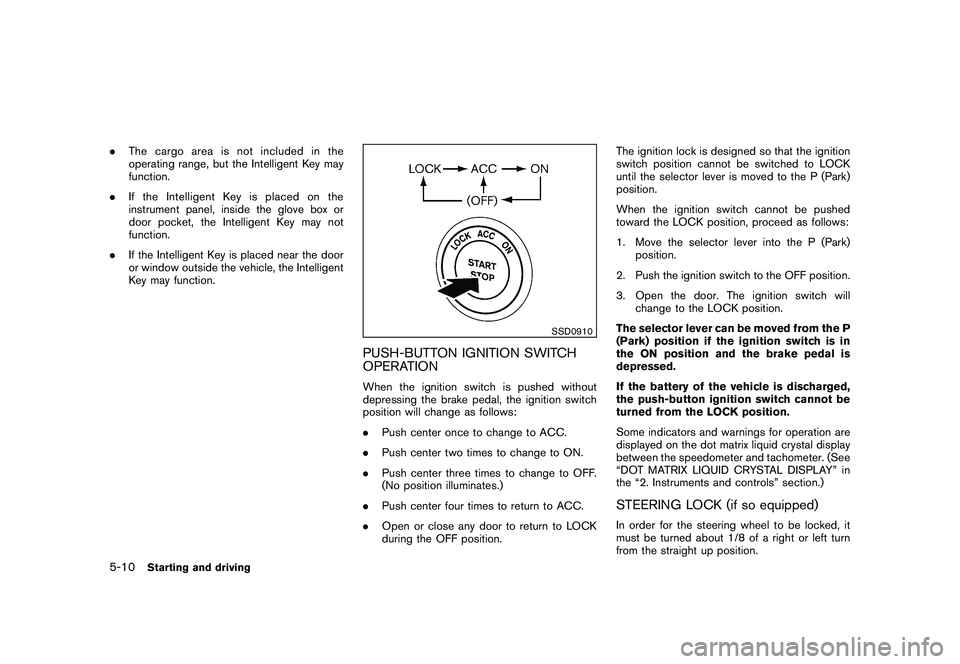
PUSH-BUTTON IGNITION SWITCH
OPERATIONWhen the ignition switch is pushed without
depressing the brake pedal, the ignition switch
position will change as follows:
.Push center once to change to ACC.
. Push center two times to change to ON.
. Push center three times to change to OFF.
(No position illuminates.)
. Push center four times to return to ACC.
. Open or close any door to return to LOCK
during the OFF position. The ignition lock is designed so that the ignition
switch position cannot be switched to LOCK
until the selector lever is moved to the P (Park)
position.
When the ignition switch cannot be pushed
toward the LOCK position, proceed as follows:
1. Move the selector lever into the P (Park)
position.
2. Push the ignition switch to the OFF position.
3. Open the door. The ignition switch will change to the LOCK position.
The selector lever can be moved from the P
(Park) position if the ignition switch is in
the ON position and the brake pedal is
depressed.
If the battery of the vehicle is discharged,
the push-button ignition switch cannot be
turned from the LOCK position.
Some indicators and warnings for operation are
displayed on the dot matrix liquid crystal display
between the speedometer and tachometer. (See
“DOT MATRIX LIQUID CRYSTAL DISPLAY” in
the “2. Instruments and controls” section.)
STEERING LOCK (if so equipped)In order for the steering wheel to be locked, it
must be turned about 1/8 of a right or left turn
from the straight up position.
5-10
Starting and driving
Page 309 of 425
Black plate (305,1)
Model "Z51-D" EDITED: 2009/ 8/ 3
WARNING
Apply the parking brake if the selector
lever is in any position while the engine
is not running. Failure to do so could
cause the vehicle to move unexpectedly
or roll away and result in serious
personal injury or property damage.
CAUTION
Use the P (Park) or R (Reverse) position
only when the vehicle is completely
stopped.
P (Park):
Use this selector position when the vehicle is
parked or when starting the engine. Make sure
the vehicle is completely stopped. The brake
pedal must be depressed and the selector
lever button pushed in to move the selec-
tor lever from N (Neutral) or any drive
position to P (Park) . Apply the parking brake.
When parking on a hill, apply the parking brake
first, then move the selector lever to the P (Park)
position. R (Reverse):
Use this position to back up. Make sure the
vehicle is completely stopped before selecting
the R (Reverse) position.
The brake pedal
must be depressed and the selector lever
button pushed in to move the selector
lever from P (Park) , N (Neutral) or any
driving position to R (Reverse) .
N (Neutral):
Neither forward nor reverse gear is engaged.
The engine can be started in this position. You
may shift to N (Neutral) and restart a stalled
engine while the vehicle is moving.
D (Drive):
Use this position for all normal forward driving.
L (Low):
Use this position for maximum engine braking on
steep downhill gradients/climbing steep slopes
and whenever approaching sharp bends. Do not
use the L position in any other circumstances.
SSD0692
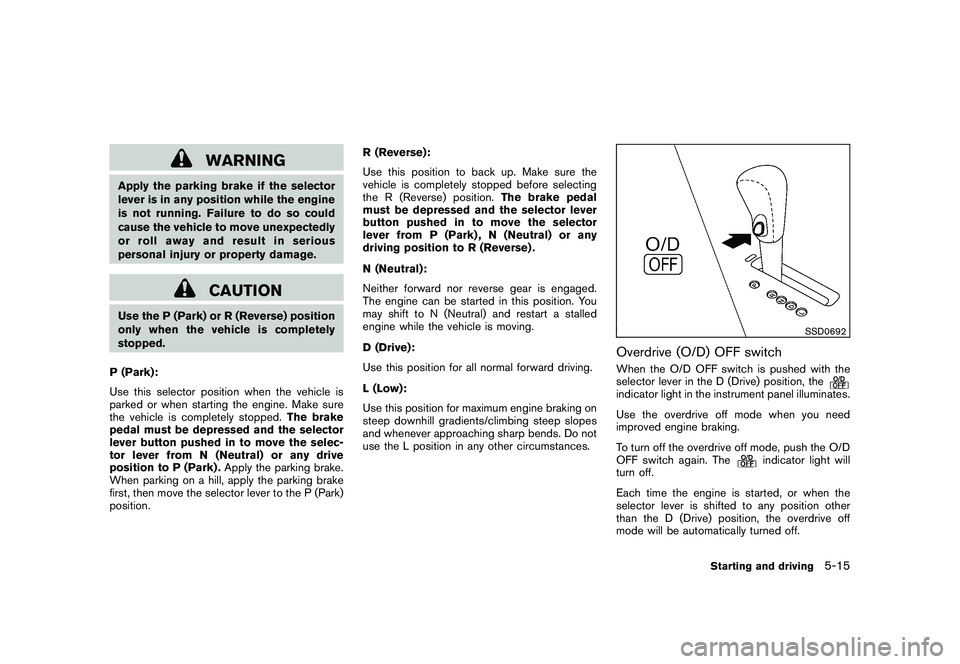
Overdrive (O/D) OFF switchWhen the O/D OFF switch is pushed with the
selector lever in the D (Drive) position, theindicator light in the instrument panel illuminates.
Use the overdrive off mode when you need
improved engine braking.
To turn off the overdrive off mode, push the O/D
OFF switch again. The
indicator light will
turn off.
Each time the engine is started, or when the
selector lever is shifted to any position other
than the D (Drive) position, the overdrive off
mode will be automatically turned off.
Starting and driving
5-15
Page 315 of 425
Black plate (311,1)
Model "Z51-D" EDITED: 2009/ 8/ 3
WARNING
.For AWD equipped vehicles, do not
attempt to raise two wheels off the
ground and shift the transmission to
any drive or reverse position with
the engine running. Doing so may
result in drivetrain damage or un-
expected vehicle movement which
could result in serious vehicle da-
mage or personal injury.
. Do not attempt to test an AWD
equipped vehicle on a 2-wheel dy-
namometer (such as the dynam-
ometers used by some states for
emissions testing) or similar equip-
ment even if the other two wheels
are raised off the ground. Make sure
that you inform the test facility
personnel that your vehicle is
equipped with AWD before it is
placed on a dynamometer. Using
the wrong test equipment may re-
sult in drivetrain damage or unex-
pected vehicle movement which
could result in serious vehicle da-
mage or personal injury.
SSD0418
ALL-WHEEL DRIVE (AWD) LOCK
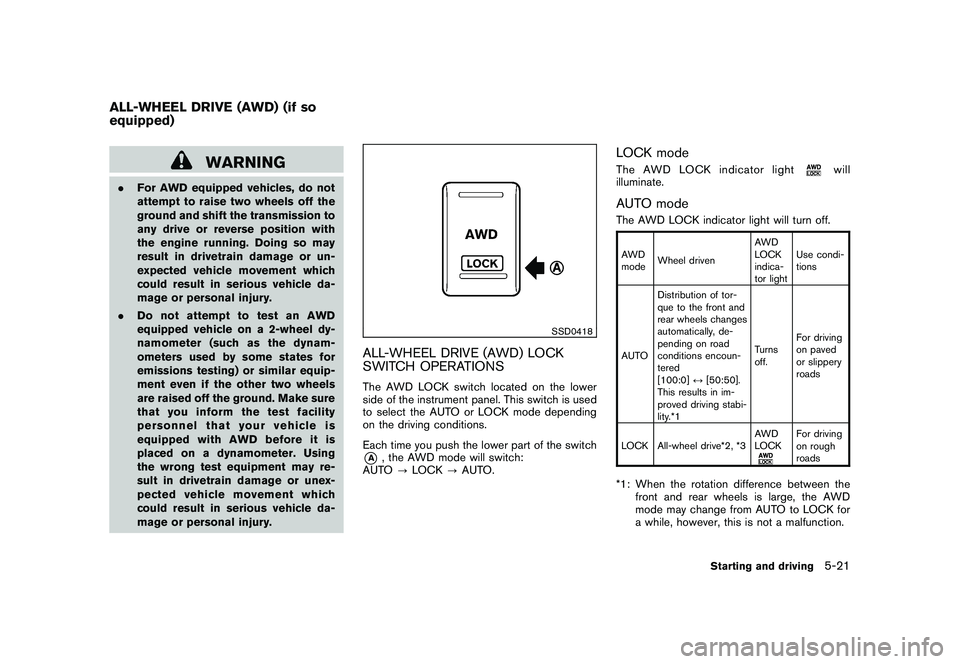
SWITCH OPERATIONSThe AWD LOCK switch located on the lower
side of the instrument panel. This switch is used
to select the AUTO or LOCK mode depending
on the driving conditions.
Each time you push the lower part of the switch*A
, the AWD mode will switch:
AUTO ?LOCK ?AUTO.
LOCK modeThe AWD LOCK indicator light
will
illuminate.
AUTO modeThe AWD LOCK indicator light will turn off.AWD
mode Wheel driven AWD
LOCK
indica-
tor lightUse condi-
tions
AUTO Distribution of tor-
que to the front and
rear wheels changes
automatically, de-
pending on road
conditions encoun-
tered
[100:0]
↔[50:50].
This results in im-
proved driving stabi-
lity.*1 Turns
off.
For driving
on paved
or slippery
roads
LOCK All-wheel drive*2, *3 AWD
LOCK
For driving
on rough
roads
*1: When the rotation difference between the
front and rear wheels is large, the AWD
mode may change from AUTO to LOCK for
a while, however, this is not a malfunction.
ALL-WHEEL DRIVE (AWD) (if so
equipped)
Starting and driving
5-21
Page 320 of 425

Black plate (316,1)
Model "Z51-D" EDITED: 2009/ 8/ 3
ANTI-LOCK BRAKING SYSTEM (ABS)
WARNING
.The Anti-lock Braking System (ABS)
is a sophisticated device, but it
cannot prevent accidents resulting
from careless or dangerous driving
techniques. It can help maintain
vehicle control during braking on
slippery surfaces. Remember that
stopping distances on slippery sur-
faces will be longer than on normal
surfaces even with ABS. Stopping
distances may also be longer on
rough, gravel or snow covered
roads, or if you are using tire chains.
Alwaysmaintainasafedistance
from the vehicle in front of you.
Ultimately, the driver is responsible
for safety.
. Tire type and condition may also
affect braking effectiveness.
— When replacing tires, install the
specified size of tires on all four
wheels.
— When installing a spare tire, make sure that it is the proper
size and type as specified on the Tire and Loading Information
label. See “TIRE AND LOADING
INFORMATION LABEL” in the “9.
Technical and consumer infor-
mation” section of this manual.
— For detailed information, see “WHEELS AND TIRES” in the
“8. Maintenance and do-it-your-
self” section of this manual.
The Anti-lock Braking System (ABS) controls
the brakes so the wheels do not lock during hard
braking or when braking on slippery surfaces.
The system detects the rotation speed at each
wheel and varies the brake fluid pressure to
prevent each wheel from locking and sliding. By
preventing each wheel from locking, the system
helps the driver maintain steering control and
helps to minimize swerving and spinning on
slippery surfaces.
Using the systemDepress the brake pedal and hold it down.
Depress the brake pedal with firm steady
pressure, but do not pump the brakes. The
ABS will operate to prevent the wheels from
locking up. Steer the vehicle to avoid obstacles.
WARNING
Do not pump the brake pedal. Doing so
may result in increased stopping dis-
tances.Self-test featureThe ABS includes electronic sensors, electric
pumps, hydraulic solenoids and a computer. The
computer has a built-in diagnostic feature that
tests the system each time you start the engine
and move the vehicle at a low speed in forward
or reverse. When the self-test occurs, you may
hear a “clunk” noise and/or feel a pulsation in the
brake pedal. This is normal and does not
indicate a malfunction. If the computer senses
a malfunction, it switches the ABS off and
illuminates the ABS warning light on the
instrument panel. The brake system then oper-
ates normally, but without anti-lock assistance.
If the ABS warning light illuminates during the
self-test or while driving, have the vehicle
checked by a NISSAN dealer.Normal operationThe ABS operates at speeds above 3 to 6 MPH
(5 to 10 km/h) . The speed varies according to
road conditions.
When the ABS senses that one or more wheels
are close to locking up, the actuator rapidly
5-26
Starting and driving
Page 321 of 425

Black plate (317,1)
Model "Z51-D" EDITED: 2009/ 8/ 3
applies and releases hydraulic pressure. This
action is similar to pumping the brakes very
quickly. You may feel a pulsation in the brake
pedal and hear a noise from under the hood or
feel a vibration from the actuator when it is
operating. This is normal and indicates that the
ABS is operating properly. However, the pulsa-
tion may indicate that road conditions are
hazardous and extra care is required while
driving.The Vehicle Dynamic Control (VDC) system
uses various sensors to monitor driver inputs
and vehicle motion. Under certain driving con-
ditions, the VDC system helps to perform the
following functions.
.
Controls brake pressure to reduce tire slip
on one slipping drive wheel so power is
transferred to a non slipping drive wheel on
the same axle.
. Controls brake pressure and engine output
to reduce drive wheel slip based on vehicle
speed (traction control function) .
. Controls brake pressure at individual wheels
and engine output to help the driver maintain
control of the vehicle in the following
conditions:
— understeer (vehicle tends to not follow the steered path despite increased steering
input)
— oversteer (vehicle tends to spin due to certain road or driving conditions) .
The VDC system can help the driver to maintain
control of the vehicle, but it cannot prevent loss
of vehicle control in all driving situations.
When the VDC system operates, the
indicator in the instrument panel flashes so note
the following:
. The road may be slippery or the system may determine some action is required to keep
the vehicle on the steered path.
. You may feel a pulsation in the brake pedal
and hear a noise or vibration from under the
hood. This is normal and indicates that the
VDC system is working properly.
. Adjust your speed and driving to the road
conditions.
. Indicator light
If a malfunction occurs in the system, the
and
indicator lights come on in
the instrument panel. The VDC system
automatically turns off when these indicator
lights are on.
. The ABLS system uses automatic braking to
transfer power from a slipping drive wheel to
the wheel on the same axle with more
traction. The ABLS system applies braking
to the slipping wheel, which helps redirect
power to another wheel.
. The ABLS system is always ON unless the
system detects brake pad overheating. If
high brake pad temperature is detected, it
will turn OFF, but normal brake function will
continue. ABLS will function even when the
VDC system is turned OFF. The ABLS
system does not operate if both wheels on
a drive axle are slipping.
VEHICLE DYNAMIC CONTROL (VDC)
SYSTEM
Starting and driving
5-27