2010 NISSAN MURANO ESP
[x] Cancel search: ESPPage 145 of 425
Black plate (141,1)
Model "Z51-D" EDITED: 2009/ 8/ 3
SPA2433
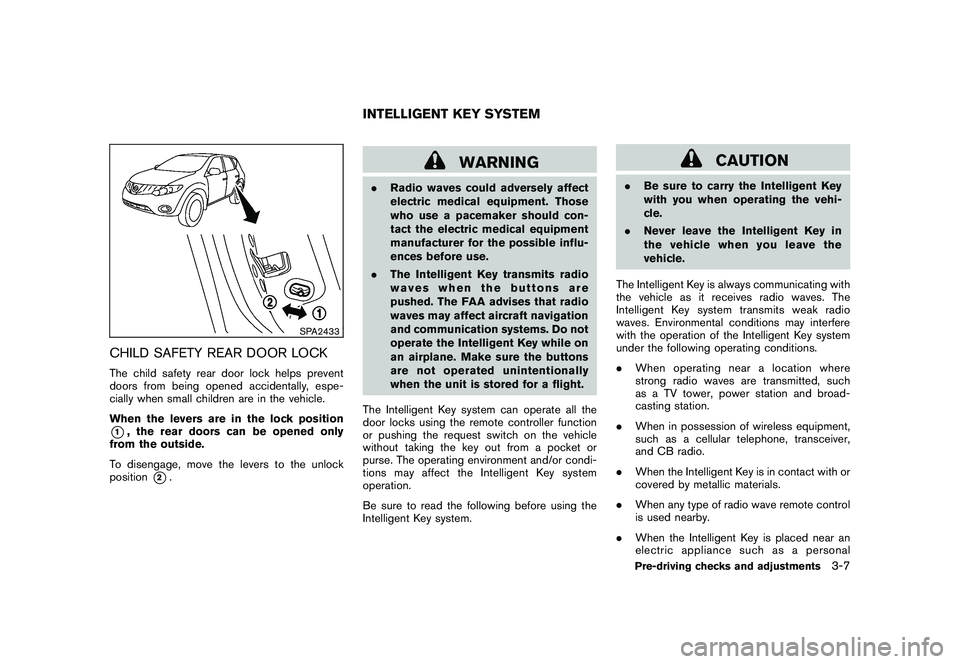
CHILD SAFETY REAR DOOR LOCKThe child safety rear door lock helps prevent
doors from being opened accidentally, espe-
cially when small children are in the vehicle.
When the levers are in the lock position*1, the rear doors can be opened only
from the outside.
To disengage, move the levers to the unlock
position
*2.
WARNING
. Radio waves could adversely affect
electric medical equipment. Those
who use a pacemaker should con-
tact the electric medical equipment
manufacturer for the possible influ-
ences before use.
. The Intelligent Key transmits radio
waves when the buttons are
pushed. The FAA advises that radio
waves may affect aircraft navigation
and communication systems. Do not
operate the Intelligent Key while on
an airplane. Make sure the buttons
are not operated unintentionally
when the unit is stored for a flight.
The Intelligent Key system can operate all the
door locks using the remote controller function
or pushing the request switch on the vehicle
without taking the key out from a pocket or
purse. The operating environment and/or condi-
tions may affect the Intelligent Key system
operation.
Be sure to read the following before using the
Intelligent Key system.
CAUTION
. Be sure to carry the Intelligent Key
with you when operating the vehi-
cle.
. Never leave the Intelligent Key in
the vehicle when you leave the
vehicle.
The Intelligent Key is always communicating with
the vehicle as it receives radio waves. The
Intelligent Key system transmits weak radio
waves. Environmental conditions may interfere
with the operation of the Intelligent Key system
under the following operating conditions.
. When operating near a location where
strong radio waves are transmitted, such
as a TV tower, power station and broad-
casting station.
. When in possession of wireless equipment,
such as a cellular telephone, transceiver,
and CB radio.
. When the Intelligent Key is in contact with or
covered by metallic materials.
. When any type of radio wave remote control
is used nearby.
. When the Intelligent Key is placed near an
electric appliance such as a personal
INTELLIGENT KEY SYSTEM
Pre-driving checks and adjustments
3-7
Page 149 of 425

Black plate (145,1)
Model "Z51-D" EDITED: 2009/ 8/ 3
When you carry the Intelligent Key with you, you
can lock or unlock all doors by pushing the door
handle request switch
*A
or the lift gate
request switch
*B
within the range of opera-
tion.
When you lock or unlock the doors or the lift
gate, the hazard indicator will flash and the horn
(or the outside chime) will sound as a confirma-
tion. For details, see “Setting hazard indicator
and horn mode” later in this section.
Locking doors1. Move the selector lever to the P (Park) position, push the ignition switch to the OFF
position and make sure you carry the
Intelligent Key with you.*1
2. Close all the doors.*2
3. Push the door handle request switch
*A
or
lift gate request switch
*B
while carrying
the Intelligent Key with you.*3
4. All the doors and the lift gate will lock.
5. The hazard indicator flashes twice and the outside chime sounds twice.
*1: Doors will lock with the Intelligent Key while the ignition switch is in the ACC or ON
position.
*2: Doors will not lock with the Intelligent Key while any door is open. *3: Doors will not lock by pushing the door
handle request switch with the Intelligent
Key inside the vehicle.
However, when an Intelligent Key is inside
the vehicle, doors can be locked with
another registered Intelligent Key.
Unlocking doors1. Push the door handle request switch
*A
or
the lift gate request switch
*B
once while
carrying the Intelligent Key with you.
2. The hazard indicator flashes once and the outside chime sounds once. The corre-
sponding door or the lift gate will unlock.
3. Push the request switch again within 1 minute.
4. The hazard indicator flashes once and the outside chime sounds once again. All the
doors and the lift gate will unlock.
All doors will be locked automatically unless one
of the following operations is performed within 1
minute after pushing the request switch while
the doors are locked. If during this 1-minute time
period, the request switch is pushed, all doors
will be locked automatically after another 1
minute.
. Opening any door
. Pushing the ignition switch Inserting the Intelligent Key into the Intelligent
Key port
Power lift gate open (if so equipped)1. Carry the Intelligent Key.
2. Push the power lift gate opener switch
*C.
3. The lift gate will unlock and automatically open.
4. The hazard indicator flashes 4 times and the outside chime sounds.
To close the lift gate, push the power lift gate
button on the key, or power lift gate switch on
the instrument panel or lower part of the lift gate.
(See “LIFT GATE” in the “3. Pre-driving checks
and adjustments” section.)
Setting hazard indicator and horn modeThis vehicle is set in hazard indicator and horn
mode when you first receive the vehicle.
In hazard indicator and horn mode, when the
LOCK
button
*1
is pushed, the hazard
indicator flashes twice and the horn chirps once.
When the UNLOCKbutton
*2
is pushed,
the hazard indicator flashes once.
If horns are not necessary, the system can be
switched to the hazard indicator mode.
In hazard indicator mode, when the LOCK
button is pushed, the hazard indicator flashesPre-driving checks and adjustments
3-11
Page 189 of 425
Black plate (185,1)
Model "Z51-D" EDITED: 2009/ 8/ 3
SAA1564SAA1565
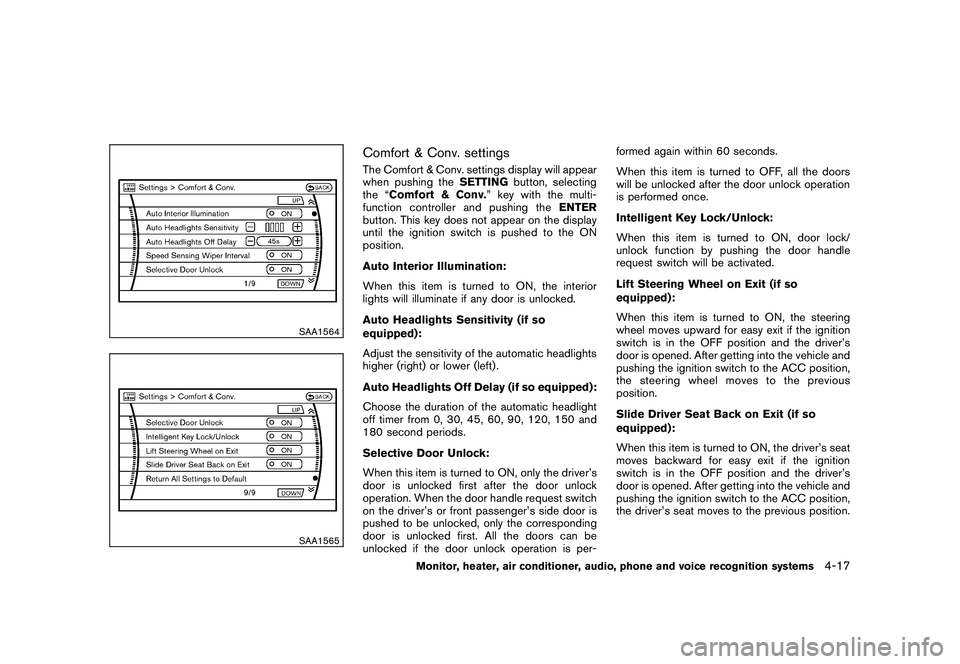
Comfort & Conv. settingsThe Comfort & Conv. settings display will appear
when pushing theSETTINGbutton, selecting
the “Comfort & Conv. ” key with the multi-
function controller and pushing the ENTER
button. This key does not appear on the display
until the ignition switch is pushed to the ON
position.
Auto Interior Illumination:
When this item is turned to ON, the interior
lights will illuminate if any door is unlocked.
Auto Headlights Sensitivity (if so
equipped):
Adjust the sensitivity of the automatic headlights
higher (right) or lower (left) .
Auto Headlights Off Delay (if so equipped):
Choose the duration of the automatic headlight
off timer from 0, 30, 45, 60, 90, 120, 150 and
180 second periods.
Selective Door Unlock:
When this item is turned to ON, only the driver’s
door is unlocked first after the door unlock
operation. When the door handle request switch
on the driver’s or front passenger’s side door is
pushed to be unlocked, only the corresponding
door is unlocked first. All the doors can be
unlocked if the door unlock operation is per- formed again within 60 seconds.
When this item is turned to OFF, all the doors
will be unlocked after the door unlock operation
is performed once.
Intelligent Key Lock/Unlock:
When this item is turned to ON, door lock/
unlock function by pushing the door handle
request switch will be activated.
Lift Steering Wheel on Exit (if so
equipped):
When this item is turned to ON, the steering
wheel moves upward for easy exit if the ignition
switch is in the OFF position and the driver’s
door is opened. After getting into the vehicle and
pushing the ignition switch to the ACC position,
the steering wheel moves to the previous
position.
Slide Driver Seat Back on Exit (if so
equipped):
When this item is turned to ON, the driver’s seat
moves backward for easy exit if the ignition
switch is in the OFF position and the driver’s
door is opened. After getting into the vehicle and
pushing the ignition switch to the ACC position,
the driver’s seat moves to the previous position.
Monitor, heater, air conditioner, audio, phone and voice recognition systems
4-17
Page 191 of 425
Black plate (187,1)
Model "Z51-D" EDITED: 2009/ 8/ 3
SAA1092
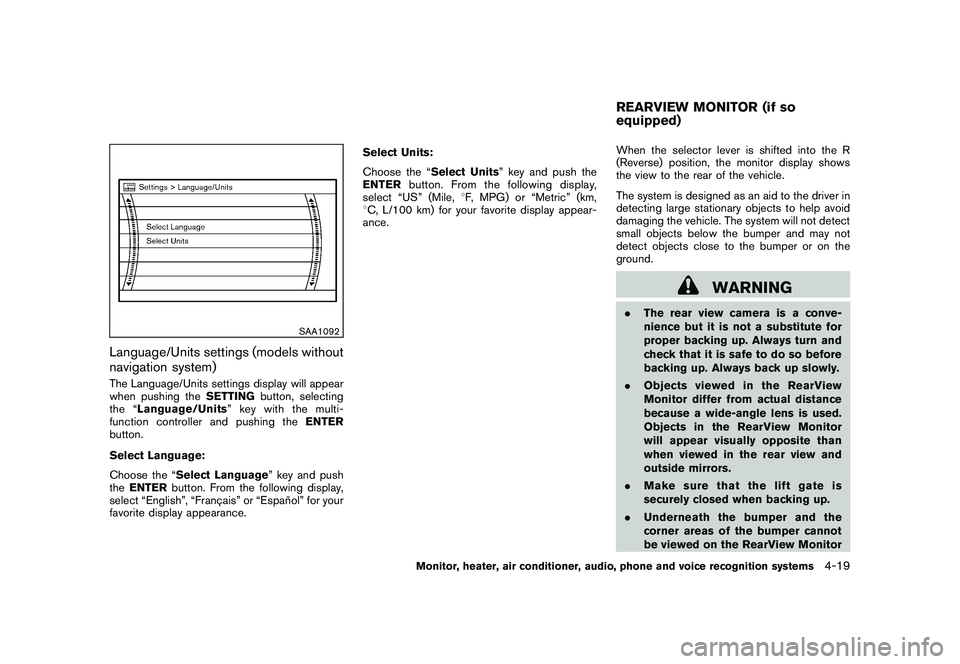
Language/Units settings (models without
navigation system)The Language/Units settings display will appear
when pushing theSETTINGbutton, selecting
the “ Language/Units ”keywiththemulti-
function controller and pushing the ENTER
button.
Select Language:
Choose the “Select Language” key and push
the ENTER button. From the following display,
select “English”, “Franc¸ ais” or “Espan ˜
ol” for your
favorite display appearance. Select Units:
Choose the “Select Units” key and push the
ENTER
button. From the following display,
select “US” (Mile, 8F, MPG) or “Metric” (km,
8 C, L/100 km) for your favorite display appear-
ance. When the selector lever is shifted into the R
(Reverse) position, the monitor display shows
the view to the rear of the vehicle.
The system is designed as an aid to the driver in
detecting large stationary objects to help avoid
damaging the vehicle. The system will not detect
small objects below the bumper and may not
detect objects close to the bumper or on the
ground.
WARNING
.
The rear view camera is a conve-
nience but it is not a substitute for
proper backing up. Always turn and
check that it is safe to do so before
backing up. Always back up slowly.
. Objects viewed in the RearView
Monitor differ from actual distance
because a wide-angle lens is used.
Objects in the RearView Monitor
will appear visually opposite than
when viewed in the rear view and
outside mirrors.
. Make sure that the lift gate is
securely closed when backing up.
. Underneath the bumper and the
corner areas of the bumper cannot
be viewed on the RearView MonitorREARVIEW MONITOR (if so
equipped)
Monitor, heater, air conditioner, audio, phone and voice recognition systems
4-19
Page 204 of 425
Black plate (200,1)
Model "Z51-D" EDITED: 2009/ 8/ 3
Static and flutter: During signal interference from
buildings, large hills or due to antenna position,
usually in conjunction with increased distance
from the station transmitter, static or flutter can
be heard. This can be reduced by lowering the
treble setting to reduce the treble response.
Multipath reception: Because of the reflective
characteristics of FM signals, direct and re-
flected signals reach the receiver at the same
time. The signals may cancel each other,
resulting in momentary flutter or loss of sound.
AM radio reception:
AM signals, because of their low frequency, can
bend around objects and skip along the ground.
In addition, the signals can be bounced off the
ionosphere and bent back to earth. Because of
these characteristics. AM signals are also
subject to interference as they travel from
transmitter to receiver.
Fading: Occurs while the vehicle is passing
through freeway underpasses or in areas with
many tall buildings. It can also occur for several
seconds during ionospheric turbulence even in
areas where no obstacles exist.
Static: Caused by thunderstorms, electrical
power lines, electric signs and even traffic lights.Satellite radio reception (if so equipped):
When the satellite radio is first installed or the
battery has been replaced, the satellite radio
may not work properly. This is not a malfunction.
Wait more than 10 minutes with satellite radio
ON for satellite radio to receive all of the
necessary data.
The satellite radio mode requires an active XM
®
satellite radio service subscription. Satellite
radio is not available in Alaska, Hawaii and
Guam.
Satellite radio performance may be affected if
cargo carried on the roof blocks the satellite
radio signal.
If possible, do not put cargo near the satellite
antenna.
A build up of ice on the satellite radio antenna
can affect satellite radio performance. Remove
the ice to restore satellite radio reception.
SAA0480
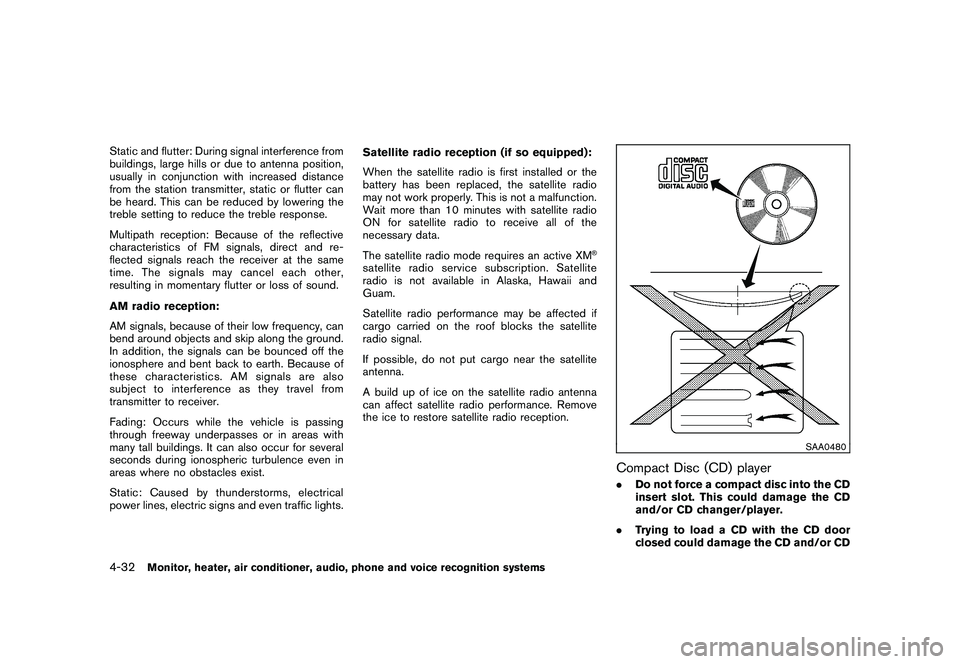
Compact Disc (CD) player.
Do not force a compact disc into the CD
insert slot. This could damage the CD
and/or CD changer/player.
. Trying to load a CD with the CD door
closed could damage the CD and/or CD
4-32
Monitor, heater, air conditioner, audio, phone and voice recognition systems
Page 206 of 425
Black plate (202,1)
Model "Z51-D" EDITED: 2009/ 8/ 3
iPod
®player (if so equipped)
.Some characters used in other lan-
guages (Chinese, Japanese, etc.) are
not displayed properly on the vehicle
center screen. We recommend using
English language characters with an
iPod
®.
. Large video podcast files cause slow
responses in the iPod
®. The vehicle
center display may momentarily black
out, but it will soon recover.
. If the iPod
®automatically selects large
video podcast files while in the shuffle
mode, the vehicle center display may
momentarily black out, but it will soon
recover.
. Improperly plugging in the iPod
®may
cause a checkmark to be displayed on
and off (flickering) . Always make sure
that the iPod
®is connected properly.
. The iPod
®nano (2nd Generation) will
continue to fast forward or rewind if it
is disconnected during a seek opera-
tion.
. An incorrect song title may appear
when the Play Mode is changed while
using the iPod
®nano (2nd Generation) .
. Audiobooks may not play in the same order as they appear on the iPod
®.
. The iPod
®nano (1st Generation) may
remain in fast forward or rewind mode
if it is connected during a seek opera-
tion. In this case, please manually reset
the iPod
®.
. If you are using an iPod
®(3rd Genera-
tion with Dock connector) , do not use
very long names for the song title,
album name or artist name to avoid
the iPod
®from resetting itself.
. Be careful not to do the following, or
the cable could be damaged and a loss
of function may occur.
— Bend the cable excessively (1.6 in (40
mm) radius minimum) .
— Twist the cable excessively (more
than 180 degrees) .
— Pull or drop the cable.
— Close the center console lid on the
cable or connectors.
— Store objects with sharp edges in the
storage where the cable is stored.
— Spill liquids on the cable and con-
nectors.
. Do not connect the cable to the iPod
®if the cable and/or connectors are wet. It
may damage the iPod
®.
. If the cable and connectors are ex-
posed to water, allow the cable and/or
connectors to dry completely before
connecting the cable to the iPod
®(wait
24 hours for it to dry) .
. If the connector is exposed to fluids
other than water, evaporative residue
may cause a short between the con-
nector pins. In this case, replace the
cable, otherwise damage to the iPod
®
and a loss of function may occur.
. If the cable is damaged (insulation cut,
connectors cracked, contamination
such as liquids, dust, dirt, etc. in the
connectors) , do not use the cable and
contact a NISSAN dealer to replace the
cable with a new one.
. When not in use for extended periods
of time, store the cable in a clean, dust
free environment at room temperature
and without direct sun exposure.
. Do not use the cable for any other
purposes other than its intended use in
the vehicle.
. iPod
®charging is only possible for
devices that support charging via a
FireWire®connection. Devices that can
4-34
Monitor, heater, air conditioner, audio, phone and voice recognition systems
Page 233 of 425
Black plate (229,1)
Model "Z51-D" EDITED: 2009/ 8/ 3
STEERING-WHEEL-MOUNTED CON-
TROLS FOR AUDIO
ENTER (models with navigation system)
or tuning (models without navigation
system) switchPush the switch upward or downward to select
a channel, track, CD or folder when they are
listed on the display.
Tune/Track:
RADIO
.Pushing DOWN “
”/UP “
” shorter
Next or previous preset channel
. Pushing DOWN “
”/UP “
” longer
Next or previous station
CD
. Pushing DOWN “
”/UP “
” shorter
Next track or the beginning of the current
track
. Pushing DOWN “
”/UP “
” longer
Disc change (When only one disc is loaded,
the 1st track of the disc will be selected.)
CD/CF (if so equipped) with MP3/WMA
. Pushing DOWN “
”/UP “
” shorter Next track or the beginning of the current
track
. Pushing DOWN “
”/UP “
” longer
Folder change (When the last folder on a
disc is playing, the next disc will be
selected.)
iPod
®(if so equipped)
. Pushing DOWN “
”/UP “
” shorter
Previous or next track (Start/Pause or Menu
can be selected when the ENTER button is
pushed.)
. Pushing DOWN “
”/UP “
” longer
Rewind or fast forward search
Music Box hard-disk drive audio system (if
so equipped)
. Pushing DOWN “
”/UP “
” shorter
Next track or the beginning of the current
track
. Pushing DOWN “
”/UP “
” longer
Playlist change (When the last playlist is
playing, the next playlist will be selected.)
ENTER switch operation:
You can also use the ENTER switch to select the
items on the usual setting menu screen. After selecting an MP3 folder using the up and
down switch, push the ENTER switch to
complete the selection.
While the display is in the NAVI, STATUS or
Audio setting screen, some audio functions can
also be controlled using the ENTER switch. The
function varies depending on if you push the
switch shorter (less than 1.5 seconds) or longer
(more than 1.5 seconds) .
BACK switch
Push this switch to go back to the previous
screen or cancel the selection if it is not
completed.Volume control switchesPush the upper (+) or lower (
�) side switch to
increase or decrease the volume.SOURCE select switchPush the source select switch to change the
mode, Preset A, Preset B, Preset C, “iPod
®” (if
so equipped) , “Music Box” (if so equipped) , CD,
and CompactFlash (if so equipped) . If they are
not ready to function, those modes will be
skipped.
Monitor, heater, air conditioner, audio, phone and voice recognition systems
4-61
Page 244 of 425

Black plate (240,1)
Model "Z51-D" EDITED: 2009/ 8/ 3
troller and push theENTERbutton again.
Angle* (DVD-VIDEO):
If the DVD contains different angles (such as
moving images) , the current image angle can be
switched to another one.
Select the “ Angle” key and push the ENTER
button. When the “+” side or “ �” side is
selected, the angle will change.
Angle Mark (DVD-VIDEO):
When this item is turned on, an angle mark will
be shown on the bottom of the screen if the
scene can be seen from a different angle.
10 Key Search* (DVD-VIDEO, VIDEO-CD,
CD-DA):
Select the “10 Key Search ” key and push the
ENTER button to open the number entry screen.
Input the number you want to search for and
select the “OK ” key with the multi-function
controller. Then push the ENTERbutton. The
specified Title/Chapter or Group/Track will be
played.
Title Search* (DVD-VIDEO) :
The scene with the specified title will be
displayed the number of times the “+” side or
“� ” side is selected. Select No.* (VIDEO-CD):
Select the “Select No.
” key and push the
ENTER button to open the number entry screen.
Input the number you wish to search for and
select the “OK ” key with the multi-function
controller, and then push the ENTERbutton.
The specified scene will be played.
Menu Skip (DVD-VIDEO):
DVD menus are automatically configured and
the contents will be played directly when the
“Menu Skip ” key is turned on. Note that some
discs may not be played directly even if this item
is turned on.
DVD Language (DVD-VIDEO, VIDEO-CD):
Select the “DVD Language” key and push the
ENTER button to open the number entry screen.
Input the number corresponding to the preferred
language and select the “OK ” key with the multi-
function controller. Then push the ENTER
button. The DVD top menu language will be
changed to the one specified.
DRC (DVD-VIDEO) :
DRC (Dynamic Range Compression) allows you
to tune the dynamic range of the sound
recorded in the Dolby Digital format.
Remote controller operationUse the remote controller to adjust the following
items.
Rear display open/close:
To open or close the flip-down rear display, push
the “
” button on the remote controller.
Joystick:
Use the joystick “
” to select the items
displayed on the rear screen.
ENTER button:
Push the ENTER“” button to make the
selected item complete on the rear screen.
BACK button:
Press to go back to the previous screen or
cancel the selection.
Display tilt:
Adjust the display angle by pushing the “DIS-
PLAY TILT” buttonor
.
DVD mode:
To select the DVD mode, push the DVD button.
AUX mode:
To select the AUX (Auxiliary input jacks) mode,
push the AUX button.
4-72
Monitor, heater, air conditioner, audio, phone and voice recognition systems