2010 NISSAN MURANO language
[x] Cancel search: languagePage 102 of 425
Black plate (98,1)
Model "Z51-D" EDITED: 2009/ 8/ 3
SIC3678
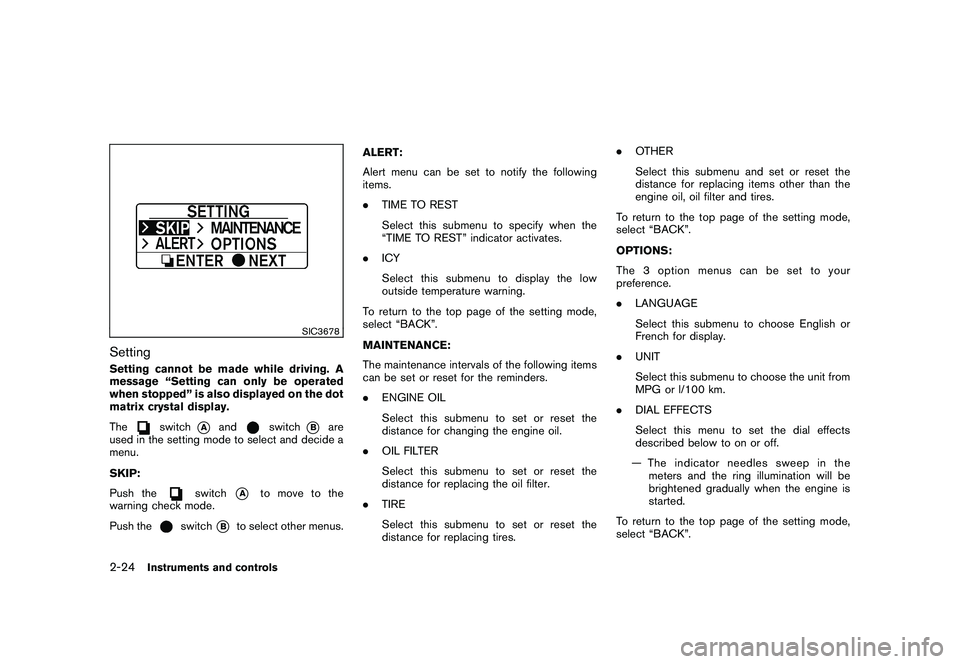
SettingSetting cannot be made while driving. A
message “Setting can only be operated
when stopped” is also displayed on the dot
matrix crystal display.
The
switch
*A
and
switch
*B
are
used in the setting mode to select and decide a
menu.
SKIP:
Push the
switch
*A
to move to the
warning check mode.
Push the
switch
*B
to select other menus. ALERT:
Alert menu can be set to notify the following
items.
.
TIME TO REST
Select this submenu to specify when the
“TIME TO REST” indicator activates.
. ICY
Select this submenu to display the low
outside temperature warning.
To return to the top page of the setting mode,
select “BACK”.
MAINTENANCE:
The maintenance intervals of the following items
can be set or reset for the reminders.
. ENGINE OIL
Select this submenu to set or reset the
distance for changing the engine oil.
. OIL FILTER
Select this submenu to set or reset the
distance for replacing the oil filter.
. TIRE
Select this submenu to set or reset the
distance for replacing tires. .
OTHER
Select this submenu and set or reset the
distance for replacing items other than the
engine oil, oil filter and tires.
To return to the top page of the setting mode,
select “BACK”.
OPTIONS:
The 3 option menus can be set to your
preference.
. LANGUAGE
Select this submenu to choose English or
French for display.
. UNIT
Select this submenu to choose the unit from
MPG or l/100 km.
. DIAL EFFECTS
Select this menu to set the dial effects
described below to on or off.
— The indicator needles sweep in the meters and the ring illumination will be
brightened gradually when the engine is
started.
To return to the top page of the setting mode,
select “BACK”.
2-24
Instruments and controls
Page 173 of 425
Black plate (14,1)
Model "Z51-D" EDITED: 2009/ 8/ 3
Care and maintenance.................................. 4-73
Car phone or CB radio ...................................... 4-74
Bluetooth
®Hands-Free Phone System with
navigation system ............................................. 4-75
Regulatory information ................................... 4-76
Voice commands. ......................................... 4-76
Control buttons ........................................... 4-77
Pairing procedure ......................................... 4-77
Phonebook registration .................................. 4-78
Making a call ............................................... 4-80
Receiving a call ........................................... 4-81
During a call ............................................... 4-81
Phone setting .............................................. 4-82
Troubleshooting guide ................................... 4-84
Bluetooth®Hands-Free Phone System without
navigation system (if so equipped) ....................... 4-85
Regulatory information ................................... 4-86
Initialization ................................................. 4-86
Operating tips ............................................. 4-86
Giving voice commands ................................. 4-86
Control buttons ........................................... 4-88 Getting started
............................................ 4-88
Choosing a language .................................... 4-88
Pairing procedure ......................................... 4-88
Making a call by entering a phone number ......... 4-89
Receiving a call ........................................... 4-89
List of voice commands ................................. 4-90
Call ........................................................... 4-90
Phone book ................................................ 4-92
Memo pad .................................................. 4-94
Setup ........................................................ 4-94
Speaker Adaptation (SA) mode ....................... 4-96
Troubleshooting guide ................................... 4-98
NISSAN Voice Recognition System
(models with navigation system) .......................... 4-99
NISSAN voice recognition standard mode .......... 4-99
Using the system ....................................... 4-102
NISSAN voice recognition alternate command
mode ...................................................... 4-109
Using the system ....................................... 4-115
Troubleshooting guide ................................. 4-121
Page 190 of 425
Black plate (186,1)
Model "Z51-D" EDITED: 2009/ 8/ 3
Return All Settings to Default:
Select this item, push theENTERbutton and
choose “YES” if you want to return all settings to
the default.
SAA1566
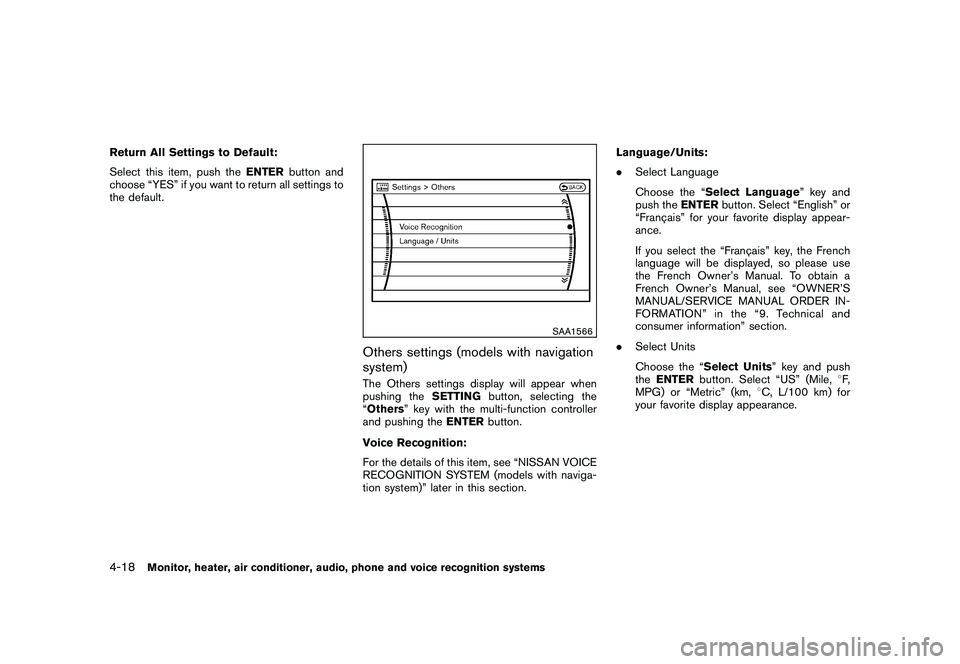
Others settings (models with navigation
system)The Others settings display will appear when
pushing the SETTINGbutton, selecting the
“Others” key with the multi-function controller
and pushing the ENTERbutton.
Voice Recognition:
For the details of this item, see “NISSAN VOICE
RECOGNITION SYSTEM (models with naviga-
tion system)” later in this section. Language/Units:
.
Select Language
Choose the “Select Language ” key and
push the ENTERbutton. Select “English” or
“Franc¸ ais” for your favorite display appear-
ance.
If you select the “Franc¸ ais” key, the French
language will be displayed, so please use
the French Owner’s Manual. To obtain a
French Owner’s Manual, see “OWNER’S
MANUAL/SERVICE MANUAL ORDER IN-
FORMATION” in the “9. Technical and
consumer information” section.
. Select Units
Choose the “Select Units” key and push
the ENTER button. Select “US” (Mile, 8F,
MPG) or “Metric” (km, 8C, L/100 km) for
your favorite display appearance.
4-18
Monitor, heater, air conditioner, audio, phone and voice recognition systems
Page 191 of 425
Black plate (187,1)
Model "Z51-D" EDITED: 2009/ 8/ 3
SAA1092
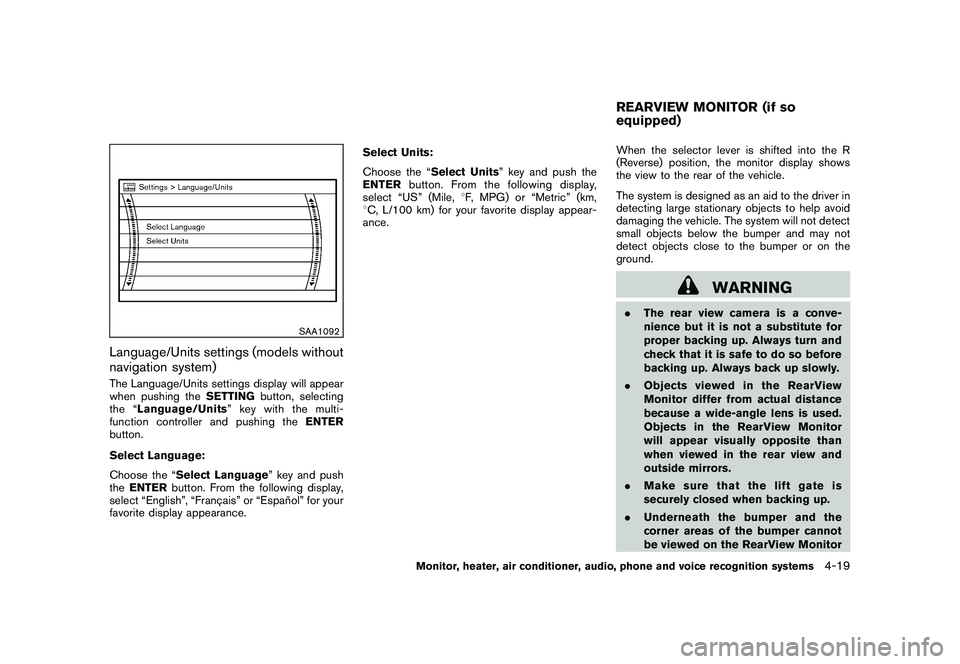
Language/Units settings (models without
navigation system)The Language/Units settings display will appear
when pushing theSETTINGbutton, selecting
the “ Language/Units ”keywiththemulti-
function controller and pushing the ENTER
button.
Select Language:
Choose the “Select Language” key and push
the ENTER button. From the following display,
select “English”, “Franc¸ ais” or “Espan ˜
ol” for your
favorite display appearance. Select Units:
Choose the “Select Units” key and push the
ENTER
button. From the following display,
select “US” (Mile, 8F, MPG) or “Metric” (km,
8 C, L/100 km) for your favorite display appear-
ance. When the selector lever is shifted into the R
(Reverse) position, the monitor display shows
the view to the rear of the vehicle.
The system is designed as an aid to the driver in
detecting large stationary objects to help avoid
damaging the vehicle. The system will not detect
small objects below the bumper and may not
detect objects close to the bumper or on the
ground.
WARNING
.
The rear view camera is a conve-
nience but it is not a substitute for
proper backing up. Always turn and
check that it is safe to do so before
backing up. Always back up slowly.
. Objects viewed in the RearView
Monitor differ from actual distance
because a wide-angle lens is used.
Objects in the RearView Monitor
will appear visually opposite than
when viewed in the rear view and
outside mirrors.
. Make sure that the lift gate is
securely closed when backing up.
. Underneath the bumper and the
corner areas of the bumper cannot
be viewed on the RearView MonitorREARVIEW MONITOR (if so
equipped)
Monitor, heater, air conditioner, audio, phone and voice recognition systems
4-19
Page 206 of 425
Black plate (202,1)
Model "Z51-D" EDITED: 2009/ 8/ 3
iPod
®player (if so equipped)
.Some characters used in other lan-
guages (Chinese, Japanese, etc.) are
not displayed properly on the vehicle
center screen. We recommend using
English language characters with an
iPod
®.
. Large video podcast files cause slow
responses in the iPod
®. The vehicle
center display may momentarily black
out, but it will soon recover.
. If the iPod
®automatically selects large
video podcast files while in the shuffle
mode, the vehicle center display may
momentarily black out, but it will soon
recover.
. Improperly plugging in the iPod
®may
cause a checkmark to be displayed on
and off (flickering) . Always make sure
that the iPod
®is connected properly.
. The iPod
®nano (2nd Generation) will
continue to fast forward or rewind if it
is disconnected during a seek opera-
tion.
. An incorrect song title may appear
when the Play Mode is changed while
using the iPod
®nano (2nd Generation) .
. Audiobooks may not play in the same order as they appear on the iPod
®.
. The iPod
®nano (1st Generation) may
remain in fast forward or rewind mode
if it is connected during a seek opera-
tion. In this case, please manually reset
the iPod
®.
. If you are using an iPod
®(3rd Genera-
tion with Dock connector) , do not use
very long names for the song title,
album name or artist name to avoid
the iPod
®from resetting itself.
. Be careful not to do the following, or
the cable could be damaged and a loss
of function may occur.
— Bend the cable excessively (1.6 in (40
mm) radius minimum) .
— Twist the cable excessively (more
than 180 degrees) .
— Pull or drop the cable.
— Close the center console lid on the
cable or connectors.
— Store objects with sharp edges in the
storage where the cable is stored.
— Spill liquids on the cable and con-
nectors.
. Do not connect the cable to the iPod
®if the cable and/or connectors are wet. It
may damage the iPod
®.
. If the cable and connectors are ex-
posed to water, allow the cable and/or
connectors to dry completely before
connecting the cable to the iPod
®(wait
24 hours for it to dry) .
. If the connector is exposed to fluids
other than water, evaporative residue
may cause a short between the con-
nector pins. In this case, replace the
cable, otherwise damage to the iPod
®
and a loss of function may occur.
. If the cable is damaged (insulation cut,
connectors cracked, contamination
such as liquids, dust, dirt, etc. in the
connectors) , do not use the cable and
contact a NISSAN dealer to replace the
cable with a new one.
. When not in use for extended periods
of time, store the cable in a clean, dust
free environment at room temperature
and without direct sun exposure.
. Do not use the cable for any other
purposes other than its intended use in
the vehicle.
. iPod
®charging is only possible for
devices that support charging via a
FireWire®connection. Devices that can
4-34
Monitor, heater, air conditioner, audio, phone and voice recognition systems
Page 243 of 425
Black plate (239,1)
Model "Z51-D" EDITED: 2009/ 8/ 3
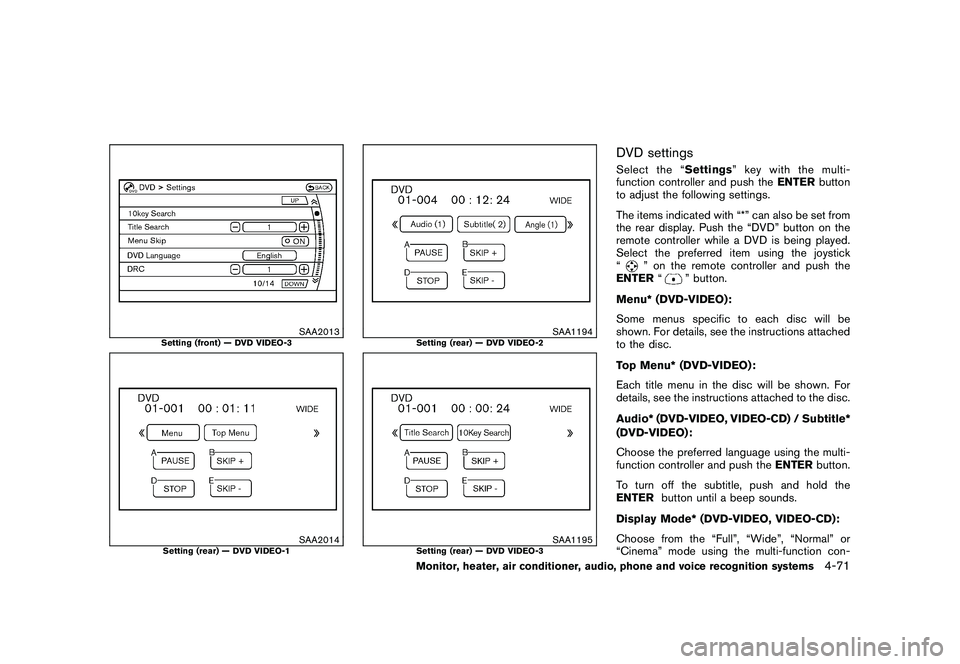
SAA2013
Setting (front) — DVD VIDEO-3
SAA2014
Setting (rear) — DVD VIDEO-1
SAA1194
Setting (rear) — DVD VIDEO-2
SAA1195
Setting (rear) — DVD VIDEO-3
DVD settingsSelect the “Settings” key with the multi-
function controller and push the ENTERbutton
to adjust the following settings.
The items indicated with “*” can also be set from
the rear display. Push the “DVD” button on the
remote controller while a DVD is being played.
Select the preferred item using the joystick
“
” on the remote controller and push the
ENTER “
” button.
Menu* (DVD-VIDEO):
Some menus specific to each disc will be
shown. For details, see the instructions attached
to the disc.
Top Menu* (DVD-VIDEO):
Each title menu in the disc will be shown. For
details, see the instructions attached to the disc.
Audio* (DVD-VIDEO, VIDEO-CD) / Subtitle*
(DVD-VIDEO):
Choose the preferred language using the multi-
function controller and push the ENTERbutton.
To turn off the subtitle, push and hold the
ENTER button until a beep sounds.
Display Mode* (DVD-VIDEO, VIDEO-CD):
Choose from the “Full”, “Wide”, “Normal” or
“Cinema” mode using the multi-function con-
Monitor, heater, air conditioner, audio, phone and voice recognition systems
4-71
Page 244 of 425

Black plate (240,1)
Model "Z51-D" EDITED: 2009/ 8/ 3
troller and push theENTERbutton again.
Angle* (DVD-VIDEO):
If the DVD contains different angles (such as
moving images) , the current image angle can be
switched to another one.
Select the “ Angle” key and push the ENTER
button. When the “+” side or “ �” side is
selected, the angle will change.
Angle Mark (DVD-VIDEO):
When this item is turned on, an angle mark will
be shown on the bottom of the screen if the
scene can be seen from a different angle.
10 Key Search* (DVD-VIDEO, VIDEO-CD,
CD-DA):
Select the “10 Key Search ” key and push the
ENTER button to open the number entry screen.
Input the number you want to search for and
select the “OK ” key with the multi-function
controller. Then push the ENTERbutton. The
specified Title/Chapter or Group/Track will be
played.
Title Search* (DVD-VIDEO) :
The scene with the specified title will be
displayed the number of times the “+” side or
“� ” side is selected. Select No.* (VIDEO-CD):
Select the “Select No.
” key and push the
ENTER button to open the number entry screen.
Input the number you wish to search for and
select the “OK ” key with the multi-function
controller, and then push the ENTERbutton.
The specified scene will be played.
Menu Skip (DVD-VIDEO):
DVD menus are automatically configured and
the contents will be played directly when the
“Menu Skip ” key is turned on. Note that some
discs may not be played directly even if this item
is turned on.
DVD Language (DVD-VIDEO, VIDEO-CD):
Select the “DVD Language” key and push the
ENTER button to open the number entry screen.
Input the number corresponding to the preferred
language and select the “OK ” key with the multi-
function controller. Then push the ENTER
button. The DVD top menu language will be
changed to the one specified.
DRC (DVD-VIDEO) :
DRC (Dynamic Range Compression) allows you
to tune the dynamic range of the sound
recorded in the Dolby Digital format.
Remote controller operationUse the remote controller to adjust the following
items.
Rear display open/close:
To open or close the flip-down rear display, push
the “
” button on the remote controller.
Joystick:
Use the joystick “
” to select the items
displayed on the rear screen.
ENTER button:
Push the ENTER“” button to make the
selected item complete on the rear screen.
BACK button:
Press to go back to the previous screen or
cancel the selection.
Display tilt:
Adjust the display angle by pushing the “DIS-
PLAY TILT” buttonor
.
DVD mode:
To select the DVD mode, push the DVD button.
AUX mode:
To select the AUX (Auxiliary input jacks) mode,
push the AUX button.
4-72
Monitor, heater, air conditioner, audio, phone and voice recognition systems
Page 245 of 425
Black plate (241,1)
Model "Z51-D" EDITED: 2009/ 8/ 3
Volume:
To control the volume level, push the “VOL”
button
or
.
Display:
Press to adjust the rear display screen bright-
ness, tint, contrast, etc.
Aspect:
To change the display size, push the “ASPECT”
button. Each time the button is pushed, the
display size will change to “Cinema”, “Wide”,
“Full” or “Normal”.
Sound:
To change the language, push the “SOUND”
button. Each time the button is pushed, the
language will change to each language stored in
the DVD.
Headphones:
The DVD sound can be heard through the
headphones.
Push the “
” button. Each time the button is
pushed the mode will switch to ON or OFF.
To control the volume of sound from the
headphones, use the VOLUME CONTROL
knob attached to the headphones. Track/Channel:
Press to skip to the previous or next DVD scene
selection.
Keypad:
: PLAY/PAUSE button: STOP button: FORWARD button: REWIND button: FORWARD button for still images (for
DVD-AUDIO): REWIND button for still images (for DVD-AUDIO)
CARE AND MAINTENANCEUse a lightly dampened, lint free cloth to clean
the surfaces of your Mobile Entertainment
System. (DVD player face, screen, remote
controller, etc.)
CAUTION
. Do not use any solvents or cleaning
solutions when cleaning the video
system.
. Do not use excessive force on the
monitor screen. .
Avoid touching or scratching the
monitor screen as it may become
dirty or damaged.
. Do not attempt to operate the
system in extreme temperature con-
ditions [below �48F( �208 C) and
above 158 8F (70 8C)].
. Do not attempt to operate the
system in extreme humidity condi-
tions (less than 10% or more than
75%) .
Monitor, heater, air conditioner, audio, phone and voice recognition systems
4-73