2010 NISSAN CUBE ignition
[x] Cancel search: ignitionPage 4 of 20
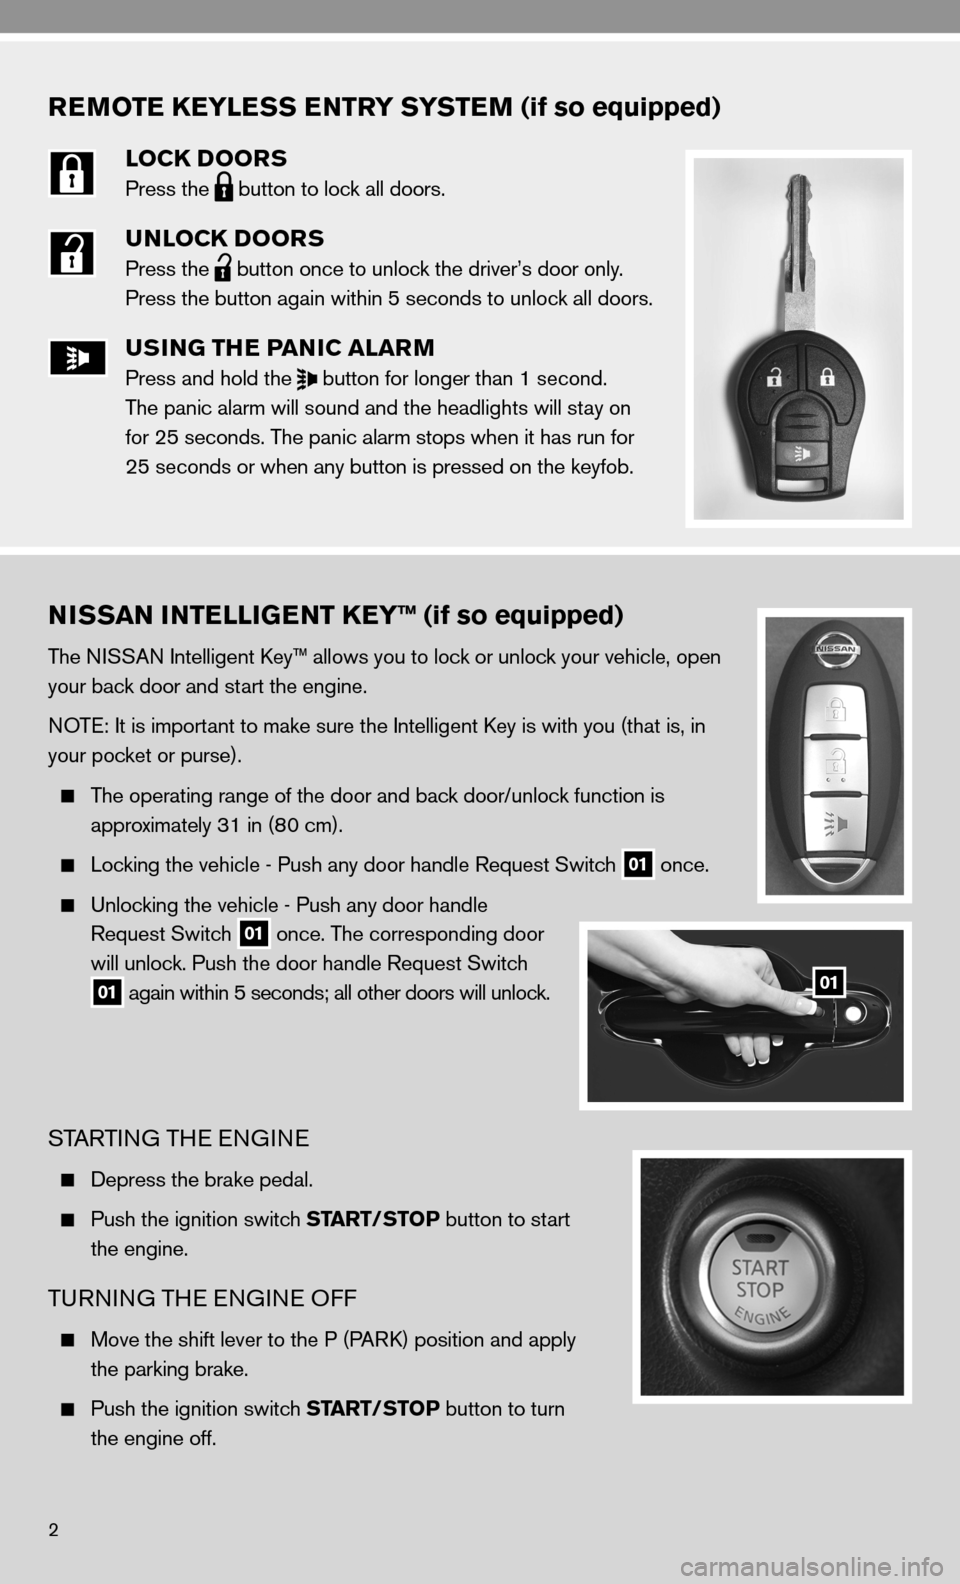
REMOTE KEYLESS ENTRY SYSTEM (if so equipped)
LOCK DOORS
Press the
button to lock all doors.
UNLOCK DOORS
Press the
button once to unlock the driver’s door only.
Press the button again within 5 seconds to unlock all doors.
USING THE PANIC ALARM
Press and hold the
button for longer than 1 second.
The panic alarm will sound and the headlights will stay on
for 25 seconds. The panic alarm stops when it has run for
25 seconds or when any button is pressed on the keyfob.
2
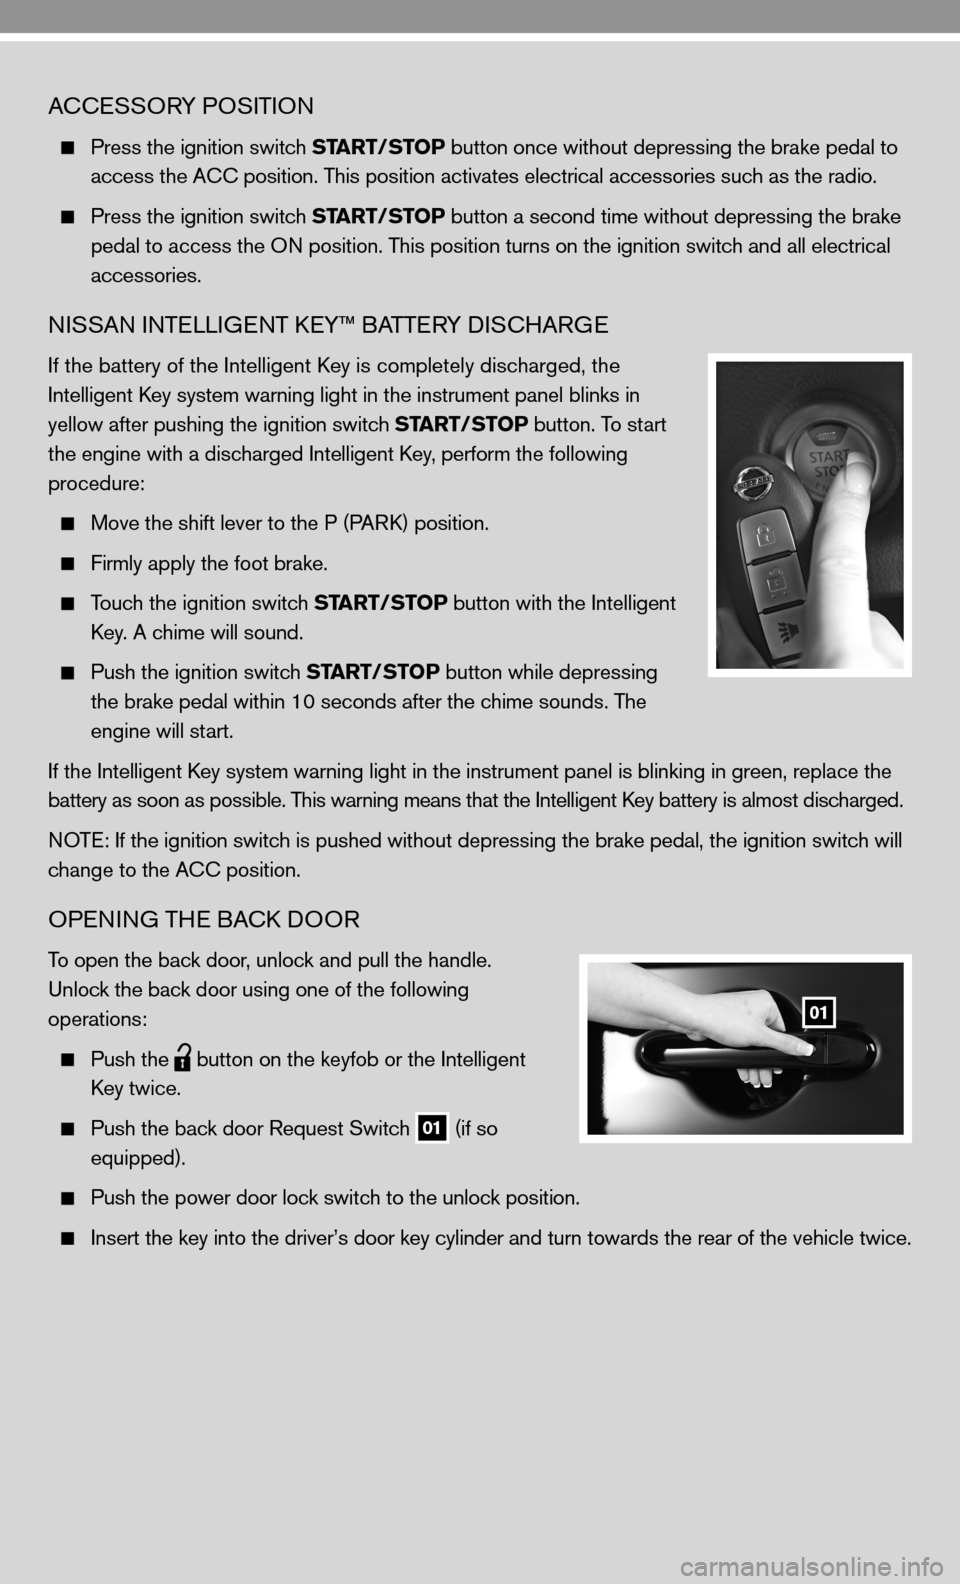
NISSAN INTELLIGENT KEY™ (if so equipped)
The niSSA n intelligent key™ allows you to lock or unlock your vehicle, open
your back door and start the engine.
n OT e: it is important to make sure the intelligent key is with you (that is, in
your pocket or purse).
The operating range of the door and back door/unlock function is
approximately 31 in (80 cm).
Locking the vehicle - Push any door handle Request Switch
01 once.
unlocking the vehicle - Push any door handle
Request Switch
01 once. The corresponding door
will unlock. Push the door handle Request Switch
01 again within 5 seconds; all other doors will unlock.
STARTin
G THe enGine
depress the brake pedal.
Push the ignition switch START/STOP button to start
the engine.
TuRnin G THe en Gine Off
Move the shift lever to the P (PAR k) position and apply
the parking brake.
Push the ignition switch START/STOP button to turn
the engine off.
01
Page 5 of 20
AcceSSORY POSi TiOn
Press the ignition switch START/STOP button once without depressing the brake pedal to
access the A cc position. This position activates electrical accessories such as the radio.
Press the ignition switch START/STOP button a second time without depressing the brake
pedal to access the O n position. This position turns on the ignition switch and all electrical
accessories.
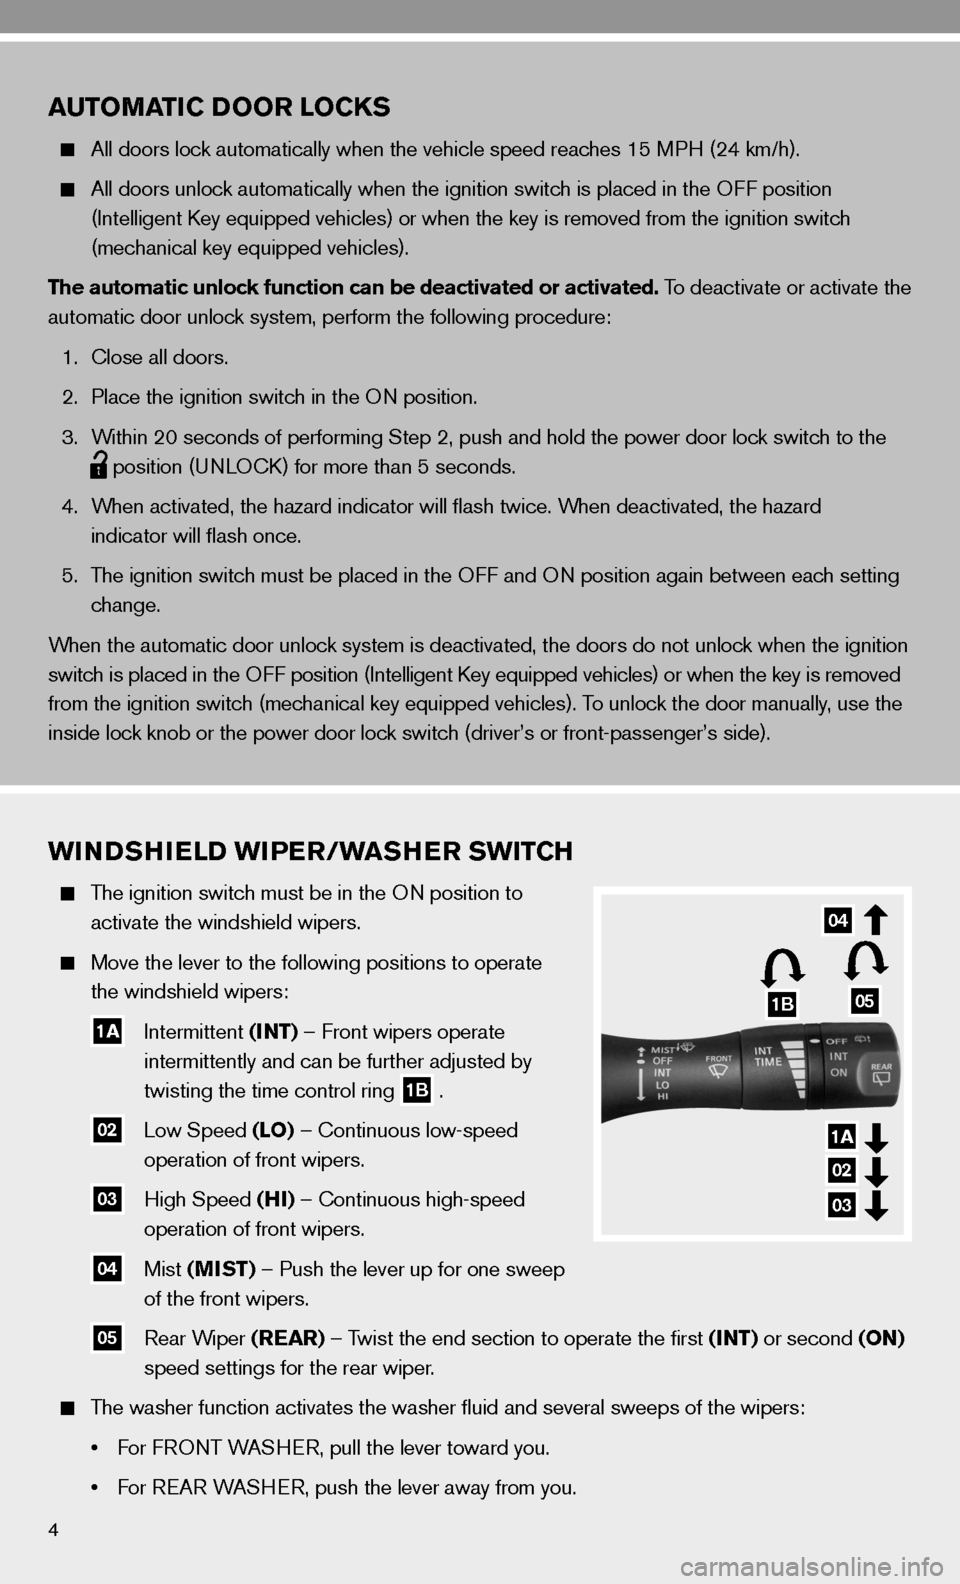
niSSAn inTe LLiGenT keY™ BATTe RY diSc HARG e
if the battery of the intelligent k ey is completely discharged, the
i ntelligent key system warning light in the instrument panel blinks in
yellow after pushing the ignition switch START/STOP button. To start
the engine with a discharged intelligent key, perform the following
procedure:
Move the shift lever to the P (PAR k) position.
firmly apply the foot brake.
Touch the ignition switch START/STOP button with the intelligent
k ey. A chime will sound.
Push the ignition switch START/STOP button while depressing
the brake pedal within 10 seconds after the chime sounds. The
engine will start.
if the intelligent k ey system warning light in the instrument panel is blinking in green, re\
place the
battery as soon as possible. This warning means that the intelligent k ey battery is almost discharged.
n OTe: if the ignition switch is pushed without depressing the brake pedal, the ignition switch will
change to the A cc position.
OPenin G THe BAck d OOR
To open the back door, unlock and pull the handle.
u nlock the back door using one of the following
operations:
Push the
button on the keyfob or the
intelligent
k ey twice.
Push the back door Request Switch
01 (if so
equipped).
Push the power door lock switch to the unlock position.
insert the key into the driver’s door key cylinder and turn towards th\
e rear of the vehicle twice.
01
Page 6 of 20
4
AUTOMATIC DOOR LOCKS
All doors lock automatically when the vehicle speed reaches 15 MPH (24 km/h).
All doors unlock automatically when the ignition switch is placed in the O ff position
(intelligent key equipped vehicles) or when the key is removed from the ignition switch
(mechanical key equipped vehicles).
The automatic unlock function can be deactivated or activated. To deactivate or activate the
automatic door unlock system, perform the following procedure:
1. close all doors.
2. Place the ignition switch in the O n position.
3. Within 20 seconds of performing Step 2, push and hold the power door lock switch to the
position (un
LOck) for more than 5 seconds.
4. When activated, the hazard indicator will flash twice. When deactivated, the hazard
indicator will flash once.
5. The ignition switch must be placed in the O ff and On position again between each setting
change.
When the automatic door unlock system is deactivated, the doors do not unlock when the ignition
switch is placed in the O ff position ( intelligent key equipped vehicles) or when the key is removed
from the ignition switch (mechanical key equipped vehicles). To unlock the door manually, use the
inside lock knob or the power door lock switch (driver’s or front-passenger’s side).
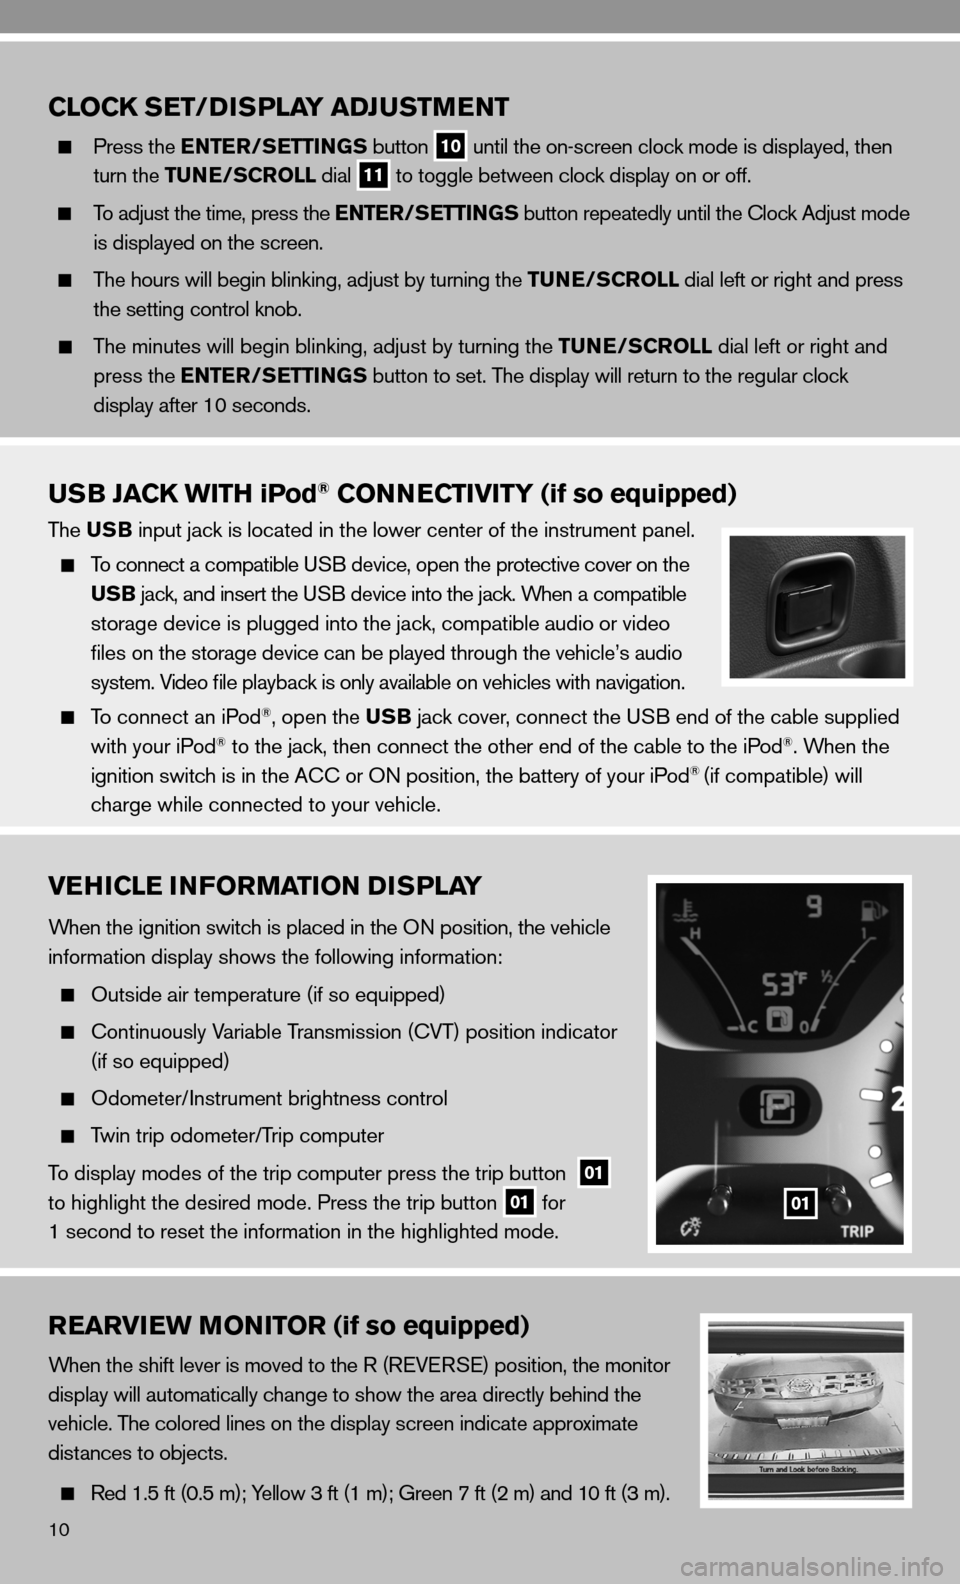
WINDSHIELD WIPER/WASHER SWITCH
The ignition switch must be in the O n position to
activate the windshield wipers.
Move the lever to the following positions to operate
the windshield wipers:
1A intermittent (INT) –
front wipers operate
intermittently and can be further adjusted by
twisting the time control ring
1B .
02 Low Speed (LO) –
continuous low-speed
operation of front wipers.
03 High Speed (HI) –
continuous high-speed
operation of front wipers.
04 Mist (MIST) – Push the lever up for one sweep
of the front wipers.
05 Rear Wiper (REAR) – Twist the end section to operate the first (INT) or second (ON)
speed settings for the rear wiper.
The washer function activates the washer fluid and several sweeps of th\
e wipers:
• For FRONT WASHER, pull the lever toward you.
• For REAR WASHER, push the lever away from you.
1B
04
05
1A
02
03
Page 12 of 20
10
VEHICLE INFORMATION DISPLAY
When the ignition switch is placed in the On position, the vehicle
information display shows the following information:
Outside air temperature (if so equipped)
c ontinuously Variable Transmission ( cVT) position indicator
(if so equipped)
Odometer/ instrument brightness control
Twin trip odometer/Trip computer
To display modes of the trip computer press the trip button
01
to highlight the desired mode. Press the trip button 01 for
1 second to reset the information in the highlighted mode.01
REARVIEW MONITOR (if so equipped)
When the shift lever is moved to the R (R eVe RS e) position, the monitor
display will automatically change to show the area directly behind the
vehicle. The colored lines on the display screen indicate approximate
distances to objects.
Red 1.5 ft (0.5 m); Yellow 3 ft (1 m); Green 7 ft (2 m) and 10 ft (3 m).
CLOCK SET/D ISPLAY ADJUSTMENT
Press the ENTER/SETTINGS button
10 until the on-screen clock mode is displayed, then
turn the TUNE/SCROLL dial
11 to toggle between clock display on or off.
To adjust the time, press the ENTER/SETTINGS button repeatedly until the clock Adjust mode
is displayed on the screen.
The hours will begin blinking, adjust by turning the TUNE/SCROLL dial left or right and press
the setting control knob.
The minutes will begin blinking, adjust by turning the TUNE/SCROLL dial left or right and
press the ENTER/SETTINGS button to set. The display will return to the regular clock
display after 10 seconds.
USB JACK WITH iPod® CONNECTIVITY (if so equipped)
The USB input jack is located in the lower center of the instrument panel.
To connect a compatible u SB device, open the protective cover on the
USB jack, and insert the uSB device into the jack. When a compatible
storage device is plugged into the jack, compatible audio or video
files on the storage device can be played through the vehicle’s audio
system. Video file playback is only available on vehicles with navigation.
To connect an iPod®, open the USB jack cover, connect the u SB end of the cable supplied
with your iPod® to the jack, then connect the other end of the cable to the iPod®. When the
ignition switch is in the A cc or On position, the battery of your iPod® (if compatible) will
charge while connected to your vehicle.
Page 14 of 20
12
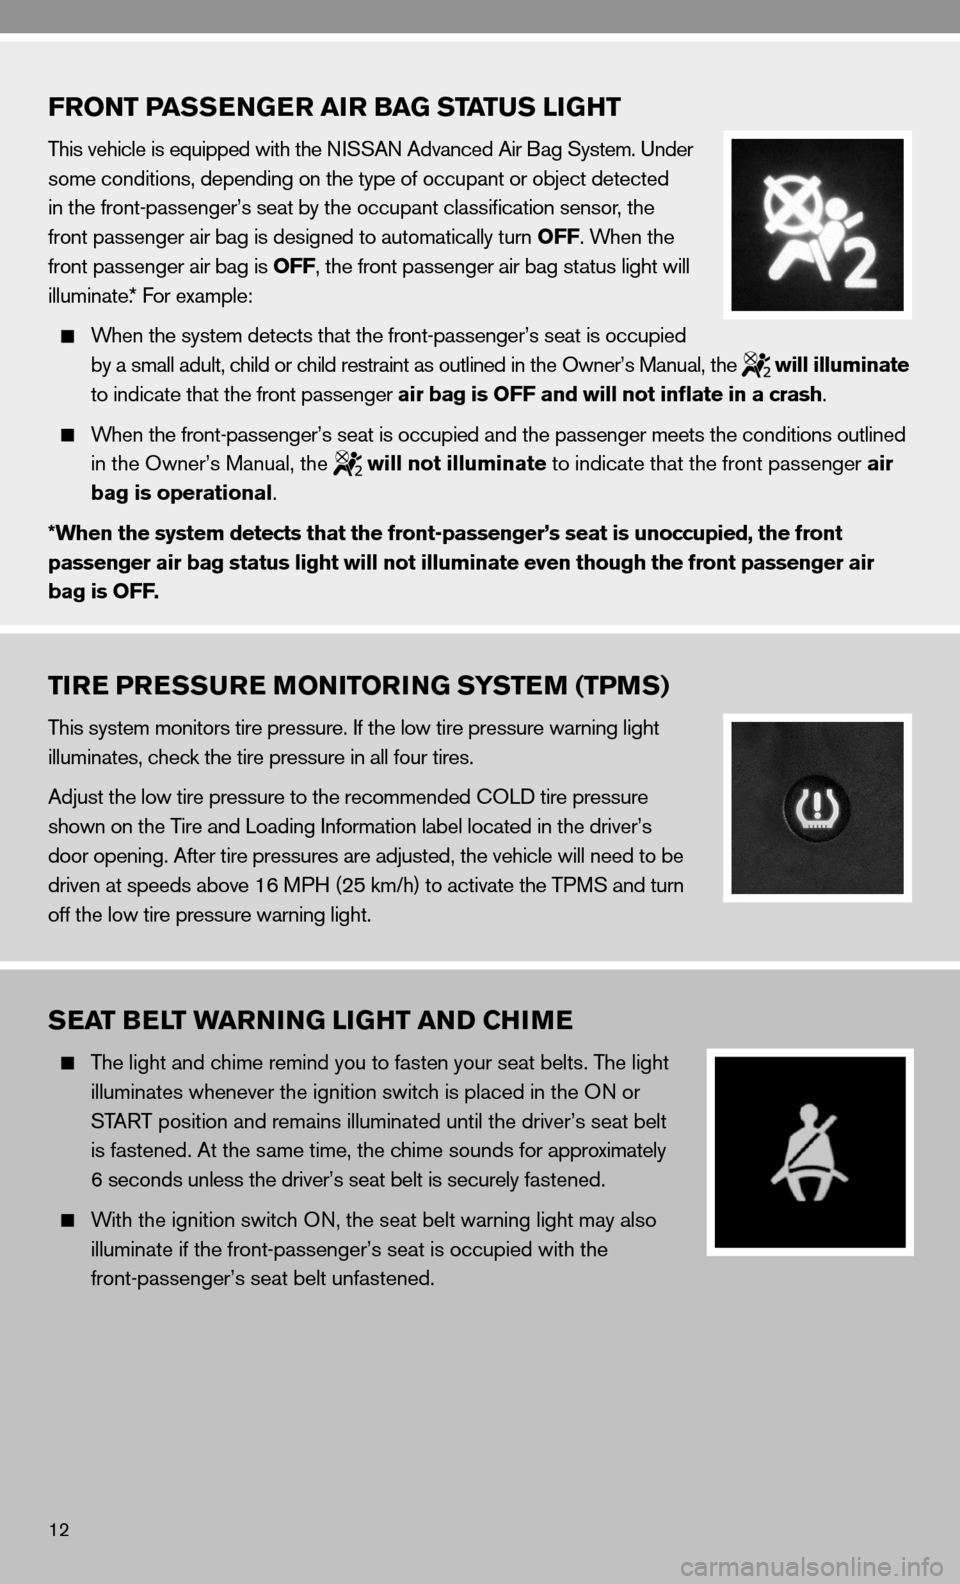
FRONT PASSENGER AIR BAG STATUS LIGHT
This vehicle is equipped with the niSSAn Advanced Air Bag System. under
some conditions, depending on the type of occupant or object detected
in the front-passenger’s seat by the occupant classification sensor, the
front passenger air bag is designed to automatically turn OFF. When the
front passenger air bag is OFF, the front passenger air bag status light will
illuminate.* f or example:
When the system detects that the front-passenger’s seat is occupied
by a small adult, child or child restraint as outlined in the Owner’s Manual, the
will illuminate
to indicate that the front passenger air bag is OFF and will not inflate in a crash.
When the front-passenger’s seat is occupied and the passenger meets the conditions outlined
in the Owner’s Manual, the
will not illuminate to indicate that the front passenger air
bag is operational.
*When the system detects that the front-passenger’s seat is unoccupied, the front
passenger air bag status light will not illuminate even though the front passenger air
bag is OFF.
TIRE PRESSURE MONITORING SYSTEM (TPMS)
This system monitors tire pressure. if the low tire pressure warning light
illuminates, check the tire pressure in all four tires.
Adjust the low tire pressure to the recommended cOL d tire pressure
shown on the Tire and Loading information label located in the driver’s
door opening. After tire pressures are adjusted, the vehicle will need to be
driven at speeds above 16 MPH (25 km/h) to activate the TPMS and turn
off the low tire pressure warning light.
SEAT BELT WARNING LIGHT AND CHIME
The light and chime remind you to fasten your seat belts. The light
illuminates whenever the ignition switch is placed in the O n or
START position and remains illuminated until the driver’s seat belt
is fastened. At the same time, the chime sounds for approximately
6 seconds unless the driver’s seat belt is securely fastened.
With the ignition switch O n, the seat belt warning light may also
illuminate if the front-passenger’s seat is occupied with the
front-passenger’s seat belt unfastened.
Page 17 of 20
To increase or decrease the volume of the voice prompts, press the VOL (volume) control
switch
or
on the steering wheel or turn the POWER/VOLUME knob on the
audio system while the system is responding.
if the Voice Recognition system does not recognize your voice commands, train th\
e system
using the Speaker Adaptation Mode. See your Owner’s Manual for detailed information.
Some commands are not available while the vehicle is in motion.
The “Help” command can be used in any menu to hear a list of availa\
ble commands.
Please refer to the cellular phone manufacturer’s Owner’s Manual for detailed information
regarding your Bluetooth® phone.
For recommended phones and detailed instructions, please visit
www.nissanusa.com/bluetooth.
cOnnec TinG YOu R PHOne
To use the hands-free feature, you need to set up, or connect, the system to recognize your
compatible cellular phone(s). five compatible Bluetooth®-enabled phones can be connected.
After setup, the system automatically connects with a connected phone wh\
en the ignition is in the
A cc or O n position, as long as the phone is on and in the vehicle.
n OTe: Some cellular phones require the user to enable the automatic reconnec\
tion feature. Please
refer to the cellular phone manufacturer’s Owner’s Manual for Blue\
tooth
® setup information.
cOnnec TinG PROcedu Re
n OTe: The vehicle must be stationary when connecting the phone.
1. Press the
button on the steering wheel. The system announces the available commands.
2. Say “connect Phone.”
3. The system acknowledges the previous command and announces the next set of available
commands. Say “Add phone.”
4. initiate connecting from the phone.
The connecting procedure varies according to each cellular phone model. for detailed
connecting instructions and a list of compatible phones, please visit
www.nissanusa.com/bluetooth.
When prompted for a Passkey code, enter “1234” from the handset. (The Passkey code
is assigned by ni SSAn and cannot be changed.)
5. Say a name for the phone when the system asks you to provide one. You can give the phone
a name of your choice.
MAkin G A PHO ne c ALL
1. Press the
button.
2. After the tone, do one of the following:
Say “call.” After the system responds, say the name of the person in the phonebook.
Say “ call Phone number.” After waiting for the tone, say [number]. for example, say “ call
Phone number.” After waiting for the tone, say “123-456-7891.”
Say “Redial” to redial the previous phone number.