2010 NISSAN CUBE change wheel
[x] Cancel search: change wheelPage 3 of 20

Remote keyless entry System (if so equipped) .........................2
ni SSAn intelligent k ey™ (if so equipped) ............................. 2
Automatic door Locks ............................................. 4
Windshield Wiper/Washer Switch ................................... 4
Headlight and Turn Signal control ................................... 5
Steering Wheel Switches for Audio control/Bluetooth
® (if so equipped) ... 5
cruise control (if so equipped) ...................................... 6
Automatic climate control (if so equipped) ............................6
f M/AM/SAT* Radio with cd Player (if so equipped) ....................8
clock Set/ display Adjustment ...................................... 10
u SB Jack with iPod
® connectivity (if so equipped) .................... 10
Vehicle information display ........................................ 10
RearView Monitor (if so equipped) .................................. 10
continuously Variable Transmission (cVT) (if so equipped) ..............11
6-Speed Manual Transmission (if so equipped) ........................11
Vehicle dynamic control (Vdc) Off Switch ...........................11
front Passenger Air Bag Status Light ............................... 12
Tire Pressure Monitoring System (TPMS) ............................ 12
Seat Belt Warning Light and chime ................................. 12
child Safety Rear door Locks ...................................... 13
fuel-filler door Release ........................................... 13
Tilt Steering column .............................................. 13
front Seat Adjustments ........................................... 13
Rear Seat Adjustments ........................................... 14
Bluetooth
® Hands-free Phone System (if so equipped) ................. 14
This easy-to-use Quick Reference Guide is intended to help you more fully
appreciate some of the unique features and functions of your new vehicle.
However, it is not intended to replace your Owner’s Manual. The Owner’s
Manual contains more detailed information to help you better understand
the important safety warnings, features, operation and maintenance of your
vehicle. All information, specifications, photographs and illustrations in this
publication are those in effect at the time of printing. niSSA n reserves the
right to change specifications or design without notice and without obligation.
TABLe O f cOnTenTS
Page 7 of 20

STEERING WHEEL SWITCHES FOR AUDIO CONTROL/
BLUETOOTH® (if so equipped)
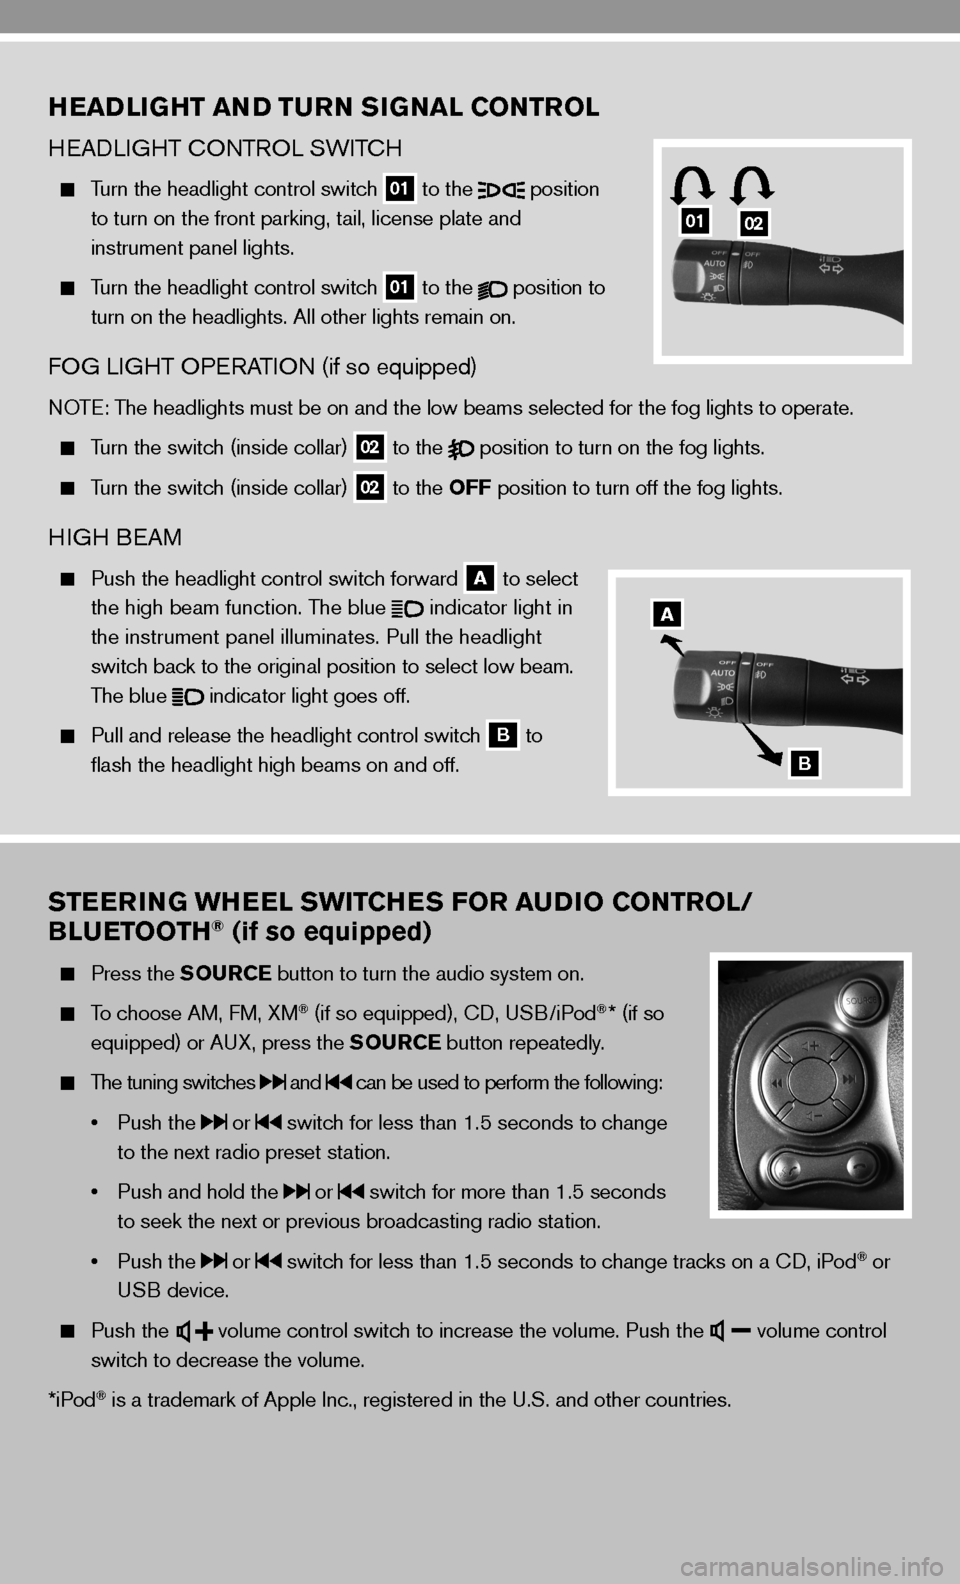
Press the SOURCE button to turn the audio system on.
To choose AM, f M, XM® (if so equipped), cd, u SB/iPod®* (if so
equipped) or A uX, press the SOURCE button repeatedly.
The tuning switches and can be used to perform the following:
• Push the
or switch for less than 1.5 seconds to change
to the next radio preset station.
• Push and hold the
or switch for more than 1.5 seconds
to seek the next or previous broadcasting radio station.
• Push the
or switch for less than 1.5 seconds to change tracks on a cd, iPod® or
u SB device.
Push the
volume control switch to increase the volume. Push the volume control
switch to decrease the volume.
*iPod
® is a trademark of Apple inc., registered in the u.S. and other countries.
HEADLIGHT AND TURN SIGNAL CONTROL
H eAd LiGHT c OnTROL SW iTc H
Turn the headlight control switch
01 to the
position
to turn on the front parking, tail, license plate and
instrument panel lights.
Turn the headlight control switch
01 to the
position to
turn on the headlights. All other lights remain on.
fOG Li GHT OP eRATi On (if so equipped)
nOTe: The headlights must be on and the low beams selected for the fog lights t\
o operate.
Turn the switch (inside collar)
02 to the
position to turn on the fog lights.
Turn the switch (inside collar)
02 to the OFF position to turn off the fog lights.
H
iGH B eAM
Push the headlight control switch forward
A to select
the high beam function. The blue
indicator light in
the instrument panel illuminates. Pull the headlight
switch back to the original position to select low beam.
The blue
indicator light goes off.
Pull and release the headlight control switch
B to
flash the headlight high beams on and off.
0102
A
B
Page 17 of 20

To increase or decrease the volume of the voice prompts, press the VOL (volume) control
switch
or
on the steering wheel or turn the POWER/VOLUME knob on the
audio system while the system is responding.
if the Voice Recognition system does not recognize your voice commands, train th\
e system
using the Speaker Adaptation Mode. See your Owner’s Manual for detailed information.
Some commands are not available while the vehicle is in motion.
The “Help” command can be used in any menu to hear a list of availa\
ble commands.
Please refer to the cellular phone manufacturer’s Owner’s Manual for detailed information
regarding your Bluetooth® phone.
For recommended phones and detailed instructions, please visit
www.nissanusa.com/bluetooth.
cOnnec TinG YOu R PHOne
To use the hands-free feature, you need to set up, or connect, the system to recognize your
compatible cellular phone(s). five compatible Bluetooth®-enabled phones can be connected.
After setup, the system automatically connects with a connected phone wh\
en the ignition is in the
A cc or O n position, as long as the phone is on and in the vehicle.
n OTe: Some cellular phones require the user to enable the automatic reconnec\
tion feature. Please
refer to the cellular phone manufacturer’s Owner’s Manual for Blue\
tooth
® setup information.
cOnnec TinG PROcedu Re
n OTe: The vehicle must be stationary when connecting the phone.
1. Press the
button on the steering wheel. The system announces the available commands.
2. Say “connect Phone.”
3. The system acknowledges the previous command and announces the next set of available
commands. Say “Add phone.”
4. initiate connecting from the phone.
The connecting procedure varies according to each cellular phone model. for detailed
connecting instructions and a list of compatible phones, please visit
www.nissanusa.com/bluetooth.
When prompted for a Passkey code, enter “1234” from the handset. (The Passkey code
is assigned by ni SSAn and cannot be changed.)
5. Say a name for the phone when the system asks you to provide one. You can give the phone
a name of your choice.
MAkin G A PHO ne c ALL
1. Press the
button.
2. After the tone, do one of the following:
Say “call.” After the system responds, say the name of the person in the phonebook.
Say “ call Phone number.” After waiting for the tone, say [number]. for example, say “ call
Phone number.” After waiting for the tone, say “123-456-7891.”
Say “Redial” to redial the previous phone number.