2010 NISSAN CUBE change time
[x] Cancel search: change timePage 3 of 20
Remote keyless entry System (if so equipped) .........................2
ni SSAn intelligent k ey™ (if so equipped) ............................. 2
Automatic door Locks ............................................. 4
Windshield Wiper/Washer Switch ................................... 4
Headlight and Turn Signal control ................................... 5
Steering Wheel Switches for Audio control/Bluetooth
® (if so equipped) ... 5
cruise control (if so equipped) ...................................... 6
Automatic climate control (if so equipped) ............................6
f M/AM/SAT* Radio with cd Player (if so equipped) ....................8
clock Set/ display Adjustment ...................................... 10
u SB Jack with iPod
® connectivity (if so equipped) .................... 10
Vehicle information display ........................................ 10
RearView Monitor (if so equipped) .................................. 10
continuously Variable Transmission (cVT) (if so equipped) ..............11
6-Speed Manual Transmission (if so equipped) ........................11
Vehicle dynamic control (Vdc) Off Switch ...........................11
front Passenger Air Bag Status Light ............................... 12
Tire Pressure Monitoring System (TPMS) ............................ 12
Seat Belt Warning Light and chime ................................. 12
child Safety Rear door Locks ...................................... 13
fuel-filler door Release ........................................... 13
Tilt Steering column .............................................. 13
front Seat Adjustments ........................................... 13
Rear Seat Adjustments ........................................... 14
Bluetooth
® Hands-free Phone System (if so equipped) ................. 14
This easy-to-use Quick Reference Guide is intended to help you more fully
appreciate some of the unique features and functions of your new vehicle.
However, it is not intended to replace your Owner’s Manual. The Owner’s
Manual contains more detailed information to help you better understand
the important safety warnings, features, operation and maintenance of your
vehicle. All information, specifications, photographs and illustrations in this
publication are those in effect at the time of printing. niSSA n reserves the
right to change specifications or design without notice and without obligation.
TABLe O f cOnTenTS
Page 5 of 20
AcceSSORY POSi TiOn
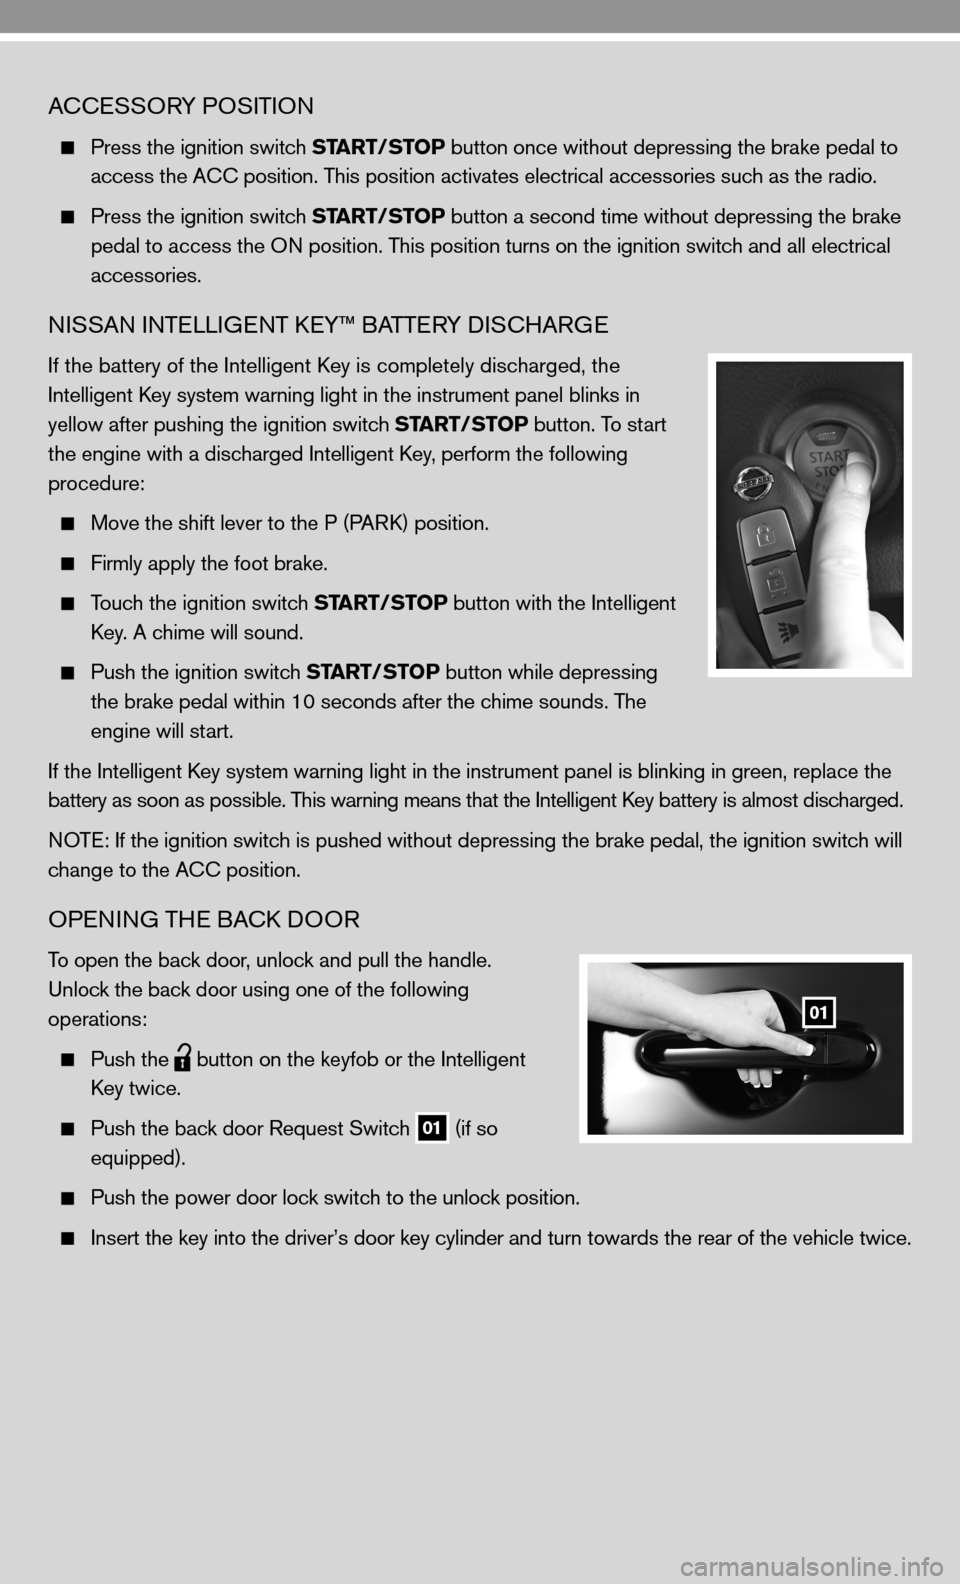
Press the ignition switch START/STOP button once without depressing the brake pedal to
access the A cc position. This position activates electrical accessories such as the radio.
Press the ignition switch START/STOP button a second time without depressing the brake
pedal to access the O n position. This position turns on the ignition switch and all electrical
accessories.
niSSAn inTe LLiGenT keY™ BATTe RY diSc HARG e
if the battery of the intelligent k ey is completely discharged, the
i ntelligent key system warning light in the instrument panel blinks in
yellow after pushing the ignition switch START/STOP button. To start
the engine with a discharged intelligent key, perform the following
procedure:
Move the shift lever to the P (PAR k) position.
firmly apply the foot brake.
Touch the ignition switch START/STOP button with the intelligent
k ey. A chime will sound.
Push the ignition switch START/STOP button while depressing
the brake pedal within 10 seconds after the chime sounds. The
engine will start.
if the intelligent k ey system warning light in the instrument panel is blinking in green, re\
place the
battery as soon as possible. This warning means that the intelligent k ey battery is almost discharged.
n OTe: if the ignition switch is pushed without depressing the brake pedal, the ignition switch will
change to the A cc position.
OPenin G THe BAck d OOR
To open the back door, unlock and pull the handle.
u nlock the back door using one of the following
operations:
Push the
button on the keyfob or the
intelligent
k ey twice.
Push the back door Request Switch
01 (if so
equipped).
Push the power door lock switch to the unlock position.
insert the key into the driver’s door key cylinder and turn towards th\
e rear of the vehicle twice.
01
Page 6 of 20
4
AUTOMATIC DOOR LOCKS
All doors lock automatically when the vehicle speed reaches 15 MPH (24 km/h).
All doors unlock automatically when the ignition switch is placed in the O ff position
(intelligent key equipped vehicles) or when the key is removed from the ignition switch
(mechanical key equipped vehicles).
The automatic unlock function can be deactivated or activated. To deactivate or activate the
automatic door unlock system, perform the following procedure:
1. close all doors.
2. Place the ignition switch in the O n position.
3. Within 20 seconds of performing Step 2, push and hold the power door lock switch to the
position (un
LOck) for more than 5 seconds.
4. When activated, the hazard indicator will flash twice. When deactivated, the hazard
indicator will flash once.
5. The ignition switch must be placed in the O ff and On position again between each setting
change.
When the automatic door unlock system is deactivated, the doors do not unlock when the ignition
switch is placed in the O ff position ( intelligent key equipped vehicles) or when the key is removed
from the ignition switch (mechanical key equipped vehicles). To unlock the door manually, use the
inside lock knob or the power door lock switch (driver’s or front-passenger’s side).
WINDSHIELD WIPER/WASHER SWITCH
The ignition switch must be in the O n position to
activate the windshield wipers.
Move the lever to the following positions to operate
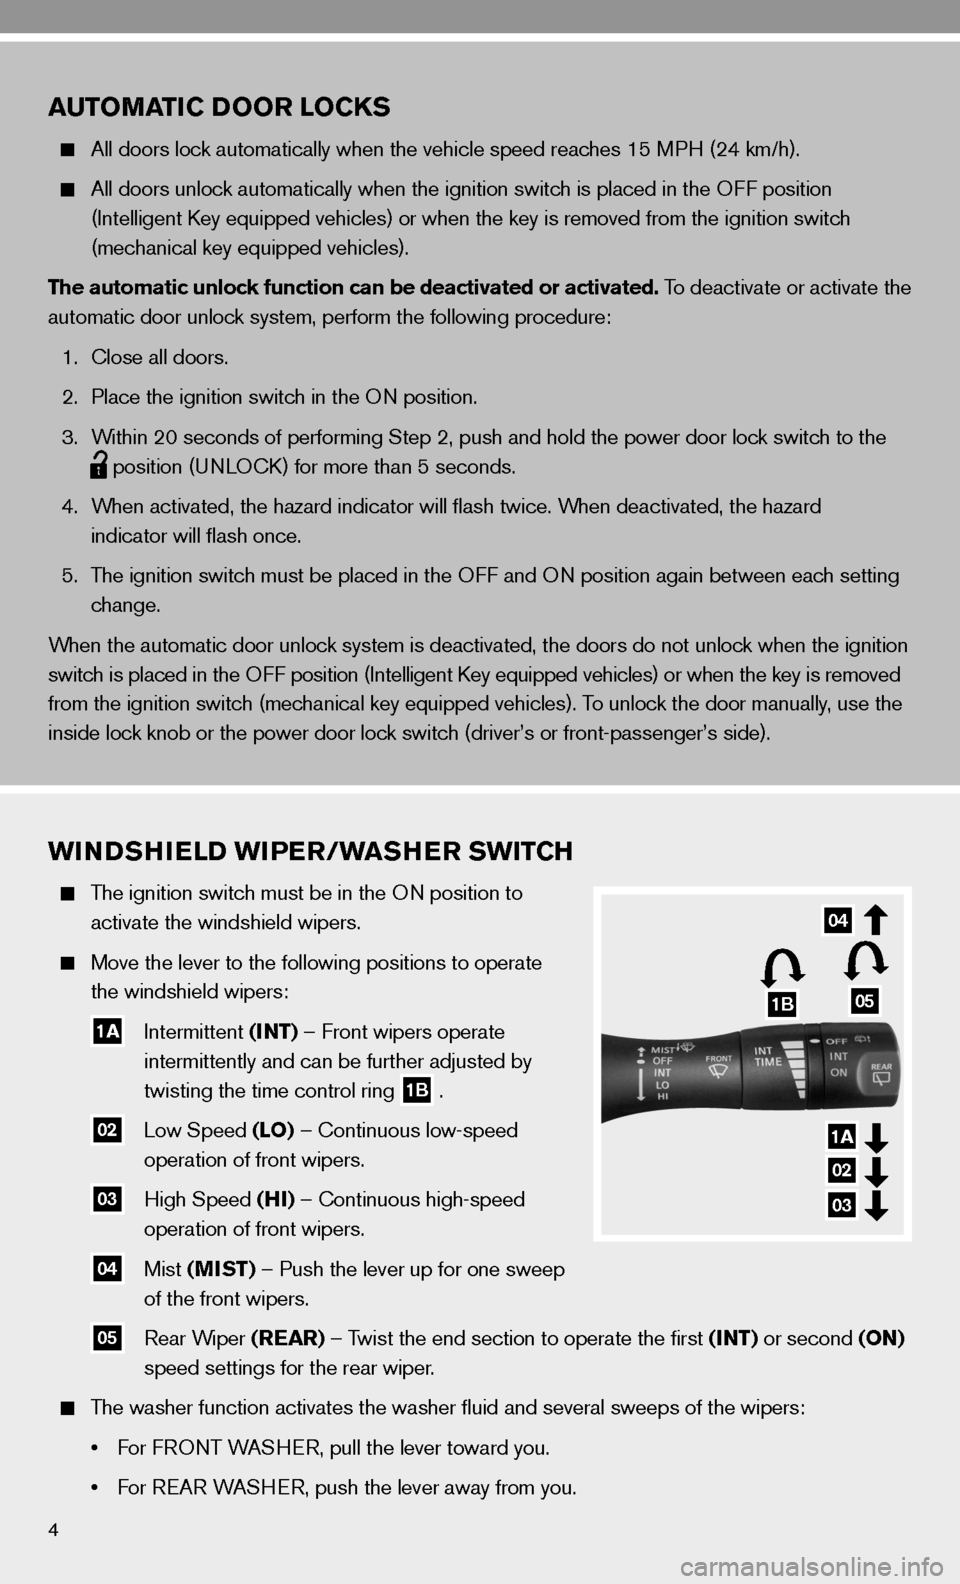
the windshield wipers:
1A intermittent (INT) –
front wipers operate
intermittently and can be further adjusted by
twisting the time control ring
1B .
02 Low Speed (LO) –
continuous low-speed
operation of front wipers.
03 High Speed (HI) –
continuous high-speed
operation of front wipers.
04 Mist (MIST) – Push the lever up for one sweep
of the front wipers.
05 Rear Wiper (REAR) – Twist the end section to operate the first (INT) or second (ON)
speed settings for the rear wiper.
The washer function activates the washer fluid and several sweeps of th\
e wipers:
• For FRONT WASHER, pull the lever toward you.
• For REAR WASHER, push the lever away from you.
1B
04
05
1A
02
03
Page 12 of 20
10
VEHICLE INFORMATION DISPLAY
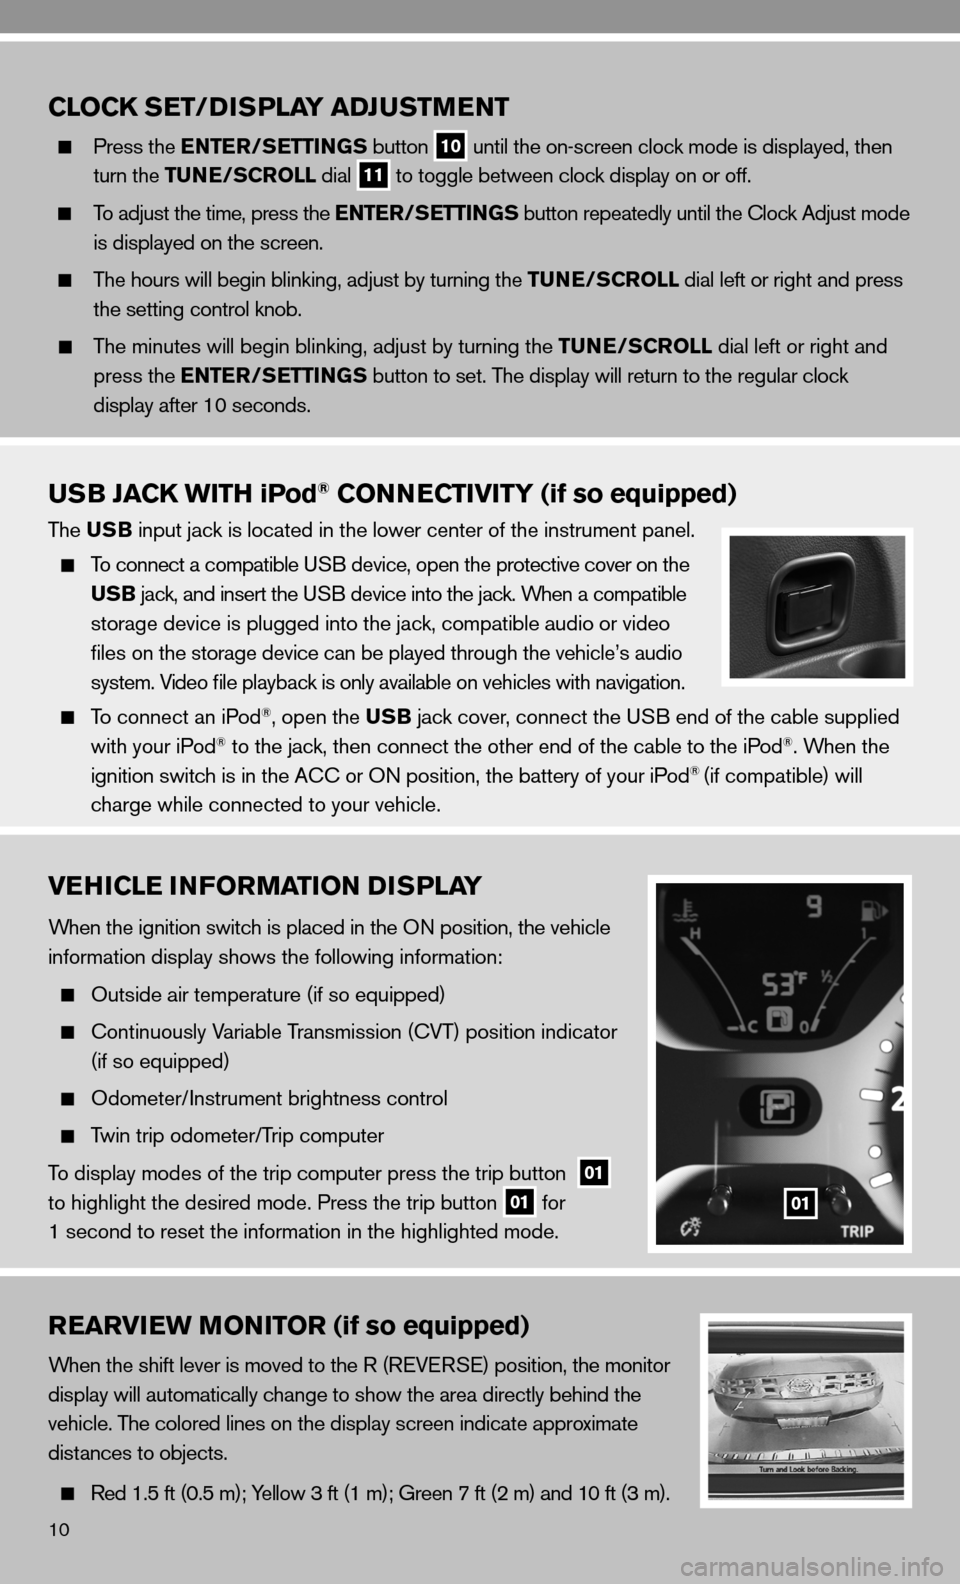
When the ignition switch is placed in the On position, the vehicle
information display shows the following information:
Outside air temperature (if so equipped)
c ontinuously Variable Transmission ( cVT) position indicator
(if so equipped)
Odometer/ instrument brightness control
Twin trip odometer/Trip computer
To display modes of the trip computer press the trip button
01
to highlight the desired mode. Press the trip button 01 for
1 second to reset the information in the highlighted mode.01
REARVIEW MONITOR (if so equipped)
When the shift lever is moved to the R (R eVe RS e) position, the monitor
display will automatically change to show the area directly behind the
vehicle. The colored lines on the display screen indicate approximate
distances to objects.
Red 1.5 ft (0.5 m); Yellow 3 ft (1 m); Green 7 ft (2 m) and 10 ft (3 m).
CLOCK SET/D ISPLAY ADJUSTMENT
Press the ENTER/SETTINGS button
10 until the on-screen clock mode is displayed, then
turn the TUNE/SCROLL dial
11 to toggle between clock display on or off.
To adjust the time, press the ENTER/SETTINGS button repeatedly until the clock Adjust mode
is displayed on the screen.
The hours will begin blinking, adjust by turning the TUNE/SCROLL dial left or right and press
the setting control knob.
The minutes will begin blinking, adjust by turning the TUNE/SCROLL dial left or right and
press the ENTER/SETTINGS button to set. The display will return to the regular clock
display after 10 seconds.
USB JACK WITH iPod® CONNECTIVITY (if so equipped)
The USB input jack is located in the lower center of the instrument panel.
To connect a compatible u SB device, open the protective cover on the
USB jack, and insert the uSB device into the jack. When a compatible
storage device is plugged into the jack, compatible audio or video
files on the storage device can be played through the vehicle’s audio
system. Video file playback is only available on vehicles with navigation.
To connect an iPod®, open the USB jack cover, connect the u SB end of the cable supplied
with your iPod® to the jack, then connect the other end of the cable to the iPod®. When the
ignition switch is in the A cc or On position, the battery of your iPod® (if compatible) will
charge while connected to your vehicle.
Page 13 of 20
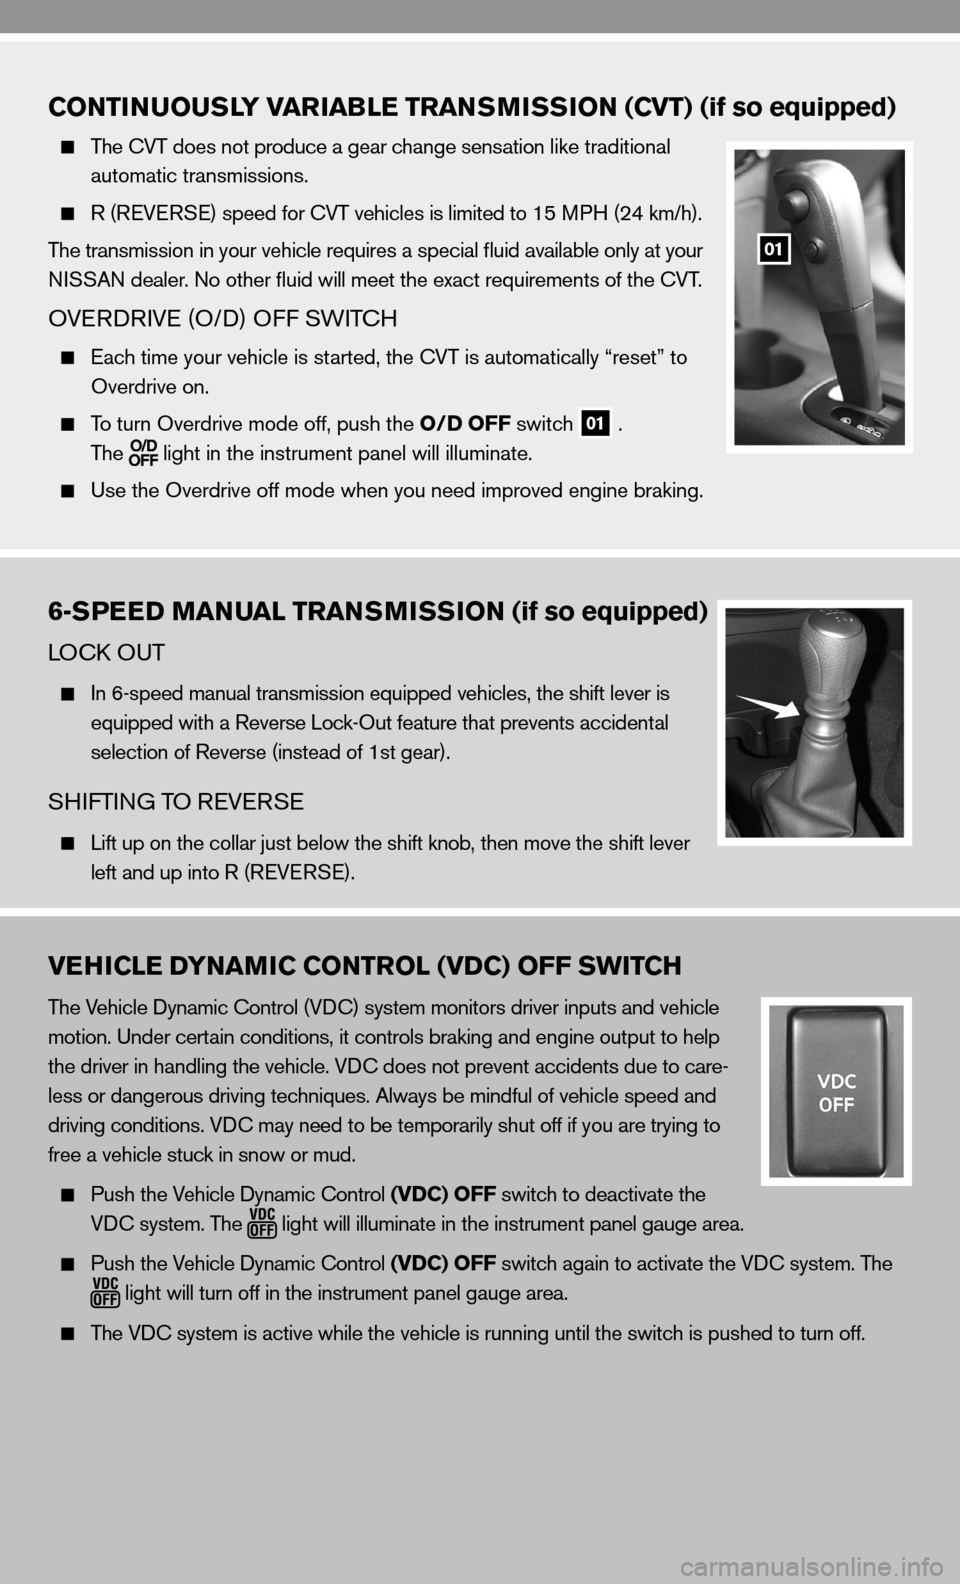
CONTINUOUSLY VARIABLE TRANSMISSION (CVT) (if so equipped)
The cVT does not produce a gear change sensation like traditional
automatic transmissions.
R (R eVeRSe) speed for cVT vehicles is limited to 15 MPH (24 km/h).
The transmission in your vehicle requires a special fluid available only at your
ni SSAn dealer. no other fluid will meet the exact requirements of the cVT.
OVe Rd RiVe (O/ d) Off SW iTc H
e ach time your vehicle is started, the cVT is automatically “reset” to
Overdrive on.
To turn Overdrive mode off, push the O/D OFF switch
01 .
The
light in the instrument panel will illuminate.
use the Overdrive off mode when you need improved engine braking.
01
VEHICLE DYNAMIC CONTROL (VDC) OFF SWITCH
The Vehicle dynamic control (V dc) system monitors driver inputs and vehicle
motion. under certain conditions, it controls braking and engine output to help
the driver in handling the vehicle. Vdc does not prevent accidents due to care-
less or dangerous driving techniques. Always be mindful of vehicle speed and
driving conditions. V dc may need to be temporarily shut off if you are trying to
free a vehicle stuck in snow or mud.
Push the Vehicle dynamic control (VDC) OFF switch to deactivate the
Vdc system. The
light will illuminate in the instrument panel gauge area.
Push the Vehicle dynamic control (VDC) OFF switch again to activate the V dc system. The
light will turn off in the instrument panel gauge area.
The Vdc system is active while the vehicle is running until the switch is pushed to turn off.
6-SPEED MANUAL TRANSMISSION (if so equipped)
LO ck O uT
in 6-speed manual transmission equipped vehicles, the shift lever is
equipped with a Reverse Lock-Out feature that prevents accidental
selection of Reverse (instead of 1st gear).
SHifTin G TO R eVeRSe
Lift up on the collar just below the shift knob, then move the shift lever
left and up into R (R eVeRSe).