Page 244 of 472

*When the AM·FM/SAT button is
pressed, the satellite radio mode will be
skipped unless an optional satellite re-
ceiver and antenna are installed and an
XM�satellite radio service subscription
is active. Satellite radio is not available
in Alaska, Hawaii and Guam.
FM/AM/SAT RADIO WITH
COMPACT DISC (CD) PLAYER (if so
equipped)
For all operation precautions, see “Audio opera-
tion precautions” earlier in this section.
The satellite radio mode will be skipped unless an
optional satellite receiver and antenna are in-
stalled and an XM� satellite radio service sub-
scription is active. Satellite radio is not available
in Alaska, Hawaii and Guam.
Audio main operation
VOL/ON·OFF control:
Place the ignition switch in the ACC or ON
position and then push the VOL/ON·OFF control
knob while the system is off to call up the mode
(radio or CD) which was playing immediately
before the system was turned off.
To turn the system off, press the VOL/ON·OFF
control knob. Turn the VOL/ON·OFF control knob to adjust the
volume.
This vehicle has Speed Sensitive Volume (SSV)
for audio. The audio volume changes as the driv-
ing speed changes.
AUDIO control knob (Bass, Treble, Balance
and Fade):
Press the AUDIO control knob to change the
mode as follows:
Bass
→Treble →Balance →Fade
To adjust Bass, Treble, Balance and Fade, press
the AUDIO control knob until the desired mode
appears in the display. Turn the tuning knob to
adjust Bass and Treble to the desired level. You
can also use the tuning knob to adjust Fade and
Balance modes. Fade adjusts the sound level
between the front and rear speakers and Balance
adjusts the sound between the right and left
speakers.
Once you have adjusted the sound quality to the
desired level, press the AUDIO control knob re-
peatedly until the radio or CD display reappears.
Otherwise, the radio or CD display will automati-
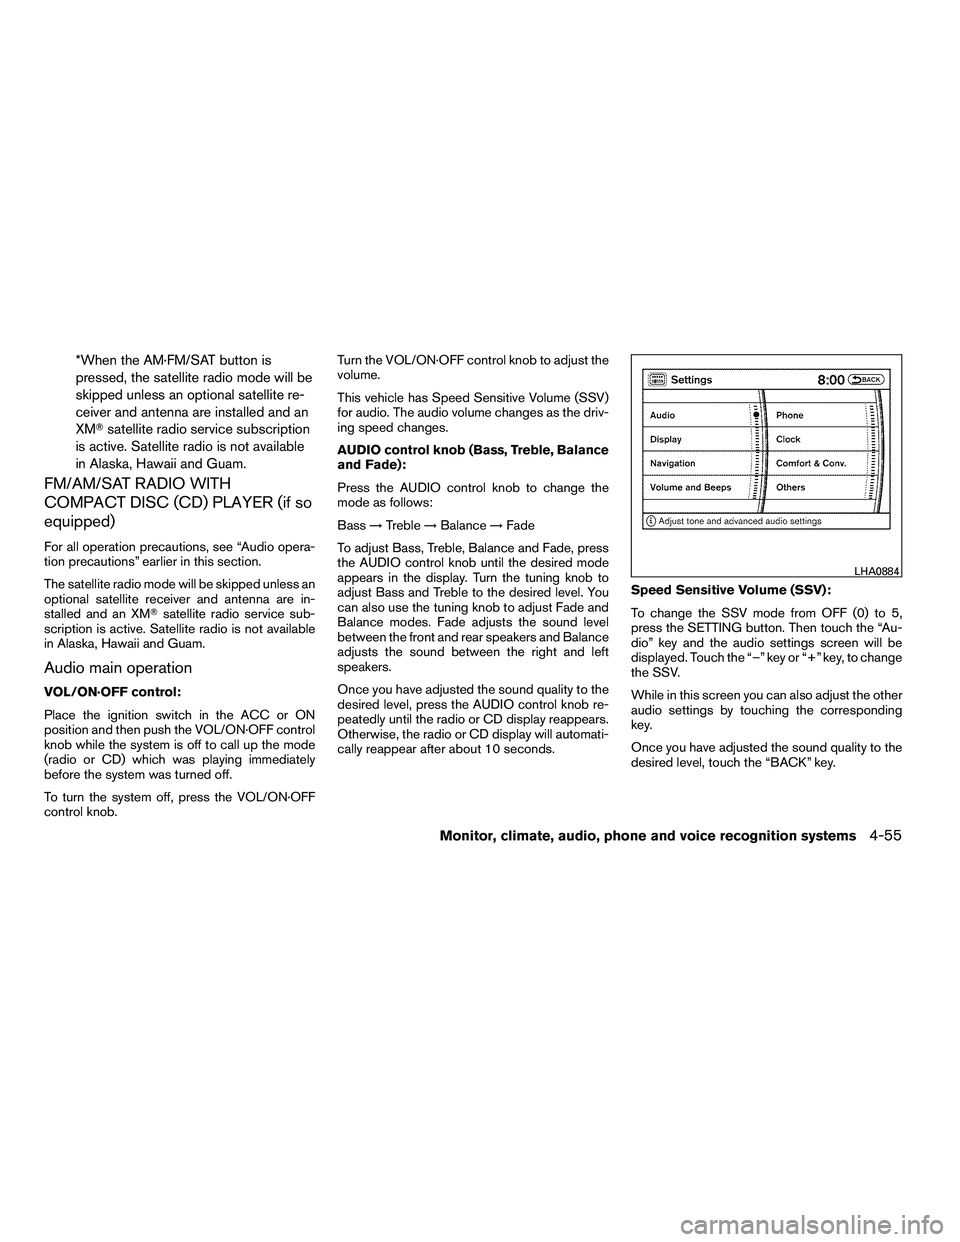
cally reappear after about 10 seconds. Speed Sensitive Volume (SSV):
To change the SSV mode from OFF (0) to 5,
press the SETTING button. Then touch the “Au-
dio” key and the audio settings screen will be
displayed. Touch the “–” key or “+” key, to change
the SSV.
While in this screen you can also adjust the other
audio settings by touching the corresponding
key.
Once you have adjusted the sound quality to the
desired level, touch the “BACK” key.
Page 246 of 472

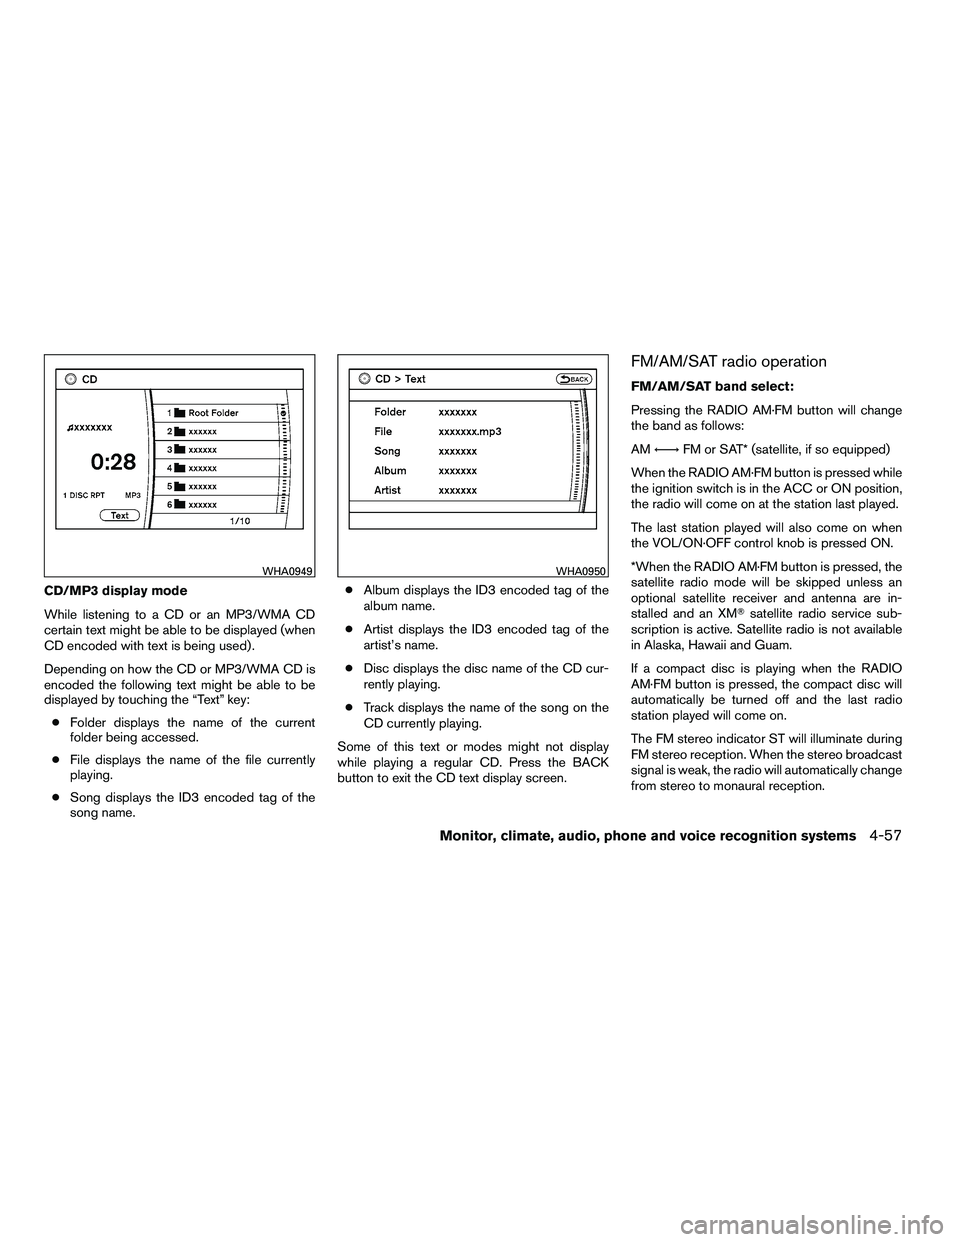
CD/MP3 display mode
While listening to a CD or an MP3/WMA CD
certain text might be able to be displayed (when
CD encoded with text is being used) .
Depending on how the CD or MP3/WMA CD is
encoded the following text might be able to be
displayed by touching the “Text” key:● Folder displays the name of the current
folder being accessed.
● File displays the name of the file currently
playing.
● Song displays the ID3 encoded tag of the
song name. ●
Album displays the ID3 encoded tag of the
album name.
● Artist displays the ID3 encoded tag of the
artist’s name.
● Disc displays the disc name of the CD cur-
rently playing.
● Track displays the name of the song on the
CD currently playing.
Some of this text or modes might not display
while playing a regular CD. Press the BACK
button to exit the CD text display screen.
FM/AM/SAT radio operation
FM/AM/SAT band select:
Pressing the RADIO AM·FM button will change
the band as follows:
AM ←→ FM or SAT* (satellite, if so equipped)
When the RADIO AM·FM button is pressed while
the ignition switch is in the ACC or ON position,
the radio will come on at the station last played.
The last station played will also come on when
the VOL/ON·OFF control knob is pressed ON.
*When the RADIO AM·FM button is pressed, the
satellite radio mode will be skipped unless an
optional satellite receiver and antenna are in-
stalled and an XM� satellite radio service sub-
scription is active. Satellite radio is not available
in Alaska, Hawaii and Guam.
If a compact disc is playing when the RADIO
AM·FM button is pressed, the compact disc will
automatically be turned off and the last radio
station played will come on.
The FM stereo indicator ST will illuminate during
FM stereo reception. When the stereo broadcast
signal is weak, the radio will automatically change
from stereo to monaural reception.
Page 259 of 472
●Title Text Priority:
Set the priority to CDDB (Compact Disc
Data Base) to acquire track information from
the Gracenote� Database or set to CD
TEXT to acquire the information from CDs.
● Delete ALL Music Box Data:
Delete all music data stored on the hard-
disk.
Gracenote�
NOTE:
● The information contained in the
Gracenote� Database is not fully guaran-
teed.
● The service of the Gracenote� Database on
the Internet may be stopped without prior
notice for maintenance.
Page 260 of 472

web page for the Gracenote Privacy Policy for
the Gracenote MusicID Service.
The Gracenote Software and each item of
Gracenote Data are licensed to you “AS IS.”
Gracenote makes no representations or warran-
ties, express or implied, regarding the accuracy
of any Gracenote Data from in the Gracenote
Servers. Gracenote reserves the right to delete
data from the Gracenote Servers or to change
data categories for any cause that Gracenote
deems sufficient. No warranty is made that the
Gracenote Software or Gracenote Servers are
error-free or that functioning of Gracenote Soft-
ware or Gracenote Servers will be uninterrupted.
Gracenote is not obligated to provide you with
new enhanced or additional data types or cat-
egories that Gracenote may provide in the future
and is free to discontinue its online services at
any time.
GRACENOTE DISCLAIMS ALL WARRANTIES
EXPRESS OR IMPLIED, INCLUDING, BUT NOT
LIMITED TO, IMPLIED WARRANTIES OF MER-
CHANTABILITY, FITNESS FOR A PARTICULAR
PURPOSE, TITLE, AND NONINFRINGEMENT.
GRACENOTE DOES NOT WARRANT THE RE-
SULTS THAT WILL BE OBTAINED BY YOUR
USE OF THE GRACENOTE SOFTWARE OR
ANY GRACENOTE SERVER. IN NO CASE
WILL GRACENOTE BE LIABLE FOR ANYCONSEQUENTIAL OR INCIDENTAL DAM-
AGES OR FOR ANY LOST PROFITS OR LOST
REVENUES.
Copyright:
Music recognition technology and related data
are provided by Gracenote�. Gracenote is the
industry standard in music recognition technol-
ogy and related content delivery. For more infor-
mation visit www.gracenote.com.
CD and music-related data from Gracenote, Inc.,
copyright © 2000-2006 Gracenote. Gracenote
Software, copyright © 2000-2006 Gracenote.
This product and service may practice one or
more of the following U.S. Patents: #5,987,525;
#6,061,680; #6,154,773, #6,161,132,
#6,230,192, #6,230,207, #6,240,459,
#6,330,593, and other patents issued or pend-
ing. Some services supplied under license from
Open Globe, Inc. for U.S. Patent: #6,304,523.
Gracenote and CDDB are registered trademarks
of Gracenote. The Gracenote logo and logotype,
and the “Powered by Gracenote” logo are trade-
marks of Gracenote.
CD/CF (CompactFlash�) CARE AND
CLEANING
CD:
● Handle a CD by its edges. Do not bend the
disc. Never touch the surface of the disc.
● Always place the discs in the storage case
when they are not being used.
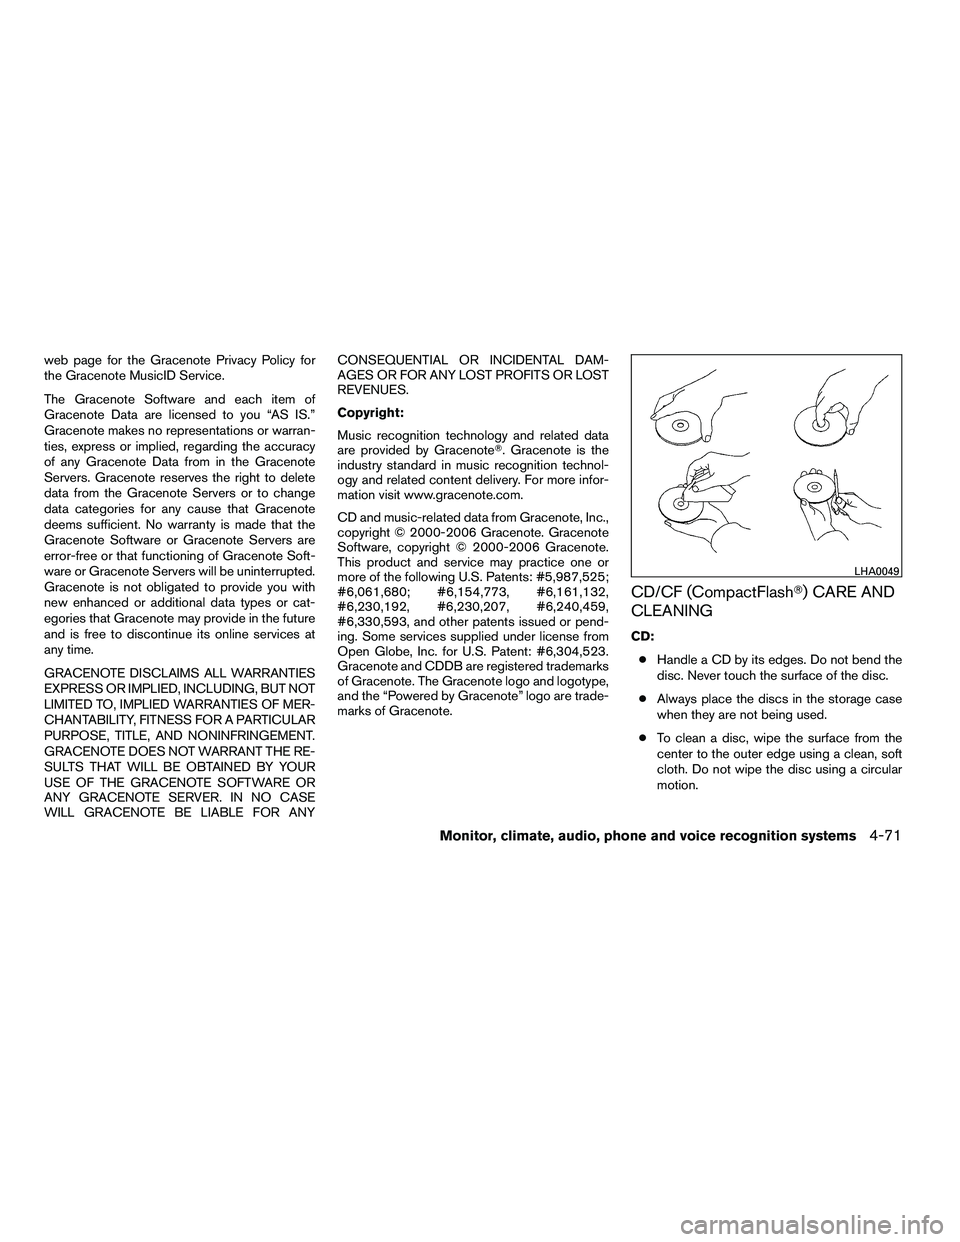
● To clean a disc, wipe the surface from the
center to the outer edge using a clean, soft
cloth. Do not wipe the disc using a circular
motion.
Page 338 of 472

WARNING
The following actions can increase the
chance of losing control of the vehicle if
there is a sudden loss of tire air pressure.
Losing control of the vehicle may cause a
collision and result in personal injury.
●The vehicle generally moves or pulls in
the direction of the flat tire.
● Do not rapidly apply the brakes.
● Do not rapidly release the accelerator
pedal.
● Do not rapidly turn the steering wheel.
1. Remain calm and do not over react.
2. Maintain a firm grip on the steering wheel with both hands and try to hold a straight
course.
3. When appropriate, slowly release the accel- erator pedal to gradually slow the vehicle.
4. Gradually steer the vehicle to a safe location off the road and away from traffic if possible.
5. Lightly apply the brake pedal to gradually stop the vehicle.
6. Turn on the hazard warning flashers and either contact a roadside emergency service
to change the tire or see “Changing a flat
tire” in the “In case of emergency” section of
this manual.
DRINKING ALCOHOL/DRUGS AND
DRIVING
Page 340 of 472
●If at all possible, avoid sharp turning
maneuvers, particularly at high speeds.
Your NISSAN four-wheel drive vehicle
has a higher center of gravity than a
passenger car. The vehicle is not de-
signed for cornering at the same
speeds as passenger cars.
● Always use tires of the same type, size,
brand, construction (bias, bias-belted,
or radial) , and tread pattern on all four
wheels. Install tire chains on the rear
wheels when driving on slippery roads
and drive carefully.
● Be sure to check the brakes immedi-
ately after driving in mud or water. See
“Brake system” later in this section for
“Wet brakes”.
● Avoid parking your vehicle on steep
hills. If you get out of the vehicle and it
rolls forward, backward or sideways,
you could be injured.
● Whenever you drive off-road through
sand, mud or water as deep as the
wheel hub, more frequent maintenance
may be required. See “Periodic mainte-
nance” in the “NISSAN Service and
Maintenance Guide.”
Page 360 of 472
This procedure is described in the vehicle service
manual and can be performed by a NISSAN
dealer.
ANTI-LOCK BRAKING SYSTEM
(ABS)
Page 376 of 472
6. After the engine cools down, check the cool-ant level in the engine coolant reservoir tank
with the engine running. Add coolant to the
engine coolant reservoir tank if necessary.
Have your vehicle repaired at a NISSAN
dealer. When towing your vehicle, all State (Provincial in
Canada) and local regulations for towing must be
followed. Incorrect towing equipment could dam-
age your vehicle. Towing instructions are avail-
able from a NISSAN dealer. Local service opera-
tors are generally familiar with the applicable laws
and procedures for towing. To assure proper
towing and to prevent accidental damage to your
vehicle, NISSAN recommends having a service
operator tow your vehicle. It is advisable to have
the service operator carefully read the following
precautions: