Page 158 of 440
TILT OPERATION
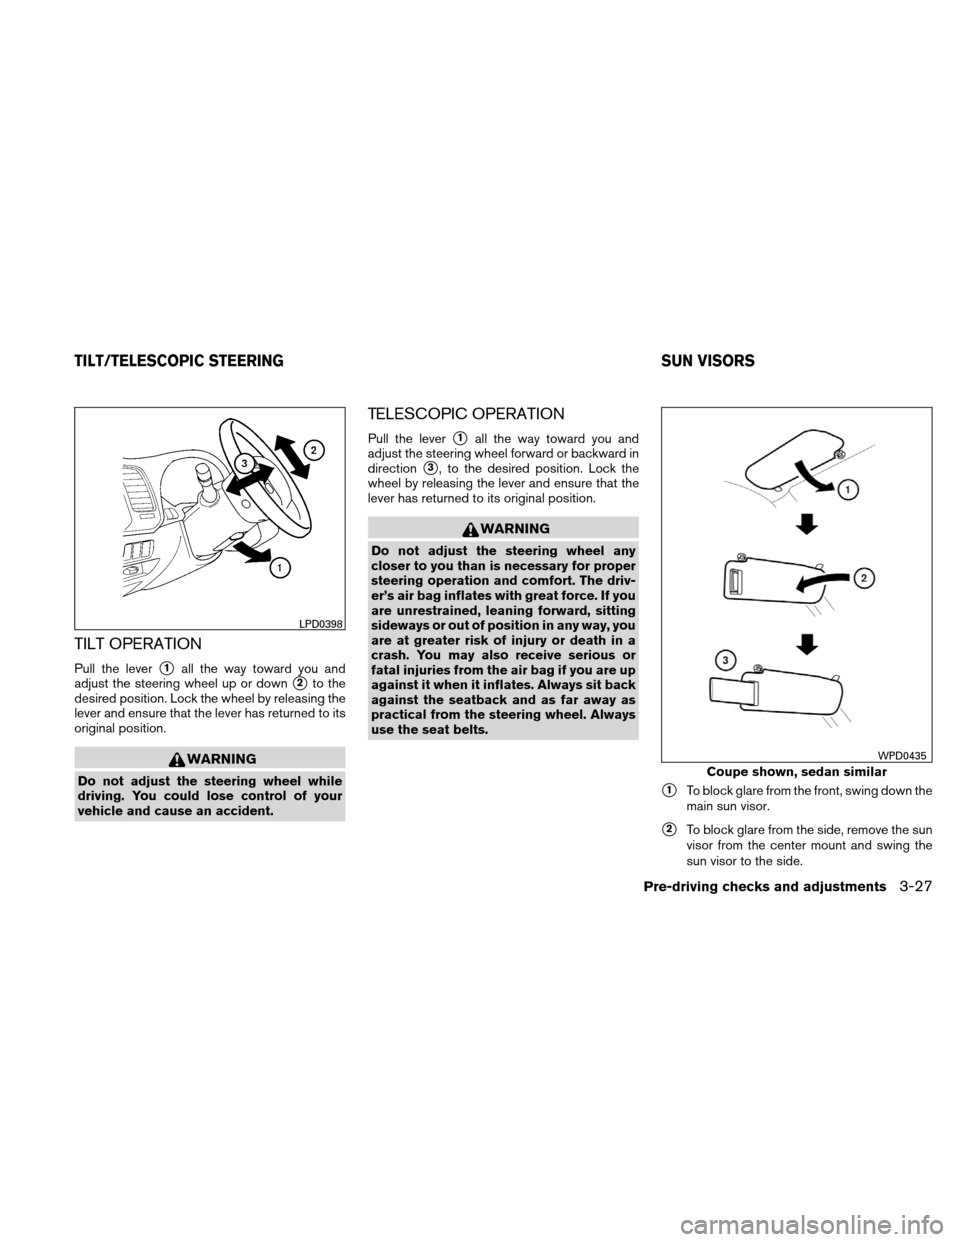
Pull the lever�1all the way toward you and
adjust the steering wheel up or down
�2to the
desired position. Lock the wheel by releasing the
lever and ensure that the lever has returned to its
original position.
WARNING
Do not adjust the steering wheel while
driving. You could lose control of your
vehicle and cause an accident.
TELESCOPIC OPERATION
Pull the lever�1all the way toward you and
adjust the steering wheel forward or backward in
direction
�3, to the desired position. Lock the
wheel by releasing the lever and ensure that the
lever has returned to its original position.
WARNING
Do not adjust the steering wheel any
closer to you than is necessary for proper
steering operation and comfort. The driv-
er’s air bag inflates with great force. If you
are unrestrained, leaning forward, sitting
sideways or out of position in any way, you
are at greater risk of injury or death in a
crash. You may also receive serious or
fatal injuries from the air bag if you are up
against it when it inflates. Always sit back
against the seatback and as far away as
practical from the steering wheel. Always
use the seat belts.
�1To block glare from the front, swing down the
main sun visor.
�2To block glare from the side, remove the sun
visor from the center mount and swing the
sun visor to the side.
LPD0398
Coupe shown, sedan similar
WPD0435
TILT/TELESCOPIC STEERING SUN VISORS
Pre-driving checks and adjustments3-27
Page 159 of 440
�3Slide the extension sun visor (if so equipped)
in or out as needed.
CAUTION
Do not store the sun visor before returning
the extension to its original position.
VANITY MIRRORS
To access the vanity mirror, pull the sun visor
down and flip open the mirror cover. Some vanity
mirrors are illuminated and turn on when the
mirror cover is open.
REARVIEW MIRROR (if so equipped)
The night position�1reduces glare from the
headlights of vehicles behind you at night.
Use the day position
�2when driving in daylight
hours.
WARNING
Use the night position only when neces-
sary, because it reduces rear view clarity.
Coupe shown, sedan similar
LPD0400WPD0126
MIRRORS
3-28Pre-driving checks and adjustments
Page 161 of 440
For information on the compass display (if so
equipped) , see “Compass display” in the “Instru-
ments and controls” section of this manual.
OUTSIDE MIRRORS
WARNING
●Objects viewed in the outside mirror on
the passenger side are closer than they
appear. Be careful when moving to the
right. Using only this mirror could cause
an accident. Use the inside mirror or
glance over your shoulder to properly
judge distances to other objects.
Electric control type
The outside mirror remote control only operates
when the ignition switch is in the ACC or ON
position.
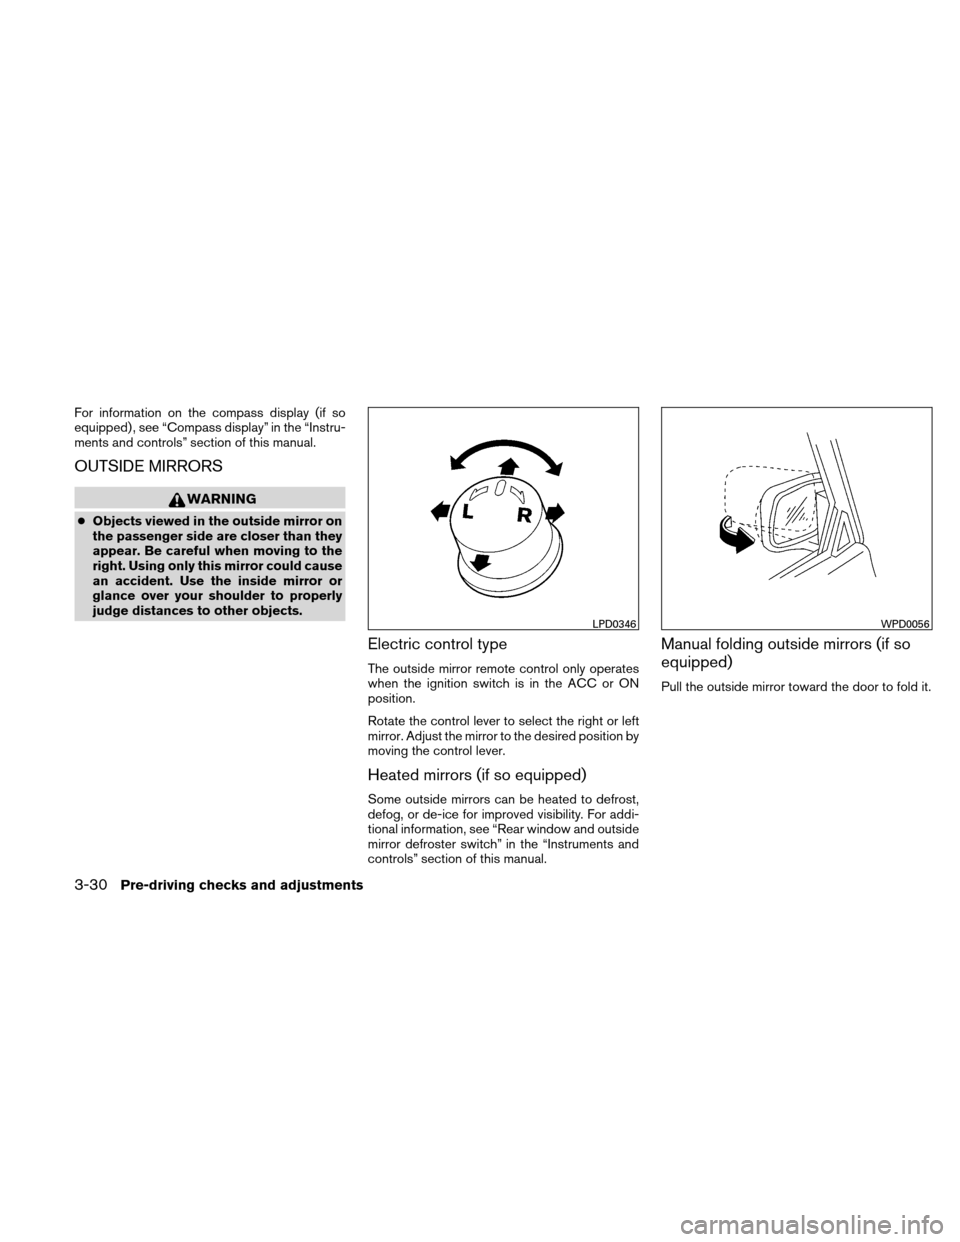
Rotate the control lever to select the right or left
mirror. Adjust the mirror to the desired position by
moving the control lever.
Heated mirrors (if so equipped)
Some outside mirrors can be heated to defrost,
defog, or de-ice for improved visibility. For addi-
tional information, see “Rear window and outside
mirror defroster switch” in the “Instruments and
controls” section of this manual.
Manual folding outside mirrors (if so
equipped)
Pull the outside mirror toward the door to fold it.
LPD0346WPD0056
3-30Pre-driving checks and adjustments
Page 165 of 440
WARNING
●Do not disassemble or modify this sys-
tem. If you do, it may result in accidents,
fire, or electrical shock.
● In case you notice any foreign object in
the system hardware, spill liquid on it,
or notice smoke or smell coming from
it, stop using the system immediately
and contact your nearest NISSAN
dealer. Ignoring such conditions may
lead to accidents, fire or electrical
shock.
CAUTION
Do not use this system if you notice any
abnormality, such as a frozen screen or
lack of sound. Continued use of the sys-
tem may result in accident, fire or electric
shock.
1. Display screen
2. MAP button*
3. DEST button*
4. ROUTE button*5. INFO button (P. 4-5)
6. SETTING button (P. 4-6)
7. Volume control knob
8.
(brightness control) button
LHA1400
CONTROL PANEL BUTTONS —
COLOR SCREEN WITH NAVIGATION
SYSTEM (if so equipped)
4-2Monitor, climate, audio, phone and voice recognition systems
Page 166 of 440
*For Navigation system control buttons, refer to
the separate Navigation System Owner’s
Manual.
When you use this system, make sure the engine
is running.
If you use the system with the engine not
running (ignition ON or ACC) for a long
time, it will discharge the battery, and the
engine will not start.
Reference symbols:
“Example” — Words marked in quotes refer to a
key shown only on the display. These keys can be
selected by touching the screen.
HOW TO USE THE TOUCH
SCREEN
CAUTION
●The glass screen on the liquid crystal
display may break if it is hit with a hard
or sharp object. If the glass breaks, do
not touch the liquid crystalline material,
which contains a small amount of mer-
cury. In case of contact with skin, wash
immediately with soap and water. ●
To clean the display, never use a rough
cloth, alcohol, benzine, thinner or any
kind of solvent or paper towel with a
chemical cleaning agent. They will
scratch or deteriorate the panel.
● Do not splash any liquid such as water
or car fragrance on the display. Contact
with liquid will cause the system to
malfunction.
To help ensure safe driving, some functions can-
not be operated while driving.
The on-screen functions that are not available
while driving will be “grayed out” or muted.
Park the vehicle in a safe location and then oper-
ate the navigation system.
WARNING
● ALWAYS give your full attention to
driving.
● Avoid using vehicle features that could
distract you. If distracted, you could
lose control of your vehicle and cause
an accident.
Touch screen operation
Selecting the item:
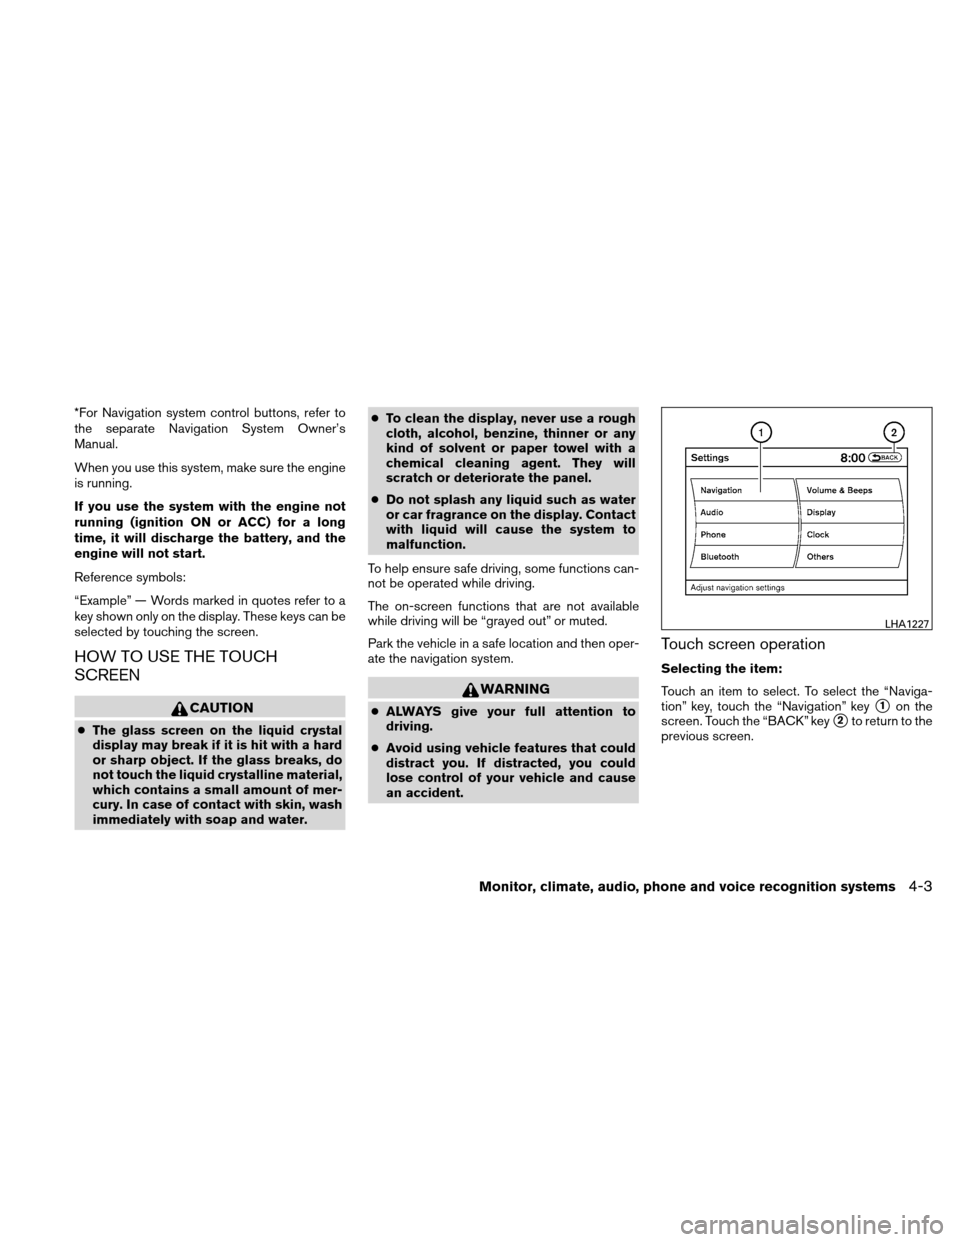
Touch an item to select. To select the “Naviga-
tion” key, touch the “Navigation” key
�1on the
screen. Touch the “BACK” key
�2to return to the
previous screen.
LHA1227
Monitor, climate, audio, phone and voice recognition systems4-3
Page 176 of 440
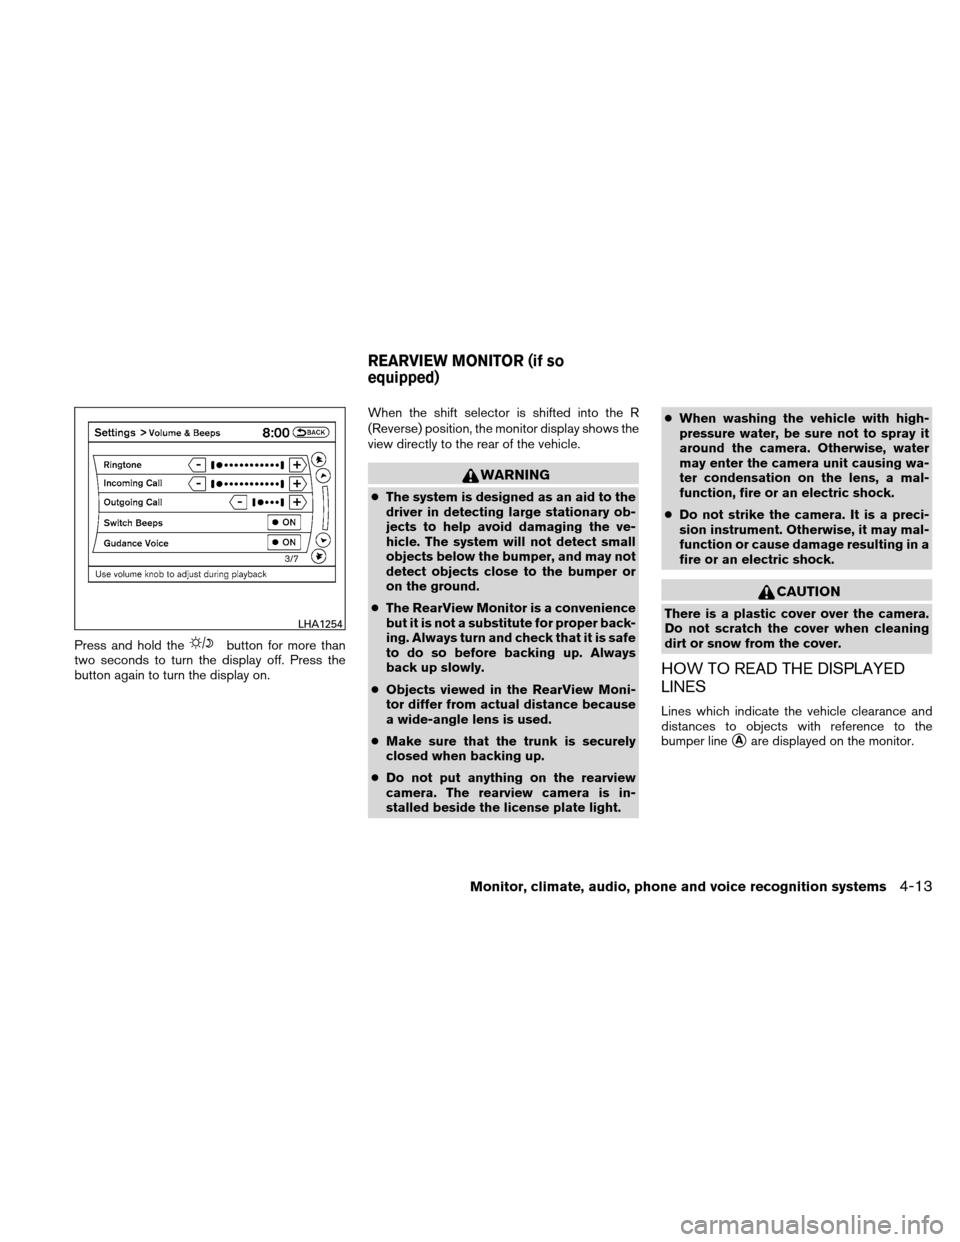
Press and hold thebutton for more than
two seconds to turn the display off. Press the
button again to turn the display on. When the shift selector is shifted into the R
(Reverse) position, the monitor display shows the
view directly to the rear of the vehicle.
WARNING
●
The system is designed as an aid to the
driver in detecting large stationary ob-
jects to help avoid damaging the ve-
hicle. The system will not detect small
objects below the bumper, and may not
detect objects close to the bumper or
on the ground.
● The RearView Monitor is a convenience
but it is not a substitute for proper back-
ing. Always turn and check that it is safe
to do so before backing up. Always
back up slowly.
● Objects viewed in the RearView Moni-
tor differ from actual distance because
a wide-angle lens is used.
● Make sure that the trunk is securely
closed when backing up.
● Do not put anything on the rearview
camera. The rearview camera is in-
stalled beside the license plate light. ●
When washing the vehicle with high-
pressure water, be sure not to spray it
around the camera. Otherwise, water
may enter the camera unit causing wa-
ter condensation on the lens, a mal-
function, fire or an electric shock.
● Do not strike the camera. It is a preci-
sion instrument. Otherwise, it may mal-
function or cause damage resulting in a
fire or an electric shock.
CAUTION
There is a plastic cover over the camera.
Do not scratch the cover when cleaning
dirt or snow from the cover.
HOW TO READ THE DISPLAYED
LINES
Lines which indicate the vehicle clearance and
distances to objects with reference to the
bumper line
�Aare displayed on the monitor.
LHA1254
REARVIEW MONITOR (if so
equipped)
Monitor, climate, audio, phone and voice recognition systems4-13
Page 182 of 440
WARNING
●The air conditioner cooling function op-
erates only when the engine is running.
● Do not leave children or adults who
would normally require the assistance
of others alone in your vehicle. Pets
should also not be left alone. They
could accidentally injure themselves or
others through inadvertent operation of
the vehicle. Also, on hot, sunny days,
temperatures in a closed vehicle could
quickly become high enough to cause
severe or possibly fatal injuries to
people or animals.
● Do not use the recirculation mode for
long periods as it may cause the interior
air to become stale and the windows to
fog up.
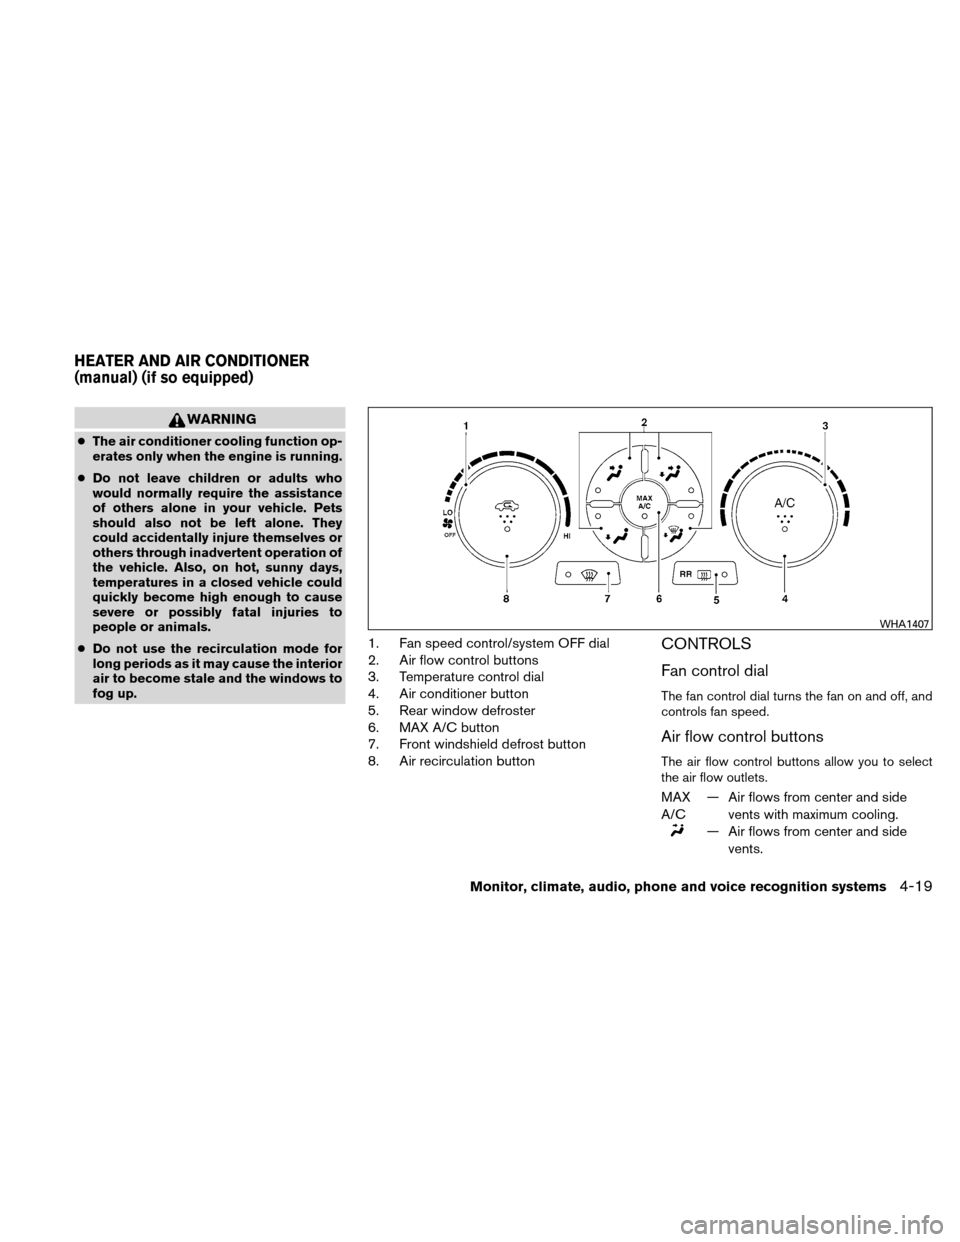
1. Fan speed control/system OFF dial
2. Air flow control buttons
3. Temperature control dial
4. Air conditioner button
5. Rear window defroster
6. MAX A/C button
7. Front windshield defrost button
8. Air recirculation buttonCONTROLS
Fan control dial
The fan control dial turns the fan on and off, and
controls fan speed.
Air flow control buttons
The air flow control buttons allow you to select
the air flow outlets.
MAX
A/C — Air flows from center and side
vents with maximum cooling.
— Air flows from center and sidevents.
WHA1407
HEATER AND AIR CONDITIONER
(manual) (if so equipped)
Monitor, climate, audio, phone and voice recognition systems4-19
Page 189 of 440
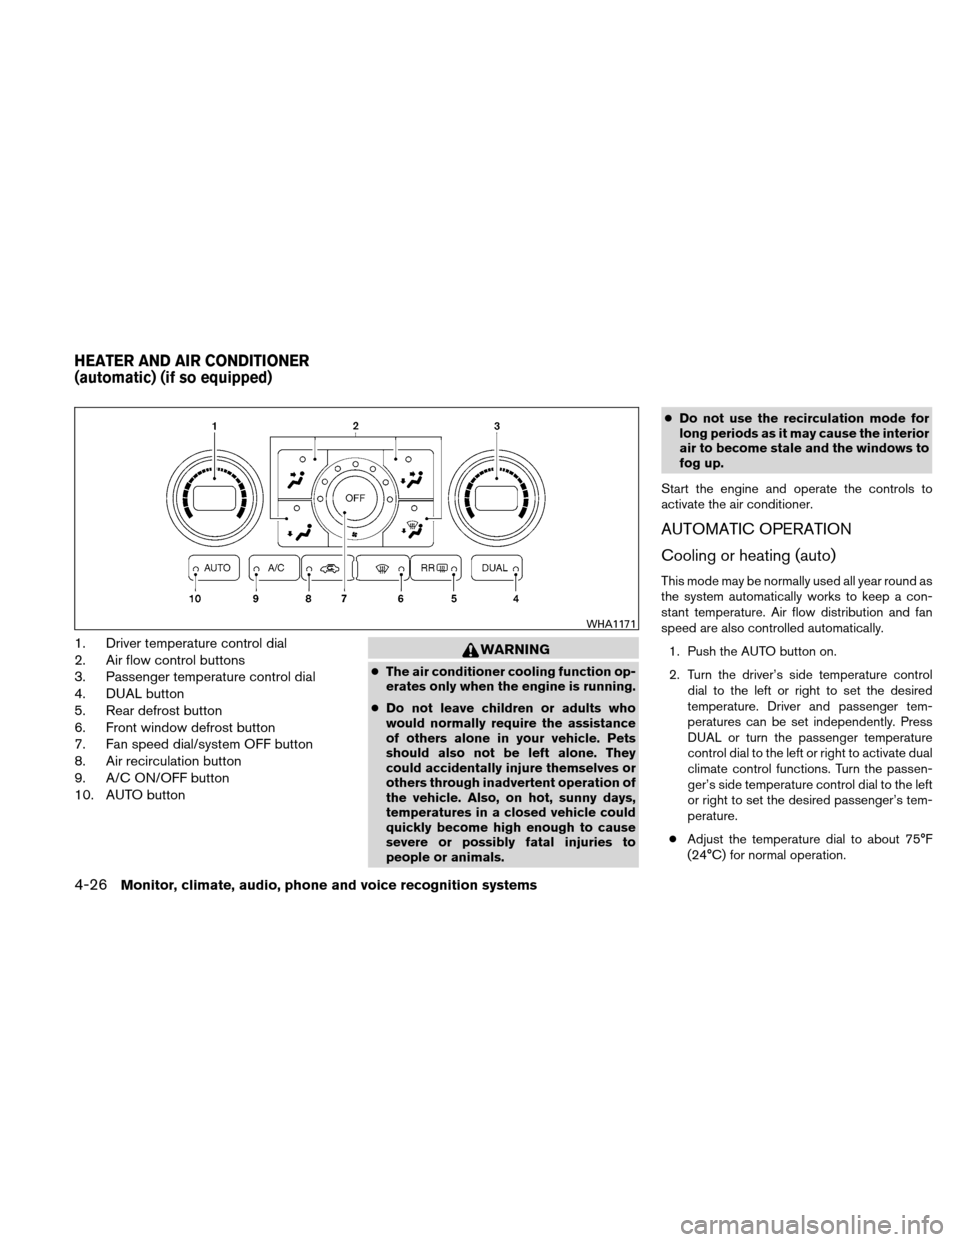
1. Driver temperature control dial
2. Air flow control buttons
3. Passenger temperature control dial
4. DUAL button
5. Rear defrost button
6. Front window defrost button
7. Fan speed dial/system OFF button
8. Air recirculation button
9. A/C ON/OFF button
10. AUTO buttonWARNING
●The air conditioner cooling function op-
erates only when the engine is running.
● Do not leave children or adults who
would normally require the assistance
of others alone in your vehicle. Pets
should also not be left alone. They
could accidentally injure themselves or
others through inadvertent operation of
the vehicle. Also, on hot, sunny days,
temperatures in a closed vehicle could
quickly become high enough to cause
severe or possibly fatal injuries to
people or animals. ●
Do not use the recirculation mode for
long periods as it may cause the interior
air to become stale and the windows to
fog up.
Start the engine and operate the controls to
activate the air conditioner.
AUTOMATIC OPERATION
Cooling or heating (auto)
This mode may be normally used all year round as
the system automatically works to keep a con-
stant temperature. Air flow distribution and fan
speed are also controlled automatically. 1. Push the AUTO button on.
2. Turn the driver’s side temperature control dial to the left or right to set the desired
temperature. Driver and passenger tem-
peratures can be set independently. Press
DUAL or turn the passenger temperature
control dial to the left or right to activate dual
climate control functions. Turn the passen-
ger’s side temperature control dial to the left
or right to set the desired passenger’s tem-
perature.
● Adjust the temperature dial to about 75°F
(24°C) for normal operation.
WHA1171
HEATER AND AIR CONDITIONER
(automatic) (if so equipped)
4-26Monitor, climate, audio, phone and voice recognition systems