2010 NISSAN 370Z ROADSTER display
[x] Cancel search: displayPage 272 of 409
Black plate (272,1)
Model "Z34-D" EDITED: 2009/ 9/ 10
SAA2552
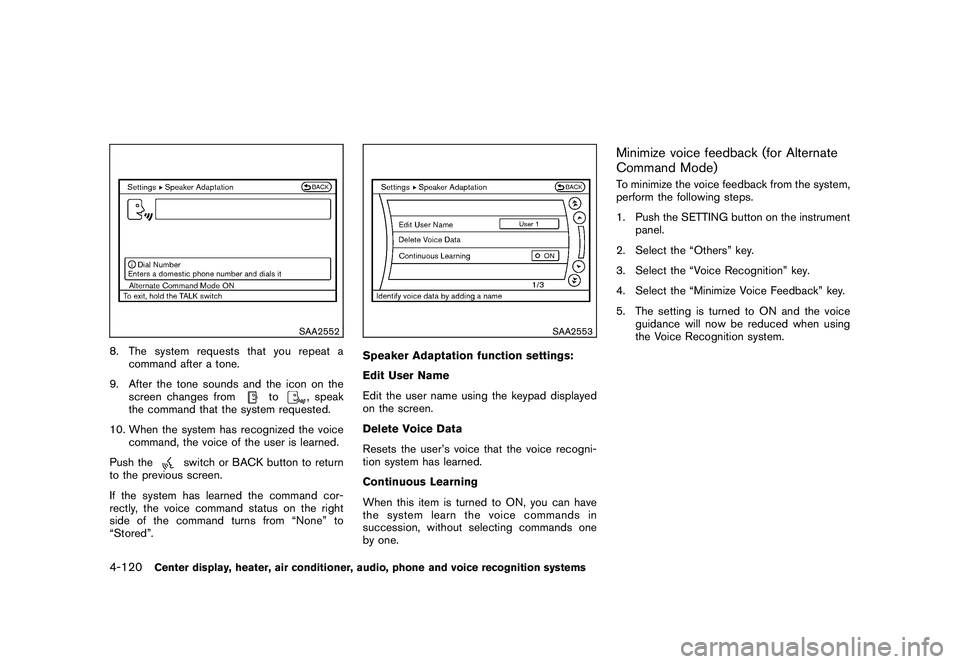
8. The system requests that you repeat acommand after a tone.
9. After the tone sounds and the icon on the screen changes from
to
, speak
the command that the system requested.
10. When the system has recognized the voice command, the voice of the user is learned.
Push the
switch or BACK button to return
to the previous screen.
If the system has learned the command cor-
rectly, the voice command status on the right
side of the command turns from “None” to
“Stored”.
SAA2553
Speaker Adaptation function settings:
Edit User Name
Edit the user name using the keypad displayed
on the screen.
Delete Voice Data
Resets the user’s voice that the voice recogni-
tion system has learned.
Continuous Learning
When this item is turned to ON, you can have
the system learn the voice commands in
succession, without selecting commands one
by one.
Minimize voice feedback (for Alternate
Command Mode)To minimize the voice feedback from the system,
perform the following steps.
1. Push the SETTING button on the instrument panel.
2. Select the “Others” key.
3. Select the “Voice Recognition” key.
4. Select the “Minimize Voice Feedback” key.
5. The setting is turned to ON and the voice guidance will now be reduced when using
the Voice Recognition system.
4-120
Center display, heater, air conditioner, audio, phone and voice recognition systems
Page 273 of 409
Black plate (273,1)
Model "Z34-D" EDITED: 2009/ 12/ 4
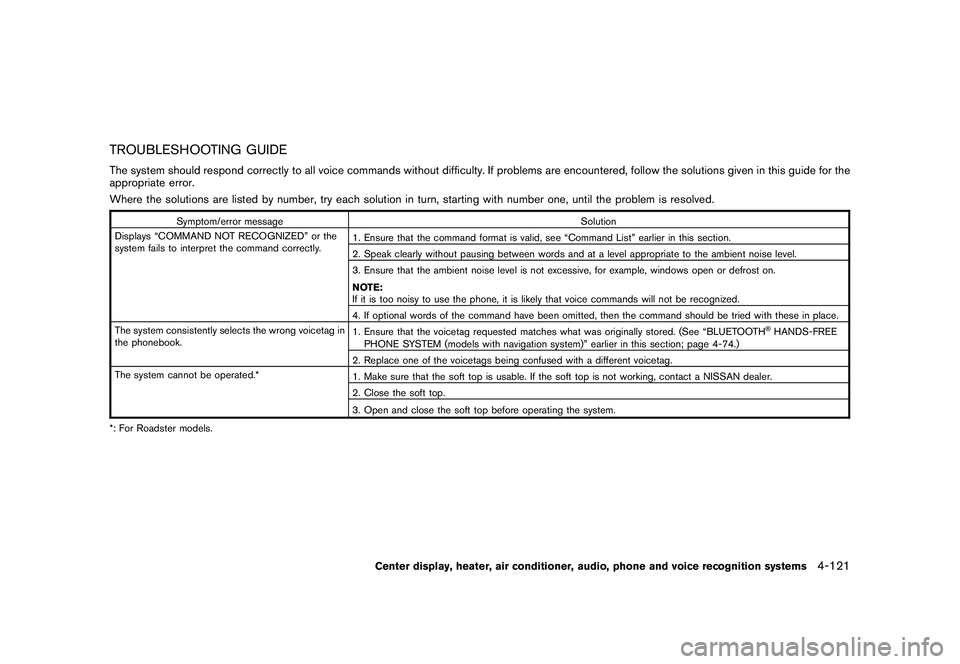
TROUBLESHOOTING GUIDEThe system should respond correctly to all voice commands without difficulty. If problems are encountered, follow the solutions given in this guide for the
appropriate error.
Where the solutions are listed by number, try each solution in turn, starting with number one, until the problem is resolved.
Symptom/error messageSolution
Displays “COMMAND NOT RECOGNIZED” or the
system fails to interpret the command correctly. 1. Ensure that the command format is valid, see “Command List” earlier in this section.
2. Speak clearly without pausing between words and at a level appropriate to the ambient noise level.
3. Ensure that the ambient noise level is not excessive, for example, windows open or defrost on.
NOTE:
If it is too noisy to use the phone, it is likely that voice commands will not be recognized.
4. If optional words of the command have been omitted, then the command should be tried with these in place.
The system consistently selects the wrong voicetag in
the phonebook. 1. Ensure that the voicetag requested matches what was originally stored. (See “BLUETOOTH
®HANDS-FREE
PHONE SYSTEM (models with navigation system)” earlier in this section; page 4-74.)
2. Replace one of the voicetags being confused with a different voicetag.
The system cannot be operated.* 1. Make sure that the soft top is usable. If the soft top is not working, contact a NISSAN dealer.
2. Close the soft top.
3. Open and close the soft top before operating the system.
*: For Roadster models.
Center display, heater, air conditioner, audio, phone and voice recognition systems
4-121
Page 274 of 409

Black plate (274,1)
Model "Z34-D" EDITED: 2009/ 9/ 10
MEMO4-122
Center display, heater, air conditioner, audio, phone and voice recognition systems
Page 283 of 409
Black plate (283,1)
Model "Z34-D" EDITED: 2009/ 9/ 10
during the OFF position.
The ignition switch is equipped with an anti-theft
steering lock device.
In order for the steering wheel to be locked, it
must be turned about 1/8 of a right or left turn
from the straight up position.
To lock the steering wheel, push the
ignition switch to the OFF position. To
unlock the steering wheel, push the igni-
tion switch. If the steering lock release
malfunction indicator appears on the ve-
hicle information display, push the push-
button ignition switch again while lightly
turning the steering wheel right and left.
(See “VEHICLE INFORMATION DISPLAY”
in the “2. Instruments and controls” sec-
tion.)
If the battery of the vehicle is discharged,
the push-button ignition switch cannot be
turned from the LOCK position.
Some indicators and warnings for operation are
displayed on the vehicle information display.
(See “VEHICLE INFORMATION DISPLAY” in
the “2. Instruments and controls” section.)
Automatic transmission modelsThe ignition lock is designed so that the ignition
switch position cannot be switched to LOCK
until the selector lever is moved to the P (Park) position.
When the ignition switch cannot be pushed
toward the LOCK position, proceed as follows:
1. Move the selector lever into the P (Park)
position.
2. Push the ignition switch to the OFF position. The ignition switch position indicator will not
illuminate.
3. Open the door. The ignition switch will change to the LOCK position.
The selector lever can be moved from the P
(Park) position if the ignition switch is in
the ON position and the brake pedal is
depressed.
PUSH-BUTTON IGNITION SWITCH
POSITIONS
LOCK (Normal parking position)The ignition switch can only be locked in this
position.
The ignition switch will be unlocked when it is
pushed to the ACC position while carrying the
Intelligent Key or with the Intelligent Key inserted
in the port.ACC (Accessories)This position activates electrical accessories
such as the radio, when the engine is not running.
ON (Normal operating position)This position turns on the ignition system and
electrical accessories.OFFThe engine can be turned off without locking the
steering wheel.
Automatic transmission models: The ignition
lock is designed so that the ignition switch
cannot be switched to the LOCK position until
the selector lever is moved to the P (Park)
position.
CAUTION
Do not leave the vehicle with the push-
button ignition switch in ACC or ON
positions when the engine is not run-
ning for an extended period. This can
discharge the battery.
Starting and driving
5-9
Page 284 of 409
Black plate (284,1)
Model "Z34-D" EDITED: 2009/ 9/ 10
SSD0826
INTELLIGENT KEY BATTERY DIS-
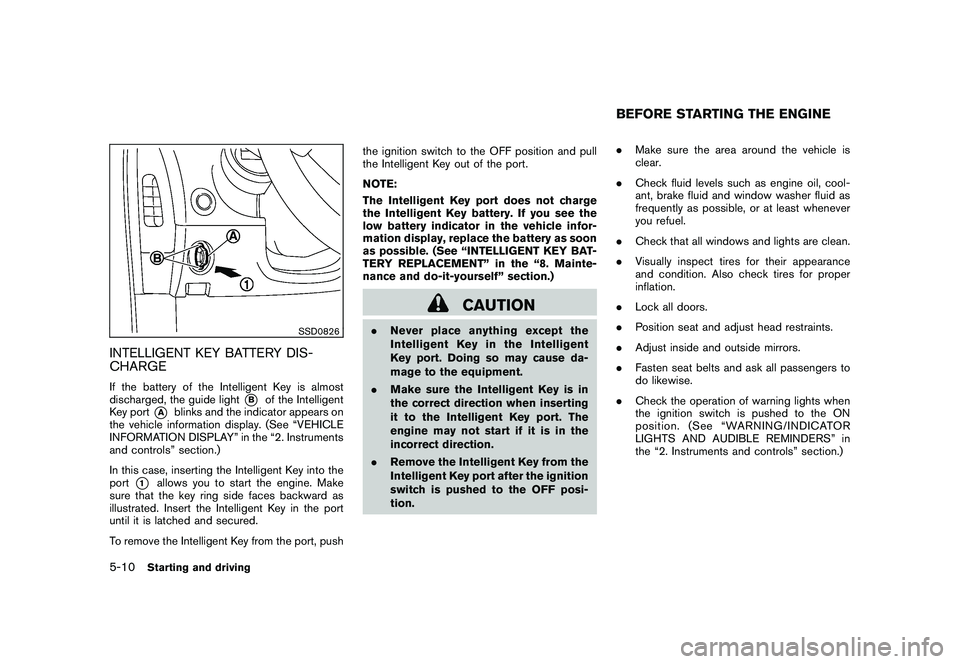
CHARGEIf the battery of the Intelligent Key is almost
discharged, the guide light
*B
of the Intelligent
Key port
*A
blinks and the indicator appears on
the vehicle information display. (See “VEHICLE
INFORMATION DISPLAY” in the “2. Instruments
and controls” section.)
In this case, inserting the Intelligent Key into the
port
*1
allows you to start the engine. Make
sure that the key ring side faces backward as
illustrated. Insert the Intelligent Key in the port
until it is latched and secured.
To remove the Intelligent Key from the port, push the ignition switch to the OFF position and pull
the Intelligent Key out of the port.
NOTE:
The Intelligent Key port does not charge
the Intelligent Key battery. If you see the
low battery indicator in the vehicle infor-
mation display, replace the battery as soon
as possible. (See “INTELLIGENT KEY BAT-
TERY REPLACEMENT” in the “8. Mainte-
nance and do-it-yourself” section.)
CAUTION
.
Never place anything except the
Intelligent Key in the Intelligent
Key port. Doing so may cause da-
mage to the equipment.
. Make sure the Intelligent Key is in
the correct direction when inserting
it to the Intelligent Key port. The
engine may not start if it is in the
incorrect direction.
. Remove the Intelligent Key from the
Intelligent Key port after the ignition
switch is pushed to the OFF posi-
tion. .
Make sure the area around the vehicle is
clear.
. Check fluid levels such as engine oil, cool-
ant, brake fluid and window washer fluid as
frequently as possible, or at least whenever
you refuel.
. Check that all windows and lights are clean.
. Visually inspect tires for their appearance
and condition. Also check tires for proper
inflation.
. Lock all doors.
. Position seat and adjust head restraints.
. Adjust inside and outside mirrors.
. Fasten seat belts and ask all passengers to
do likewise.
. Check the operation of warning lights when
the ignition switch is pushed to the ON
position. (See “WARNING/INDICATOR
LIGHTS AND AUDIBLE REMINDERS” in
the “2. Instruments and controls” section.)
BEFORE STARTING THE ENGINE
5-10
Starting and driving
Page 288 of 409
Black plate (288,1)
Model "Z34-D" EDITED: 2009/ 9/ 10
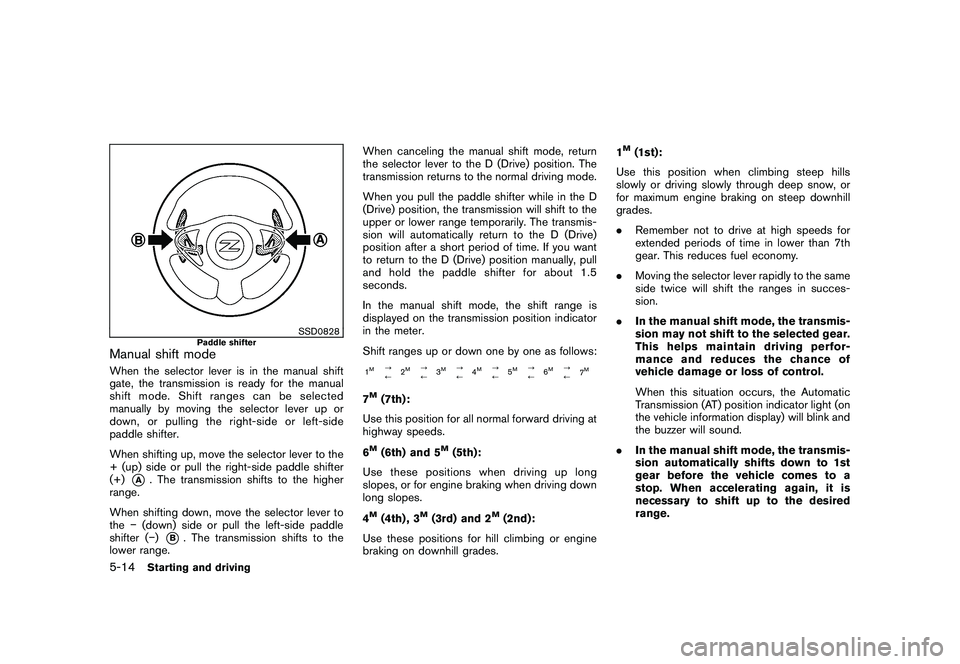
SSD0828
Paddle shifter
Manual shift modeWhen the selector lever is in the manual shift
gate, the transmission is ready for the manual
shift mode. Shift ranges can be selected
manually by moving the selector lever up or
down, or pulling the right-side or left-side
paddle shifter.
When shifting up, move the selector lever to the
+ (up) side or pull the right-side paddle shifter
(+)
*A
. The transmission shifts to the higher
range.
When shifting down, move the selector lever to
the �(down) side or pull the left-side paddle
shifter ( �)
*B. The transmission shifts to the
lower range. When canceling the manual shift mode, return
the selector lever to the D (Drive) position. The
transmission returns to the normal driving mode.
When you pull the paddle shifter while in the D
(Drive) position, the transmission will shift to the
upper or lower range temporarily. The transmis-
sion will automatically return to the D (Drive)
position after a short period of time. If you want
to return to the D (Drive) position manually, pull
and hold the paddle shifter for about 1.5
seconds.
In the manual shift mode, the shift range is
displayed on the transmission position indicator
in the meter.
Shift ranges up or down one by one as follows:
1M
?
/
2
M
?
/3
M
?
/4
M
?
/5
M
?
/6
M
?
/
7
M
7M(7th):
Use this position for all normal forward driving at
highway speeds.
6M(6th) and 5
M(5th):
Use these positions when driving up long
slopes, or for engine braking when driving down
long slopes.
4
M(4th) , 3
M(3rd) and 2
M(2nd):
Use these positions for hill climbing or engine
braking on downhill grades. 1
M(1st):
Use this position when climbing steep hills
slowly or driving slowly through deep snow, or
for maximum engine braking on steep downhill
grades.
. Remember not to drive at high speeds for
extended periods of time in lower than 7th
gear. This reduces fuel economy.
. Moving the selector lever rapidly to the same
side twice will shift the ranges in succes-
sion.
. In the manual shift mode, the transmis-
sion may not shift to the selected gear.
This helps maintain driving perfor-
mance and reduces the chance of
vehicle damage or loss of control.
When this situation occurs, the Automatic
Transmission (AT) position indicator light (on
the vehicle information display) will blink and
the buzzer will sound.
. In the manual shift mode, the transmis-
sion automatically shifts down to 1st
gear before the vehicle comes to a
stop. When accelerating again, it is
necessary to shift up to the desired
range.
5-14
Starting and driving
Page 291 of 409
Black plate (291,1)
Model "Z34-D" EDITED: 2009/ 9/ 10
high depending on the gear position and
vehicle speed.
. When the clutch pedal is depressed with
the transmission in neutral, the system
operates for approximately 2 seconds, and
then the engine speed will decrease to the
idle speed.
. When the engine coolant temperature is low
right after starting the engine, engine speed
synchronization will be delayed or may be
insufficient.
. The system controls the engine speed up to
the rev limit. Note that S-MODE is not a
function that prevents over-revving resulting
from shifting mistakes.
. The system does not operate while the
vehicle is backing up.
. If the engine speed is limited lower than
usual when the engine oil temperature is
extremely high, the system will control up to
the limited engine speed.
. If the malfunction indicator light illuminates,
the system may not operate and the S-
MODE indicator turns off.
SSD0830
SynchroRev Match mode (S-MODE) warn-
ing:
The SynchroRev Match mode (S-MODE) warn-
ing will appear on the vehicle information display
and the S-MODE indicator will turn off if a
system malfunction occurs.
If the warning appears, the S-MODE function
will not operate, but manual transmission will
operate normally and driving can be continued.
Have the system checked by a NISSAN dealer.
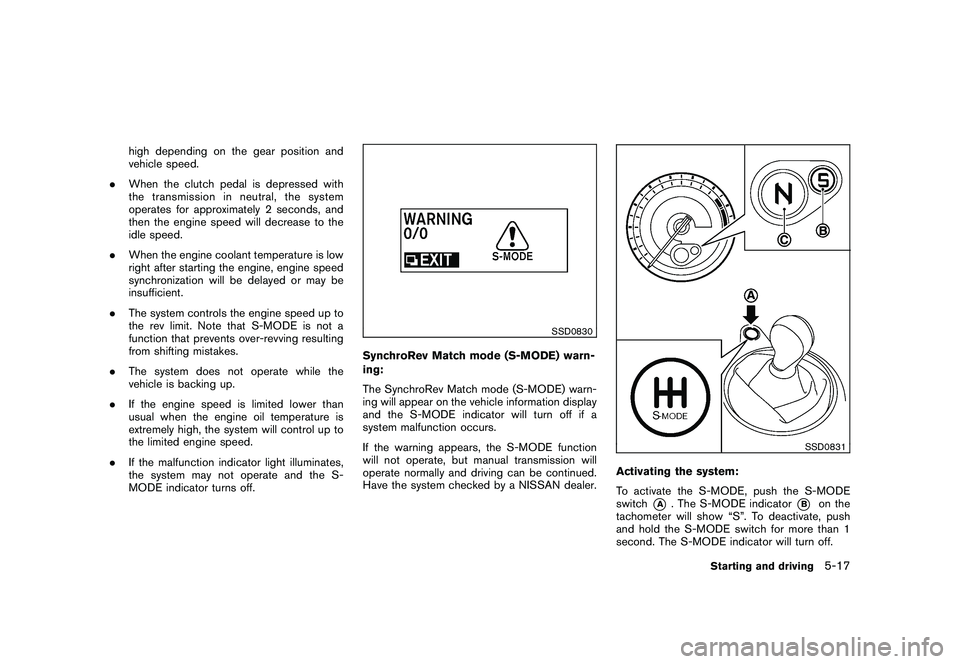
SSD0831
Activating the system:
To activate the S-MODE, push the S-MODE
switch
*A
. The S-MODE indicator
*B
on the
tachometer will show “S”. To deactivate, push
and hold the S-MODE switch for more than 1
second. The S-MODE indicator will turn off.
Starting and driving
5-17
Page 292 of 409
Black plate (292,1)
Model "Z34-D" EDITED: 2009/ 9/ 10
While the S-MODE is off, you can drive the
vehicle as a conventional manual transmission
model.
Note that the status of the S-MODE (on or off) is
memorized even after the ignition switch is
turned off; however, it will be initialized (off)
when the battery is disconnected.
The transmission position indicator
*C
shows
the selected gear: N (Neutral) , 1, 2, 3, 4, 5, 6, R
(Reverse) .
SynchroRev Match mode (S-MODE) op-
eration:
The SynchroRev Match mode (S-MODE) auto-
matically adjusts the engine speed by controlling
the engine throttle. The accelerator pedal does
not have to be depressed.
The system detects the clutch pedal and shift
lever operations, and then calculates the target
engine speed using the shifting gear position
and the vehicle speed information.
The system provides accurate engine speed
control that helps achieve quick gear shifting
and reduces shift shock on clutch engagement.
. When downshifting:
The engine speed is automatically increased
to the target engine speed before the clutch
is engaged. .
When upshifting:
The engine speed is automatically kept after
the engine speed lowers to the target
engine speed.
Rapid clutch engagement before the engine
speed lowers to the target engine speed
may cause shift shock.
. When depressing the clutch pedal with
the gear engaged:
The engine speed is automatically kept at
the proper engine speed for the engaged
gear.
This function will not operate when low (1st)
gear is selected.
There is a delay between the clutch pedal
operation and the S-MODE operation. Make
sure the engine speed is adjusted before
engaging the clutch again.
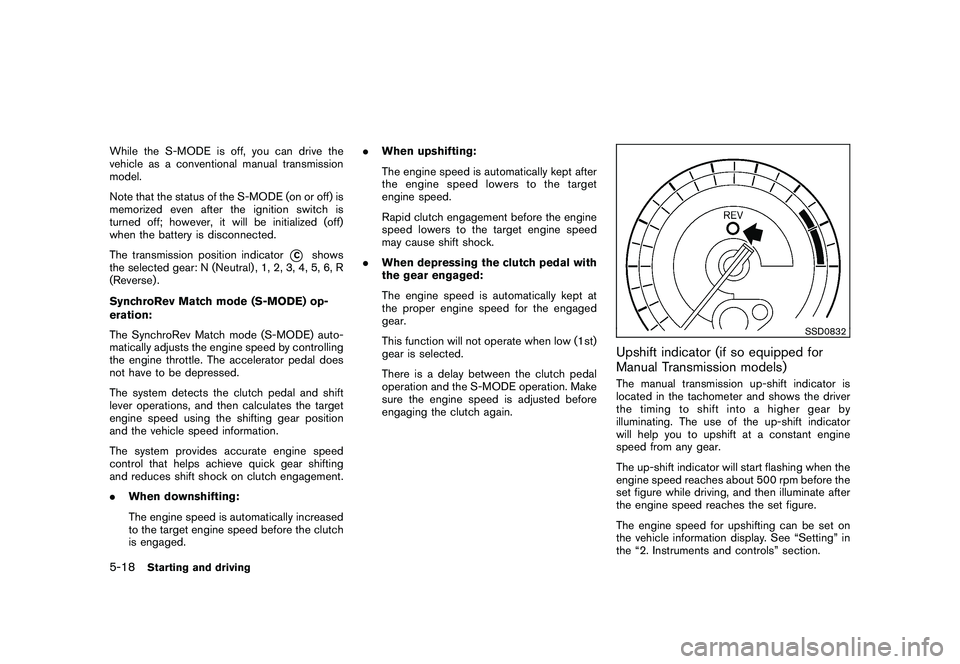
SSD0832
Upshift indicator (if so equipped for
Manual Transmission models)The manual transmission up-shift indicator is
located in the tachometer and shows the driver
the timing to shift into a higher gear by
illuminating. The use of the up-shift indicator
will help you to upshift at a constant engine
speed from any gear.
The up-shift indicator will start flashing when the
engine speed reaches about 500 rpm before the
set figure while driving, and then illuminate after
the engine speed reaches the set figure.
The engine speed for upshifting can be set on
the vehicle information display. See “Setting” in
the “2. Instruments and controls” section.
5-18
Starting and driving