2010 NISSAN 370Z COUPE fuse
[x] Cancel search: fusePage 13 of 409
Black plate (9,1)
Model "Z34-D" EDITED: 2009/ 9/ 10
SSI0585
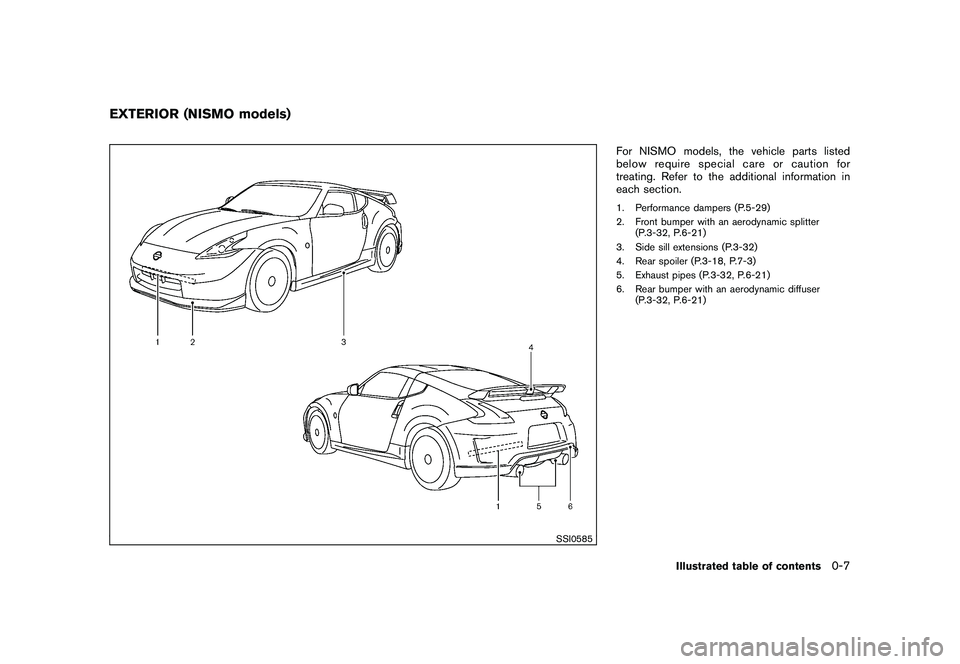
For NISMO models, the vehicle parts listed
below require special care or caution for
treating. Refer to the additional information in
each section.1. Performance dampers (P.5-29)
2. Front bumper with an aerodynamic splitter(P.3-32, P.6-21)
3. Side sill extensions (P.3-32)
4. Rear spoiler (P.3-18, P.7-3)
5. Exhaust pipes (P.3-32, P.6-21)
6. Rear bumper with an aerodynamic diffuser (P.3-32, P.6-21)
EXTERIOR (NISMO models)
Illustrated table of contents
0-7
Page 17 of 409

Black plate (13,1)
Model "Z34-D" EDITED: 2009/ 9/ 10
SSI0653
1. Ventilator (P.4-17)
2. Center display and multi-function control panel(P.4-2)/Instrument pocket (P.2-38)
— Navigation system* (if so equipped)
— Vehicle information and setting buttons
(if so equipped) (P.4-6)
— Bluetooth
®Hands-Free Phone System
(if so equipped) (P.4-74) 3. Front passenger air bag status light (P.1-32)
4. Front passenger supplemental air bag (P.1-27)
5. Fuse box cover (P.8-20)
6. Push-button ignition switch (P.5-7)
7. Hazard warning flasher switch (P.2-33) 8. Seat heater switch (if so equipped) (P.2-34) or
Climate controlled seat switch (if so equipped)
(P.2-36)
9. Soft top operating switch (for Roadster models) (P.3-21)
10. SynchroRev Match mode (S-MODE) switch (if so equipped) (P.5-16)
11. Heater and air conditioner (P.4-17) — Rear window defroster switch (P.2-29)
12. Audio system (P.4-24)
13. Power outlet (P.2-37)
14. Glove box (P.2-39)
*: Refer to the separate Navigation System Owner’s Manual.
INSTRUMENT PANEL
Illustrated table of contents
0-11
Page 19 of 409
Black plate (15,1)
Model "Z34-D" EDITED: 2009/ 9/ 10
SSI0510
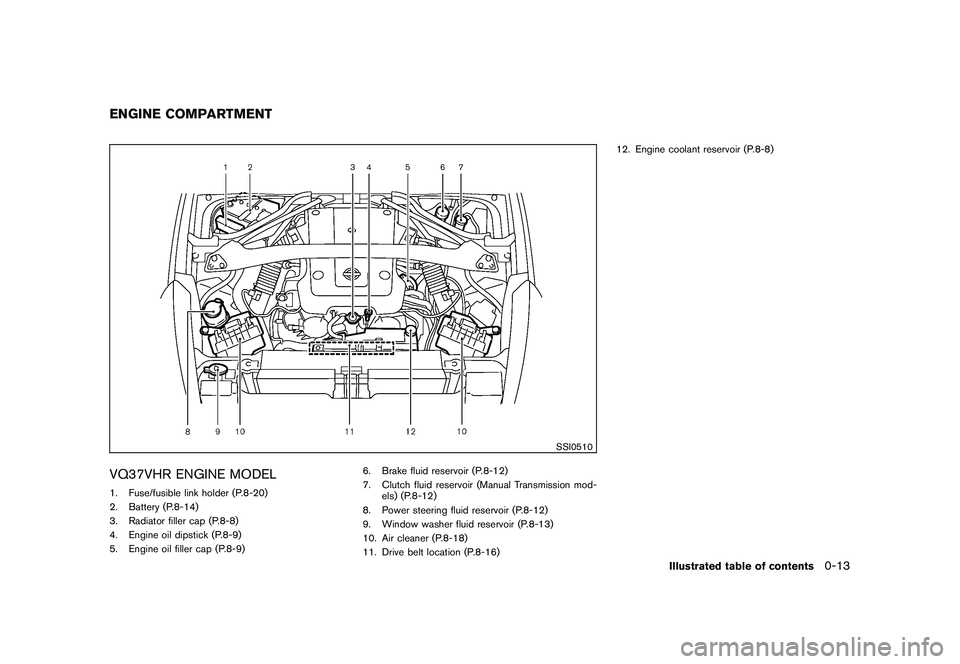
VQ37VHR ENGINE MODEL1. Fuse/fusible link holder (P.8-20)
2. Battery (P.8-14)
3. Radiator filler cap (P.8-8)
4. Engine oil dipstick (P.8-9)
5. Engine oil filler cap (P.8-9)6. Brake fluid reservoir (P.8-12)
7. Clutch fluid reservoir (Manual Transmission mod-
els) (P.8-12)
8. Power steering fluid reservoir (P.8-12)
9. Window washer fluid reservoir (P.8-13)
10. Air cleaner (P.8-18)
11. Drive belt location (P.8-16) 12. Engine coolant reservoir (P.8-8)ENGINE COMPARTMENT
Illustrated table of contents
0-13
Page 65 of 409

Black plate (63,1)
Model "Z34-D" EDITED: 2009/ 9/ 10
SSI0653
1. Ventilator (P.4-17)
2. Center display and multi-function control panel(P.4-2)/Instrument pocket (P.2-38)
— Navigation system* (if so equipped)
— Vehicle information and setting buttons
(if so equipped) (P.4-6)
— Bluetooth
®Hands-Free Phone System
(if so equipped) (P.4-74) 3. Front passenger air bag status light (P.1-32)
4. Front passenger supplemental air bag (P.1-27)
5. Fuse box cover (P.8-20)
6. Push-button ignition switch (P.5-7)
7. Hazard warning flasher switch (P.2-33) 8. Seat heater switch (if so equipped) (P.2-34) or
Climate controlled seat switch (if so equipped)
(P.2-36)
9. Soft top operating switch (for Roadster models) (P.3-21)
10. SynchroRev Match mode (S-MODE) switch (if so equipped) (P.5-16)
11. Heater and air conditioner (P.4-17) — Rear window defroster switch (P.2-29)
12. Audio system (P.4-24)
13. Power outlet (P.2-37)
14. Glove box (P.2-39)
*: Refer to the separate Navigation System Owner’s Manual.
INSTRUMENT PANEL
Instruments and controls
2-3
Page 99 of 409
Black plate (97,1)
Model "Z34-D" EDITED: 2009/ 9/ 10
SIC4004
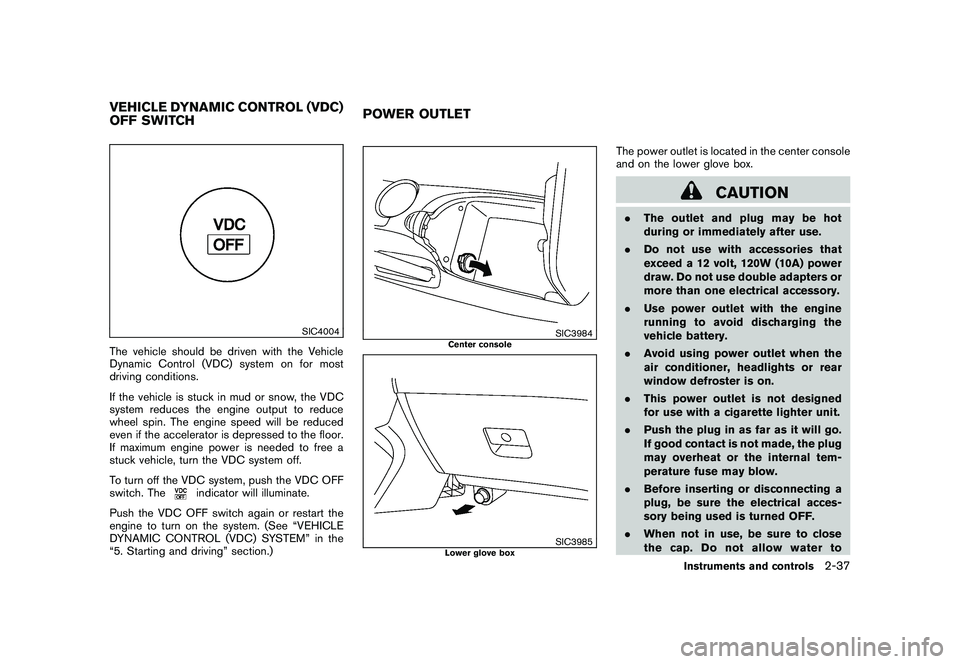
The vehicle should be driven with the Vehicle
Dynamic Control (VDC) system on for most
driving conditions.
If the vehicle is stuck in mud or snow, the VDC
system reduces the engine output to reduce
wheel spin. The engine speed will be reduced
even if the accelerator is depressed to the floor.
If maximum engine power is needed to free a
stuck vehicle, turn the VDC system off.
To turn off the VDC system, push the VDC OFF
switch. The
indicator will illuminate.
Push the VDC OFF switch again or restart the
engine to turn on the system. (See “VEHICLE
DYNAMIC CONTROL (VDC) SYSTEM” in the
“5. Starting and driving” section.)
SIC3984
Center console
SIC3985
Lower glove box
The power outlet is located in the center console
and on the lower glove box.
CAUTION
. The outlet and plug may be hot
during or immediately after use.
. Do not use with accessories that
exceed a 12 volt, 120W (10A) power
draw. Do not use double adapters or
more than one electrical accessory.
. Use power outlet with the engine
running to avoid discharging the
vehicle battery.
. Avoid using power outlet when the
air conditioner, headlights or rear
window defroster is on.
. This power outlet is not designed
for use with a cigarette lighter unit.
. Push the plug in as far as it will go.
If good contact is not made, the plug
may overheat or the internal tem-
perature fuse may blow.
. Before inserting or disconnecting a
plug, be sure the electrical acces-
sory being used is turned OFF.
. When not in use, be sure to close
the cap. Do not allow water to
VEHICLE DYNAMIC CONTROL (VDC)
OFF SWITCH POWER OUTLET
Instruments and controls
2-37
Page 145 of 409

Black plate (145,1)
Model "Z34-D" EDITED: 2009/ 9/ 10
The NISMO models have the following unique
parts on the front, side and rear of the vehicle.
— Front bumper with an aerodynamic splitter
— Side sill extensions
— Rear bumper with an aerodynamic diffuser
— Large-diameter exhaust pipes
These parts are close to the ground and may be
damaged if they contact objects such as curbs,
parking blocks, etc.
CAUTION
Reduce vehicle speed to decrease the
possibility of damaging these parts
when:
.driving on bumpy or rutted roads
. entering or exiting parking garages
and driveways
. driving over speed bumps
SPA2648
CAUTION
The approach and departure angles are
small. Reduce vehicle speed when the
vehicle approaches or leaves a steep
hill. Otherwise, the front bumper with
an aerodynamic splitter, rear bumper
with an aerodynamic diffuser and ex-
haust pipes may contact the road sur-
face and be damaged.
SPA2649
CAUTION
Do not step on the front bumper with an
aerodynamic splitter. Doing so could
damage it.Pre-driving checks and adjustments
3-33
Page 189 of 409
Black plate (189,1)
Model "Z34-D" EDITED: 2009/ 9/ 10
Push the TUNE
or
or SEEK
or
button to adjust Bass, Treble, Fade and
Balance to the desired level. Fade adjusts the
sound level between the front and rear speakers
and Balance adjusts the sound between the
right and left speakers.
Once you have adjusted the sound quality to the
desired level, push the MENU button repeatedly
until the radio or CD display reappears (normal
mode) . Otherwise, the radio or CD display will
automatically reappear after approximately 10
seconds.
For information about adjusting the clock dis-
play, see “TRIPLE METER” in the “2. Instruments
and controls” section.
FM-AM radio operation
Radio (FM/AM) band select:
Pushing the radio band select button will
change the band as follows:
AM ?FM1 ?FM2 ?AM
When the radio band select button is pushed
while the ignition switch is in the ACC or ON
position, the radio will come on at the station last
played. The last station played will also come on when
the PWR button is pushed to ON.
If another audio source is playing when the radio
band select button is pushed, the audio source
will automatically be turned off and the last radio
station played will come on.
When the stereo broadcast signal is weak, the
radio will automatically change from stereo to
monaural reception.
TUNE (Tuning):
Push the TUNE button
or
for manual
tuning.
SEEK tuning:
Push the SEEK button
or
to tune from
low to high or high to low frequencies and to
stop at the next broadcasting station.
SCAN tuning:
Push the SCAN tuning button to tune from low
to high frequencies and stops at each broad-
casting station for 5 seconds. Pushing the
button again during this 5 seconds period will
stop SCAN tuning and the radio will remain
tuned to that station.
If the SCAN tuning button is not pushed within 5
seconds, SCAN tuning moves to the next station.
to
Station memory operations:
Twelve stations can be set for the FM band (6
each for FM1 and FM2) and 6 stations can be
set for the AM band.
1. Choose the radio band AM, FM1 or FM2 using the radio band select button.
2. Tune to the desired station using the SEEK, SCAN or TUNE button.
3. Select the desired station and push and hold the desired station preset buttons 1 to
6 until a beep sound is heard. (The radio
mutes when the select button is pushed.)
4. The station indicator will then come on and the sound will resume. Memorizing is now
complete.
5. Other buttons can be set in the same manner.
If the battery cable is disconnected, or if the fuse
blows, the radio memory will be erased. In that
case, reset the desired stations.
Compact Disc (CD) player operationPlace the ignition switch in the ACC or ON
position, and insert the CD into the slot with the
label side facing up. The CD will be guided
automatically into the slot and start playing.
Center display, heater, air conditioner, audio, phone and voice recognition systems
4-37
Page 194 of 409
Black plate (194,1)
Model "Z34-D" EDITED: 2009/ 9/ 10
monaural reception.
TUNE (Tuning):
. For AM and FM radio
Push the TUNE button
or
for
manual tuning.
. For XM Satellite Radio
Push the TUNE button
or
to seek
channels from all of the categories when any
CAT is not selected.
SEEK tuning/CATEGORY
(CAT):
. For AM and FM radio
Push the SEEK button
or
to tune
from low to high or high to low frequencies
and to stop at the next broadcasting station.
. For XM Satellite Radio
Push the SEEK button
or
to tune
to the first channel of the next or previous
category.
During satellite radio reception, the following
notices will be displayed under certain condi-
tions.
. NO SIGNAL (No signal is received while the SAT tuner is connected.)
. OFF AIR (Broadcasting signed off)
. CHECK ANTENNA (Antenna connection
error)
. LOADING (When the initial setting is
performed)
. UPDATING (When the satellite radio sub-
scription is not active)
SCAN tuning:
Push the SCAN tuning button to tune from low
to high frequencies and stop at each broad-
casting station/channel for 5 seconds. Pushing
the button again during this 5 seconds period
will stop SCAN tuning and the radio will remain
tuned to that station/channel.
If the SCAN tuning button is not pushed within 5
seconds, SCAN tuning moves to the next
station/channel.
*1
to
*6
Station memory operations:
Eighteen stations/channels can be set for the
SAT band (6 each for XM1, XM2 and XM3) ,
twelve can be set for the FM band (6 each for
FM1 and FM2) , and 6 can be set for the AM
band.
1. Choose the radio band using the radio band select button. 2. Tune to the desired station/channel using
the SEEK, SCAN or TUNE button.
3. Push and hold the desired radio station preset button
*1
to*6
until a beep sound
is heard. (The radio mutes when the select
button is pushed.)
4. The station indicator will then come on and the sound will resume. Memorizing is now
complete.
5. Other buttons can be set in the same manner.
If the battery cable is disconnected, or if the fuse
opens, the radio memory will be erased. In that
case, reset the desired stations.
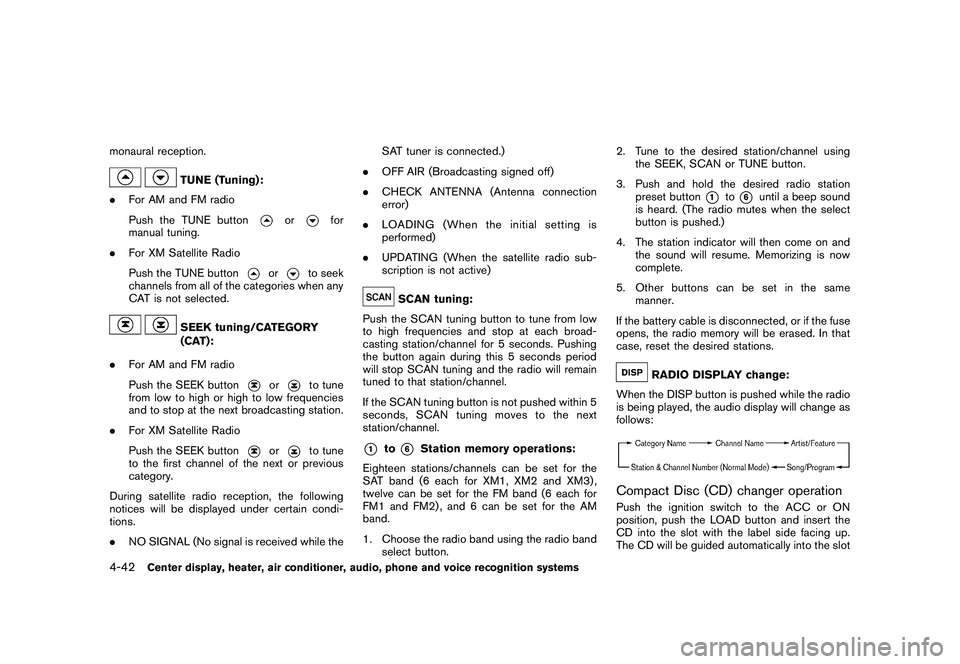
RADIO DISPLAY change:
When the DISP button is pushed while the radio
is being played, the audio display will change as
follows:
Compact Disc (CD) changer operationPush the ignition switch to the ACC or ON
position, push the LOAD button and insert the
CD into the slot with the label side facing up.
The CD will be guided automatically into the slot
4-42
Center display, heater, air conditioner, audio, phone and voice recognition systems