2010 MERCEDES-BENZ SLS COUPE low beam
[x] Cancel search: low beamPage 30 of 361
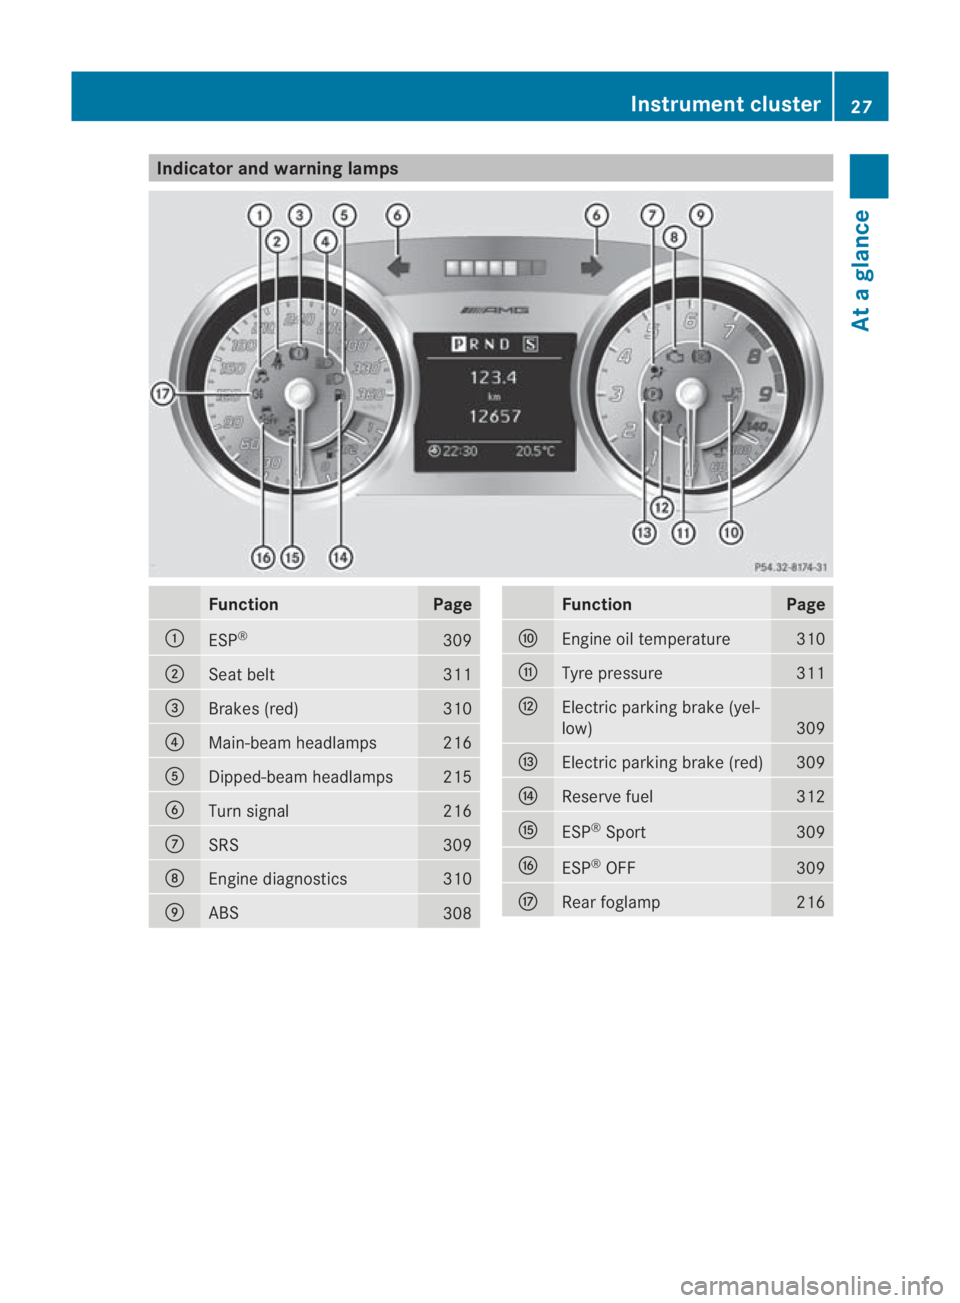
Indicator and warning lamps
Function Page
0001
ESP
® 309
0002
Seat belt 311
0015
Brakes (red) 310
0014
Main-beam headlamps 216
0012
Dipped-beam headlamps 215
0013
Turn signal 216
000A
SRS 309
000B
Engine diagnostics 310
000C
ABS
308 Function Page
000D
Engine oil temperature 310
000E
Tyre pressure 311
000F
Electric parking brake (yel-
low)
309
0010
Electric parking brak
e(red) 309
0011
Reserve fuel 312
0016
ESP
®
Sport 309
0017
ESP
®
OFF 309
0018
Rearf
oglamp 216Instrument cluster
27At a glance
BA 197 ECE RE 2010/6a; 1; 2, en-GB
sabbaeu Version: 3.0.3.6 2010-05-07T14:19:43+02:00 - Seite 27
Page 219 of 361
driving lights
12
or the dipped-beam head-
lamps (in addition to the side lamps) are
switched on or off automatically.
When the dipped-beam headlamps are
switched on, the 000Bindicator lamp in the
instrument cluster lights up.
Rear foglamps i
If you switch off the engine (KEYLESS-GO
function or key in position 1in the ignition
lock) and then restart the engine, the pre-
vious settings for the rear foglamp take
effec tagain.
X Select key position 2with the Start/Stop
button or start the engine.
X Turn the light switch to 000Bor000D 13
.
X To switch on: press the000Dbutton.
The yellow 000Dindicator lamp in the
instrument cluster lights up.
X To switch off: press the000Dbutton.
The yellow 000Dindicator lamp in the
instrument cluster goes out.
Main-beam headlamps X
Select key position 2with the Start/Stop
button or start the engine.
X To switch on: turn the light switch to
000B.
X Press the combination switch beyond the
pressure point in the direction of arrow
000A(Y page 215).
The 0009 indicator lamp in the instrument
cluster lights up.
X To deactivate: move the combination
switch back to its normal position.
The 0009 indicator lamp in the instrument
cluster goes out. Turn signals X
Select key position 2with the Start/Stop
button.
X To indicate briefly: press the combination
switch briefly in the direction of arrow 000B
or 000D(Y page 215).
The corresponding turn signal flashes three
times.
X To indicate: push the combination switch
beyond the pressure point in the direction
of arrow 000Bor000D(Y page 215).
The corresponding turn signal indicator
lamp (000B or0007) flashes in the instru-
ment cluster.
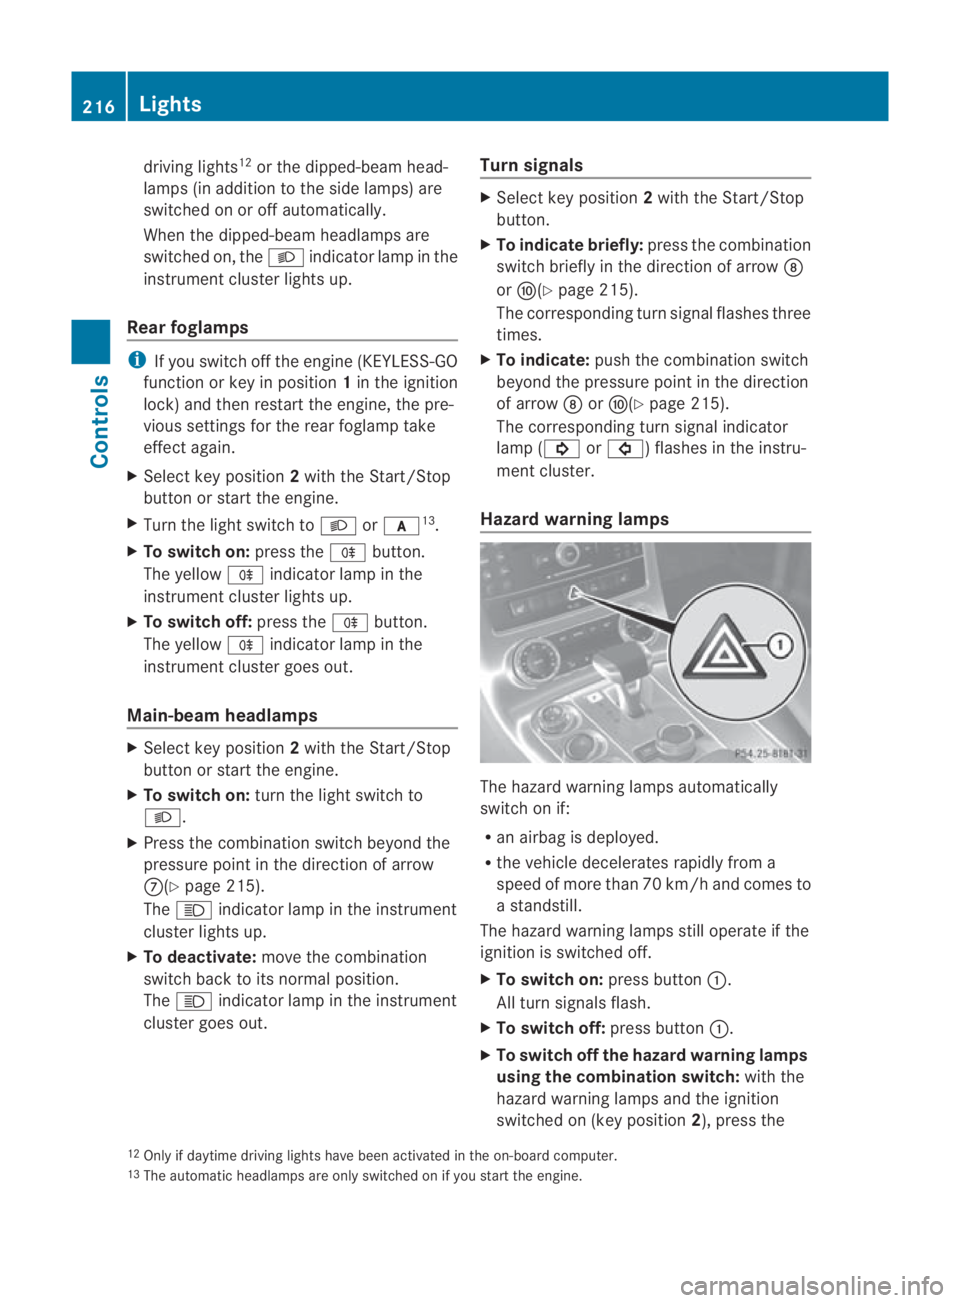
Hazard warning lamps The hazard warning lamps automatically
switch on if:
R
an airbag is deployed.
R the vehicle decelerates rapidly from a
speed of more than 70 km/ha nd comes to
a standstill.
The hazard warning lamps still operate if the
ignition is switched off.
X To switc hon:press button 0001.
All turn signals flash.
X To switch off: press button0001.
X To switch off the hazard warning lamps
using the combination switch: with the
hazard warning lamps and the ignition
switched on (key position 2), press the
12 Only if daytime driving lights have been activated in the on-board computer.
13 The automatic headlamps are only switched on if you start the engine. 216
LightsControls
BA 197 ECE RE 2010/6a; 1; 2, en-GB
sabbaeu
Version: 3.0.3.6 2010-05-07T14:19:43+02:00 - Seite 216
Page 241 of 361
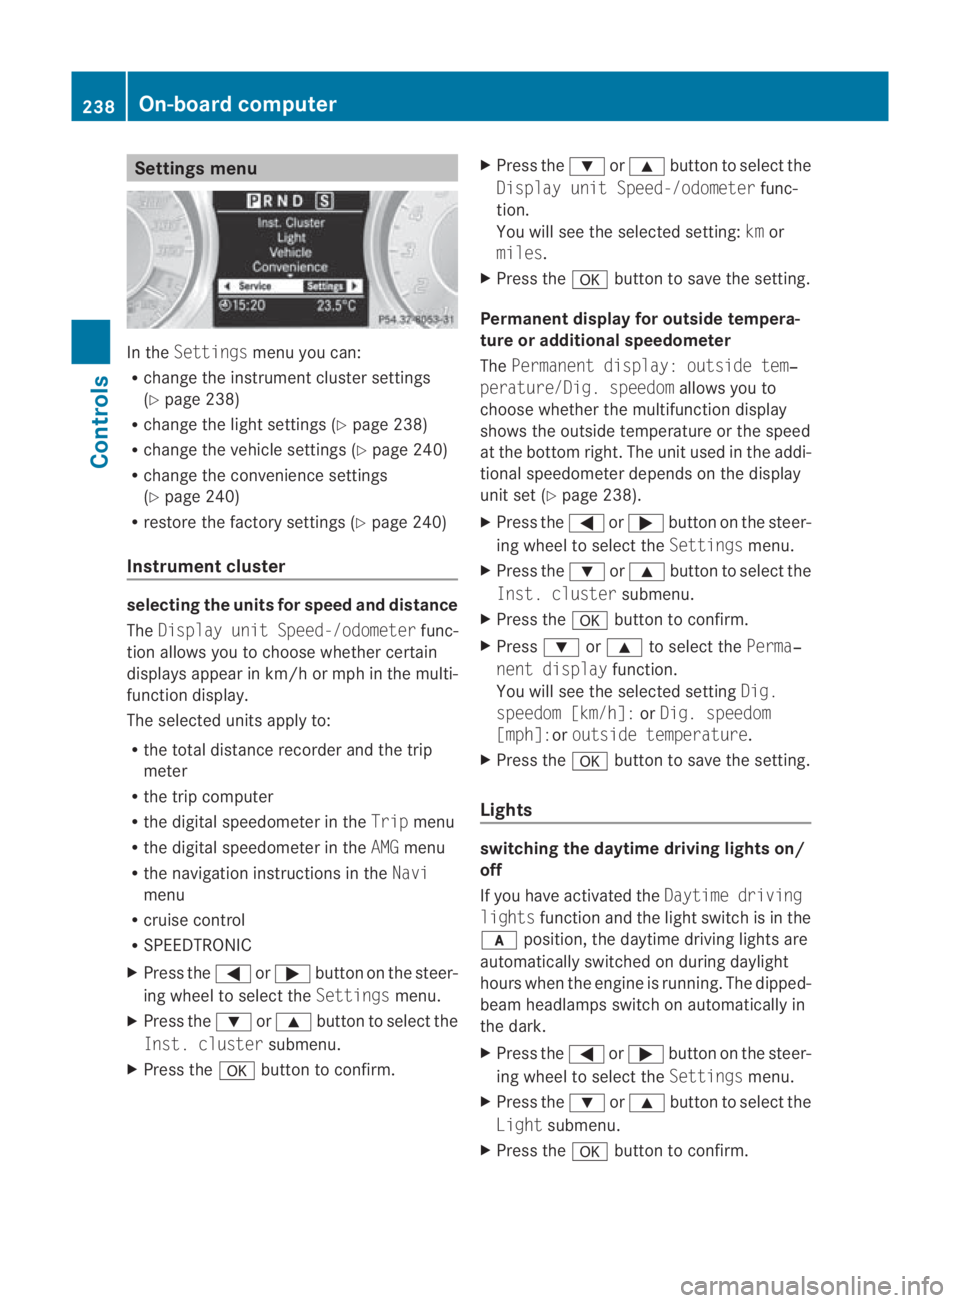
Settings menu
In the
Settings menu you can:
R change the instrument cluster settings
(Y page 238)
R change the light settings (Y page 238)
R change the vehicle settings (Y page 240)
R change the convenience settings
(Y page 240)
R restore the factory settings (Y page 240)
Instrument cluster selecting the units for speed and distance
The Display unit Speed-/odometer func-
tion allows you to choose whether certain
displays appear in km/h or mph in the multi-
function display.
The selected units apply to:
R the total distance recorder and the trip
meter
R the trip computer
R the digital speedometer in the Tripmenu
R the digital speedometer in the AMGmenu
R the navigation instructions in the Navi
menu
R cruise control
R SPEEDTRONIC
X Press the 0008or000E button on the steer-
ing wheel to select the Settingsmenu.
X Press the 000Cor000F button to select the
Inst. cluster submenu.
X Press the 000Abutton to confirm. X
Press the 000Cor000F button to select the
Display unit Speed-/odometer func-
tion.
You will see the selected setting: kmor
miles.
X Press the 000Abutton to save the setting.
Permanent display for outside tempera-
ture or additional speedometer
The Permanent display: outside tem‐
perature/Dig. speedom allows you to
choose whether the multifunction display
shows the outside temperature or the speed
at the bottom right. The unit used in the addi-
tional speedometer depends on the display
unit set (Y page 238).
X Press the 0008or000E button on the steer-
ing wheel to select the Settingsmenu.
X Press the 000Cor000F button to select the
Inst. cluster submenu.
X Press the 000Abutton to confirm.
X Press 000Cor000F to select the Perma‐
nent display function.
You will see the selected setting Dig.
speedom [km/h]: orDig. speedom
[mph]:or outside temperature.
X Press the 000Abutton to save the setting.
Lights switching the daytime driving lights on/
off
If you have activated the
Daytime driving
lights function and the light switch is in the
000D position, the daytime driving lights are
automatically switched on during daylight
hours when the engine is running. The dipped-
beam headlamps switch on automatically in
the dark.
X Press the 0008or000E button on the steer-
ing wheel to select the Settingsmenu.
X Press the 000Cor000F button to select the
Light submenu.
X Press the 000Abutton to confirm. 238
On-board computerControls
BA 197 ECE RE 2010/6a; 1; 2, en-GB
sabbaeu Version: 3.0.3.6 2010-05-07T14:19:43+02:00 - Seite 238
Page 242 of 361
X
Press the 000Cor000F button to select the
Daytime driving lamps function.
You will see the selected setting: onor
off.
X Press the 000Abutton to save the setting.
Setting brightness for display and
switches
You can use the Brightness display/
switches function to set the brightness of
the multifunction display and the switches in
the vehicle.
X Press the 0008or000E button on the steer-
ing wheel to select the Settingsmenu.
X Press the 000Cor000F button to select the
Light submenu.
X Press the 000Abutton to confirm.
X Press the 000Cor000F button to select the
Brightness Display/switches func-
tion.
You see the selected setting Levelwith a
value of between 0 and 100.
X Press the 000Abutton to save the setting.
X Press 000Cor000F to increase or decrease
the brightness.
Activating or deactivating the surround
lighting and exterior lighting delayed
switch-off
The Surround lighting function allows you
to set whether the exterior lighting should
come on when it is dark:
R for 40 seconds after unlocking the vehicle
with the key
The exterior lighting switches off when you
open the driver’s door.
R for 15 seconds after switching off the
engine and closing the doors
If the engine is switched off and then none
of the doors are opened, or if an open door
is not closed, the exterior lighting goes out
after 60 seconds.
If you activate the Surround lighting func-
tion, the following light up: R
the side lamps
R the dipped-beam headlamps
R the licence plate lighting
X Press the 0008or000E button on the steer-
ing wheel to select the Settingsmenu.
X Press the 000Cor000F button to select the
LIGHT submenu.
X Press the 000Abutton to confirm.
X Press the 000Cor000F button to select the
Surround lighting: function.
You will see the selected setting: onor
off.
X Press the 000Abutton to save the setting.
Deactivating the delayed switch-off tempora-
rily:
X Select key position 0with the Start/Stop
button before leaving the vehicle.
X Select key position 2and then key position
0 again with the Start/Stop button
The delayed switch-off is deactivated.
Delayed switch-off is reactivated the next
time you start the engine.
Activating/deactivating the interior light-
ing delayed switch-off
If you select key position 0with the Start/
Stop button when the Light. delayfunc-
tion is activated, the interior lighting lights up
for approximately 20 seconds if it is dark.
X Press the 0008or000E button on the steer-
ing wheel to select the Settingsmenu.
X Press the 000Cor000F button to select the
LIGHT submenu.
X Press the 000Abutton to confirm.
X Press the 000Cor000F button to select the
Interior lighting delay sw. off:
function.
You will see the selected setting: onor
off.
X Press the 000Abutton to save the setting. On-board computer
239Controls
BA 197 ECE RE 2010/6a; 1; 2, en-GB
sabbaeu Version: 3.0.3.6 2010-05-07T14:19:43+02:00 - Seite 239 Z
Page 282 of 361
waves. This may cause the maximum per-
missible water depth to be exceeded.
Failure to observe these notes may result
in damage to the engine, electrical systems
and transmission.
Driving abroad
Please bear the following in mind
An extensive Mercedes–Benz Service net-
work is also available in other countries. The
Service Hotline's curren ttelephone numbers
for use when you are abroad are to be found
in the "Service24h" chapter of the Service
Booklet.
Only low-octane fuel is available in certain
countries.
You can find further information about fuel
grades on (Y page 266). Symmetrical dipped-beam head-
lamps
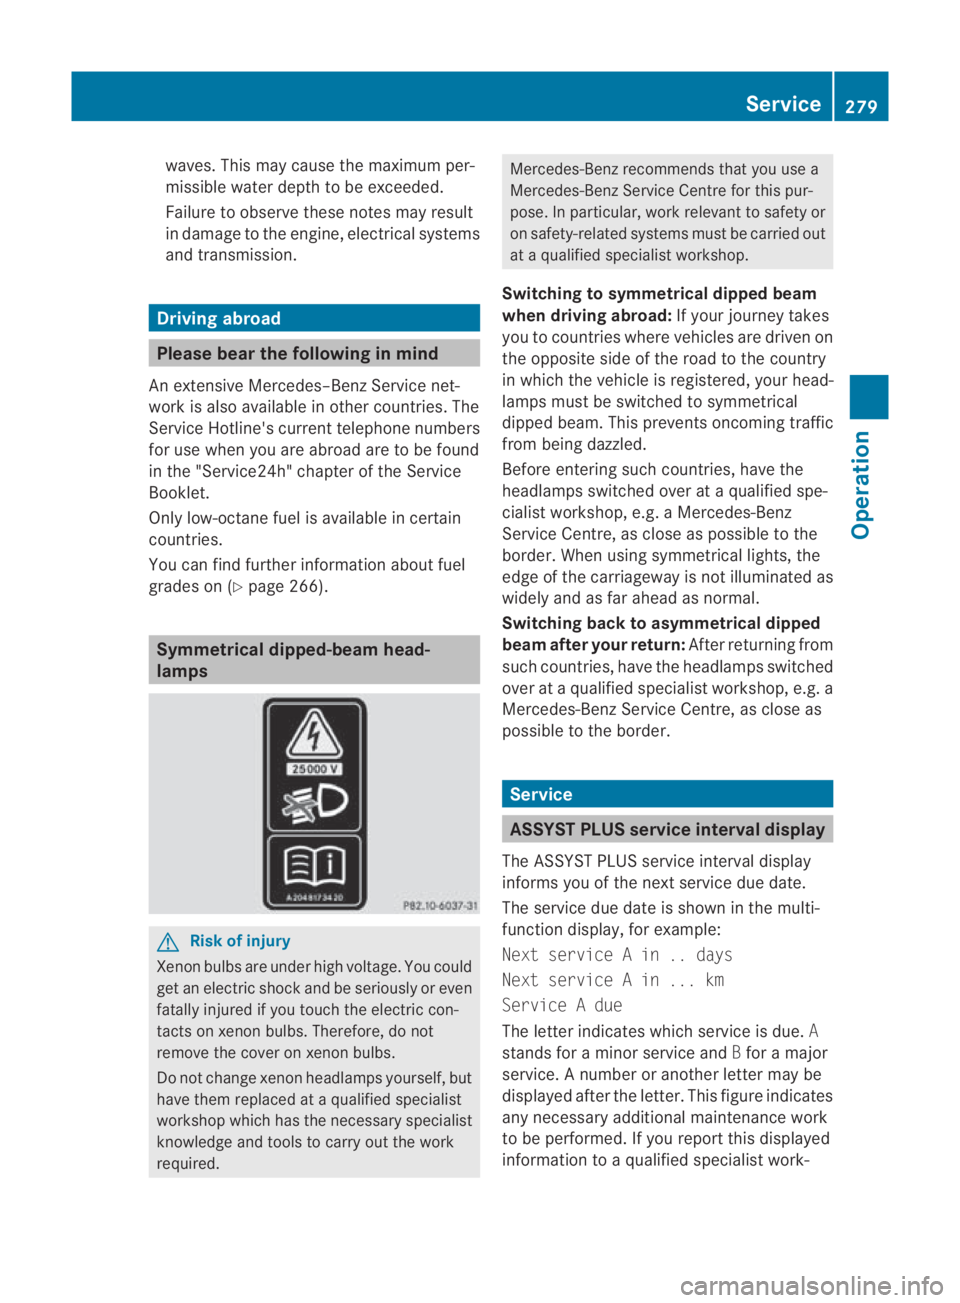
G
Risk of injury
Xenon bulbs are under high voltage. You could
get an electric shock and be seriously or even
fatally injured if you touch the electric con-
tacts on xenon bulbs. Therefore, do not
remove the cover on xenon bulbs.
Do not change xenon headlamps yourself, but
have them replaced at a qualified specialist
workshop which has the necessary specialist
knowledge and tools to carry out the work
required. Mercedes-Benz recommends that you use a
Mercedes-Benz Service Centre for this pur-
pose. In particular, work relevant to safety or
on safety-related systems must be carried out
at a qualified specialist workshop.
Switching to symmetrical dipped beam
when driving abroad: If your journey takes
you to countries where vehicles are driven on
the opposite side of the road to the country
in which the vehicle is registered, your head-
lamps must be switched to symmetrical
dipped beam. This prevents oncoming traffic
from being dazzled.
Before entering such countries, have the
headlamps switched over at a qualified spe-
cialist workshop, e.g. a Mercedes-Benz
Service Centre, as close as possible to the
border. When using symmetrical lights, the
edge of the carriageway is not illuminated as
widely and as far ahead as normal.
Switching back to asymmetrical dipped
beam after your return: After returning from
such countries, have the headlamps switched
over at a qualified specialist workshop, e.g. a
Mercedes-BenzS ervice Centre, as close as
possible to the border. Service
ASSYST PLUS service interval display
The ASSYST PLUS service interval display
informs you of the nexts ervice due date.
The service due date is shown in the multi-
function display, for example:
Next service A in .. days
Next service A in ... km
Service A due
The letter indicates which service is due. A
stands for a minor service and Bfor a major
service. A number or another letter may be
displayed after the letter. This figure indicates
any necessary additional maintenance work
to be performed. If you report this displayed
information to a qualified specialist work- Service
279Operation
BA 197 ECE RE 2010/6a; 1; 2, en-GB
sabbaeu Version: 3.0.3.6 2010-05-07T14:19:43+02:00 - Seite 279 Z
Page 303 of 361
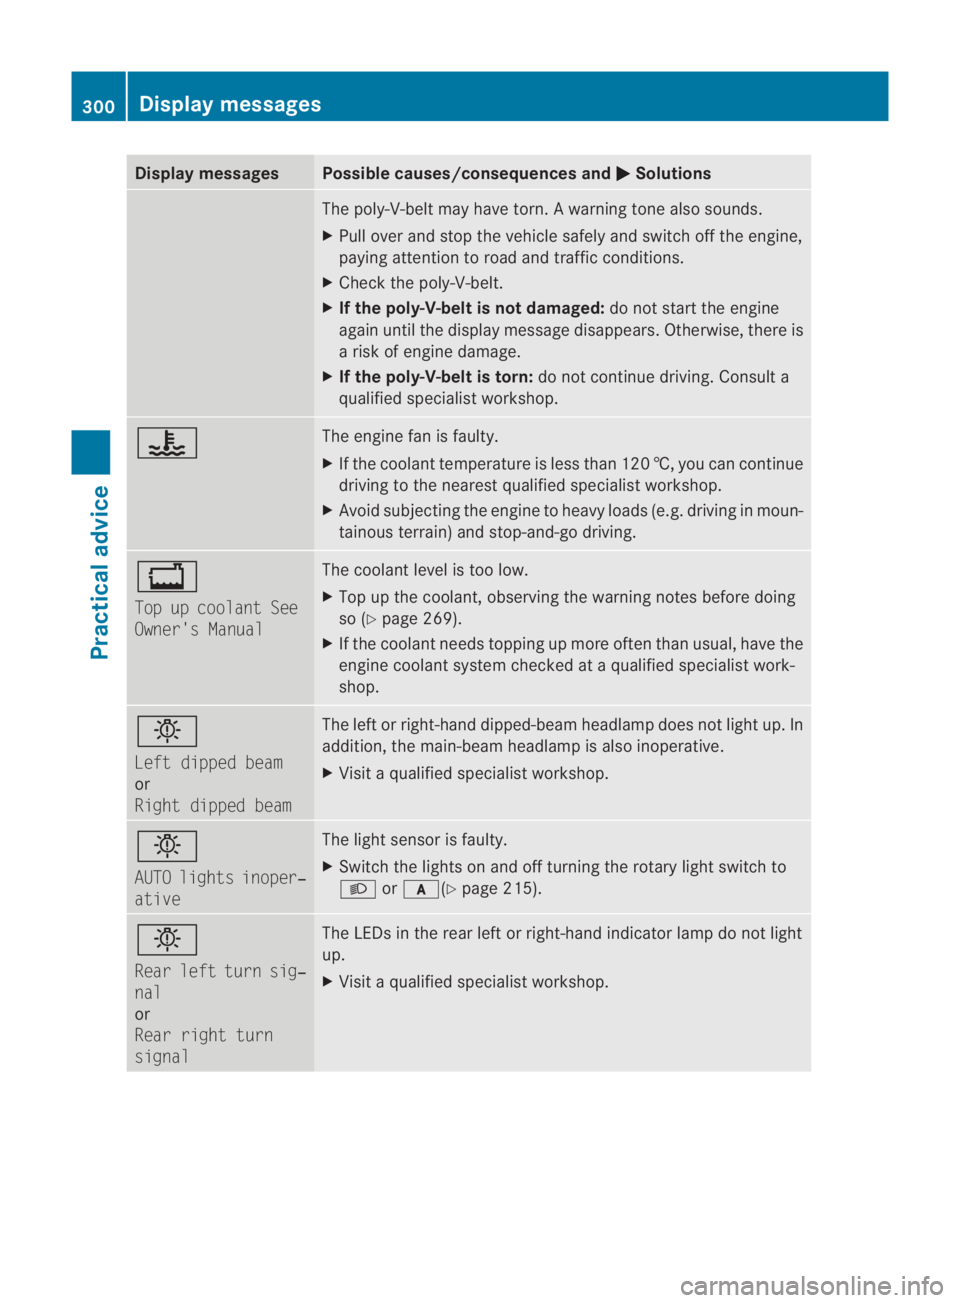
Display messages Possible causes/consequences and
0003 Solutions
The poly-V-belt may hav
etorn. Awarning tone also sounds.
X Pull ove rand stop the vehicle safely and switch off the engine,
paying attention to road and traffic conditions.
X Check the poly-V-belt.
X If the poly-V-belt is not damaged: do not start the engine
agai nuntil the display message disappears. Otherwise, ther eis
a ris kofe ngine damage.
X If the poly-V-belt is torn: do not continue driving. Consult a
qualified specialist workshop. 000F The engine fa
nis faulty.
X If the coolant temperature is less than 120 †, you can continue
driving to the nearest qualified specialist workshop.
X Avoid subjecting the engine to heavy loads (e.g. driving in moun-
tainous terrain) and stop-and-go driving. 000E
Top up coolant See
Owner's Manual The coolant level is too low.
X
Top up the coolant, observing the warning notes before doing
so (Y page 269).
X If the coolant needs topping up more often than usual, have the
engine coolant system checked at a qualified specialist work-
shop. 0006
Left dipped beam
or
Right dipped beam The left or right-hand dipped-beam headlamp does not light up. In
addition, the main-beam headlamp is also inoperative.
X
Visit a qualified specialist workshop. 0006
AUTO lights inoper‐
ative The light sensor is faulty.
X
Switch the lights on and off turning the rotary light switch to
000B or000D(Y page 215). 0006
Rear left turn sig‐
nal
or
Rear right turn
signal The LEDs in the rear left or right-hand indicator lamp do not light
up.
X
Visit a qualified specialist workshop. 300
Display messagesPractical advice
BA 197 ECE RE 2010/6a; 1; 2, en-GB
sabbaeu
Version: 3.0.3.6 2010-05-07T14:19:43+02:00 - Seite 300