2010 MERCEDES-BENZ SLK55AMG buttons
[x] Cancel search: buttonsPage 152 of 312

i
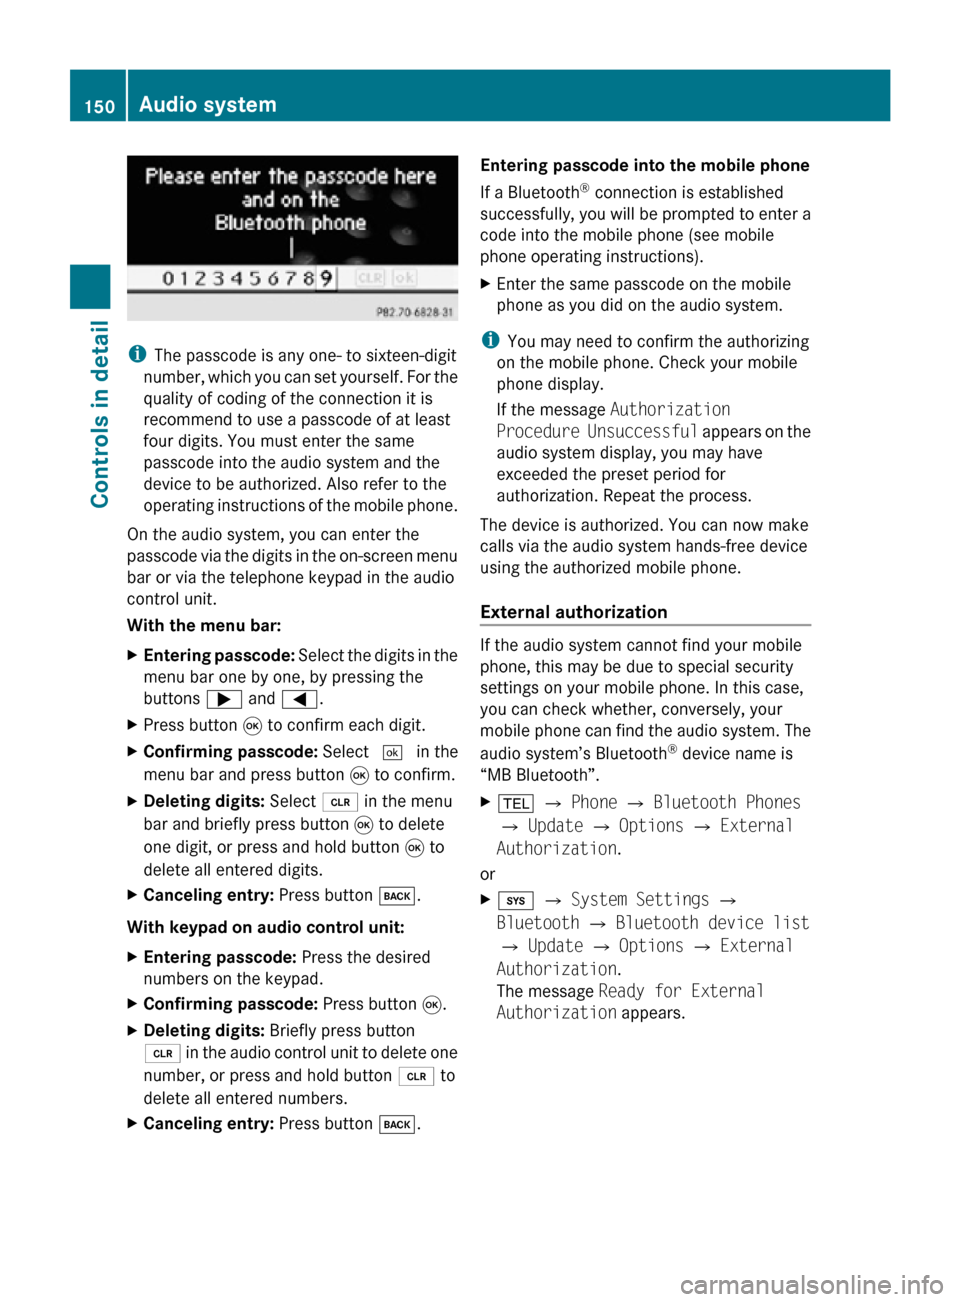
The passcode is any one- to sixteen-digit
number, which you can set yourself. For the
quality of coding of the connection it is
recommend to use a passcode of at least
four digits. You must enter the same
passcode into the audio system and the
device to be authorized. Also refer to the
operating instructions of the mobile phone.
On the audio system, you can enter the
passcode via the digits in the on-screen menu
bar or via the telephone keypad in the audio
control unit.
With the menu bar:
X Entering passcode: Select the digits in the
menu bar one by one, by pressing the
buttons ; and =.
X Press button 9 to confirm each digit.
X Confirming passcode: Select ¬ in the
menu bar and press button 9 to confirm.
X Deleting digits: Select 2 in the menu
bar and briefly press button 9 to delete
one digit, or press and hold button 9 to
delete all entered digits.
X Canceling entry: Press button k.
With keypad on audio control unit:
X Entering passcode: Press the desired
numbers on the keypad.
X Confirming passcode: Press button 9.
X Deleting digits: Briefly press button
2 in the audio control unit to delete one
number, or press and hold button 2 to
delete all entered numbers.
X Canceling entry: Press button k. Entering passcode into the mobile phone
If a Bluetooth
®
connection is established
successfully, you will be prompted to enter a
code into the mobile phone (see mobile
phone operating instructions).
X Enter the same passcode on the mobile
phone as you did on the audio system.
i You may need to confirm the authorizing
on the mobile phone. Check your mobile
phone display.
If the message Authorization
Procedure Unsuccessful appears on the
audio system display, you may have
exceeded the preset period for
authorization. Repeat the process.
The device is authorized. You can now make
calls via the audio system hands-free device
using the authorized mobile phone.
External authorization If the audio system cannot find your mobile
phone, this may be due to special security
settings on your mobile phone. In this case,
you can check whether, conversely, your
mobile phone can find the audio system. The
audio system’s Bluetooth
®
device name is
“MB Bluetooth”.
X % Q Phone Q Bluetooth Phones
Q Update Q Options Q External
Authorization.
or
X i Q System Settings Q
Bluetooth Q Bluetooth device list
Q Update Q Options Q External
Authorization.
The message Ready for External
Authorization appears. 150
Audio systemControls in detail
171_AKB; 3; 60, en-US
d2ureepe,
Version: 2.11.8.1 2009-05-11T16:00:23+02:00 - Seite 150
Page 186 of 312

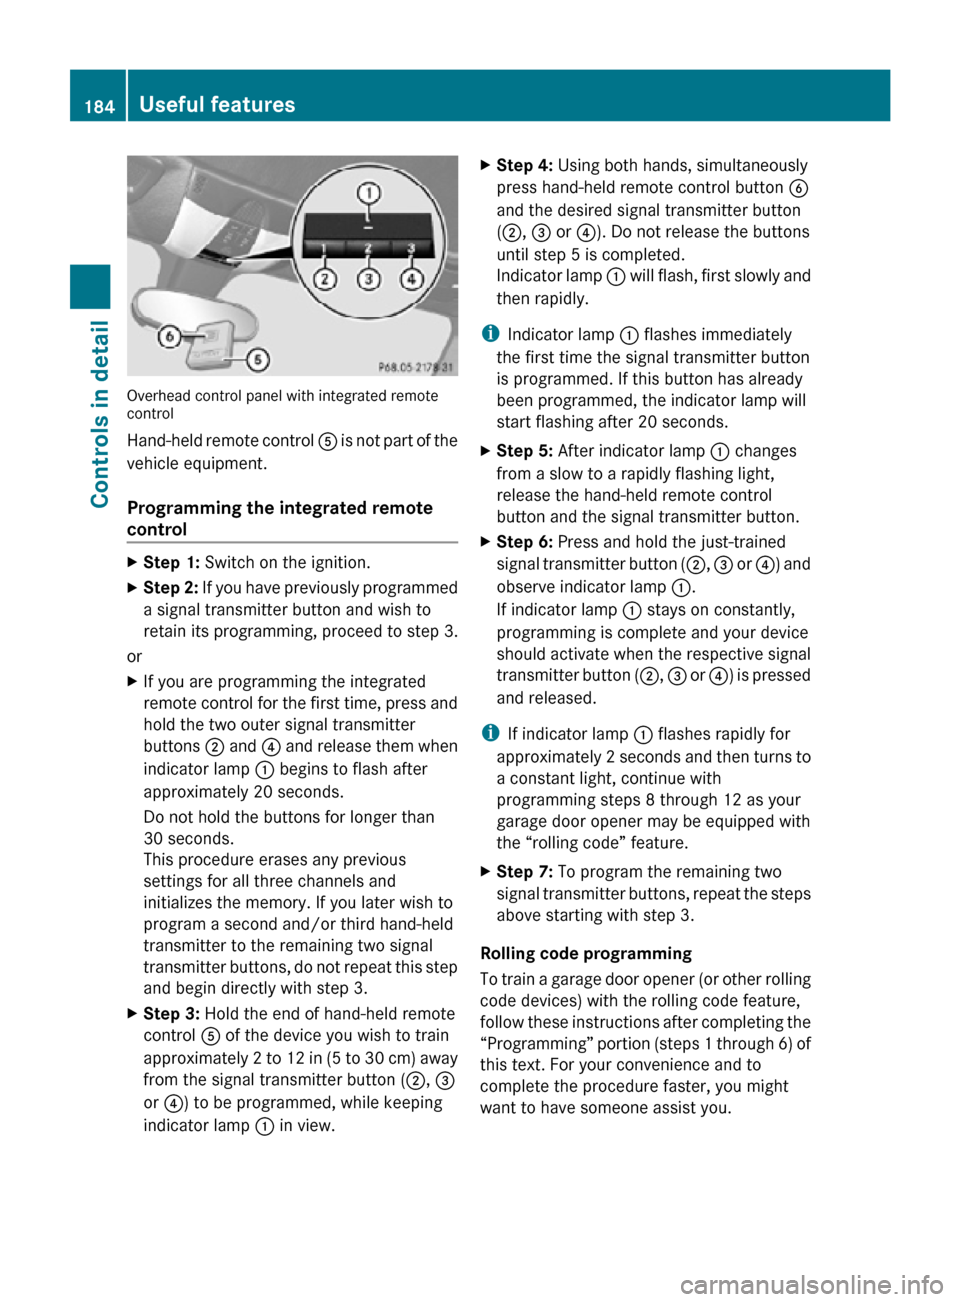
Overhead control panel with integrated remote
control
Hand-held remote control
A is not part of the
vehicle equipment.
Programming the integrated remote
control X
Step 1: Switch on the ignition.
X Step 2: If you have previously programmed
a signal transmitter button and wish to
retain its programming, proceed to step 3.
or
X If you are programming the integrated
remote control for the first time, press and
hold the two outer signal transmitter
buttons ; and ? and release them when
indicator lamp : begins to flash after
approximately 20 seconds.
Do not hold the buttons for longer than
30 seconds.
This procedure erases any previous
settings for all three channels and
initializes the memory. If you later wish to
program a second and/or third hand-held
transmitter to the remaining two signal
transmitter buttons, do not repeat this step
and begin directly with step 3.
X Step 3: Hold the end of hand-held remote
control A of the device you wish to train
approximately 2 to 12 in (5 to 30 cm) away
from the signal transmitter button ( ;, =
or ?) to be programmed, while keeping
indicator lamp : in view. X
Step 4: Using both hands, simultaneously
press hand-held remote control button B
and the desired signal transmitter button
(;, = or ?). Do not release the buttons
until step 5 is completed.
Indicator lamp : will flash, first slowly and
then rapidly.
i Indicator lamp : flashes immediately
the first time the signal transmitter button
is programmed. If this button has already
been programmed, the indicator lamp will
start flashing after 20 seconds.
X Step 5: After indicator lamp : changes
from a slow to a rapidly flashing light,
release the hand-held remote control
button and the signal transmitter button.
X Step 6: Press and hold the just-trained
signal transmitter button (;, = or ?) and
observe indicator lamp :.
If indicator lamp : stays on constantly,
programming is complete and your device
should activate when the respective signal
transmitter button ( ;, = or ?) is pressed
and released.
i If indicator lamp : flashes rapidly for
approximately 2 seconds and then turns to
a constant light, continue with
programming steps 8 through 12 as your
garage door opener may be equipped with
the “rolling code” feature.
X Step 7: To program the remaining two
signal transmitter buttons, repeat the steps
above starting with step 3.
Rolling code programming
To train a garage door opener (or other rolling
code devices) with the rolling code feature,
follow these instructions after completing the
“Programming” portion (steps 1 through 6) of
this text. For your convenience and to
complete the procedure faster, you might
want to have someone assist you. 184
Useful featuresControls in detail
171_AKB; 3; 60, en-US
d2ureepe,
Version: 2.11.8.1 2009-05-11T16:00:23+02:00 - Seite 184
Page 187 of 312

X
Step 8: Locate the “training” button on the
garage door opener motor head unit.
i Exact
location and color of the button may
vary by garage door opener brand.
Depending on manufacturer, the “training”
button may also be referred to as “learn” or
“smart” button. If there is difficulty locating
the transmitting button, refer to the garage
door opener Operator’s Manual.
X Step 9: Press the “training” button on the
garage door opener motor head unit.
The “training light” is activated.
You have 30 seconds to initiate the
following two steps.
X Step 10: Return to the vehicle and firmly
press, hold for 2 seconds and release the
programmed
signal transmitter button (;,
= or ?).
X Step 11: Press, hold for 2 seconds and
release same signal transmitter button a
second time to complete the training
process.
i Some garage door openers (or other
rolling
code equipped devices) may require
you to press, hold for 2 seconds and
release the same signal transmitter button
a third time to complete the training
process.
X Step 12: Confirm the garage door
operation by pressing the programmed
signal transmitter button ( ;, = or ?).
X Step 13: To program the remaining two
signal
transmitter buttons, repeat the steps
above starting with step 3.
Gate operator/Canadian programming
Canadian radio-frequency laws require
transmitter signals to “time-out” (or quit)
after several seconds of transmission which
may not be long enough for the integrated
signal
transmitter to pick up the signal during
programming. Similar to this Canadian law,
some U.S. gate operators are designed to
“time-out” in the same manner. If you live in Canada or if you are having
difficulties programming a gate operator
(regardless of where you live) by using the
programming
procedures, replace step 4 with
the following:
X Step 4: Press and hold the signal
transmitter button ( ;, = or ?). Do not
release this button until it has been
successfully trained.
X While still holding down the signal
transmitter button ( ;, = or ?), “cycle”
your hand-held remote control button B
as follows: Press and hold button B for
2 seconds, then release it for 2 seconds,
and again press and hold it for 2 seconds.
Repeat this sequence on the hand-held
remote control until the frequency signal
has been learned.
Upon successful training, indicator
lamp : will flash slowly and then rapidly
after several seconds.
X Proceed with programming step 5 and
step 6 to complete.
i Upon completion of programming the
integrated remote control, make sure you
retain the hand-held remote control that
came with the garage door opener, gate
operator or other device. You may need it
for use in other vehicles, for future
programming of an integrated remote
control, or simply for continued use as a
hand-held remote control to operate the
respective device in other situations.
Reprogramming a single signal
transmitter button To program a device using a signal
transmitter button previously trained, follow
these steps: Useful features
185
Controls in detail
171_AKB; 3; 60, en-US
d2ureepe, Version: 2.11.8.1 2009-05-11T16:00:23+02:00 - Seite 185 Z
Page 188 of 312

X
Switch on the ignition.
X Press and hold the desired signal
transmitter button ( ;, = or ?). Do not
release the button.
Indicator lamp : will begin to flash after
20 seconds.
X Without releasing the signal transmitter
button,
proceed with programming starting
with step 3.
Operation of integrated remote control X
Switch on the ignition.
X Select and press the appropriate
integrated signal transmitter button ( ;,
=
or ?) to activate the remote controlled
device.
The integrated remote control transmitter
continues to send the signal as long as the
button is pressed – up to 20 seconds.
Erasing the integrated remote control
memory i
If
you sell your vehicle, erase the codes of
all three channels.
X Switch on the ignition.
X Simultaneously press and hold outer signal
transmitter buttons ; and ?, for
approximately 20 seconds, until indicator
lamp : flashes rapidly. Do not hold for
longer than 30 seconds.
The
codes of all three channels are erased.
Programming tips If you are having difficulty programming the
integrated remote control, here are some
helpful tips:
R
Check the frequency of hand-held remote
control A
(typically located on the reverse
side of the remote). The integrated remote control is compatible with radio-frequency
devices operating between 280-390 MHz
.
R Put a new battery in hand-held remote
control A. This will increase the likelihood
of the hand-held remote control sending a
stronger and more accurate signal to the
integrated remote control.
R While performing step 3, hold hand-held
remote control A at different lengths and
angles from the signal transmitter button
(;, = or ?) you are programming.
Attempt varying angles at the distance of 2
to 12 inches (5 to 30 cm) away or the same
angle at varying distances.
R If another hand-held remote control is
available for the same device, try the
programming steps again using that other
hand-held remote control. Make sure new
batteries are in the hand-held remote
control before beginning the procedure.
R Straighten the antenna wire from the
garage door opener assembly. This may
help improve transmitting and/or receiving
signals.
i Certain types of garage door openers are
incompatible with the integrated remote
control. If you should experience further
difficulties with programming the
integrated remote control, contact an
authorized Mercedes-Benz Center, or call
the Mercedes-Benz Customer Assistance
Center (USA only) at
1-800-FOR-MERCedes, or the HomeLink ®
Hotline (USA only) at 1-800-355-3515, or
the Customer Service (Canada only) at
1-800-387-0100. 186
Useful features
Controls in detail
171_AKB; 3; 60, en-US
d2ureepe,
Version: 2.11.8.1 2009-05-11T16:00:23+02:00 - Seite 186