2010 MERCEDES-BENZ SLK55AMG bulb
[x] Cancel search: bulbPage 257 of 312
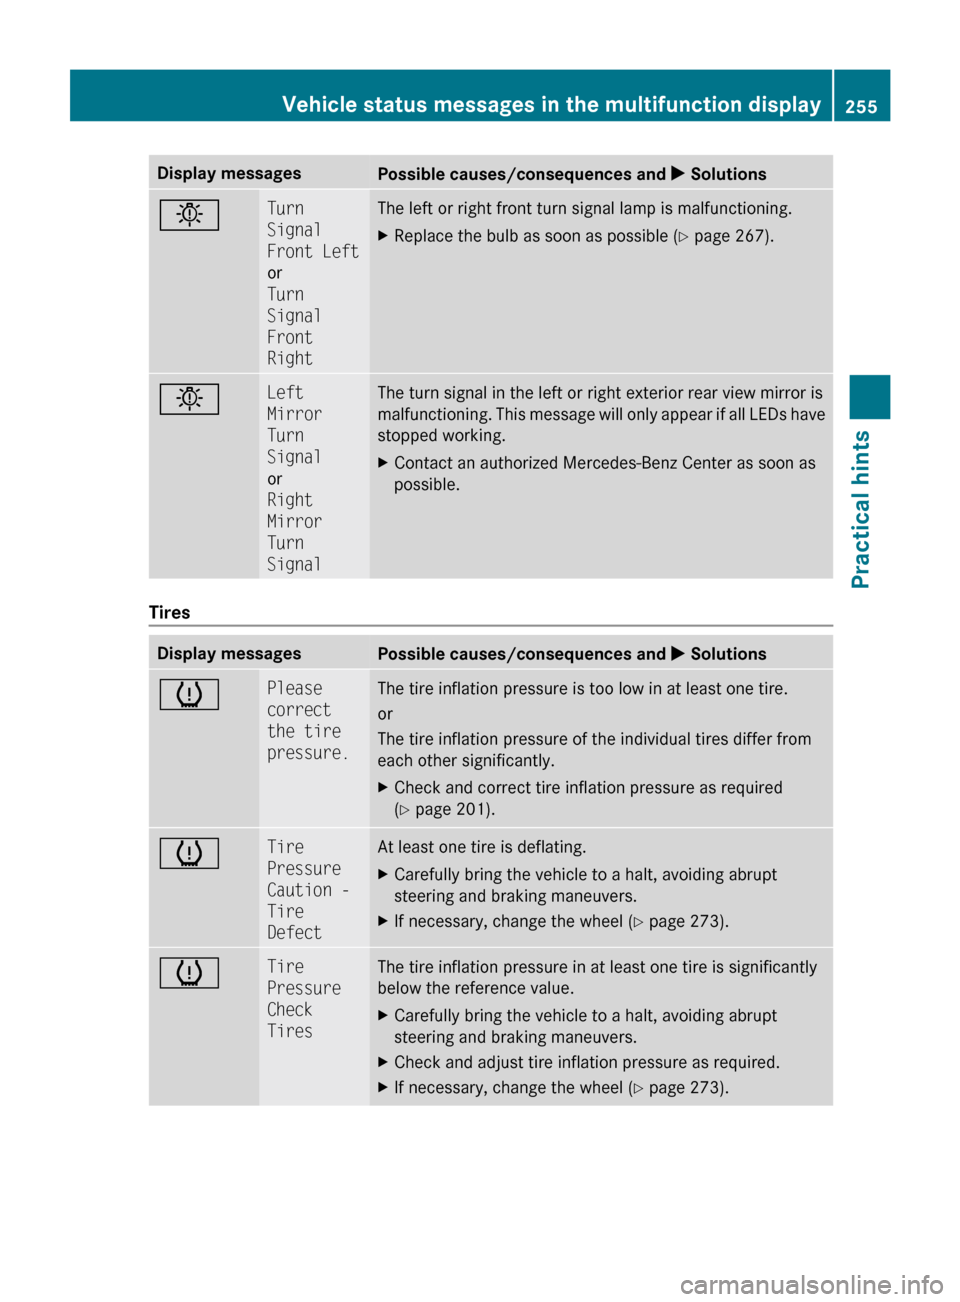
Display messages
Possible causes/consequences and
X Solutionsb Turn
Signal
Front Left
or
Turn
Signal
Front
Right The left or right front turn signal lamp is malfunctioning.
X
Replace the bulb as soon as possible (Y page 267). b Left
Mirror
Turn
Signal
or
Right
Mirror
Turn
Signal The turn signal in the left or right exterior rear view mirror is
malfunctioning.
This message will only appear if all LEDs have
stopped working.
X Contact an authorized Mercedes-Benz Center as soon as
possible. Tires
Display messages
Possible causes/consequences and
X Solutionsh Please
correct
the tire
pressure. The tire inflation pressure is too low in at least one tire.
or
The tire inflation pressure of the individual tires differ from
each other significantly.
X
Check and correct tire inflation pressure as required
(Y page 201). h Tire
Pressure
Caution -
Tire
Defect At least one tire is deflating.
X
Carefully bring the vehicle to a halt, avoiding abrupt
steering and braking maneuvers.
X If necessary, change the wheel (Y page 273). h Tire
Pressure
Check
Tires The tire inflation pressure in at least one tire is significantly
below the reference value.
X
Carefully bring the vehicle to a halt, avoiding abrupt
steering and braking maneuvers.
X Check and adjust tire inflation pressure as required.
X If necessary, change the wheel (Y page 273). Vehicle status messages in the multifunction display
255
Practical hints
171_AKB; 3; 60, en-US
d2ureepe,Version: 2.11.8.1 2009-05-11T16:00:23+02:00 - Seite 255 Z
Page 258 of 312
G
Warning!
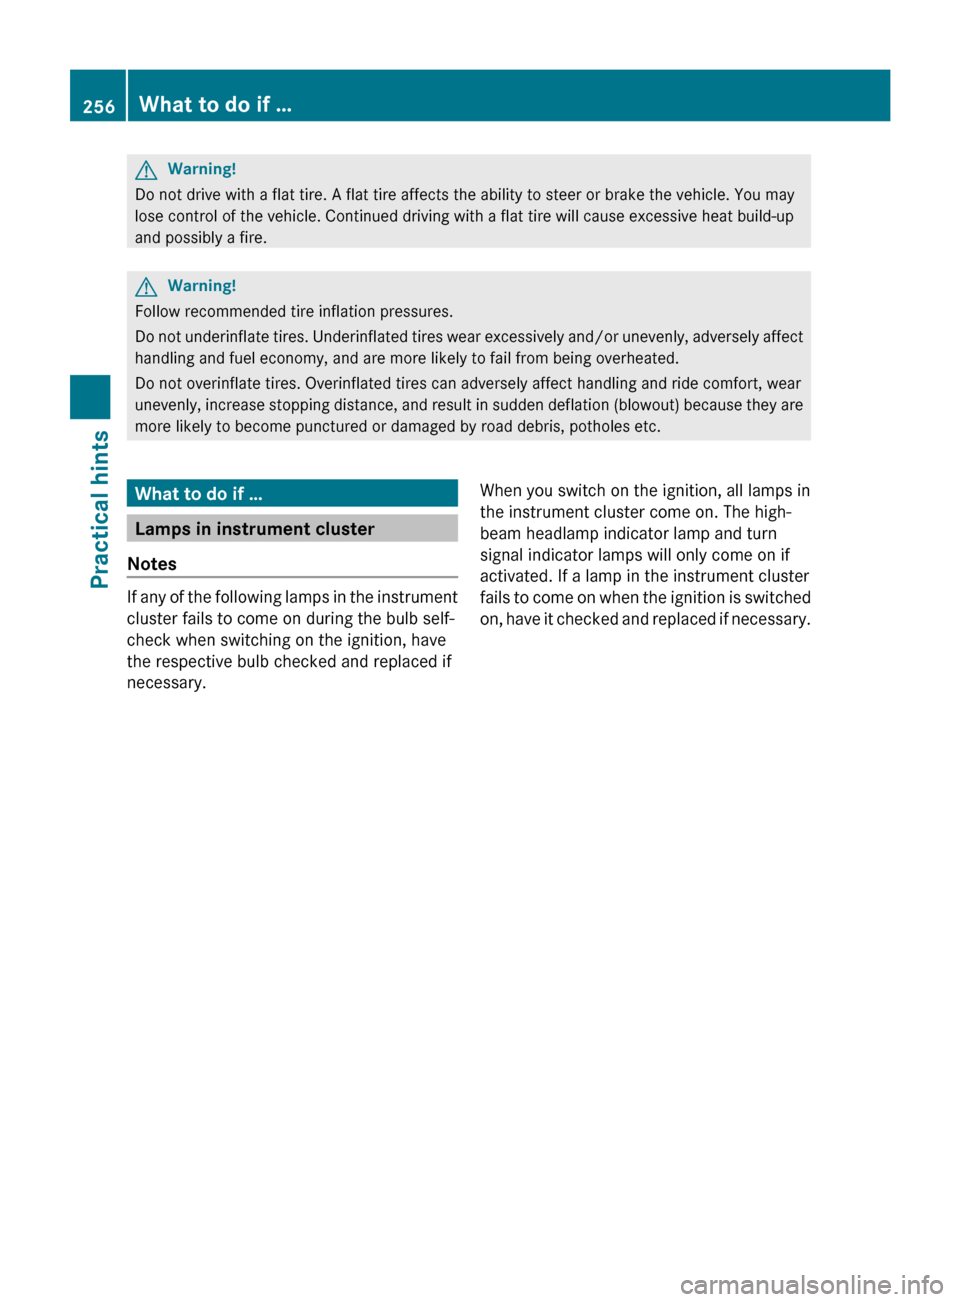
Do not drive with a flat tire. A flat tire affects the ability to steer or brake the vehicle. You may
lose control of the vehicle. Continued driving with a flat tire will cause excessive heat build-up
and possibly a fire. G
Warning!
Follow recommended tire inflation pressures.
Do not underinflate tires. Underinflated tires wear excessively and/or unevenly, adversely affect
handling and fuel economy, and are more likely to fail from being overheated.
Do not overinflate tires. Overinflated tires can adversely affect handling and ride comfort, wear
unevenly, increase stopping distance, and result in sudden deflation (blowout) because they are
more likely to become punctured or damaged by road debris, potholes etc. What to do if …
Lamps in instrument cluster
Notes If any of the following lamps in the instrument
cluster fails to come on during the bulb self-
check when switching on the ignition, have
the respective bulb checked and replaced if
necessary.
When you switch on the ignition, all lamps in
the instrument cluster come on. The high-
beam headlamp indicator lamp and turn
signal indicator lamps will only come on if
activated. If a lamp in the instrument cluster
fails
to come on when the ignition is switched
on, have it checked and replaced if necessary. 256
What to do if …
Practical hints
171_AKB; 3; 60, en-US
d2ureepe,
Version: 2.11.8.1 2009-05-11T16:00:23+02:00 - Seite 256
Page 269 of 312

G
Warning!
Batteries contain poisonous and corrosive
substances. Therefore, keep the batteries out
of reach of children.
If a battery is swallowed, seek medical help
immediately. G
Warning!
SmartKey batteries contain perchlorate
material, which may require special handling
and regard for the environment. Check with
your local government’s disposal guidelines.
California residents, see www.dtsc.ca.gov/
HazardousWaste/Perchlorate/
index.cfm.
Batteries contain materials that can harm the
environment if disposed of improperly.
Recycling of batteries is the preferred method
of disposal. Many states (USA only) or
provinces (Canada only) require sellers of
batteries to accept old batteries for recycling.
When inserting the batteries, make sure they
are clean and free of lint.
When replacing batteries, always replace
both batteries.
i The required replacement batteries are
available at any authorized Mercedes-Benz
Center.
Replacement batteries: Lithium, type
CR 2025 or equivalent.
X Remove the mechanical key from the
SmartKey (Y page 264). X
Press mechanical key ; into the SmartKey
opening until battery compartment
cover : opens. Do not keep the cover
shut. X
Remove the battery compartment cover.
X Pat the SmartKey against the palm of your
hand until battery = falls out.
X Insert the new battery with the positive
terminal (+) facing up. Use a lint-free cloth.
X Insert the tabs of the battery compartment
cover into the housing and press the cover
closed.
X Check the operation of the SmartKey. Replacing bulbs
Safety notes
Safe vehicle operation depends on proper
exterior lighting and signaling to a large
degree.
Correct headlamp adjustment is extremely
important. Have headlamps checked and
readjusted at regular intervals and when a
bulb has been replaced. Contact an
authorized Mercedes-Benz Center for
headlamp adjustment. G
Warning!
Bulbs and bulb sockets can be very hot. Allow
the lamp to cool down before changing a bulb.
Keep bulbs out of reach of children. Replacing bulbs
267Practical hints
171_AKB; 3; 60, en-US
d2ureepe, Version: 2.11.8.1 2009-05-11T16:00:23+02:00 - Seite 267 Z
Page 270 of 312
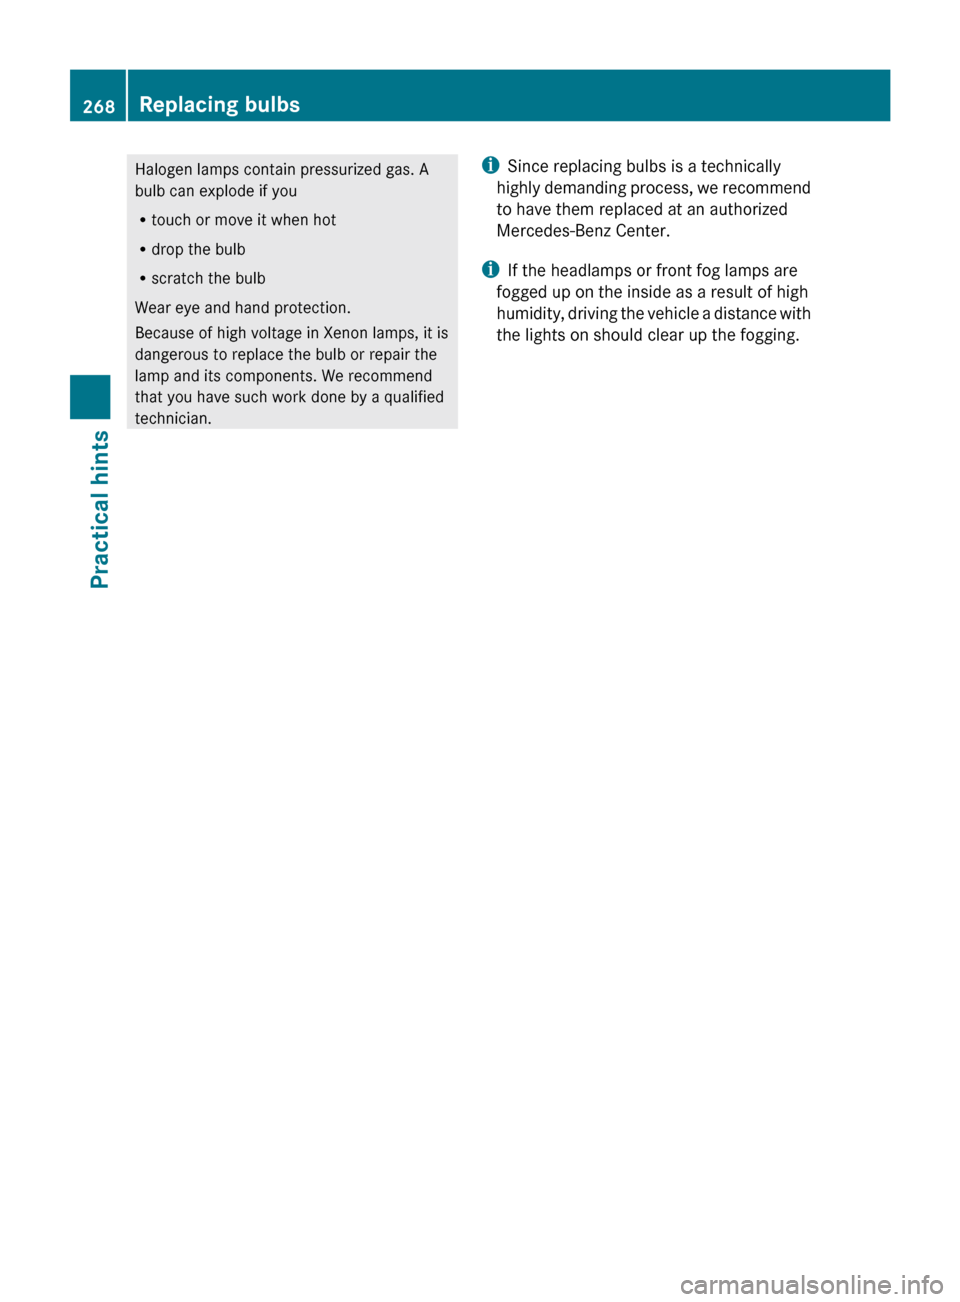
Halogen lamps contain pressurized gas. A
bulb can explode if you
R
touch or move it when hot
R drop the bulb
R scratch the bulb
Wear eye and hand protection.
Because of high voltage in Xenon lamps, it is
dangerous to replace the bulb or repair the
lamp and its components. We recommend
that you have such work done by a qualified
technician. i
Since replacing bulbs is a technically
highly
demanding process, we recommend
to have them replaced at an authorized
Mercedes-Benz Center.
i If the headlamps or front fog lamps are
fogged up on the inside as a result of high
humidity, driving the vehicle a distance with
the lights on should clear up the fogging. 268
Replacing bulbs
Practical hints
171_AKB; 3; 60, en-US
d2ureepe,
Version: 2.11.8.1 2009-05-11T16:00:23+02:00 - Seite 268
Page 271 of 312
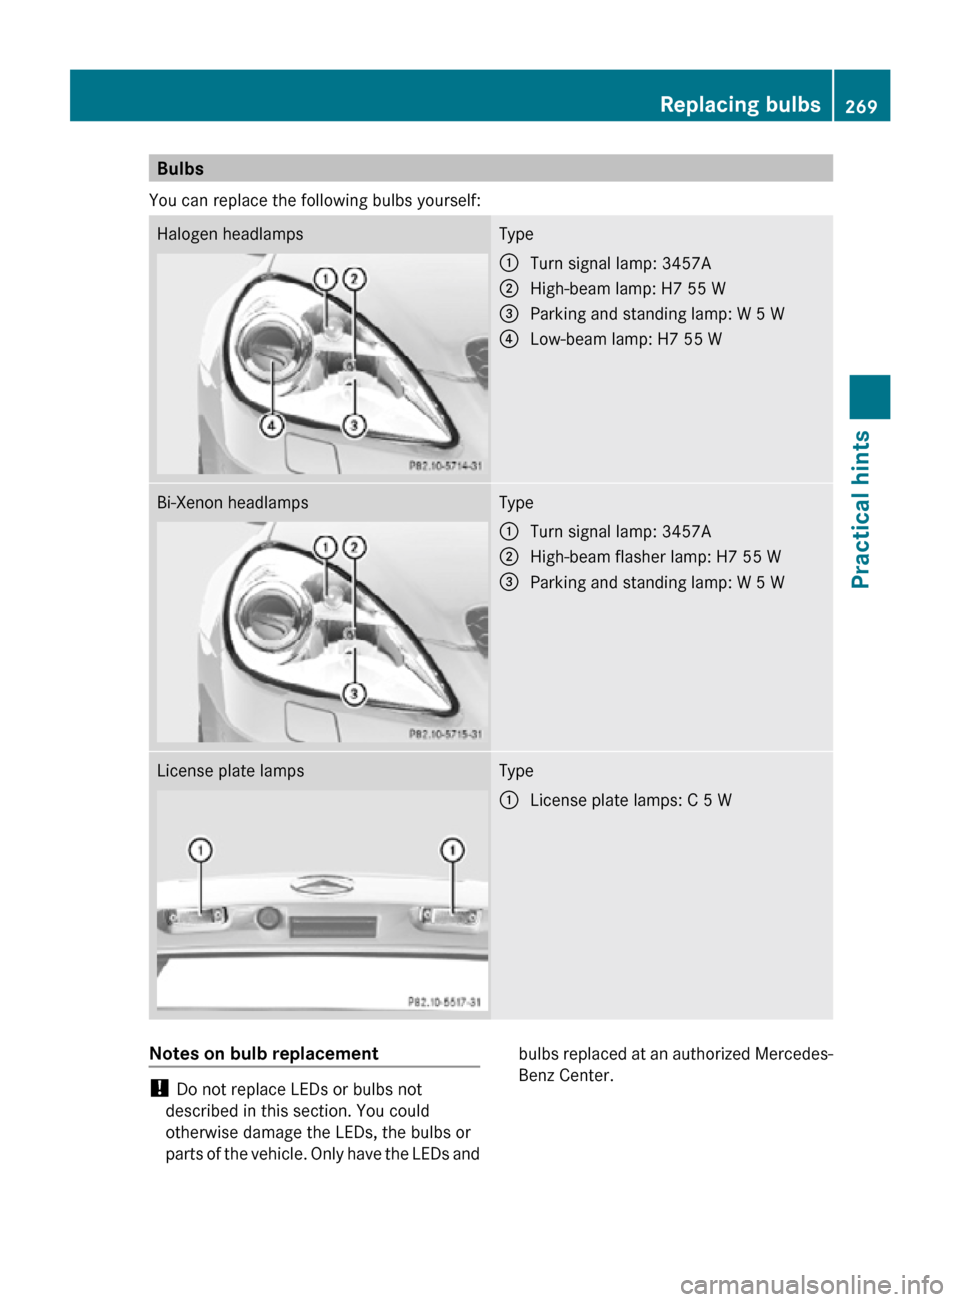
Bulbs
You can replace the following bulbs yourself: Halogen headlamps Type
:
Turn signal lamp: 3457A
; High-beam lamp: H7 55 W
= Parking and standing lamp: W 5 W
? Low-beam lamp: H7 55 W Bi-Xenon headlamps Type
:
Turn signal lamp: 3457A
; High-beam flasher lamp: H7 55 W
= Parking and standing lamp: W 5 W License plate lamps Type
:
License plate lamps: C 5 W Notes on bulb replacement
!
Do not replace LEDs or bulbs not
described in this section. You could
otherwise damage the LEDs, the bulbs or
parts of the vehicle. Only have the LEDs and bulbs replaced at an authorized Mercedes-
Benz Center. Replacing bulbs
269Practical hints
171_AKB; 3; 60, en-US
d2ureepe, Version: 2.11.8.1 2009-05-11T16:00:23+02:00 - Seite 269 Z
Page 272 of 312

G
Observe Safety notes, see page 267.
R Only use 12-volt bulbs of the same type and
with the specified watt rating.
R Switch the lights off before changing a bulb
to prevent short circuits.
R Always use a clean lint-free cloth when
handling bulbs.
R Your hands should be dry and free of oil and
grease.
R If the newly installed bulb does not come
on, contact an authorized Mercedes-Benz
Center.
i Mercedes-Benz recommends using
Longlife (LL) bulbs. Replacing bulbs for front lamps
Before you start to replace a bulb for a front
lamp, do the following:
X Switch off the ignition.
X Turn the exterior lamp switch to position
$.
X Open the hood (Y page 192). :
Housing cover for low beam (halogen
headlamps only)
Housing cover for Bi-Xenon headlamps.
Do not remove!
; Bulb socket for turn signal lamp
= Bulb socket for high beam/high-beam
flasher lamp
? Bulb socket for parking and standing lamp G
Warning!
Do not remove the cover for the Bi-Xenon
headlamp. Because of high voltage in Xenon
lamps, it is dangerous to replace the bulb or
repair the lamp and its components. It is
recommended to have such work done by a
qualified technician.
Low-beam bulb (halogen headlamps
only) A
Bulb socket for low-beam headlamp
X Turn housing cover : counterclockwise
and remove it.
X Turn bulb socket A with the bulb
counterclockwise and remove it.
X Pull the bulb out of bulb socket A.
X Gently press the new bulb into bulb socket
A.
X Place bulb socket A back into the housing
and turn it clockwise.
X Align housing cover : and turn it
clockwise until it engages.
High-beam and high-beam flasher bulb
(halogen headlamps only)/high-beam
flasher bulb (Bi-Xenon headlamps only) X
Turn bulb socket = with the bulb
counterclockwise and remove it.
X Pull the bulb out of bulb socket =.270
Replacing bulbsPractical hints
171_AKB; 3; 60, en-US
d2ureepe,
Version: 2.11.8.1 2009-05-11T16:00:23+02:00 - Seite 270
Page 273 of 312
X
Gently press the new bulb into bulb socket
=.
X Place bulb socket = back into the housing
and turn it clockwise until it engages.
Front turn signal lamp bulb X
Turn bulb socket ; with the bulb
counterclockwise and remove it.
X Gently press onto the bulb and turn it
counterclockwise out of bulb socket ;.
X Gently press the new bulb into bulb
socket ; and turn it clockwise until it
engages.
X Place bulb socket ; back into the housing
and turn it clockwise until it engages.
Parking and standing lamp bulb X
Turn bulb socket ? with the bulb
counterclockwise and remove it.
X Pull the bulb out of bulb socket ?.
X Gently press the new bulb into bulb
socket ?.
X Place bulb socket ? back into the housing
and turn it clockwise until it engages. Replacing bulbs for rear lamps
Tail lamp unit Since replacing bulbs in the tail lamp unit is a
technically highly demanding process, we
recommend to have them replaced at an
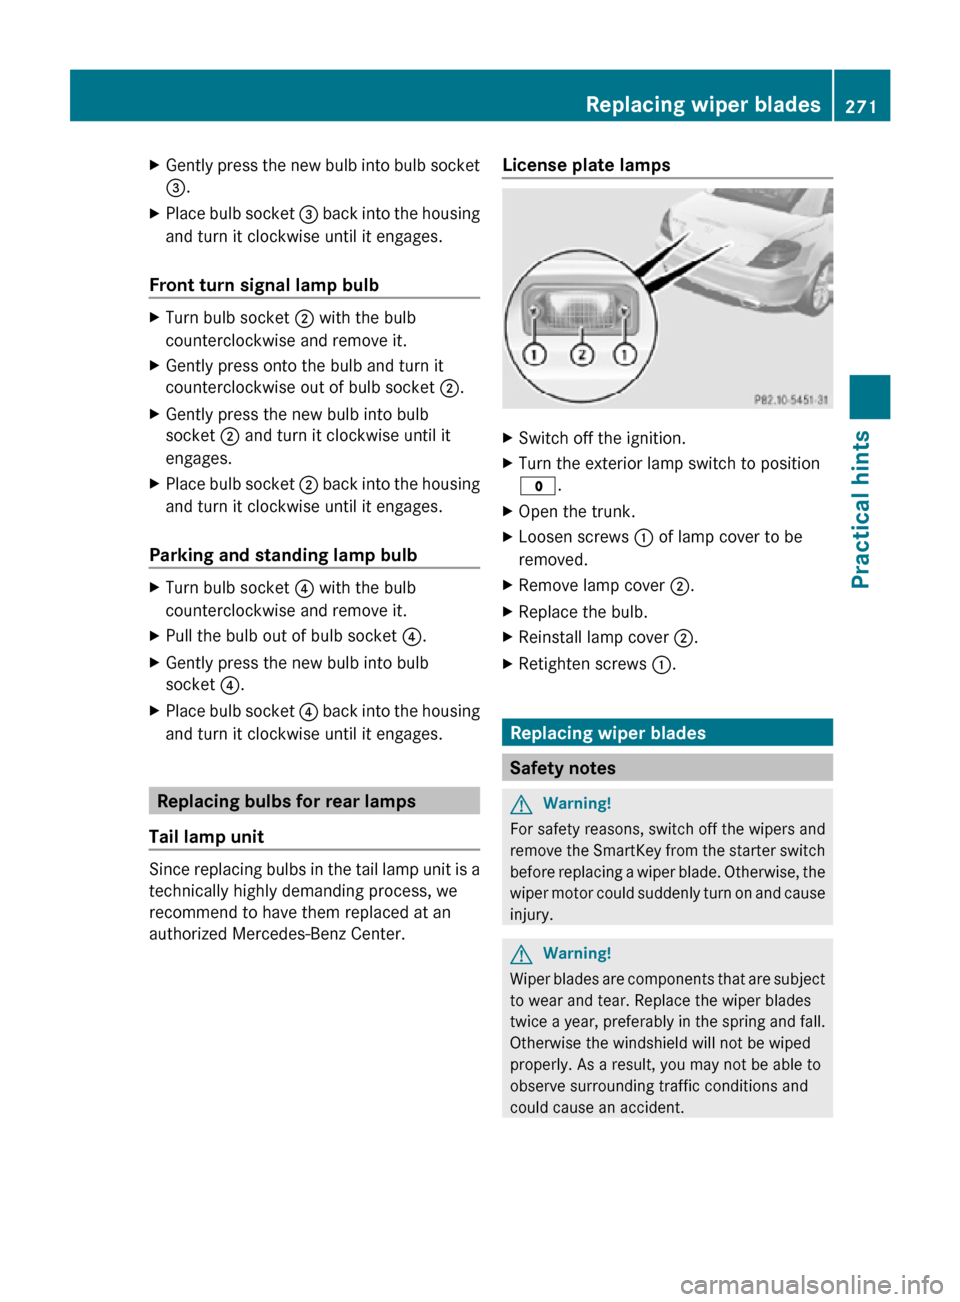
authorized Mercedes-Benz Center. License plate lamps X
Switch off the ignition.
X Turn the exterior lamp switch to position
$.
X Open the trunk.
X Loosen screws : of lamp cover to be
removed.
X Remove lamp cover ;.
X Replace the bulb.
X Reinstall lamp cover ;.
X Retighten screws :. Replacing wiper blades
Safety notes
G
Warning!
For safety reasons, switch off the wipers and
remove the SmartKey from the starter switch
before replacing a wiper blade. Otherwise, the
wiper motor could suddenly turn on and cause
injury. G
Warning!
Wiper blades are components that are subject
to wear and tear. Replace the wiper blades
twice a year, preferably in the spring and fall.
Otherwise the windshield will not be wiped
properly. As a result, you may not be able to
observe surrounding traffic conditions and
could cause an accident. Replacing wiper blades
271Practical hints
171_AKB; 3; 60, en-US
d2ureepe, Version: 2.11.8.1 2009-05-11T16:00:23+02:00 - Seite 271 Z