2010 MERCEDES-BENZ SLK300 brake
[x] Cancel search: brakePage 163 of 312
R
Vehicles with manual transmission: you
engage a gear too high for the current
speed
and thus the engine speed is too low
R Vehicles with automatic transmission: you
shift the automatic transmission into
neutral position N while driving
Depressing the accelerator pedal does not
deactivate the cruise control. After a brief
acceleration (e.g. for passing), the cruise
control will resume the last set speed.
Changing the set speed G
Warning!
Keep in mind that it may take a brief moment
until the vehicle has made the necessary
adjustments.
Increase
or decrease the set vehicle speed to
a value that the prevailing road conditions and
legal speed limits permit. Otherwise, sudden
and unexpected acceleration or deceleration
of the vehicle could cause an accident and/
or serious injury to you and others.
When you use the cruise control lever to
decelerate, the brake system will brake the
vehicle automatically if the engine’s braking
power does not brake the vehicle sufficiently.
X Increasing: Lift the cruise control lever in
direction of arrow : and hold it up until
the desired speed is reached.
X Decreasing:
Press the cruise control lever
in direction of arrow ; and hold it down
until the desired speed is reached.
X Release the cruise control lever.
The new speed is set and the vehicle will
accelerate or decelerate. Fine adjustment in 1 mph (Canada:
1 km/h) increments
X
Increasing: Briefly tip the cruise control
lever in direction of arrow :.
X Decreasing: Briefly tip the cruise control
lever in direction of arrow ;.
Setting stored speed (Resume
function) G
Warning!
The set speed stored in memory should only
be set again if prevailing road conditions and
legal speed limits permit. Possible
acceleration or deceleration differences
arising from returning to the preset speed
could
cause an accident and/or serious injury
to you and others.
X Briefly pull the cruise control lever in
direction of arrow ?.
X Remove your foot from the accelerator
pedal.
The last stored speed is deleted from memory
when the engine is turned off. Driving systems
161
Controls in detail
171_AKB; 3; 60, en-US
d2ureepe, Version: 2.11.8.1 2009-05-11T16:00:23+02:00 - Seite 161 Z
Page 173 of 312
G
Warning!
Before operating the retractable hardtop,
make sure there is no danger of anyone being
injured by the moving parts (retractable
hardtop, roof frame, and trunk lid).
Hands must never be placed near the roof
frame, upper windshield area, hardtop, shelf
behind roll bars, or trunk lid while the
retractable hardtop is being raised or
lowered. Serious personal injury may occur.
If potential danger exists, release the
retractable hardtop switch or button % or
& on the SmartKey. This immediately
interrupts the raising or lowering procedure.
You then can operate the retractable hardtop
switch or press button % or & on the
SmartKey to raise or lower the retractable
hardtop away from the danger zone
! Never sit or place heavy objects on the
rear shelf. Doing so could cause damage to
the retractable hardtop and the rear shelf.
! Please keep in mind that weather
conditions can sometimes change rapidly.
Make sure to close the retractable hardtop
when leaving the vehicle. If water enters
the vehicle interior, vehicle electronics
could be damaged which is not covered by
the Mercedes-Benz Limited Warranty.
! When opening and closing the retractable
hardtop, make sure
R there is sufficient clearance for the
retractable hardtop to move up and for
the trunk lid to move back
R the luggage cover is installed, extended
and closed
R the trunk is loaded only to the height of
the luggage cover
R the luggage/cargo does not push up the
closed luggage cover R
the trunk lid is closed
R the outside temperature is above +5‡
(-15†)
Otherwise the retractable hardtop and
trunk as well as other parts of the vehicle
could be damaged. Opening and closing
With the retractable hardtop switch G
Observe Safety notes, see page 170.
X Engage the parking brake.
X Close the luggage cover ( Y page 173).
X Close the trunk lid.
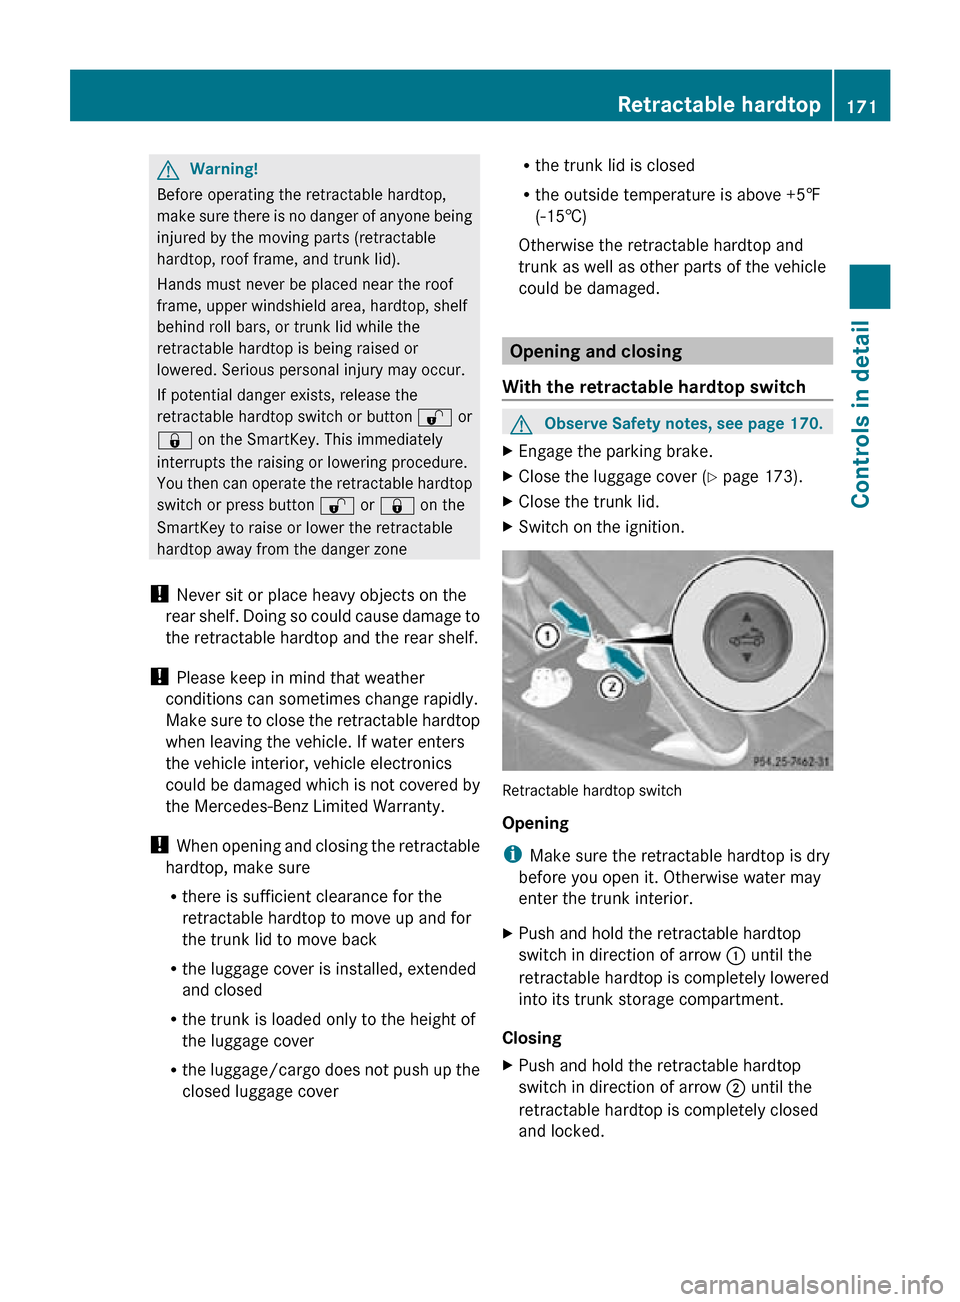
X Switch on the ignition. Retractable hardtop switch
Opening
i
Make sure the retractable hardtop is dry
before you open it. Otherwise water may
enter the trunk interior.
X Push and hold the retractable hardtop
switch in direction of arrow : until the
retractable hardtop is completely lowered
into its trunk storage compartment.
Closing
X Push and hold the retractable hardtop
switch in direction of arrow ; until the
retractable hardtop is completely closed
and locked. Retractable hardtop
171Controls in detail
171_AKB; 3; 60, en-US
d2ureepe, Version: 2.11.8.1 2009-05-11T16:00:23+02:00 - Seite 171 Z
Page 179 of 312
X
Lift up vanity mirror cover B.
Vanity mirror lamp : comes on. Ashtray
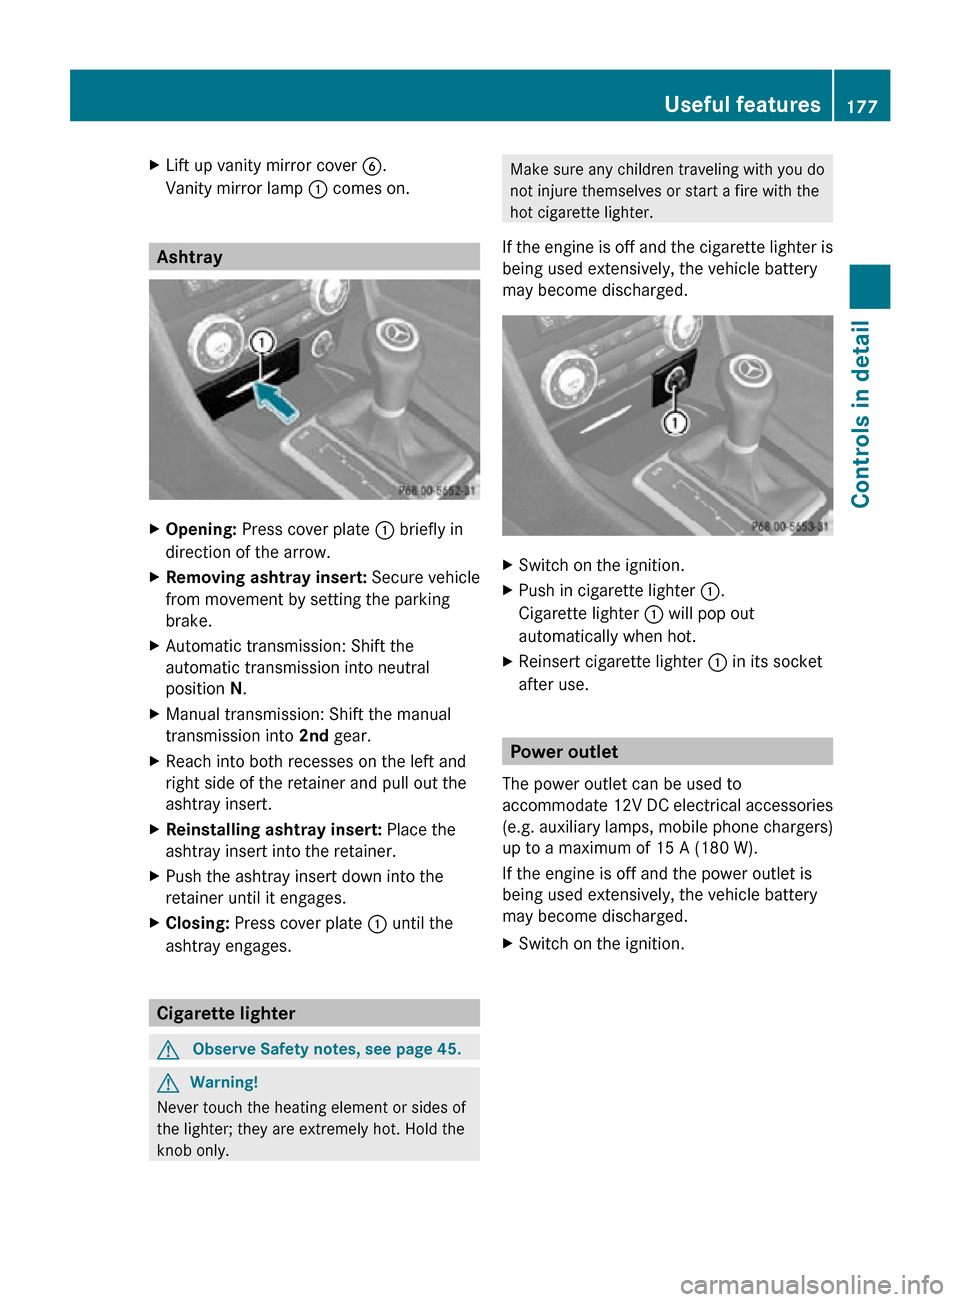
X
Opening: Press cover plate : briefly in
direction of the arrow.
X Removing ashtray insert: Secure vehicle
from movement by setting the parking
brake.
X Automatic transmission: Shift the
automatic transmission into neutral
position N.
X Manual transmission: Shift the manual
transmission into 2nd gear.
X Reach into both recesses on the left and
right side of the retainer and pull out the
ashtray insert.
X Reinstalling ashtray insert: Place the
ashtray insert into the retainer.
X Push the ashtray insert down into the
retainer until it engages.
X Closing: Press cover plate : until the
ashtray engages. Cigarette lighter
G
Observe Safety notes, see page 45. G
Warning!
Never touch the heating element or sides of
the lighter; they are extremely hot. Hold the
knob only. Make sure any children traveling with you do
not injure themselves or start a fire with the
hot cigarette lighter.
If the engine is off and the cigarette lighter is
being used extensively, the vehicle battery
may become discharged. X
Switch on the ignition.
X Push in cigarette lighter :.
Cigarette lighter : will pop out
automatically when hot.
X Reinsert cigarette lighter : in its socket
after use. Power outlet
The power outlet can be used to
accommodate 12V DC electrical accessories
(e.g. auxiliary lamps, mobile phone chargers)
up to a maximum of 15 A (180 W).
If the engine is off and the power outlet is
being used extensively, the vehicle battery
may become discharged.
X Switch on the ignition. Useful features
177Controls in detail
171_AKB; 3; 60, en-US
d2ureepe, Version: 2.11.8.1 2009-05-11T16:00:23+02:00 - Seite 177 Z
Page 194 of 312
Check the following:
R
Engine oil level ( Y page 193)
R Tire inflation pressure ( Y page 201)
R Coolant level ( Y page 196)
R Vehicle lighting ( Y page 267)
R Washer system and headlamp cleaning
system (Y page 196)
R Brake fluid ( Y page 197) Engine compartment
Hood
G
Warning!
Do not pull the release lever while the vehicle
is in motion. Otherwise the hood could be
forced open by passing air flow.
This could cause the hood to come loose and
injure you and/or others.
Opening G
Warning!
Do not open the hood when the engine is
overheated. You could be seriously injured.
Observe the coolant temperature display to
determine whether the engine may be
overheated. If you see flames or smoke
coming from the engine compartment, move
away from the vehicle. Wait until the engine
has cooled. If necessary, call the fire
department. G
Warning!
You could be injured when the hood is open –
even when the engine is turned off.
Parts of the engine can become very hot. To
prevent burns, let the engine cool completely
before touching any components on the
vehicle. Comply with all relevant safety
precautions. G
Warning!
To help prevent personal injury, stay clear of
moving parts when the hood is open and the
engine is running.
The radiator fan may continue to run for
approximately 30 seconds or may even
restart after the engine has been turned off.
Stay clear of fan blades. G
Warning!
The engine is equipped with a transistorized
ignition system. Because of the high voltage
it is dangerous to touch any components
(ignition coils, spark plug sockets, diagnostic
socket) of the ignition system
R with the engine running
R while starting the engine
R when the ignition is switched on and the
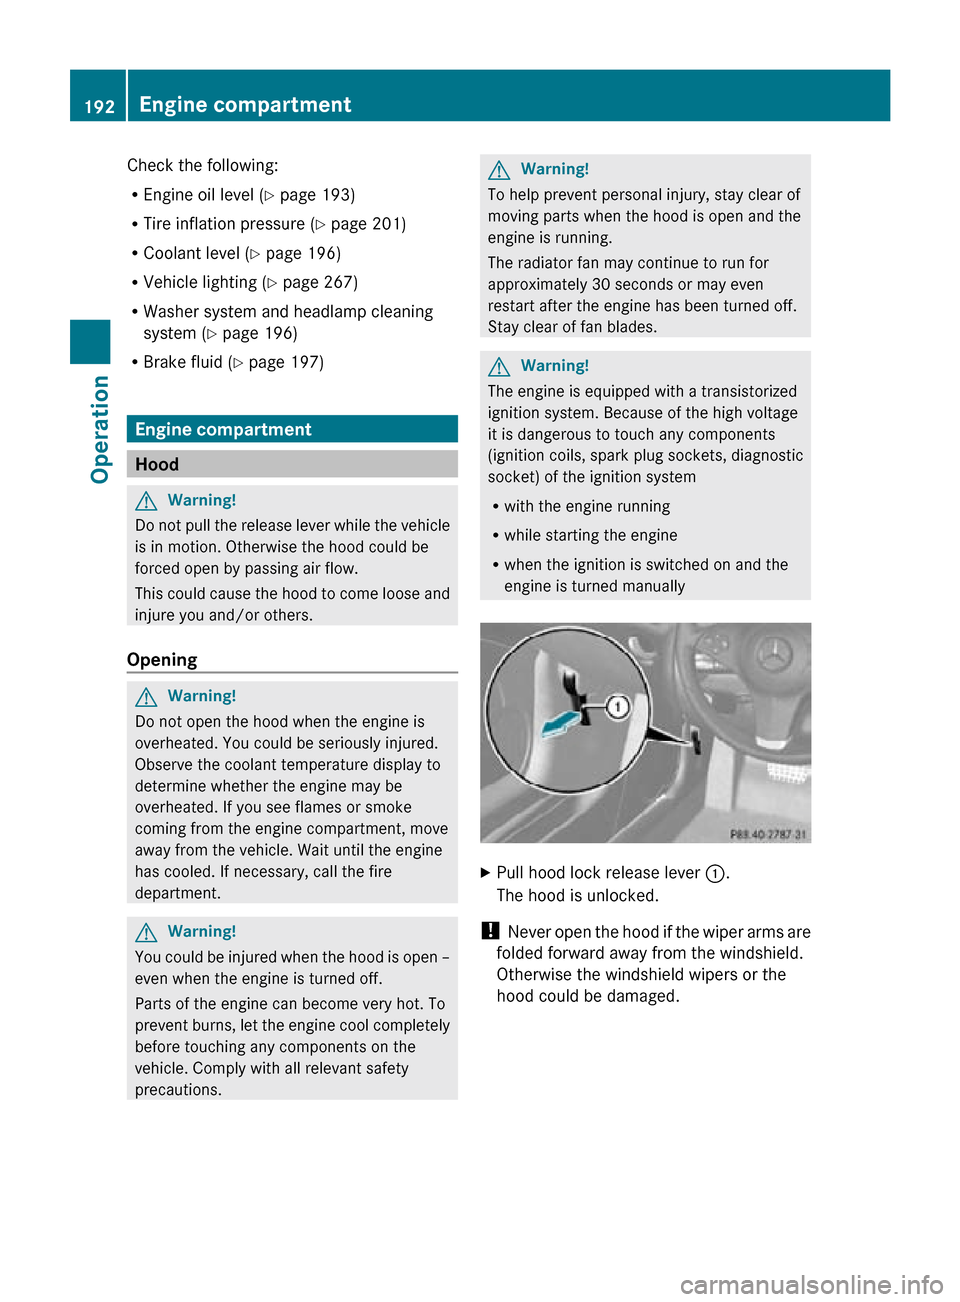
engine is turned manually X
Pull hood lock release lever :.
The hood is unlocked.
! Never open the hood if the wiper arms are
folded forward away from the windshield.
Otherwise the windshield wipers or the
hood could be damaged. 192
Engine compartmentOperation
171_AKB; 3; 60, en-US
d2ureepe,
Version: 2.11.8.1 2009-05-11T16:00:23+02:00 - Seite 192
Page 199 of 312
!
Only use washer fluid which is suitable for
plastic lenses. Improper washer fluid can
damage the plastic lenses of the
headlamps.
! Do not use distilled or deionized water in
the washer fluid reservoir. Otherwise, the
washer fluid level sensor could be
damaged.
Fluid for the washer system and the headlamp
cleaning system is supplied from the washer
fluid reservoir.
During all seasons, use MB Windshield
Washer Concentrate “MB SummerFit”. Mix it
with water or premixed washer solvent/
antifreeze depending on the ambient
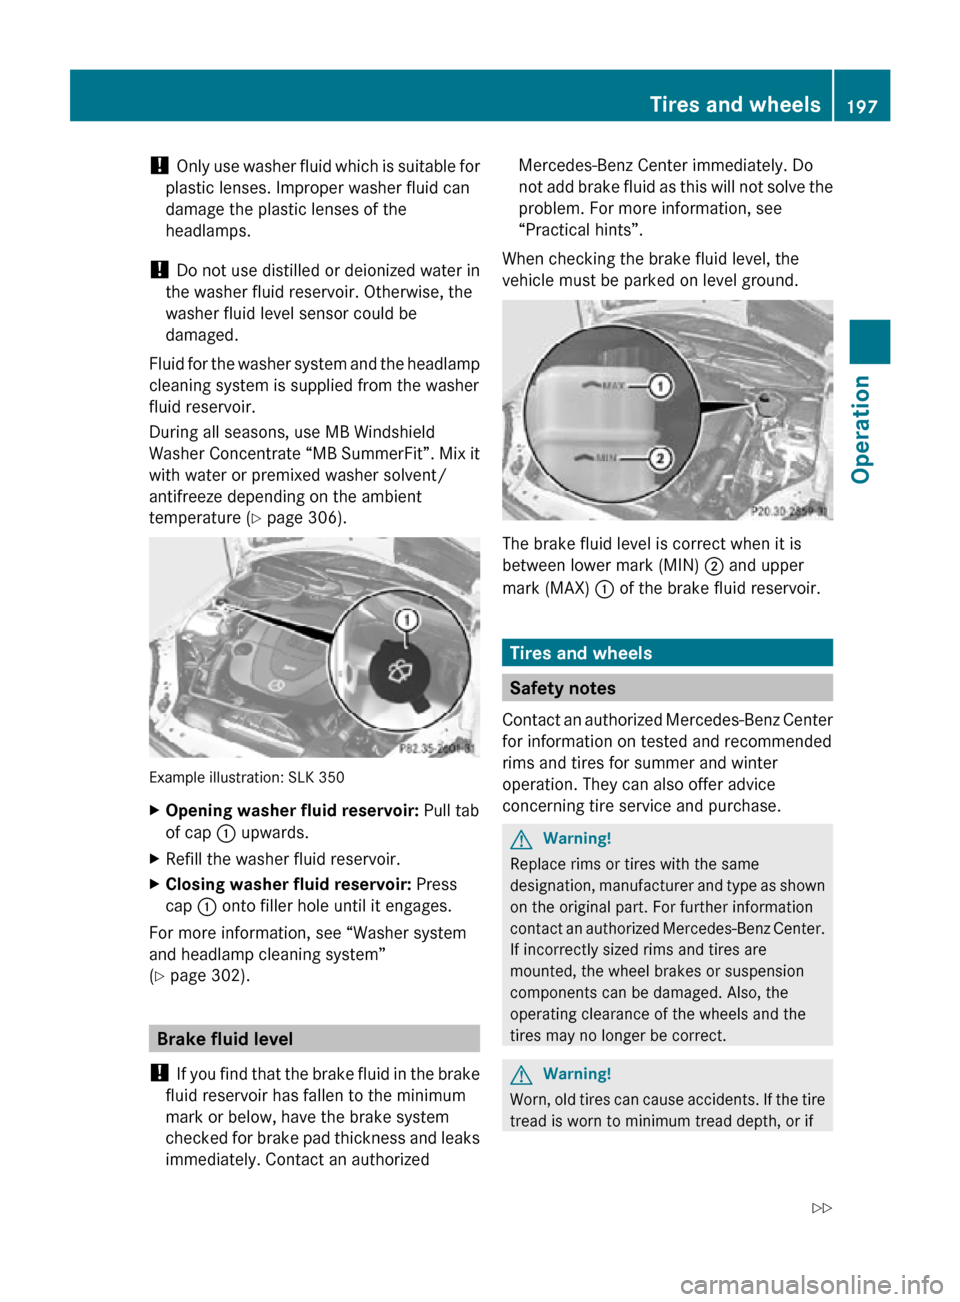
temperature ( Y page 306). Example illustration: SLK 350
X
Opening washer fluid reservoir: Pull tab
of cap : upwards.
X Refill the washer fluid reservoir.
X Closing washer fluid reservoir: Press
cap : onto filler hole until it engages.
For more information, see “Washer system
and headlamp cleaning system”
(Y page 302). Brake fluid level
! If you find that the brake fluid in the brake
fluid reservoir has fallen to the minimum
mark or below, have the brake system
checked for brake pad thickness and leaks
immediately. Contact an authorized Mercedes-Benz Center immediately. Do
not add brake fluid as this will not solve the
problem. For more information, see
“Practical hints”.
When checking the brake fluid level, the
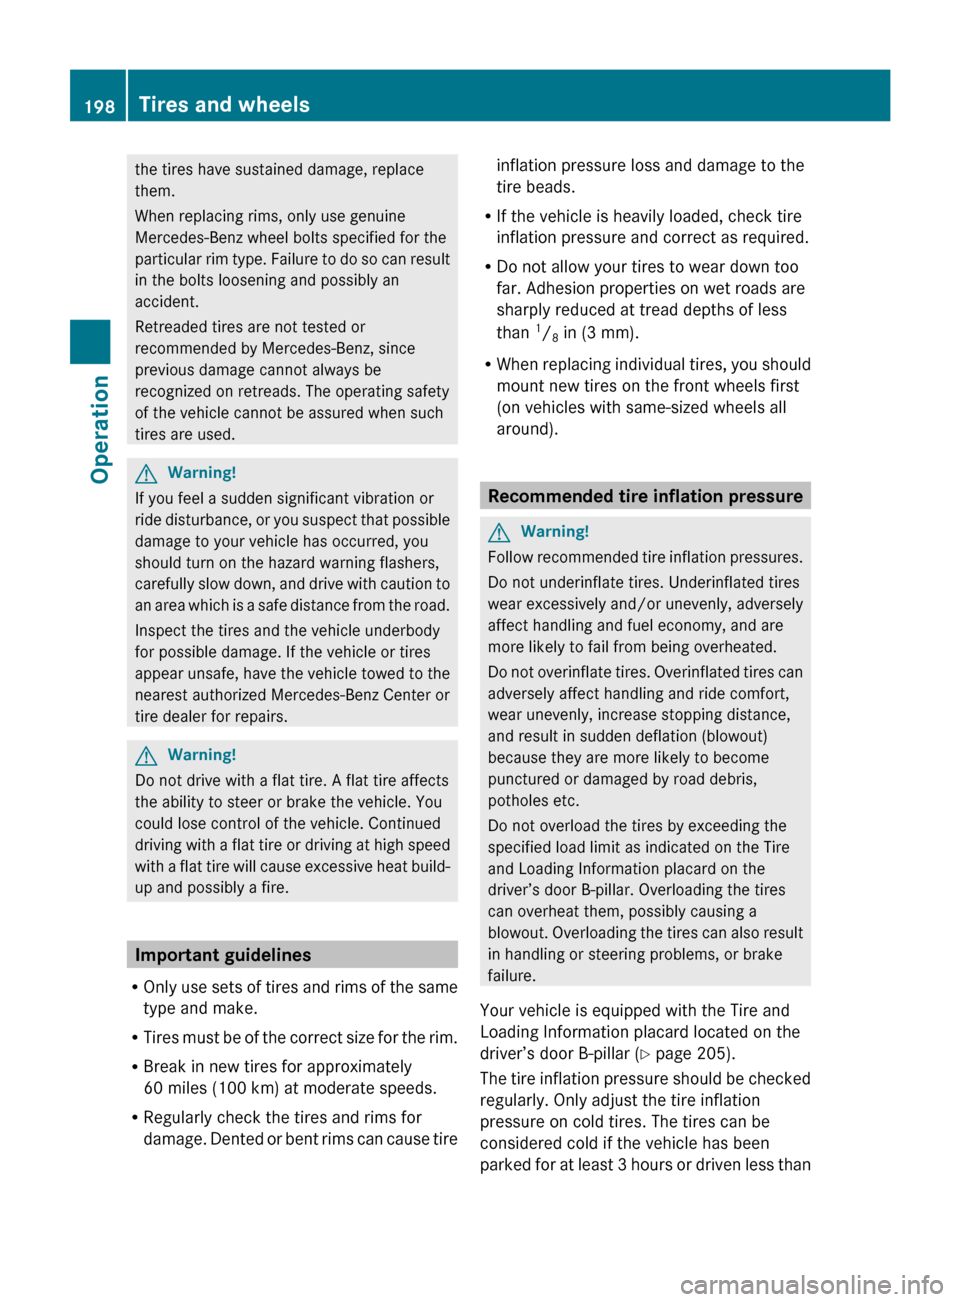
vehicle must be parked on level ground. The brake fluid level is correct when it is
between lower mark (MIN)
; and upper
mark (MAX) : of the brake fluid reservoir. Tires and wheels
Safety notes
Contact an authorized Mercedes-Benz Center
for information on tested and recommended
rims and tires for summer and winter
operation. They can also offer advice
concerning tire service and purchase. G
Warning!
Replace rims or tires with the same
designation, manufacturer and type as shown
on the original part. For further information
contact an authorized Mercedes-Benz Center.
If incorrectly sized rims and tires are
mounted, the wheel brakes or suspension
components can be damaged. Also, the
operating clearance of the wheels and the
tires may no longer be correct. G
Warning!
Worn, old tires can cause accidents. If the tire
tread is worn to minimum tread depth, or if Tires and wheels
197Operation
171_AKB; 3; 60, en-US
d2ureepe, Version: 2.11.8.1 2009-05-11T16:00:23+02:00 - Seite 197 Z
Page 200 of 312
the tires have sustained damage, replace
them.
When replacing rims, only use genuine
Mercedes-Benz wheel bolts specified for the
particular
rim type. Failure to do so can result
in the bolts loosening and possibly an
accident.
Retreaded tires are not tested or
recommended by Mercedes-Benz, since
previous damage cannot always be
recognized on retreads. The operating safety
of the vehicle cannot be assured when such
tires are used. G
Warning!
If you feel a sudden significant vibration or
ride
disturbance, or you suspect that possible
damage to your vehicle has occurred, you
should turn on the hazard warning flashers,
carefully slow down, and drive with caution to
an area which is a safe distance from the road.
Inspect the tires and the vehicle underbody
for possible damage. If the vehicle or tires
appear unsafe, have the vehicle towed to the
nearest authorized Mercedes-Benz Center or
tire dealer for repairs. G
Warning!
Do not drive with a flat tire. A flat tire affects
the ability to steer or brake the vehicle. You
could lose control of the vehicle. Continued
driving
with a flat tire or driving at high speed
with a flat tire will cause excessive heat build-
up and possibly a fire. Important guidelines
R Only
use sets of tires and rims of the same
type and make.
R Tires must be of the correct size for the rim.
R Break in new tires for approximately
60 miles (100 km) at moderate speeds.
R Regularly check the tires and rims for
damage. Dented or bent rims can cause tire inflation pressure loss and damage to the
tire beads.
R If the vehicle is heavily loaded, check tire
inflation pressure and correct as required.
R Do not allow your tires to wear down too
far. Adhesion properties on wet roads are
sharply reduced at tread depths of less
than 1
/ 8 in (3 mm).
R When
replacing individual tires, you should
mount new tires on the front wheels first
(on vehicles with same-sized wheels all
around). Recommended tire inflation pressure
G
Warning!
Follow recommended tire inflation pressures.
Do not underinflate tires. Underinflated tires
wear excessively and/or unevenly, adversely
affect handling and fuel economy, and are
more likely to fail from being overheated.
Do
not overinflate tires. Overinflated tires can
adversely affect handling and ride comfort,
wear unevenly, increase stopping distance,
and result in sudden deflation (blowout)
because they are more likely to become
punctured or damaged by road debris,
potholes etc.
Do not overload the tires by exceeding the
specified load limit as indicated on the Tire
and Loading Information placard on the
driver’s door B-pillar. Overloading the tires
can overheat them, possibly causing a
blowout. Overloading the tires can also result
in handling or steering problems, or brake
failure.
Your vehicle is equipped with the Tire and
Loading Information placard located on the
driver’s door B-pillar ( Y page 205).
The tire inflation pressure should be checked
regularly. Only adjust the tire inflation
pressure on cold tires. The tires can be
considered cold if the vehicle has been
parked for at least 3 hours or driven less than 198
Tires and wheels
Operation
171_AKB; 3; 60, en-US
d2ureepe,
Version: 2.11.8.1 2009-05-11T16:00:23+02:00 - Seite 198
Page 203 of 312

punctured or damaged by road debris,
potholes etc.
Overinflated tires can
R adversely affect handling characteristics
R cause uneven tire wear
R be more prone to damage from road
hazards
R adversely affect ride comfort
R increase stopping distance Checking tire inflation pressure
Safety notes G
Warning!
Follow recommended tire inflation pressures.
Do not underinflate tires. Underinflated tires
wear excessively and/or unevenly, adversely
affect handling and fuel economy, and are
more likely to fail from being overheated.
Do
not overinflate tires. Overinflated tires can
adversely affect handling and ride comfort,
wear unevenly, increase stopping distance,
and result in sudden deflation (blowout)
because they are more likely to become
punctured or damaged by road debris,
potholes etc.
Do not overload the tires by exceeding the
specified load limit as indicated on the Tire
and Loading Information placard on the
driver’s door B-pillar. Overloading the tires
can overheat them, possibly causing a
blowout. Overloading the tires can also result
in handling or steering problems, or brake
failure.
Check the tire inflation pressure at least once
a month.
Check and adjust the tire inflation pressure
when the tires are cold ( Y page 198).Checking tire inflation pressure
manually Follow the steps below to achieve correct tire
inflation pressure:
X
Remove the cap from the valve on one tire.
X Firmly press a tire gauge onto the valve.
X Read the tire inflation pressure on the tire
gauge and check against the
recommended
tire inflation pressure on the
Tire and Loading Information placard on the
driver’s door B-pillar ( Y page 205). If
necessary, add air to achieve the
recommended tire inflation pressure.
X If you have overfilled the tire, release tire
inflation pressure by pushing the metal
stem of the valve with e.g. a tip of a pen.
Then recheck the tire inflation pressure
with the tire gauge.
X Install the valve cap.
X Repeat this procedure for each tire.
Advanced Tire Pressure Monitoring
System (Advanced TPMS), (USA only) Your vehicle is equipped with the Advanced
Tire Pressure Monitoring System (Advanced
TPMS).
It measures the tire inflation pressure
in the vehicle’s tires and issues warnings in
case of pressure loss in one or more of the
tires.
The TPMS is equipped with a combination low
tire pressure/ TPMS malfunction telltale in
the instrument cluster. Depending on how the
telltale illuminates, it indicates a low tire
pressure condition or a malfunction in the
TPMS system itself:
R If the telltale illuminates continuously, one
or more of your tires is significantly
underinflated. There is no malfunction in
the TPMS.
R If the telltale flashes for 60 seconds and
then stays illuminated, the TPMS system
itself is not operating properly.
The TPMS only functions on wheels that are
equipped with the proper electronic sensors. Tires and wheels
201
Operation
171_AKB; 3; 60, en-US
d2ureepe, Version: 2.11.8.1 2009-05-11T16:00:23+02:00 - Seite 201 Z
Page 204 of 312

G
Warning!
The TPMS does not indicate a warning for
wrongly selected inflation pressures. Always
adjust
tire inflation pressure according to the
Tire and Loading Information placard or the
supplemental tire inflation pressure
information on the inside of the fuel filler flap.
The TPMS is not able to issue a warning due
to a sudden dramatic loss of pressure (e.g. tire
blowout caused by a foreign object). In this
case bring the vehicle to a halt by carefully
applying the brakes and avoiding abrupt
steering maneuvers. G
Warning!
Each tire, including the spare (if provided),
should be checked at least once a month
when cold and inflated to the inflation
pressure recommended by the vehicle
manufacturer on the Tire and Loading
Information placard on the driver’s door B-
pillar
or the tire inflation pressure label on the
inside of the fuel filler flap. If your vehicle has
tires of a different size than the size indicated
on the Tire and Loading Information placard
or the tire inflation pressure label, you should
determine the proper tire inflation pressure
for those tires.
As an added safety feature, your vehicle has
been equipped with a tire pressure monitoring
system (TPMS) that illuminates a low tire
pressure telltale when one or more of your
tires are significantly underinflated.
Accordingly, when the low tire pressure
telltale illuminates, you should stop and check
your tires as soon as possible, and inflate
them to the proper pressure. Driving on a
significantly underinflated tire causes the tire
to overheat and can lead to tire failure.
Underinflation also reduces fuel efficiency
and tire tread life, and may affect the vehicle’s
handling and stopping ability. Please note that
the TPMS is not a substitute for proper tire
maintenance, and it is the driver’s
responsibility to maintain correct tire
pressure, even if underinflation has not reached the level to trigger illumination of the
TPMS low tire pressure telltale.
Your vehicle has also been equipped with a
TPMS malfunction indicator to indicate when
the system is not operating properly. The
TPMS
malfunction indicator is combined with
the low tire pressure telltale. When the
system detects a malfunction, the telltale will
flash for approximately 1 minute and then
remain continuously illuminated. This
sequence will continue upon subsequent
vehicle start-ups as long as the malfunction
exists. When the malfunction indicator is
illuminated, the system may not be able to
detect or signal low tire pressure as intended.
TPMS malfunctions may occur for a variety of
reasons, including the installation of
incompatible replacement or alternate tires
or wheels on the vehicle that prevent the
TPMS from functioning properly. Always
check the TPMS malfunction telltale after
replacing one or more tires or wheels on your
vehicle to ensure that the replacement or
alternate tires and wheels allow the TPMS to
continue to function properly.
i If a condition causing the TPMS to
malfunction develops, it may take up to
10 minutes for the system to signal a
malfunction using the TPMS telltale
flashing and illumination sequence.
The telltale extinguishes after a few
minutes driving if the malfunction has been
corrected.
Tire pressure inquiries are made using the
multifunction display. The current tire
inflation pressure for each tire appears in the
multifunction display after a few minutes of
driving.
i Possible differences between the
readings of a tire pressure gauge of an air
hose, e.g. gas station equipment, and the
vehicle’s control system can occur. The tire
pressure displayed by the control system
apply to sea level. In high-altitude
locations, the reading on a tire pressure 202
Tires and wheels
Operation
171_AKB; 3; 60, en-US
d2ureepe,
Version: 2.11.8.1 2009-05-11T16:00:23+02:00 - Seite 202