2010 MERCEDES-BENZ S65AMG weight
[x] Cancel search: weightPage 61 of 548
injured or even killed if the front passenger
front air bag inflates.
RIf you have to place a child in a forward-
facing child restraint on the front passenger
seat, move the seat as far back as possible,
use the proper child restraint
recommended for the age, size and weight
of the child, and secure child restraint with
the vehicle’s seat belt according to the child
seat manufacturer’s instructions. For
children larger than the typical 12-month-
old child, the front passenger front air bag
may or may not be activated.
GWarning!
Infants and small children should never share
a seat belt with another occupant. During an
accident, they could be crushed between the
occupant and seat belt.
A child’s risk of serious or fatal injuries is
significantly increased if the child restraints
are not properly secured in the vehicle and/
or the child is not properly secured in the child
restraint.
Children too big for a toddler restraint must
ride in seats using regular seat belts. Position
shoulder belt across chest and shoulder, not
face or neck. A booster seat may be
necessary to achieve proper seat belt
positioning for children over 41 lb (18 kg) until
they reach a height where a lap/shoulder belt
fits properly without a booster.
When the child restraint is not in use, remove
it from the vehicle or secure it with the seat
belt to prevent the child restraint from
becoming a projectile in the event of an
accident.
Installation of infant and child restraint
systems
GObserve Safety notes, see page 56.
This vehicle is equipped with tether
anchorages for a top tether strap at each of
the rear seating positions.
Top tether straps enable an additional
connection to be made between child
restraint systems secured with LATCH-type
(ISOFIX) anchors and rear seats. This can
further reduce the risk of injury.
XVehicles with rear power seats: Bring the
rear power seat backrest to a fully upright
position (Y page 287).
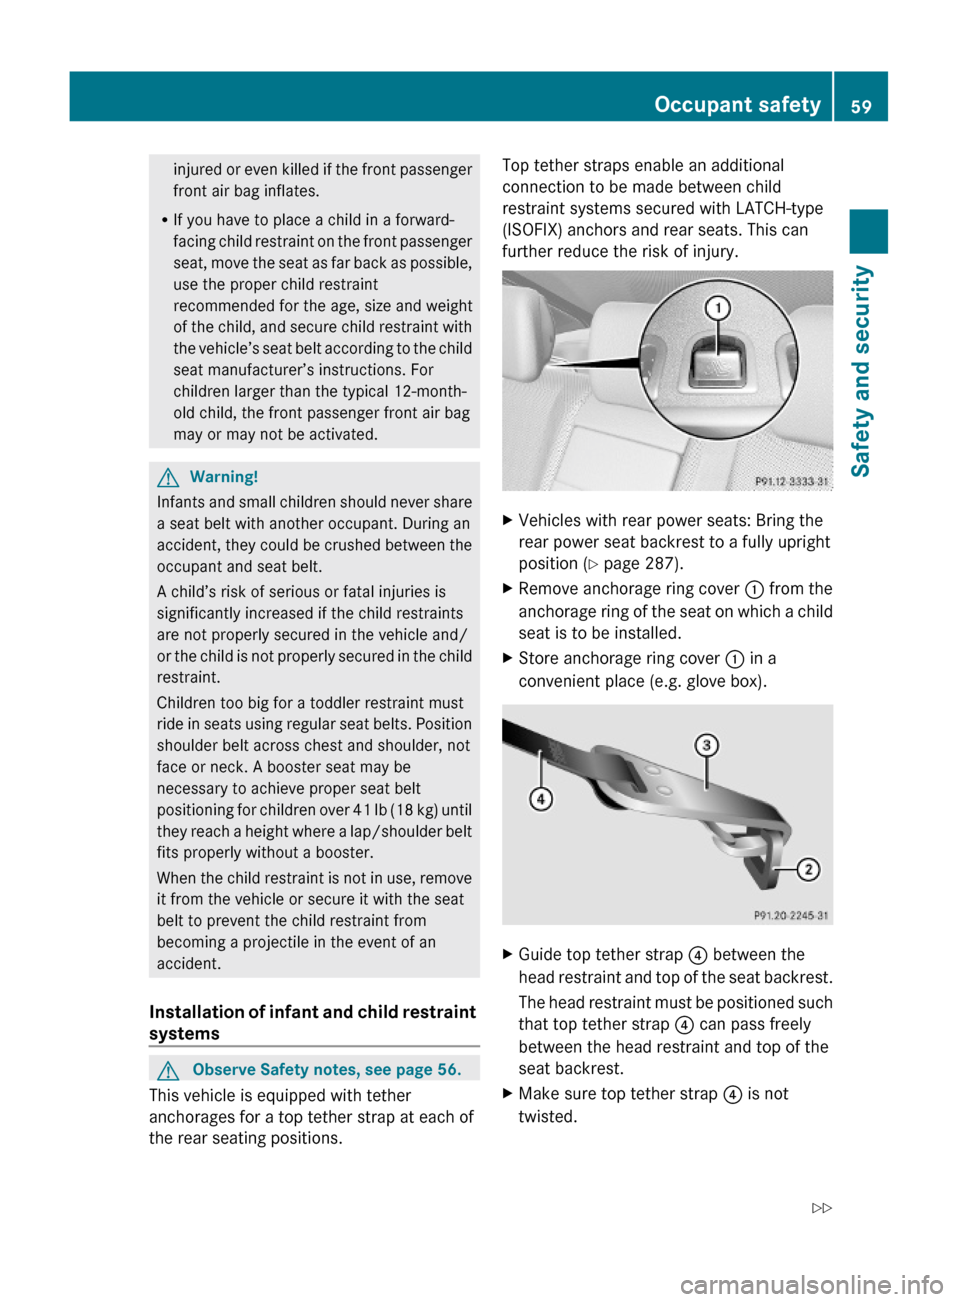
XRemove anchorage ring cover : from the
anchorage ring of the seat on which a child
seat is to be installed.
XStore anchorage ring cover : in a
convenient place (e.g. glove box).
XGuide top tether strap ? between the
head restraint and top of the seat backrest.
The head restraint must be positioned such
that top tether strap ? can pass freely
between the head restraint and top of the
seat backrest.
XMake sure top tether strap ? is not
twisted.
Occupant safety59Safety and security221_AKB; 6; 20, en-USd2ugruen,Version: 2.11.8.12009-09-24T13:28:17+02:00 - Seite 59Z
Page 288 of 548
iWhen you now press the KEYLESS-GO
start/stop button once and the driver’s
door is open, the power supply is switched
off.
Seats
Safety notes
GWarning!
In order to avoid possible loss of vehicle
control the following must be done before the
vehicle is put into motion:
R seat adjustment
R head restraint adjustment
R steering wheel adjustment
R rear view mirror adjustment
R fastening of seat belts
GWarning!
Do not adjust the driver’s seat while driving.
Adjusting the seat while driving could cause
the driver to lose control of the vehicle.
Never ride in a moving vehicle with the seat
backrest in an excessively reclined position as
this can be dangerous. You could slide under
the seat belt in a collision. If you slide under
it, the seat belt would apply force at the
abdomen or neck. That could cause serious
or fatal injuries. The seat backrest and seat
belts provide the best restraint when the
wearer is in a position that is as upright as
possible and seat belts are properly
positioned on the body.
GWarning!
Your seat must be adjusted so that you can
correctly fasten your seat belt.
Observe the following points:
R Adjust the seat backrest until your arms are
slightly angled when holding the steering
wheel.
R Adjust the seat to a comfortable seating
position that still allows you to reach the
accelerator/brake pedal safely. The
position should be as far back as possible
with the driver still able to operate the
controls properly.
R Adjust the head restraint so that it is as
close to the head as possible. The center of
the head restraint must support the back of
the head at eye level.
R Never place hands under the seat or near
any moving parts while a seat is being
adjusted.
Failure to do so could result in an accident
and/or serious personal injury.GWarning!
The power seats can be operated at any time.
Therefore, do not leave children unattended
in the vehicle, or with access to an unlocked
vehicle. A child’s unsupervised access to a
vehicle could result in an accident and/or
serious personal injury.
GWarning!
According to accident statistics, children are
safer when properly restrained in the rear
seating positions than in the front seating
position. Thus, we strongly recommend that
children be placed in the rear seats whenever
possible. Regardless of seating position,
children 12 years old and under must be
seated and properly secured in an
appropriately sized infant restraint, toddler
restraint, or booster seat recommended for
the size and weight of the child. For additional
information, see “Children in the vehicle”.
A child’s risk of serious or fatal injuries is
significantly increased if the child restraints
are not properly secured in the vehicle and/
286SeatsControls in detail
221_AKB; 6; 20, en-USd2ugruen,Version: 2.11.8.12009-09-24T13:28:17+02:00 - Seite 286
Page 381 of 548
panel could otherwise lock-up in the open
position.
If the tilt/sliding panel cannot be closed or
synchronized, contact an authorized
Mercedes-Benz Center or call Roadside
Assistance.
Tilt/sliding panel and front roller
sunblindXSwitch on the ignition.XPull and hold the roof panel switch several
times in direction of arrow =
( Y page 375) until the tilt/sliding panel is
fully closed.XKeep holding the roof panel switch in
direction of arrow = for approximately
1 second.XPull and hold the roof panel switch several
times in direction of arrow = until the front
roller sunblind is fully extended.XKeep holding the roof panel switch in
direction of arrow = for approximately
1 second.XCheck the express operation feature of the
front roller sunblind.
If the front roller sunblind retracts
completely, the front roller sunblind is
synchronized. Otherwise repeat the above
steps.XCheck the express operation feature of the
tilt/sliding panel ( Y page 377).
If the tilt/sliding panel opens completely,
the tilt/sliding panel is synchronized.
Otherwise repeat the above steps.
Rear roller sunblind
XSwitch on the ignition.XPull roller sunblind switch :
( Y page 376) in the rear door control panel
several times until the rear roller sunblind
is fully extended.XKeep holding roller sunblind switch : for
approximately 1 second.XCheck the express operation feature of the
front roller sunblind.
If the rear roller sunblind retracts
completely, the rear roller sunblind is
synchronized. Otherwise repeat the above
steps.
Loading and storing
Loading instructions
GWarning!
Always fasten items being carried as securely
as possible using cargo tie-down hooks and
fastening materials appropriate for the weight
and size of the load.
In an accident, during hard braking or sudden
maneuvers, loose items will be thrown around
inside the vehicle. This can cause injury to
vehicle occupants unless the items are
securely fastened in the vehicle.
To help avoid personal injury during a collision
or sudden maneuver, exercise care when
transporting cargo. Do not pile luggage or
cargo higher than the seat backrests.
The trunk is the preferred place to carry
objects. Always use cargo tie-down hooks
when transporting cargo. Do not place
anything on the rear-window shelf.
Never drive a vehicle with the trunk open.
Deadly carbon monoxide (CO) gases may
enter vehicle interior resulting in
unconsciousness and death.
Load distribution
The total load weight including vehicle
occupants and luggage/cargo should not
exceed the total load limit indicated on the
corresponding Tire and Loading Information
placard located on the driver’s door B-pillar
( Y page 418).
The handling characteristics of a fully loaded
vehicle depends greatly on the load
Loading and storing379Controls in detail221_AKB; 6; 20, en-USd2ugruen,Version: 2.11.8.12009-09-24T13:28:17+02:00 - Seite 379Z
Page 382 of 548
distribution. It is therefore recommended to
load the vehicle accordingly with the heaviest
items being placed towards the front of the
vehicle.
Please pay attention to and comply with the
following instructions when loading the
vehicle and transporting cargo:
RAlways place items being carried against
front or rear seat backrests, and fasten
them as securely as possible.
RThe heaviest portion of the cargo should
always be kept as low as possible against
front or rear seat backrests.
Roof rack
For information about further roof rack
equipment, contact an authorized Mercedes-
Benz Center.
GWarning!
Only use roof racks approved by Mercedes-
Benz for your vehicle model to avoid damage
to the vehicle.
Follow the manufacturer’s installation
instructions. Otherwise, an improperly
attached roof rack system or its load could
become detached from the vehicle.
Do not exceed the maximum roof load of
220 lb (100 kg).
Take into consideration that when the roof
rack is loaded, the handling characteristics
are different from those when operating the
vehicle without the roof rack loaded.
Make sure
Ryou can raise the power tilt/sliding sunroof
or the panorama roof with tilt/sliding panel
completely
Ryou can open the trunk completely
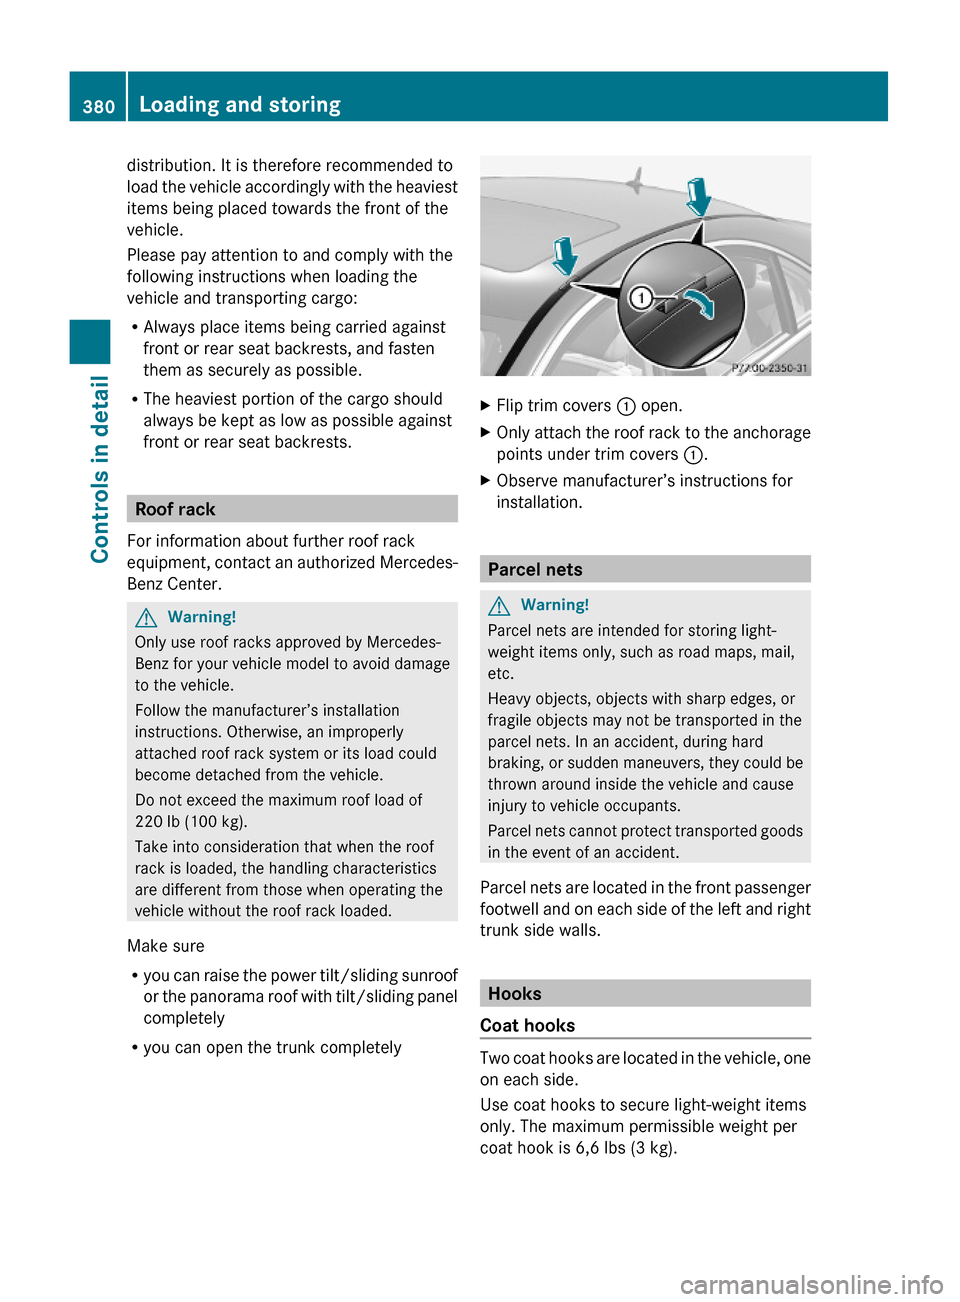
XFlip trim covers : open.XOnly attach the roof rack to the anchorage
points under trim covers :.
XObserve manufacturer’s instructions for
installation.
Parcel nets
GWarning!
Parcel nets are intended for storing light-
weight items only, such as road maps, mail,
etc.
Heavy objects, objects with sharp edges, or
fragile objects may not be transported in the
parcel nets. In an accident, during hard
braking, or sudden maneuvers, they could be
thrown around inside the vehicle and cause
injury to vehicle occupants.
Parcel nets cannot protect transported goods
in the event of an accident.
Parcel nets are located in the front passenger
footwell and on each side of the left and right
trunk side walls.
Hooks
Coat hooks
Two coat hooks are located in the vehicle, one
on each side.
Use coat hooks to secure light-weight items
only. The maximum permissible weight per
coat hook is 6,6 lbs (3 kg).
380Loading and storingControls in detail
221_AKB; 6; 20, en-USd2ugruen,Version: 2.11.8.12009-09-24T13:28:17+02:00 - Seite 380
Page 385 of 548
Rear storage compartmentsGWarning!
To help avoid personal injury during a collision
or sudden maneuver, exercise care when
storing objects in the vehicle. Put luggage or
cargo in the trunk if possible.
Do not pile luggage or cargo higher than the
seat backrests.
Keep compartment lids closed. This will help
to prevent stored objects from being thrown
about and injuring vehicle occupants during
Rbraking
Rvehicle maneuvers
Ran accident
Rear armrest storage compartment
! Do not sit on or lean your body weight
against the armrest when it is folded down,
as you could otherwise damage it.
! Before storing the armrest in the seat
backrest, close the storage compartment
cover.
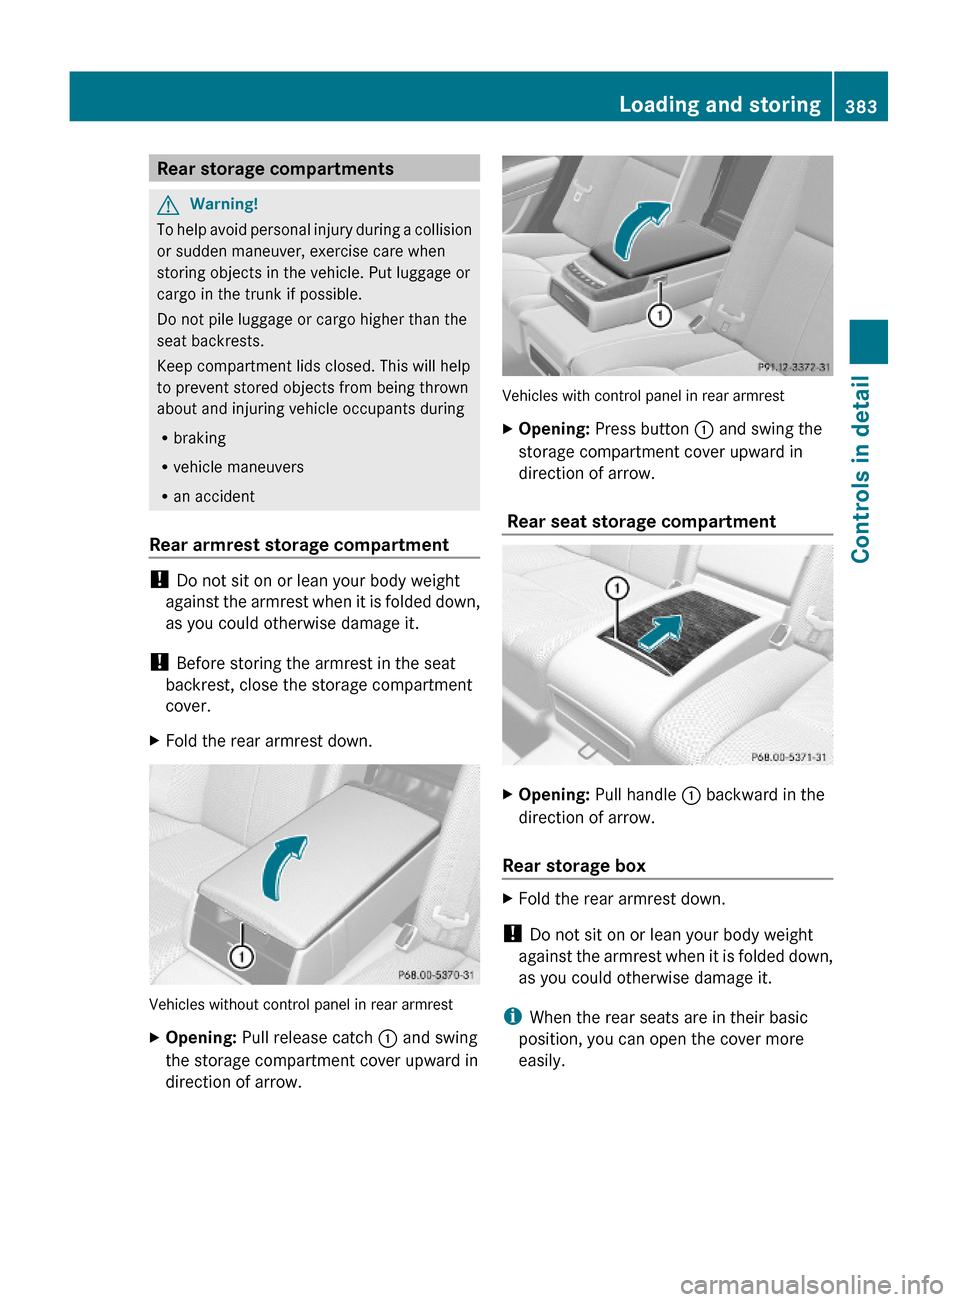
XFold the rear armrest down.
Vehicles without control panel in rear armrest
XOpening: Pull release catch : and swing
the storage compartment cover upward in
direction of arrow.
Vehicles with control panel in rear armrest
XOpening: Press button : and swing the
storage compartment cover upward in
direction of arrow.
Rear seat storage compartment
XOpening: Pull handle : backward in the
direction of arrow.
Rear storage box
XFold the rear armrest down.
! Do not sit on or lean your body weight
against the armrest when it is folded down,
as you could otherwise damage it.
iWhen the rear seats are in their basic
position, you can open the cover more
easily.
Loading and storing383Controls in detail221_AKB; 6; 20, en-USd2ugruen,Version: 2.11.8.12009-09-24T13:28:17+02:00 - Seite 383Z
Page 386 of 548
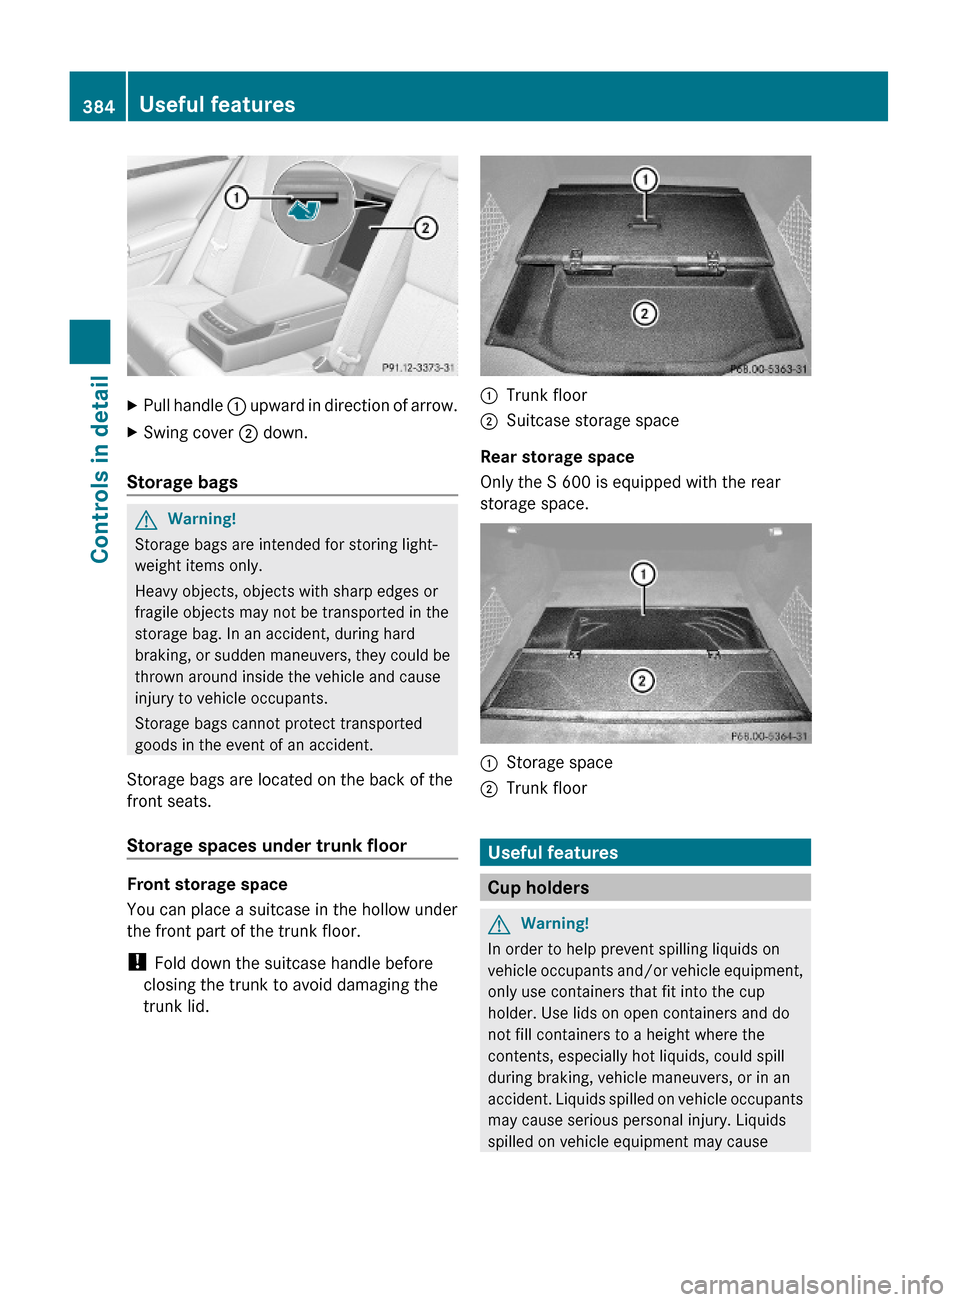
XPull handle : upward in direction of arrow.XSwing cover ; down.
Storage bags
GWarning!
Storage bags are intended for storing light-
weight items only.
Heavy objects, objects with sharp edges or
fragile objects may not be transported in the
storage bag. In an accident, during hard
braking, or sudden maneuvers, they could be
thrown around inside the vehicle and cause
injury to vehicle occupants.
Storage bags cannot protect transported
goods in the event of an accident.
Storage bags are located on the back of the
front seats.
Storage spaces under trunk floor
Front storage space
You can place a suitcase in the hollow under
the front part of the trunk floor.
! Fold down the suitcase handle before
closing the trunk to avoid damaging the
trunk lid.
:Trunk floor;Suitcase storage space
Rear storage space
Only the S 600 is equipped with the rear
storage space.
:Storage space;Trunk floor
Useful features
Cup holders
GWarning!
In order to help prevent spilling liquids on
vehicle occupants and/or vehicle equipment,
only use containers that fit into the cup
holder. Use lids on open containers and do
not fill containers to a height where the
contents, especially hot liquids, could spill
during braking, vehicle maneuvers, or in an
accident. Liquids spilled on vehicle occupants
may cause serious personal injury. Liquids
spilled on vehicle equipment may cause
384Useful featuresControls in detail
221_AKB; 6; 20, en-USd2ugruen,Version: 2.11.8.12009-09-24T13:28:17+02:00 - Seite 384
Page 414 of 548
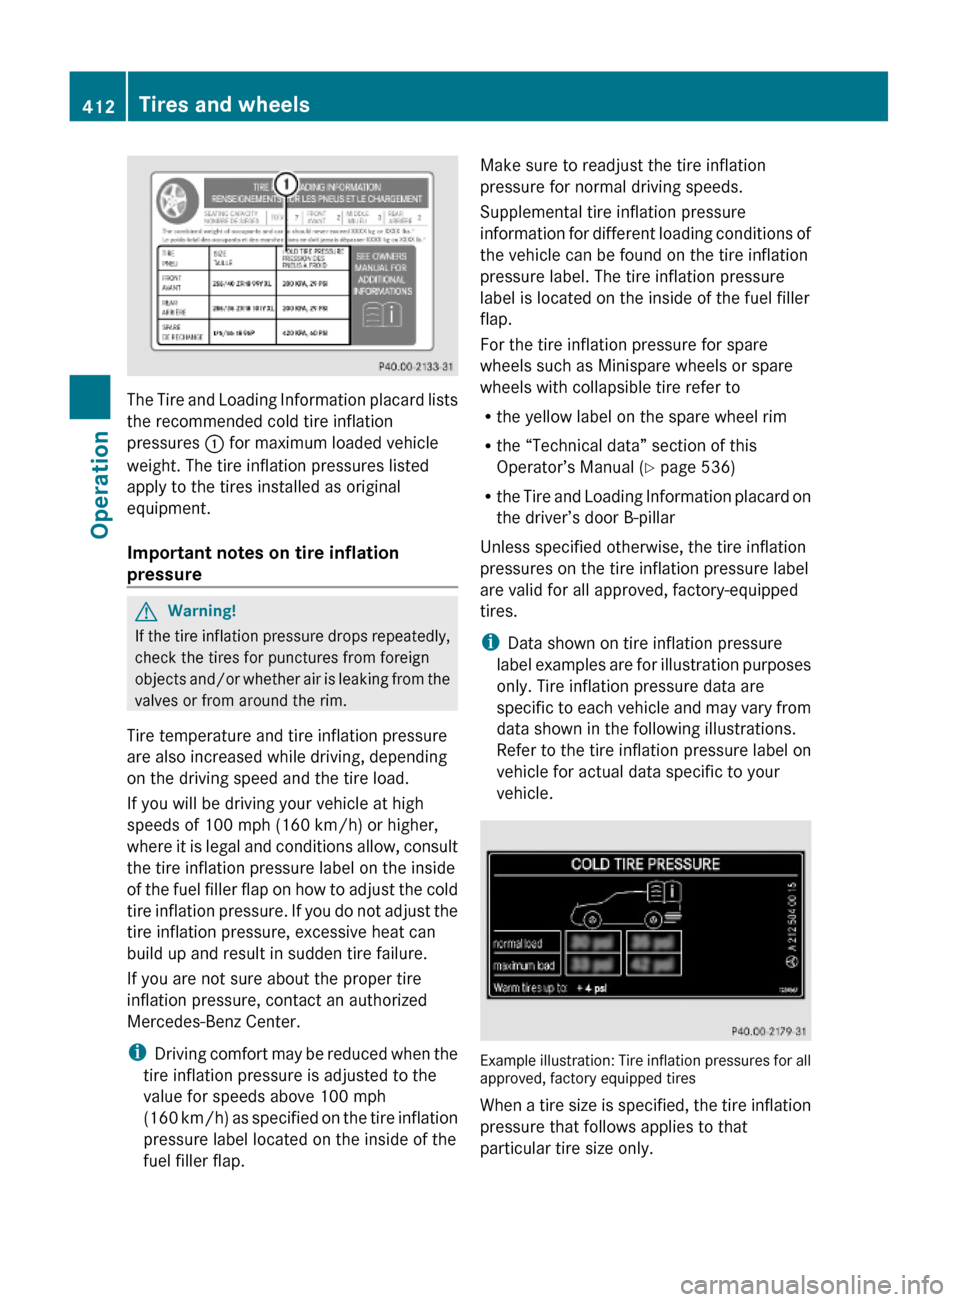
The Tire and Loading Information placard lists
the recommended cold tire inflation
pressures : for maximum loaded vehicle
weight. The tire inflation pressures listed
apply to the tires installed as original
equipment.
Important notes on tire inflation
pressure
GWarning!
If the tire inflation pressure drops repeatedly,
check the tires for punctures from foreign
objects and/or whether air is leaking from the
valves or from around the rim.
Tire temperature and tire inflation pressure
are also increased while driving, depending
on the driving speed and the tire load.
If you will be driving your vehicle at high
speeds of 100 mph (160 km/h) or higher,
where it is legal and conditions allow, consult
the tire inflation pressure label on the inside
of the fuel filler flap on how to adjust the cold
tire inflation pressure. If you do not adjust the
tire inflation pressure, excessive heat can
build up and result in sudden tire failure.
If you are not sure about the proper tire
inflation pressure, contact an authorized
Mercedes-Benz Center.
iDriving comfort may be reduced when the
tire inflation pressure is adjusted to the
value for speeds above 100 mph
(160 km/h) as specified on the tire inflation
pressure label located on the inside of the
fuel filler flap.
Make sure to readjust the tire inflation
pressure for normal driving speeds.
Supplemental tire inflation pressure
information for different loading conditions of
the vehicle can be found on the tire inflation
pressure label. The tire inflation pressure
label is located on the inside of the fuel filler
flap.
For the tire inflation pressure for spare
wheels such as Minispare wheels or spare
wheels with collapsible tire refer to
Rthe yellow label on the spare wheel rim
Rthe “Technical data” section of this
Operator’s Manual (Y page 536)
Rthe Tire and Loading Information placard on
the driver’s door B-pillar
Unless specified otherwise, the tire inflation
pressures on the tire inflation pressure label
are valid for all approved, factory-equipped
tires.
iData shown on tire inflation pressure
label examples are for illustration purposes
only. Tire inflation pressure data are
specific to each vehicle and may vary from
data shown in the following illustrations.
Refer to the tire inflation pressure label on
vehicle for actual data specific to your
vehicle.
Example illustration: Tire inflation pressures for allapproved, factory equipped tires
When a tire size is specified, the tire inflation
pressure that follows applies to that
particular tire size only.
412Tires and wheelsOperation
221_AKB; 6; 20, en-USd2ugruen,Version: 2.11.8.12009-09-24T13:28:17+02:00 - Seite 412
Page 420 of 548
This is the maximum permissible tire inflation
pressure : for the tire.
Always follow the recommended tire inflation
pressure (Y page 411) for proper tire
inflation.
Loading the vehicle
Two labels on your vehicle show how much
weight it may properly carry.
(1)The Tire and Loading Information placard
can be found on the driver’s door
B-pillar. This placard tells you important
information about the number of people
that can be in the vehicle and the total
weight that can be carried in the vehicle.
It also contains information on the proper
size and recommended tire inflation
pressures for the original equipment tires
on your vehicle.
(2)The certification label, also found on the
driver’s door B-pillar. It tells you about the
gross weight capacity of your vehicle,
called the Gross Vehicle Weight Rating
(GVWR). The GVWR includes the weight
of the vehicle, all occupants, fuel and
cargo. The certification label also tells
you about the front and rear axle weight
capacity, called the Gross Axle Weight
Rating (GAWR).
The GAWR is the total allowable weight
that can be carried by a single axle (front
or rear). Never exceed the GVWR or
GAWR for either the front axle or rear
axle.
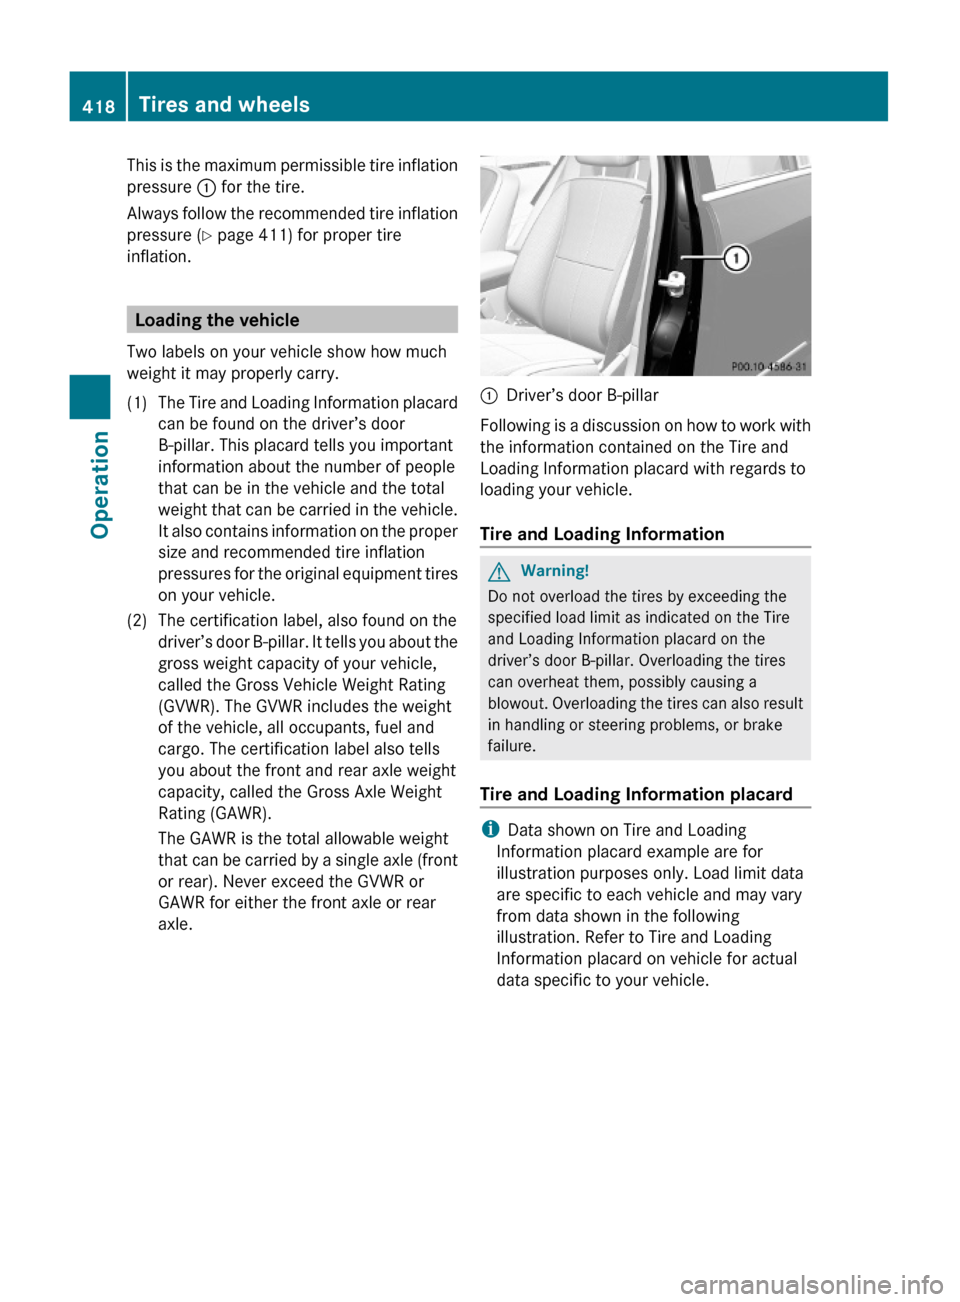
:Driver’s door B-pillar
Following is a discussion on how to work with
the information contained on the Tire and
Loading Information placard with regards to
loading your vehicle.
Tire and Loading Information
GWarning!
Do not overload the tires by exceeding the
specified load limit as indicated on the Tire
and Loading Information placard on the
driver’s door B-pillar. Overloading the tires
can overheat them, possibly causing a
blowout. Overloading the tires can also result
in handling or steering problems, or brake
failure.
Tire and Loading Information placard
iData shown on Tire and Loading
Information placard example are for
illustration purposes only. Load limit data
are specific to each vehicle and may vary
from data shown in the following
illustration. Refer to Tire and Loading
Information placard on vehicle for actual
data specific to your vehicle.
418Tires and wheelsOperation
221_AKB; 6; 20, en-USd2ugruen,Version: 2.11.8.12009-09-24T13:28:17+02:00 - Seite 418