2010 MERCEDES-BENZ S63AMG belt
[x] Cancel search: beltPage 345 of 548
Ryou depress the brake pedal fully again
until the message HOLD in the multifunction
display disappears
Ryou engage the electronic parking brake
Ryou activate the DISTRONIC PLUS
iAfter a while, the vehicle will be secured
by the electronic parking brake to relieve
the service brake.
GWarning!
The braking effect of the HOLD function is
canceled and the vehicle can start to roll if
Rthe HOLD function is deactivated by
depressing the accelerator pedal or the
brake pedal
Rthe HOLD function or the power supply is
malfunctioning, e.g. due to battery failure
Rthe electrical components in the engine
compartment or the fuses have been
manipulated
Rthe battery is disconnected
GWarning!
Never get out of the vehicle while the HOLD
function is activated!
The HOLD function must never be operated
or deactivated by passengers or from outside
the vehicle.
The HOLD function does not replace the
electronic parking brake. It must not be used
to secure the vehicle when parking.
Deactivate the HOLD function when leaving
or parking the vehicle. Use the electronic
parking brake to secure the vehicle.
When the HOLD function is activated, the
automatic transmission shifts into park
position P automatically when
Ropening the driver’s door and releasing the
seat belt
Rturning off the engine
Ropening the hood
Ra system malfunction occurs
Rthe on-board voltage is insufficient
The HOLD function is deactivated.
AIRMATIC
Introduction
The AIRMATIC lets you select the chassis and
suspension setup. The chassis and
suspension setup adjusts the damping
behavior and the ride height for your vehicle.
The AIRMATIC consists of two components.
The Adaptive Damping System (ADS)
(Y page 343) and the vehicle level control
(Y page 344).
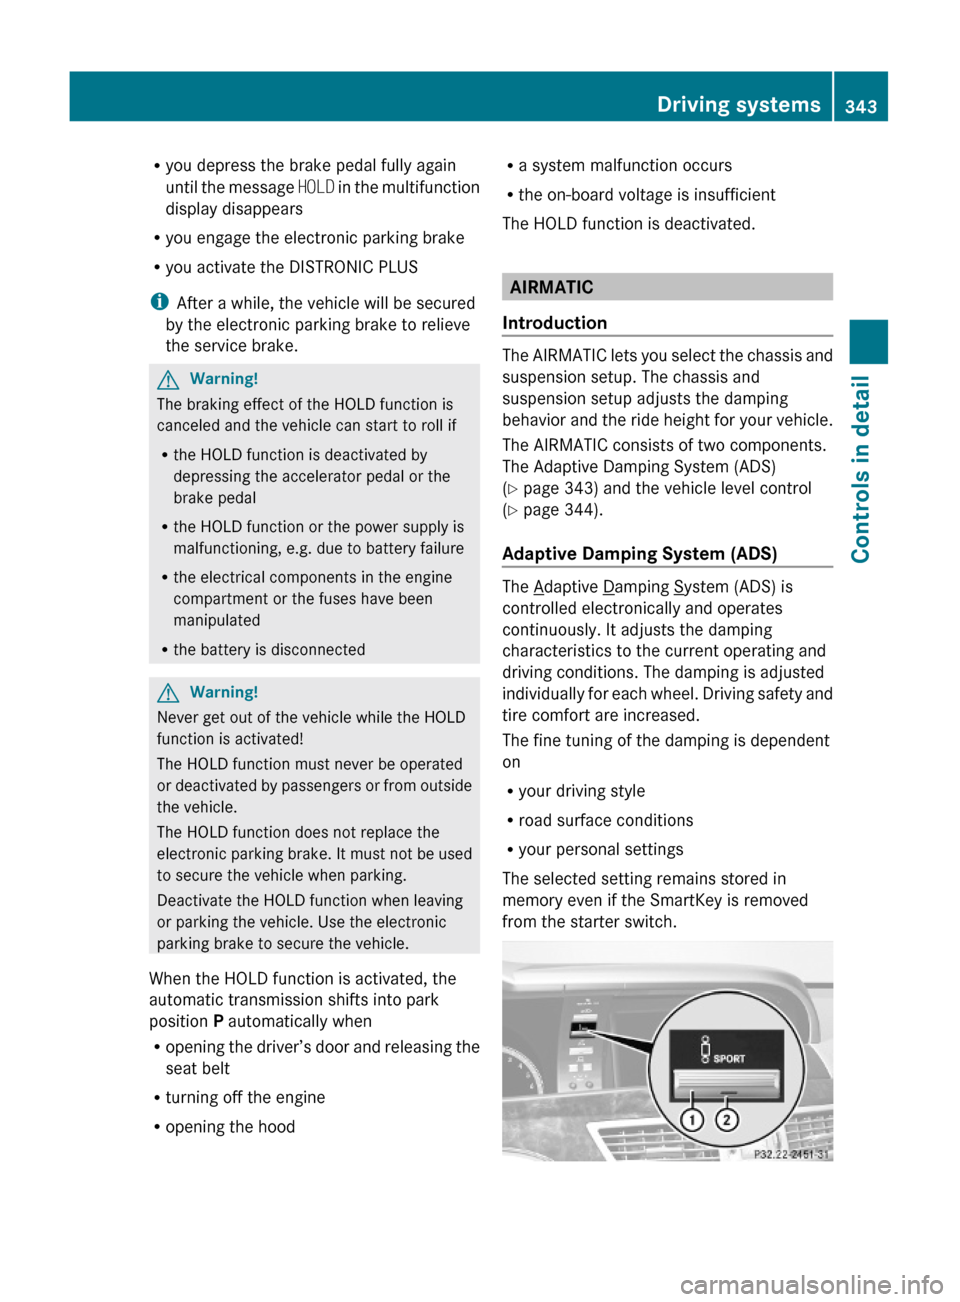
Adaptive Damping System (ADS)
The Adaptive Damping System (ADS) is
controlled electronically and operates
continuously. It adjusts the damping
characteristics to the current operating and
driving conditions. The damping is adjusted
individually for each wheel. Driving safety and
tire comfort are increased.
The fine tuning of the damping is dependent
on
Ryour driving style
Rroad surface conditions
Ryour personal settings
The selected setting remains stored in
memory even if the SmartKey is removed
from the starter switch.
Driving systems343Controls in detail221_AKB; 6; 20, en-USd2ugruen,Version: 2.11.8.12009-09-24T13:28:17+02:00 - Seite 343Z
Page 358 of 548
GWarning!
The ATTENTION ASSIST is only an aid to the
driver. It might not recognize fatigue or
increasing inattentiveness in time or fail to
recognize them at all. The system cannot
substitute a rested and attentive driver.
Fatigue can cause you to recognize dangers
too late, to misjudge potential dangers, or to
react slower. Therefore, make sure to be
rested before and during your trip. Take rests
early enough and regularly, especially during
long trips. Failure to do so could cause you to
recognize dangers too late which could result
in an accident and serious injury to you and/
or others.
The ATTENTION ASSIST interprets your
fatigue or increasing inattentiveness
considering the following criteria:
Rthe individual driving style, for example the
way you steer
Rthe driving conditions such as time of day
and duration of the ride
The ATTENTION ASSIST function is restricted
and warnings will be delayed or not issued at
all when
Rroad conditions are bad, e.g. heavy bumps
or potholes
Rcrosswinds are strong
Rdriving in a sporty manner with high speed
in curves or rapid acceleration
Rdriving slower than 50 mph (80 km/h) or
faster than 112 mph (180 km/h) most of
the time
Roperating the COMAND or making phone
calls via COMAND
Rchanging lanes or varying the vehicle
speed, i.e. you intervene actively
Warnings and displays in the
multifunction display
XSwitch on the ATTENTION ASSIST via the
control system (Y page 232).
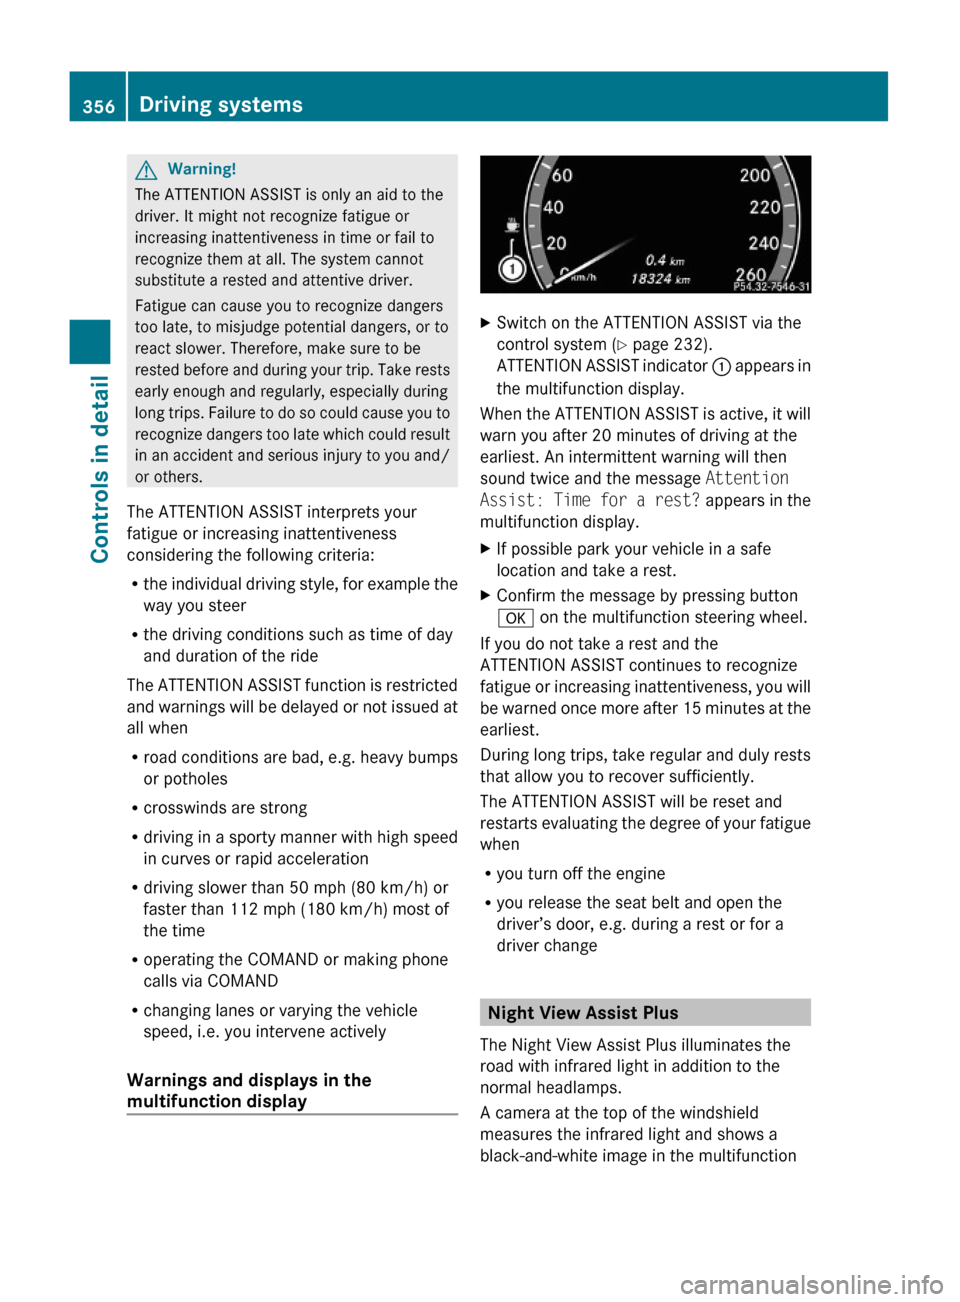
ATTENTION ASSIST indicator : appears in
the multifunction display.
When the ATTENTION ASSIST is active, it will
warn you after 20 minutes of driving at the
earliest. An intermittent warning will then
sound twice and the message Attention
Assist: Time for a rest? appears in the
multifunction display.
XIf possible park your vehicle in a safe
location and take a rest.
XConfirm the message by pressing button
a on the multifunction steering wheel.
If you do not take a rest and the
ATTENTION ASSIST continues to recognize
fatigue or increasing inattentiveness, you will
be warned once more after 15 minutes at the
earliest.
During long trips, take regular and duly rests
that allow you to recover sufficiently.
The ATTENTION ASSIST will be reset and
restarts evaluating the degree of your fatigue
when
Ryou turn off the engine
Ryou release the seat belt and open the
driver’s door, e.g. during a rest or for a
driver change
Night View Assist Plus
The Night View Assist Plus illuminates the
road with infrared light in addition to the
normal headlamps.
A camera at the top of the windshield
measures the infrared light and shows a
black-and-white image in the multifunction
356Driving systemsControls in detail
221_AKB; 6; 20, en-USd2ugruen,Version: 2.11.8.12009-09-24T13:28:17+02:00 - Seite 356
Page 375 of 548

XSwitch on the ignition.XSwitching on: Press rocker switch ¤
up or down.
The indicator lamp in the rocker switch
comes on.XSwitching off: Press rocker switch ¤
up or down.
The rear window defroster switches off when
the battery voltage is too low. Too many
electrical consumers may be operating
simultaneously.
XSwitch off consumers that are currently not
needed if required.
Power tilt/sliding sunroof
Opening and closing
GObserve Safety notes, see page 56.GWarning!
When opening or closing the tilt/sliding
sunroof, make sure there is no danger of
anyone being harmed by the opening/closing
procedure.
The tilt/sliding sunroof is equipped with the
express operation and automatic reversal
function. If the movement of the tilt/sliding
sunroof is blocked during the closing
procedure, the tilt/sliding sunroof will stop
and open slightly.
The tilt/sliding sunroof operates differently
when the sunroof switch is pressed and held.
See the “Closing when the tilt/sliding sunroof
is blocked” section for details.
The opening/closing procedure of the tilt/
sliding sunroof can be immediately halted by
releasing the sunroof switch or, if the sunroof
switch was moved past the resistance point
and released, by moving the sunroof switch in
any direction.
GWarning!
The tilt/sliding sunroof is made out of glass.
In the event of an accident, the glass may
shatter. This may result in an opening in the
roof.
In a vehicle rollover, occupants not wearing
their seat belts or not wearing them properly
may be thrown out of the opening. Such an
opening also presents a potential for injury for
occupants wearing their seat belts properly as
entire body parts or portions of them may
protrude from the passenger compartment.
! To avoid damaging the seals, do not
transport any objects with sharp edges
which can stick out of the tilt/sliding
sunroof.
Do not open the tilt/sliding sunroof if there
is snow or ice on the roof, as this could
result in malfunctions.
If you cannot open or close the tilt/sliding
sunroof due to a malfunction contact
Roadside Assistance or an authorized
Mercedes-Benz Center.
! Please keep in mind that weather
conditions can sometimes change rapidly.
Make sure to close the tilt/sliding sunroof
when leaving the vehicle. If water enters
the vehicle interior, vehicle electronics
could be damaged which is not covered by
the Mercedes-Benz Limited Warranty.
i You can also open or close the tilt/sliding
sunroof using the SmartKey or the
KEYLESS-GO function, see “Summer
opening feature” ( Y page 309) and
“Convenience closing feature”
( Y page 309).
i After switching off the ignition or
removing the SmartKey from the starter
switch, you can operate the tilt/sliding
sunroof until you open the driver’s or front
passenger door. If no door was opened you
can operate the tilt/sliding sunroof for up
to 5 minutes.Power tilt/sliding sunroof373Controls in detail221_AKB; 6; 20, en-USd2ugruen,Version: 2.11.8.12009-09-24T13:28:17+02:00 - Seite 373Z
Page 379 of 548
Opening and closing the panorama
roof with power tilt/sliding panel
GObserve Safety notes, see page 56.GWarning!
When opening or closing the tilt/sliding panel,
make sure there is no danger of anyone being
harmed by the opening/closing procedure.
The tilt/sliding panel is equipped with the
express operation and automatic reversal
function. If the movement of the tilt/sliding
panel is blocked during the closing procedure,
the tilt/sliding panel will stop and open
slightly.
The tilt/sliding panel operates differently
when the roof panel switch is pressed and
held. See the “Closing when the tilt/sliding
panel is blocked” section in this chapter for
details.
The opening/closing procedure of the tilt/
sliding panel can be immediately halted by
releasing the roof panel switch or, if the roof
panel switch was moved past the resistance
point and released, by moving the roof panel
switch in any direction.
GWarning!
The panorama roof with tilt/sliding panel is
made out of glass. In the event of an accident,
the glass may shatter. This may result in an
opening in the roof.
In a vehicle rollover, occupants not wearing
their seat belts or not wearing them properly
may be thrown out of the opening. Such an
opening also presents a potential for injury for
occupants wearing their seat belts properly as
entire body parts or portions of them may
protrude from the passenger compartment.
! To avoid damaging the seals, do not
transport any objects with sharp edges
which can stick out of the tilt/sliding panel.
Do not open the tilt/sliding panel if there is
snow or ice on the roof, as this could result
in malfunctions.
! Please keep in mind that weather
conditions can sometimes change rapidly.
Make sure to close the tilt/sliding panel
when leaving the vehicle. If water enters
the vehicle interior, vehicle electronics
could be damaged which is not covered by
the Mercedes-Benz Limited Warranty.
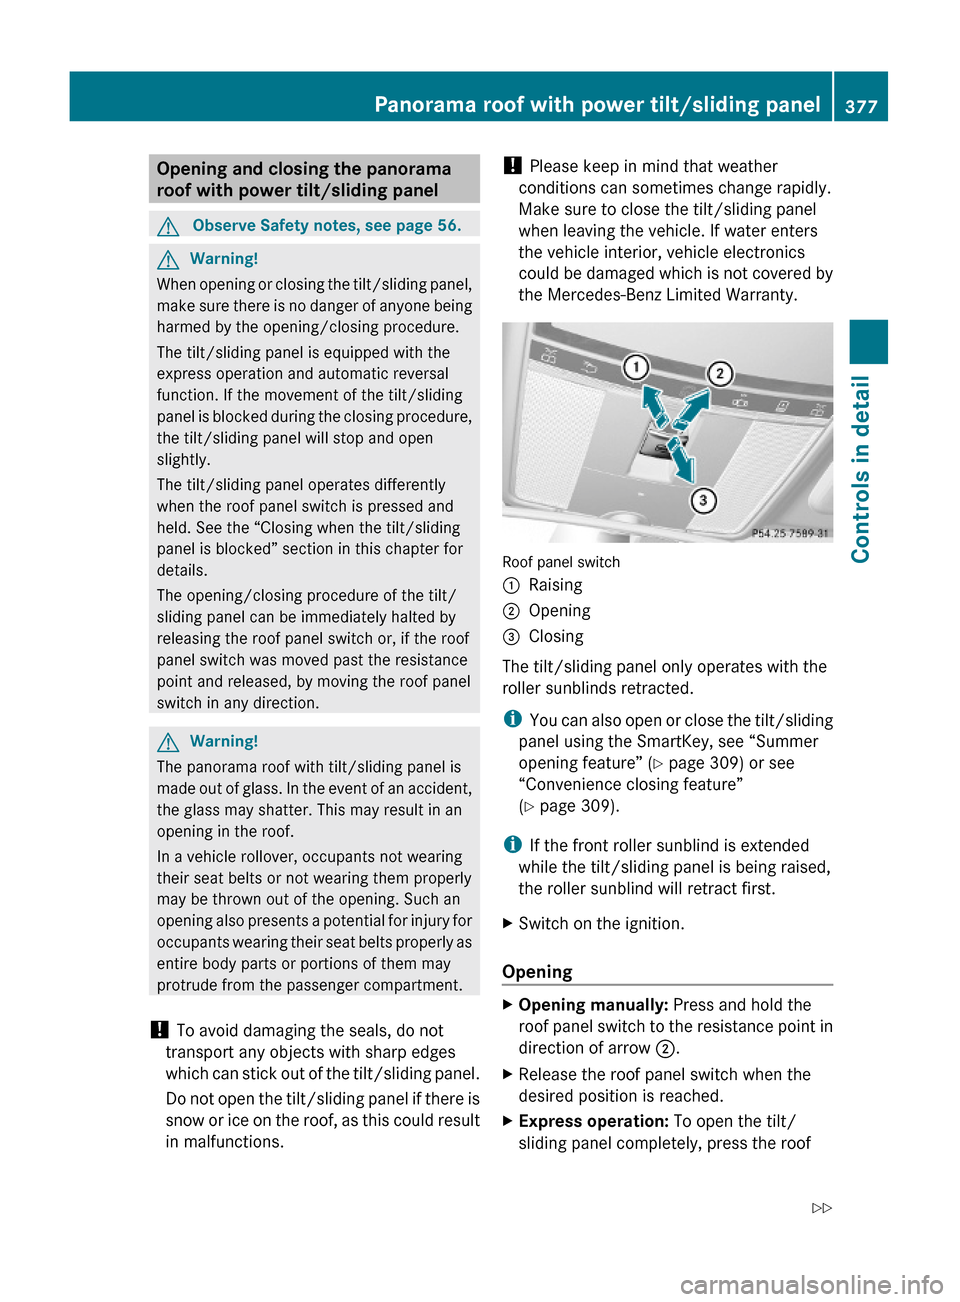
Roof panel switch
:Raising;Opening=Closing
The tilt/sliding panel only operates with the
roller sunblinds retracted.
iYou can also open or close the tilt/sliding
panel using the SmartKey, see “Summer
opening feature” (Y page 309) or see
“Convenience closing feature”
(Y page 309).
iIf the front roller sunblind is extended
while the tilt/sliding panel is being raised,
the roller sunblind will retract first.
XSwitch on the ignition.
Opening
XOpening manually: Press and hold the
roof panel switch to the resistance point in
direction of arrow ;.
XRelease the roof panel switch when the
desired position is reached.
XExpress operation: To open the tilt/
sliding panel completely, press the roof
Panorama roof with power tilt/sliding panel377Controls in detail221_AKB; 6; 20, en-USd2ugruen,Version: 2.11.8.12009-09-24T13:28:17+02:00 - Seite 377Z
Page 384 of 548
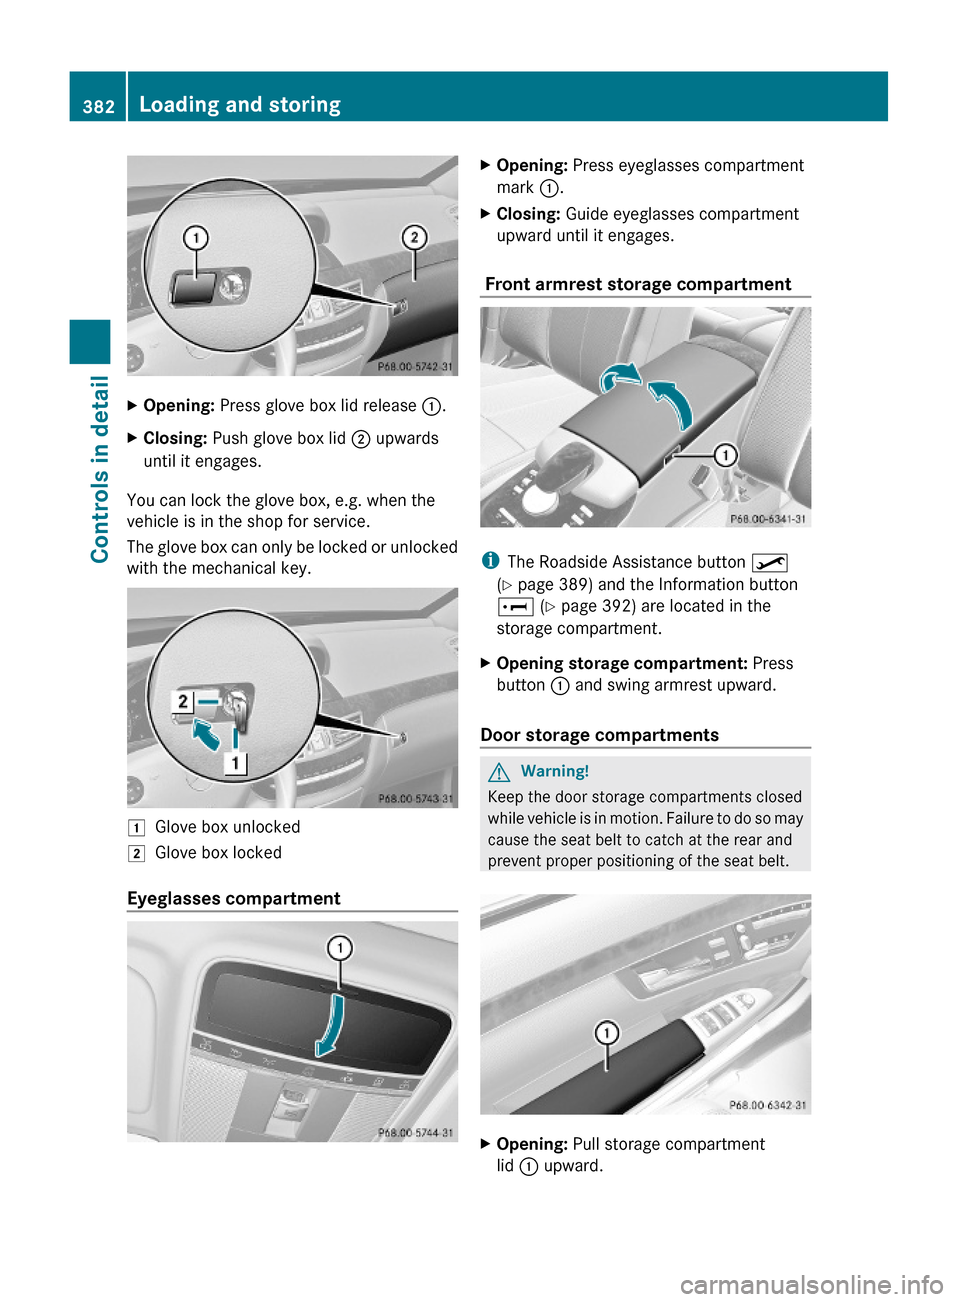
XOpening: Press glove box lid release :.XClosing: Push glove box lid ; upwards
until it engages.
You can lock the glove box, e.g. when the
vehicle is in the shop for service.
The glove box can only be locked or unlocked
with the mechanical key.
1Glove box unlocked2Glove box locked
Eyeglasses compartment
XOpening: Press eyeglasses compartment
mark :.
XClosing: Guide eyeglasses compartment
upward until it engages.
Front armrest storage compartment
iThe Roadside Assistance button º
(Y page 389) and the Information button
E (Y page 392) are located in the
storage compartment.
XOpening storage compartment: Press
button : and swing armrest upward.
Door storage compartments
GWarning!
Keep the door storage compartments closed
while vehicle is in motion. Failure to do so may
cause the seat belt to catch at the rear and
prevent proper positioning of the seat belt.
XOpening: Pull storage compartment
lid : upward.
382Loading and storingControls in detail
221_AKB; 6; 20, en-USd2ugruen,Version: 2.11.8.12009-09-24T13:28:17+02:00 - Seite 382
Page 429 of 548
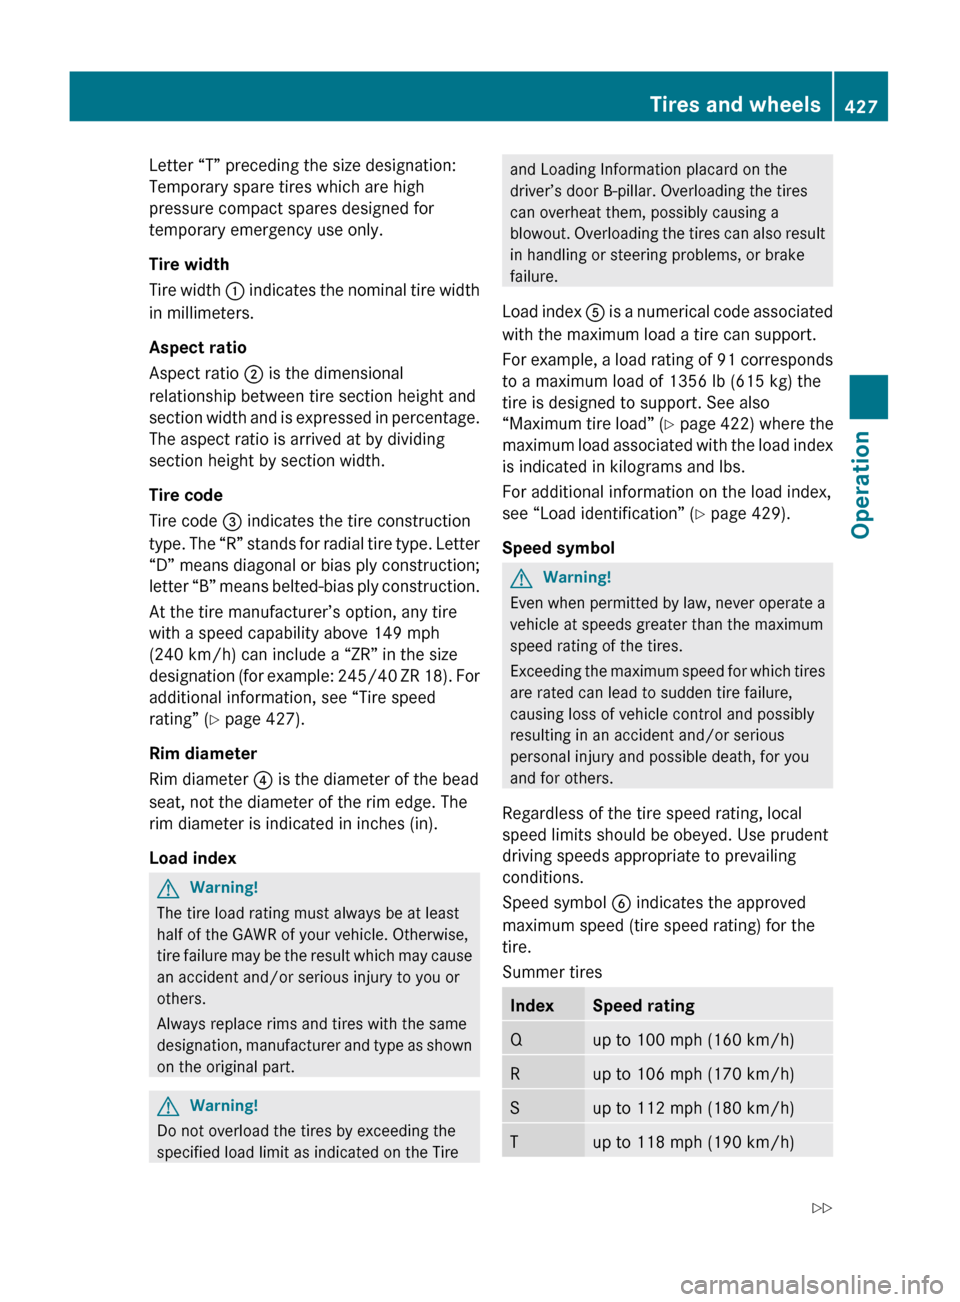
Letter “T” preceding the size designation:
Temporary spare tires which are high
pressure compact spares designed for
temporary emergency use only.
Tire width
Tire width : indicates the nominal tire width
in millimeters.
Aspect ratio
Aspect ratio ; is the dimensional
relationship between tire section height and
section width and is expressed in percentage.
The aspect ratio is arrived at by dividing
section height by section width.
Tire code
Tire code = indicates the tire construction
type. The “R” stands for radial tire type. Letter
“D” means diagonal or bias ply construction;
letter “B” means belted-bias ply construction.
At the tire manufacturer’s option, any tire
with a speed capability above 149 mph
(240 km/h) can include a “ZR” in the size
designation (for example: 245/40 ZR 18). For
additional information, see “Tire speed
rating” ( Y page 427).
Rim diameter
Rim diameter ? is the diameter of the bead
seat, not the diameter of the rim edge. The
rim diameter is indicated in inches (in).
Load indexGWarning!
The tire load rating must always be at least
half of the GAWR of your vehicle. Otherwise,
tire failure may be the result which may cause
an accident and/or serious injury to you or
others.
Always replace rims and tires with the same
designation, manufacturer and type as shown
on the original part.
GWarning!
Do not overload the tires by exceeding the
specified load limit as indicated on the Tire
and Loading Information placard on the
driver’s door B-pillar. Overloading the tires
can overheat them, possibly causing a
blowout. Overloading the tires can also result
in handling or steering problems, or brake
failure.
Load index A is a numerical code associated
with the maximum load a tire can support.
For example, a load rating of 91 corresponds
to a maximum load of 1356 lb (615 kg) the
tire is designed to support. See also
“Maximum tire load” (Y page 422) where the
maximum load associated with the load index
is indicated in kilograms and lbs.
For additional information on the load index,
see “Load identification” ( Y page 429).
Speed symbol GWarning!
Even when permitted by law, never operate a
vehicle at speeds greater than the maximum
speed rating of the tires.
Exceeding the maximum speed for which tires
are rated can lead to sudden tire failure,
causing loss of vehicle control and possibly
resulting in an accident and/or serious
personal injury and possible death, for you
and for others.
Regardless of the tire speed rating, local
speed limits should be obeyed. Use prudent
driving speeds appropriate to prevailing
conditions.
Speed symbol B indicates the approved
maximum speed (tire speed rating) for the
tire.
Summer tires
IndexSpeed ratingQup to 100 mph (160 km/h)Rup to 106 mph (170 km/h)Sup to 112 mph (180 km/h)Tup to 118 mph (190 km/h)Tires and wheels427Operation221_AKB; 6; 20, en-USd2ugruen,Version: 2.11.8.12009-09-24T13:28:17+02:00 - Seite 427Z
Page 444 of 548
normally be done every 3 to 5 months,
depending on the climate and washing
detergent used.
Mercedes-Benz approved Paint Cleaner
should be applied if the paint surface shows
signs of embedded dirt (i.e. loss of gloss).
Do not apply any of these products or wax if
your vehicle is parked in the sun or if the hood
is still hot.XUse the appropriate MB-Touch-Up Stick for
quick and provisional repairs of minor paint
damage (i.e. chips from stones, vehicle
doors, etc.).
Engine cleaning
Prior to cleaning the engine compartment,
make sure to protect electrical components
and connectors from contact with water and
cleaning agents.
Corrosion protection, such as MB
Anticorrosion Wax should be applied to the
engine compartment after every engine
cleaning. Before applying, all control linkage
bushings and joints should be lubricated. The
poly-V-belt and all pulleys should be
protected from any wax.
Vehicle washing
In the winter, thoroughly remove all traces of
road salt as soon as possible.
When washing the vehicle underbody, do not
forget to clean the inner sides of the wheels.
i Vehicles with KEYLESS-GO:
If a door handle is hit by a strong jet of
water, and a SmartKey is within
approximately 3 ft (1 m) of the vehicle, it
could be inadvertently locked or unlocked.
Hand-wash
XDo not use hot water or wash your vehicle
in direct sunlight.XOnly use a soft, wet cloth or sponge to
clean the vehicle.XOnly use a mild vehicle wash detergent,
such as Mercedes-Benz approved Car
Shampoo.XThoroughly spray the vehicle with a
diffused jet of water.XDo not spray directly towards the
ventilation intake.XUse plenty of water and rinse the sponge
and chamois frequently.XRinse with clean water and dry with a
chamois thoroughly.
Do not allow cleaning agents to dry on the
finish.
Automatic car wash
GWarning!
The vehicle is braked when the HOLD function
or DISTRONIC PLUS is activated. Therefore,
deactivate the HOLD function or DISTRONIC
PLUS before the vehicle is washed in an
automatic car wash.
You can have your vehicle washed in an
automatic car wash from the start. Brushless
car washes are preferable.
XTo protect the filter system, activate the air
recirculation mode using rocker switch
g on the climate control panel.
!
Do not clean your vehicle in an automatic
touchless car wash which uses caustic
spray. Caustic spray will damage the paint
or ornamental moldings.
If the vehicle is very dirty, prewash it before
running it through the automatic car wash.
! Make sure the combination switch is set
to wiper setting $. Otherwise, the rain
sensor could activate and cause the wipers
to move unintentionally. This may lead to
vehicle damage.
Due to the width of the vehicle, fold in
exterior rear view mirrors prior to running
the vehicle through an automatic car wash
to prevent damage to the mirrors.
442Vehicle careOperation
221_AKB; 6; 20, en-USd2ugruen,Version: 2.11.8.12009-09-24T13:28:17+02:00 - Seite 442
Page 448 of 548
wheel cleaners may also damage the wheel
paint if the vehicle is not driven after
cleaning.
Therefore, the vehicle’s brake system
should always be warmed-up before it is
parked after cleaning. Drive your vehicle for
several minutes to allow the brakes to dry.
When applying Mercedes-Benz approved
Tire Care and Mercedes-Benz approved
Wheel Care products, take care not to
spray them on the brake disks.
Plastic and rubber partsXUse a gentle dishwashing detergent or mild
detergent for delicate fabrics as a washing
solution.XWipe with a cloth moistened in a lukewarm
solution.
The surface may temporarily change color.
If this is the case, wait for it to dry.GWarning!
Do not use cleaners or cockpit care sprays
containing solvents to clean the cockpit or the
steering wheel. Cleaners containing solvents
will make the surface porous and vehicle
occupants could suffer serious injuries from
plastic parts coming loose in the event of air
bag deployment.
! Do not use oil, wax or scouring agents.
Otherwise you may scratch or damage the
surface.
Hard plastic trim items
XUse Mercedes-Benz approved Interior Care
on a soft, lint-free cloth and apply with light
pressure.
COMAND display
! You must switch off the COMAND display
and allow it to cool prior to cleaning.
! Do not use any liquids or cleaning agents.
These can damage or even destroy the
COMAND display screen.XUse a standard microfiber cloth and apply
with light pressure.
Steering wheel
XWipe with a damp cloth and dry thoroughly
or clean with Mercedes-Benz approved
Leather Care.
Carpets
XUse Mercedes-Benz approved Carpet and
Fabric Care for cleaning the carpets.
Headliner and shelf below rear window
XUse a soft bristle brush or a dry-shampoo
cleaner in case of excessive dirt.
Seat belts
XOnly use clear, lukewarm water and soap.
! The seat belts must not be treated with
chemical cleaning agents. Do not dry the
seat belts at temperatures above 176‡
(80†) or in direct sunlight.
GWarning!
Do not bleach or dye seat belts as this may
severely weaken them. In a crash they may
not be able to provide adequate protection.
Upholstery
Using aftermarket seat covers or wearing
clothing that have the tendency to give off
coloring (e.g. when wet, etc.) may cause the
upholstery to become permanently
discolored. By lining the seats with a proper
intermediate cover, contact-discoloration will
be prevented.
446Vehicle careOperation
221_AKB; 6; 20, en-USd2ugruen,Version: 2.11.8.12009-09-24T13:28:17+02:00 - Seite 446