2010 MERCEDES-BENZ S63AMG change wheel
[x] Cancel search: change wheelPage 360 of 548

and cannot check the function of the Night
View Assist Plus.
Image on multifunction display
When you switch on the Night View Assist
Plus, the dial for the speedometer changes on
the multifunction display. The speedometer
dial is shown as a bar on the lower edge of
the multifunction display. The line for main
menus is no longer available. If you would like
to change a setting using the steering wheel
buttons, you must first switch off the Night
View Assist Plus.
Pedestrian detection
The Night View Assist Plus detects
pedestrians by means of specific
characteristics, e.g. a human silhouette.
Pedestrian detection is activated when
Rthe Night View Assist Plus is switched on
Rthe vehicle speed is above approximately
6 mph (10 km/h)
Rdriving in darkness, e.g. on highways
without road lighting
:Night View Assist Plus image;Detected pedestrian=Frame?Symbol for active pedestrian detectionASpeedometer dial
When pedestrian detection is active,
symbol ? appears in the Night View Assist
Plus image. Once a pedestrian is detected,
that pedestrian is highlighted by frame =.
When you have been made aware of a
pedestrian, assess the situation by looking
through the windshield. The actual distance
between your vehicle and objects or
pedestrians cannot be assessed properly via
a screen display.
Other objects apart from pedestrians may
also be highlighted.
GWarning!
The pedestrian detection may be impaired or
unavailable when
Rpedestrians are obstructed fully or in part
by other objects such as parking vehicles
Rthe silhouette in the Night View Assist Plus
image is displayed incomplete or
interrupted, e.g. by significant light
reflection
Ra pedestrian’s silhouette is not rich enough
in contrast compared to the background
Rpedestrians are not in erected position but,
for example, sit, crouch down, or lie
iAnimals cannot be detected.
Adjusting instrument cluster illumination
If you change the brightness of the
instrument cluster while the Night View
Assist Plus is switched on, only the brightness
of the multifunction display is changed.
XMake sure the Night View Assist Plus is
switched on.
XBrightening illumination: Turn knob :
clockwise.
358Driving systemsControls in detail
221_AKB; 6; 20, en-USd2ugruen,Version: 2.11.8.12009-09-24T13:28:17+02:00 - Seite 358
Page 364 of 548
Lane Keeping Assist
The Lane Keeping Assist supports you at a
vehicle speed of above 40 mph when you
have set the display unit to miles in the
Display Unit Speed-/Odometer: menu in
the control system (Y page 235). When you
have set the display unit to km, the system
supports you at a vehicle speed of above
60 km/h. When the Lane Keeping Assist
detects lane markings, the system is
designed to alert you in case you leave your
lane unintentionally. A warning is usually
issued when a front wheel is on the lane
marking. An interval vibration in the steering
wheel that lasts for up to 1.5 seconds will
then alert you.
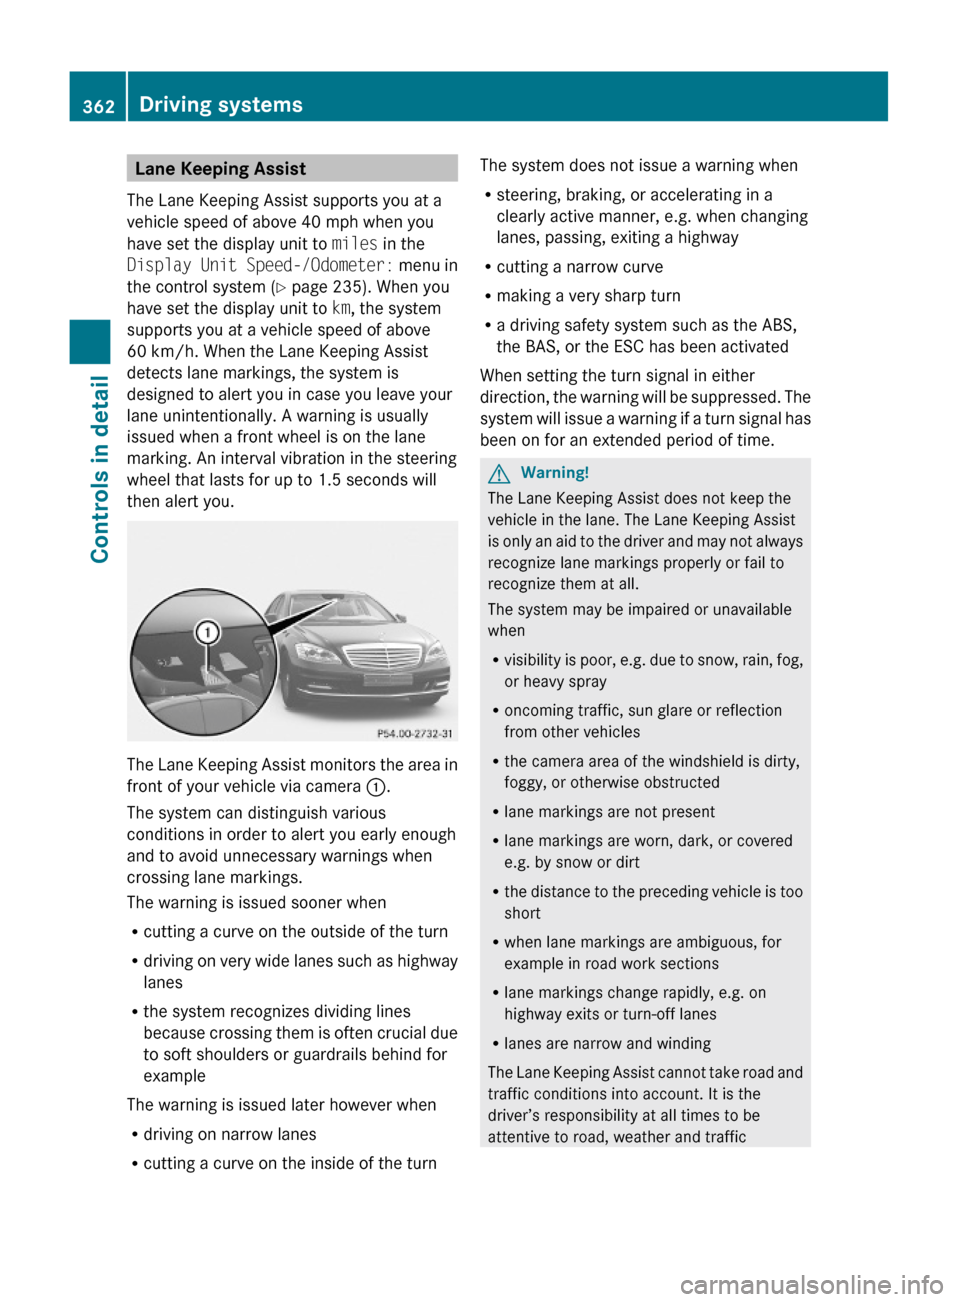
The Lane Keeping Assist monitors the area in
front of your vehicle via camera :.
The system can distinguish various
conditions in order to alert you early enough
and to avoid unnecessary warnings when
crossing lane markings.
The warning is issued sooner when
Rcutting a curve on the outside of the turn
Rdriving on very wide lanes such as highway
lanes
Rthe system recognizes dividing lines
because crossing them is often crucial due
to soft shoulders or guardrails behind for
example
The warning is issued later however when
Rdriving on narrow lanes
Rcutting a curve on the inside of the turn
The system does not issue a warning when
Rsteering, braking, or accelerating in a
clearly active manner, e.g. when changing
lanes, passing, exiting a highway
Rcutting a narrow curve
Rmaking a very sharp turn
Ra driving safety system such as the ABS,
the BAS, or the ESC has been activated
When setting the turn signal in either
direction, the warning will be suppressed. The
system will issue a warning if a turn signal has
been on for an extended period of time.
GWarning!
The Lane Keeping Assist does not keep the
vehicle in the lane. The Lane Keeping Assist
is only an aid to the driver and may not always
recognize lane markings properly or fail to
recognize them at all.
The system may be impaired or unavailable
when
Rvisibility is poor, e.g. due to snow, rain, fog,
or heavy spray
Roncoming traffic, sun glare or reflection
from other vehicles
Rthe camera area of the windshield is dirty,
foggy, or otherwise obstructed
Rlane markings are not present
Rlane markings are worn, dark, or covered
e.g. by snow or dirt
Rthe distance to the preceding vehicle is too
short
Rwhen lane markings are ambiguous, for
example in road work sections
Rlane markings change rapidly, e.g. on
highway exits or turn-off lanes
Rlanes are narrow and winding
The Lane Keeping Assist cannot take road and
traffic conditions into account. It is the
driver’s responsibility at all times to be
attentive to road, weather and traffic
362Driving systemsControls in detail
221_AKB; 6; 20, en-USd2ugruen,Version: 2.11.8.12009-09-24T13:28:17+02:00 - Seite 362
Page 394 of 548
i The COMAND system display indicates
that a Tele Aid call is in progress. While the
call is connected you can change to the
navigation menu by pressing shortcut
button S. Spoken commands are not
available.
A voice connection between the Roadside
Assistance dispatcher and the occupants of
the vehicle will be established.
XDescribe the nature of the need for
assistance.
The Mercedes-Benz Roadside Assistance
dispatcher will either dispatch a qualified
Mercedes-Benz technician or arrange to tow
your vehicle to the nearest authorized
Mercedes-Benz Center. For services such as
labor and/or towing, charges may apply.
Refer to the Roadside Assistance manual for
more information.
Sign and Drive services (USA only):
Services such as a jump start, a few gallons
of fuel or the replacement of a flat tire with
the vehicle spare wheel are obtainable at no
charge.
iIf the indicator lamp in Roadside
Assistance button : is flashing
continuously and there was no voice
connection to the Customer Assistance
Center established, then the Tele Aid
system could not initiate a Roadside
Assistance call (e.g. the relevant cellular
phone network is not available). The
message Call Failed appears in the
multifunction display. Call could not
be connected! appears in the COMAND
display. Confirm the message pressing W
(Y page 79).
If the indicator lamp in Roadside Assistance
button : is flashing continuously and
there was no voice connection established,
then the Tele Aid system could not initiate
a Roadside Assistance call (e.g. the
relevant cellular phone network is not
available). The message Call Failed
appears in the multifunction display. Call
could not be connected! appears in the
COMAND display. Confirm the message
pressing W (Y page 79).
XTerminating calls: Press button ~ on
the multifunction steering wheel.
or
XPress the respective button for ending a
telephone call on the telephone keypad.
Information button
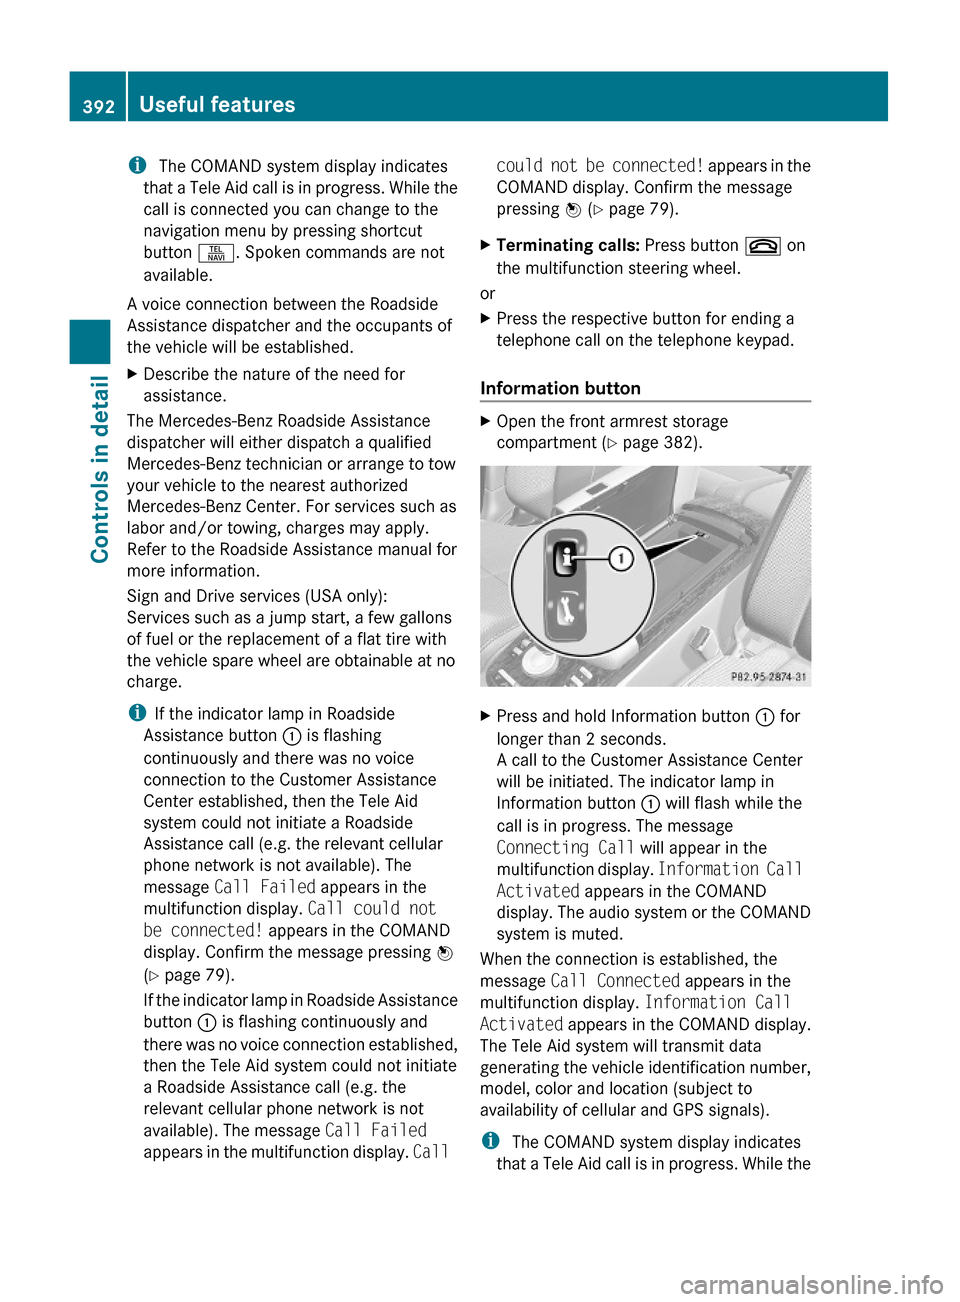
XOpen the front armrest storage
compartment (Y page 382).
XPress and hold Information button : for
longer than 2 seconds.
A call to the Customer Assistance Center
will be initiated. The indicator lamp in
Information button : will flash while the
call is in progress. The message
Connecting Call will appear in the
multifunction display. Information Call
Activated appears in the COMAND
display. The audio system or the COMAND
system is muted.
When the connection is established, the
message Call Connected appears in the
multifunction display. Information Call
Activated appears in the COMAND display.
The Tele Aid system will transmit data
generating the vehicle identification number,
model, color and location (subject to
availability of cellular and GPS signals).
i The COMAND system display indicates
that a Tele Aid call is in progress. While the
392Useful featuresControls in detail
221_AKB; 6; 20, en-USd2ugruen,Version: 2.11.8.12009-09-24T13:28:17+02:00 - Seite 392
Page 395 of 548
call is connected you can change to the
navigation menu by pressing shortcut
button S. Spoken commands are not
available.
A voice connection between the Customer
Assistance Center representative and the
occupants of the vehicle will be established.
Information regarding the operation of your
vehicle, the nearest authorized Mercedes-
Benz Center or Mercedes-Benz USA products
and services is available to you.
For more details concerning the Tele Aid
system, please visit www.mbusa.com (USA
only), log in to “Owner’s Online” and visit the
“My Tele Aid” section to learn more.
i If the indicator lamp in Information
button : is flashing continuously and
there was no voice connection established,
then the Tele Aid system could not initiate
an Information call (e.g. the relevant
cellular phone network is not available).
The message Call Failed appears in the
multifunction display. Call could not
be connected! appears in the COMAND
display. Confirm the message pressing W
( Y page 79).XTerminating calls: Press button ~ on
the multifunction steering wheel.
or
XPress the respective button for ending a
telephone call on the telephone keypad.
Call priority
If other service calls such as a Roadside
Assistance call or Information call are active,
an emergency call is still possible. In this
case, the emergency call will take priority and
override all other active calls.
The indicator lamp in the respective button
flashes until the call is concluded. Automatic
initiated emergency calls can only be
terminated by a Customer Assistance Center
representative. All other calls can be
terminated by pressing button ~ on the
multifunction steering wheel or the
respective button for ending a telephone call
on the telephone keypad.
Destination Download to the COMAND
system
i The components and operating principles
of the COMAND system can be found on
( Y page 77).
Destination Download allows you access to a
database of over 10 million points of interest
(POIs) that can be downloaded to your
vehicle’s navigation system. If you know the
destination, the address can be downloaded,
or can be provided with points of interests
near your location.
Route guidance
You will be prompted to confirm that route
guidance to the entered address is to be
started.
XSlide ZV Æ or rotate cV d to select Yes
menu item and confirm by pressing W.
The system calculates the route and
subsequently starts the route guidance to the
defined address.
i If you select No, you can save the address
to your address book.
i The Destination Download feature is
available if the relevant mobile phone
network is available and data connection is
possible.
Search & Send
i In order to utilize Search & Send your
vehicle must be equipped with Tele Aid,
Navigation, and an active Tele Aid
subscription.
“Search & Send” is a navigation destination
address entry service. A destination address
located using Google Maps ®
or Yahoo Local
Maps ®
websites can be delivered via Tele Aid
Useful features393Controls in detail221_AKB; 6; 20, en-USd2ugruen,Version: 2.11.8.12009-09-24T13:28:17+02:00 - Seite 393Z
Page 409 of 548
iIf you want to interrupt the checking
procedure, press button % on the
multifunction steering wheel.
XIf necessary, add engine oil.
For more information on engine oil, see
“Fuels, coolants, lubricants etc.”
(Y page 537).
Other display messages
If the ignition is not switched on, the following
message appears in the multifunction
display:
For Engine Oil Level
Ignition Must be On
XSwitch on the ignition.
Need More Time
to Check
Engine Oil Level
XIf the engine is at operating temperature,
wait 5 minutes before repeating check
procedure.
XIf the engine is not at operating
temperature yet, you must wait 30 minutes
before checking oil.
If you see the message:
Engine Oil Level
Not Measurable
With Running Engine
XTurn off the engine.XIf the engine is at operating temperature,
wait 5 minutes before checking oil.
XIf the engine is not at operating
temperature yet, you must wait 30 minutes
before checking oil.
If there is excess engine oil with the engine at
normal operating temperature, the following
message appears in the multifunction
display:
Reduce
Engine Oil Level
XHave excess oil siphoned or drained off.
Contact an authorized Mercedes-Benz
Center.
! Excess oil must be siphoned or drained
off. It could cause damage to the engine
and emission control system not covered
by the Mercedes-Benz Limited Warranty.
For information on messages in the
multifunction display concerning engine oil,
see the “Practical hints” section
(Y page 483).
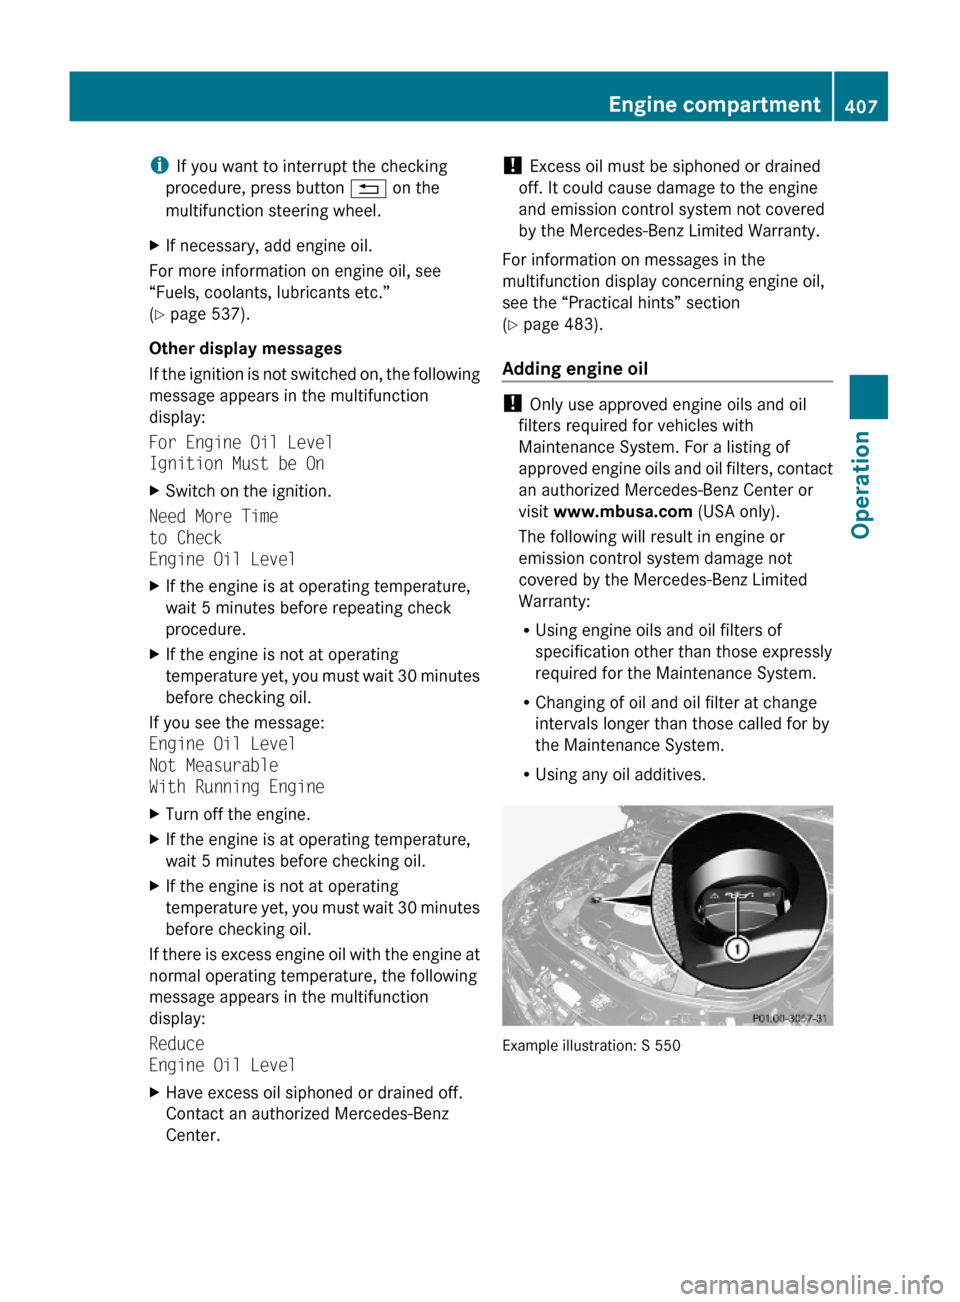
Adding engine oil
! Only use approved engine oils and oil
filters required for vehicles with
Maintenance System. For a listing of
approved engine oils and oil filters, contact
an authorized Mercedes-Benz Center or
visit www.mbusa.com (USA only).
The following will result in engine or
emission control system damage not
covered by the Mercedes-Benz Limited
Warranty:
RUsing engine oils and oil filters of
specification other than those expressly
required for the Maintenance System.
RChanging of oil and oil filter at change
intervals longer than those called for by
the Maintenance System.
RUsing any oil additives.
Example illustration: S 550
Engine compartment407Operation221_AKB; 6; 20, en-USd2ugruen,Version: 2.11.8.12009-09-24T13:28:17+02:00 - Seite 407Z
Page 413 of 548
inflation pressure loss and damage to the
tire beads.
R If the vehicle is heavily loaded, check tire
inflation pressure and correct as required.
R Do not allow your tires to wear down too
far. Adhesion properties on wet roads are
sharply reduced at tread depths of less
than 1
/ 8 in (3 mm).
R When replacing individual tires, you should
mount new tires on the front wheels first
(on vehicles with same-sized wheels all
around).
Recommended tire inflation pressure
GWarning!
Follow recommended tire inflation pressures.
Do not underinflate tires. Underinflated tires
wear excessively and/or unevenly, adversely
affect handling and fuel economy, and are
more likely to fail from being overheated.
Do not overinflate tires. Overinflated tires can
adversely affect handling and ride comfort,
wear unevenly, increase stopping distance,
and result in sudden deflation (blowout)
because they are more likely to become
punctured or damaged by road debris,
potholes etc.
Do not overload the tires by exceeding the
specified load limit as indicated on the Tire
and Loading Information placard on the
driver’s door B-pillar. Overloading the tires
can overheat them, possibly causing a
blowout. Overloading the tires can also result
in handling or steering problems, or brake
failure.
Your vehicle is equipped with the Tire and
Loading Information placard located on the
driver’s door B-pillar ( Y page 418).
The tire inflation pressure should be checked
regularly. Only adjust the tire inflation
pressure on cold tires. The tires can be
considered cold if the vehicle has been
parked for at least 3 hours or driven less than
1 mile (1.6 km). Depending on the ambient
temperature, the driving speed and the tire
load, the tire temperature changes. When the
tire temperature changes by 18 ‡ (10†), the
tire inflation pressure will change by
approximately 1.5 psi (0.1 bar). Keep this in
mind when checking tire inflation pressure on
warm tires and adjust the tire pressure only
if the tire inflation pressure is too low for the
current operating conditions. If you check the
tire inflation pressure when the tires are
warm, the reading will be higher than the cold
reading. This is normal. Do not let air out to
match the specified cold tire inflation
pressure. Otherwise, the tire will be
underinflated.
Follow recommended cold tire inflation
pressures listed on Tire and Loading
Information placard on the driver’s door
B-pillar.
Keeping the tires properly inflated provides
the best handling, tread life and riding
comfort.
In addition to the Tire and Loading
Information placard on the driver’s door
B-pillar, also consult the tire inflation
pressure label on the inside of the filler flap
for any additional information pertaining to
special driving situations. For more
information, see “Important notes on tire
inflation pressure” ( Y page 412).
i Data shown on Tire and Loading
Information placard example are for
illustration purposes only. Tire data are
specific to each vehicle and may vary from
data shown in the following illustration.
Refer to Tire and Loading Information
placard on vehicle for actual data specific
to your vehicle.Tires and wheels411Operation221_AKB; 6; 20, en-USd2ugruen,Version: 2.11.8.12009-09-24T13:28:17+02:00 - Seite 411Z
Page 419 of 548
driver’s door B-pillar. Some vehicles may have
supplemental tire inflation pressure
information for driving at high speeds or for
vehicle loads less than the maximum loaded
vehicle condition. If such information is
provided, it can be found on the inside of the
fuel filler flap.
XUsing the Tire and Loading Information
placard on the driver’s door B-pillar
(Y page 418) or the supplemental tire
inflation pressure information on the inside
of the fuel filler flap, make sure the tire
inflation pressure of all four tires is correct.
XSwitch on the ignition.XPress button = or ; on the
multifunction steering wheel to select the
Service menu.
XPress button 9 or : on the
multifunction steering wheel to select
Tire Press..
XPress button a.
The current inflation pressure for each tire
appears in the multifunction display or the
following message appears in the
multifunction display:
Tire Pressure
Displayed After Driving
A Few Minutes
XPress button :.
The following message appears in the
multifunction display:
Use Current
Pressures As New
Reference Values
Press 'OK' to Confirm
XPress button a.
The following message appears in the
multifunction display:
Tire Pressure Monitor
Reactivated
After driving a few minutes the system
verifies that the current tire inflation
pressures are within the system’s specified
range. Afterwards the current tire inflation
pressures are accepted as reference values
and then monitored.
XIf you wish to cancel: Press button %.
or
XPress button 9 to exit the menu screen.
iWhen the wheel positions have been
changed, the inflation pressure of a tire
may be displayed for the wrong position
temporarily. After driving for a few minutes,
the inflation pressure will be shown for the
correct position.
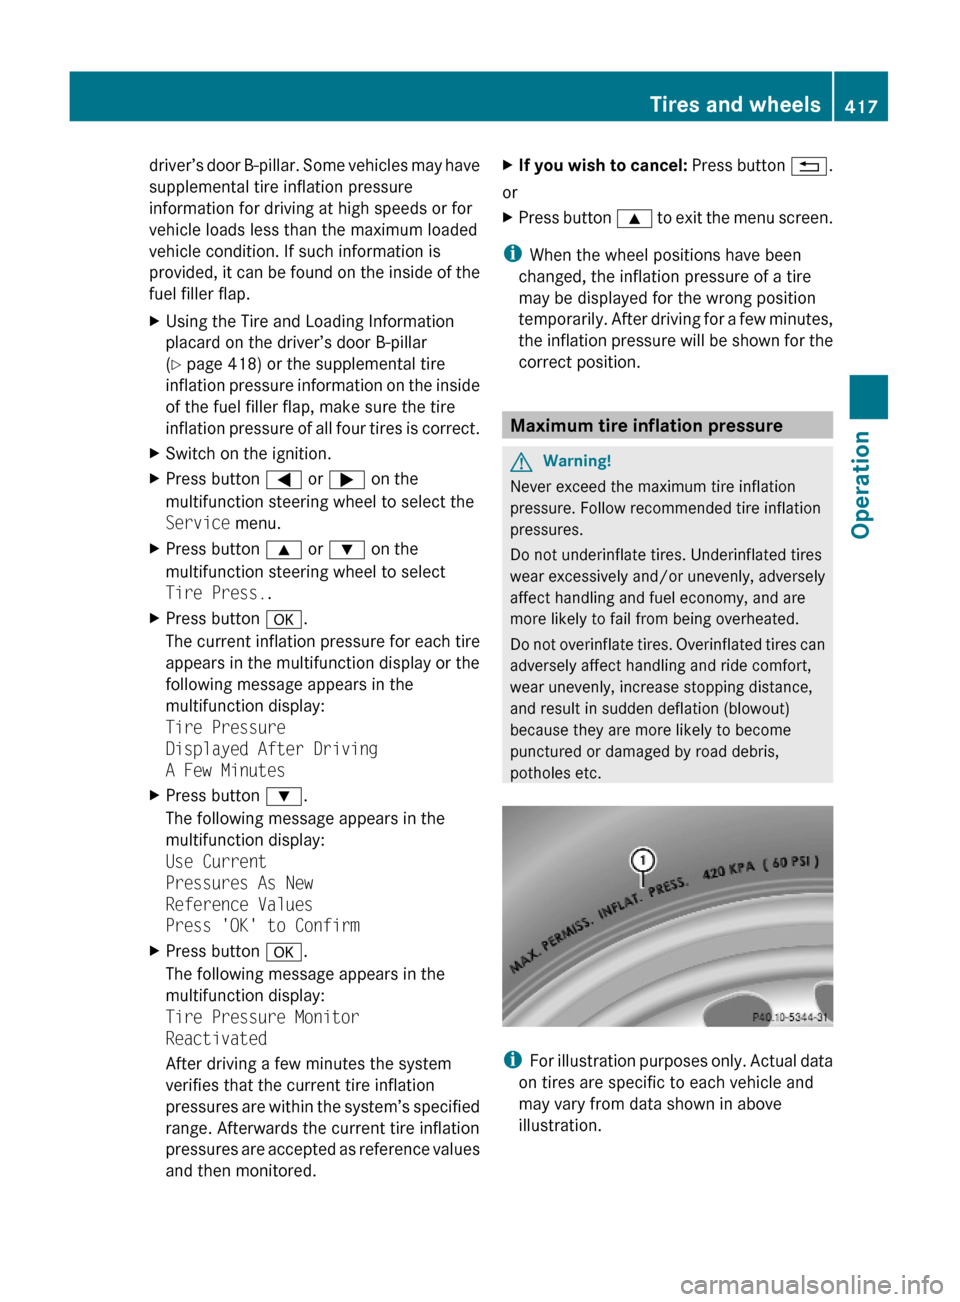
Maximum tire inflation pressure
GWarning!
Never exceed the maximum tire inflation
pressure. Follow recommended tire inflation
pressures.
Do not underinflate tires. Underinflated tires
wear excessively and/or unevenly, adversely
affect handling and fuel economy, and are
more likely to fail from being overheated.
Do not overinflate tires. Overinflated tires can
adversely affect handling and ride comfort,
wear unevenly, increase stopping distance,
and result in sudden deflation (blowout)
because they are more likely to become
punctured or damaged by road debris,
potholes etc.
iFor illustration purposes only. Actual data
on tires are specific to each vehicle and
may vary from data shown in above
illustration.
Tires and wheels417Operation221_AKB; 6; 20, en-USd2ugruen,Version: 2.11.8.12009-09-24T13:28:17+02:00 - Seite 417Z
Page 428 of 548
Thoroughly clean the mounting face of wheels
and brake disks, i.e. the inner side of the
wheels/tires, during each rotation. Check for
and ensure proper tire inflation pressure.
For information on wheel change, see “Flat
tire” (Y page 508).
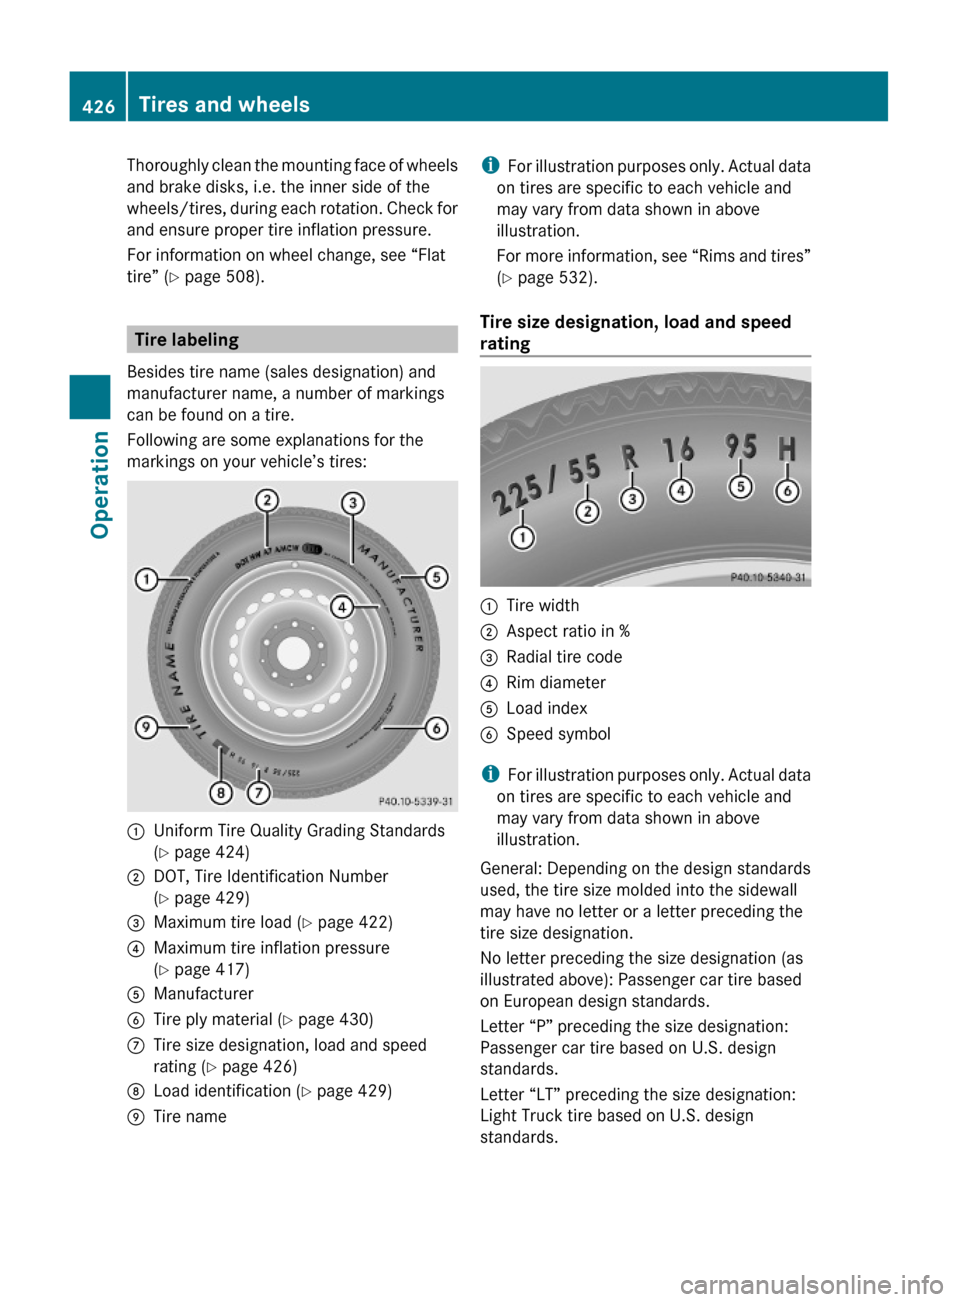
Tire labeling
Besides tire name (sales designation) and
manufacturer name, a number of markings
can be found on a tire.
Following are some explanations for the
markings on your vehicle’s tires:
:Uniform Tire Quality Grading Standards
(Y page 424)
;DOT, Tire Identification Number
(Y page 429)
=Maximum tire load (Y page 422)?Maximum tire inflation pressure
(Y page 417)
AManufacturerBTire ply material (Y page 430)CTire size designation, load and speed
rating (Y page 426)
DLoad identification (Y page 429)ETire nameiFor illustration purposes only. Actual data
on tires are specific to each vehicle and
may vary from data shown in above
illustration.
For more information, see “Rims and tires”
(Y page 532).
Tire size designation, load and speed
rating
:Tire width;Aspect ratio in %=Radial tire code?Rim diameterALoad index BSpeed symbol
iFor illustration purposes only. Actual data
on tires are specific to each vehicle and
may vary from data shown in above
illustration.
General: Depending on the design standards
used, the tire size molded into the sidewall
may have no letter or a letter preceding the
tire size designation.
No letter preceding the size designation (as
illustrated above): Passenger car tire based
on European design standards.
Letter “P” preceding the size designation:
Passenger car tire based on U.S. design
standards.
Letter “LT” preceding the size designation:
Light Truck tire based on U.S. design
standards.
426Tires and wheelsOperation
221_AKB; 6; 20, en-USd2ugruen,Version: 2.11.8.12009-09-24T13:28:17+02:00 - Seite 426