2010 MERCEDES-BENZ S63AMG key battery
[x] Cancel search: key batteryPage 277 of 548
interference that may cause undesired
operation.
Any unauthorized modification to this
device could void the user’s authority to
operate the equipment.
i Canada only:
This device complies with RSS-210 of
Industry Canada. Operation is subject to
the following two conditions:
1. This device may not cause interference,
and
2. this device must accept any interference received, including
interference that may cause undesired
operation of the device.
Any unauthorized modification to this
device could void the user’s authority to
operate the equipment.
Factory setting XGlobal unlocking: Press button %.
Unless you open a door or the trunk within
approximately 40 seconds after unlocking
the vehicle:
R The vehicle will be locked again.
R The anti-theft alarm system will be
rearmed.
XGlobal locking: Press button &.
Selective setting
If you frequently travel alone, you may wish
to reprogramm the SmartKey. Pressing
button % will then only unlock the driver’s
door and the fuel filler flap.
XSwitching on/off: Press and hold buttons
% and & simultaneously for
approximately 6 seconds until the battery
check lamp ( Y page 277) flashes twice.
The SmartKey will then function as follows:
XUnlocking driver’s door and fuel filler
flap: Press button % once.XGlobal unlocking: Press button %
twice.XGlobal locking: Press button &.
KEYLESS-GO
Vehicles equipped with KEYLESS-GO come
with two SmartKeys with KEYLESS-GO, each
with remote control and a removable
mechanical key.
The KEYLESS-GO function is integrated into
the SmartKey. The validity of the SmartKey is
checked every time you grasp an outside door
handle.
When the SmartKey is valid, your vehicle
unlocks
R the doors
R the trunk lid
R the fuel filler flap
i USA only:
This device complies with Part 15 of the
FCC Rules. Operation is subject to the
following two conditions:
1. This device may not cause harmful interference, and
2. this device must accept any interference received, including
interference that may cause undesired
operation.
Any unauthorized modification to this
device could void the user’s authority to
operate the equipment.
Locking and unlocking275Controls in detail221_AKB; 6; 20, en-USd2ugruen,Version: 2.11.8.12009-09-24T13:28:17+02:00 - Seite 275Z
Page 279 of 548
Possibility 2 (One SmartKey in the vehicle,
no SmartKey outside the vehicle):
When exiting and trying to lock the vehicle,
the message Key Detected In Vehicle
appears in the multifunction display. The
vehicle will not be locked.
Factory setting
XGlobal unlocking: Pull an outside door
handle.
Unless you open a door or the trunk within
approximately 40 seconds after unlocking
the vehicle:
RThe vehicle will be locked again.
RThe anti-theft alarm system will be
rearmed.
XGlobal locking: Touch outside of a door
handle :.
Selective setting
If you frequently travel alone, you may wish
to reprogram the SmartKey. Pulling the
driver’s outside door handle will then only
unlock the driver’s door and the fuel filler flap.
XSwitching on/off: Press and hold buttons
% and & simultaneously for
approximately 6 seconds until the battery
check lamp (Y page 277) flashes twice.
KEYLESS-GO will then function as follows:
XUnlocking driver’s door and fuel filler
flap: Pull the driver’s outside door handle.
XGlobal unlocking: Pull any outside door
handle other than the driver’s outside door
handle.
XGlobal locking: Touch outside of a door
handle :.
Checking SmartKey batteries
Example illustration: SmartKey with KEYLESS-GO
XPress button & or % on the
SmartKey.
Battery check lamp : comes on briefly to
indicate that the SmartKey batteries are in
order.
If the battery check lamp does not come on
briefly during check, the SmartKey batteries
are discharged.
XReplace the batteries (Y page 502).
iYou can obtain the required batteries at
any authorized Mercedes-Benz Center.
iIf the batteries are checked within signal
range of the vehicle, pressing button
& or % will lock or unlock the vehicle
accordingly.
Loss of the SmartKey
If you lose your SmartKey or mechanical key,
you should do the following:
Locking and unlocking277Controls in detail221_AKB; 6; 20, en-USd2ugruen,Version: 2.11.8.12009-09-24T13:28:17+02:00 - Seite 277Z
Page 285 of 548
XBriefly press emergency release
button :.
The emergency release button unlocks and
opens the trunk while the vehicle is standing
still or in motion.
Illumination of the emergency release button:
RThe button flashes for 30 minutes after
opening the trunk.
RThe button flashes for 60 minutes after
closing the trunk.
The emergency release button does not open
the trunk, if the vehicle battery is discharged
or disconnected.
Valet locking
You can lock the trunk separately with the
mechanical key. This denies unauthorized
access to the trunk, e.g. when you valet park
the vehicle.
XLeave only the SmartKey less its
mechanical key with the vehicle.
XValet locking: Close the trunk.XRemove the mechanical key from the
SmartKey (Y page 499).
XInsert the mechanical key in the trunk lid
lock.
XTurn the mechanical key clockwise to
position 2 and remove the mechanical
key in that position to lock the trunk.
The trunk remains locked even when the
vehicle is centrally unlocked.
You can then only open the trunk with the
mechanical key.
XCanceling: Insert the mechanical key in
the trunk lid lock.
XTurn the mechanical key counterclockwise
to neutral position 1 and remove the
mechanical key in that position to unlock
the trunk.
You can now open the trunk.
Power closing assist for doors and
trunk lid
It is not necessary to slam the door or trunk
lid closed. An electrical power-assisted
mechanism draws doors and trunk lid closed
quietly and automatically once door and trunk
lid has been latched. When the electrical
power-assisted mechanism has stopped,
doors and/or trunk can be reopened.
GWarning!
To prevent possible personal injury, always
keep hands and fingers away from the door or
trunk opening when closing a door or the
trunk lid. Be especially careful when small
children are around.
In case of danger, pull the inside or outside
door handle, or pull the trunk lid handle.
To prevent personal injury, never actuate the
closing assist mechanism by tampering with
the door or trunk lid latch.
Locking and unlocking283Controls in detail221_AKB; 6; 20, en-USd2ugruen,Version: 2.11.8.12009-09-24T13:28:17+02:00 - Seite 283Z
Page 286 of 548

GWarning!
Only drive with the doors closed. Otherwise,
one or more of the doors could open while the
vehicle is in motion, putting you and/or
others at risk.
GWarning!
Make sure the trunk is closed when the engine
is running and while driving. Among other
dangers, deadly carbon monoxide (CO) gases
may enter vehicle interior resulting in
unconsciousness and death.
XPower closing assist for doors: Press the
doors gently past the initial engage position
into the lock.
XPower closing assist for trunk lid: Press
the trunk lid gently into its lock.
Starter switch positions
SmartKey
GObserve Safety notes, see page 56.
Starter switch
gFor removing SmartKey1Power supply for some electrical
consumers, e.g. wipers
2Ignition (power supply for all electrical
consumers) and driving position
3Starting position
When you switch on the ignition, all lamps in
the instrument cluster come on. The high-
beam headlamp indicator lamp and turn
signal indicator lamps will only come on if
activated. If a lamp in the instrument cluster
fails to come on when the ignition is switched
on, have it checked and replaced if necessary.
If a lamp in the instrument cluster remains on
after starting the engine or comes on while
driving, refer to “Lamps in instrument cluster”
(Y page 489).
XAlways remove the SmartKey from the
starter switch when the engine is not in
operation.
This will help to prevent accelerated vehicle
battery discharge or a completely
discharged vehicle battery.
If the SmartKey cannot be turned in the
starter switch, the vehicle battery may not be
sufficiently charged.
XCheck the vehicle battery and charge it if
necessary (Y page 514).
or
XGet a jump start (Y page 514).
iIf the SmartKey does not belong to the
vehicle, the SmartKey can be turned in the
starter switch. However, the ignition does
not switch on and the engine does not start.
KEYLESS-GO
GObserve Safety notes, see page 56.
Vehicles equipped with the KEYLESS-GO
feature are supplied with a SmartKey with
integrated KEYLESS-GO function and a
removable KEYLESS-GO start/stop button.
The KEYLESS-GO start/stop button must be
inserted in the starter switch and the
SmartKey present in the vehicle.
Pressing the KEYLESS-GO start/stop button
without depressing the brake pedal
corresponds to the various starter switch
positions (Y page 284).
Pressing the KEYLESS-GO start/stop button
with the brake pedal firmly depressed will
start the engine (Y page 311).
The KEYLESS-GO start/stop button can be
pulled out of the starter switch easily. You can
284Starter switch positionsControls in detail
221_AKB; 6; 20, en-USd2ugruen,Version: 2.11.8.12009-09-24T13:28:17+02:00 - Seite 284
Page 301 of 548
Switch off the parking lamps or the rear fog
lamp manually.
! Failure to switch off the parking lamps
when leaving the vehicle may result in a
discharged battery.
i Vehicles without front fog lamps: For
better detection of the vehicle, the LED
daytime running lamps are dimmed to
parking lamp level when the low-beam
headlamps are switched on.
Low-beam headlamps
The low-beam headlamps can be switched on
and off with the exterior lamp switch.
XSwitch on the ignition.XSwitching on: Turn the exterior lamp
switch to position L.
The following lamps come on:
R Low-beam headlamps
R Parking lamps 38
R Green indicator lamp T in the exterior
lamp switchXSwitching off: Turn the exterior lamp
switch to position $.
Automatic headlamp mode
GWarning!
If the exterior lamp switch is set to c, the
headlamps will not automatically come on
under foggy conditions.
To minimize risk to you and to others, activate
headlamps by turning exterior lamp switch to
L when driving or when traffic and/or
ambient lighting conditions require you to do
so.
In low ambient lighting conditions, only switch
from position c to L with the vehicle
at a standstill in a safe location. Switching
from c to L will briefly switch off the
headlamps. Doing so while driving in low
ambient lighting conditions may result in an
accident.
The automatic headlamp feature is only an aid
to the driver. The driver is responsible for the
operation of the vehicle’s lights at all times.XSwitching on: Turn the exterior lamp
switch to position c.
When ambient light is low: When the
SmartKey is in starter switch position 1 or
when the KEYLESS-GO start/stop button has
been pressed once, the parking lamps 38
come on automatically.
When the engine is running, the low-beam
headlamps come on additionally.
When ambient light is bright: When the
SmartKey is in starter switch position 1 or
when the KEYLESS-GO start/stop button has
been pressed once, all lamps are off.
When the engine is running, the daytime
running lamps 39
come on automatically.
When the low-beam headlamps are switched
on, the green indicator lamp T in the
exterior lamp switch comes on.
Once the low-beam headlamps are on, the
high-beam headlamps are also available.
Daytime running lamp mode
In Canada, the daytime running lamp mode is
mandatory and therefore in a constant mode.
In the USA, the daytime running lamp mode
is deactivated by default.
XActivate the daytime running lamp mode
using the control system, see “Switching38 When the parking lamps are on, the tail lamps, the license plate lamps, the side marker lamps, and the
instrument cluster illumination are also on.
39 USA only: The daytime running lamp mode must be activated via the control system.Lighting299Controls in detail221_AKB; 6; 20, en-USd2ugruen,Version: 2.11.8.12009-09-24T13:28:17+02:00 - Seite 299Z
Page 314 of 548
children unattended in the vehicle, as they
could otherwise accidentally start the engine.
When leaving the vehicle, always take the
SmartKey with you and lock the vehicle. Do
not leave children unattended in the vehicle,
or with access to an unlocked vehicle. A
child’s unsupervised access to a vehicle could
result in an accident and/or serious personal
injury.
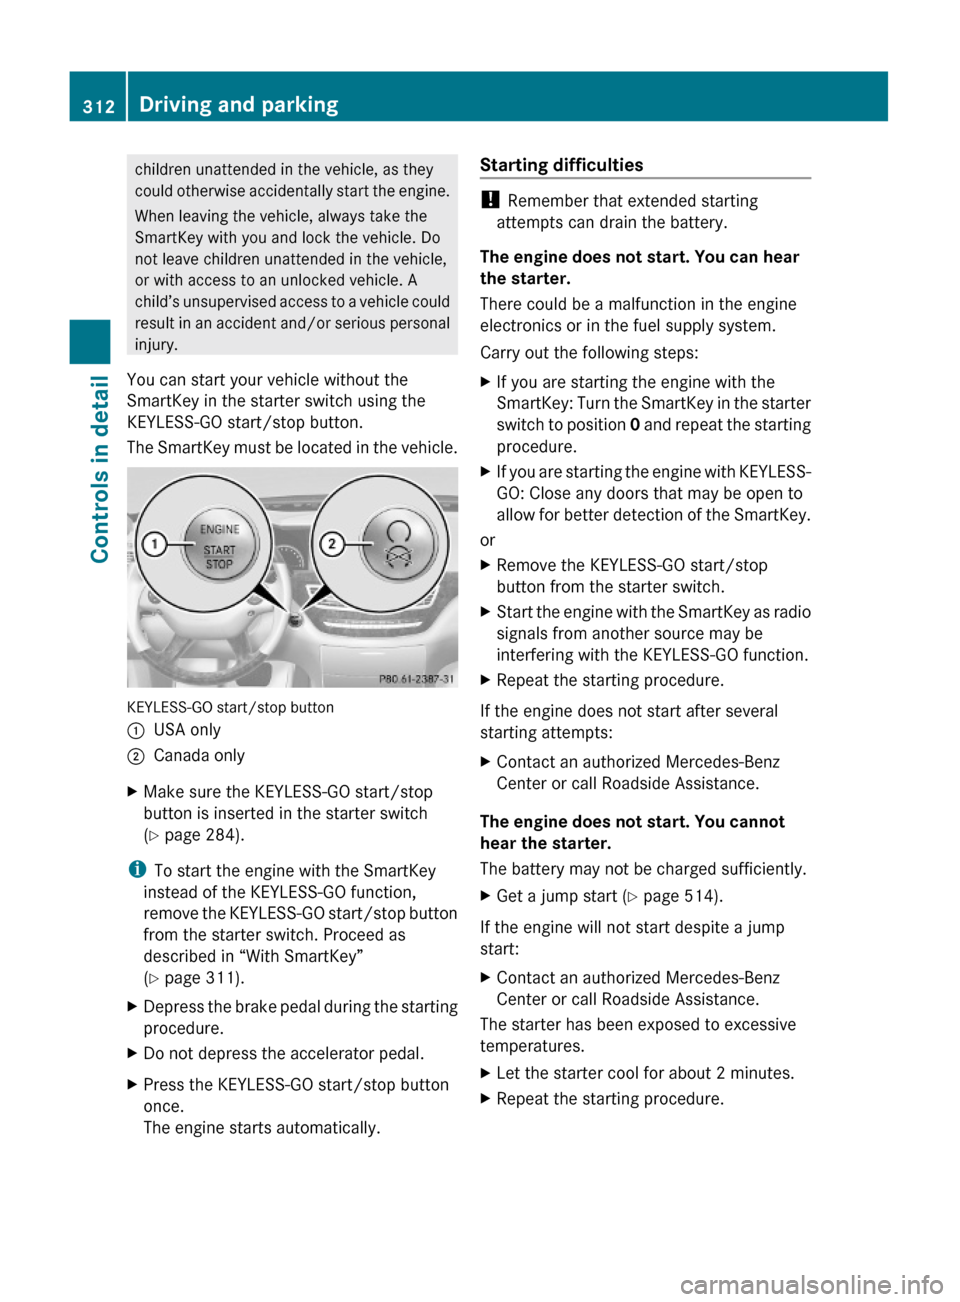
You can start your vehicle without the
SmartKey in the starter switch using the
KEYLESS-GO start/stop button.
The SmartKey must be located in the vehicle.
KEYLESS-GO start/stop button
:USA only;Canada onlyXMake sure the KEYLESS-GO start/stop
button is inserted in the starter switch
(Y page 284).
iTo start the engine with the SmartKey
instead of the KEYLESS-GO function,
remove the KEYLESS-GO start/stop button
from the starter switch. Proceed as
described in “With SmartKey”
(Y page 311).
XDepress the brake pedal during the starting
procedure.
XDo not depress the accelerator pedal.XPress the KEYLESS-GO start/stop button
once.
The engine starts automatically.
Starting difficulties
! Remember that extended starting
attempts can drain the battery.
The engine does not start. You can hear
the starter.
There could be a malfunction in the engine
electronics or in the fuel supply system.
Carry out the following steps:
XIf you are starting the engine with the
SmartKey: Turn the SmartKey in the starter
switch to position 0 and repeat the starting
procedure.
XIf you are starting the engine with KEYLESS-
GO: Close any doors that may be open to
allow for better detection of the SmartKey.
or
XRemove the KEYLESS-GO start/stop
button from the starter switch.
XStart the engine with the SmartKey as radio
signals from another source may be
interfering with the KEYLESS-GO function.
XRepeat the starting procedure.
If the engine does not start after several
starting attempts:
XContact an authorized Mercedes-Benz
Center or call Roadside Assistance.
The engine does not start. You cannot
hear the starter.
The battery may not be charged sufficiently.
XGet a jump start (Y page 514).
If the engine will not start despite a jump
start:
XContact an authorized Mercedes-Benz
Center or call Roadside Assistance.
The starter has been exposed to excessive
temperatures.
XLet the starter cool for about 2 minutes.XRepeat the starting procedure.312Driving and parkingControls in detail
221_AKB; 6; 20, en-USd2ugruen,Version: 2.11.8.12009-09-24T13:28:17+02:00 - Seite 312
Page 345 of 548
Ryou depress the brake pedal fully again
until the message HOLD in the multifunction
display disappears
Ryou engage the electronic parking brake
Ryou activate the DISTRONIC PLUS
iAfter a while, the vehicle will be secured
by the electronic parking brake to relieve
the service brake.
GWarning!
The braking effect of the HOLD function is
canceled and the vehicle can start to roll if
Rthe HOLD function is deactivated by
depressing the accelerator pedal or the
brake pedal
Rthe HOLD function or the power supply is
malfunctioning, e.g. due to battery failure
Rthe electrical components in the engine
compartment or the fuses have been
manipulated
Rthe battery is disconnected
GWarning!
Never get out of the vehicle while the HOLD
function is activated!
The HOLD function must never be operated
or deactivated by passengers or from outside
the vehicle.
The HOLD function does not replace the
electronic parking brake. It must not be used
to secure the vehicle when parking.
Deactivate the HOLD function when leaving
or parking the vehicle. Use the electronic
parking brake to secure the vehicle.
When the HOLD function is activated, the
automatic transmission shifts into park
position P automatically when
Ropening the driver’s door and releasing the
seat belt
Rturning off the engine
Ropening the hood
Ra system malfunction occurs
Rthe on-board voltage is insufficient
The HOLD function is deactivated.
AIRMATIC
Introduction
The AIRMATIC lets you select the chassis and
suspension setup. The chassis and
suspension setup adjusts the damping
behavior and the ride height for your vehicle.
The AIRMATIC consists of two components.
The Adaptive Damping System (ADS)
(Y page 343) and the vehicle level control
(Y page 344).
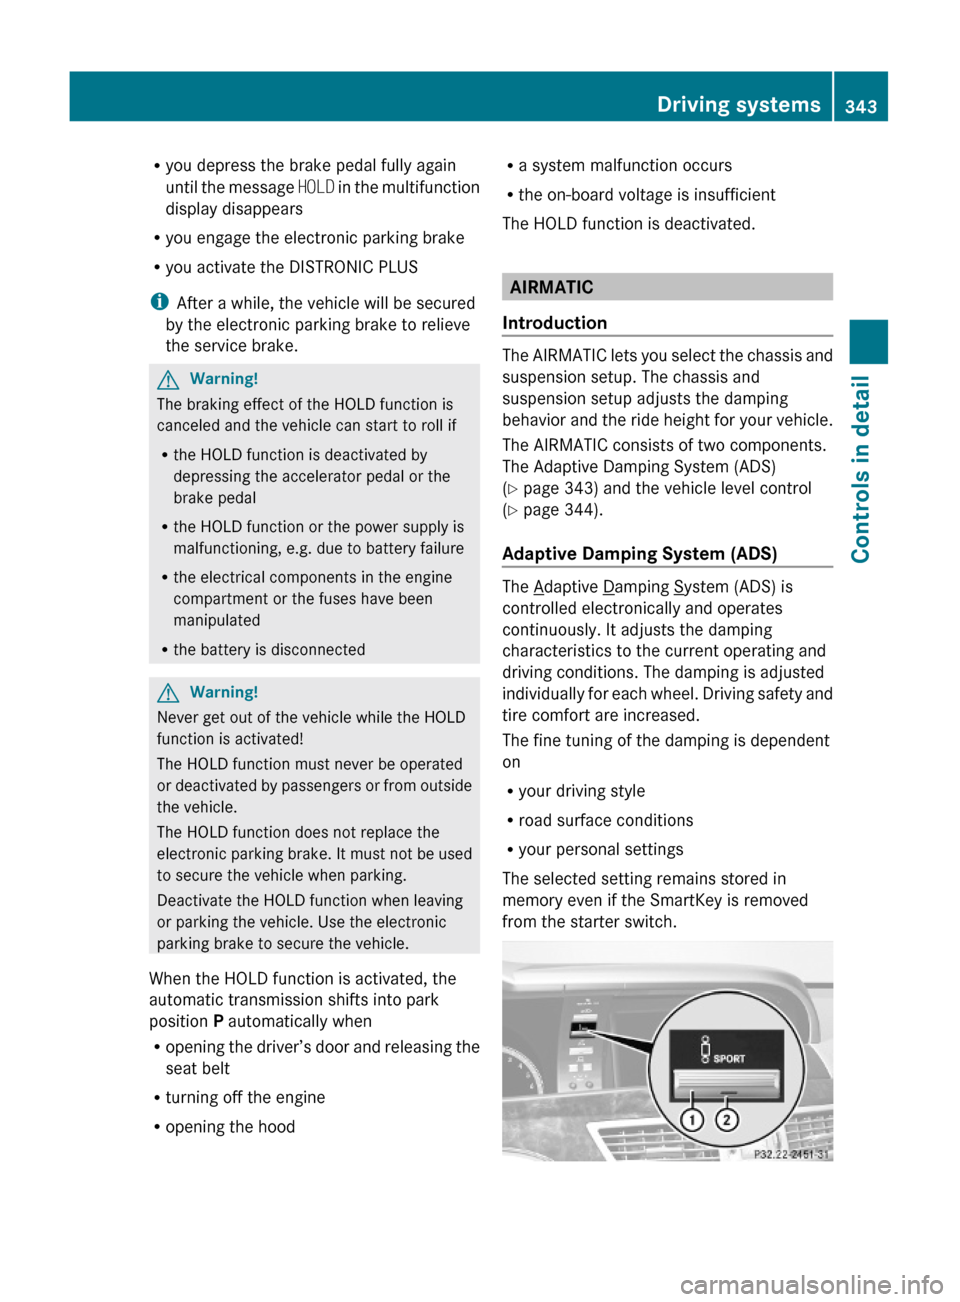
Adaptive Damping System (ADS)
The Adaptive Damping System (ADS) is
controlled electronically and operates
continuously. It adjusts the damping
characteristics to the current operating and
driving conditions. The damping is adjusted
individually for each wheel. Driving safety and
tire comfort are increased.
The fine tuning of the damping is dependent
on
Ryour driving style
Rroad surface conditions
Ryour personal settings
The selected setting remains stored in
memory even if the SmartKey is removed
from the starter switch.
Driving systems343Controls in detail221_AKB; 6; 20, en-USd2ugruen,Version: 2.11.8.12009-09-24T13:28:17+02:00 - Seite 343Z
Page 375 of 548

XSwitch on the ignition.XSwitching on: Press rocker switch ¤
up or down.
The indicator lamp in the rocker switch
comes on.XSwitching off: Press rocker switch ¤
up or down.
The rear window defroster switches off when
the battery voltage is too low. Too many
electrical consumers may be operating
simultaneously.
XSwitch off consumers that are currently not
needed if required.
Power tilt/sliding sunroof
Opening and closing
GObserve Safety notes, see page 56.GWarning!
When opening or closing the tilt/sliding
sunroof, make sure there is no danger of
anyone being harmed by the opening/closing
procedure.
The tilt/sliding sunroof is equipped with the
express operation and automatic reversal
function. If the movement of the tilt/sliding
sunroof is blocked during the closing
procedure, the tilt/sliding sunroof will stop
and open slightly.
The tilt/sliding sunroof operates differently
when the sunroof switch is pressed and held.
See the “Closing when the tilt/sliding sunroof
is blocked” section for details.
The opening/closing procedure of the tilt/
sliding sunroof can be immediately halted by
releasing the sunroof switch or, if the sunroof
switch was moved past the resistance point
and released, by moving the sunroof switch in
any direction.
GWarning!
The tilt/sliding sunroof is made out of glass.
In the event of an accident, the glass may
shatter. This may result in an opening in the
roof.
In a vehicle rollover, occupants not wearing
their seat belts or not wearing them properly
may be thrown out of the opening. Such an
opening also presents a potential for injury for
occupants wearing their seat belts properly as
entire body parts or portions of them may
protrude from the passenger compartment.
! To avoid damaging the seals, do not
transport any objects with sharp edges
which can stick out of the tilt/sliding
sunroof.
Do not open the tilt/sliding sunroof if there
is snow or ice on the roof, as this could
result in malfunctions.
If you cannot open or close the tilt/sliding
sunroof due to a malfunction contact
Roadside Assistance or an authorized
Mercedes-Benz Center.
! Please keep in mind that weather
conditions can sometimes change rapidly.
Make sure to close the tilt/sliding sunroof
when leaving the vehicle. If water enters
the vehicle interior, vehicle electronics
could be damaged which is not covered by
the Mercedes-Benz Limited Warranty.
i You can also open or close the tilt/sliding
sunroof using the SmartKey or the
KEYLESS-GO function, see “Summer
opening feature” ( Y page 309) and
“Convenience closing feature”
( Y page 309).
i After switching off the ignition or
removing the SmartKey from the starter
switch, you can operate the tilt/sliding
sunroof until you open the driver’s or front
passenger door. If no door was opened you
can operate the tilt/sliding sunroof for up
to 5 minutes.Power tilt/sliding sunroof373Controls in detail221_AKB; 6; 20, en-USd2ugruen,Version: 2.11.8.12009-09-24T13:28:17+02:00 - Seite 373Z