2010 MERCEDES-BENZ S550 4MATIC sd card capacity
[x] Cancel search: sd card capacityPage 18 of 548
S
Safety
Driving safety systems .....................63
Occupant safety ............................... 40
Reporting defects ............................ 24
Safety belts
see Seat belts
Satellite radio .................................... 170
SD card ............................................... 180
Seat belt force limiter ......................... 53
Seat belts ............................................. 49
Adjustment function ........................52
Automatic comfort-fit feature ..........54
Children in the vehicle .....................56
Cleaning ......................................... 446
Fastening ......................................... 51
Height adjustment ...........................52
Proper use of ................................... 50
Safety guidelines ............................. 43
Safety notes ..................................... 49
Telltale ..................................... 32, 493
Seat heating ....................................... 292
Seating capacity ................................ 419
Seats .................................................. 286
Adjustment .................................... 286
Drive-dynamic ................................ 219
Heating .......................................... 292
Memory function ........................... 297
Multicontour, front ......................... 218
Multicontour, rear ..........................293
Ventilation ..................................... 292
Securing cargo
Cargo tie-down hooks ....................381
Selective setting
see Key, SmartKey
Selector lever
see Gear selector lever
Self-test
OCS (Occupant Classification
System) ........................................... 49
Tele Aid .......................................... 389
Service
see Maintenance
Service, parts .................................... 524
Service and warranty information ..... 21Service intervals
see Maintenance System, Service
indicator message
Service life (tires) .............................. 423
Service menu ..................................... 233
Settings
Automatic locking ..........................210
Automatic mirror folding ................209
Display settings (COMAND) .............92
Easy-entry/exit feature .................. 208
Factory setting (KEYLESS-GO) .......277
Factory setting (SmartKey) ............275
Individual (vehicle) .........................234
Interior ambient lighting ................209
Language ......................................... 94
Locator lighting .............................. 210
Memory function ........................... 297
Night security illumination .............208
Rear window sunshade ..................207
Seat belt adjustment function .......236
Selective setting (KEYLESS-GO) ..... 277
Selective setting (SmartKey) .......... 275
Time ................................................. 92
Trunk opening-height restriction ....210
Voice Control System ......................93
Shelf below rear window, cleaning .. 446
Shortcut buttons ................................. 77
Side impact air bags ........................... 45
Side marker lamps
Cleaning lenses ............................. 443
Messages in the multifunction
display ........................................... 485
Sidewall (tires) .................................. 432
SmartKey see Key, SmartKey
SmartKey with KEYLESS-GO
see Key, SmartKey
Snow chains ...................................... 433
Snow tires see Winter tires
Spare wheel ....................................... 532
Mounting ....................................... 509
Storage location ............................ 451
Speedometer ....................................... 3216Index221_AKB; 6; 20, en-USd2ugruen,Version: 2.11.8.12009-09-24T13:28:17+02:00 - Seite 16
Page 182 of 548
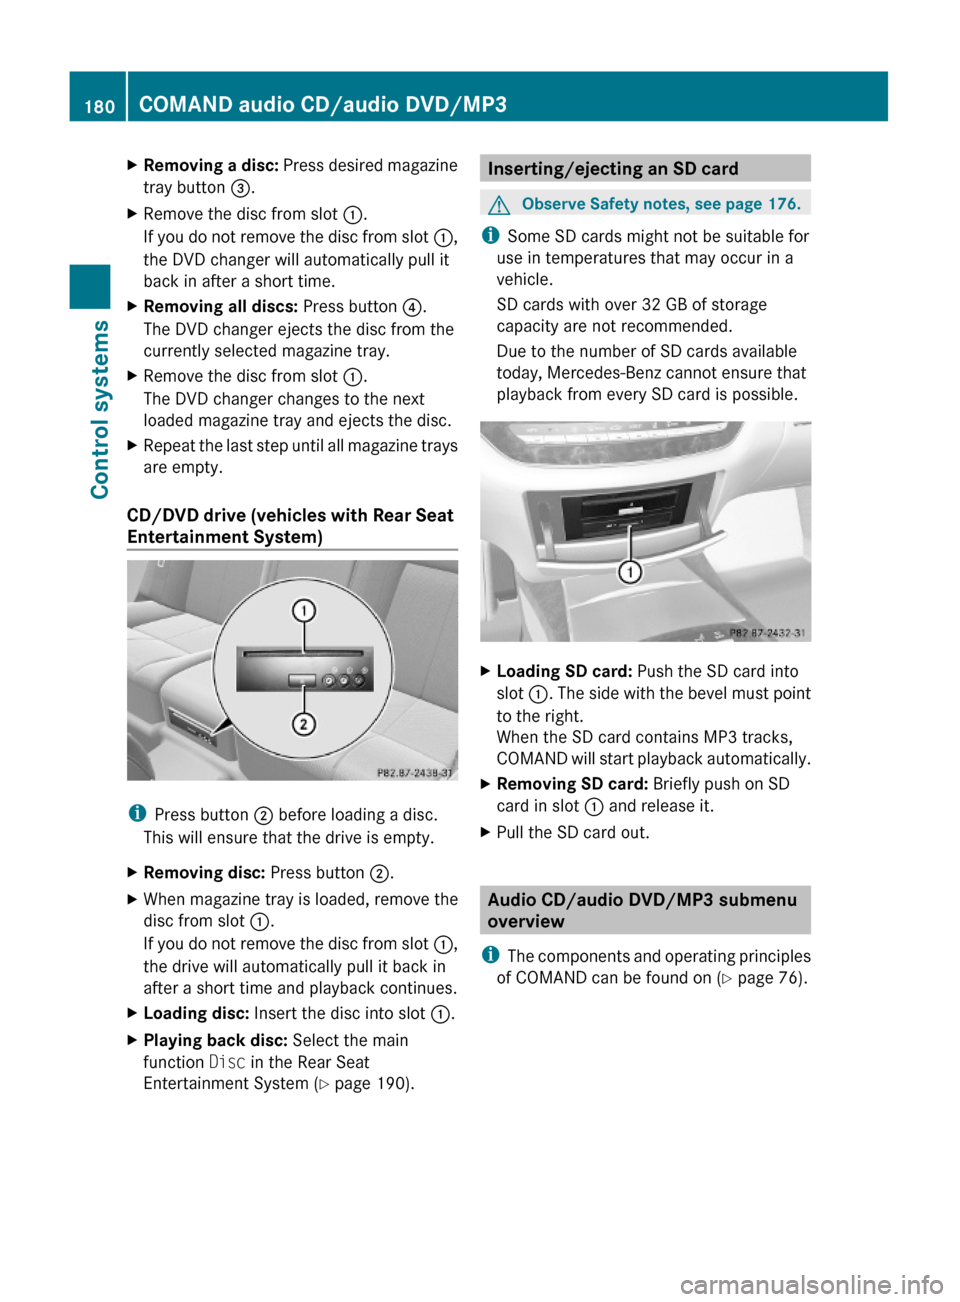
XRemoving a disc: Press desired magazine
tray button =.
XRemove the disc from slot :.
If you do not remove the disc from slot :,
the DVD changer will automatically pull it
back in after a short time.
XRemoving all discs: Press button ?.
The DVD changer ejects the disc from the
currently selected magazine tray.
XRemove the disc from slot :.
The DVD changer changes to the next
loaded magazine tray and ejects the disc.
XRepeat the last step until all magazine trays
are empty.
CD/DVD drive (vehicles with Rear Seat
Entertainment System)
iPress button ; before loading a disc.
This will ensure that the drive is empty.
XRemoving disc: Press button ;.XWhen magazine tray is loaded, remove the
disc from slot :.
If you do not remove the disc from slot :,
the drive will automatically pull it back in
after a short time and playback continues.
XLoading disc: Insert the disc into slot :.XPlaying back disc: Select the main
function Disc in the Rear Seat
Entertainment System (Y page 190).
Inserting/ejecting an SD cardGObserve Safety notes, see page 176.
iSome SD cards might not be suitable for
use in temperatures that may occur in a
vehicle.
SD cards with over 32 GB of storage
capacity are not recommended.
Due to the number of SD cards available
today, Mercedes-Benz cannot ensure that
playback from every SD card is possible.
XLoading SD card: Push the SD card into
slot :. The side with the bevel must point
to the right.
When the SD card contains MP3 tracks,
COMAND will start playback automatically.
XRemoving SD card: Briefly push on SD
card in slot : and release it.
XPull the SD card out.
Audio CD/audio DVD/MP3 submenu
overview
iThe components and operating principles
of COMAND can be found on (Y page 76).
180COMAND audio CD/audio DVD/MP3Control systems
221_AKB; 6; 20, en-USd2ugruen,Version: 2.11.8.12009-09-24T13:28:17+02:00 - Seite 180
Page 201 of 548
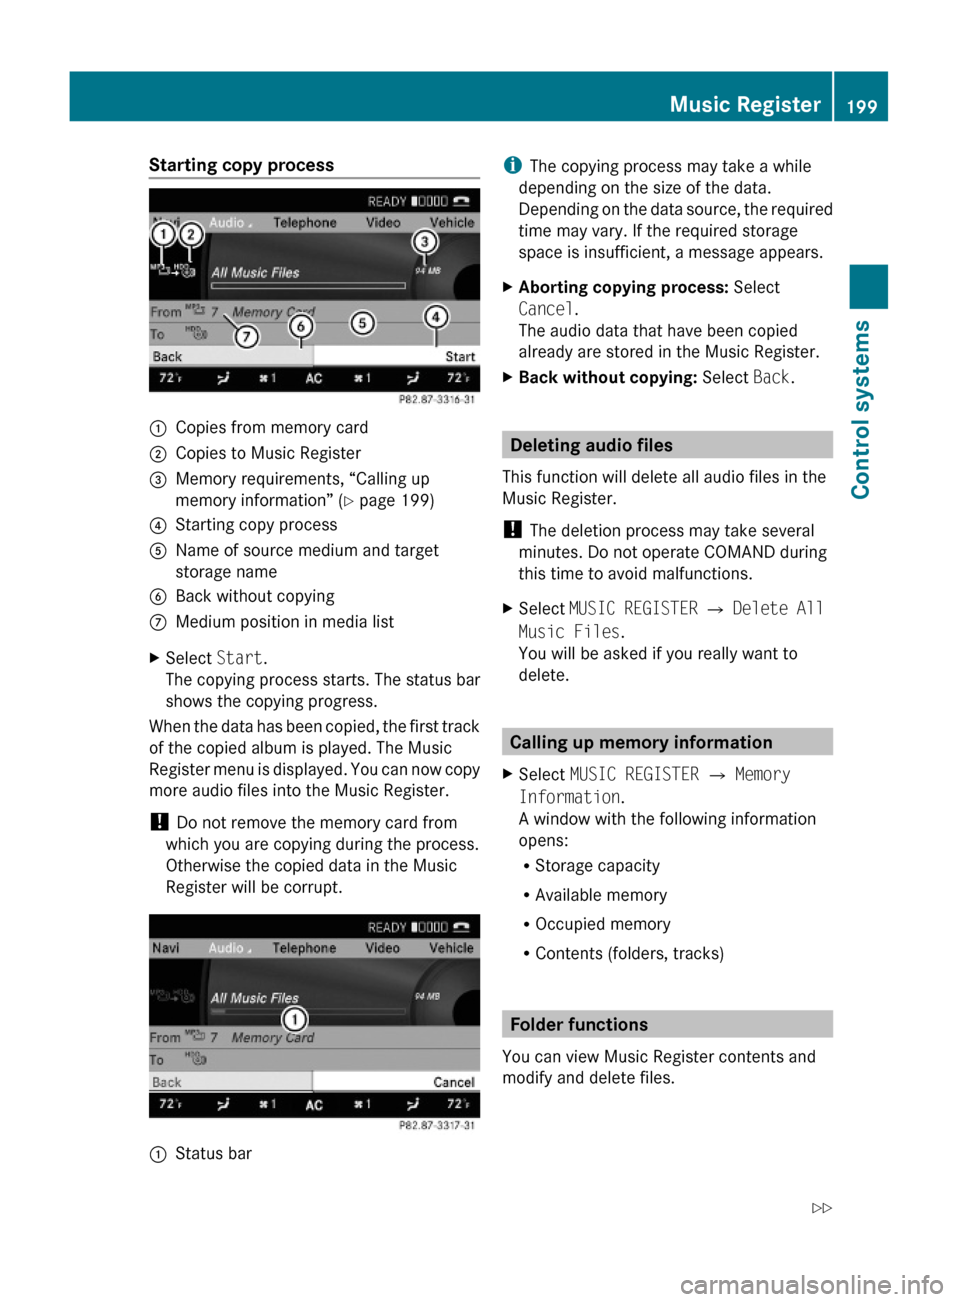
Starting copy process:Copies from memory card;Copies to Music Register=Memory requirements, “Calling up
memory information” (Y page 199)
?Starting copy processAName of source medium and target
storage name
BBack without copyingCMedium position in media listXSelect Start.
The copying process starts. The status bar
shows the copying progress.
When the data has been copied, the first track
of the copied album is played. The Music
Register menu is displayed. You can now copy
more audio files into the Music Register.
! Do not remove the memory card from
which you are copying during the process.
Otherwise the copied data in the Music
Register will be corrupt.
:Status bariThe copying process may take a while
depending on the size of the data.
Depending on the data source, the required
time may vary. If the required storage
space is insufficient, a message appears.
XAborting copying process: Select
Cancel.
The audio data that have been copied
already are stored in the Music Register.
XBack without copying: Select Back.
Deleting audio files
This function will delete all audio files in the
Music Register.
! The deletion process may take several
minutes. Do not operate COMAND during
this time to avoid malfunctions.
XSelect MUSIC REGISTER Q Delete All
Music Files.
You will be asked if you really want to
delete.
Calling up memory information
XSelect MUSIC REGISTER Q Memory
Information.
A window with the following information
opens:
RStorage capacity
RAvailable memory
ROccupied memory
RContents (folders, tracks)
Folder functions
You can view Music Register contents and
modify and delete files.
Music Register199Control systems221_AKB; 6; 20, en-USd2ugruen,Version: 2.11.8.12009-09-24T13:28:17+02:00 - Seite 199Z
Page 420 of 548
This is the maximum permissible tire inflation
pressure : for the tire.
Always follow the recommended tire inflation
pressure (Y page 411) for proper tire
inflation.
Loading the vehicle
Two labels on your vehicle show how much
weight it may properly carry.
(1)The Tire and Loading Information placard
can be found on the driver’s door
B-pillar. This placard tells you important
information about the number of people
that can be in the vehicle and the total
weight that can be carried in the vehicle.
It also contains information on the proper
size and recommended tire inflation
pressures for the original equipment tires
on your vehicle.
(2)The certification label, also found on the
driver’s door B-pillar. It tells you about the
gross weight capacity of your vehicle,
called the Gross Vehicle Weight Rating
(GVWR). The GVWR includes the weight
of the vehicle, all occupants, fuel and
cargo. The certification label also tells
you about the front and rear axle weight
capacity, called the Gross Axle Weight
Rating (GAWR).
The GAWR is the total allowable weight
that can be carried by a single axle (front
or rear). Never exceed the GVWR or
GAWR for either the front axle or rear
axle.
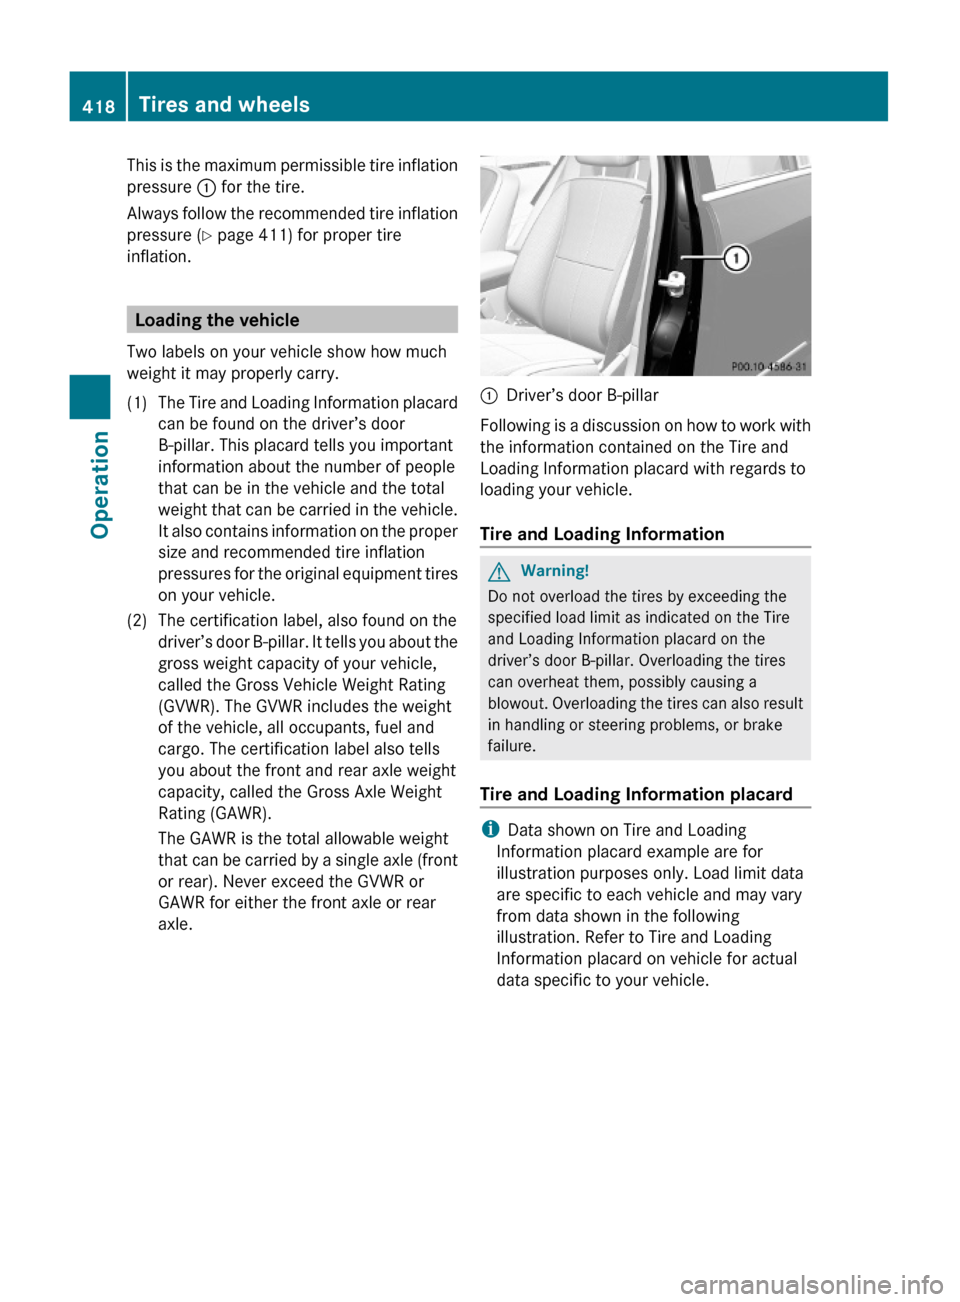
:Driver’s door B-pillar
Following is a discussion on how to work with
the information contained on the Tire and
Loading Information placard with regards to
loading your vehicle.
Tire and Loading Information
GWarning!
Do not overload the tires by exceeding the
specified load limit as indicated on the Tire
and Loading Information placard on the
driver’s door B-pillar. Overloading the tires
can overheat them, possibly causing a
blowout. Overloading the tires can also result
in handling or steering problems, or brake
failure.
Tire and Loading Information placard
iData shown on Tire and Loading
Information placard example are for
illustration purposes only. Load limit data
are specific to each vehicle and may vary
from data shown in the following
illustration. Refer to Tire and Loading
Information placard on vehicle for actual
data specific to your vehicle.
418Tires and wheelsOperation
221_AKB; 6; 20, en-USd2ugruen,Version: 2.11.8.12009-09-24T13:28:17+02:00 - Seite 418
Page 421 of 548
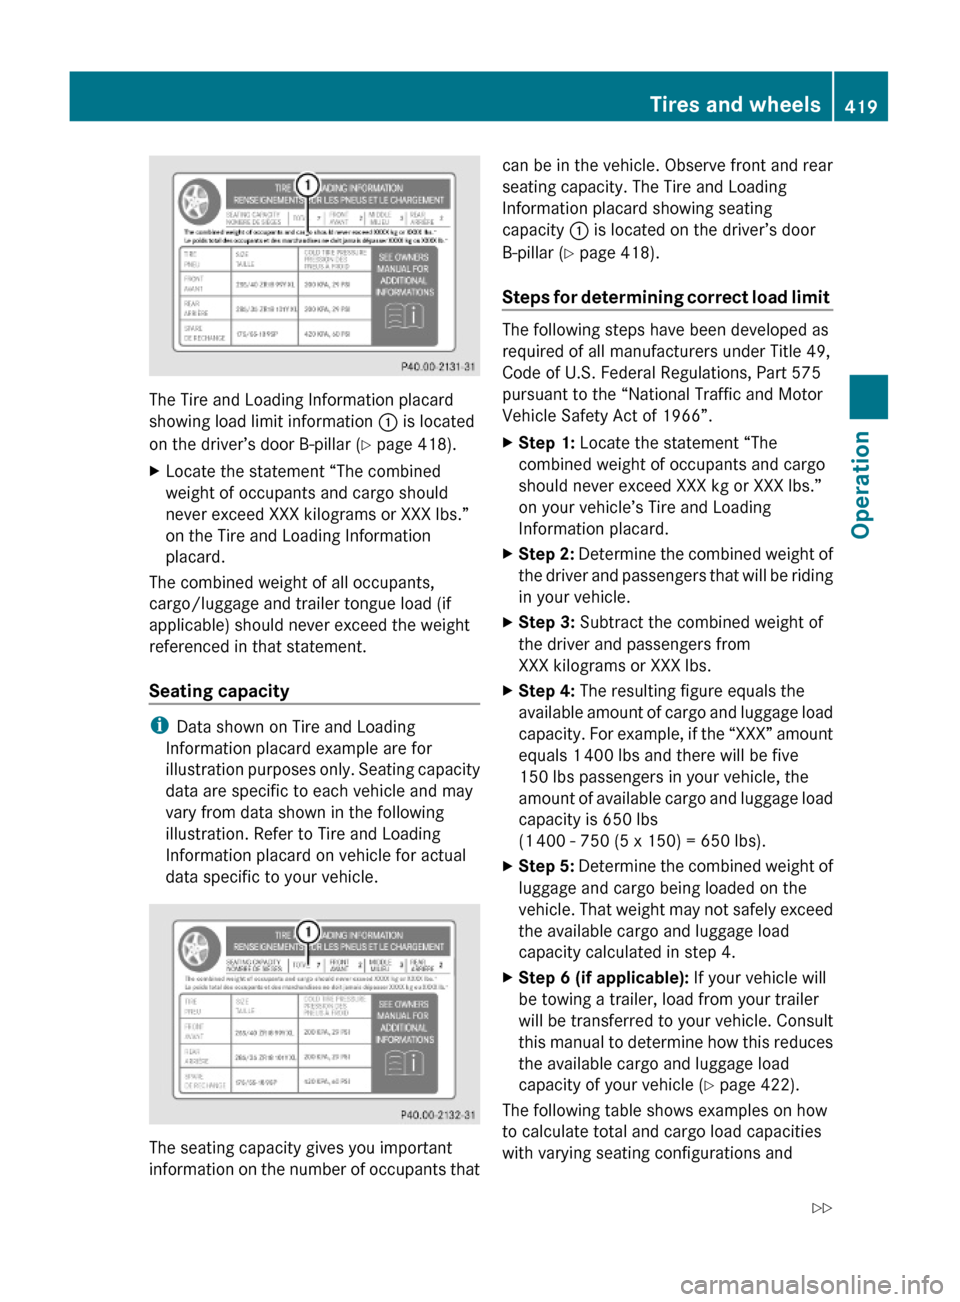
The Tire and Loading Information placard
showing load limit information : is located
on the driver’s door B-pillar (Y page 418).
XLocate the statement “The combined
weight of occupants and cargo should
never exceed XXX kilograms or XXX lbs.”
on the Tire and Loading Information
placard.
The combined weight of all occupants,
cargo/luggage and trailer tongue load (if
applicable) should never exceed the weight
referenced in that statement.
Seating capacity
iData shown on Tire and Loading
Information placard example are for
illustration purposes only. Seating capacity
data are specific to each vehicle and may
vary from data shown in the following
illustration. Refer to Tire and Loading
Information placard on vehicle for actual
data specific to your vehicle.
The seating capacity gives you important
information on the number of occupants that
can be in the vehicle. Observe front and rear
seating capacity. The Tire and Loading
Information placard showing seating
capacity : is located on the driver’s door
B-pillar (Y page 418).
Steps for determining correct load limit
The following steps have been developed as
required of all manufacturers under Title 49,
Code of U.S. Federal Regulations, Part 575
pursuant to the “National Traffic and Motor
Vehicle Safety Act of 1966”.
XStep 1: Locate the statement “The
combined weight of occupants and cargo
should never exceed XXX kg or XXX lbs.”
on your vehicle’s Tire and Loading
Information placard.
XStep 2: Determine the combined weight of
the driver and passengers that will be riding
in your vehicle.
XStep 3: Subtract the combined weight of
the driver and passengers from
XXX kilograms or XXX lbs.
XStep 4: The resulting figure equals the
available amount of cargo and luggage load
capacity. For example, if the “XXX” amount
equals 1 400 lbs and there will be five
150 lbs passengers in your vehicle, the
amount of available cargo and luggage load
capacity is 650 lbs
(1 400 - 750 (5 x 150) = 650 lbs).
XStep 5: Determine the combined weight of
luggage and cargo being loaded on the
vehicle. That weight may not safely exceed
the available cargo and luggage load
capacity calculated in step 4.
XStep 6 (if applicable): If your vehicle will
be towing a trailer, load from your trailer
will be transferred to your vehicle. Consult
this manual to determine how this reduces
the available cargo and luggage load
capacity of your vehicle (Y page 422).
The following table shows examples on how
to calculate total and cargo load capacities
with varying seating configurations and
Tires and wheels419Operation221_AKB; 6; 20, en-USd2ugruen,Version: 2.11.8.12009-09-24T13:28:17+02:00 - Seite 419Z
Page 423 of 548
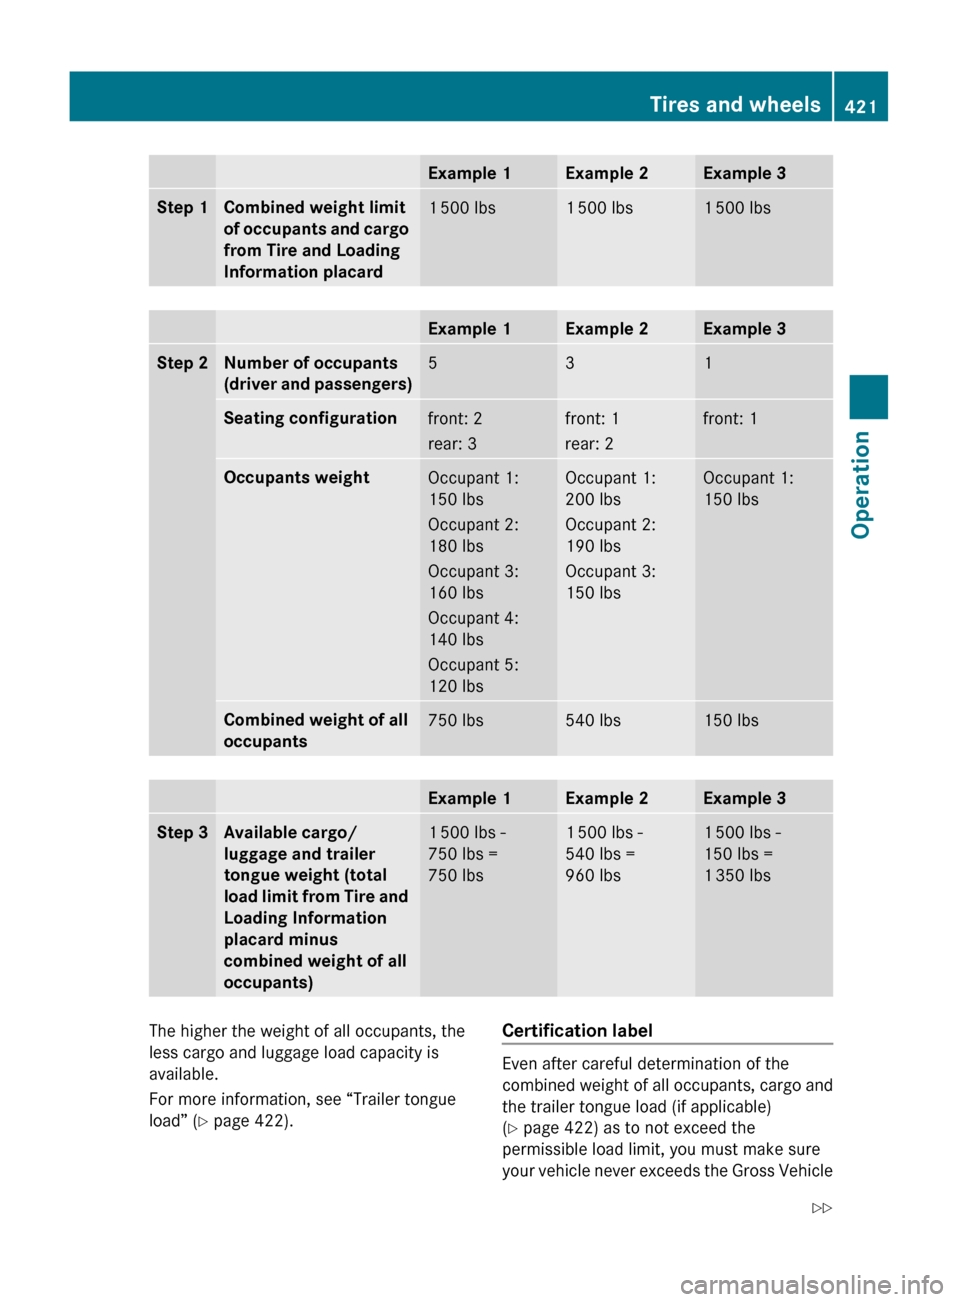
Example 1Example 2Example 3Step 1Combined weight limit
of occupants and cargo
from Tire and Loading
Information placard1 500 lbs1 500 lbs1 500 lbsExample 1Example 2Example 3Step 2Number of occupants
(driver and passengers)531Seating configurationfront: 2
rear: 3front: 1
rear: 2front: 1Occupants weightOccupant 1:
150 lbs
Occupant 2:
180 lbs
Occupant 3:
160 lbs
Occupant 4:
140 lbs
Occupant 5:
120 lbsOccupant 1:
200 lbs
Occupant 2:
190 lbs
Occupant 3:
150 lbsOccupant 1:
150 lbsCombined weight of all
occupants750 lbs540 lbs150 lbsExample 1Example 2Example 3Step 3Available cargo/
luggage and trailer
tongue weight (total
load limit from Tire and
Loading Information
placard minus
combined weight of all
occupants)1 500 lbs -
750 lbs =
750 lbs1 500 lbs -
540 lbs =
960 lbs1 500 lbs -
150 lbs =
1 350 lbsThe higher the weight of all occupants, the
less cargo and luggage load capacity is
available.
For more information, see “Trailer tongue
load” ( Y page 422).Certification label
Even after careful determination of the
combined weight of all occupants, cargo and
the trailer tongue load (if applicable)
( Y page 422) as to not exceed the
permissible load limit, you must make sure
your vehicle never exceeds the Gross Vehicle
Tires and wheels421Operation221_AKB; 6; 20, en-USd2ugruen,Version: 2.11.8.12009-09-24T13:28:17+02:00 - Seite 421Z