2010 MERCEDES-BENZ S550 4MATIC raise vehicle
[x] Cancel search: raise vehiclePage 69 of 548

Because the ESC operates automatically,
the engine and ignition must be shut off
(SmartKey in starter switch position 0 or
1 or KEYLESS-GO start/stop button in
position 0 or 1) when the electronic parking
brake is being tested on a brake test
dynamometer.
Active braking action through the ESC may
otherwise seriously damage the brake
system which is not covered by the
Mercedes-Benz Limited Warranty.
! Vehicles without 4MATIC:
Because the ESC operates automatically,
the engine and ignition must be shut off
(SmartKey in starter switch position 0 or
1 or KEYLESS-GO start/stop button in
position 0 or 1) when the electronic parking
brake is being tested on a brake test
dynamometer or when the vehicle is being
towed with one axle raised.
Active braking action through the ESC may
otherwise seriously damage the brake
system which is not covered by the
Mercedes-Benz Limited Warranty.
! The ESC will only function properly if you
use wheels of the recommended tire size
as specified in the “Technical data” section
of this Operator’s Manual.
i The DISTRONIC PLUS and cruise control
switch off automatically when the ESC
engages.
Electronic Traction System
(ETS/4-ETS) GObserve Safety notes, see page 63.
The ETS (Electronic Traction System) and
4-ETS (four-wheel Electronic Traction
System, vehicles with 4MATIC only) are
components of the ESC. The ETS/4-ETS
improves the vehicle’s ability to utilize
available traction, especially under slippery
road conditions by applying the brakes to a
spinning wheel. Vehicles with 4MATIC also
transfer more power to the wheel(s) with
traction.
When you switch off the ESC, the
ETS/4-ETS is still enabled.
Switching off the ESC
Switching off the ESC (except S 63 AMG)
GWarning!
The ESC should not be switched off during
normal driving other than in the
circumstances described below. Disabling
the system will reduce vehicle stability in
driving maneuvers.
Do not switch off the ESC when a spare wheel
is mounted.
To improve the vehicle’s traction, switch off
the ESC. This allows the drive wheels to spin
and thus cut into surfaces for better grip, for
example
R when driving with snow chains
R in deep snow
R in sand or gravel
GWarning!
Switch on the ESC immediately if the
aforementioned circumstances do not apply
anymore. Otherwise the ESC will not stabilize
the vehicle when it is starting to skid or a
wheel is spinning.
When you switch off the ESC,
R the ESC does not stabilize the vehicle
R the engine output is not limited, which
allows the drive wheels to spin and thus cut
into surfaces for better grip
R the ETS/4-ETS will still apply the brakes to
a spinning wheel
R the ESC continues to operate when you are
braking
Driving safety systems67Safety and security221_AKB; 6; 20, en-USd2ugruen,Version: 2.11.8.12009-09-24T13:28:17+02:00 - Seite 67Z
Page 328 of 548

otherwise seriously damage the brake
system or the transfer case which is not
covered by the Mercedes-Benz Limited
Warranty.
! Because the ESC operates automatically,
the engine and ignition must be shut off
(SmartKey in starter switch position 0 or
1 or KEYLESS-GO start/stop button in
position 0 or 1) when the electronic parking
brake is being tested on a brake test
dynamometer or when the vehicle is being
towed with one axle raised.
Active braking action through the ESC may
otherwise seriously damage the brake
system which is not covered by the
Mercedes-Benz Limited Warranty.
Instrument cluster
Introduction
For a full view illustration of the instrument
cluster, see “Instrument cluster”
(Y page 32).
GWarning!
No messages will be displayed if either the
instrument cluster or the multifunction
display is inoperative.
As a result, you will not be able to see
information about your driving conditions,
such as
Rspeed
Routside temperature
Rwarning/indicator lamps
Rmalfunction/warning messages
Rfailure of any systems
Driving characteristics may be impaired.
If you must continue to drive, do so with added
caution. Contact an authorized Mercedes-
Benz Center as soon as possible.
GWarning!
HYBRID vehicles: It is imperative that you read
the HYBRID Supplemental Operating
Instructions included in your vehicle literature
portfolio. You may otherwise not receive all
necessary safety information and warning for
the operation of your vehicle.
The language setting for the multifunction
display can be changed via COMAND
(Y page 94).
Activating the instrument cluster
The instrument cluster is activated when you
Ropen a door
Rswitch on the ignition
Rswitch on the exterior lamps
Adjusting the instrument cluster
illumination
XTo brighten illumination: Turn knob :
clockwise.
XTo dim illumination: Turn knob :
counterclockwise.
iThe instrument cluster illumination is
dimmed or brightened automatically to suit
ambient light conditions.
The instrument cluster illumination will also
be adjusted automatically when you switch
on the vehicle’s exterior lamps.
326Instrument clusterControls in detail
221_AKB; 6; 20, en-USd2ugruen,Version: 2.11.8.12009-09-24T13:28:17+02:00 - Seite 326
Page 346 of 548
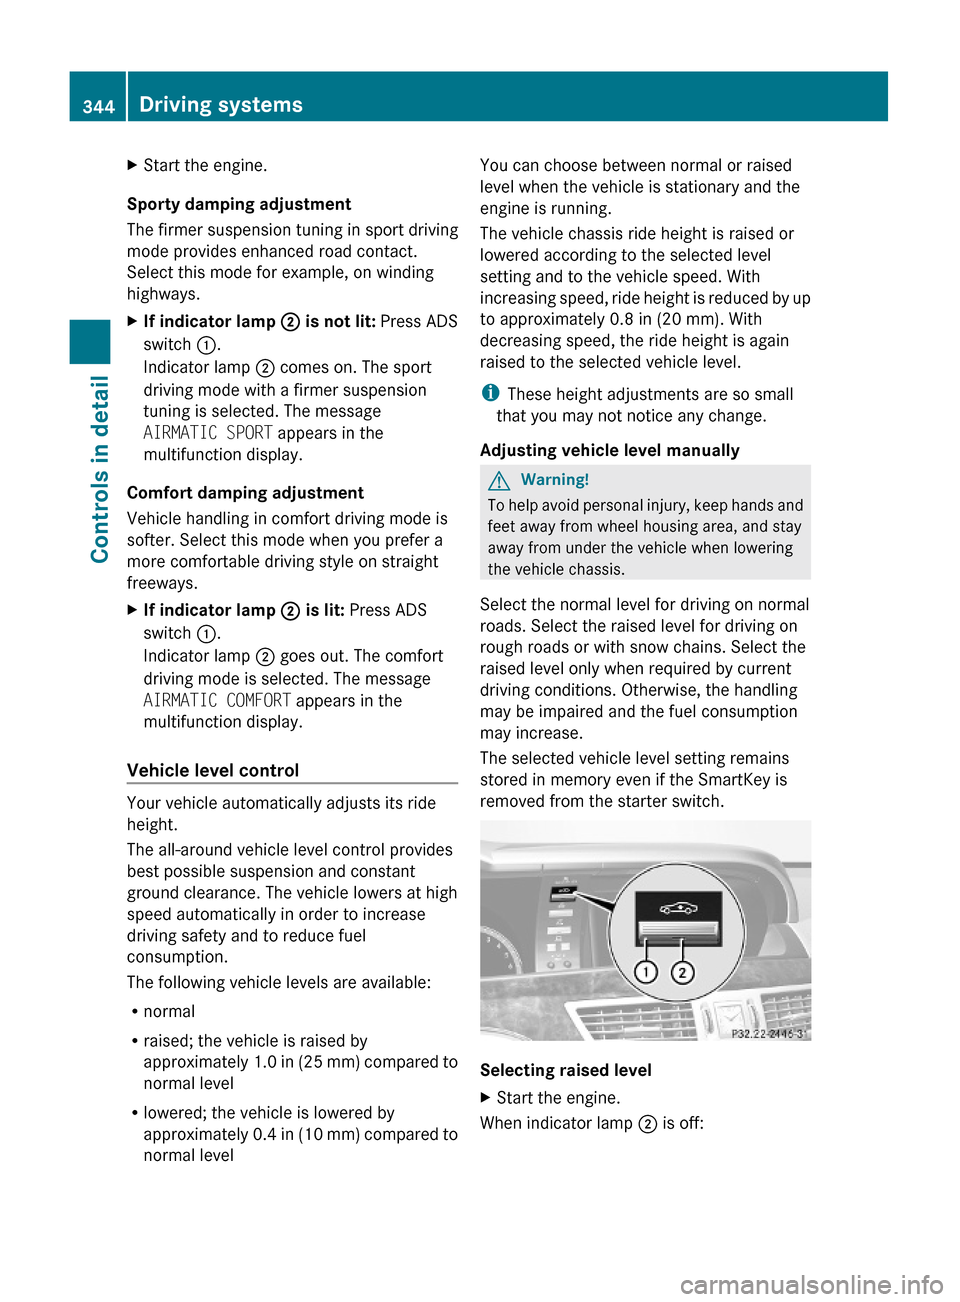
XStart the engine.
Sporty damping adjustment
The firmer suspension tuning in sport driving
mode provides enhanced road contact.
Select this mode for example, on winding
highways.
XIf indicator lamp ; is not lit: Press ADS
switch :.
Indicator lamp ; comes on. The sport
driving mode with a firmer suspension
tuning is selected. The message
AIRMATIC SPORT appears in the
multifunction display.
Comfort damping adjustment
Vehicle handling in comfort driving mode is
softer. Select this mode when you prefer a
more comfortable driving style on straight
freeways.
XIf indicator lamp ; is lit: Press ADS
switch :.
Indicator lamp ; goes out. The comfort
driving mode is selected. The message
AIRMATIC COMFORT appears in the
multifunction display.
Vehicle level control
Your vehicle automatically adjusts its ride
height.
The all-around vehicle level control provides
best possible suspension and constant
ground clearance. The vehicle lowers at high
speed automatically in order to increase
driving safety and to reduce fuel
consumption.
The following vehicle levels are available:
Rnormal
Rraised; the vehicle is raised by
approximately 1.0 in (25 mm) compared to
normal level
Rlowered; the vehicle is lowered by
approximately 0.4 in (10 mm) compared to
normal level
You can choose between normal or raised
level when the vehicle is stationary and the
engine is running.
The vehicle chassis ride height is raised or
lowered according to the selected level
setting and to the vehicle speed. With
increasing speed, ride height is reduced by up
to approximately 0.8 in (20 mm). With
decreasing speed, the ride height is again
raised to the selected vehicle level.
iThese height adjustments are so small
that you may not notice any change.
Adjusting vehicle level manually
GWarning!
To help avoid personal injury, keep hands and
feet away from wheel housing area, and stay
away from under the vehicle when lowering
the vehicle chassis.
Select the normal level for driving on normal
roads. Select the raised level for driving on
rough roads or with snow chains. Select the
raised level only when required by current
driving conditions. Otherwise, the handling
may be impaired and the fuel consumption
may increase.
The selected vehicle level setting remains
stored in memory even if the SmartKey is
removed from the starter switch.
Selecting raised level
XStart the engine.
When indicator lamp ; is off:
344Driving systemsControls in detail
221_AKB; 6; 20, en-USd2ugruen,Version: 2.11.8.12009-09-24T13:28:17+02:00 - Seite 344
Page 347 of 548
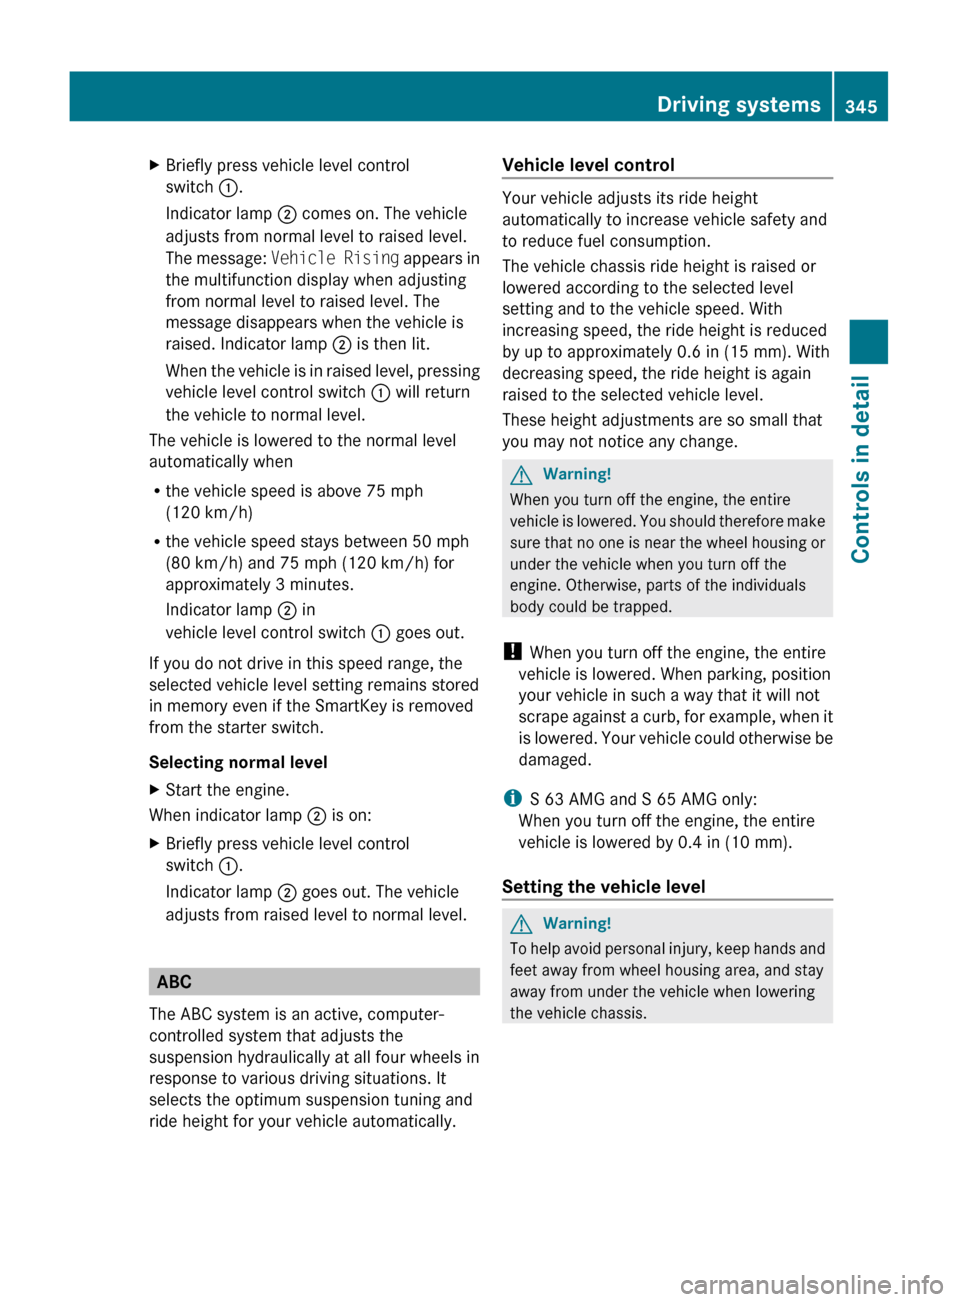
XBriefly press vehicle level control
switch :.
Indicator lamp ; comes on. The vehicle
adjusts from normal level to raised level.
The message: Vehicle Rising appears in
the multifunction display when adjusting
from normal level to raised level. The
message disappears when the vehicle is
raised. Indicator lamp ; is then lit.
When the vehicle is in raised level, pressing
vehicle level control switch : will return
the vehicle to normal level.
The vehicle is lowered to the normal level
automatically when
R the vehicle speed is above 75 mph
(120 km/h)
R the vehicle speed stays between 50 mph
(80 km/h) and 75 mph (120 km/h) for
approximately 3 minutes.
Indicator lamp ; in
vehicle level control switch : goes out.
If you do not drive in this speed range, the
selected vehicle level setting remains stored
in memory even if the SmartKey is removed
from the starter switch.
Selecting normal level
XStart the engine.
When indicator lamp ; is on:
XBriefly press vehicle level control
switch :.
Indicator lamp ; goes out. The vehicle
adjusts from raised level to normal level.
ABC
The ABC system is an active, computer-
controlled system that adjusts the
suspension hydraulically at all four wheels in
response to various driving situations. It
selects the optimum suspension tuning and
ride height for your vehicle automatically.
Vehicle level control
Your vehicle adjusts its ride height
automatically to increase vehicle safety and
to reduce fuel consumption.
The vehicle chassis ride height is raised or
lowered according to the selected level
setting and to the vehicle speed. With
increasing speed, the ride height is reduced
by up to approximately 0.6 in (15 mm). With
decreasing speed, the ride height is again
raised to the selected vehicle level.
These height adjustments are so small that
you may not notice any change.
GWarning!
When you turn off the engine, the entire
vehicle is lowered. You should therefore make
sure that no one is near the wheel housing or
under the vehicle when you turn off the
engine. Otherwise, parts of the individuals
body could be trapped.
! When you turn off the engine, the entire
vehicle is lowered. When parking, position
your vehicle in such a way that it will not
scrape against a curb, for example, when it
is lowered. Your vehicle could otherwise be
damaged.
i S 63 AMG and S 65 AMG only:
When you turn off the engine, the entire
vehicle is lowered by 0.4 in (10 mm).
Setting the vehicle level
GWarning!
To help avoid personal injury, keep hands and
feet away from wheel housing area, and stay
away from under the vehicle when lowering
the vehicle chassis.
Driving systems345Controls in detail221_AKB; 6; 20, en-USd2ugruen,Version: 2.11.8.12009-09-24T13:28:17+02:00 - Seite 345Z
Page 348 of 548
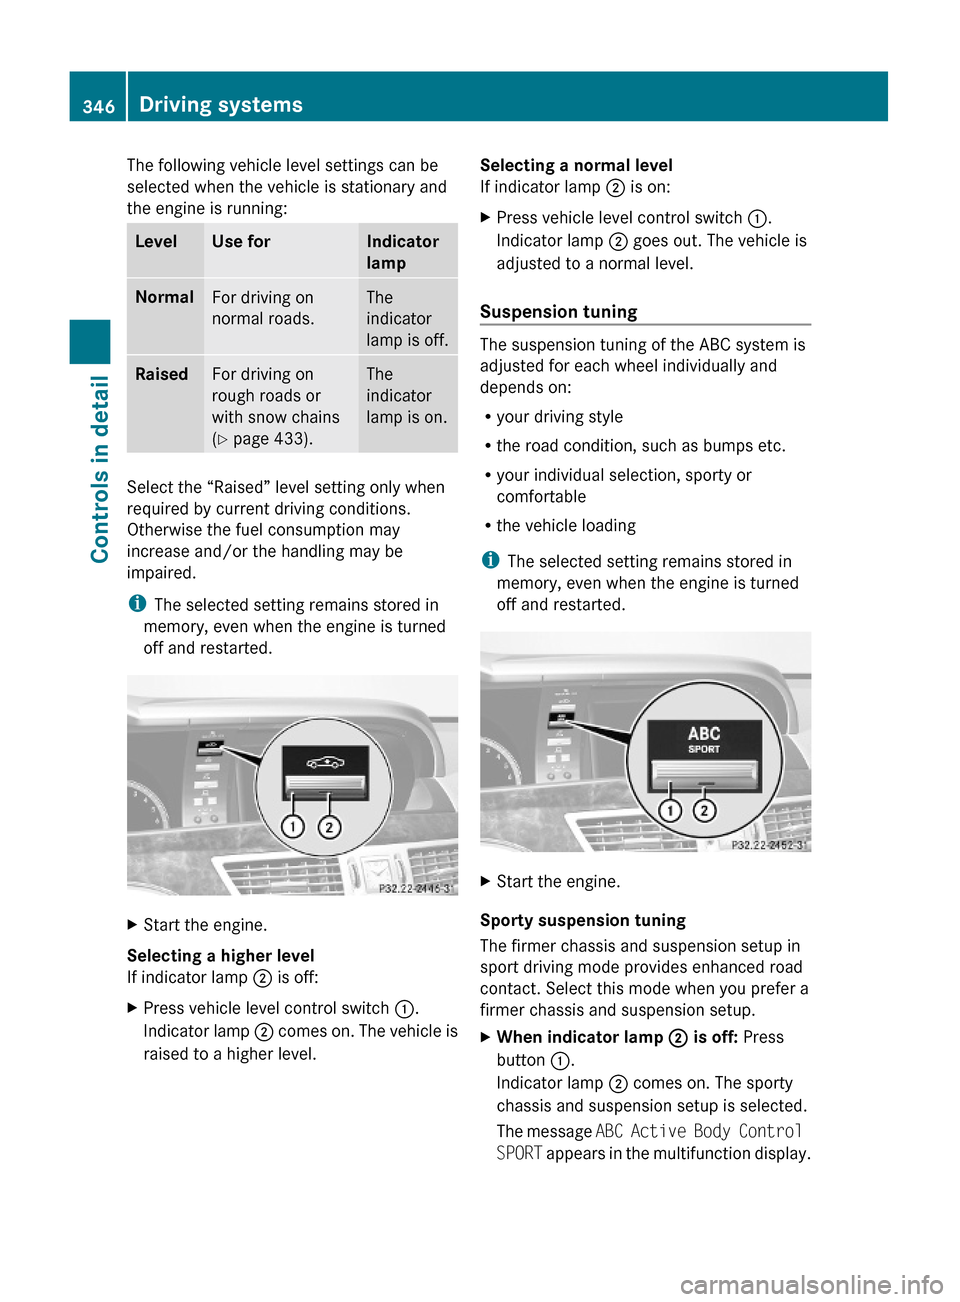
The following vehicle level settings can be
selected when the vehicle is stationary and
the engine is running:
LevelUse forIndicator
lamp
NormalFor driving on
normal roads.
The
indicator
lamp is off.
RaisedFor driving on
rough roads or
with snow chains
(Y page 433).
The
indicator
lamp is on.
Select the “Raised” level setting only when
required by current driving conditions.
Otherwise the fuel consumption may
increase and/or the handling may be
impaired.
iThe selected setting remains stored in
memory, even when the engine is turned
off and restarted.
XStart the engine.
Selecting a higher level
If indicator lamp ; is off:
XPress vehicle level control switch :.
Indicator lamp ; comes on. The vehicle is
raised to a higher level.
Selecting a normal level
If indicator lamp ; is on:
XPress vehicle level control switch :.
Indicator lamp ; goes out. The vehicle is
adjusted to a normal level.
Suspension tuning
The suspension tuning of the ABC system is
adjusted for each wheel individually and
depends on:
Ryour driving style
Rthe road condition, such as bumps etc.
Ryour individual selection, sporty or
comfortable
Rthe vehicle loading
iThe selected setting remains stored in
memory, even when the engine is turned
off and restarted.
XStart the engine.
Sporty suspension tuning
The firmer chassis and suspension setup in
sport driving mode provides enhanced road
contact. Select this mode when you prefer a
firmer chassis and suspension setup.
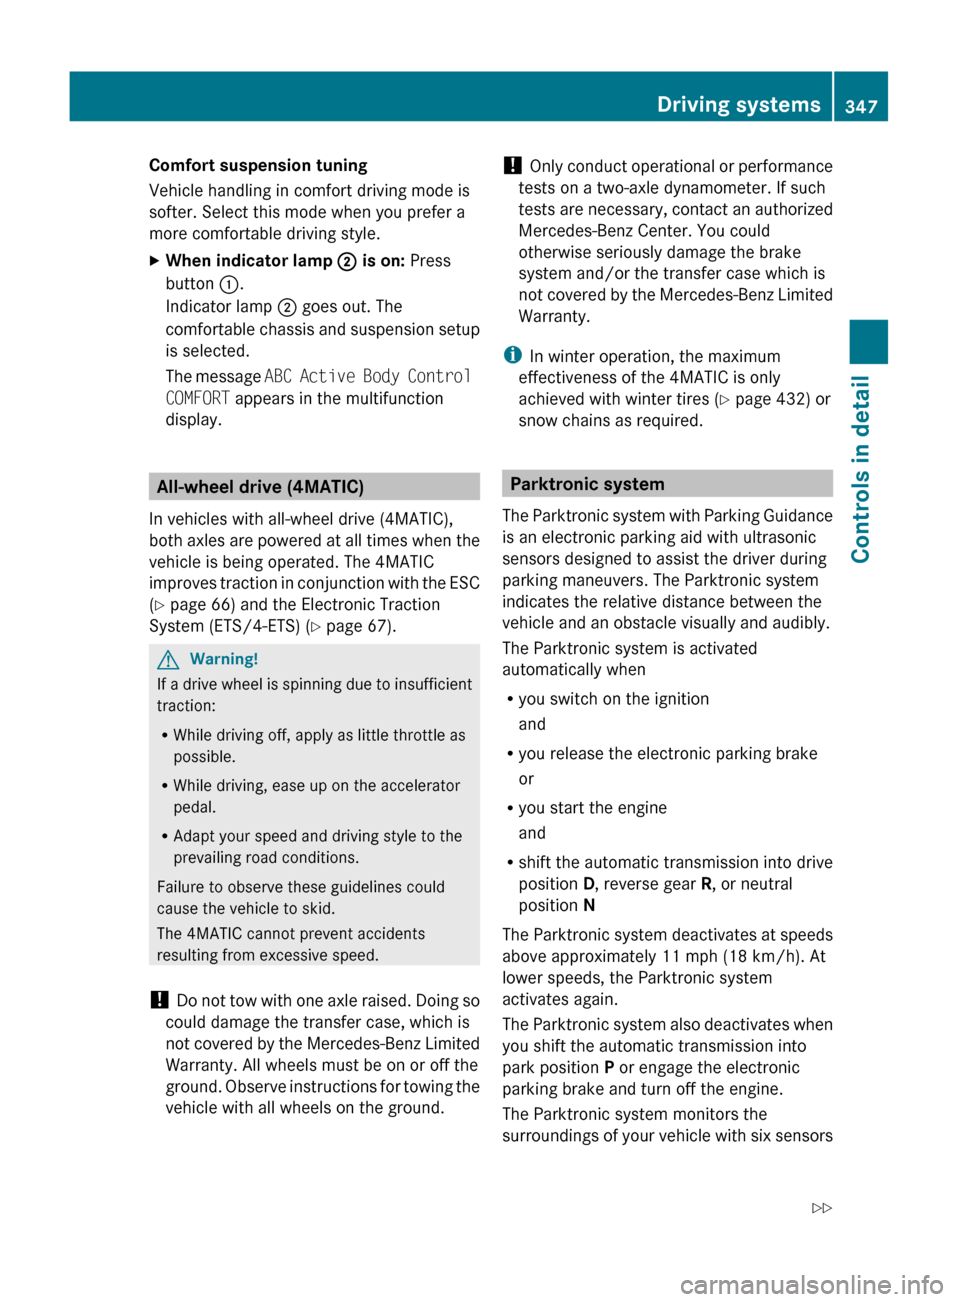
XWhen indicator lamp ; is off: Press
button :.
Indicator lamp ; comes on. The sporty
chassis and suspension setup is selected.
The message ABC Active Body Control
SPORT appears in the multifunction display.
346Driving systemsControls in detail
221_AKB; 6; 20, en-USd2ugruen,Version: 2.11.8.12009-09-24T13:28:17+02:00 - Seite 346
Page 349 of 548
Comfort suspension tuning
Vehicle handling in comfort driving mode is
softer. Select this mode when you prefer a
more comfortable driving style.XWhen indicator lamp ; is on: Press
button :.
Indicator lamp ; goes out. The
comfortable chassis and suspension setup
is selected.
The message ABC Active Body Control
COMFORT appears in the multifunction
display.
All-wheel drive (4MATIC)
In vehicles with all-wheel drive (4MATIC),
both axles are powered at all times when the
vehicle is being operated. The 4MATIC
improves traction in conjunction with the ESC
( Y page 66) and the Electronic Traction
System (ETS/4-ETS) ( Y page 67).
GWarning!
If a drive wheel is spinning due to insufficient
traction:
R While driving off, apply as little throttle as
possible.
R While driving, ease up on the accelerator
pedal.
R Adapt your speed and driving style to the
prevailing road conditions.
Failure to observe these guidelines could
cause the vehicle to skid.
The 4MATIC cannot prevent accidents
resulting from excessive speed.
! Do not tow with one axle raised. Doing so
could damage the transfer case, which is
not covered by the Mercedes-Benz Limited
Warranty. All wheels must be on or off the
ground. Observe instructions for towing the
vehicle with all wheels on the ground.
! Only conduct operational or performance
tests on a two-axle dynamometer. If such
tests are necessary, contact an authorized
Mercedes-Benz Center. You could
otherwise seriously damage the brake
system and/or the transfer case which is
not covered by the Mercedes-Benz Limited
Warranty.
i In winter operation, the maximum
effectiveness of the 4MATIC is only
achieved with winter tires ( Y page 432) or
snow chains as required.
Parktronic system
The Parktronic system with Parking Guidance
is an electronic parking aid with ultrasonic
sensors designed to assist the driver during
parking maneuvers. The Parktronic system
indicates the relative distance between the
vehicle and an obstacle visually and audibly.
The Parktronic system is activated
automatically when
R you switch on the ignition
and
R you release the electronic parking brake
or
R you start the engine
and
R shift the automatic transmission into drive
position D, reverse gear R, or neutral
position N
The Parktronic system deactivates at speeds
above approximately 11 mph (18 km/h). At
lower speeds, the Parktronic system
activates again.
The Parktronic system also deactivates when
you shift the automatic transmission into
park position P or engage the electronic
parking brake and turn off the engine.
The Parktronic system monitors the
surroundings of your vehicle with six sensors
Driving systems347Controls in detail221_AKB; 6; 20, en-USd2ugruen,Version: 2.11.8.12009-09-24T13:28:17+02:00 - Seite 347Z
Page 369 of 548
In automatic mode, cooling with
dehumidification is switched on. This function
can be switched off if necessary.
GWarning!
If you deactivate the air conditioning, the
vehicle will not be cooled when weather
conditions are warm. The windows can fog up
more quickly. Window fogging may impair
visibility and endanger you and others.
Automatic mode with the front climate
control
XSet the desired temperature
(Y page 367).
XActivating: Press rocker switch à up or
down.
The indicator lamp in the rocker switch
comes on.
XDeactivating: Press rocker switch K up
or down.
or
XAdjust air distribution via COMAND
(Y page 212).
The indicator lamp in rocker switch Ã
goes out.
Automatic mode with the rear climate
control
Operating on the front climate control
panel
XSet the desired temperature
(Y page 367).
XActivate the RearY function via
COMAND (Y page 215). This function is
used to operate the rear climate control via
COMAND and the rocker switches on the
control panel from the front.
XActivating: Press rocker switch à up or
down.
The indicator lamp in the rocker switch
comes on.
XDeactivating: Press rocker switch K up
or down.
orXAdjust air distribution via COMAND
(Y page 212).
The indicator lamp in rocker switch Ã
goes out.
iTo return to the standard display, activate
the Front Climate Control function via
COMAND (Y page 216).
Operating on the rear climate control
panel
XSet the desired temperature
(Y page 367).
XActivating: Press rocker switch J
(Y page 363) repeatedly until AUTO mode is
selected in the display.
XDeactivating: Press rocker switch J
repeatedly until MAN mode or OFF mode is
selected in the display.
Setting temperature
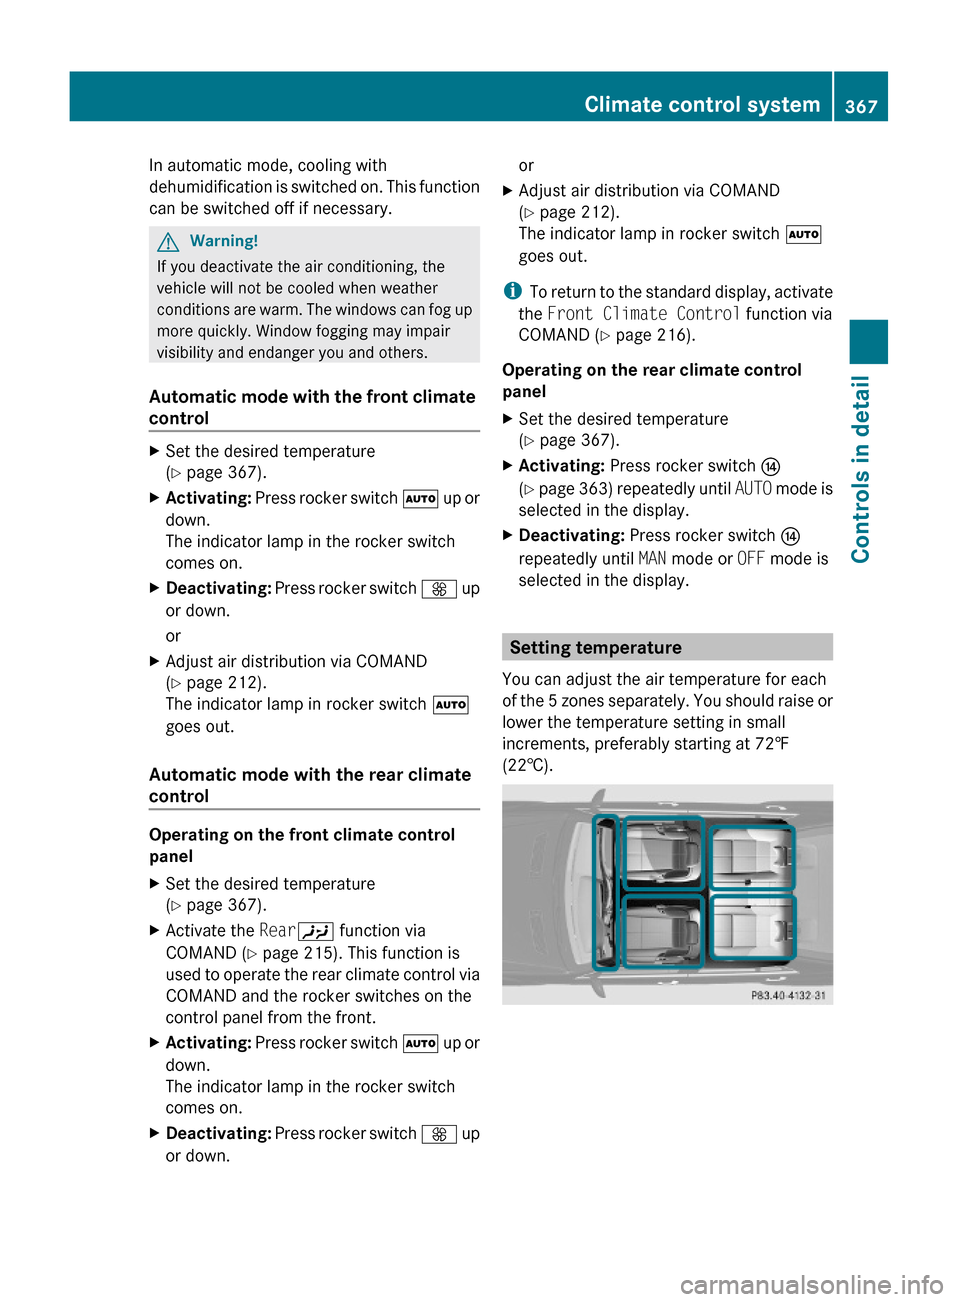
You can adjust the air temperature for each
of the 5 zones separately. You should raise or
lower the temperature setting in small
increments, preferably starting at 72‡
(22†).
Climate control system367Controls in detail221_AKB; 6; 20, en-USd2ugruen,Version: 2.11.8.12009-09-24T13:28:17+02:00 - Seite 367Z
Page 379 of 548
Opening and closing the panorama
roof with power tilt/sliding panel
GObserve Safety notes, see page 56.GWarning!
When opening or closing the tilt/sliding panel,
make sure there is no danger of anyone being
harmed by the opening/closing procedure.
The tilt/sliding panel is equipped with the
express operation and automatic reversal
function. If the movement of the tilt/sliding
panel is blocked during the closing procedure,
the tilt/sliding panel will stop and open
slightly.
The tilt/sliding panel operates differently
when the roof panel switch is pressed and
held. See the “Closing when the tilt/sliding
panel is blocked” section in this chapter for
details.
The opening/closing procedure of the tilt/
sliding panel can be immediately halted by
releasing the roof panel switch or, if the roof
panel switch was moved past the resistance
point and released, by moving the roof panel
switch in any direction.
GWarning!
The panorama roof with tilt/sliding panel is
made out of glass. In the event of an accident,
the glass may shatter. This may result in an
opening in the roof.
In a vehicle rollover, occupants not wearing
their seat belts or not wearing them properly
may be thrown out of the opening. Such an
opening also presents a potential for injury for
occupants wearing their seat belts properly as
entire body parts or portions of them may
protrude from the passenger compartment.
! To avoid damaging the seals, do not
transport any objects with sharp edges
which can stick out of the tilt/sliding panel.
Do not open the tilt/sliding panel if there is
snow or ice on the roof, as this could result
in malfunctions.
! Please keep in mind that weather
conditions can sometimes change rapidly.
Make sure to close the tilt/sliding panel
when leaving the vehicle. If water enters
the vehicle interior, vehicle electronics
could be damaged which is not covered by
the Mercedes-Benz Limited Warranty.
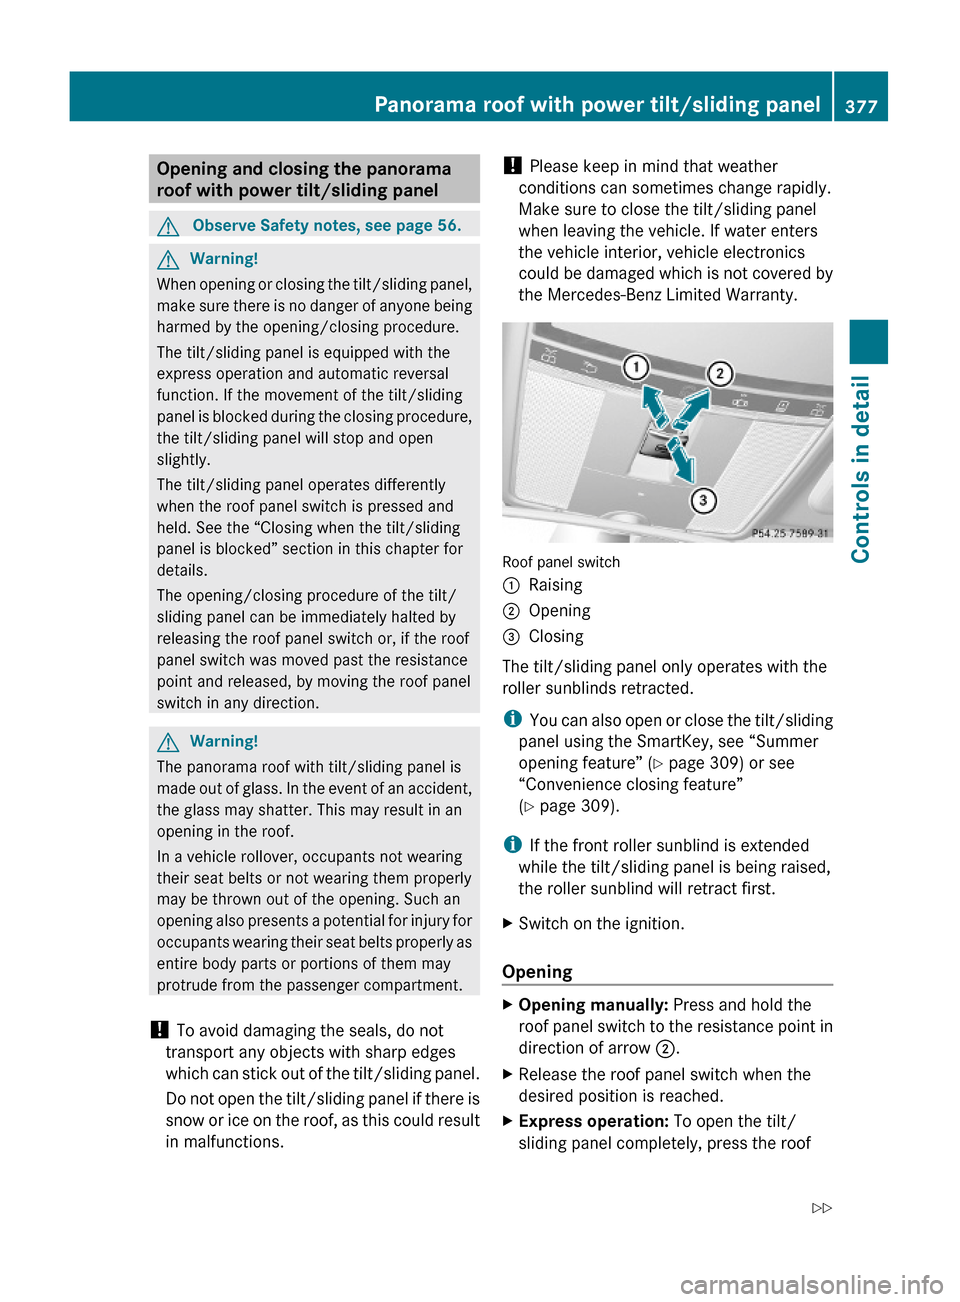
Roof panel switch
:Raising;Opening=Closing
The tilt/sliding panel only operates with the
roller sunblinds retracted.
iYou can also open or close the tilt/sliding
panel using the SmartKey, see “Summer
opening feature” (Y page 309) or see
“Convenience closing feature”
(Y page 309).
iIf the front roller sunblind is extended
while the tilt/sliding panel is being raised,
the roller sunblind will retract first.
XSwitch on the ignition.
Opening
XOpening manually: Press and hold the
roof panel switch to the resistance point in
direction of arrow ;.
XRelease the roof panel switch when the
desired position is reached.
XExpress operation: To open the tilt/
sliding panel completely, press the roof
Panorama roof with power tilt/sliding panel377Controls in detail221_AKB; 6; 20, en-USd2ugruen,Version: 2.11.8.12009-09-24T13:28:17+02:00 - Seite 377Z