2010 MERCEDES-BENZ S550 4MATIC page 508
[x] Cancel search: page 508Page 428 of 548
Thoroughly clean the mounting face of wheels
and brake disks, i.e. the inner side of the
wheels/tires, during each rotation. Check for
and ensure proper tire inflation pressure.
For information on wheel change, see “Flat
tire” (Y page 508).
Tire labeling
Besides tire name (sales designation) and
manufacturer name, a number of markings
can be found on a tire.
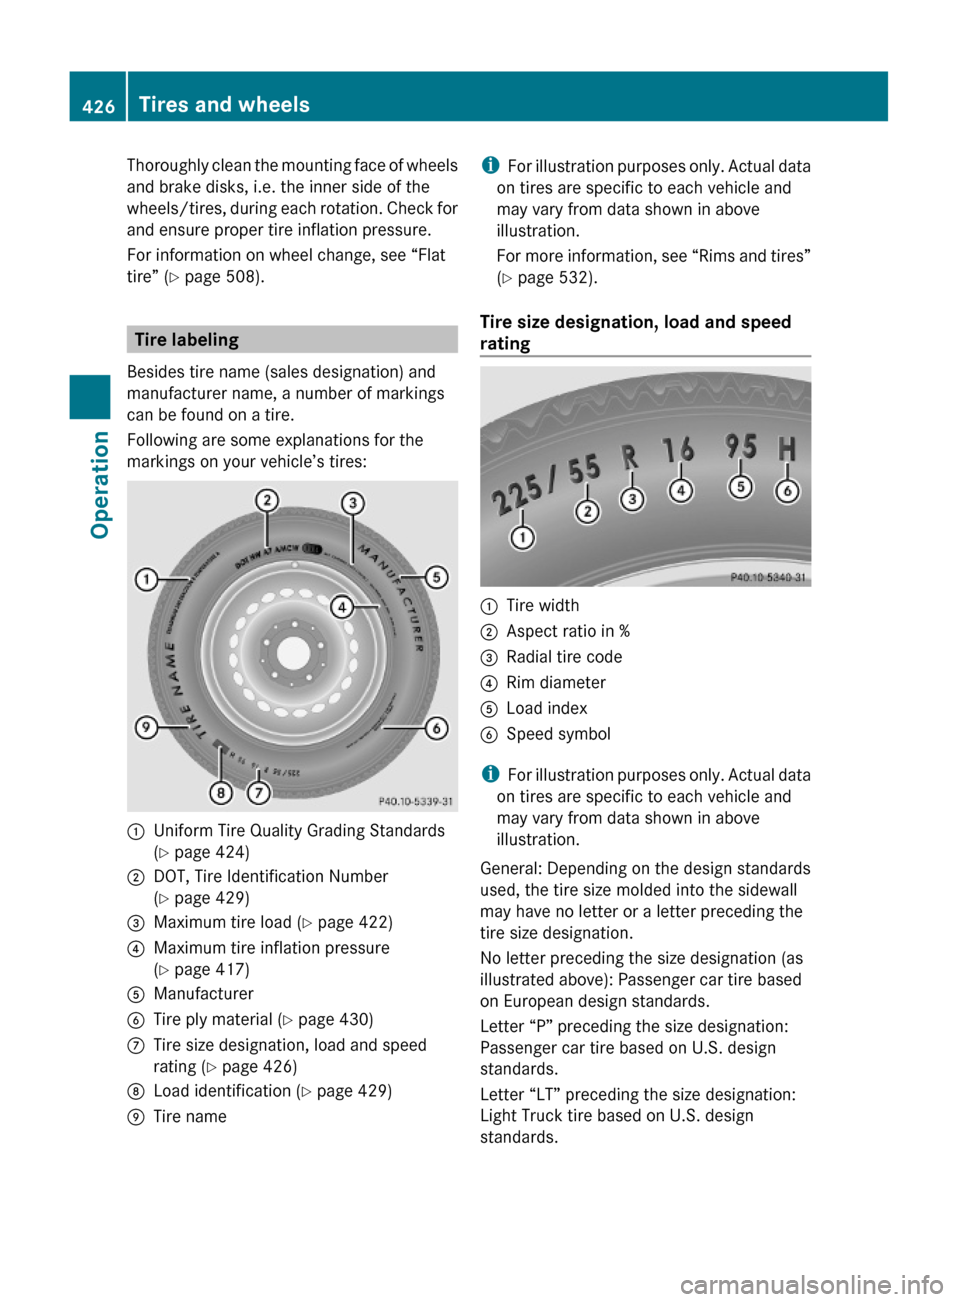
Following are some explanations for the
markings on your vehicle’s tires:
:Uniform Tire Quality Grading Standards
(Y page 424)
;DOT, Tire Identification Number
(Y page 429)
=Maximum tire load (Y page 422)?Maximum tire inflation pressure
(Y page 417)
AManufacturerBTire ply material (Y page 430)CTire size designation, load and speed
rating (Y page 426)
DLoad identification (Y page 429)ETire nameiFor illustration purposes only. Actual data
on tires are specific to each vehicle and
may vary from data shown in above
illustration.
For more information, see “Rims and tires”
(Y page 532).
Tire size designation, load and speed
rating
:Tire width;Aspect ratio in %=Radial tire code?Rim diameterALoad index BSpeed symbol
iFor illustration purposes only. Actual data
on tires are specific to each vehicle and
may vary from data shown in above
illustration.
General: Depending on the design standards
used, the tire size molded into the sidewall
may have no letter or a letter preceding the
tire size designation.
No letter preceding the size designation (as
illustrated above): Passenger car tire based
on European design standards.
Letter “P” preceding the size designation:
Passenger car tire based on U.S. design
standards.
Letter “LT” preceding the size designation:
Light Truck tire based on U.S. design
standards.
426Tires and wheelsOperation
221_AKB; 6; 20, en-USd2ugruen,Version: 2.11.8.12009-09-24T13:28:17+02:00 - Seite 426
Page 453 of 548
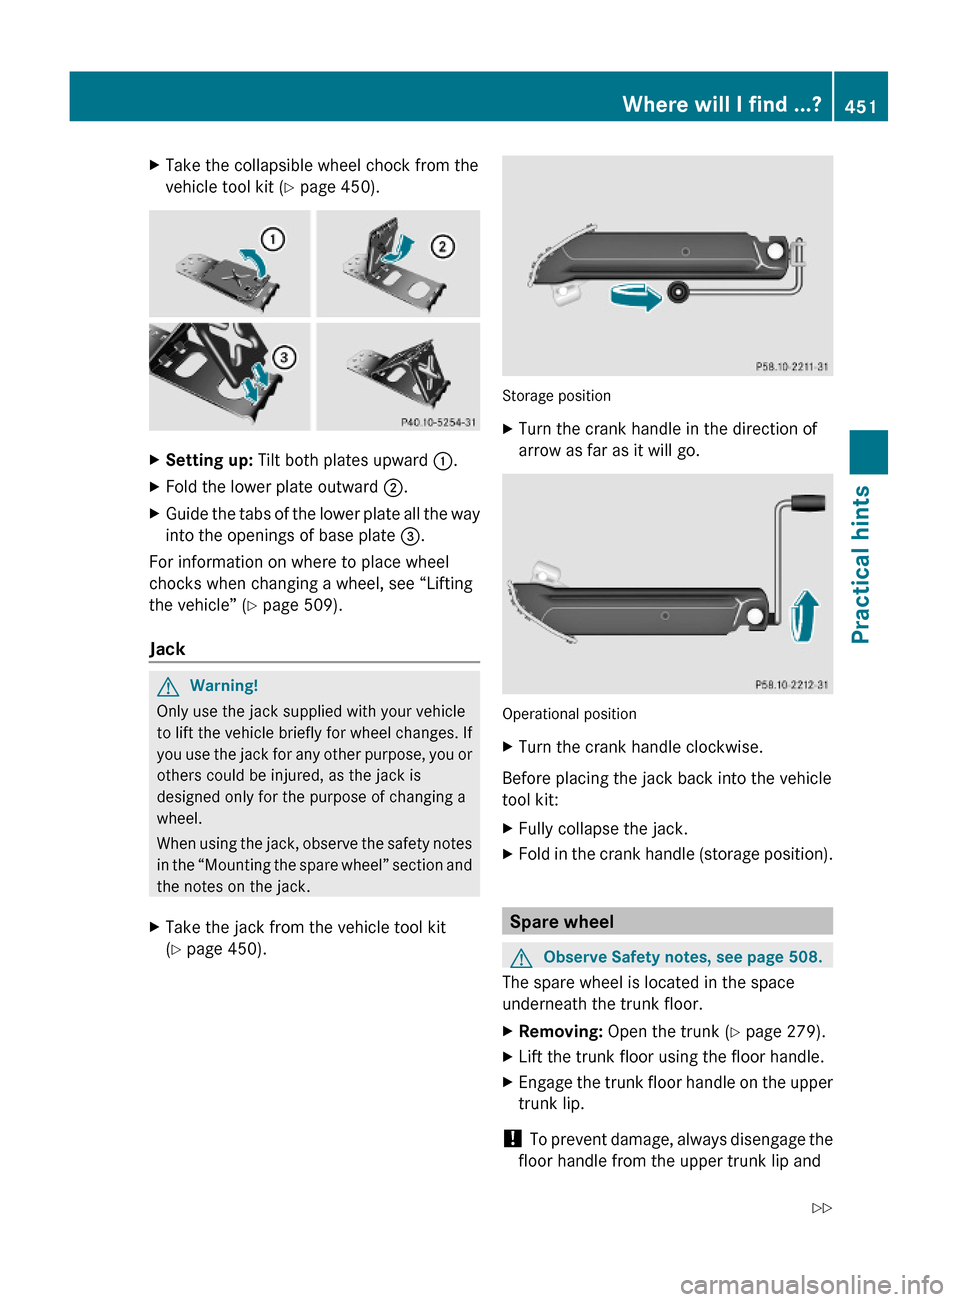
XTake the collapsible wheel chock from the
vehicle tool kit (Y page 450).
XSetting up: Tilt both plates upward :.XFold the lower plate outward ;.XGuide the tabs of the lower plate all the way
into the openings of base plate =.
For information on where to place wheel
chocks when changing a wheel, see “Lifting
the vehicle” (Y page 509).
Jack
GWarning!
Only use the jack supplied with your vehicle
to lift the vehicle briefly for wheel changes. If
you use the jack for any other purpose, you or
others could be injured, as the jack is
designed only for the purpose of changing a
wheel.
When using the jack, observe the safety notes
in the “Mounting the spare wheel” section and
the notes on the jack.
XTake the jack from the vehicle tool kit
(Y page 450).
Storage position
XTurn the crank handle in the direction of
arrow as far as it will go.
Operational position
XTurn the crank handle clockwise.
Before placing the jack back into the vehicle
tool kit:
XFully collapse the jack.XFold in the crank handle (storage position).
Spare wheel
GObserve Safety notes, see page 508.
The spare wheel is located in the space
underneath the trunk floor.
XRemoving: Open the trunk (Y page 279).XLift the trunk floor using the floor handle.XEngage the trunk floor handle on the upper
trunk lip.
! To prevent damage, always disengage the
floor handle from the upper trunk lip and
Where will I find ...?451Practical hints221_AKB; 6; 20, en-USd2ugruen,Version: 2.11.8.12009-09-24T13:28:17+02:00 - Seite 451Z
Page 454 of 548
lower the trunk floor before closing the
trunk.
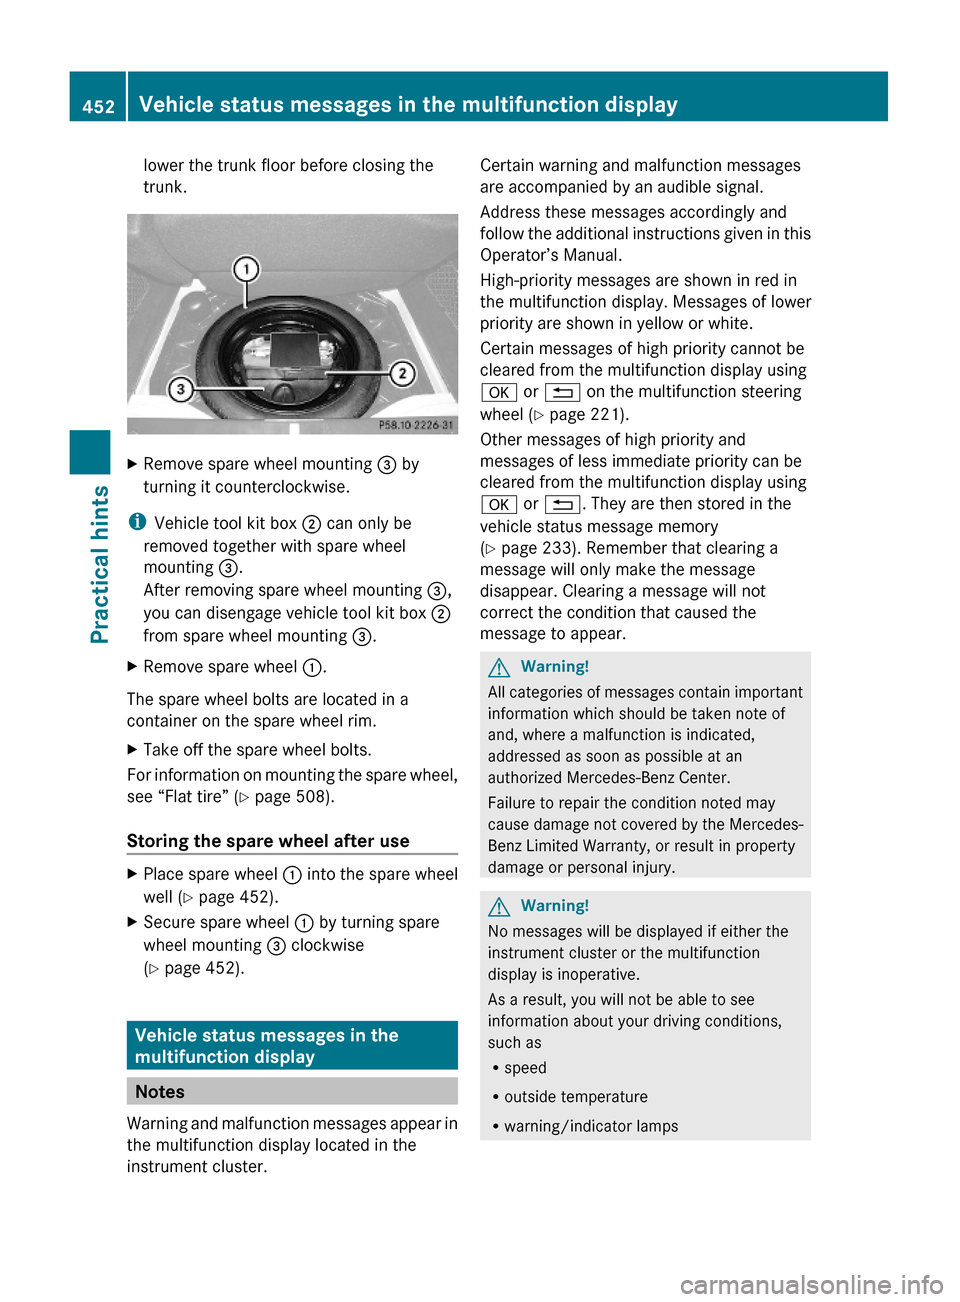
XRemove spare wheel mounting = by
turning it counterclockwise.
iVehicle tool kit box ; can only be
removed together with spare wheel
mounting =.
After removing spare wheel mounting =,
you can disengage vehicle tool kit box ;
from spare wheel mounting =.
XRemove spare wheel :.
The spare wheel bolts are located in a
container on the spare wheel rim.
XTake off the spare wheel bolts.
For information on mounting the spare wheel,
see “Flat tire” (Y page 508).
Storing the spare wheel after use
XPlace spare wheel : into the spare wheel
well (Y page 452).
XSecure spare wheel : by turning spare
wheel mounting = clockwise
(Y page 452).
Vehicle status messages in the
multifunction display
Notes
Warning and malfunction messages appear in
the multifunction display located in the
instrument cluster.
Certain warning and malfunction messages
are accompanied by an audible signal.
Address these messages accordingly and
follow the additional instructions given in this
Operator’s Manual.
High-priority messages are shown in red in
the multifunction display. Messages of lower
priority are shown in yellow or white.
Certain messages of high priority cannot be
cleared from the multifunction display using
a or % on the multifunction steering
wheel (Y page 221).
Other messages of high priority and
messages of less immediate priority can be
cleared from the multifunction display using
a or %. They are then stored in the
vehicle status message memory
(Y page 233). Remember that clearing a
message will only make the message
disappear. Clearing a message will not
correct the condition that caused the
message to appear.
GWarning!
All categories of messages contain important
information which should be taken note of
and, where a malfunction is indicated,
addressed as soon as possible at an
authorized Mercedes-Benz Center.
Failure to repair the condition noted may
cause damage not covered by the Mercedes-
Benz Limited Warranty, or result in property
damage or personal injury.
GWarning!
No messages will be displayed if either the
instrument cluster or the multifunction
display is inoperative.
As a result, you will not be able to see
information about your driving conditions,
such as
Rspeed
Routside temperature
Rwarning/indicator lamps
452Vehicle status messages in the multifunction displayPractical hints
221_AKB; 6; 20, en-USd2ugruen,Version: 2.11.8.12009-09-24T13:28:17+02:00 - Seite 452
Page 467 of 548
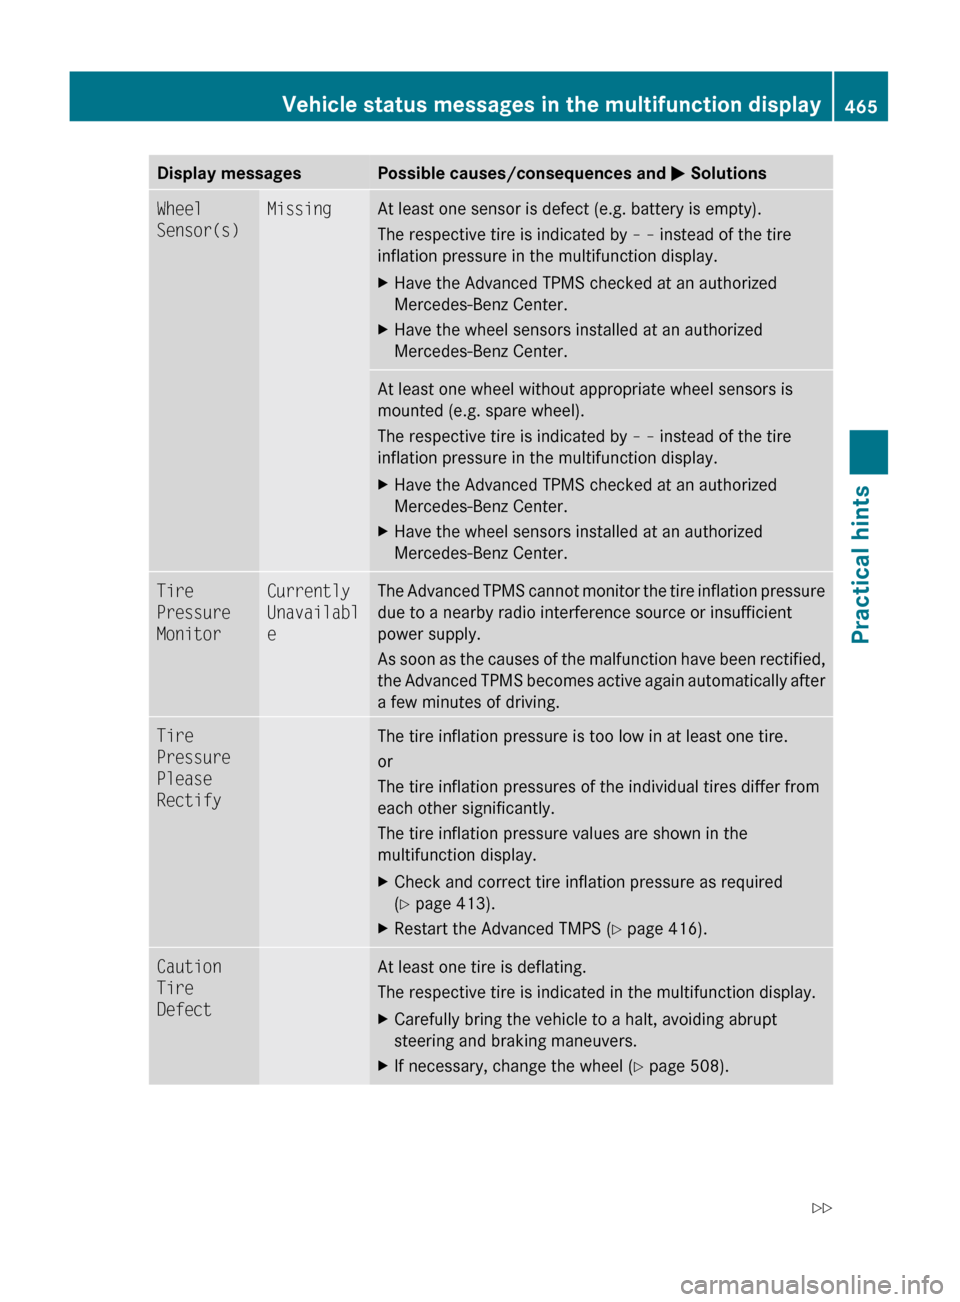
Display messagesPossible causes/consequences and M SolutionsWheel
Sensor(s)MissingAt least one sensor is defect (e.g. battery is empty).
The respective tire is indicated by – – instead of the tire
inflation pressure in the multifunction display.XHave the Advanced TPMS checked at an authorized
Mercedes-Benz Center.XHave the wheel sensors installed at an authorized
Mercedes-Benz Center.At least one wheel without appropriate wheel sensors is
mounted (e.g. spare wheel).
The respective tire is indicated by – – instead of the tire
inflation pressure in the multifunction display.XHave the Advanced TPMS checked at an authorized
Mercedes-Benz Center.XHave the wheel sensors installed at an authorized
Mercedes-Benz Center.Tire
Pressure
MonitorCurrently
Unavailabl
eThe Advanced TPMS cannot monitor the tire inflation pressure
due to a nearby radio interference source or insufficient
power supply.
As soon as the causes of the malfunction have been rectified,
the Advanced TPMS becomes active again automatically after
a few minutes of driving.Tire
Pressure
Please
RectifyThe tire inflation pressure is too low in at least one tire.
or
The tire inflation pressures of the individual tires differ from
each other significantly.
The tire inflation pressure values are shown in the
multifunction display.XCheck and correct tire inflation pressure as required
( Y page 413).XRestart the Advanced TMPS ( Y page 416).Caution
Tire
DefectAt least one tire is deflating.
The respective tire is indicated in the multifunction display.XCarefully bring the vehicle to a halt, avoiding abrupt
steering and braking maneuvers.XIf necessary, change the wheel ( Y page 508).Vehicle status messages in the multifunction display465Practical hints221_AKB; 6; 20, en-USd2ugruen,Version: 2.11.8.12009-09-24T13:28:17+02:00 - Seite 465Z
Page 468 of 548
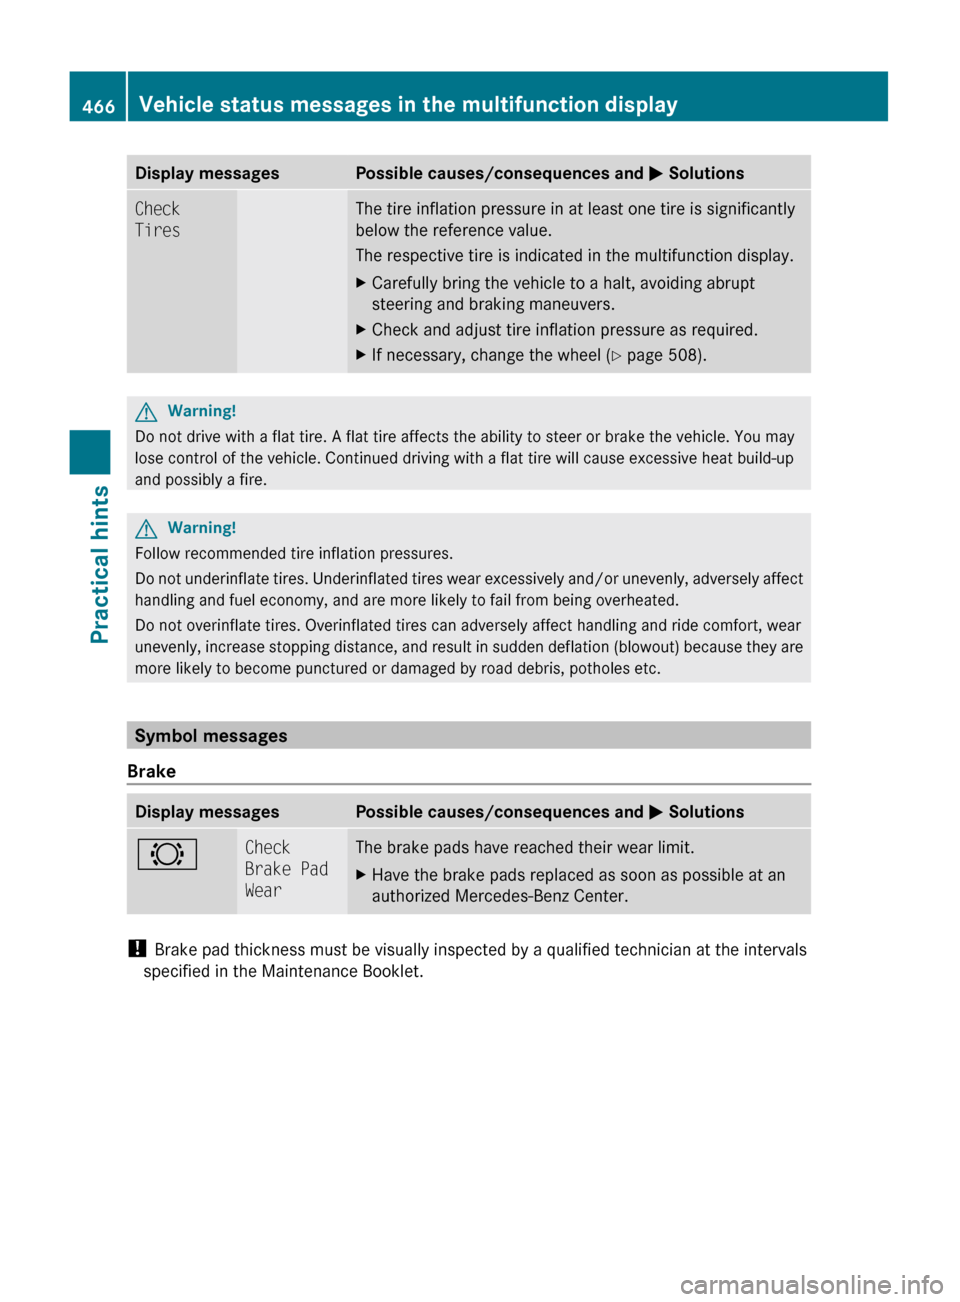
Display messagesPossible causes/consequences and M SolutionsCheck
TiresThe tire inflation pressure in at least one tire is significantly
below the reference value.
The respective tire is indicated in the multifunction display.XCarefully bring the vehicle to a halt, avoiding abrupt
steering and braking maneuvers.XCheck and adjust tire inflation pressure as required.XIf necessary, change the wheel ( Y page 508).GWarning!
Do not drive with a flat tire. A flat tire affects the ability to steer or brake the vehicle. You may
lose control of the vehicle. Continued driving with a flat tire will cause excessive heat build-up
and possibly a fire.
GWarning!
Follow recommended tire inflation pressures.
Do not underinflate tires. Underinflated tires wear excessively and/or unevenly, adversely affect
handling and fuel economy, and are more likely to fail from being overheated.
Do not overinflate tires. Overinflated tires can adversely affect handling and ride comfort, wear
unevenly, increase stopping distance, and result in sudden deflation (blowout) because they are
more likely to become punctured or damaged by road debris, potholes etc.
Symbol messages
Brake
Display messagesPossible causes/consequences and M Solutions#Check
Brake Pad
WearThe brake pads have reached their wear limit.XHave the brake pads replaced as soon as possible at an
authorized Mercedes-Benz Center.
! Brake pad thickness must be visually inspected by a qualified technician at the intervals
specified in the Maintenance Booklet.
466Vehicle status messages in the multifunction displayPractical hints
221_AKB; 6; 20, en-USd2ugruen,Version: 2.11.8.12009-09-24T13:28:17+02:00 - Seite 466
Page 491 of 548
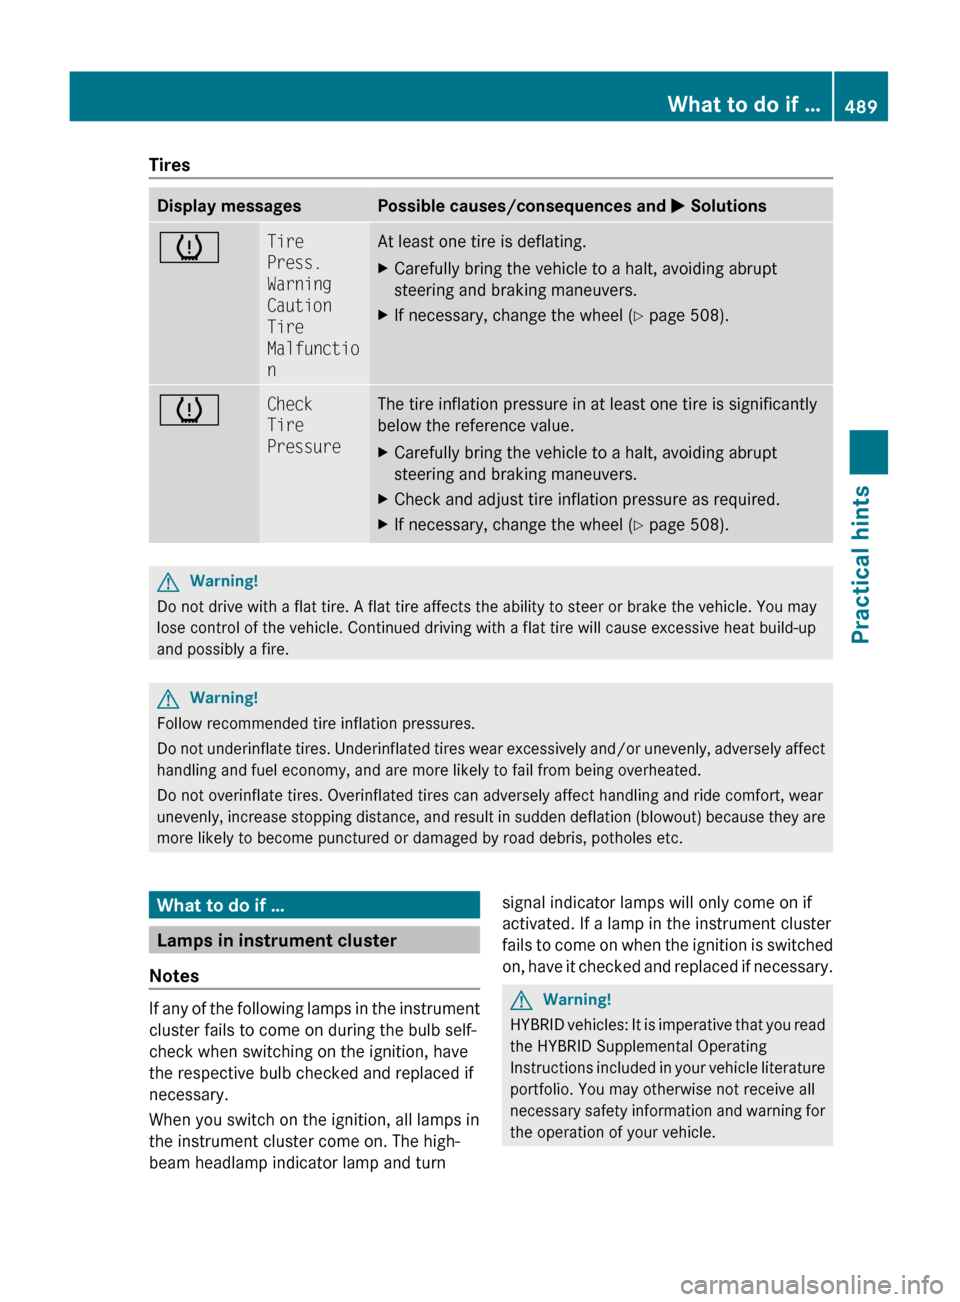
TiresDisplay messagesPossible causes/consequences and M SolutionshTire
Press.
Warning
Caution
Tire
Malfunctio
nAt least one tire is deflating.XCarefully bring the vehicle to a halt, avoiding abrupt
steering and braking maneuvers.XIf necessary, change the wheel ( Y page 508).hCheck
Tire
PressureThe tire inflation pressure in at least one tire is significantly
below the reference value.XCarefully bring the vehicle to a halt, avoiding abrupt
steering and braking maneuvers.XCheck and adjust tire inflation pressure as required.XIf necessary, change the wheel ( Y page 508).GWarning!
Do not drive with a flat tire. A flat tire affects the ability to steer or brake the vehicle. You may
lose control of the vehicle. Continued driving with a flat tire will cause excessive heat build-up
and possibly a fire.
GWarning!
Follow recommended tire inflation pressures.
Do not underinflate tires. Underinflated tires wear excessively and/or unevenly, adversely affect
handling and fuel economy, and are more likely to fail from being overheated.
Do not overinflate tires. Overinflated tires can adversely affect handling and ride comfort, wear
unevenly, increase stopping distance, and result in sudden deflation (blowout) because they are
more likely to become punctured or damaged by road debris, potholes etc.
What to do if …
Lamps in instrument cluster
Notes
If any of the following lamps in the instrument
cluster fails to come on during the bulb self-
check when switching on the ignition, have
the respective bulb checked and replaced if
necessary.
When you switch on the ignition, all lamps in
the instrument cluster come on. The high-
beam headlamp indicator lamp and turn
signal indicator lamps will only come on if
activated. If a lamp in the instrument cluster
fails to come on when the ignition is switched
on, have it checked and replaced if necessary.GWarning!
HYBRID vehicles: It is imperative that you read
the HYBRID Supplemental Operating
Instructions included in your vehicle literature
portfolio. You may otherwise not receive all
necessary safety information and warning for
the operation of your vehicle.
What to do if …489Practical hints221_AKB; 6; 20, en-USd2ugruen,Version: 2.11.8.12009-09-24T13:28:17+02:00 - Seite 489Z
Page 511 of 548
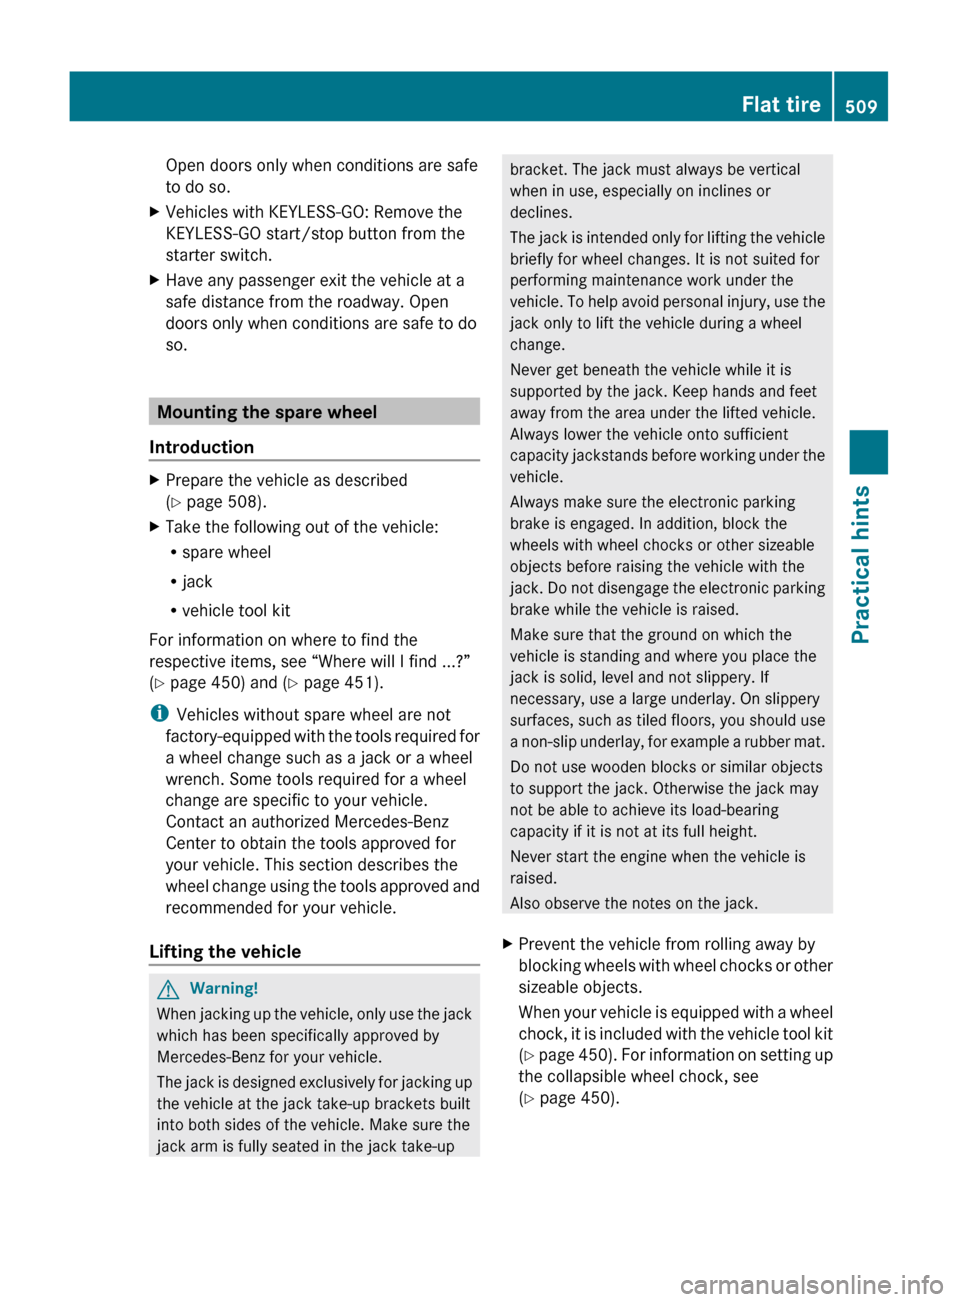
Open doors only when conditions are safe
to do so.XVehicles with KEYLESS-GO: Remove the
KEYLESS-GO start/stop button from the
starter switch.XHave any passenger exit the vehicle at a
safe distance from the roadway. Open
doors only when conditions are safe to do
so.
Mounting the spare wheel
Introduction
XPrepare the vehicle as described
( Y page 508).XTake the following out of the vehicle:
R spare wheel
R jack
R vehicle tool kit
For information on where to find the
respective items, see “Where will I find ...?”
( Y page 450) and ( Y page 451).
i Vehicles without spare wheel are not
factory-equipped with the tools required for
a wheel change such as a jack or a wheel
wrench. Some tools required for a wheel
change are specific to your vehicle.
Contact an authorized Mercedes-Benz
Center to obtain the tools approved for
your vehicle. This section describes the
wheel change using the tools approved and
recommended for your vehicle.
Lifting the vehicle
GWarning!
When jacking up the vehicle, only use the jack
which has been specifically approved by
Mercedes-Benz for your vehicle.
The jack is designed exclusively for jacking up
the vehicle at the jack take-up brackets built
into both sides of the vehicle. Make sure the
jack arm is fully seated in the jack take-up
bracket. The jack must always be vertical
when in use, especially on inclines or
declines.
The jack is intended only for lifting the vehicle
briefly for wheel changes. It is not suited for
performing maintenance work under the
vehicle. To help avoid personal injury, use the
jack only to lift the vehicle during a wheel
change.
Never get beneath the vehicle while it is
supported by the jack. Keep hands and feet
away from the area under the lifted vehicle.
Always lower the vehicle onto sufficient
capacity jackstands before working under the
vehicle.
Always make sure the electronic parking
brake is engaged. In addition, block the
wheels with wheel chocks or other sizeable
objects before raising the vehicle with the
jack. Do not disengage the electronic parking
brake while the vehicle is raised.
Make sure that the ground on which the
vehicle is standing and where you place the
jack is solid, level and not slippery. If
necessary, use a large underlay. On slippery
surfaces, such as tiled floors, you should use
a non-slip underlay, for example a rubber mat.
Do not use wooden blocks or similar objects
to support the jack. Otherwise the jack may
not be able to achieve its load-bearing
capacity if it is not at its full height.
Never start the engine when the vehicle is
raised.
Also observe the notes on the jack.XPrevent the vehicle from rolling away by
blocking wheels with wheel chocks or other
sizeable objects.
When your vehicle is equipped with a wheel
chock, it is included with the vehicle tool kit
( Y page 450). For information on setting up
the collapsible wheel chock, see
( Y page 450).Flat tire509Practical hints221_AKB; 6; 20, en-USd2ugruen,Version: 2.11.8.12009-09-24T13:28:17+02:00 - Seite 509Z