2010 MERCEDES-BENZ S CLASS ESP
[x] Cancel search: ESPPage 100 of 548

XEnter the activation code and confirm by
pressing \000>.
Installation of the map software starts.
When you enter an invalid activation code,
you are prompted to reenter the activation
code. After entering an invalid activation code
for the third time, the prompt for reentering
the activation code will be delayed. The delay
increases by 5 minutes each time an invalid
activation code is entered to a maximum
delay of 5 hours.
Map software installation
Immediately before installation, the
COMAND system reboots.
A corresponding message and a progress bar
appear during the installation process.
XCanceling installation on the DVD
changer: Press the respective magazine
tray button.
XRemove the DVD from the slot.
iWhen you cancel the installation, the
navigation system will be inoperative. You
can resume a canceled installation at a
later time.
XInstallation of multiple DVD map
software: After installation of the first
DVD, a message appears that prompts you
to insert the next DVD. Follow the
instructions on the COMAND display.
XContinue installation without
canceling: Let the installation continue
without pressing any buttons.
When the installation has been completed,
a corresponding message appears.
XConfirming message: Press \000
Page 106 of 548
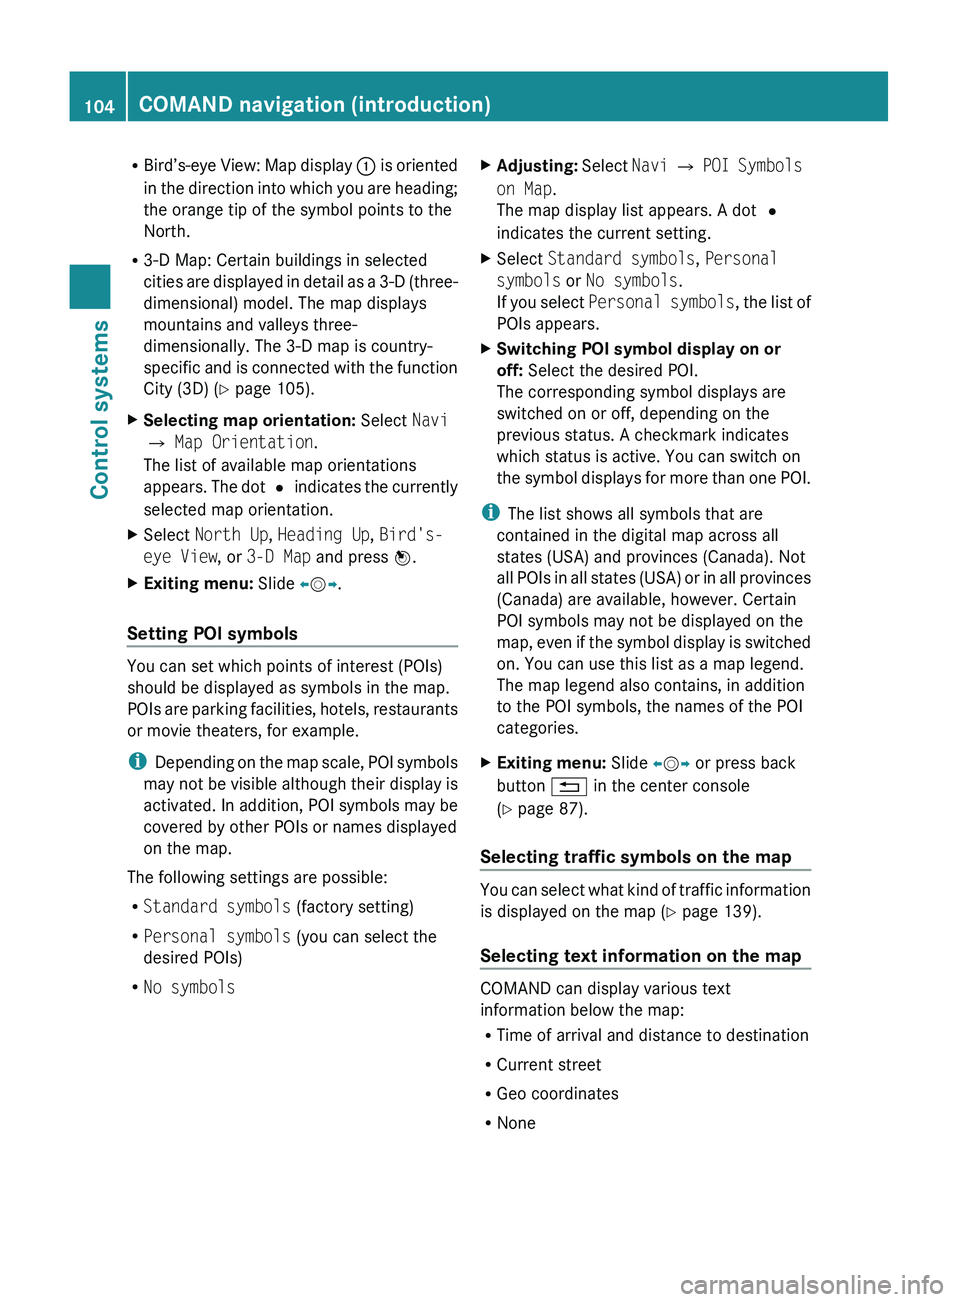
RBird’s-eye View: Map display 0046 is oriented
in the direction into which you are heading;
the orange tip of the symbol points to the
North.
R 3-D Map: Certain buildings in selected
cities are displayed in detail as a 3-D (three-
dimensional) model. The map displays
mountains and valleys three-
dimensionally. The 3-D map is country-
specific and is connected with the function
City (3D) ( Y page 105).XSelecting map orientation: Select Navi
0054 Map Orientation .
The list of available map orientations
appears. The dot 003F indicates the currently
selected map orientation.XSelect North Up , Heading Up , Bird's-
eye View , or 3-D Map and press 00A1.XExiting menu: Slide 009E005B 009F.
Setting POI symbols
You can set which points of interest (POIs)
should be displayed as symbols in the map.
POIs are parking facilities, hotels, restaurants
or movie theaters, for example.
i Depending on the map scale, POI symbols
may not be visible although their display is
activated. In addition, POI symbols may be
covered by other POIs or names displayed
on the map.
The following settings are possible:
R Standard symbols (factory setting)
R Personal symbols (you can select the
desired POIs)
R No symbols
XAdjusting: Select Navi 0054 POI Symbols
on Map .
The map display list appears. A dot 003F
indicates the current setting.XSelect Standard symbols , Personal
symbols or No symbols .
If you select Personal symbols , the list of
POIs appears.XSwitching POI symbol display on or
off: Select the desired POI.
The corresponding symbol displays are
switched on or off, depending on the
previous status. A checkmark indicates
which status is active. You can switch on
the symbol displays for more than one POI.
i The list shows all symbols that are
contained in the digital map across all
states (USA) and provinces (Canada). Not
all POIs in all states (USA) or in all provinces
(Canada) are available, however. Certain
POI symbols may not be displayed on the
map, even if the symbol display is switched
on. You can use this list as a map legend.
The map legend also contains, in addition
to the POI symbols, the names of the POI
categories.
XExiting menu: Slide 009E005B 009F or press back
button 0041 in the center console
( Y page 87).
Selecting traffic symbols on the map
You can select what kind of traffic information
is displayed on the map ( Y page 139).
Selecting text information on the map
COMAND can display various text
information below the map:
R Time of arrival and distance to destination
R Current street
R Geo coordinates
R None
104COMAND navigation (introduction)Control systems
221_AKB; 6; 20, en-USd2ugruen,Version: 2.11.8.12009-09-24T13:28:17+02:00 - Seite 104
Page 133 of 548
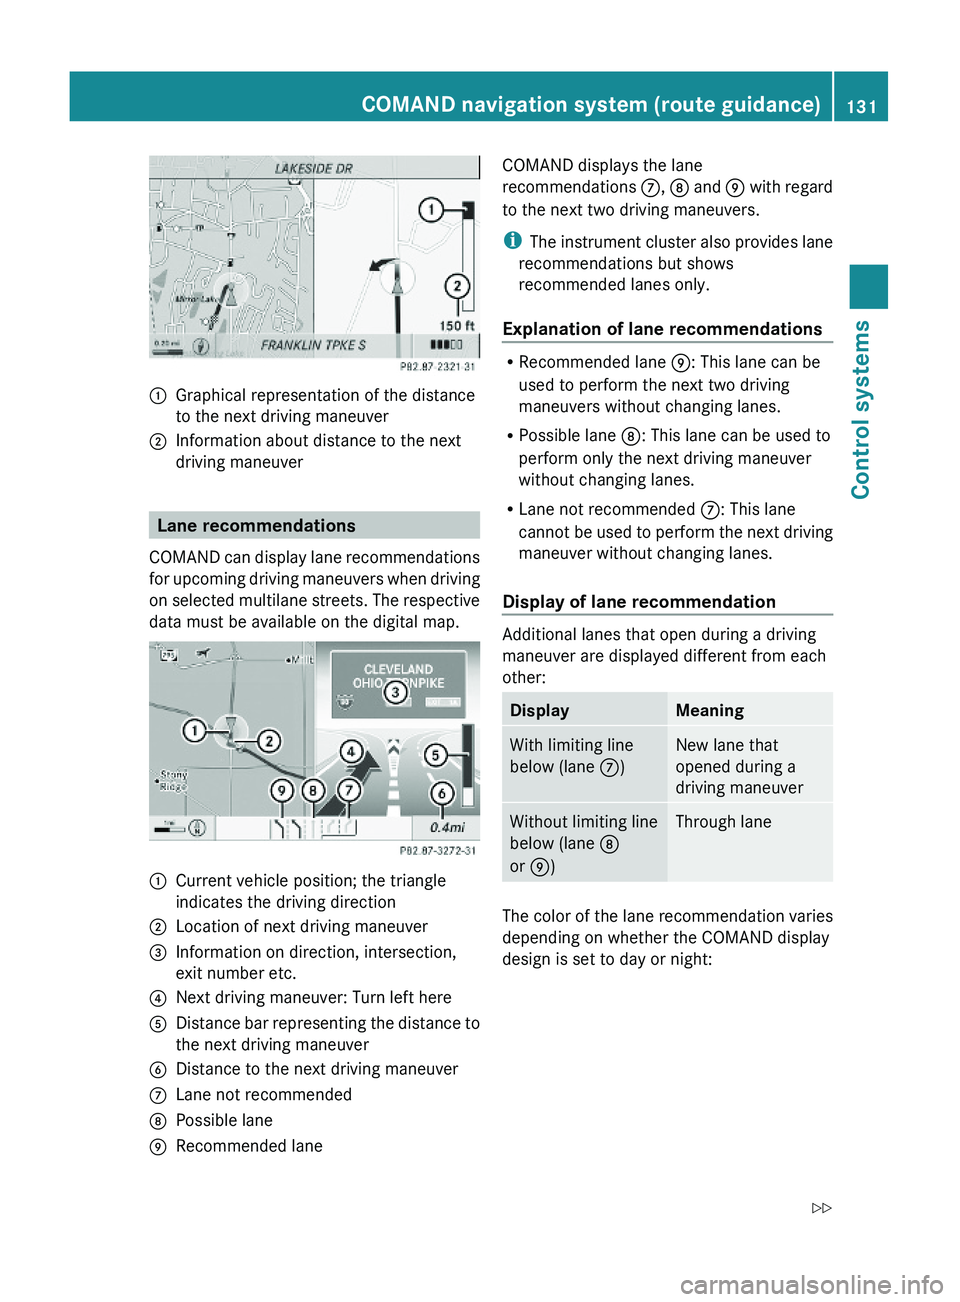
\000FGraphical representation of the distance
to the next driving maneuver
\000GInformation about distance to the next
driving maneuver
Lane recommendations
COMAND can display lane recommendations
for upcoming driving maneuvers when driving
on selected multilane streets. The respective
data must be available on the digital map.
\000FCurrent vehicle position; the triangle
indicates the driving direction
\000GLocation of next driving maneuver\000
Page 136 of 548
Off-road and off-map
Route guidance to an off-road
destination
GWarning!
The COMAND navigation system may direct
you to off-road routes that your vehicle may
not be capable of traversing through without
damaging your tires, wheels or vehicle. It is
the driver’s sole responsibility to determine
the suitability of the route. Off-road routes
may be of varying conditions and their
appropriateness for use may be affected by
various factors such as time of day, time of
year and immediate weather conditions that
cannot be judged or taken into consideration
by the COMAND system.
COMAND can guide you to destinations
within the area covered by the digital map,
even if a destination is not located at a road
known to the system.
These destinations are shown as off-road
destinations, which you can enter using the
map, for example. In these cases, COMAND
guides you for as long as possible with
navigation announcements and displays on
roads known to the system.
Shortly before you reach the last known the
point to leave the digitized road network, you
will hear the announcement The
destination is nearby. Follow the
arrow on the display.
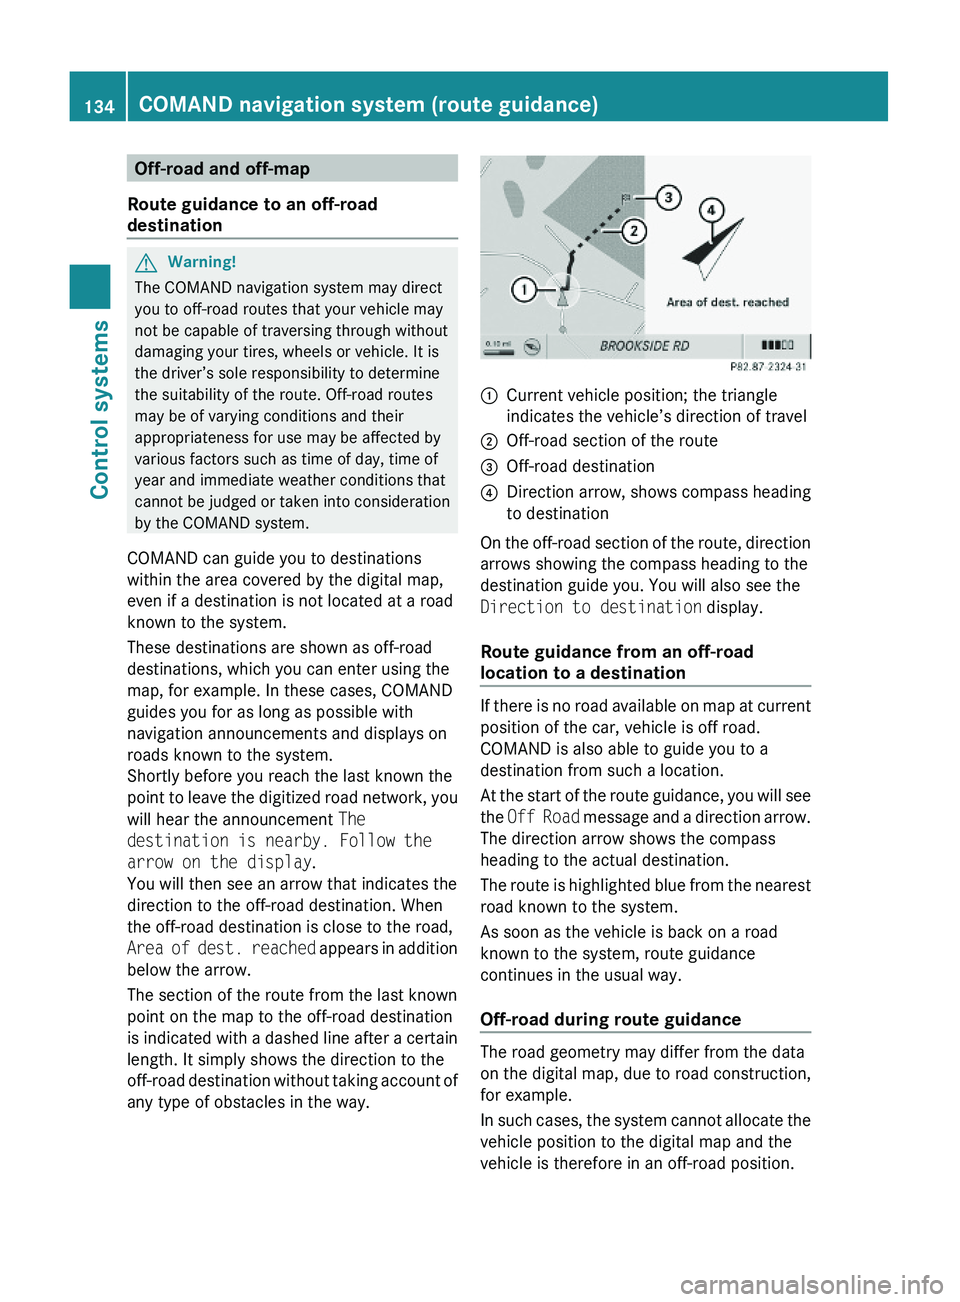
You will then see an arrow that indicates the
direction to the off-road destination. When
the off-road destination is close to the road,
Area of dest. reached appears in addition
below the arrow.
The section of the route from the last known
point on the map to the off-road destination
is indicated with a dashed line after a certain
length. It simply shows the direction to the
off-road destination without taking account of
any type of obstacles in the way.
\000FCurrent vehicle position; the triangle
indicates the vehicle’s direction of travel
\000GOff-road section of the route\000
Page 149 of 548
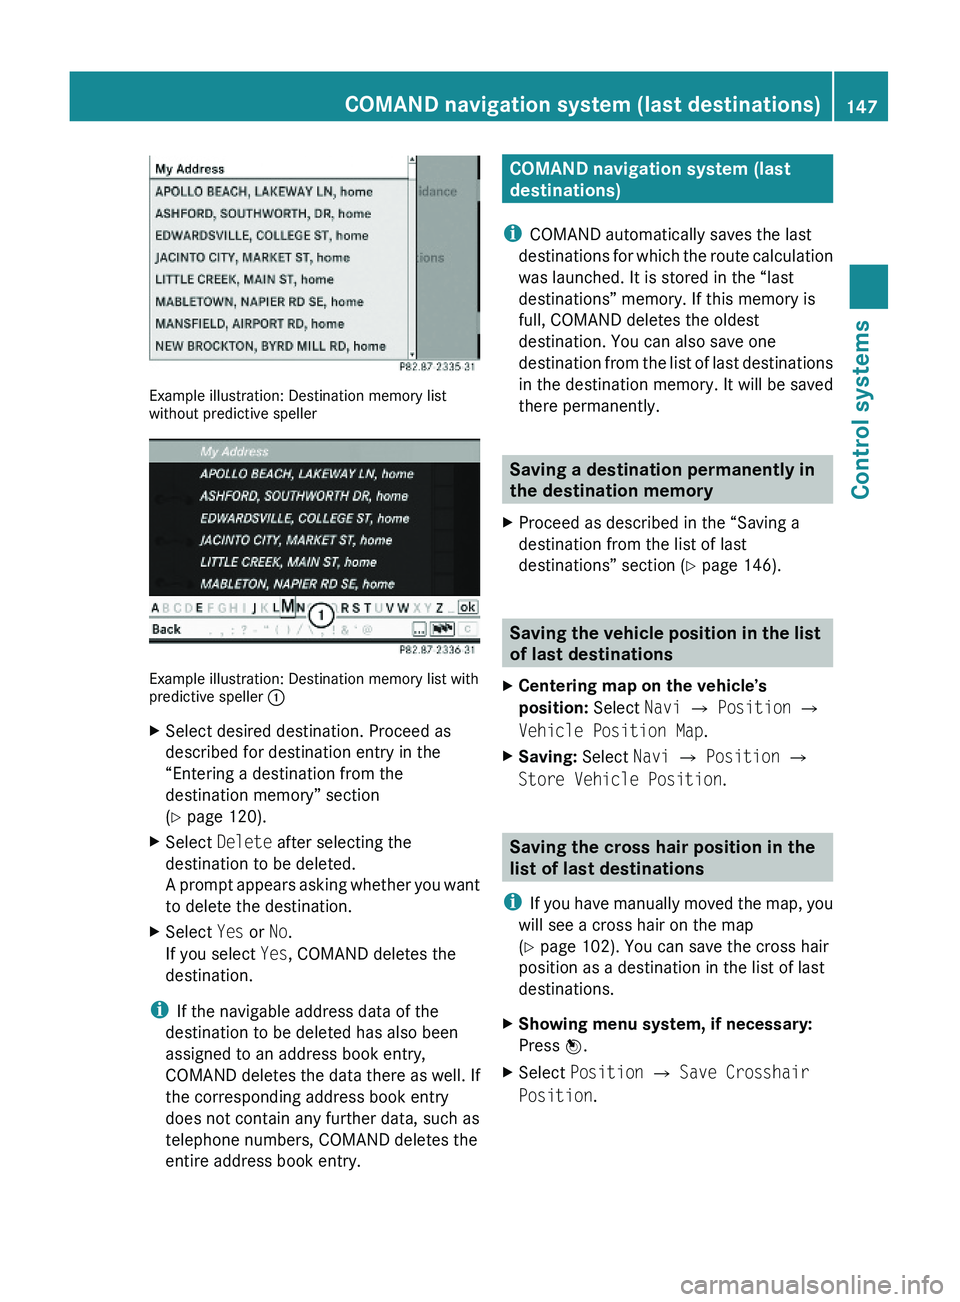
Example illustration: Destination memory listwithout predictive speller
Example illustration: Destination memory list withpredictive speller \000F
XSelect desired destination. Proceed as
described for destination entry in the
“Entering a destination from the
destination memory” section
(Y page 120).
XSelect Delete after selecting the
destination to be deleted.
A prompt appears asking whether you want
to delete the destination.
XSelect Yes or No.
If you select Yes, COMAND deletes the
destination.
iIf the navigable address data of the
destination to be deleted has also been
assigned to an address book entry,
COMAND deletes the data there as well. If
the corresponding address book entry
does not contain any further data, such as
telephone numbers, COMAND deletes the
entire address book entry.
COMAND navigation system (last
destinations)
iCOMAND automatically saves the last
destinations for which the route calculation
was launched. It is stored in the “last
destinations” memory. If this memory is
full, COMAND deletes the oldest
destination. You can also save one
destination from the list of last destinations
in the destination memory. It will be saved
there permanently.
Saving a destination permanently in
the destination memory
XProceed as described in the “Saving a
destination from the list of last
destinations” section (Y page 146).
Saving the vehicle position in the list
of last destinations
XCentering map on the vehicle’s
position: Select Navi \000T Position \000T
Vehicle Position Map.
XSaving: Select Navi \000T Position \000T
Store Vehicle Position.
Saving the cross hair position in the
list of last destinations
iIf you have manually moved the map, you
will see a cross hair on the map
(Y page 102). You can save the cross hair
position as a destination in the list of last
destinations.
XShowing menu system, if necessary:
Press \000
Page 153 of 548
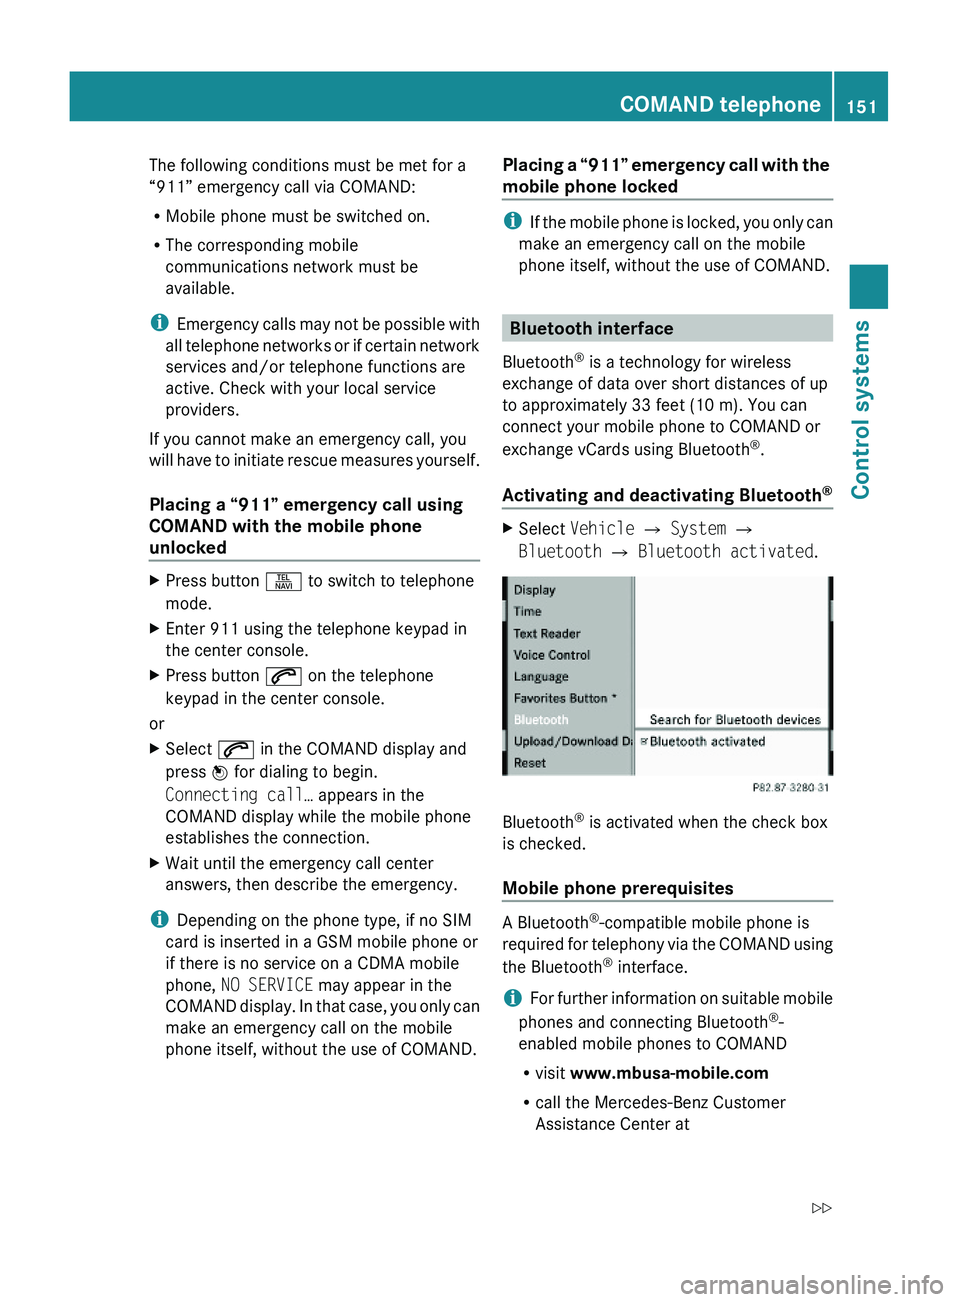
The following conditions must be met for a
“911” emergency call via COMAND:
RMobile phone must be switched on.
RThe corresponding mobile
communications network must be
available.
iEmergency calls may not be possible with
all telephone networks or if certain network
services and/or telephone functions are
active. Check with your local service
providers.
If you cannot make an emergency call, you
will have to initiate rescue measures yourself.
Placing a “911” emergency call using
COMAND with the mobile phone
unlocked
XPress button \000X to switch to telephone
mode.
XEnter 911 using the telephone keypad in
the center console.
XPress button \000j on the telephone
keypad in the center console.
or
XSelect \000j in the COMAND display and
press \000
Page 156 of 548
External authorization
Certain security settings in your mobile
phone may prevent COMAND from finding
your mobile phone. In this case, you might
want to check if your mobile phone can
recognize the COMAND. The Bluetooth ®
device name of COMAND is MB Bluetooth.XSelect Data/Connections 0054
Bluetooth Telephones .XGo to Update and select Options 0054
External Authorization .XActivate the Bluetooth®
search on the
mobile phone. Refer to mobile phone
operating instructions for detail.XSelect MB Bluetooth on the mobile phone.XWhen prompted, enter the passkey into
COMAND and the mobile phone
( Y page 153).
Show details
Details can be displayed for each mobile
phone in the Bluetooth ®
phone list.
XSelect Data/Connections 0054
Bluetooth Telephones .XChoose the mobile phone from the list and
select Options 0054 Details .
The following mobile phone details appear:
R Bluetooth ®
name
R Bluetooth ®
address
R Availability status
R Authorization
R Bluetooth ®
Class (mobile phone,
notebook, etc.)XClosing detail display: Slide 009E005B 009F.Deauthorizing the mobile phone XSelect Data/Connections 0054
Bluetooth Telephones .XChoose the mobile phone from the list and
select Options 0054 De-authorize .
You will be asked whether you want to
deauthorize the device.XSelect Yes.
i
You should delete the device name MB
Bluetooth from the Bluetooth ®
list of the
mobile phone before authorizing that
mobile phone again.
Connecting another mobile phone
You can switch between several mobile
phones that you have authorized.
i Switching to another authorized mobile
phone is only possible while no phone calls
are being made.
XSelect Data/Connections 0054
Bluetooth Telephones .XSelect the mobile phone from the
Bluetooth ®
phone list.XConfirm the selection.
The selected mobile phone is connected
provided it is within Bluetooth ®
range and
Bluetooth ®
is activated on the respective
device.
You can only connect one mobile phone at
a time. The currently connected mobile
phone is indicated by a dot 003F in the
Bluetooth ®
phone list ( Y page 153).
Main telephone menu
When the connected mobile phone is ready,
the following display appears:
154COMAND telephoneControl systems
221_AKB; 6; 20, en-USd2ugruen,Version: 2.11.8.12009-09-24T13:28:17+02:00 - Seite 154
Page 160 of 548
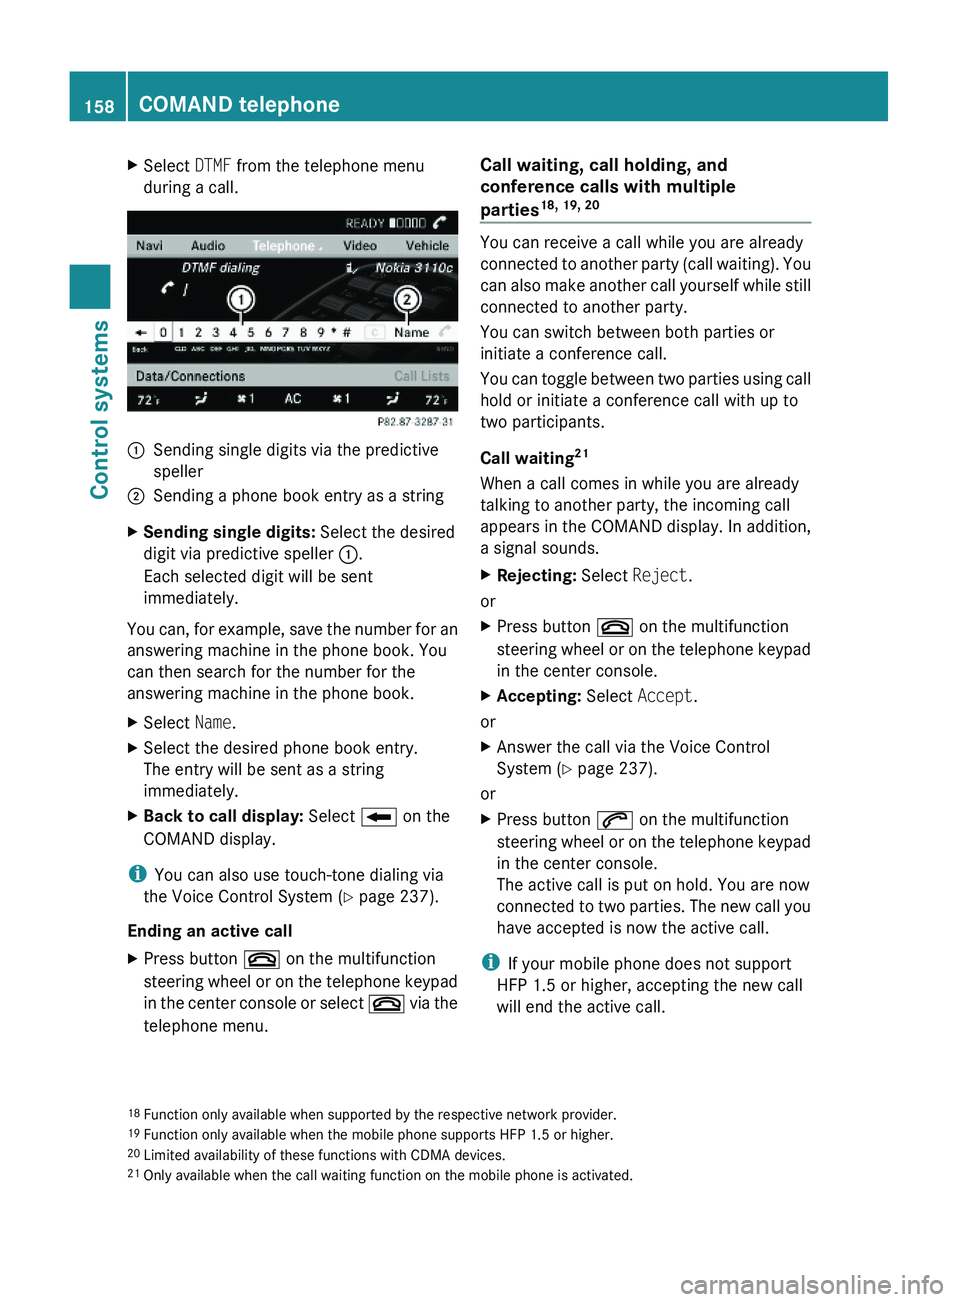
XSelect DTMF from the telephone menu
during a call.\000FSending single digits via the predictive
speller
\000GSending a phone book entry as a stringXSending single digits: Select the desired
digit via predictive speller \000F.
Each selected digit will be sent
immediately.
You can, for example, save the number for an
answering machine in the phone book. You
can then search for the number for the
answering machine in the phone book.
XSelect Name.XSelect the desired phone book entry.
The entry will be sent as a string
immediately.
XBack to call display: Select \000E on the
COMAND display.
iYou can also use touch-tone dialing via
the Voice Control System (Y page 237).
Ending an active call
XPress button \000 on the multifunction
steering wheel or on the telephone keypad
in the center console or select \000 via the
telephone menu.
Call waiting, call holding, and
conference calls with multiple
parties18, 19, 20
You can receive a call while you are already
connected to another party (call waiting). You
can also make another call yourself while still
connected to another party.
You can switch between both parties or
initiate a conference call.
You can toggle between two parties using call
hold or initiate a conference call with up to
two participants.
Call waiting21
When a call comes in while you are already
talking to another party, the incoming call
appears in the COMAND display. In addition,
a signal sounds.
XRejecting: Select Reject.
or
XPress button \000 on the multifunction
steering wheel or on the telephone keypad
in the center console.
XAccepting: Select Accept.
or
XAnswer the call via the Voice Control
System (Y page 237).
or
XPress button \000j on the multifunction
steering wheel or on the telephone keypad
in the center console.
The active call is put on hold. You are now
connected to two parties. The new call you
have accepted is now the active call.
iIf your mobile phone does not support
HFP 1.5 or higher, accepting the new call
will end the active call.
18Function only available when supported by the respective network provider.19Function only available when the mobile phone supports HFP 1.5 or higher.20Limited availability of these functions with CDMA devices.21Only available when the call waiting function on the mobile phone is activated.
158COMAND telephoneControl systems
221_AKB; 6; 20, en-USd2ugruen,Version: 2.11.8.12009-09-24T13:28:17+02:00 - Seite 158