2010 MERCEDES-BENZ S CLASS roof
[x] Cancel search: roofPage 101 of 548

compatible. If this is the case, the navigation
system will not be operational.
You will know if this is the case, when the
following message will appear when you
switch to navigation mode: The system
software has been updated. The map
software must be updated now. Please
insert the DVD with the map software.XUpdating map software: Proceed as
described in the “Updating the map
software” section ( Y page 96). Use map
software which is compatible with the
system software.
i Please note that the update must be
allowed to run to the end in this case. If you
interrupt it, the navigation system will
continue to be non-operational.
Initial use or use following a system
software update
In both these cases, the navigation system
must determine the position of the vehicle.
You may have to drive for a while before
precise route guidance is possible.
GPS reception
The Navigation system relies on a number of
factors to function correctly. GPS reception
is very important.
In certain situations GPS may be impaired, for
example:
R in tunnels
R in parking garages
R due to snow on the GPS antenna
If there is snow on the GPS antenna, you
should remove it. The GPS antenna is at the
back of the vehicle roof.
A roof cargo container may also impair GPS
coverage.
Route guidance after transporting the
vehicle or exiting a parking garage
COMAND has to redetermine the position of
the vehicle if the vehicle has been transported
(e.g. by ferry, by train or after towing).
COMAND may also have to redetermine the
vehicle position when leaving a parking
garage.
The proper position of the vehicle will even be
found if you are driving with COMAND
switched off. The duration of the positioning
recalculation will vary case by case.
During positioning, route guidance may be
inaccurate and may show the following:
R Navigation announcements, route
guidance displays and displayed street
names are not consistent with the actual
location of the vehicle.
R COMAND does not generate navigation
announcements.
R Instead of the route guidance displays, you
see the Off Road display and a direction
arrow. The direction arrow shows the
compass heading to the destination.
After the vehicle position has been
redetermined, route guidance with navigation
announcements and route guidance display
is available again.
Interrupting the journey during route
guidance
The following applies if you interrupt the
journey during route guidance and continue
the journey later:
R COMAND resumes route guidance
automatically if you continue the journey
within 2 hours.
R Route guidance is canceled if you continue
the journey after more than 2 hours. It will
be necessary to resume the canceled route
guidance manually ( Y page 135).
i The journey is interrupted if you park the
vehicle and switch off COMAND. The
COMAND navigation (introduction)99Control systems221_AKB; 6; 20, en-USd2ugruen,Version: 2.11.8.12009-09-24T13:28:17+02:00 - Seite 99Z
Page 179 of 548
File structure on a disc
When you create an audio disc, the tracks can
be organized in folders. A disc may contain a
maximum of 4000 tracks.
The directory depth may not exceed a
maximum of 8 levels. The system will ignore
files in lower levels.
Notes on USB storage media
Do not store data other than audio data on a
USB storage medium. Doing so will increase
the time required to initialize the USB storage
medium.
A maximum of 8 directory levels with up to
4000 tracks each are supported.
For information on connecting USB storage
media to the built-in USB socket in the glove
box see ( Y page 80).
Track and folder names
When you create an audio medium, you can
assign names to the tracks and folders.
COMAND uses these names for the
corresponding display. Empty folders or
folders which contain data other than MP3/
WMA tracks are not displayed by COMAND.
If MP3/WMA files are saved in the root
directory itself (uppermost directory on
storage medium), the root directory will also
be treated as a folder. COMAND will then
show the name of the root directory as the
folder name.
You must observe the following when
assigning track names:
R Track names must have at least one
character.
R Track names must have the extension
“mp3” or “wma”.
R There must be a period between the track
name and the extension.
Example of a correct track name:
Track1.mp3
Compatible file systems and
compression methods
COMAND supports the following formats:
R MPEG1 Audio Layer 3 (MP3) 25
R Microsoft Windows Media Audio (WMA) V2,
V7, V8 or V9 that are not copy-proof
Bit and sampling rates
MP3
COMAND supports MP3 files of the following
types:
R Fixed and variable bit rates from
32 kbit/s up to 320 kbit/s
R Sampling rates of 24 kHz to 48 kHz
WMA (Windows Media ®
Audio)
Windows Media ®
Audio (WMA) is an audio
data compression technology developed by
Microsoft ®
.
COMAND supports WMA files of the following
types:
R Fixed and variable bit rates from 5 kbit/s
up to 384 kbit/s
R Sampling rates of 8 kHz to 48 kHz
COMAND does not support WMA files of the
following types:
R DRM (Digital Rights Management) coded
files
R variable bit rates
R Losless Settings
R WMA Pro
R 5.1-Surround
i Only use tracks with a bit rate of above
128 kbit/s and a sampling rate of above
44.1 kHz. Lower rates will cause an audible
25 MPEG Layer 3 audio-coding technology under license of Fraunhofer-Institut for Integrated Circuits (IIS) and
ThomsonCOMAND audio CD/audio DVD/MP3177Control systems221_AKB; 6; 20, en-USd2ugruen,Version: 2.11.8.12009-09-24T13:28:17+02:00 - Seite 177Z
Page 213 of 548
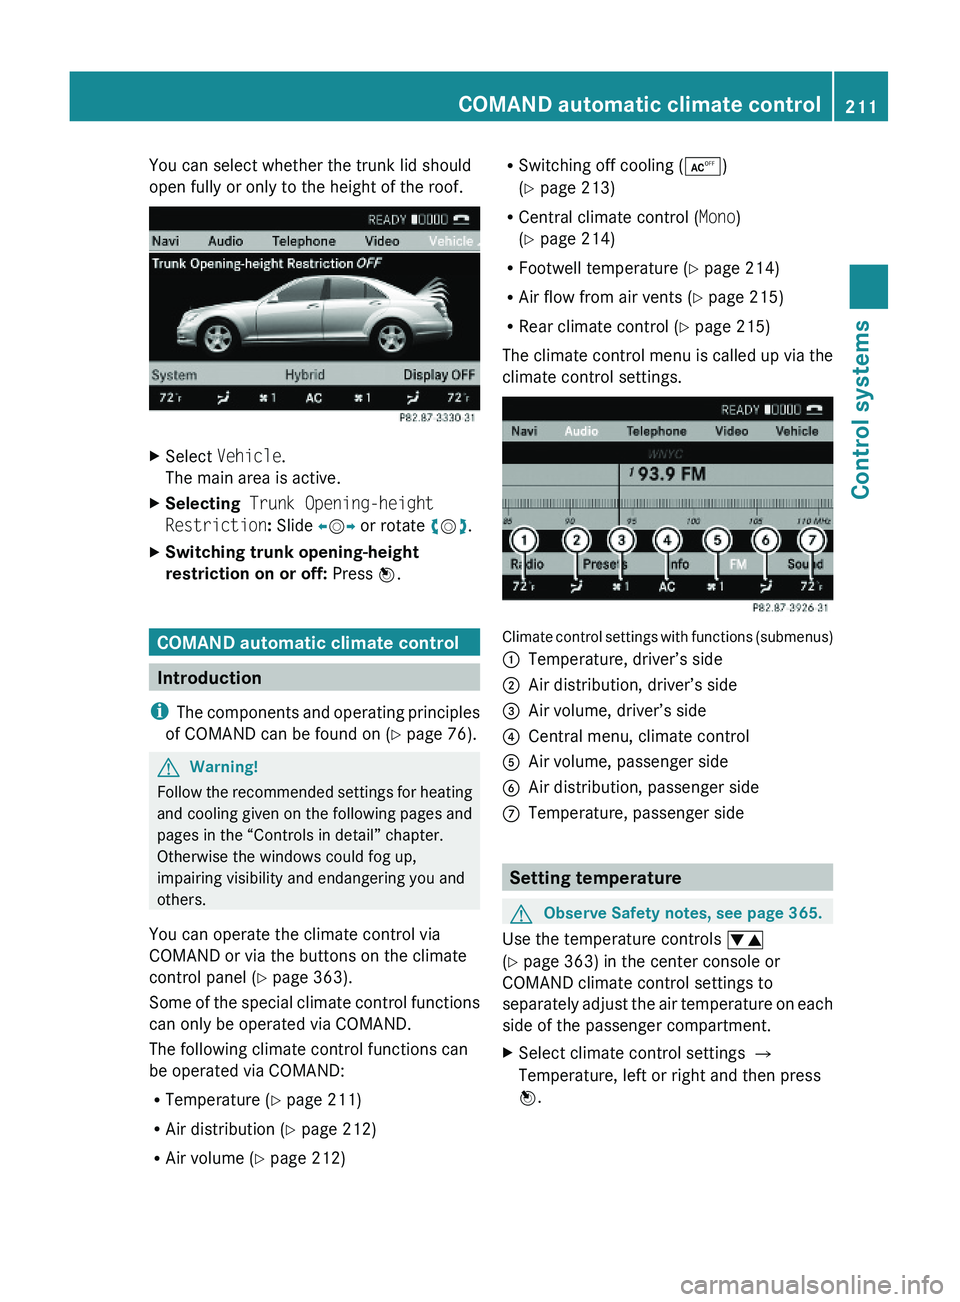
You can select whether the trunk lid should
open fully or only to the height of the roof.
XSelect Vehicle.
The main area is active.
XSelecting Trunk Opening-height
Restriction: Slide \000
Page 275 of 548
Vehicle equipment ............................274
Locking and unlocking .....................274
Starter switch positions ...................284
Seats ..................................................286
Multifunction steering wheel ..........293
Mirrors ...............................................294
Memory function ..............................297
Lighting ..............................................298
Wipers ................................................305
Power windows .................................307
Driving and parking ..........................311
Automatic transmission ...................317
Transfer case ....................................325
Instrument cluster ............................326
Driving systems ................................327
Climate control system ....................363
Rear window defroster .....................372
Power tilt/sliding sunroof ...............373
Panorama roof with power tilt/
sliding panel ......................................375
Loading and storing ..........................379
Useful features .................................384
273Controls in detail221_AKB; 6; 20, en-USd2ugruen,Version: 2.11.8.12009-09-24T13:28:17+02:00 - Seite 273
Page 280 of 548
XHave the SmartKey deactivated by an
authorized Mercedes-Benz Center.
XReport the loss of the SmartKey or the
mechanical key to your car insurance
company immediately.
XHave the mechanical lock replaced if
necessary.
Any authorized Mercedes-Benz Center will be
glad to supply you with a replacement. For
information on replacing the SmartKey, see
“Replacing the SmartKey” (Y page 278).
Replacing the SmartKey
Only you, or someone authorized by you can
order a replacement key from any Mercedes-
Benz Center. In order to do so, the Mercedes-
Benz Center will require proof of identity and
vehicle ownership with original documents,
including the following:
If you are the current owner of the vehicle:
Rthe vehicle’s current state registration
Ra current identity card, passport, or drivers
license
If you are an authorized person:
Rthe vehicle’s current state registration
Ra current identity card, passport, or drivers
license for the authorized individual
Rsigned and dated authorization from the
owner of the vehicle for which the key is
being requested
iDuplicated or photocopied
documentation will not be accepted.
Activating the key
Once you, or an authorized person, has
provided the appropriate documents, the
Mercedes-Benz Center will need to
synchronize the key to your vehicle before it
can be used. In order to do so, the Mercedes-
Benz Center need access to your vehicle.
Opening the doors from the inside
You can open a door from the inside even
when it is locked unless it is secured with the
child safety lock (Y page 61).
Open door only when conditions are safe to
do so.
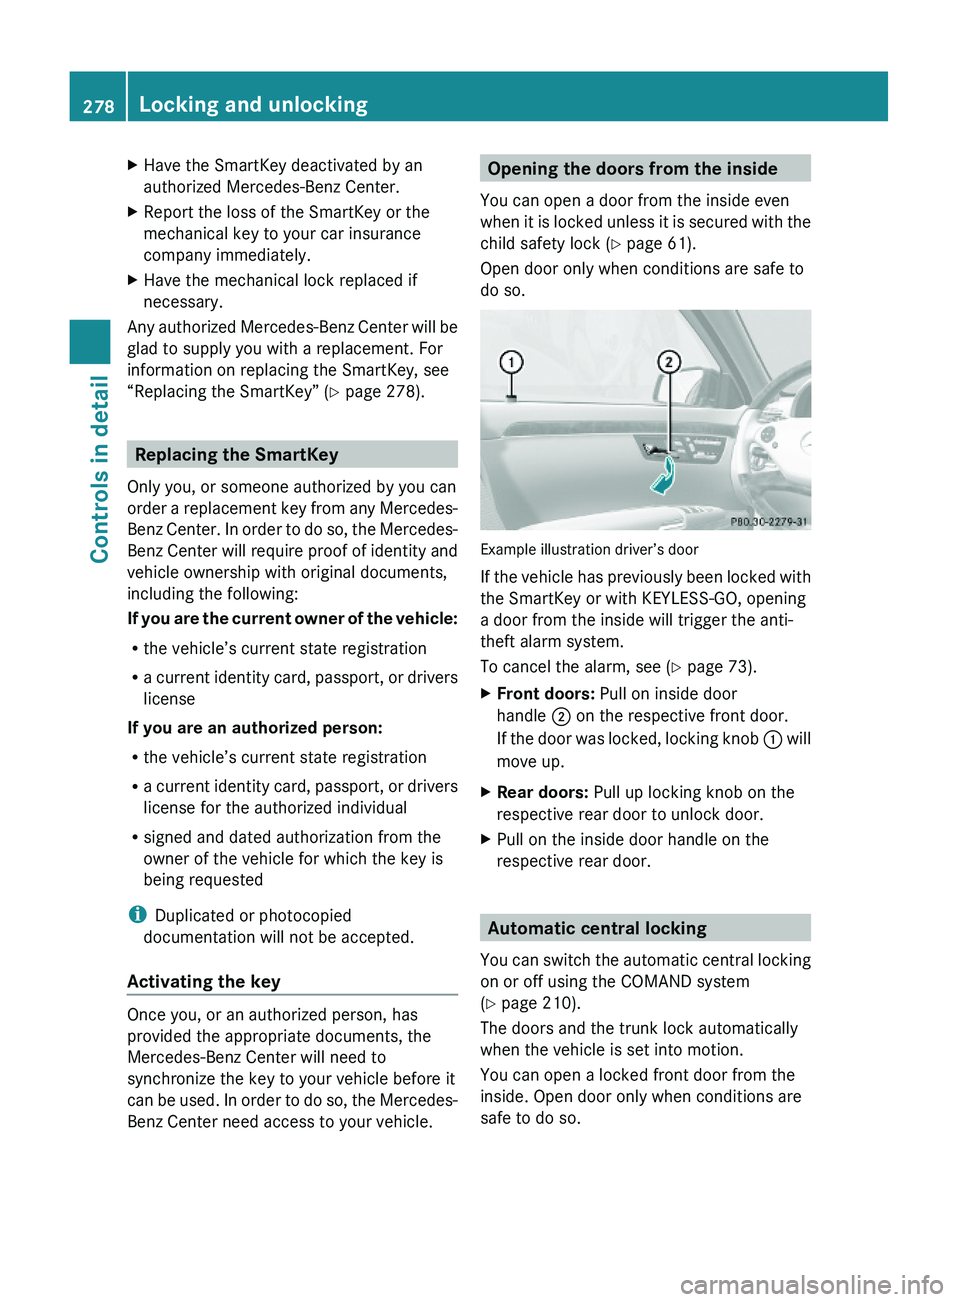
Example illustration driver’s door
If the vehicle has previously been locked with
the SmartKey or with KEYLESS-GO, opening
a door from the inside will trigger the anti-
theft alarm system.
To cancel the alarm, see (Y page 73).
XFront doors: Pull on inside door
handle \000G on the respective front door.
If the door was locked, locking knob \000F will
move up.
XRear doors: Pull up locking knob on the
respective rear door to unlock door.
XPull on the inside door handle on the
respective rear door.
Automatic central locking
You can switch the automatic central locking
on or off using the COMAND system
(Y page 210).
The doors and the trunk lock automatically
when the vehicle is set into motion.
You can open a locked front door from the
inside. Open door only when conditions are
safe to do so.
278Locking and unlockingControls in detail
221_AKB; 6; 20, en-USd2ugruen,Version: 2.11.8.12009-09-24T13:28:17+02:00 - Seite 278
Page 282 of 548
XPress and hold button \000T (Y page 274)
on the SmartKey until the trunk unlocks
and begins to open.
or
XPull on handle \000F.
In vehicles without KEYLESS-GO: The
vehicle must be unlocked.
If the trunk does not open, it is still locked
separately (Y page 283).
Vehicles with trunk opening/closing system:
XStopping the opening procedure: Press
button \000T on the SmartKey.
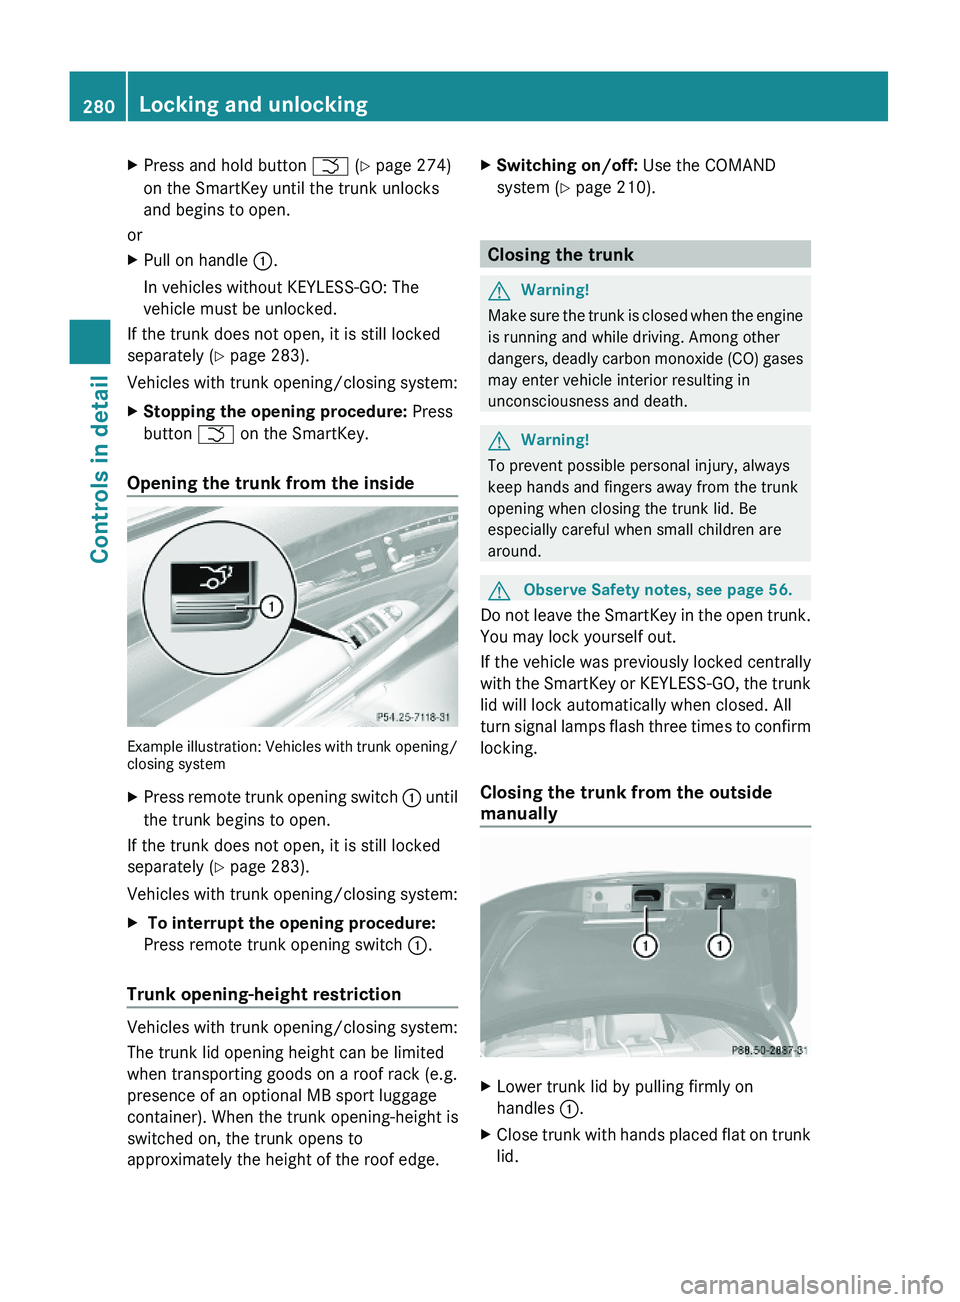
Opening the trunk from the inside
Example illustration: Vehicles with trunk opening/closing system
XPress remote trunk opening switch \000F until
the trunk begins to open.
If the trunk does not open, it is still locked
separately (Y page 283).
Vehicles with trunk opening/closing system:
X To interrupt the opening procedure:
Press remote trunk opening switch \000F.
Trunk opening-height restriction
Vehicles with trunk opening/closing system:
The trunk lid opening height can be limited
when transporting goods on a roof rack (e.g.
presence of an optional MB sport luggage
container). When the trunk opening-height is
switched on, the trunk opens to
approximately the height of the roof edge.
XSwitching on/off: Use the COMAND
system (Y page 210).
Closing the trunk
GWarning!
Make sure the trunk is closed when the engine
is running and while driving. Among other
dangers, deadly carbon monoxide (CO) gases
may enter vehicle interior resulting in
unconsciousness and death.
GWarning!
To prevent possible personal injury, always
keep hands and fingers away from the trunk
opening when closing the trunk lid. Be
especially careful when small children are
around.
GObserve Safety notes, see page 56.
Do not leave the SmartKey in the open trunk.
You may lock yourself out.
If the vehicle was previously locked centrally
with the SmartKey or KEYLESS-GO, the trunk
lid will lock automatically when closed. All
turn signal lamps flash three times to confirm
locking.
Closing the trunk from the outside
manually
XLower trunk lid by pulling firmly on
handles \000F.
XClose trunk with hands placed flat on trunk
lid.
280Locking and unlockingControls in detail
221_AKB; 6; 20, en-USd2ugruen,Version: 2.11.8.12009-09-24T13:28:17+02:00 - Seite 280
Page 311 of 548
Summer opening feature
When the weather is warm, you can ventilate
the vehicle before driving off by
simultaneously
R opening the door windows
R retracting the rear door window sunshades
R opening the tilt/sliding sunroof
R opening the panorama roof with power tilt/
sliding panel and roller sunblinds
R switching on the seat ventilation for the
driver’s seat
The summer opening feature can only be
activated via the remote control of the
SmartKey. The SmartKey must be in close
proximity to the driver’s outside door handle.XAim the transmitter eye of the SmartKey at
the driver’s outside door handle.
When roller sunblinds and/or rear door
window sunshades are extended:
XPress and hold button 0036 on the
SmartKey.
The vehicle unlocks.
The roller sunblinds and/or rear door
window sunshades begin to retract after
approximately 1 second.
i When the vehicle is equipped with rear
door window sunshades, the rear window
sunshade opens simultaneously.
XWith the roller sunblinds and/or rear door
window sunshades fully retracted, press
and hold button 0036 on the SmartKey
again.
The door windows and the tilt/sliding
sunroof or the panorama roof with power
tilt/sliding panel open.XRelease button 0036 on the SmartKey to
interrupt the opening procedure.When roller sunblinds and/or rear door
window sunshades are retracted
or
when the vehicle is equipped with tilt/
sliding sunroof only:XPress and hold button 0036 on the
SmartKey.
The vehicle unlocks.
The door windows and the tilt/sliding
sunroof or the panorama roof with power
tilt/sliding panel open after approximately
1 second.XRelease button 0036 on the SmartKey to
interrupt the opening procedure.
Convenience closing feature
When locking the vehicle, you can
simultaneously close
R the door windows
R the tilt/sliding sunroof
R the panorama roof with power tilt/sliding
panel
Afterward, you can extend the roller
sunblinds of the panorama roof with power
tilt/sliding panel and the rear door window
sunshades.
GWarning!
When closing the door windows and the tilt/
sliding sunroof or panorama roof with power
tilt/sliding panel, make sure there is no
danger of anyone being harmed by the closing
procedure.
If potential danger exists, proceed as follows:
R Release button 0037 to stop the closing
procedure. To open, press and hold button
0036 . To continue the closing procedure
after making sure that there is no danger of
Power windows309Controls in detail221_AKB; 6; 20, en-USd2ugruen,Version: 2.11.8.12009-09-24T13:28:17+02:00 - Seite 309Z
Page 312 of 548

anyone being harmed by the closing
procedure, press and hold button \0007.
Vehicles with KEYLESS-GO:
RRelease the sensor surface on the outside
door handle to stop the closing procedure.
RImmediately pull on the same outside door
handle and hold firmly. The door windows
and the tilt/sliding sunroof or panorama
roof with power tilt/sliding panel will open
for as long as the door handle is held but
the door not opened.
With SmartKey
The SmartKey must be in close proximity to
the driver’s outside door handle.
XAim transmitter eye of the SmartKey at the
driver’s outside door handle.
XPress and hold button \0007 on the
SmartKey until the door windows and the
tilt/sliding sunroof or panorama roof with
power tilt/sliding panel are closed
completely.
XRelease button \0007 on the SmartKey to
interrupt the closing procedure.
XVehicles with panorama roof with
power tilt/sliding panel and/or rear
door window sunshades: Press button
\0007 on the SmartKey once more.
The roller sunblinds and/or the rear door
window sunshades extend.
XPress button \0006 on the SmartKey to
interrupt the extending procedure.
iVehicles with rear door window
sunshades: The rear window sunshade
extends simultaneously.
With KEYLESS-GO
The SmartKey with KEYLESS-GO must be
located outside the vehicle within
approximately 3 ft (1 m) of a door.
XClose all doors.XTouch and hold sensor surface \000F on an
outside door handle until the door windows
and the tilt/sliding sunroof or panorama
roof with power tilt/sliding panel are
closed completely.
iMake sure you are only touching sensor
surface \000F.
XRelease sensor surface \000F to interrupt the
closing procedure.
XVehicles with panorama roof with
power tilt/sliding panel and/or rear
door window sunshades: Touch and hold
sensor surface \000F once more.
The roller sunblinds and/or the rear door
window sunshades extend.
XPull on the outside door handle and hold
firmly to interrupt the extending procedure.
iVehicles with rear door window
sunshades: The rear window sunshade
extends simultaneously.
310Power windowsControls in detail
221_AKB; 6; 20, en-USd2ugruen,Version: 2.11.8.12009-09-24T13:28:17+02:00 - Seite 310