2010 MERCEDES-BENZ R320 change wheel
[x] Cancel search: change wheelPage 125 of 364
Adjusting the instrument cluster
illumination
X To brighten illumination: Press and hold
button = until the desired level of
illumination is reached.
X To dim illumination: Press and hold
button : until the desired level of
illumination is reached.
i The instrument cluster illumination is
dimmed
or brightened automatically to suit
ambient light conditions.
The instrument cluster illumination will also
be adjusted automatically when you switch
on the vehicle’s exterior lamps.
i With the exterior lighting switched on, the
brightness of the switches in the center
console will also be adjusted when using
button : or =. Resetting trip odometer
X Make sure you are viewing the standard
display
(Y page 126) in the multifunction
display.
X Press and hold the reset button in the
instrument cluster
(Y page 122) until the
trip odometer is reset. Tachometer
The red marking on the tachometer
(Y
page 29) denotes excessive engine speed.
! Avoid driving at excessive engine speeds,
as it may result in serious engine damage
that is not covered by the Mercedes-Benz
Limited Warranty.
To help protect the engine, the fuel supply is
interrupted if the engine is operated within
the red marking. Control system
Introduction
The
control system is activated as soon as the
starter switch is in position 1 (Y page 79).
The control system enables you to call up
information about your vehicle and to change
vehicle settings.
For example, you can use the control system
to find out when your vehicle is next due for
maintenance service, to set the language for
messages in the instrument cluster display,
and much more. G
Warning!
A driver’s attention to the road and traffic
conditions must always be his/her primary
focus when driving.
For your safety and the safety of others,
selecting features through the multifunction
steering wheel should only be done by the
driver
when traffic and road conditions permit
it to be done safely.
Bear in mind that at a speed of just 30 mph
(approximately 50 km/h), your vehicle is
covering a distance of 44 feet (approximately
14 m) every second.
The control system relays information to the
multifunction display. Multifunction steering wheel
The displays in the multifunction display and
the settings in the control system are
controlled by using the buttons on the
multifunction steering wheel. Control system
123Controls in detail
251_AKB; 4; 52, en-US
d2ureepe, Version: 2.11.8.1 2009-03-23T09:22:52+01:00 - Seite 123 Z
Page 144 of 364
Redialing
The control system stores the most recently
dialed phone numbers. This eliminates the
need to search through your entire phone
book.
X
Press button U or V repeatedly until
the message TEL appears in the
multifunction display.
X Press button 6.
The first number in the redial memory
appears in the multifunction display.
X Press button &
or * repeatedly until
the desired number or name appears in the
multifunction display.
X Press button 6.
The control system dials the selected
phone number. Driving systems
Introduction
This section describes the following driving
systems of your vehicle:
R Cruise control
R Distronic
R Distance warning function (only available
with Distronic)
R Hill-start assist system
R Rear-axle level control
R AIRMATIC
R All-wheel drive (4MATIC)
R Parktronic system
R Rear view camera
The
driving safety systems ABS, BAS, EBP and
ESP ®
are described in the “Safety and
security” section (Y page 63). Cruise control
The cruise control maintains the speed you
set for your vehicle automatically.
The
use of the cruise control is recommended
for driving at a constant speed for extended
periods of time.
The currently set speed or last set speed
(“Resume” function) appears in the status
indicator of the multifunction display:
R USA only: e.g. Cruise 55 Miles
R Canada only: e.g. ¯ 90 Km/h G
Warning!
The cruise control is a convenience system
designed to assist the driver during vehicle
operation. The driver is and must always
remain responsible for the vehicle’s speed
and for safe brake operation.
Only
use the cruise control if the road, traffic,
and weather conditions make it advisable to
travel at a constant speed.
R The use of the cruise control can be
dangerous on winding roads or in heavy
traffic because conditions do not allow safe
driving at a constant speed.
R The use of the cruise control can be
dangerous on slippery roads. Rapid
changes in tire traction can result in wheel
spin and loss of control.
R Deactivate the cruise control when driving
in fog.
The “Resume” function should only be
operated if the driver is fully aware of the
previously set speed and wishes to resume
this particular preset speed. 142
Driving systems
Controls in detail
251_AKB; 4; 52, en-US
d2ureepe,
Version: 2.11.8.1 2009-03-23T09:22:52+01:00 - Seite 142
Page 148 of 364
G
Warning!
Use of the Distronic can be dangerous on
slippery roads. Rapid changes in tire traction
can result in wheel spin and loss of control.
The Distronic does not function in adverse
sight and distance conditions. Do not use the
Distronic during conditions of fog, heavy rain,
snow or sleet. G
Warning!
The Distronic cannot take weather conditions
into account. Switch off the Distronic or do
not switch it on if:
R roads are slippery or covered with snow or
ice. The wheels could lose traction while
braking or accelerating, and the vehicle
could skid.
R the Distronic system sensor cover is dirty
or visibility is diminished due to snow, rain
or fog, for example. The distance control
system functionality could be impaired.
Always pay attention to surrounding traffic
conditions even while the Distronic is
switched on. Otherwise, you may not be able
to recognize dangerous situations until it is
too late. This could cause an accident in which
you and/or others could be injured. G
Warning!
The “Resume” function should only be
operated if the driver is fully aware of the
previously set speed and wishes to resume
this particular preset speed. G
Warning!
Close attention to road and traffic conditions
is imperative at all times, regardless of
whether or not the Distronic is activated.
Use of the Distronic can be dangerous on
winding roads or in heavy traffic because
conditions do not allow safe driving at a
constant speed.
The Distronic will not react to stationary
objects in the roadway (e.g. a stopped vehicle
in a traffic jam or a disabled vehicle). The Distronic will also not respond to oncoming
vehicles.
Switch off the Distronic:
R
when changing from the left to the right
lane if vehicles are moving more slowly in
the left lane
R when entering a turn lane or highway off
ramp
R in complex driving situations, such as in
highway construction zones
In these situations, the Distronic will continue
to maintain the set speed unless deactivated.
The Distronic is designed and intended only
to maintain a set speed and keep a set
distance from moving objects in front of it.
i This device has been approved by the FCC
as a “Vehicular Radar System”. The radar
sensor is intended for use in an automotive
radar system only. Removal, tampering, or
altering of the device will void any
warranties, and is not permitted by the
FCC. Do not tamper with, alter, or use in
any non-approved way.
Any unauthorized modification to this
device could void the user’s authority to
operate the equipment.
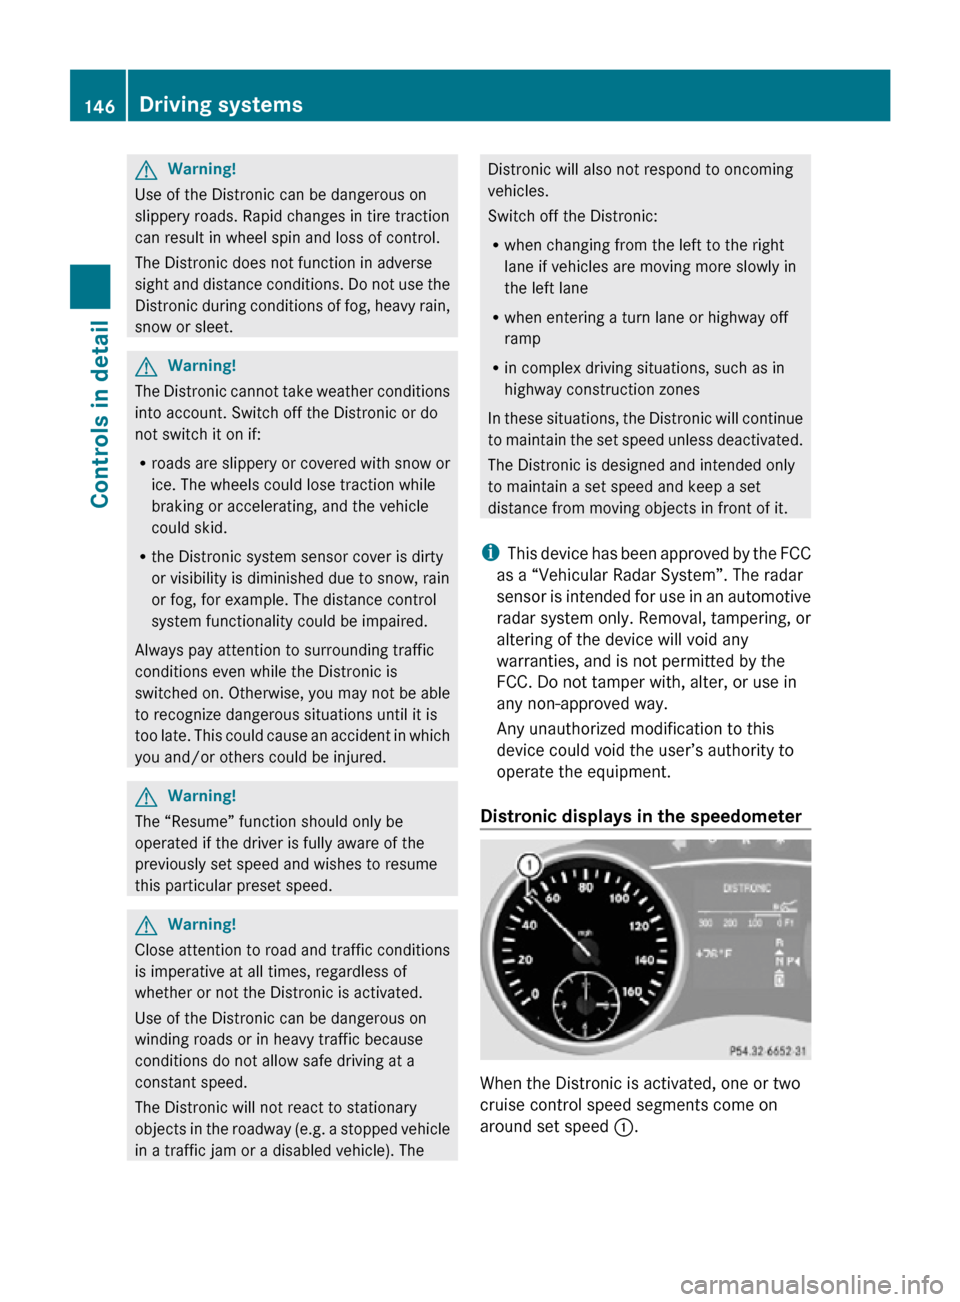
Distronic displays in the speedometer When the Distronic is activated, one or two
cruise control speed segments come on
around set speed
:.146
Driving systemsControls in detail
251_AKB; 4; 52, en-US
d2ureepe,
Version: 2.11.8.1 2009-03-23T09:22:52+01:00 - Seite 146
Page 156 of 364

Indicator lamps ; and = are off.
R SPORT (for sporty driving)
Indicator lamp ; comes on.
R COMF (for comfort driving)
Indicator lamp = comes on.
X Start the engine.
X Press ADS switch : repeatedly until the
desired suspension tuning is reached.
The setting remains stored when you turn off
the engine. Vehicle level control
Your vehicle automatically adjusts its ride
height.
The all-around vehicle level control provides
best possible suspension and constant
ground clearance. The vehicle lowers at high
speed automatically in order to increase
driving safety and to reduce fuel
consumption.
Changes to the vehicle level should be made
while the vehicle is moving. The vehicle will
then reach the set level as fast as possible.
When you park the vehicle and the ambient
temperature changes, the vehicle level may
change visibly. When the temperature drops,
the vehicle lowers. When the temperature
rises, the vehicle raises.
The vehicle begins adjusting to the set vehicle
level as soon as the doors or tailgate are
unlocked or opened or closed with the vehicle
unlocked.
For major changes in vehicle level, the engine
must be running. G
Warning!
Make sure no one is near the wheel housing
or under the vehicle when you lower the
vehicle while it is standing still. Limbs could
become wedged into or under the vehicle.
For safety reasons, the vehicle can only be
lowered with all doors and the tailgate closed.
Lowering is interrupted if a door or the tailgate is opened and will continue after the door is
closed again.
! Keep in mind that on rough or uneven
roads, adjusting the vehicle to a lower level
may cause the vehicle underbody to come
in contact with the road and result in
damage to the vehicle underbody. Always
make sure the vehicle has sufficient ground
clearance before adjusting it to a lower
level.
! Before jacking up the vehicle with
equipment that lifts one or more of the
wheels completely off of the ground,
remove the SmartKey from the starter
switch.
i The activation threshold is defined by the
ADS setting (Y page 153). Basic settings
The following vehicle chassis ride heights can
be selected using vehicle level control
switch : in the center console:
Level Driving situation
Raised level For driving on rough roads.
Indicator lamp ; is on.
Highway
level For driving on paved roads
in fair or better condition.
Indicator lamp ; is off.154
Driving systemsControls in detail
251_AKB; 4; 52, en-US
d2ureepe,
Version: 2.11.8.1 2009-03-23T09:22:52+01:00 - Seite 154
Page 157 of 364
i
The third available level is the highspeed
level that is set automatically.
The following is the approximate change in
ride height for each of the level settings: Level Ride height
Raised level +1.97 in (50 mm)
Highway
level +/-0 in (0 mm)
Highspeed
level -0.78 in (-20 mm)
i
The vehicle is lowered to the highspeed
level automatically if the vehicle speed is
above 70 mph (112 km/h) or if the vehicle
speed stays between 60 mph (96 km/h)
and 70 mph (112 km/h) for
approximately 20 seconds.
i The highspeed level is not available when
towing a trailer. For more information on
towing a trailer, see “Trailer towing”
(Y page 256).
i Obey local speed limits. Use prudent
driving speeds appropriate to prevailing
conditions.
Raised level Only select the raised level if appropriate for
the driving situation encountered. Otherwise
the fuel consumption may increase and/or
the handling characteristics of the vehicle
may be unfavorable.
i
You can select the raised level at speeds
up to 25 mph (40 km/h). At higher speeds,
the message Á Level Selection
Not Permitted appears in the
multifunction display.
X Start the engine. When indicator lamp
; is off:
X Press switch :.
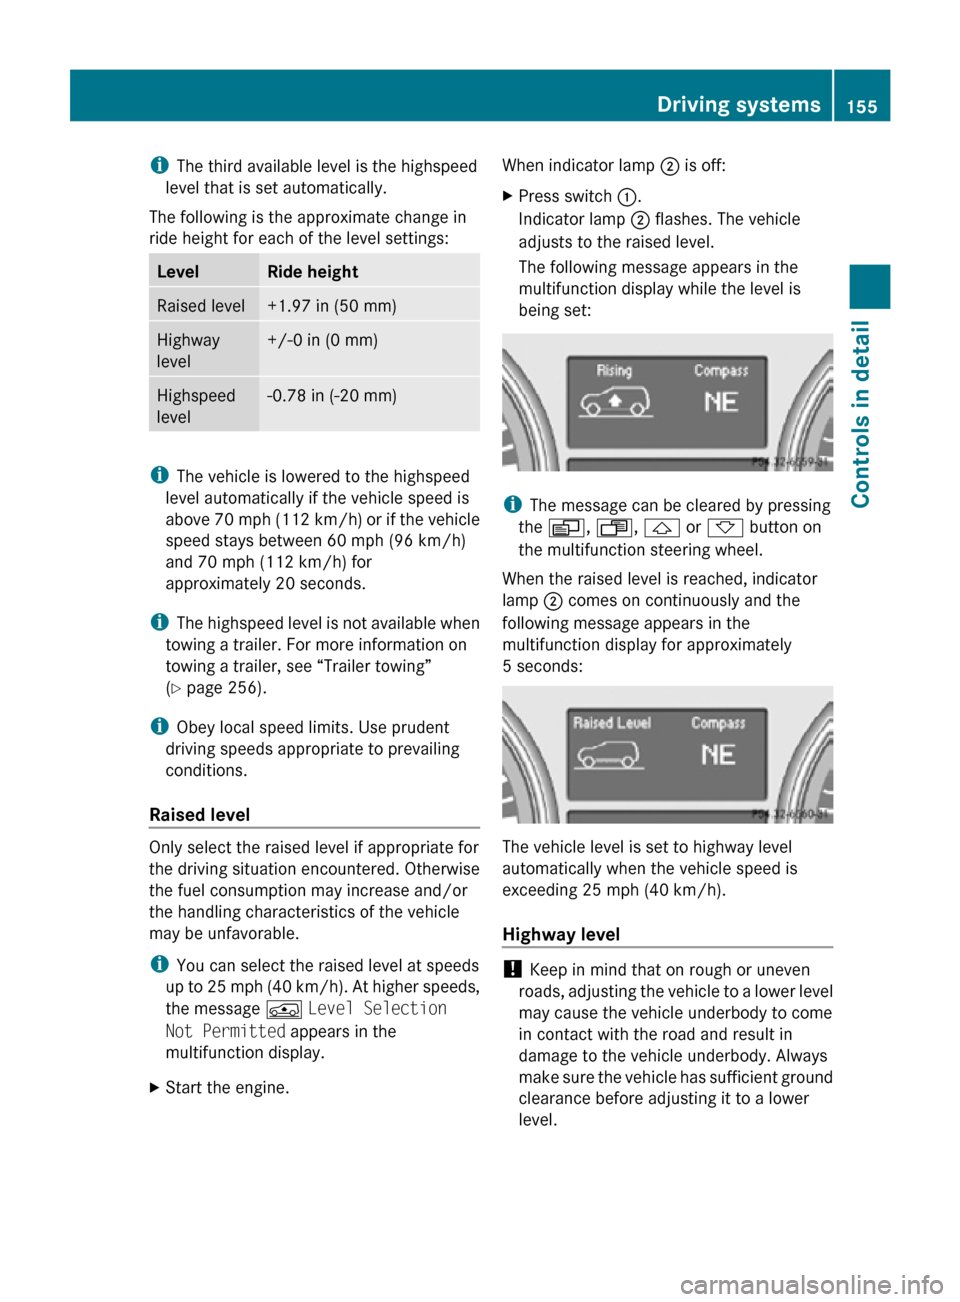
Indicator lamp ; flashes. The vehicle
adjusts to the raised level.
The following message appears in the
multifunction display while the level is
being set: i
The message can be cleared by pressing
the V, U, & or * button on
the multifunction steering wheel.
When the raised level is reached, indicator
lamp ; comes on continuously and the
following message appears in the
multifunction display for approximately
5 seconds: The vehicle level is set to highway level
automatically when the vehicle speed is
exceeding 25 mph (40 km/h).
Highway level
!
Keep in mind that on rough or uneven
roads, adjusting the vehicle to a lower level
may cause the vehicle underbody to come
in contact with the road and result in
damage to the vehicle underbody. Always
make sure the vehicle has sufficient ground
clearance before adjusting it to a lower
level. Driving systems
155Controls in detail
251_AKB; 4; 52, en-US
d2ureepe, Version: 2.11.8.1 2009-03-23T09:22:52+01:00 - Seite 155 Z
Page 212 of 364

The Response Center will automatically
contact local emergency officials with the
vehicle’s approximate location if they receive
an automatic SOS signal and cannot make
voice contact with the vehicle occupants.
Roadside Assistance button X
Open the telephone tray ( Y page 198).X
Press and hold Roadside Assistance
button : for longer than 2 seconds.
A call to a Mercedes-Benz Roadside
Assistance dispatcher will be initiated. The
indicator lamp in Roadside Assistance
button : will flash while the call is in
progress. The message Connecting
Call will appear in the multifunction
display and the COMAND system is muted.
When the connection is established, the
message Call Connected appears in the
multifunction display. The Tele Aid system will
transmit data generating the vehicle
identification number, model, color and
location (subject to availability of cellular and
GPS signals).
i The COMAND system display indicates
that a Tele Aid call is in progress. While the
call is connected you can change to the
navigation menu by pressing the NAVI
button on the COMAND system. Spoken
commands are not available.
A voice connection between the Roadside
Assistance dispatcher and the occupants of
the vehicle will be established. X
Describe the nature of the need for
assistance.
The Mercedes-Benz Roadside Assistance
dispatcher will either dispatch a qualified
Mercedes-Benz technician or arrange to tow
your vehicle to the nearest authorized
Mercedes-Benz Center. For services such as
labor and/or towing, charges may apply.
Refer to the Roadside Assistance manual for
more information.
Sign and Drive services (USA only):
Services such as a jump start, a few gallons
of fuel or the replacement of a flat tire with
the vehicle spare tire are obtainable at no
charge.
i If the indicator lamp in Roadside
Assistance button : is flashing
continuously and there was no voice
connection to the Response Center
established, then the Tele Aid system could
not initiate a Roadside Assistance call (e.g.
the relevant cellular phone network is not
available). The message Call Failed
appears in the multifunction display.
X Terminating calls: Press button ~ on
the multifunction steering wheel.
or
X Press the respective button for ending a
telephone call on the COMAND system.
Information button X
Open the telephone tray ( Y page 198).210
Useful featuresControls in detail
251_AKB; 4; 52, en-US
d2ureepe,
Version: 2.11.8.1 2009-03-23T09:22:52+01:00 - Seite 210
Page 213 of 364

X
Press and hold Information button : for
longer than 2 seconds.
A call to the Customer Assistance Center
will be initiated. The indicator lamp in
Information button : will flash while the
call is in progress. The message
Connecting Call will appear in the
multifunction display and the COMAND
system is muted.
When the connection is established, the
message Call Connected appears in the
multifunction
display. The Tele Aid system will
transmit data generating the vehicle
identification number, model, color and
location (subject to availability of cellular and
GPS signals).
i The COMAND system display indicates
that a Tele Aid call is in progress. While the
call is connected you can change to the
navigation menu by pressing the NAVI
button on the COMAND system. Spoken
commands are not available.
A voice connection between the Customer
Assistance Center representative and the
occupants of the vehicle will be established.
Information regarding the operation of your
vehicle, the nearest authorized Mercedes-
Benz Center or Mercedes-Benz USA products
and services is available to you.
For more details concerning the Tele Aid
system, please visit www.mbusa.com (USA
only), log in to “Owner’s Online” and visit the
“My Tele Aid” section to learn more.
i If the indicator lamp in Information
button : is flashing continuously and
there was no voice connection to the
Response Center established, then the Tele
Aid system could not initiate an Information
call (e.g. the relevant cellular phone
network is not available). The message
Call Failed appears in the multifunction
display. X
Terminating calls: Press button ~ on
the multifunction steering wheel.
or
X Press the respective button for ending a
telephone call on the COMAND system.
Call priority If other service calls such as a Roadside
Assistance
call or Information call are active,
an emergency call is still possible. In this
case, the emergency call will take priority and
override all other active calls.
The indicator lamp in the respective button
flashes until the call is concluded. Emergency
calls can only be terminated by a Response
Center or Customer Assistance Center
representative. All other calls can be
terminated by pressing button ~ on the
multifunction steering wheel or the
respective button for ending a telephone call
on the COMAND system.
Destination Download to the COMAND
system i
The
components and operating principles
of the COMAND system can be found in the
separate COMAND system operating
instructions.
Destination Download allows you access to a
database of over 10 million points of interest
(POIs) that can be downloaded to your
vehicle’s navigation system. If you know the
destination, the address can be downloaded,
or can be provided with points of interests
near your location.
The Response Center can transmit
destination data to the COMAND system
during the connection with the Roadside
Assistance or Customer Assistance Center.
The transmitted data can contain address
details for a Mercedes-Benz Center or POIs. Useful features
211
Controls in detail
251_AKB; 4; 52, en-US
d2ureepe, Version: 2.11.8.1 2009-03-23T09:22:52+01:00 - Seite 211 Z
Page 230 of 364
R
Break in new tires for approximately
60 miles (100 km) at moderate speeds.
R Regularly check the tires and rims for
damage.
Dented or bent rims can cause tire
inflation pressure loss and damage to the
tire beads.
R If the vehicle is heavily loaded, check tire
inflation pressure and correct as required.
R Do not allow your tires to wear down too
far. Adhesion properties on wet roads are
sharply reduced at tread depths of less
than 1
/ 8 in (3 mm).
R When replacing individual tires, you should
mount new tires on the front wheels first
(on vehicles with same-sized wheels all
around). Recommended tire inflation pressure
G
Warning!
Follow recommended tire inflation pressures.
Do not underinflate tires. Underinflated tires
wear excessively and/or unevenly, adversely
affect handling and fuel economy, and are
more likely to fail from being overheated.
Do
not overinflate tires. Overinflated tires can
adversely affect handling and ride comfort,
wear unevenly, increase stopping distance,
and result in sudden deflation (blowout)
because they are more likely to become
punctured or damaged by road debris,
potholes etc.
Do not overload the tires by exceeding the
specified load limit as indicated on the Tire
and Loading Information placard on the
driver’s door B-pillar. Overloading the tires
can overheat them, possibly causing a
blowout. Overloading the tires can also result
in handling or steering problems, or brake
failure.
Your vehicle is equipped with the Tire and
Loading Information placard located on the
driver’s door B-pillar ( Y page 236). The tire inflation pressure should be checked
regularly. Only adjust the tire inflation
pressure on cold tires. The tires can be
considered cold if the vehicle has been
parked
for at least 3 hours or driven less than
1 mile (1.6 km). Depending on the ambient
temperature, the driving speed and the tire
load, the tire temperature changes. When the
tire temperature changes by 18‡ (10†), the
tire inflation pressure will change by
approximately 1.5 psi (0.1 bar). Keep this in
mind when checking tire inflation pressure on
warm tires and adjust the tire pressure only
if the tire inflation pressure is too low for the
current operating conditions. If you check the
tire inflation pressure when the tires are
warm, the reading will be higher than the cold
reading. This is normal. Do not let air out to
match the specified cold tire inflation
pressure. Otherwise, the tire will be
underinflated.
Follow recommended cold tire inflation
pressures listed on Tire and Loading
Information placard on the driver’s door
B-pillar.
Keeping the tires properly inflated provides
the best handling, tread life and riding
comfort.
In addition to the Tire and Loading
Information placard on the driver’s door
B-pillar, also consult the tire inflation
pressure label on the inside of the filler flap
for any additional information pertaining to
special driving situations. For more
information, see “Important notes on tire
inflation pressure” ( Y page 229).
i Data shown on Tire and Loading
Information placard example are for
illustration purposes only. Tire data are
specific to each vehicle and may vary from
data shown in the following illustration.
Refer to Tire and Loading Information
placard on vehicle for actual data specific
to your vehicle. 228
Tires and wheels
Operation
251_AKB; 4; 52, en-US
d2ureepe,
Version: 2.11.8.1 2009-03-23T09:22:52+01:00 - Seite 228