Page 335 of 368

For more information on AdBlue®, see
(Y page 361).
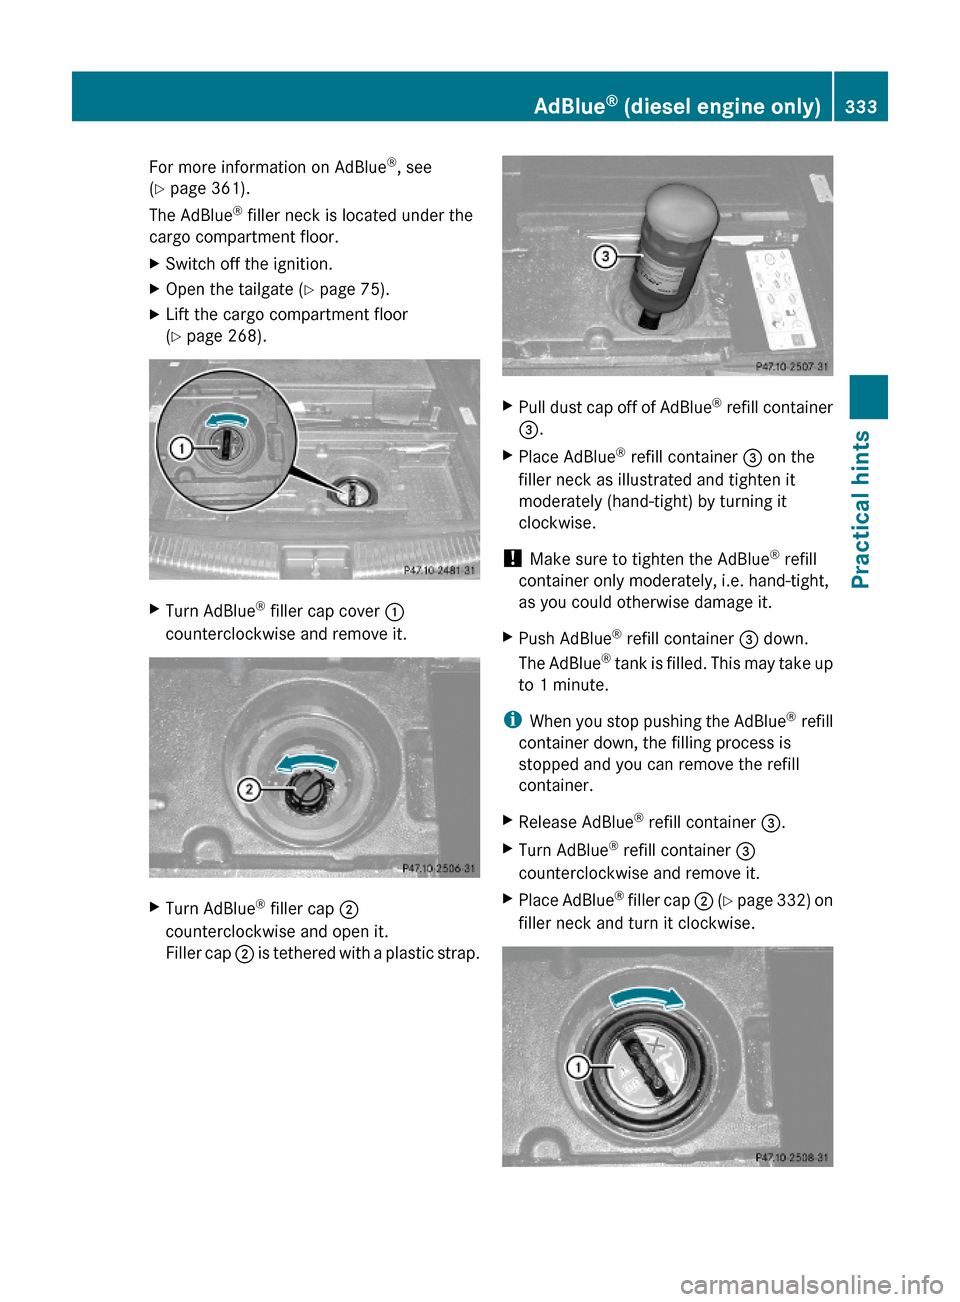
The AdBlue® filler neck is located under the
cargo compartment floor.
XSwitch off the ignition.XOpen the tailgate (Y page 75).XLift the cargo compartment floor
(Y page 268).
XTurn AdBlue® filler cap cover :
counterclockwise and remove it.
XTurn AdBlue® filler cap ;
counterclockwise and open it.
Filler cap ; is tethered with a plastic strap.
XPull dust cap off of AdBlue® refill container
=.
XPlace AdBlue® refill container = on the
filler neck as illustrated and tighten it
moderately (hand-tight) by turning it
clockwise.
! Make sure to tighten the AdBlue® refill
container only moderately, i.e. hand-tight,
as you could otherwise damage it.
XPush AdBlue® refill container = down.
The AdBlue® tank is filled. This may take up
to 1 minute.
iWhen you stop pushing the AdBlue® refill
container down, the filling process is
stopped and you can remove the refill
container.
XRelease AdBlue® refill container =.XTurn AdBlue® refill container =
counterclockwise and remove it.
XPlace AdBlue® filler cap ; (Y page 332) on
filler neck and turn it clockwise.
AdBlue® (diesel engine only)333Practical hints164_AKB; 7; 31, en-USd2ureepe,Version: 2.11.8.12009-09-11T12:07:36+02:00 - Seite 333Z
Page 343 of 368

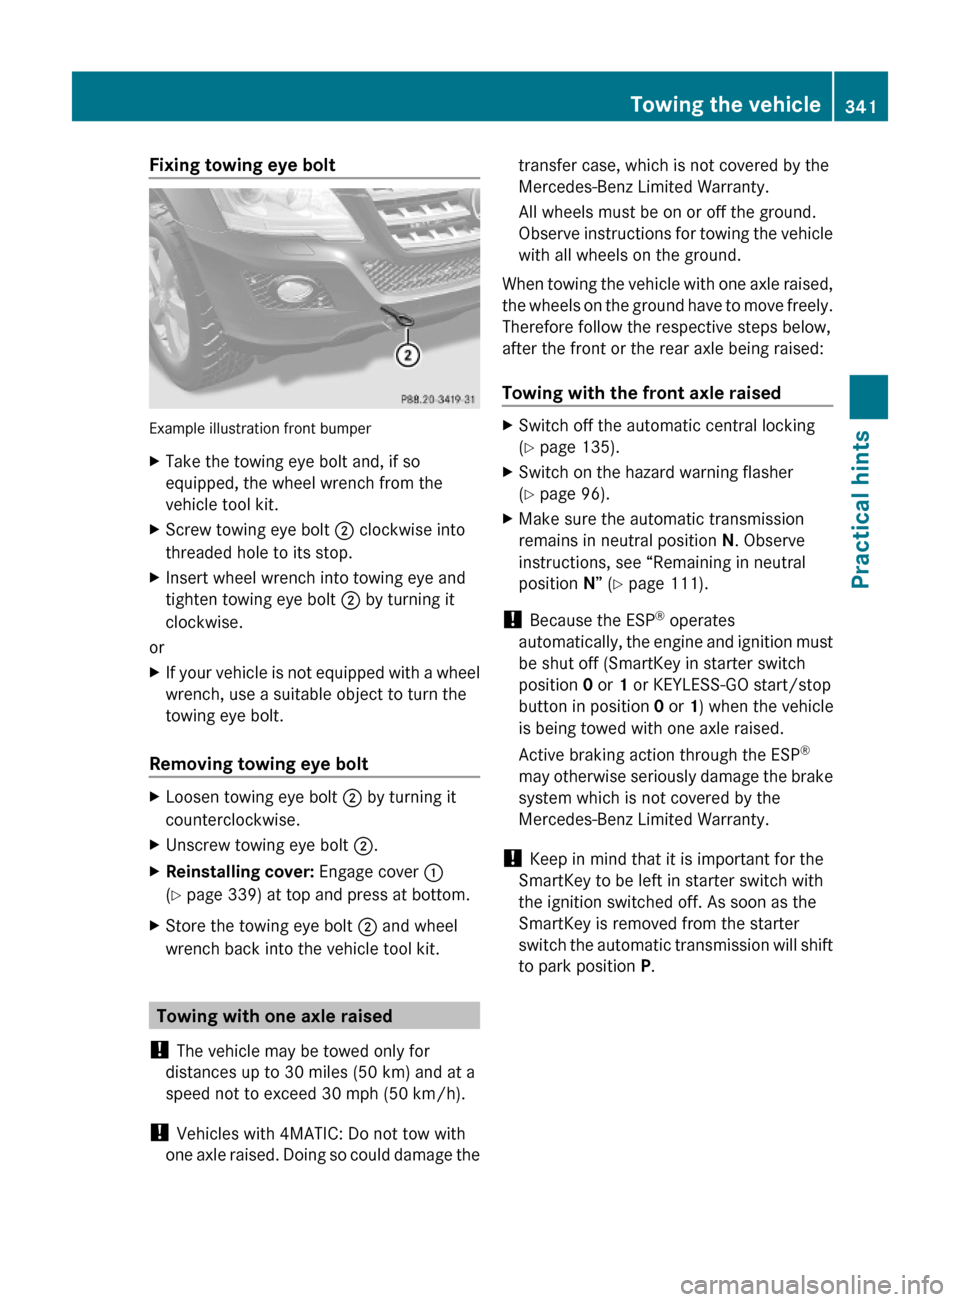
Fixing towing eye bolt
Example illustration front bumper
XTake the towing eye bolt and, if so
equipped, the wheel wrench from the
vehicle tool kit.
XScrew towing eye bolt ; clockwise into
threaded hole to its stop.
XInsert wheel wrench into towing eye and
tighten towing eye bolt ; by turning it
clockwise.
or
XIf your vehicle is not equipped with a wheel
wrench, use a suitable object to turn the
towing eye bolt.
Removing towing eye bolt
XLoosen towing eye bolt ; by turning it
counterclockwise.
XUnscrew towing eye bolt ;.XReinstalling cover: Engage cover :
(Y page 339) at top and press at bottom.
XStore the towing eye bolt ; and wheel
wrench back into the vehicle tool kit.
Towing with one axle raised
! The vehicle may be towed only for
distances up to 30 miles (50 km) and at a
speed not to exceed 30 mph (50 km/h).
! Vehicles with 4MATIC: Do not tow with
one axle raised. Doing so could damage the
transfer case, which is not covered by the
Mercedes-Benz Limited Warranty.
All wheels must be on or off the ground.
Observe instructions for towing the vehicle
with all wheels on the ground.
When towing the vehicle with one axle raised,
the wheels on the ground have to move freely.
Therefore follow the respective steps below,
after the front or the rear axle being raised:
Towing with the front axle raised
XSwitch off the automatic central locking
(Y page 135).
XSwitch on the hazard warning flasher
(Y page 96).
XMake sure the automatic transmission
remains in neutral position N. Observe
instructions, see “Remaining in neutral
position N” (Y page 111).
! Because the ESP® operates
automatically, the engine and ignition must
be shut off (SmartKey in starter switch
position 0 or 1 or KEYLESS-GO start/stop
button in position 0 or 1) when the vehicle
is being towed with one axle raised.
Active braking action through the ESP®
may otherwise seriously damage the brake
system which is not covered by the
Mercedes-Benz Limited Warranty.
! Keep in mind that it is important for the
SmartKey to be left in starter switch with
the ignition switched off. As soon as the
SmartKey is removed from the starter
switch the automatic transmission will shift
to park position P.
Towing the vehicle341Practical hints164_AKB; 7; 31, en-USd2ureepe,Version: 2.11.8.12009-09-11T12:07:36+02:00 - Seite 341Z
Page 344 of 368

Towing with the rear axle raisedXSwitch off the ignition and remove the
SmartKey from the starter switch.XSwitch on the hazard warning flasher
( Y page 96).XTake the SmartKey or SmartKey with
KEYLESS-GO with you when leaving the
vehicle.
Towing with all wheels on the ground
GWarning!
If circumstances require towing the vehicle
with all wheels on the ground, always tow with
a tow bar if:
R the engine will not run
R there is a malfunction in the brake system
R there is a malfunction in the power supply
or in the vehicle’s electrical system
This is necessary to adequately control the
towed vehicle.
Prior to towing the vehicle with all wheels on
the ground, make sure the SmartKey is in
starter switch position 2.
GWarning!
With the engine not running, there is no power
assistance for the brake and steering
systems. In this case, it is important to keep
in mind that a considerably higher degree of
effort is necessary to brake and steer the
vehicle. Adapt your driving accordingly.
XMake sure the ignition is switched on.XWith the vehicle at a standstill, depress the
brake pedal and keep it pressed.XShift the automatic transmission into
neutral position N.XRelease the brake pedal.XIf engaged, release the parking brake.XSwitch on the hazard warning flasher
( Y page 96).!
Keep in mind that it is important to have
the ignition switched on. Removing the
SmartKey from the starter switch or
opening a front door with the ignition
switched off will automatically shift the
automatic transmission into park position
P .
! The vehicle may be towed only for
distances up to 30 miles (50 km) and at a
speed not to exceed 30 mph (50 km/h).
i While being towed with the hazard
warning flasher in use, use the combination
switch in the usual manner to signal turns.
Only the selected turn signal will operate.
Upon canceling the turn signal, the hazard
warning flasher will operate again.
Stranded vehicle
Freeing a stranded vehicle, on which the
wheels are dug into sand or mud, should be
done with the greatest of care, especially if
the vehicle is heavily loaded.
Note the following when freeing a stranded
vehicle:
R Avoid pulling the vehicle abruptly or
diagonally, since it could result in damage
to the chassis alignment.
R Never try to free a vehicle that is still
coupled to a trailer.
R If possible, a vehicle equipped with a trailer
hitch receiver should be pulled backward in
its own previously made tracks.
Fuses
Introduction
The electrical fuses in your vehicle serve to
switch off malfunctioning power circuits.
If a fuse is blown, the components and
systems secured by that fuse will stop
operating.
342FusesPractical hints
164_AKB; 7; 31, en-USd2ureepe,Version: 2.11.8.12009-09-11T12:07:36+02:00 - Seite 342