2010 MERCEDES-BENZ ML350 lamp
[x] Cancel search: lampPage 131 of 368

Should the vehicle’s system record any
conditions while driving, the number of
messages will reappear in the multifunction
display when the SmartKey in the starter
switch is turned to position 0 or removed
from the starter switch. With KEYLESS-GO,
the number of messages will reappear when
you turn off the engine by pressing the
KEYLESS-GO start/stop button and open the
driver’s door.
Except for high-priority messages, the vehicle
status message memory will be cleared when
you switch off the ignition.
Settings menu
Introduction
In the Settings menu there are two
functions: The function To reset, press
reset button for 3 seconds, with which
you can reset all the settings to the original
factory settings and a collection of submenus
with which you can make individual settings
for your vehicle.
The following settings and submenus are
available in the Settings menu:
RResetting to factory settings
(Y page 129)
RSubmenus in the Settings menu
(Y page 130)
RInstrument cluster submenu
(Y page 130)
RTime/Date submenu (Y page 132)
RLighting submenu (Y page 133)
RVehicle submenu (Y page 135)
RComfort submenu (Y page 135)
Resetting to factory settings
You can reset the settings of all submenus to
the factory settings.
For safety reasons, the function Lamp
Circuit Headlamp in the Lighting
submenu cannot be reset while driving.
The following message appears in the
multifunction display:
Settings
Cannot be
completely reset
to factory settings
when engine is running.
XPress button V or U repeatedly until
the Settings menu appears in the
multifunction display.
XPress the reset button in the instrument
cluster (Y page 117) for approximately
3 seconds.
The request to press the reset button once
more to confirm appears in the
multifunction display.
XPress the reset button once more.
The settings you have changed will not be
reset unless you confirm the action by
pressing the reset button a second time. After
approximately 5 seconds, the Settings
menu reappears in the multifunction display.
Control system129Controls in detail164_AKB; 7; 31, en-USd2ureepe,Version: 2.11.8.12009-09-11T12:07:36+02:00 - Seite 129Z
Page 132 of 368

Submenus in the Settings menuXPress button V or U repeatedly until
the Settings menu appears in the
multifunction display.
XPress button &.
The collection of the submenus appears in
the multifunction display. There are more
submenus than can be displayed
simultaneously.
XPress button X.
The selection marker moves to the next
submenu.
XScroll down with button X, scroll up
with button W.
XWith the selection marker on the desired
submenu, use button & to access the
individual functions within that submenu.
XOnce within the submenu, use button
& to move to the next function or button
* to move to the previous function
within that submenu.
XUse button W or X to change the
settings of the respective function.
The following lists show what settings can be
changed within the various menus. Detailed
instructions on making individual settings can
be found on the following pages.
Instrument cluster submenu
RSelecting speedometer/odometer display
mode (Y page 131) (Canada only)
RSelecting digital speedometer display
mode (Y page 131)
RSelecting language (Y page 131)
RSelecting display (digital speedometer or
outside temperature) for status indicator
(Y page 131)
Time/Date submenu
RSetting the time (Y page 132)
RSetting the date (Y page 132)
Lighting submenu
RSwitching daytime running lamp mode on
or off (USA only) (Y page 133)
RSwitching locator lighting on or off
(Y page 133)
RSwitching night security illumination
(Headlamps delayed shut-off feature) on or
off (Y page 134)
RSwitching interior lighting delayed shut-off
on or off (Y page 135)
Vehicle submenu
RSwitching automatic central locking on or
off (Y page 135)
Comfort submenu
RActivating easy-entry/exit feature
(Y page 136)
RActivating/deactivating seat belt
adjustment feature (Y page 136)
RSwitching fold-in function for exterior rear
view mirrors on or off (Y page 137)
Instrument cluster submenu
Access the Instrument Cluster submenu
via the Settings menu. Use the
Instrument Cluster submenu to change
the instrument cluster display settings.
The following functions are available:
RSelecting speedometer/odometer display
mode (Y page 131) (Canada only)
RSelecting digital speedometer display
mode (Y page 131)
130Control systemControls in detail
164_AKB; 7; 31, en-USd2ureepe,Version: 2.11.8.12009-09-11T12:07:36+02:00 - Seite 130
Page 135 of 368

Example illustration for setting the month
XPress button W or X to set the
month, day, or year.
Lighting submenu
Access the Lighting submenu via the
Settings menu. Use the Lighting submenu
to change the lamp and lighting settings on
your vehicle.
The following functions are available:
RSwitching daytime running lamp mode on
or off (USA only) (Y page 133)
RSwitching locator lighting on or off
(Y page 133)
RSwitching night security illumination on or
off (Y page 134)
RSwitching interior lighting delayed shut-off
on or off (Y page 135)
Switching daytime running lamp mode on
or off (USA only)
XPress button V or U repeatedly until
the Settings menu appears in the
multifunction display.
XPress button &.XMove the selection marker with button
W or X to the Lighting submenu.
XPress button & or * repeatedly until
the message Daytime Running Lamps
appears in the multifunction display.
The selection marker is on the current
setting.
XPress button W or X to switch the
daytime running lamp mode On or Off.
With daytime running lamp mode switched on
and the exterior lamp switch in
position $ or Ã, the low-beam
headlamps are switched on when the engine
is running.
In low ambient light conditions the following
lamps will come on additionally:
RParking lamps
RTail lamps
RLicense plate lamps
RSide marker lamps
For more information on the daytime running
lamp mode, see (Y page 94).
For safety reasons, changing the setting for
the daytime running lamp mode is not
possible while the vehicle is in motion.
The following message appears in the
multifunction display:
Settings can only be made with
engine off.
For safety reasons, resetting all the functions
of all submenus to the factory settings while
driving (Y page 129) will not deactivate the
daytime running lamp mode.
Switching locator lighting on or off
With the locator lighting feature activated, the
exterior lamp switch in position à and the
interior lighting in automatic mode, the
following lamps will come on during darkness
when the vehicle is unlocked using button
% on the SmartKey:
RParking lamps
RTail lamps
Control system133Controls in detail164_AKB; 7; 31, en-USd2ureepe,Version: 2.11.8.12009-09-11T12:07:36+02:00 - Seite 133Z
Page 136 of 368

RLicense plate lamps
RSide marker lamps
RFront fog lamps
The locator lighting goes out when the driver’s
door is opened.
If you do not open the driver’s door after
unlocking the vehicle with the SmartKey, the
lamps will go out automatically after
approximately 40 seconds.
XPress button V or U repeatedly until
the Settings menu appears in the
multifunction display.
XPress button &.XMove the selection marker with button
W or X to the Lighting submenu.
XPress button & or * repeatedly until
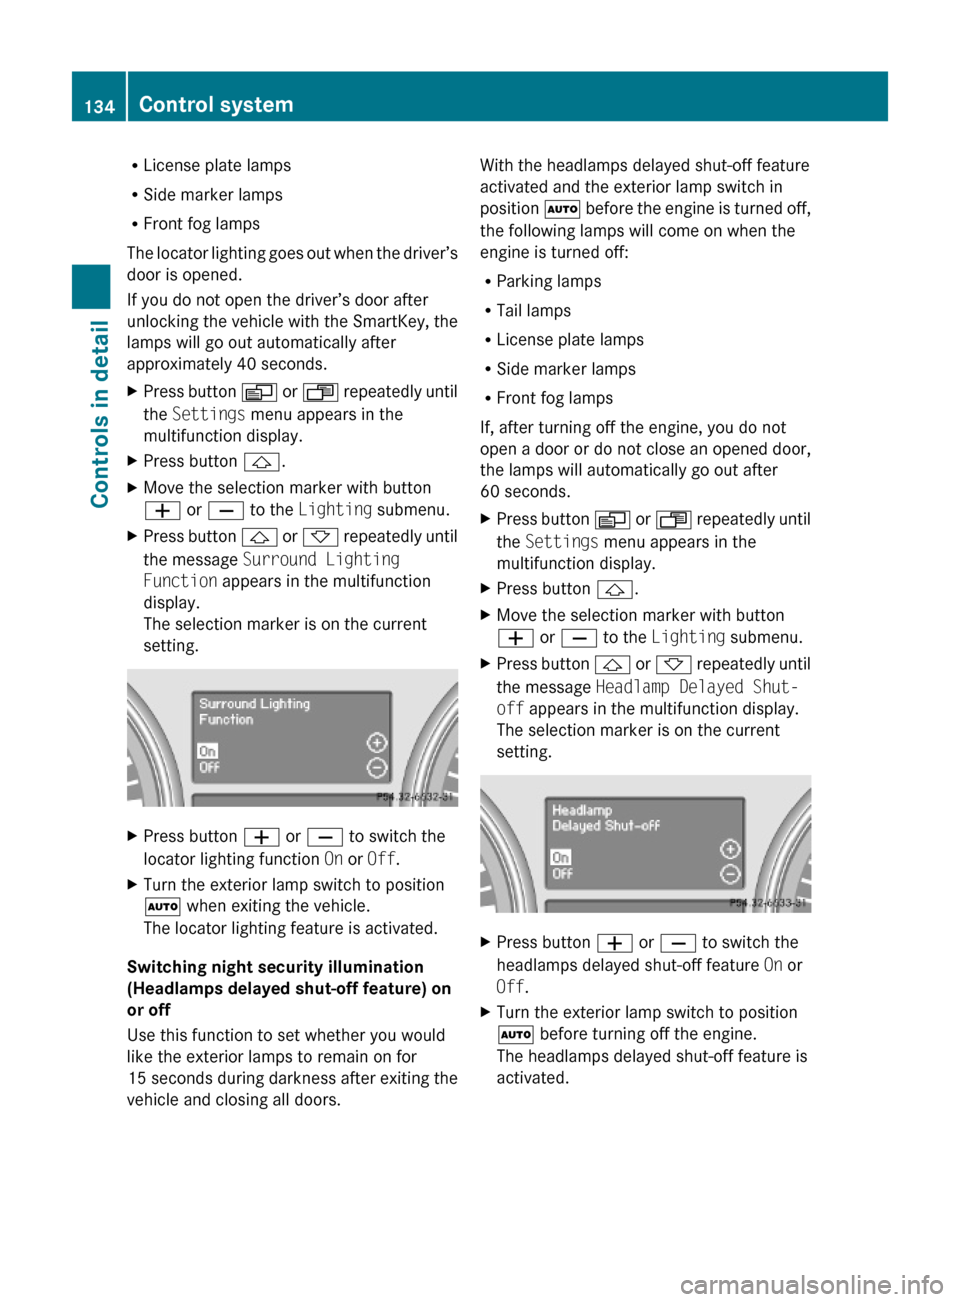
the message Surround Lighting
Function appears in the multifunction
display.
The selection marker is on the current
setting.
XPress button W or X to switch the
locator lighting function On or Off.
XTurn the exterior lamp switch to position
à when exiting the vehicle.
The locator lighting feature is activated.
Switching night security illumination
(Headlamps delayed shut-off feature) on
or off
Use this function to set whether you would
like the exterior lamps to remain on for
15 seconds during darkness after exiting the
vehicle and closing all doors.
With the headlamps delayed shut-off feature
activated and the exterior lamp switch in
position à before the engine is turned off,
the following lamps will come on when the
engine is turned off:
RParking lamps
RTail lamps
RLicense plate lamps
RSide marker lamps
RFront fog lamps
If, after turning off the engine, you do not
open a door or do not close an opened door,
the lamps will automatically go out after
60 seconds.
XPress button V or U repeatedly until
the Settings menu appears in the
multifunction display.
XPress button &.XMove the selection marker with button
W or X to the Lighting submenu.
XPress button & or * repeatedly until
the message Headlamp Delayed Shut-
off appears in the multifunction display.
The selection marker is on the current
setting.
XPress button W or X to switch the
headlamps delayed shut-off feature On or
Off.
XTurn the exterior lamp switch to position
à before turning off the engine.
The headlamps delayed shut-off feature is
activated.
134Control systemControls in detail
164_AKB; 7; 31, en-USd2ureepe,Version: 2.11.8.12009-09-11T12:07:36+02:00 - Seite 134
Page 137 of 368

You can temporarily deactivate the
headlamps delayed shut-off feature:
XBefore exiting the vehicle, turn the
SmartKey in the starter switch to position
0.
XThen turn it to position 2 and back to
position 0.
The headlamps delayed shut-off feature is
deactivated. It will reactivate as soon as
you start the engine.
Switching interior lighting delayed shut-
off on or off
Use this function to set whether you would
like the interior lighting to remain on for
10 seconds during darkness after you have
removed the SmartKey from the starter
switch.
XPress button V or U repeatedly until
the Settings menu appears in the
multifunction display.
XPress button &.XMove the selection marker with button
W or X to the Lighting submenu.
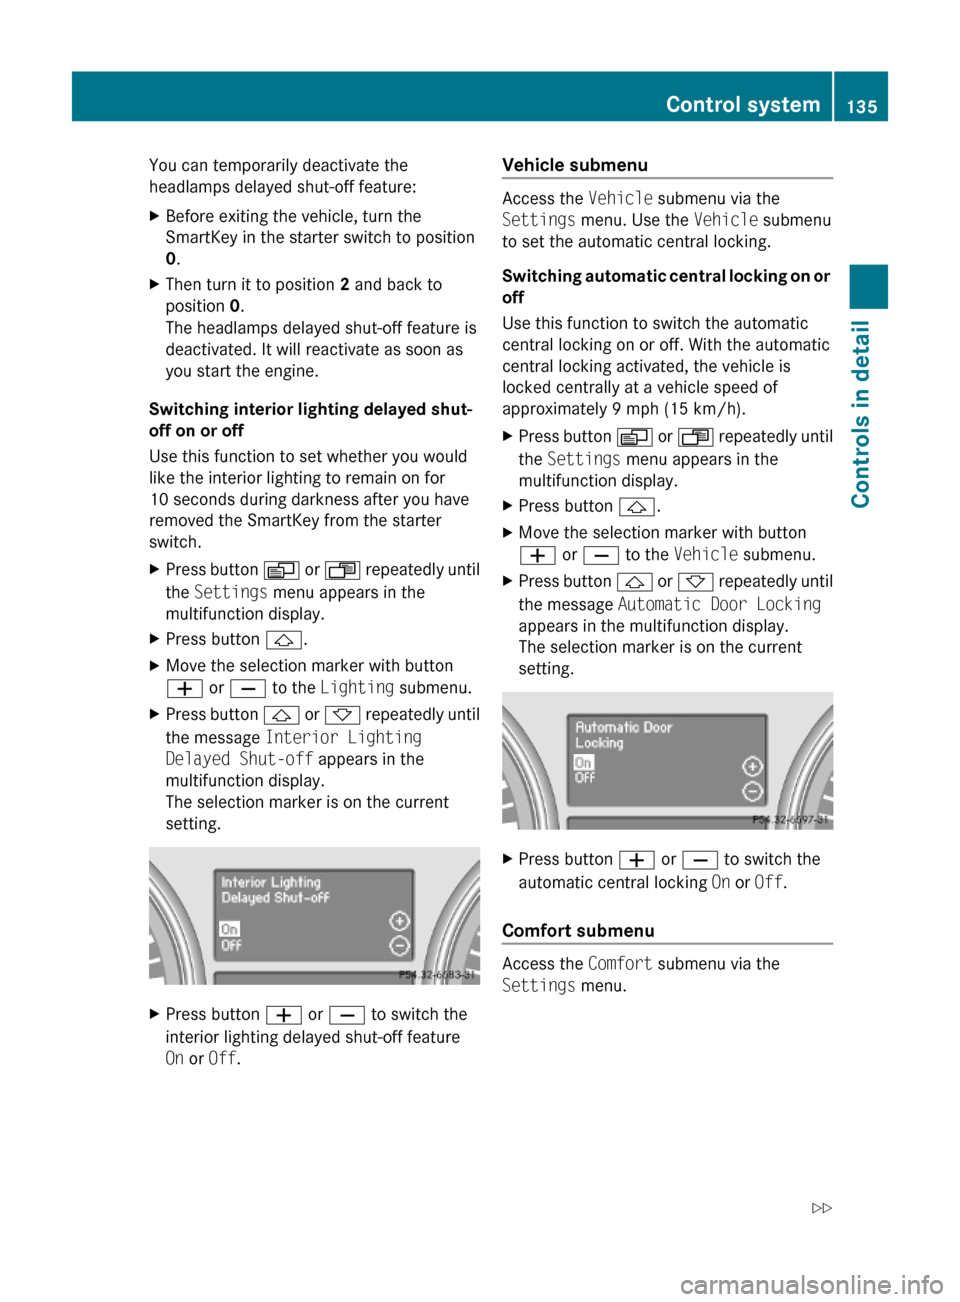
XPress button & or * repeatedly until
the message Interior Lighting
Delayed Shut-off appears in the
multifunction display.
The selection marker is on the current
setting.
XPress button W or X to switch the
interior lighting delayed shut-off feature
On or Off.
Vehicle submenu
Access the Vehicle submenu via the
Settings menu. Use the Vehicle submenu
to set the automatic central locking.
Switching automatic central locking on or
off
Use this function to switch the automatic
central locking on or off. With the automatic
central locking activated, the vehicle is
locked centrally at a vehicle speed of
approximately 9 mph (15 km/h).
XPress button V or U repeatedly until
the Settings menu appears in the
multifunction display.
XPress button &.XMove the selection marker with button
W or X to the Vehicle submenu.
XPress button & or * repeatedly until
the message Automatic Door Locking
appears in the multifunction display.
The selection marker is on the current
setting.
XPress button W or X to switch the
automatic central locking On or Off.
Comfort submenu
Access the Comfort submenu via the
Settings menu.
Control system135Controls in detail164_AKB; 7; 31, en-USd2ureepe,Version: 2.11.8.12009-09-11T12:07:36+02:00 - Seite 135Z
Page 148 of 368

Distronic displays in the speedometer
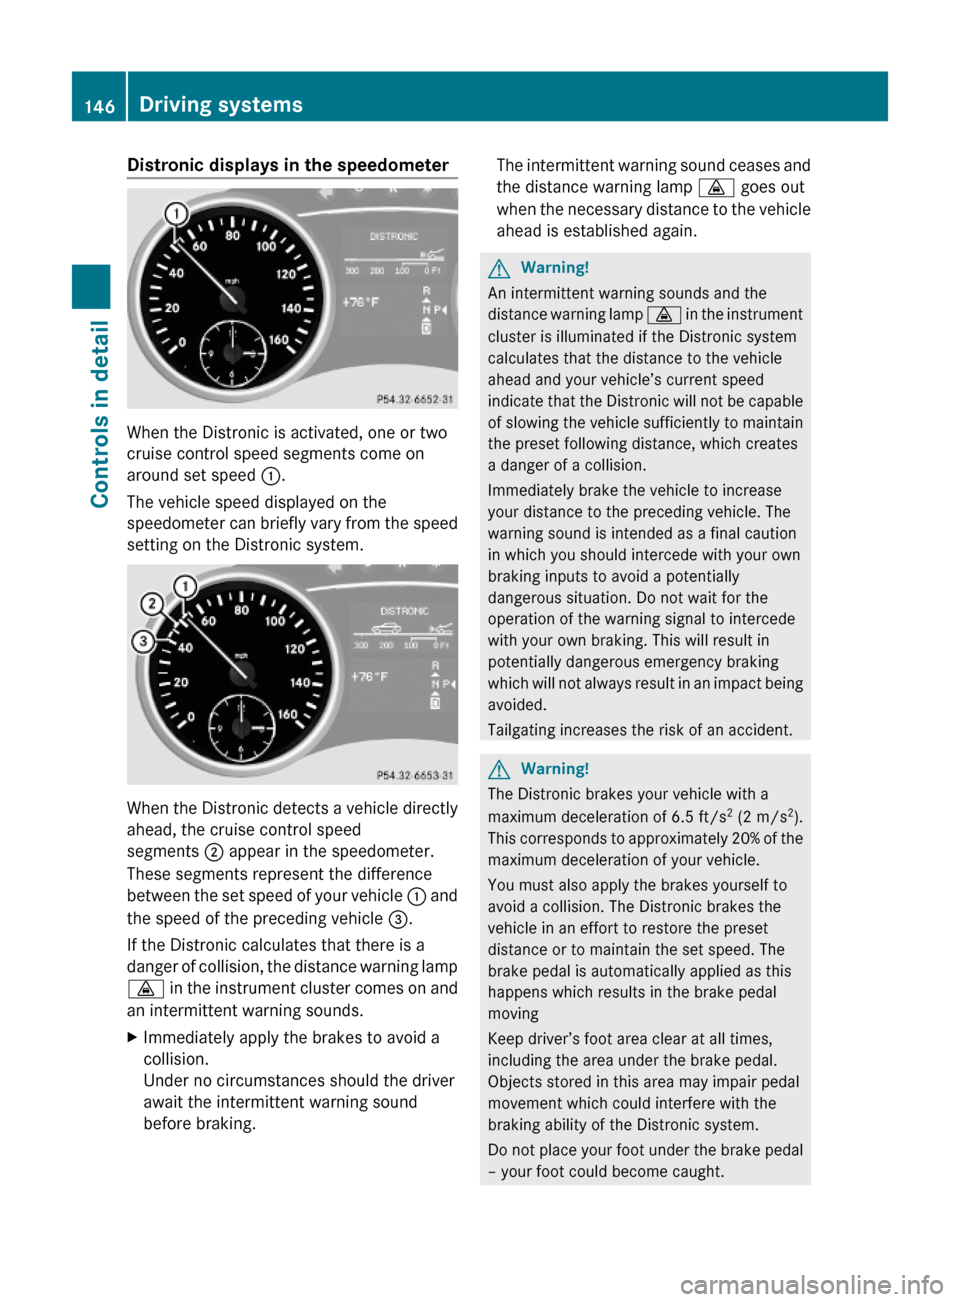
When the Distronic is activated, one or two
cruise control speed segments come on
around set speed :.
The vehicle speed displayed on the
speedometer can briefly vary from the speed
setting on the Distronic system.
When the Distronic detects a vehicle directly
ahead, the cruise control speed
segments ; appear in the speedometer.
These segments represent the difference
between the set speed of your vehicle : and
the speed of the preceding vehicle =.
If the Distronic calculates that there is a
danger of collision, the distance warning lamp
· in the instrument cluster comes on and
an intermittent warning sounds.
XImmediately apply the brakes to avoid a
collision.
Under no circumstances should the driver
await the intermittent warning sound
before braking.
The intermittent warning sound ceases and
the distance warning lamp · goes out
when the necessary distance to the vehicle
ahead is established again.
GWarning!
An intermittent warning sounds and the
distance warning lamp · in the instrument
cluster is illuminated if the Distronic system
calculates that the distance to the vehicle
ahead and your vehicle’s current speed
indicate that the Distronic will not be capable
of slowing the vehicle sufficiently to maintain
the preset following distance, which creates
a danger of a collision.
Immediately brake the vehicle to increase
your distance to the preceding vehicle. The
warning sound is intended as a final caution
in which you should intercede with your own
braking inputs to avoid a potentially
dangerous situation. Do not wait for the
operation of the warning signal to intercede
with your own braking. This will result in
potentially dangerous emergency braking
which will not always result in an impact being
avoided.
Tailgating increases the risk of an accident.
GWarning!
The Distronic brakes your vehicle with a
maximum deceleration of 6.5 ft/s2 (2 m/s2).
This corresponds to approximately 20% of the
maximum deceleration of your vehicle.
You must also apply the brakes yourself to
avoid a collision. The Distronic brakes the
vehicle in an effort to restore the preset
distance or to maintain the set speed. The
brake pedal is automatically applied as this
happens which results in the brake pedal
moving
Keep driver’s foot area clear at all times,
including the area under the brake pedal.
Objects stored in this area may impair pedal
movement which could interfere with the
braking ability of the Distronic system.
Do not place your foot under the brake pedal
– your foot could become caught.
146Driving systemsControls in detail
164_AKB; 7; 31, en-USd2ureepe,Version: 2.11.8.12009-09-11T12:07:36+02:00 - Seite 146
Page 153 of 368

Turns and bends
In turns or bends, the Distronic may not
detect a moving vehicle in front, or it may
detect one too soon. This may cause your
vehicle to brake late or unexpectedly.
Offset driving
A vehicle traveling in your lane but offset from
your direct line of travel may not be detected
by the Distronic. There will be insufficient
distance to the preceding vehicle.
Lane changing
The Distronic has not yet detected the vehicle
changing lanes. There will be insufficient
distance to the lane-changing vehicle.
Narrow vehicles
Because of their narrow profile, the vehicles
traveling near the outer edges of the lane
have not yet been detected by the Distronic.
There will be insufficient distance to the
preceding vehicles.
Distance warning function
This function warns you at a vehicle speed of
above approximately 20 mph (30 km/h) in
the following cases:
RAt the current speed, the distance between
your vehicle and the preceding vehicle is
too low for several seconds. The distance
warning lamp · in the instrument
cluster comes on.
RYou are gaining on a preceding vehicle
rapidly. An intermittent warning sounds
and the distance warning lamp · in the
instrument cluster comes on.
If these warnings are issued, you must apply
the brakes to maintain a safe distance and
avoid a collision with the preceding vehicle.
When depressing the brake pedal, the
warning sound ceases. The warning sound
will also cease when the distance to the
preceding vehicle is sufficient again without
applying the brakes. In this case, the distance
warning lamp · will also go out.
Driving systems151Controls in detail164_AKB; 7; 31, en-USd2ureepe,Version: 2.11.8.12009-09-11T12:07:36+02:00 - Seite 151Z
Page 154 of 368

GWarning!
If the distance warning lamp · in the
instrument cluster comes on while driving
and/or an intermittent warning sounds,
immediate attention on the part of the driver
is required. As required by the traffic
situation, apply the brakes and navigate
around a possible obstacle. However, do not
drive by relying on the distance warning
function, as this will result in an emergency
braking application. This will not always
enable you to avoid a collision, especially
when traveling on varying road surface
conditions and with varying driver reaction.
Complex driving situations are not always
fully recognized by the distance warning
function. This could result in wrong or missing
distance warnings.
XActivating/deactivating: Activate or
deactivate the distance warning function in
the control system ( Y page 137).
When activated, the distance warning
function indicator Ä appears in the
multifunction display.
Hill-start assist system
GWarning!
The hill-start assist system is not designed to
function as a parking brake. It does not
prevent the vehicle from moving when parked
on an incline.
Always engage the parking brake in addition
to shifting the automatic transmission into
park position P.
On uphill grades, the hill-start assist system
maintains the pressure in the brake system
for approximately 1 second after you have
released the brake pedal. Therefore, you can
start off smoothly without the vehicle moving
immediately after releasing the brake pedal.
XDepress the brake pedal.XShift the automatic transmission into drive
position D or reverse gear R.XRelease the brake pedal.XCarefully depress the accelerator pedal.
The hill-start assist system is inactive
R when starting off on a level road or downhill
grades
R with the automatic transmission in neutral
position N
R with the parking brake engaged
R if the ESP ®
has switched off due to a
malfunction
Downhill Speed Regulation (DSR)
For information on off-road driving, see “Off-
road driving” ( Y page 248).
The DSR is an aid for driving downhill. The
DSR regulates your vehicle’s speed when
driving downhill to the value set in the control
system ( Y page 138). The steeper the
downhill gradient is, the greater the brake
application. On flat road surfaces, the DSR
brakes only slightly or not at all.
GWarning!
The Downhill Speed Regulation (DSR) is a
convenience system designed to assist the
driver during vehicle operation. The system
must be set to be appropriate for the
topographical and weather conditions
encountered which can change quickly. The
driver is and must remain at all times
responsible for the vehicle speed and for safe
brake operation.
Depending on the programmed speed, actual
vehicle speed and gradient, switching on the
DSR while driving can cause the vehicle to
slow down rapidly and you may hear a sound
which is caused by the activation of the
vehicle’s brake system through the DSR.
Sudden and unexpected deceleration can
result in loss of vehicle control, causing an
accident and/or serious personal injury to
you and others. Do not switch on the DSR in
152Driving systemsControls in detail
164_AKB; 7; 31, en-USd2ureepe,Version: 2.11.8.12009-09-11T12:07:36+02:00 - Seite 152