2010 MERCEDES-BENZ ML320 ECU
[x] Cancel search: ECUPage 210 of 368

wheel repeatedly until the AIRMATIC/
Compass menu appears in the
multifunction display.
The compass displays the direction into
which the vehicle is currently traveling: N,
NE, E, SE, S, SW, W, or NW.
iIf your vehicle is not equipped with air
suspension program, the multifunction
display will show the compass only.
Floormats
GWarning!
Whenever you are using floormats, make sure
there is enough clearance and that the
floormats are securely fastened.
Floormats should always be securely fastened
using the fastening equipment.
Before driving off, check that the floormats
are securely in place and adjust them if
necessary. A loose floormat could slip and
hinder proper functioning of the pedals.
Do not place several floormats on top of each
other as this may impair pedal movement.
XMove the driver’s seat or front passenger
seat as far to the rear as possible.
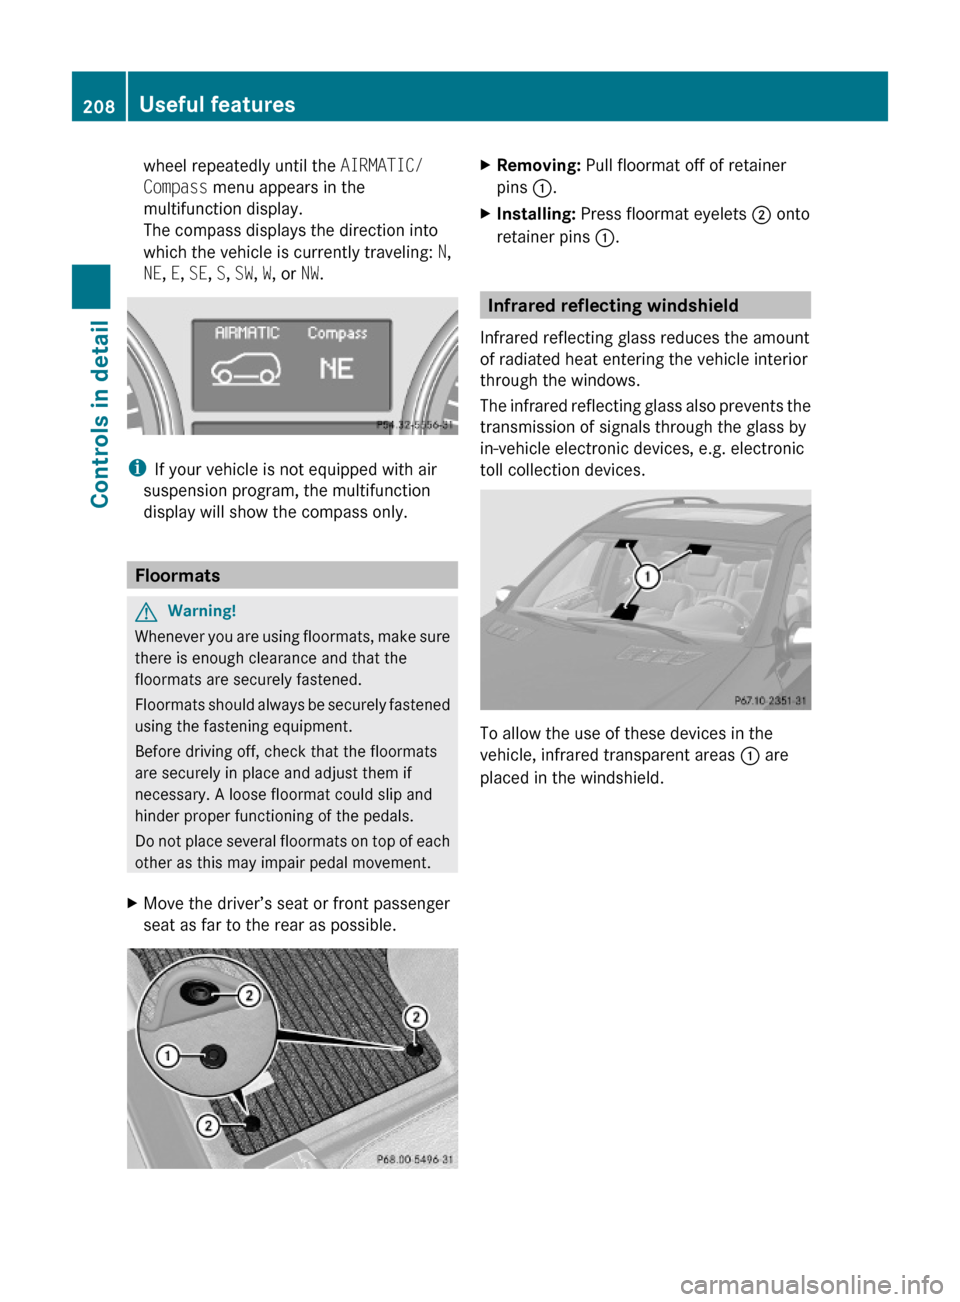
XRemoving: Pull floormat off of retainer
pins :.
XInstalling: Press floormat eyelets ; onto
retainer pins :.
Infrared reflecting windshield
Infrared reflecting glass reduces the amount
of radiated heat entering the vehicle interior
through the windows.
The infrared reflecting glass also prevents the
transmission of signals through the glass by
in-vehicle electronic devices, e.g. electronic
toll collection devices.
To allow the use of these devices in the
vehicle, infrared transparent areas : are
placed in the windshield.
208Useful featuresControls in detail
164_AKB; 7; 31, en-USd2ureepe,Version: 2.11.8.12009-09-11T12:07:36+02:00 - Seite 208
Page 216 of 368

XPress and hold handle ;.
The hood is unlocked.
XPull up on the hood in direction of arrow
and then release it.
The hood will be held open at shoulder
height by gas-filled struts automatically.
Closing
GWarning!
When closing the hood, use extreme caution
not to catch hands or fingers. Be careful that
you do not close the hood on anyone.
Make sure the hood is securely engaged
before driving off. Do not continue driving if
the hood can no longer engage after an
accident, for example. The hood could
otherwise come loose while the vehicle is in
motion and injure you and/or others.
XLet the hood drop from a height of
approximately 8 in (20 cm).
XCheck to make sure the hood is fully
closed.
If you can raise the hood at a point above
the headlamps, then it is not properly
closed. Open it again and let it drop with
somewhat greater force.
Radiator
iVehicles with diesel engine:
Do not cover the radiator, for example with
a winter front or bug cover. Otherwise the
readings of the on-board diagnostic system
may be inaccurate. Some of theses
readings are required by law and must be
accurate at all times.
Engine oil
GWarning!
HYBRID vehicles: It is imperative that you read
the HYBRID Supplemental Operating
Instructions included in your vehicle literature
portfolio. You may otherwise not receive all
necessary safety information and warning for
the operation of your vehicle.
The amount of oil your engine consumes will
depend on a number of factors, including
driving style. Increased oil consumption can
occur when the vehicle is new or the vehicle
is driven frequently at higher engine speeds.
Engine oil consumption checks should only
be made after the vehicle break-in period.
! Do not use any special lubricant additives,
as these may damage the drive assemblies.
Using special additives not approved by
Mercedes-Benz may cause damage not
covered by the Mercedes-Benz Limited
Warranty.
For further information contact an
authorized Mercedes-Benz Center.
Notes on checking engine oil level
When checking the oil level the vehicle must
be parked on level ground and the vehicle
must have been stationary for at least
5 minutes with the engine turned off.
Checking engine oil level
XOpen the hood (Y page 213).214Engine compartmentOperation
164_AKB; 7; 31, en-USd2ureepe,Version: 2.11.8.12009-09-11T12:07:36+02:00 - Seite 214
Page 250 of 368

For more information, see “Driving through
water” ( Y page 251).
Off-road driving
GWarning!
Do not load items on the basic carrier bars. It
may cause instability during some maneuvers
which could result in an accident.
Drive slowly in unknown terrain. This will
make it easier to recognize unexpected
obstacles and avoid damage to the vehicle.
To help avoid the vehicle rolling over, never
turn it around on steep inclines. If the vehicle
cannot complete the attempted climb, back it
down in reverse gear.
Do not drive along the side of a slope. The
vehicle might otherwise rollover. If in doing so
the vehicle begins to show a tendency to roll,
immediately steer into a line of gravity
(straight up or downhill).
Never let the vehicle roll backwards in idle.
You may lose control of the vehicle if you use
only the service brake. For information on
driving downhill, see “Driving downhill”.
GWarning!
Sand, dirt, mud and other material having
friction property can cause exceptional wear
and tear as well as brake failure.
Have the brakes checked for dirt build-up and
cleaned. There is otherwise a risk that full
braking power may not be available in an
emergency.
GWarning!
Vehicles with air suspension program: Please
be aware that by raising the vehicle level, the
center of gravity also rises. Therefore, always
ensure that the vehicle level is as low as
possible. With higher ride height the ESP ®
may activate earlier in certain situations.
Read this chapter carefully before you begin
off-road travel.
Familiarize yourself with the vehicle
characteristics and gear changing before you
attempt any difficult terrain off-road driving.
We recommend that you start out with easy
off-road travel.
Special driving features for off-road
driving
The following driving features are available for
specific kind of operation:
R Off-road ABS ( Y page 63)
R Off-road ESP ®
(Y page 65)
R Off-road 4-ETS ( Y page 64)
R Hill-start assist system ( Y page 113)
R Downhill Speed Regulation (DSR)
( Y page 152)
R Off-road driving program ( Y page 155)
R Air suspension program ( Y page 155)
Off-road driving rules
R Engage the off-road driving program
( Y page 155) before driving under off-road
conditions.
R Vehicles with air suspension program:
Make sure you select a vehicle level
( Y page 156) appropriate to the
topographical conditions. Always make
sure the vehicle has enough ground
clearance.
R Fasten items being carried as securely as
possible ( Y page 186).
R Always navigate gradients with the engine
on and with the transmission engaged in a
gear. Switch on the DSR ( Y page 152) to
help maintain a preset speed.
248Driving instructionsOperation
164_AKB; 7; 31, en-USd2ureepe,Version: 2.11.8.12009-09-11T12:07:36+02:00 - Seite 248
Page 258 of 368

XClose all doors and the tailgate.XAttach the trailer.XPlug in all electrical connectors.
iVehicles with vehicle level control:
When you are towing a trailer, the vehicle
level always remains in the highway setting.
The following applies additionally when
towing a trailer:
R The vehicle is lowered to the highway
level when it reaches a speed of 5 mph
(8 km/h) if not set to highway level.
R The highspeed level is not available.
The restrictions that apply to towing also
apply when using accessories that are
connected to the trailer power socket, such
as a bicycle rack.
Towing a trailer
There are many different laws, including
speed limit restrictions, having to do with
trailer towing. Make sure your rig will be legal,
not only for where you reside, but also for
where you will be driving. A good source for
this information can be the police or local
authorities.
Note the following, when driving with a trailer:
R In order to gain skill and an understanding
of the vehicle’s behavior, you should
practice turning, stopping and backing up
in an area which is free of traffic.
R Before you start driving check the
- trailer hitch
- break-away switch
- safety chains
- electrical connections
- lighting
- tires
R Adjust the mirrors ( Y page 89) to permit
unobstructed view beyond rear of trailer.
R If the trailer has electric brakes, start your
vehicle and trailer moving slowly, and then
apply only the trailer brake controller by
hand to make sure the brakes are working
properly.
R Always secure items in the trailer to
prevent load shifts while driving.
R When towing a trailer, check occasionally
to make sure the load is secure, and that
trailer lighting and brakes (if so equipped)
are functioning properly.
R Take into consideration that when towing a
trailer, the handling characteristics are
different and less stable from those when
operating the vehicle without a trailer.
It is important to avoid sudden maneuvers.
R The vehicle and trailer combination is
heavier, and therefore limited in
acceleration and climbing ability, and has a
larger braking distance.
It is more prone to reacting to cross wind
gusts, and requires more sensitive steering
input.
R If possible, do not brake abruptly, but
rather engage the brake slightly at first to
permit the trailer to activate its brake. Then
increase the braking force.
! If the trailer should begin to sway, reduce
the vehicle’s speed immediately.
Do not attempt to straighten out the tow
vehicle and trailer by increasing the speed.
R If the transmission shifts between gears on
inclines repeatedly, shift to a lower gear
range manually ( Y page 113). Select 4, 3 ,
2 or 1.
A lower gear and reduction of speed
reduces the chance of engine overloading
and/or overheating.
R On very steep inclines, not manageable
with automatic transmission in gear range
1 , switch on off-road driving program
( Y page 155).
R When going down an incline, shift into a
lower gear and use the engine’s braking
effect.256Driving instructionsOperation
164_AKB; 7; 31, en-USd2ureepe,Version: 2.11.8.12009-09-11T12:07:36+02:00 - Seite 256
Page 271 of 368

XRelease securing hook = (located below
the floor handle) from holder.
XEngage securing hook = on upper cargo
compartment lip ?.
! With the cargo compartment cover blind
installed behind the rear seats, disengage
cargo compartment cover blind and flip it
forward. Otherwise the strap of the
securing hook could damage the cargo
compartment cover blind.
! To prevent damage, always disengage the
securing hook from upper cargo
compartment lip and lower the cargo
compartment floor before closing the
tailgate.
Vehicles without spare wheel
iVehicles without spare wheel are not
factory-equipped with the tools required for
a wheel change such as a jack or a wheel
wrench. Some tools required for a wheel
change are specific to your vehicle.
Contact an authorized Mercedes-Benz
Center to obtain the tools approved for
your vehicle. The illustration shows the
vehicle retrofitted with the necessary tools
for a wheel change.
:Towing eye bolt;Alignment bolt=Jack?Fuse chartAElectric air pump27BTIREFIT kit27CWheel wrenchDCollapsible wheel chockEReversible ratchet for jack27ML 350 BlueTEC 4MATIC (Canada vehicles) factory equipped with 20" wheels only.Where will I find ...?269Practical hints164_AKB; 7; 31, en-USd2ureepe,Version: 2.11.8.12009-09-11T12:07:36+02:00 - Seite 269Z
Page 272 of 368

Vehicles with spare wheel
Example illustration
:Electric air pump28;Storage well casing=Alignment bolt?Towing eye boltAWheel wrenchXTo access remaining tools: Remove
storage well casing ; (if so equipped).
XRemove the spare wheel (Y page 271).
Example illustration
BJackCCollapsible wheel chockDFuse chartESpare wheel bolts29FReversible ratchet for jackCollapsible wheel chock
The collapsible wheel chock serves to secure
the vehicle, e.g. while changing a wheel.
XTake the collapsible wheel chock from the
vehicle tool kit (Y page 268).
XSetting up: Tilt both plates upward :.XFold the lower plate outward ;.XGuide the tabs of the lower plate all the way
into the openings of base plate =.
For information on where to place wheel
chocks when changing a wheel, see “Lifting
the vehicle” (Y page 324).
Jack
GWarning!
Only use the jack supplied with your vehicle
to lift the vehicle briefly for wheel changes. If
you use the jack for any other purpose, you or
others could be injured, as the jack is
designed only for the purpose of changing a
wheel.
When using the jack, observe the safety notes
in the “Mounting the spare wheel” section and
the notes on the jack.
XTake the jack from the vehicle tool kit
(Y page 268).28Vehicles with spare wheel with collapsible tire only.29Vehicles with Minispare wheel only.
270Where will I find ...?Practical hints
164_AKB; 7; 31, en-USd2ureepe,Version: 2.11.8.12009-09-11T12:07:36+02:00 - Seite 270
Page 273 of 368

Storage position
XTake the reversible ratchet from the vehicle
tool kit (Y page 268).
Operational position
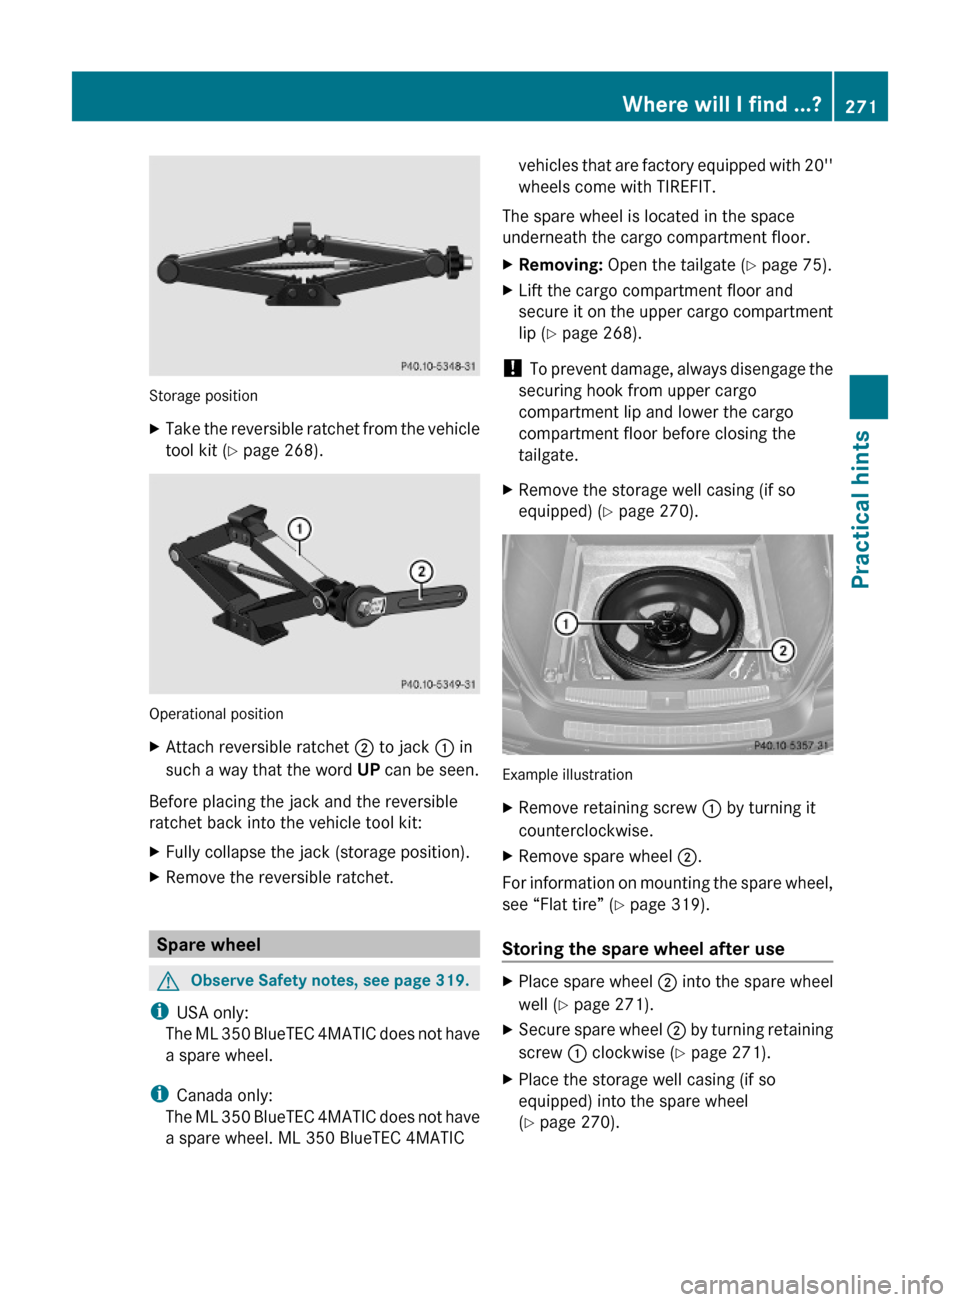
XAttach reversible ratchet ; to jack : in
such a way that the word UP can be seen.
Before placing the jack and the reversible
ratchet back into the vehicle tool kit:
XFully collapse the jack (storage position).XRemove the reversible ratchet.
Spare wheel
GObserve Safety notes, see page 319.
iUSA only:
The ML 350 BlueTEC 4MATIC does not have
a spare wheel.
iCanada only:
The ML 350 BlueTEC 4MATIC does not have
a spare wheel. ML 350 BlueTEC 4MATIC
vehicles that are factory equipped with 20''
wheels come with TIREFIT.
The spare wheel is located in the space
underneath the cargo compartment floor.
XRemoving: Open the tailgate (Y page 75).XLift the cargo compartment floor and
secure it on the upper cargo compartment
lip (Y page 268).
! To prevent damage, always disengage the
securing hook from upper cargo
compartment lip and lower the cargo
compartment floor before closing the
tailgate.
XRemove the storage well casing (if so
equipped) (Y page 270).
Example illustration
XRemove retaining screw : by turning it
counterclockwise.
XRemove spare wheel ;.
For information on mounting the spare wheel,
see “Flat tire” (Y page 319).
Storing the spare wheel after use
XPlace spare wheel ; into the spare wheel
well (Y page 271).
XSecure spare wheel ; by turning retaining
screw : clockwise (Y page 271).
XPlace the storage well casing (if so
equipped) into the spare wheel
(Y page 270).
Where will I find ...?271Practical hints164_AKB; 7; 31, en-USd2ureepe,Version: 2.11.8.12009-09-11T12:07:36+02:00 - Seite 271Z
Page 277 of 368

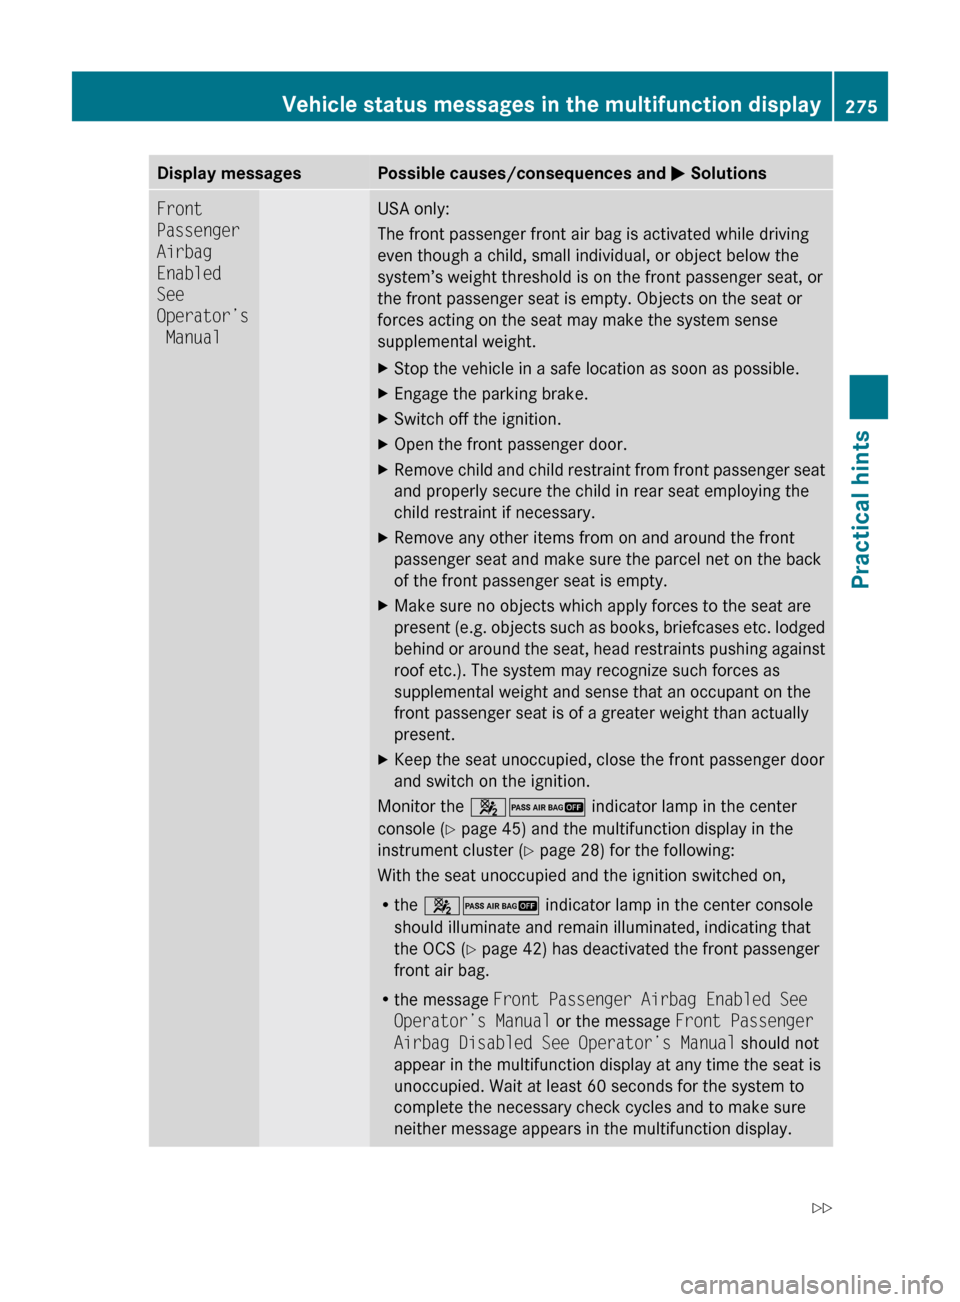
Display messagesPossible causes/consequences and M SolutionsFront
Passenger
Airbag
Enabled
See
Operator’s
ManualUSA only:
The front passenger front air bag is activated while driving
even though a child, small individual, or object below the
system’s weight threshold is on the front passenger seat, or
the front passenger seat is empty. Objects on the seat or
forces acting on the seat may make the system sense
supplemental weight.XStop the vehicle in a safe location as soon as possible.XEngage the parking brake.XSwitch off the ignition.XOpen the front passenger door.XRemove child and child restraint from front passenger seat
and properly secure the child in rear seat employing the
child restraint if necessary.XRemove any other items from on and around the front
passenger seat and make sure the parcel net on the back
of the front passenger seat is empty.XMake sure no objects which apply forces to the seat are
present (e.g. objects such as books, briefcases etc. lodged
behind or around the seat, head restraints pushing against
roof etc.). The system may recognize such forces as
supplemental weight and sense that an occupant on the
front passenger seat is of a greater weight than actually
present.XKeep the seat unoccupied, close the front passenger door
and switch on the ignition.
Monitor the 42 indicator lamp in the center
console ( Y page 45) and the multifunction display in the
instrument cluster ( Y page 28) for the following:
With the seat unoccupied and the ignition switched on,
R the 42 indicator lamp in the center console
should illuminate and remain illuminated, indicating that
the OCS ( Y page 42) has deactivated the front passenger
front air bag.
R the message Front Passenger Airbag Enabled See
Operator’s Manual or the message Front Passenger
Airbag Disabled See Operator’s Manual should not
appear in the multifunction display at any time the seat is
unoccupied. Wait at least 60 seconds for the system to
complete the necessary check cycles and to make sure
neither message appears in the multifunction display.
Vehicle status messages in the multifunction display275Practical hints164_AKB; 7; 31, en-USd2ureepe,Version: 2.11.8.12009-09-11T12:07:36+02:00 - Seite 275Z