2010 MERCEDES-BENZ GLK350 4MATIC manual transmission
[x] Cancel search: manual transmissionPage 11 of 344
Front air bagssee Air bags
Front axle oil ...................................... 334
Front lamps see Headlamps
Front passenger front air bag ............ 40
Messages in the multifunction
display ........................................... 264
Front passenger front air bag off
indicator lamp (Canada only) ..... 45, 297
Front passenger front air bag off
indicator lamp (USA only) .......... 42, 298
Front seat head restraints see Head restraints
Fuel ..................................................... 212
Additives ........................................ 337
Capacity, fuel tank .........................335
Drive sensibly–safe fuel .................243
Fuel consumption statistics ...........114
Fuel filler flap and cap ...................213
Fuel tank reserve warning lamp .....294
Premium unleaded gasoline ...........336
Refueling ........................................ 212
Requirements ................................ 337
Fuel filler flap ..................................... 213
Opening manually ..........................301
Fuel gauge ................................... 28, 110
Fuels, coolants, lubricants etc. ........ 334
Fuel tank
Capacity ........................................ 335
Fuel filler flap and cap ...................213
Refueling ........................................ 212
Fuses .................................................. 325
G
Garage door opener .................... 32, 205
Gasoline see Fuel
GAWR (Gross Axle Weight Rating) ... 240
Gear range ......................................... 106
Indicator ........................................ 106
Limiting .......................................... 107
Shifting into optimal ......................108
Gear selector lever ............................ 103
Cleaning ......................................... 256
Gearshift pattern ........................... 103
Lock ......................................... 99, 104
Shifting procedure .........................104
Transmission position indicator .....104
Transmission positions ..................104
Generator
see Alternator
Global locking/unlocking
see Key, SmartKey
Glove box ........................................... 192
Gross Axle Weight Rating see GAWR
Gross Trailer Weight
see GTW
Gross Vehicle Weight
see GVW
Gross Vehicle Weight Rating
see GVWR
GTW (Gross Trailer Weight) .............. 240
GVW (Gross Vehicle Weight) ............ 240
GVWR (Gross Vehicle Weight
Rating) ................................................ 240
H
Halogen headlamps see Headlamps
Hard plastic trim items, cleaning .... 256
Hazard warning flasher ....................... 90
Headlamp cleaning system ................ 91
Headlamps
Active Bi-Xenon headlamps .............87
Automatic headlamp mode ..............88
Bi-Xenon .................................. 87, 304
Cleaning lenses ............................. 254
Cleaning system .............................. 91
Daytime running lamp mode ............88
Delayed shut-off ............................ 122
Halogen ......................................... 304
High-beam flasher ............................ 90
High-beam headlamps .....................90
Low-beam headlamps ......................88
Messages in the multifunction
display ........................................... 283
Replacing bulbs ............................. 303
Switch .............................................. 87
Headliner, cleaning and care of ....... 256
Head restraints .................................... 78
Adjustment ................................ 78, 80
Folding back .................................... 80
Index9X204_AKB; 3; 23, en-USd2ureepe,Version: 2.11.8.12009-07-16T19:16:58+02:00 - Seite 9
Page 19 of 344
Speed rating .......................... 236, 241
Storing ........................................... 233
Temperature .......................... 220, 234
Terminology ................................... 239
Tire Identification Number .............241
Tire pressure loss warning system . 222
TPMS low tire pressure/
malfunction telltale ........................296
Traction ................................. 233, 241
Tread ............................................. 241
Tread depth ........................... 232, 241
Treadwear ...................................... 233
Treadwear indicators .............232, 241
Vehicle maximum load on ..............241
Wear pattern .................................. 234
Winter tires ............................ 241, 331
Tire speed rating ....................... 236, 241
Tongue Weight Rating see TWR
Top tether
see Children in the vehicle
Total load limit ................................... 241
Towing
Towing eye bolt .............................. 322
Trailer .................................... 106, 246
Vehicle ........................................... 321
Towing eye bolt ................................. 322
Traction ...................................... 233, 241
Trailer towing ............................ 106, 246
Coupling a trailer ........................... 247
Decoupling ..................................... 249
Electrical connections .................... 246
Towing ........................................... 248
Trailer hitch ................................... 246
Weights and ratings .......................247
Transfer case ..................................... 108
Transmission see Automatic transmission
Transmission fluid level .................... 216
Transmission gear selector lever see Gear selector lever
Transmission positions .................... 104
Traveling abroad ............................... 249
Tread (tires) ....................................... 241
Tread depth (tires) .................... 232, 241
Treadwear .......................................... 233
Treadwear indicators (tires) .... 232, 241Trip menu ........................................... 113
Turning off the engine ...................... 102
Turn signals ......................................... 90
Cleaning lenses ............................. 254
Indicator lamps ................................ 28
Messages in the multifunction
display ........................................... 287
Replacing bulbs ............................. 304
TWR (Tongue Weight Rating) ........... 241
U
Uniform Tire Quality Grading
Standards .................................. 233, 241
Units
Selecting speedometer display
mode ............................................. 120
Unleaded gasoline, premium ........... 336
Unlocking the vehicle
KEYLESS-GO .................................... 67
Manually ........................................ 299
SmartKey ......................................... 66
Upholstery, cleaning ......................... 257
Useful features .................................. 195
V
Vehicle
Battery ........................................... 317
Care ............................................... 251
Control system .............................. 110
Identification Number (VIN) ...........328
Locking/unlocking ........................... 66
Lowering (wheel change) ...............317
Modifications and alterations,
Operating safety .............................. 22
Towing ........................................... 321
Unlocking/locking manually ..........299
Vehicle dimensions
see Vehicle specification
Vehicle Identification Number
(VIN) ................................................... 328
Vehicle jack see Jack
Vehicle lighting .................................... 87
Vehicle loading
Cargo tie-down rings ...................... 188
Instructions .................................... 187
Index17X204_AKB; 3; 23, en-USd2ureepe,Version: 2.11.8.12009-07-16T19:16:58+02:00 - Seite 17
Page 86 of 344
Interior rear view mirrorXAdjust the interior rear view mirror
manually.
Interior rear view mirror, antiglare
position
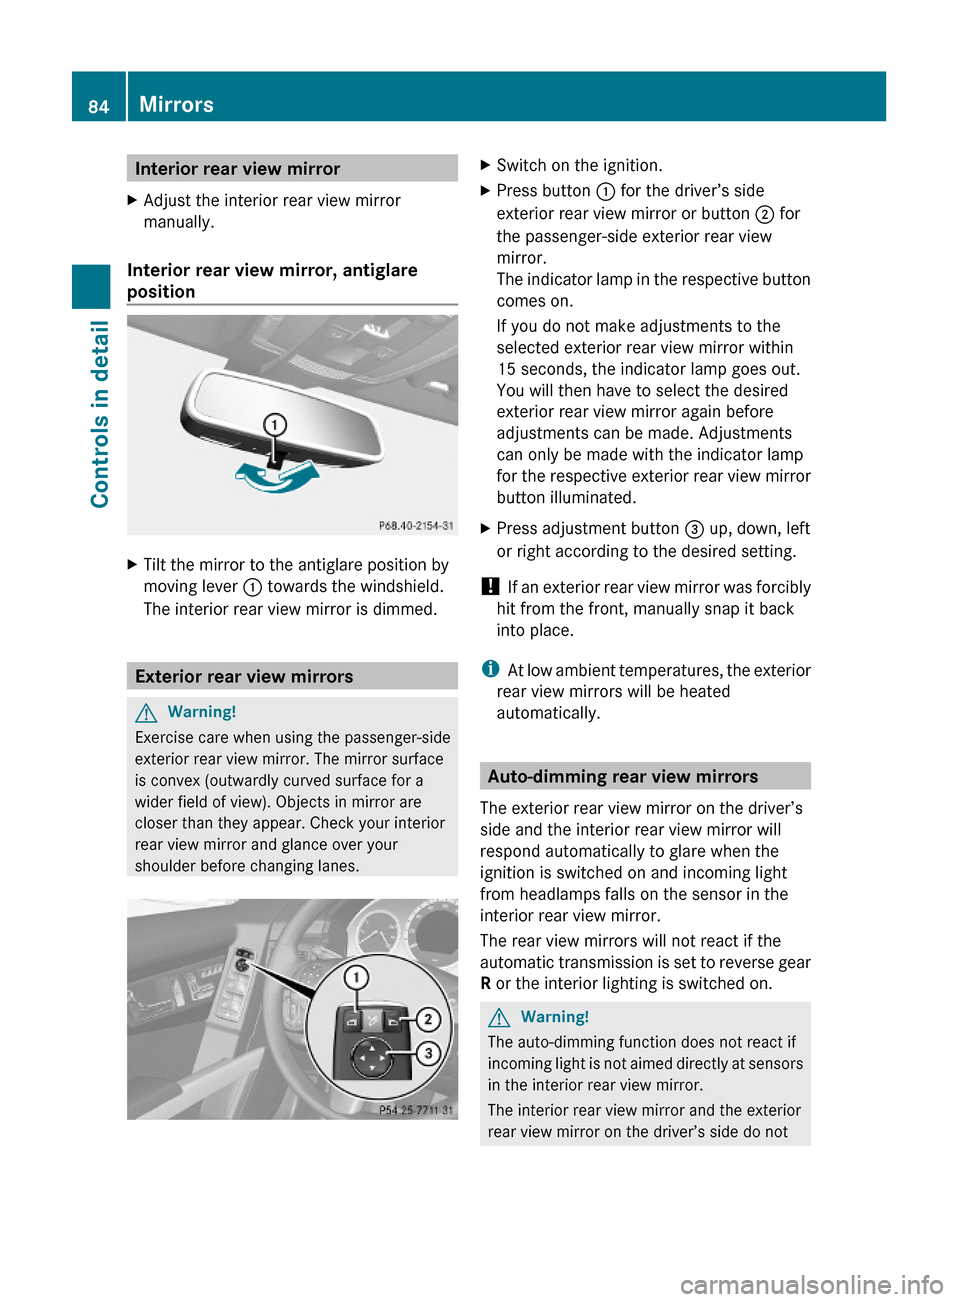
XTilt the mirror to the antiglare position by
moving lever : towards the windshield.
The interior rear view mirror is dimmed.
Exterior rear view mirrors
GWarning!
Exercise care when using the passenger-side
exterior rear view mirror. The mirror surface
is convex (outwardly curved surface for a
wider field of view). Objects in mirror are
closer than they appear. Check your interior
rear view mirror and glance over your
shoulder before changing lanes.
XSwitch on the ignition.XPress button : for the driver’s side
exterior rear view mirror or button ; for
the passenger-side exterior rear view
mirror.
The indicator lamp in the respective button
comes on.
If you do not make adjustments to the
selected exterior rear view mirror within
15 seconds, the indicator lamp goes out.
You will then have to select the desired
exterior rear view mirror again before
adjustments can be made. Adjustments
can only be made with the indicator lamp
for the respective exterior rear view mirror
button illuminated.
XPress adjustment button = up, down, left
or right according to the desired setting.
! If an exterior rear view mirror was forcibly
hit from the front, manually snap it back
into place.
iAt low ambient temperatures, the exterior
rear view mirrors will be heated
automatically.
Auto-dimming rear view mirrors
The exterior rear view mirror on the driver’s
side and the interior rear view mirror will
respond automatically to glare when the
ignition is switched on and incoming light
from headlamps falls on the sensor in the
interior rear view mirror.
The rear view mirrors will not react if the
automatic transmission is set to reverse gear
R or the interior lighting is switched on.
GWarning!
The auto-dimming function does not react if
incoming light is not aimed directly at sensors
in the interior rear view mirror.
The interior rear view mirror and the exterior
rear view mirror on the driver’s side do not
84MirrorsControls in detail
X204_AKB; 3; 23, en-USd2ureepe,Version: 2.11.8.12009-07-16T19:16:58+02:00 - Seite 84
Page 104 of 344
Vehicle movement can cause serious
personal injury or damage to the vehicle or
the vehicle drivetrain. Therefore, always do
the following before turning off the engine and
leaving the vehicle:
RKeep right foot on the brake pedal.
REngage the parking brake.
RManual transmission: Shift the manual
transmission into 1st gear or reverse gear
R.
RAutomatic transmission: Shift the
automatic transmission into park position
P.
RSlowly release the brake pedal.
RWhen parked on an incline, always turn the
front wheels towards the road curb.
RTurn the SmartKey in the starter switch to
position 0 and remove the SmartKey from
the starter switch, or press the KEYLESS-
GO start/stop button.
RTake the SmartKey with you and lock the
vehicle when leaving.
Parking brake
GWarning!
Engaging the parking brake while the vehicle
is in motion can cause the rear wheels to lock
up. You could lose control of the vehicle and
cause an accident. In addition, the vehicle’s
brake lights do not light up when the parking
brake is engaged.
GWarning!
When leaving the vehicle, always remove the
SmartKey from the starter switch, take it with
you, and lock the vehicle. Do not leave
children unattended in the vehicle, or with
access to an unlocked vehicle. Children could
release the parking brake and/or shift the
automatic transmission out of park position
P, either of which could result in an accident
and/or serious personal injury.
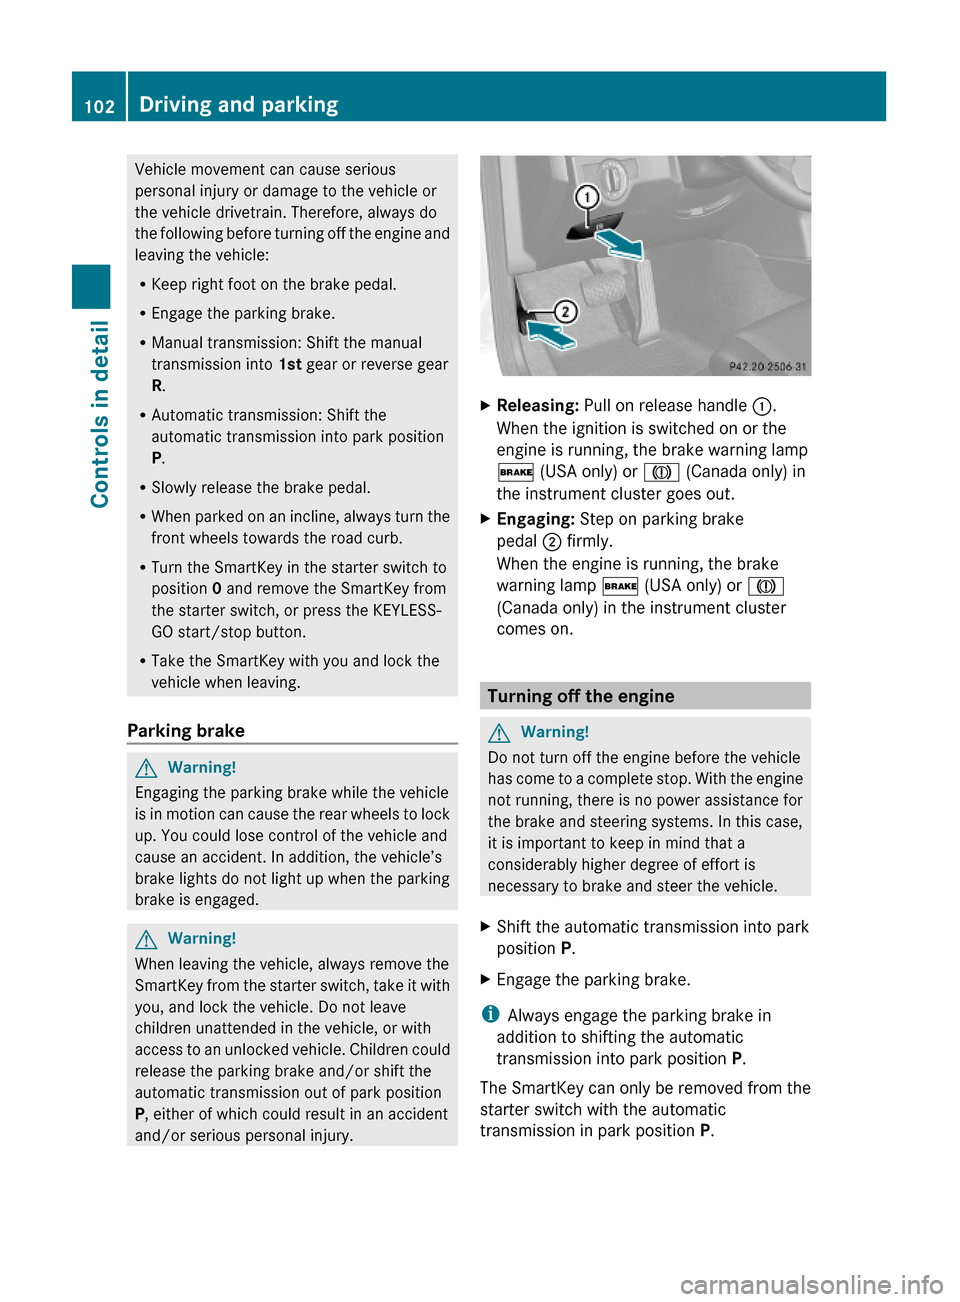
XReleasing: Pull on release handle :.
When the ignition is switched on or the
engine is running, the brake warning lamp
$ (USA only) or J (Canada only) in
the instrument cluster goes out.
XEngaging: Step on parking brake
pedal ; firmly.
When the engine is running, the brake
warning lamp $ (USA only) or J
(Canada only) in the instrument cluster
comes on.
Turning off the engine
GWarning!
Do not turn off the engine before the vehicle
has come to a complete stop. With the engine
not running, there is no power assistance for
the brake and steering systems. In this case,
it is important to keep in mind that a
considerably higher degree of effort is
necessary to brake and steer the vehicle.
XShift the automatic transmission into park
position P.
XEngage the parking brake.
iAlways engage the parking brake in
addition to shifting the automatic
transmission into park position P.
The SmartKey can only be removed from the
starter switch with the automatic
transmission in park position P.
102Driving and parkingControls in detail
X204_AKB; 3; 23, en-USd2ureepe,Version: 2.11.8.12009-07-16T19:16:58+02:00 - Seite 102
Page 107 of 344
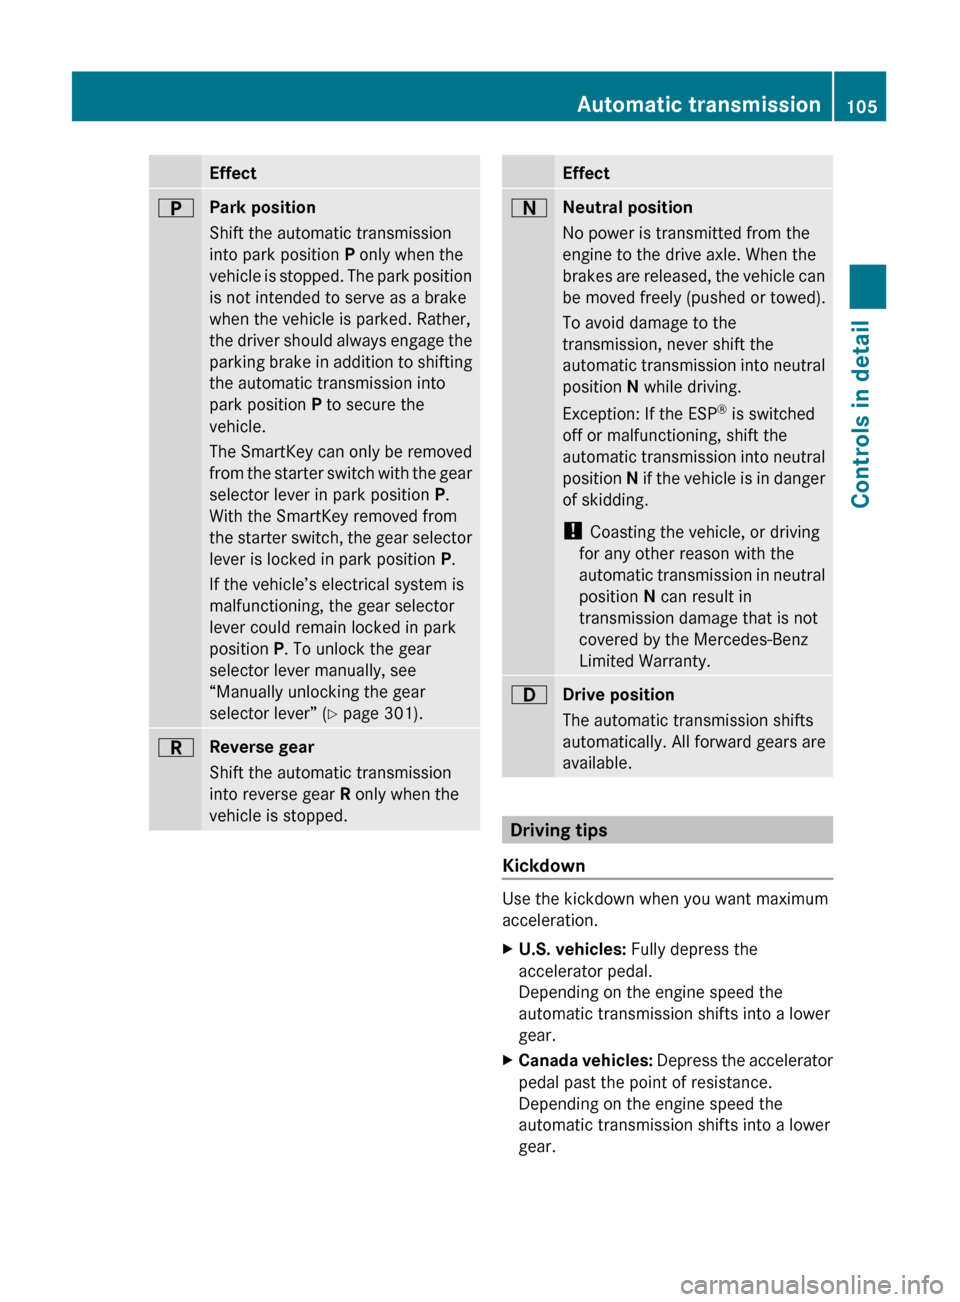
EffectBPark position
Shift the automatic transmission
into park position P only when the
vehicle is stopped. The park position
is not intended to serve as a brake
when the vehicle is parked. Rather,
the driver should always engage the
parking brake in addition to shifting
the automatic transmission into
park position P to secure the
vehicle.
The SmartKey can only be removed
from the starter switch with the gear
selector lever in park position P.
With the SmartKey removed from
the starter switch, the gear selector
lever is locked in park position P.
If the vehicle’s electrical system is
malfunctioning, the gear selector
lever could remain locked in park
position P. To unlock the gear
selector lever manually, see
“Manually unlocking the gear
selector lever” ( Y page 301).CReverse gear
Shift the automatic transmission
into reverse gear R only when the
vehicle is stopped.EffectANeutral position
No power is transmitted from the
engine to the drive axle. When the
brakes are released, the vehicle can
be moved freely (pushed or towed).
To avoid damage to the
transmission, never shift the
automatic transmission into neutral
position N while driving.
Exception: If the ESP ®
is switched
off or malfunctioning, shift the
automatic transmission into neutral
position N if the vehicle is in danger
of skidding.
! Coasting the vehicle, or driving
for any other reason with the
automatic transmission in neutral
position N can result in
transmission damage that is not
covered by the Mercedes-Benz
Limited Warranty.7Drive position
The automatic transmission shifts
automatically. All forward gears are
available.
Driving tips
Kickdown
Use the kickdown when you want maximum
acceleration.
XU.S. vehicles: Fully depress the
accelerator pedal.
Depending on the engine speed the
automatic transmission shifts into a lower
gear.XCanada vehicles: Depress the accelerator
pedal past the point of resistance.
Depending on the engine speed the
automatic transmission shifts into a lower
gear.Automatic transmission105Controls in detailX204_AKB; 3; 23, en-USd2ureepe,Version: 2.11.8.12009-07-16T19:16:58+02:00 - Seite 105Z
Page 108 of 344
Working on the vehicleGWarning!
When working on the vehicle, engage the
parking brake and shift the automatic
transmission into park position P. Otherwise
the vehicle could roll away which could result
in an accident and/or serious personal injury.
Towing a trailer
XWhen you tow a trailer, shift into a lower
gear range manually if the automatic
transmission hunts between gears on
inclines.
A lower gear range and reduction of speed
reduces the potential to overload or to
overheat the engine.
For more information on trailer towing, see
“Trailer towing” (Y page 246).
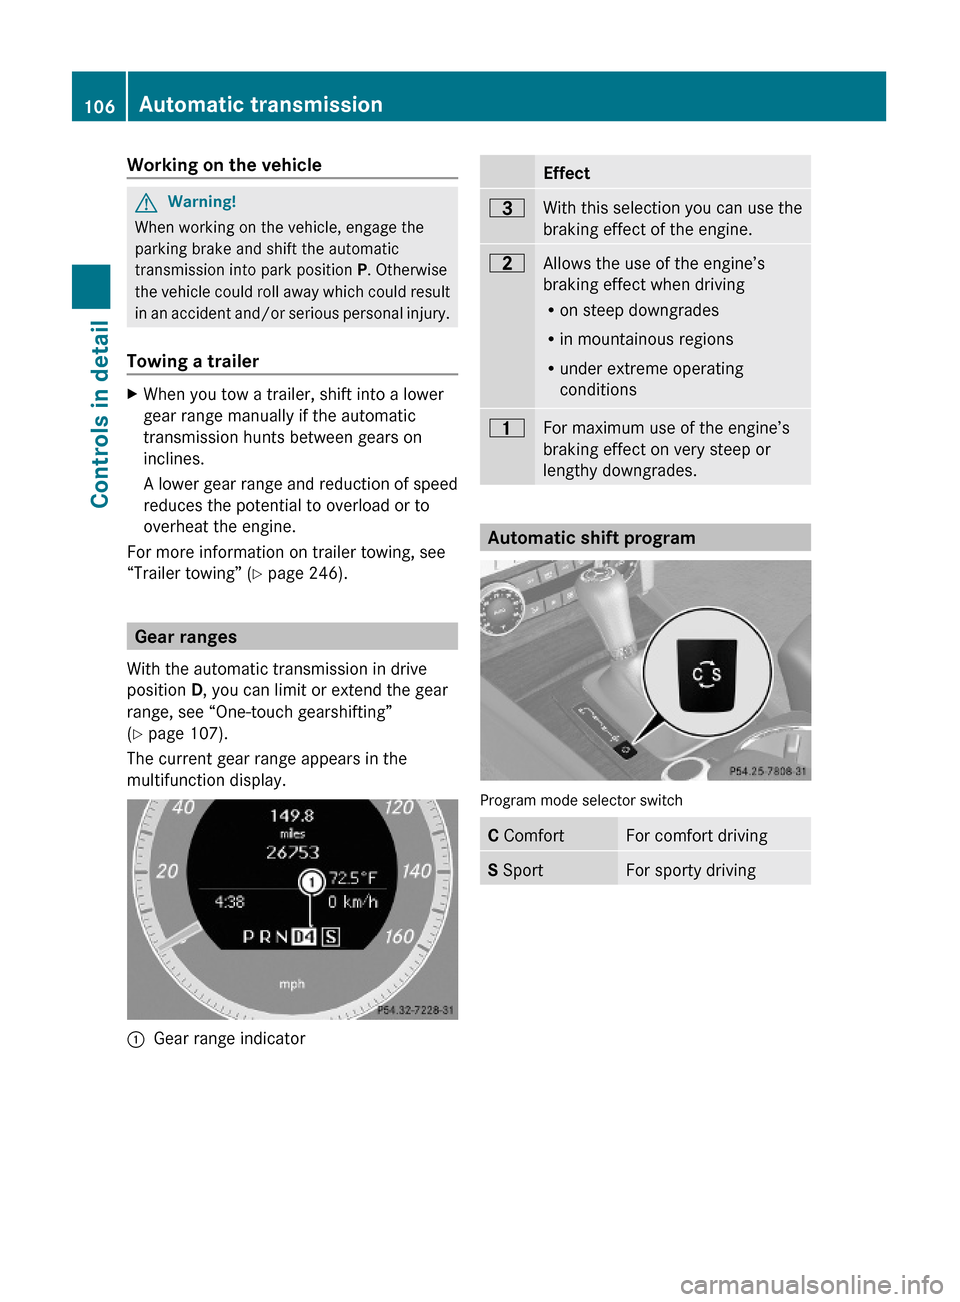
Gear ranges
With the automatic transmission in drive
position D, you can limit or extend the gear
range, see “One-touch gearshifting”
(Y page 107).
The current gear range appears in the
multifunction display.
:Gear range indicator Effect=With this selection you can use the
braking effect of the engine.
5Allows the use of the engine’s
braking effect when driving
Ron steep downgrades
Rin mountainous regions
Runder extreme operating
conditions
4For maximum use of the engine’s
braking effect on very steep or
lengthy downgrades.
Automatic shift program
Program mode selector switch
C ComfortFor comfort drivingS SportFor sporty driving106Automatic transmissionControls in detail
X204_AKB; 3; 23, en-USd2ureepe,Version: 2.11.8.12009-07-16T19:16:58+02:00 - Seite 106
Page 209 of 344
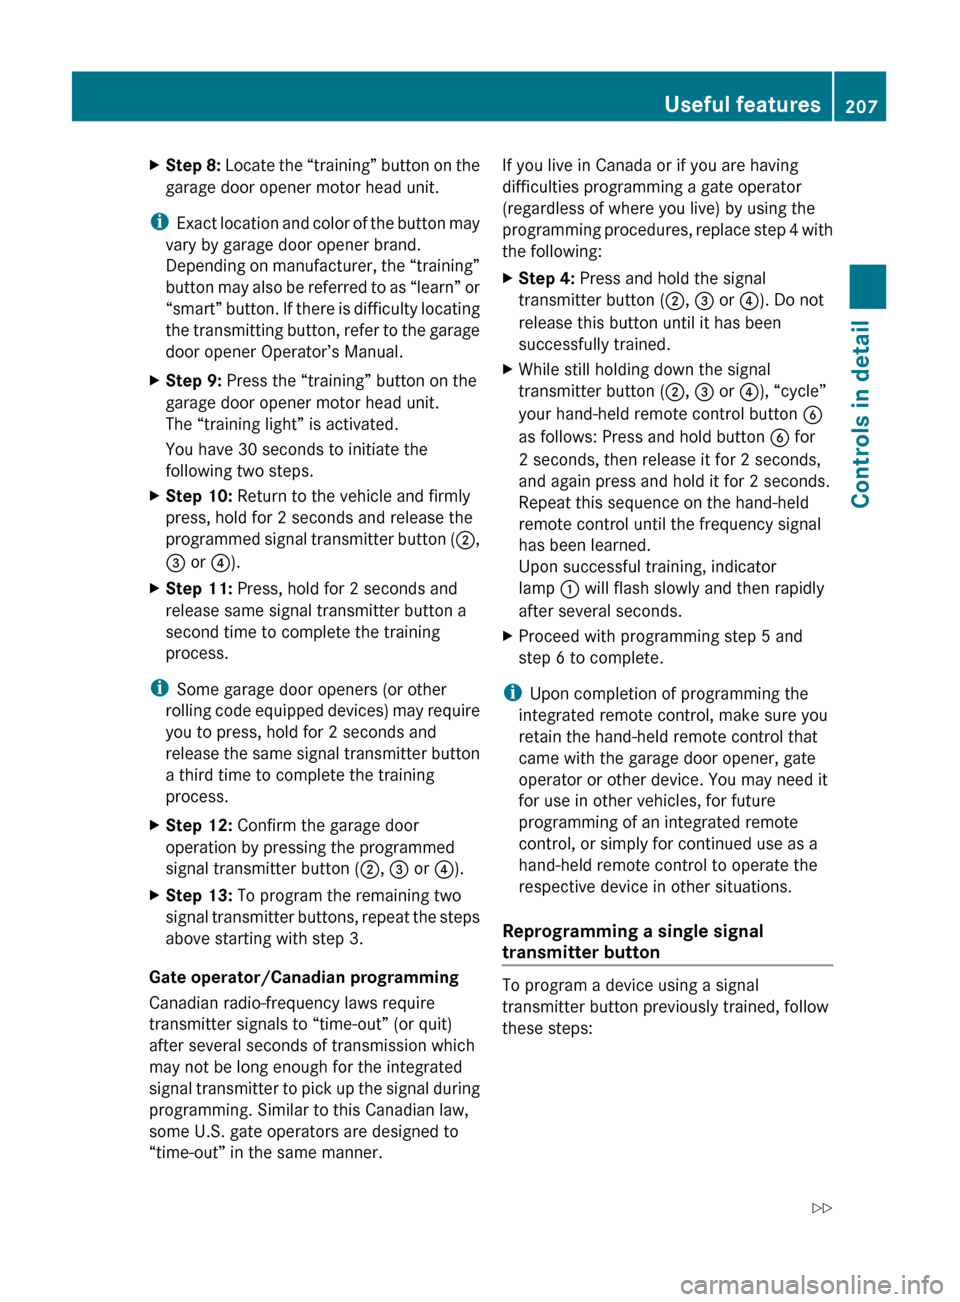
XStep 8: Locate the “training” button on the
garage door opener motor head unit.
i Exact location and color of the button may
vary by garage door opener brand.
Depending on manufacturer, the “training”
button may also be referred to as “learn” or
“smart” button. If there is difficulty locating
the transmitting button, refer to the garage
door opener Operator’s Manual.
XStep 9: Press the “training” button on the
garage door opener motor head unit.
The “training light” is activated.
You have 30 seconds to initiate the
following two steps.XStep 10: Return to the vehicle and firmly
press, hold for 2 seconds and release the
programmed signal transmitter button ( ;,
= or ?).XStep 11: Press, hold for 2 seconds and
release same signal transmitter button a
second time to complete the training
process.
i Some garage door openers (or other
rolling code equipped devices) may require
you to press, hold for 2 seconds and
release the same signal transmitter button
a third time to complete the training
process.
XStep 12: Confirm the garage door
operation by pressing the programmed
signal transmitter button ( ;, = or ?).XStep 13: To program the remaining two
signal transmitter buttons, repeat the steps
above starting with step 3.
Gate operator/Canadian programming
Canadian radio-frequency laws require
transmitter signals to “time-out” (or quit)
after several seconds of transmission which
may not be long enough for the integrated
signal transmitter to pick up the signal during
programming. Similar to this Canadian law,
some U.S. gate operators are designed to
“time-out” in the same manner.
If you live in Canada or if you are having
difficulties programming a gate operator
(regardless of where you live) by using the
programming procedures, replace step 4 with
the following:XStep 4: Press and hold the signal
transmitter button ( ;, = or ?). Do not
release this button until it has been
successfully trained.XWhile still holding down the signal
transmitter button ( ;, = or ?), “cycle”
your hand-held remote control button B
as follows: Press and hold button B for
2 seconds, then release it for 2 seconds,
and again press and hold it for 2 seconds.
Repeat this sequence on the hand-held
remote control until the frequency signal
has been learned.
Upon successful training, indicator
lamp : will flash slowly and then rapidly
after several seconds.XProceed with programming step 5 and
step 6 to complete.
i Upon completion of programming the
integrated remote control, make sure you
retain the hand-held remote control that
came with the garage door opener, gate
operator or other device. You may need it
for use in other vehicles, for future
programming of an integrated remote
control, or simply for continued use as a
hand-held remote control to operate the
respective device in other situations.
Reprogramming a single signal
transmitter button
To program a device using a signal
transmitter button previously trained, follow
these steps:
Useful features207Controls in detailX204_AKB; 3; 23, en-USd2ureepe,Version: 2.11.8.12009-07-16T19:16:58+02:00 - Seite 207Z
Page 248 of 344
extended period with the ESP®
switched
off. Doing so may cause serious damage to
the drivetrain which is not covered by the
Mercedes-Benz Limited Warranty.
! Simultaneously depressing the
accelerator pedal and applying the brakes
reduces engine performance and causes
premature brake and drivetrain wear which
is not covered by the Mercedes-Benz
Limited Warranty.
Hydroplaning
Depending on the depth of the water layer on
the road, hydroplaning may occur, even at low
speeds and with new tires. In heavy rain or
when conditions indicate possible
hydroplaning:
XReduce vehicle speed.XAvoid track grooves in the road.XApply brakes cautiously.
Standing water
! Do not drive through flooded areas.
Before driving through water, determine its
depth.
If you must drive through standing water,
drive slowly to prevent water from entering
the passenger compartment or the engine
compartment. Water in these areas could
cause damage to electrical components or
wiring of the engine or transmission, or
could result in water being ingested by the
engine through the air intake causing
severe internal engine damage. Any such
damage is not covered by the Mercedes-
Benz Limited Warranty.
Prevent water from entering the passenger
compartment or the engine compartment. If
you must drive through standing water, keep
in mind that
R the maximum depth of the water may not
exceed 12 in (30 cm)
R you must drive slowly
Trailer towing
GWarning!
Failure to use proper equipment and driving
technique can result in a loss of vehicle
control when towing a trailer.
Improper towing or failure to follow the
instructions in this manual can result in
vehicle damage and/or serious personal
injury. Follow the guidelines below carefully
to assure safe trailer operation.
Contact an authorized Mercedes-Benz Center
should you require an explanation of
information contained in this manual.
Trailer hitch
R Only install a trailer hitch receiver approved
for your vehicle.
For information on availability and
installation, contact an authorized
Mercedes-Benz Center.
R The bumpers on your vehicle are not
designed for use with clamp-type hitches.
Do not attach rental hitches or other
bumper-type hitches to them.
R To reduce the possibility of damage,
remove the hitch ball adapter from the
receiver when not in use.
Electrical connections
The vehicle is prewired to accept the seven-
wire harness included in the Mercedes-Benz
approved trailer hitch receiver kit.
i A four-pole conversion plug is available
from your authorized Mercedes-Benz
Center as a spare part.
For further information, contact an
authorized Mercedes-Benz Center.
246Driving instructionsOperation
X204_AKB; 3; 23, en-USd2ureepe,Version: 2.11.8.12009-07-16T19:16:58+02:00 - Seite 246