2010 MERCEDES-BENZ GLK350 4MATIC Sport
[x] Cancel search: SportPage 108 of 344
Working on the vehicleGWarning!
When working on the vehicle, engage the
parking brake and shift the automatic
transmission into park position P. Otherwise
the vehicle could roll away which could result
in an accident and/or serious personal injury.
Towing a trailer
XWhen you tow a trailer, shift into a lower
gear range manually if the automatic
transmission hunts between gears on
inclines.
A lower gear range and reduction of speed
reduces the potential to overload or to
overheat the engine.
For more information on trailer towing, see
“Trailer towing” (Y page 246).
Gear ranges
With the automatic transmission in drive
position D, you can limit or extend the gear
range, see “One-touch gearshifting”
(Y page 107).
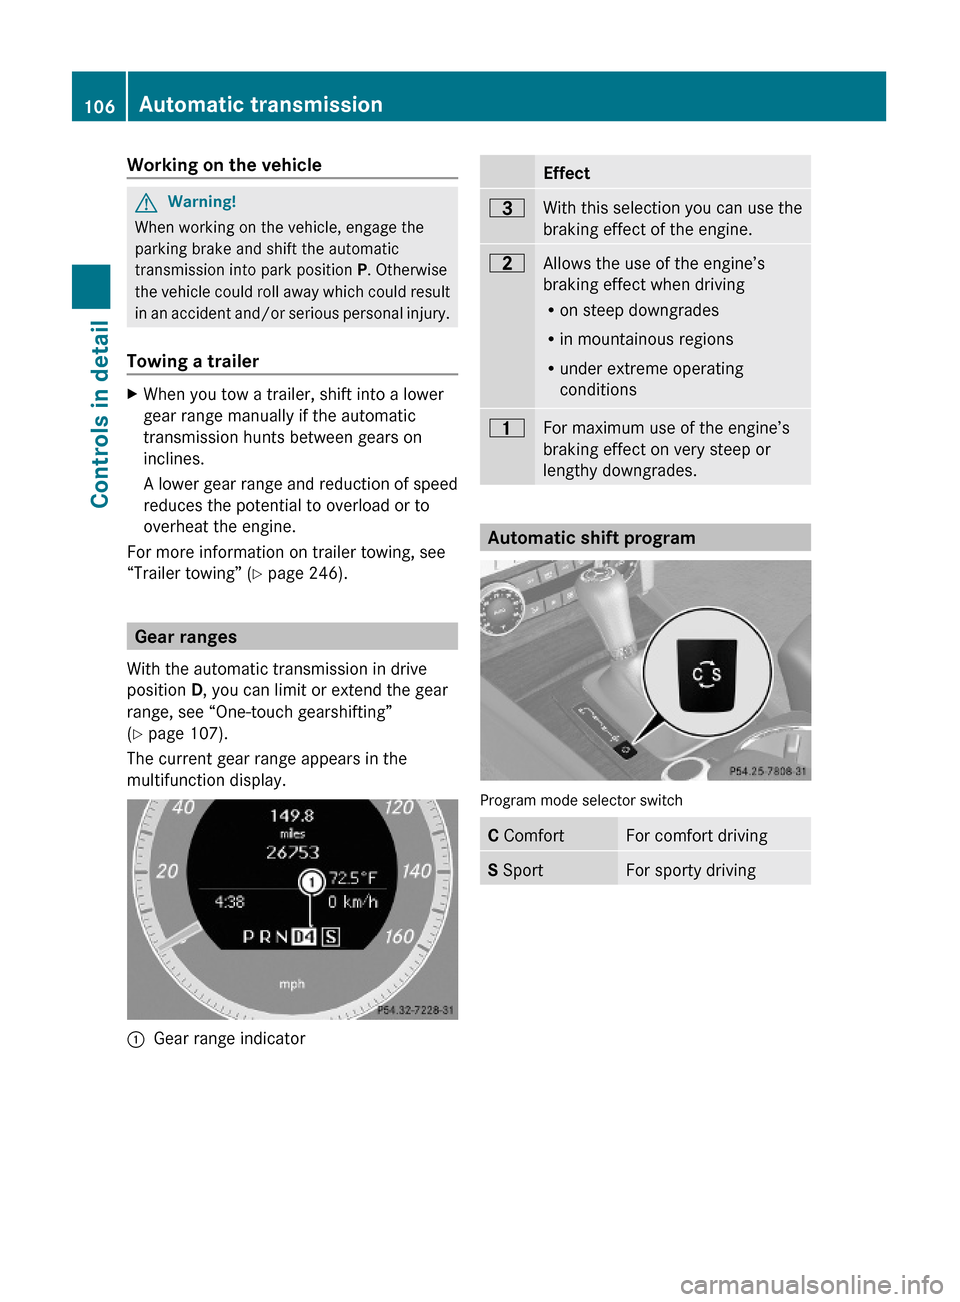
The current gear range appears in the
multifunction display.
:Gear range indicator Effect=With this selection you can use the
braking effect of the engine.
5Allows the use of the engine’s
braking effect when driving
Ron steep downgrades
Rin mountainous regions
Runder extreme operating
conditions
4For maximum use of the engine’s
braking effect on very steep or
lengthy downgrades.
Automatic shift program
Program mode selector switch
C ComfortFor comfort drivingS SportFor sporty driving106Automatic transmissionControls in detail
X204_AKB; 3; 23, en-USd2ureepe,Version: 2.11.8.12009-07-16T19:16:58+02:00 - Seite 106
Page 143 of 344
Contact an authorized Mercedes-Benz
Center for details and availability for your
vehicle.
SIRIUS XM Satellite Radio provides over
130 channels of digital-quality radio,
including 100 % commercial-free music,
sports, news and entertainment. SIRIUS XM
Satellite Radio uses a fleet of high-power
satellites to broadcast 24 hours per day,
coast to coast, in the contiguous U. S. and
Canada.
This diverse, satellite-delivered programming
is available for a monthly subscription fee.
For more information and service availability
call the SIRIUS XM Service Center at
1-888-539-7474 (Y page 145), or visit
www.sirius.com (USA) or
www.siriuscanada.ca (Canada).
iNote that categories and channels shown
in illustrations are dependent on
programming content delivered by the
service provider. Programming content is
subject to change. Therefore, channels and
categories shown in illustrations and
descriptions contained in this manual may
differ from the channels and categories
delivered by the service provider.
iSatellite radio service may be unavailable
or interrupted from time to time for a
variety of reasons, such as environmental
or topographic conditions and other things
we cannot control. Service might also not
be available in certain places (e.g. in
tunnels, parking garages, under leafy trees,
or within or next to buildings) or near other
obstructions. In such situations, the
satellite radio’s main menu shows the No
Service screen. At this point, the radio’s
functions are restricted.
Subscribing to satellite radio
XPress button $ on audio control unit
repeatedly until Sat is selected.
The following conditions are possible:
RSatellite radio service is not activated
(only the preview channel is displayed).
RSatellite radio service is activated.
iIf a satellite receiver is not installed or not
properly installed:
The message Device Unavailable will
appear.
If the satellite radio service is not activated,
the “SIRIUS Preview” display appears.
Satellite radio service is not activated
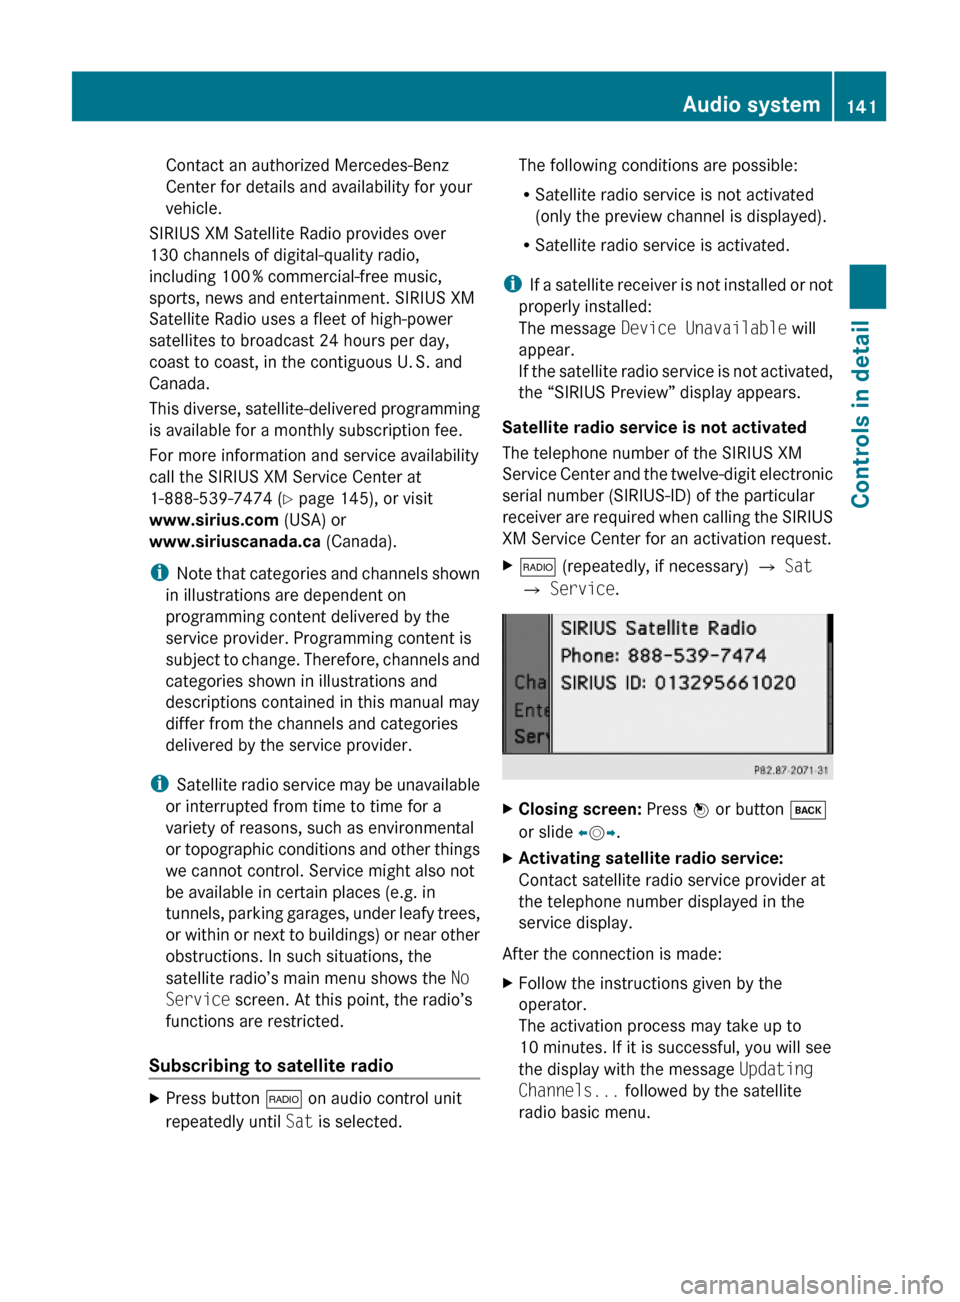
The telephone number of the SIRIUS XM
Service Center and the twelve-digit electronic
serial number (SIRIUS-ID) of the particular
receiver are required when calling the SIRIUS
XM Service Center for an activation request.
X$ (repeatedly, if necessary) Q Sat
Q Service.
XClosing screen: Press W or button k
or slide XVY.
XActivating satellite radio service:
Contact satellite radio service provider at
the telephone number displayed in the
service display.
After the connection is made:
XFollow the instructions given by the
operator.
The activation process may take up to
10 minutes. If it is successful, you will see
the display with the message Updating
Channels... followed by the satellite
radio basic menu.
Audio system141Controls in detailX204_AKB; 3; 23, en-USd2ureepe,Version: 2.11.8.12009-07-16T19:16:58+02:00 - Seite 141Z
Page 145 of 344
Selecting program category
iThe channels are categorized. Categories
allow you to tune to stations broadcasting
a certain type of program.
Satellite radio channels are split up into
categories such as News, Sports, Rock, or
Country, if available. The category list is
sorted alphabetically.
XCalling up category list: $
(repeatedly, if necessary) Q Cat .
or
XIn Sat mode, slide XV Y or rotate cV d until
Cat. is highlighted and press W.
The category list appears.XSelecting a category: Slide ZV Æ or rotate
c V d.XSetting the selected category: Press W.
The selected program category
(alphabetical order) will appear in the audio
display. The last tuned channel in the new
category will begin to play.
When searching, tuning in, or selecting
from the channel list, the All Channels
option accesses all of your subscribed
channels.
i When you select the category All
Channels , you have access to all the
channels you subscribed to, regardless of
category.
Tuning in channels
You have the following selection options:
R the channel search function
R the manual channel number entry
R the channel list
R the channel presets
Tuning in channels using channel search
functionXSlide XV Y or rotate cV d when the main
area in the basic menu is active.
Depending on the direction in which the
controller is being slid or rotated, the
system searches upward or downward and
stops at the next subscribed channel.
or
XPress button E or F on audio control
unit.
Depending on the pressed button, the
system searches upward or downward and
stops at the next subscribed channel.
i Which channels are available depends on
which channels you have subscribed to and
the program category you have selected
( Y page 143). For tuning in channels you
can also use the buttons on the
multifunction steering wheel, see “Audio
menu” ( Y page 115).
Tuning in channels using manual channel
number entry
X$ (repeatedly, if necessary) Q Sat
Q Enter Channel .
The menu for manual channel number entry
appears.
or
XIn Sat mode, press button l on the
keypad in audio control unit briefly.XChannel number entry with keypad:
Enter desired channel number with buttons
k to x with the keypad in audio
control unit briefly.
Further operation depends on whether the
selected channel number is valid or if the
channel is included in your subscription.
XExiting menu without making an entry:
Press button k in the center console
( Y page 129).
Channel number is valid and channel is
included in subscription: The audio system
tunes in the channel entered.
Audio system143Controls in detailX204_AKB; 3; 23, en-USd2ureepe,Version: 2.11.8.12009-07-16T19:16:58+02:00 - Seite 143Z
Page 187 of 344
Opening and closing the panorama
roof with power tilt/sliding panel
GObserve Safety notes, see page 53.GWarning!
When opening or closing the tilt/sliding panel,
make sure there is no danger of anyone being
harmed by the opening/closing procedure.
The tilt/sliding panel is equipped with the
express operation and automatic reversal
function. If the movement of the tilt/sliding
panel is blocked during the closing procedure,
the tilt/sliding panel will stop and open
slightly.
The tilt/sliding panel operates differently
when the roof panel switch is pressed and
held. See the “Closing when the tilt/sliding
panel is blocked” section in this chapter for
details.
The opening/closing procedure of the tilt/
sliding panel can be immediately halted by
releasing the roof panel switch or, if the roof
panel switch was moved past the resistance
point and released, by moving the roof panel
switch in any direction.
GWarning!
The panorama roof with tilt/sliding panel is
made out of glass. In the event of an accident,
the glass may shatter. This may result in an
opening in the roof.
In a vehicle rollover, occupants not wearing
their seat belts or not wearing them properly
may be thrown out of the opening. Such an
opening also presents a potential for injury for
occupants wearing their seat belts properly as
entire body parts or portions of them may
protrude from the passenger compartment.
! To avoid damaging the seals, do not
transport any objects with sharp edges
which can stick out of the tilt/sliding panel.
Do not open the tilt/sliding panel if there is
snow or ice on the roof, as this could result
in malfunctions.
! Please keep in mind that weather
conditions can sometimes change rapidly.
Make sure to close the tilt/sliding panel
when leaving the vehicle. If water enters
the vehicle interior, vehicle electronics
could be damaged which is not covered by
the Mercedes-Benz Limited Warranty.
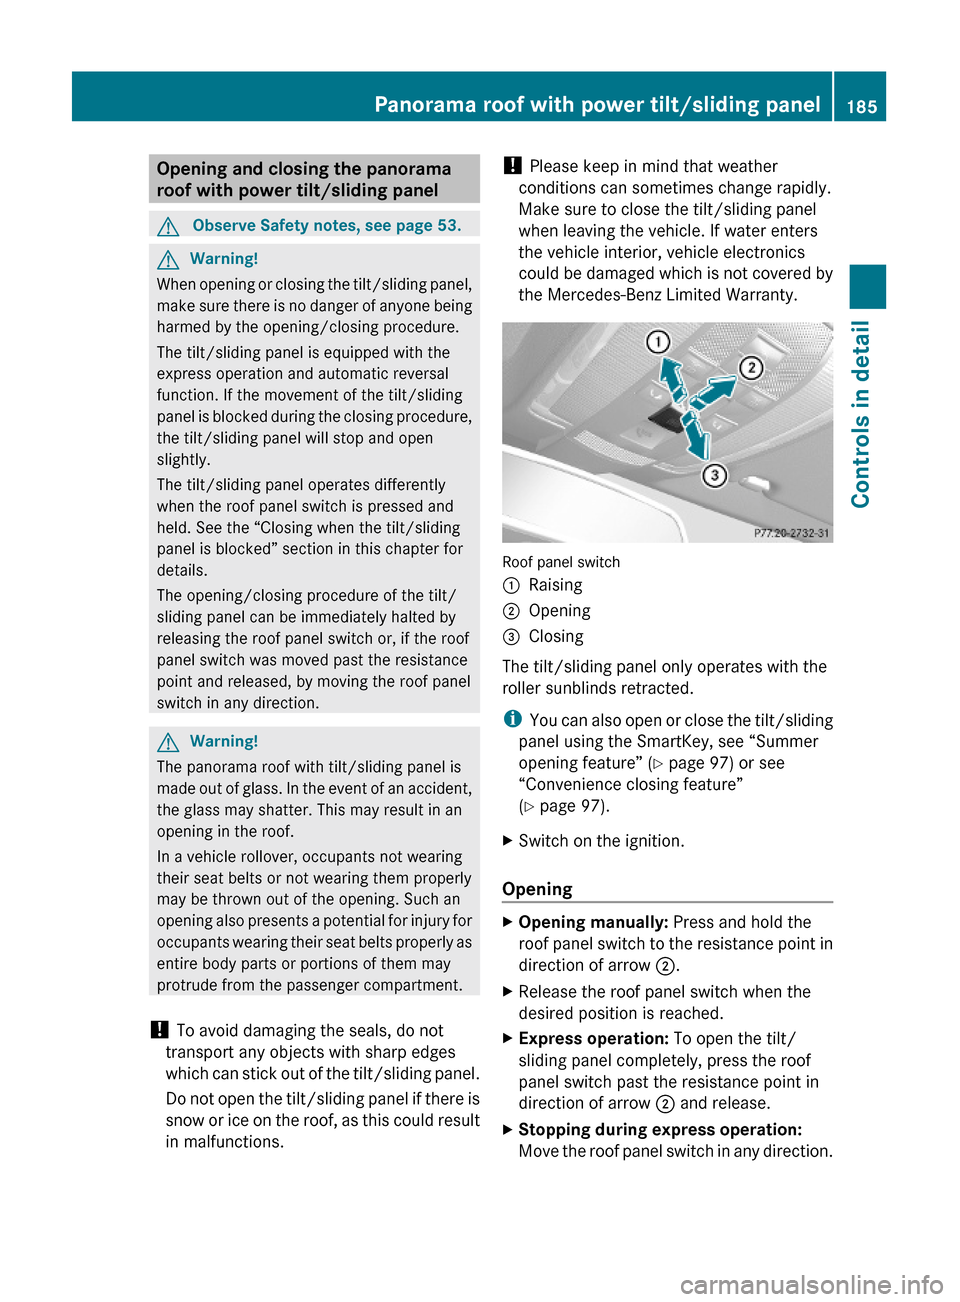
Roof panel switch
:Raising;Opening=Closing
The tilt/sliding panel only operates with the
roller sunblinds retracted.
iYou can also open or close the tilt/sliding
panel using the SmartKey, see “Summer
opening feature” (Y page 97) or see
“Convenience closing feature”
(Y page 97).
XSwitch on the ignition.
Opening
XOpening manually: Press and hold the
roof panel switch to the resistance point in
direction of arrow ;.
XRelease the roof panel switch when the
desired position is reached.
XExpress operation: To open the tilt/
sliding panel completely, press the roof
panel switch past the resistance point in
direction of arrow ; and release.
XStopping during express operation:
Move the roof panel switch in any direction.
Panorama roof with power tilt/sliding panel185Controls in detailX204_AKB; 3; 23, en-USd2ureepe,Version: 2.11.8.12009-07-16T19:16:58+02:00 - Seite 185Z
Page 189 of 344
XSwitch on the ignition.XPush and hold the roof panel switch in
direction of arrow ; (Y page 184) until the
roller sunblinds are fully retracted.
XPush and hold the roof panel switch in
direction of arrow ; until the tilt/sliding
panel is opened approximately 4 inch
(10 cm).
XPull and hold the roof panel switch in
direction of arrow = until the tilt/sliding
panel is fully closed.
XKeep holding the roof panel switch in
direction of arrow = for approximately
1 second.
XPull and hold the roof panel switch in
direction of arrow = (Y page 184) until the
roller sunblinds are fully extended.
XKeep holding the roof panel switch in
direction of arrow = for approximately
1 second.
XCheck the express operation feature of the
tilt/sliding panel (Y page 185).
If the tilt/sliding panel opens completely,
the roof is synchronized. Otherwise repeat
the above steps.
Loading and storing
Loading instructions
GWarning!
Always fasten items being carried as securely
as possible using cargo tie-down rings and
fastening materials appropriate for the weight
and size of the load.
In an accident, during hard braking or sudden
maneuvers, loose items will be thrown around
inside the vehicle. This can cause injury to
vehicle occupants unless the items are
securely fastened in the vehicle.
To help avoid personal injury during a collision
or sudden maneuver, exercise care when
transporting cargo. Do not pile luggage or
cargo higher than the seat backrests.
Never drive a vehicle with the tailgate open.
Deadly carbon monoxide (CO) gases may
enter vehicle interior resulting in
unconsciousness and death.
Load distribution
The Gross Vehicle Weight (GVW) is the weight
of the vehicle including:Rfuel
Rtools
Rspare wheel
Rinstalled accessories
Rpassengers
Rluggage/cargo
It must never exceed the load limit and the
Gross Vehicle Weight Rating (GVWR) for your
vehicle. The load limit and the GVWR are
specified on the placard located on the
driver’s door B-pillar (Y page 227).
In addition, the load must be distributed so
that the weight on each axle never exceeds
the Gross Axle Weight Rating (GAWR) for the
front and rear axle. The GVWR and GAWR for
your vehicle are indicated on the certification
label located on the driver’s door B-pillar
(Y page 227).
For more information, see “Tire and Loading
Information” (Y page 228).
The handling characteristics of a fully loaded
vehicle depend greatly on the load
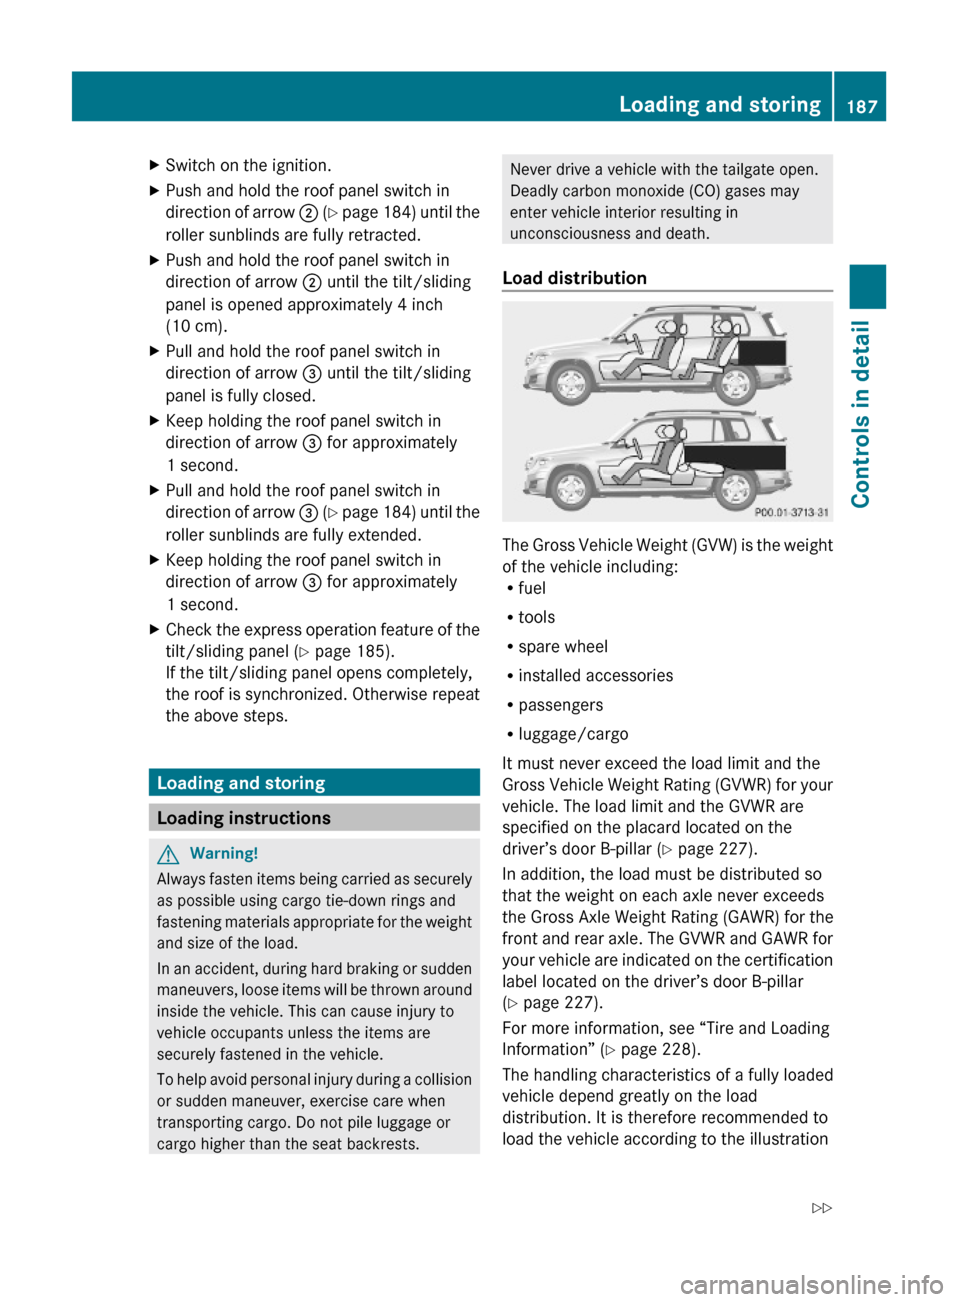
distribution. It is therefore recommended to
load the vehicle according to the illustration
Loading and storing187Controls in detailX204_AKB; 3; 23, en-USd2ureepe,Version: 2.11.8.12009-07-16T19:16:58+02:00 - Seite 187Z
Page 190 of 344
shown. The heaviest items are to be placed
towards the front of the vehicle.
Please pay attention to and comply with the
following instructions when loading the
vehicle and transporting cargo:
RAlways place items being carried against
front or rear seat backrests, and fasten
them as securely as possible.
RThe heaviest portion of the cargo should
always be kept as low as possible against
front or rear seat backrests.
Roof rack
For information about further roof rack
equipment, contact an authorized Mercedes-
Benz Center.
GWarning!
Only use roof racks approved by Mercedes-
Benz for your vehicle model to avoid damage
to the vehicle.
Follow the manufacturer’s installation
instructions. Otherwise, an improperly
attached roof rack system or its load could
become detached from the vehicle.
Do not exceed the maximum roof load of
165 lb (75 kg).
Take into consideration that when the roof
rack is loaded, the handling characteristics
are different from those when operating the
vehicle without the roof rack loaded.
Make sure
Ryou can raise the panorama roof with
power tilt/sliding panel completely
Ryou can open the tailgate completely
Parcel nets
GWarning!
Parcel nets are intended for storing light-
weight items only, such as road maps, mail,
etc.
Heavy objects, objects with sharp edges, or
fragile objects may not be transported in the
parcel nets. In an accident, during hard
braking, or sudden maneuvers, they could be
thrown around inside the vehicle and cause
injury to vehicle occupants.
Parcel nets cannot protect transported goods
in the event of an accident.
Parcel nets are located in the front passenger
footwell and on the left trunk side wall.
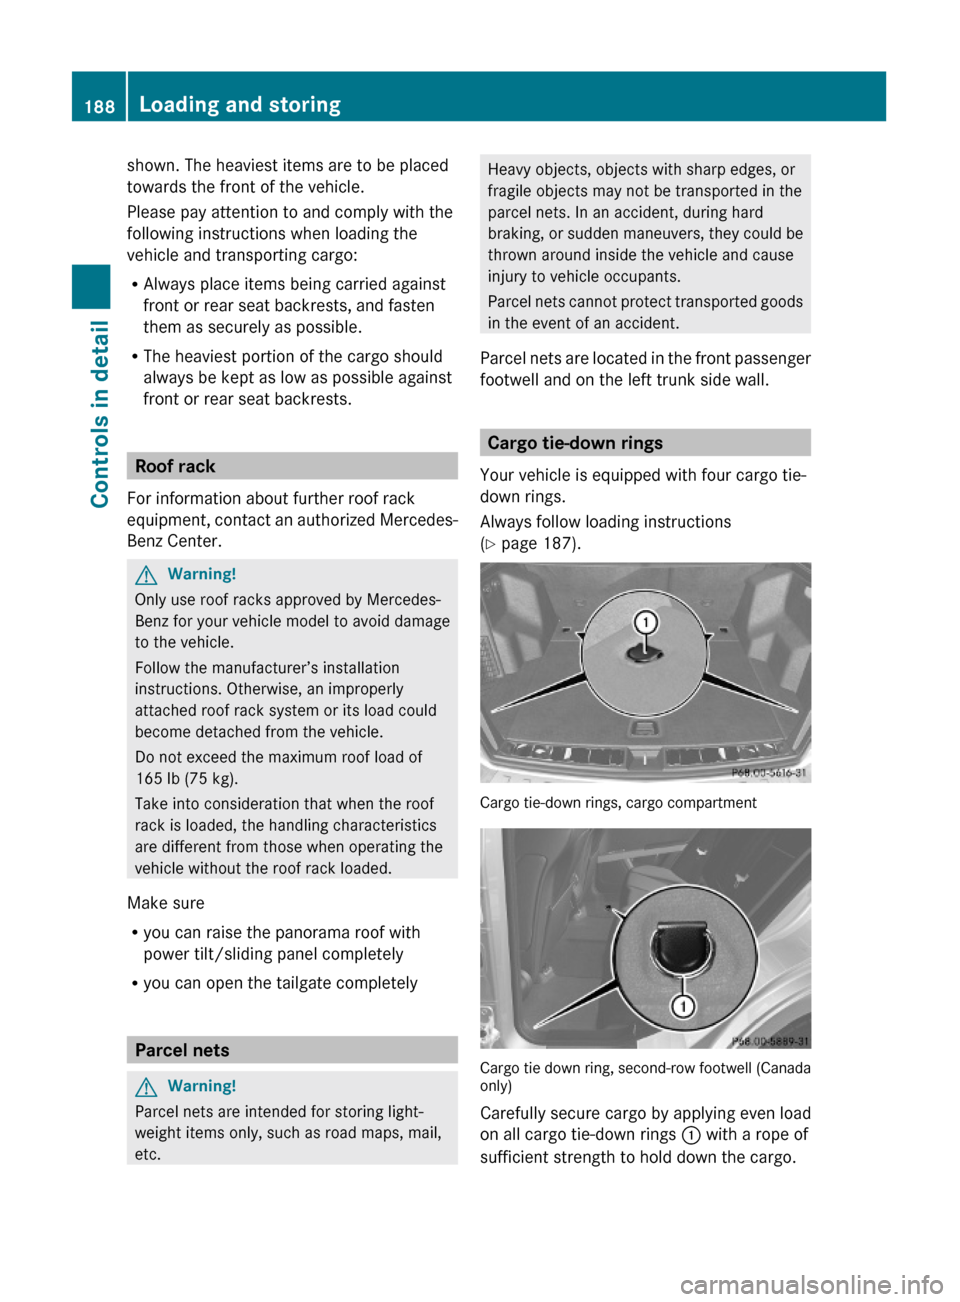
Cargo tie-down rings
Your vehicle is equipped with four cargo tie-
down rings.
Always follow loading instructions
(Y page 187).
Cargo tie-down rings, cargo compartment
Cargo tie down ring, second-row footwell (Canadaonly)
Carefully secure cargo by applying even load
on all cargo tie-down rings : with a rope of
sufficient strength to hold down the cargo.
188Loading and storingControls in detail
X204_AKB; 3; 23, en-USd2ureepe,Version: 2.11.8.12009-07-16T19:16:58+02:00 - Seite 188
Page 191 of 344
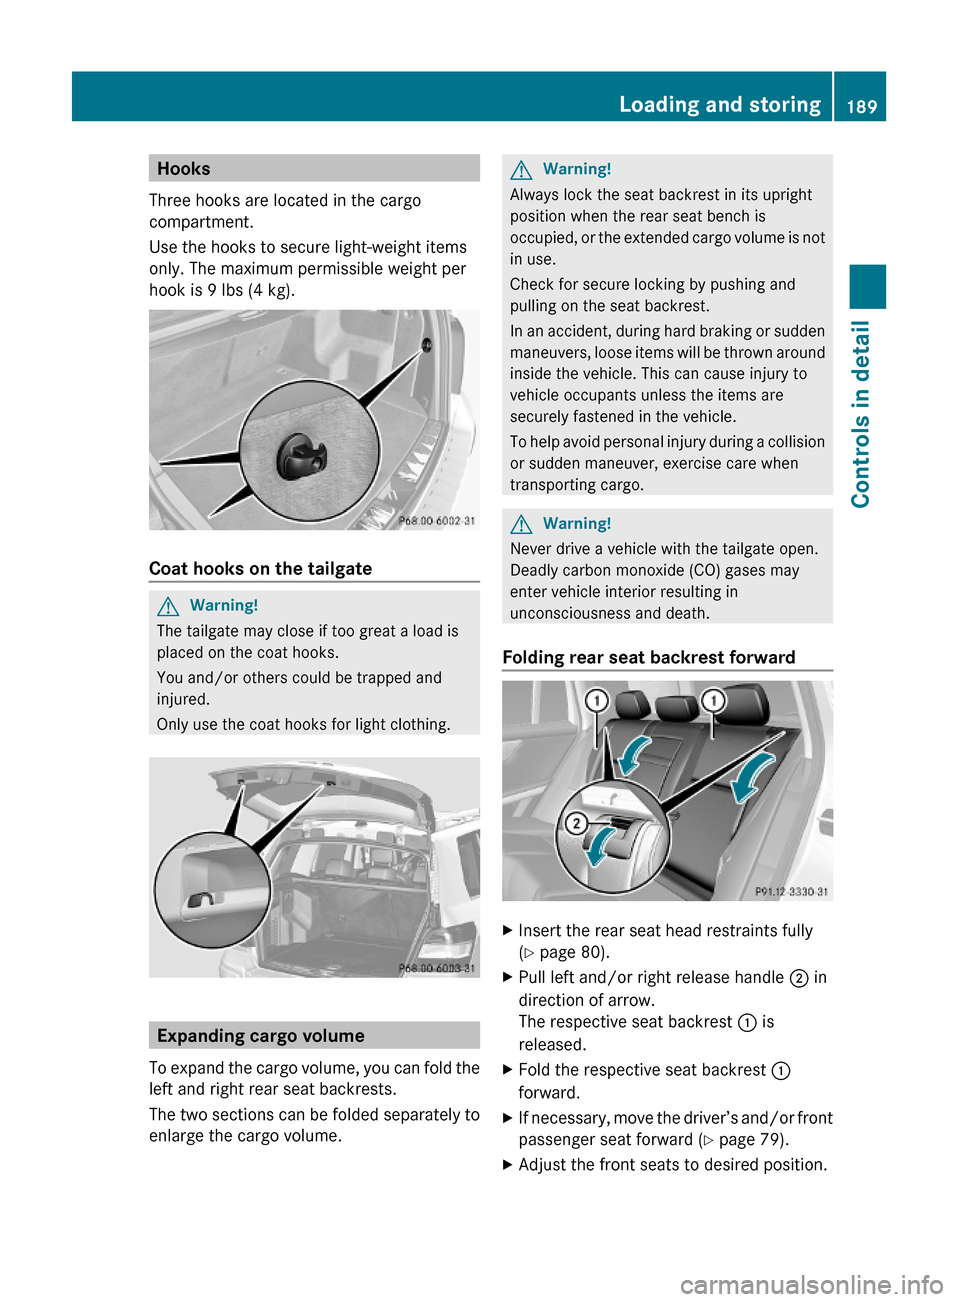
Hooks
Three hooks are located in the cargo
compartment.
Use the hooks to secure light-weight items
only. The maximum permissible weight per
hook is 9 lbs (4 kg).
Coat hooks on the tailgate
GWarning!
The tailgate may close if too great a load is
placed on the coat hooks.
You and/or others could be trapped and
injured.
Only use the coat hooks for light clothing.
Expanding cargo volume
To expand the cargo volume, you can fold the
left and right rear seat backrests.
The two sections can be folded separately to
enlarge the cargo volume.
GWarning!
Always lock the seat backrest in its upright
position when the rear seat bench is
occupied, or the extended cargo volume is not
in use.
Check for secure locking by pushing and
pulling on the seat backrest.
In an accident, during hard braking or sudden
maneuvers, loose items will be thrown around
inside the vehicle. This can cause injury to
vehicle occupants unless the items are
securely fastened in the vehicle.
To help avoid personal injury during a collision
or sudden maneuver, exercise care when
transporting cargo.
GWarning!
Never drive a vehicle with the tailgate open.
Deadly carbon monoxide (CO) gases may
enter vehicle interior resulting in
unconsciousness and death.
Folding rear seat backrest forward
XInsert the rear seat head restraints fully
(Y page 80).
XPull left and/or right release handle ; in
direction of arrow.
The respective seat backrest : is
released.
XFold the respective seat backrest :
forward.
XIf necessary, move the driver’s and/or front
passenger seat forward (Y page 79).
XAdjust the front seats to desired position.Loading and storing189Controls in detailX204_AKB; 3; 23, en-USd2ureepe,Version: 2.11.8.12009-07-16T19:16:58+02:00 - Seite 189Z
Page 192 of 344
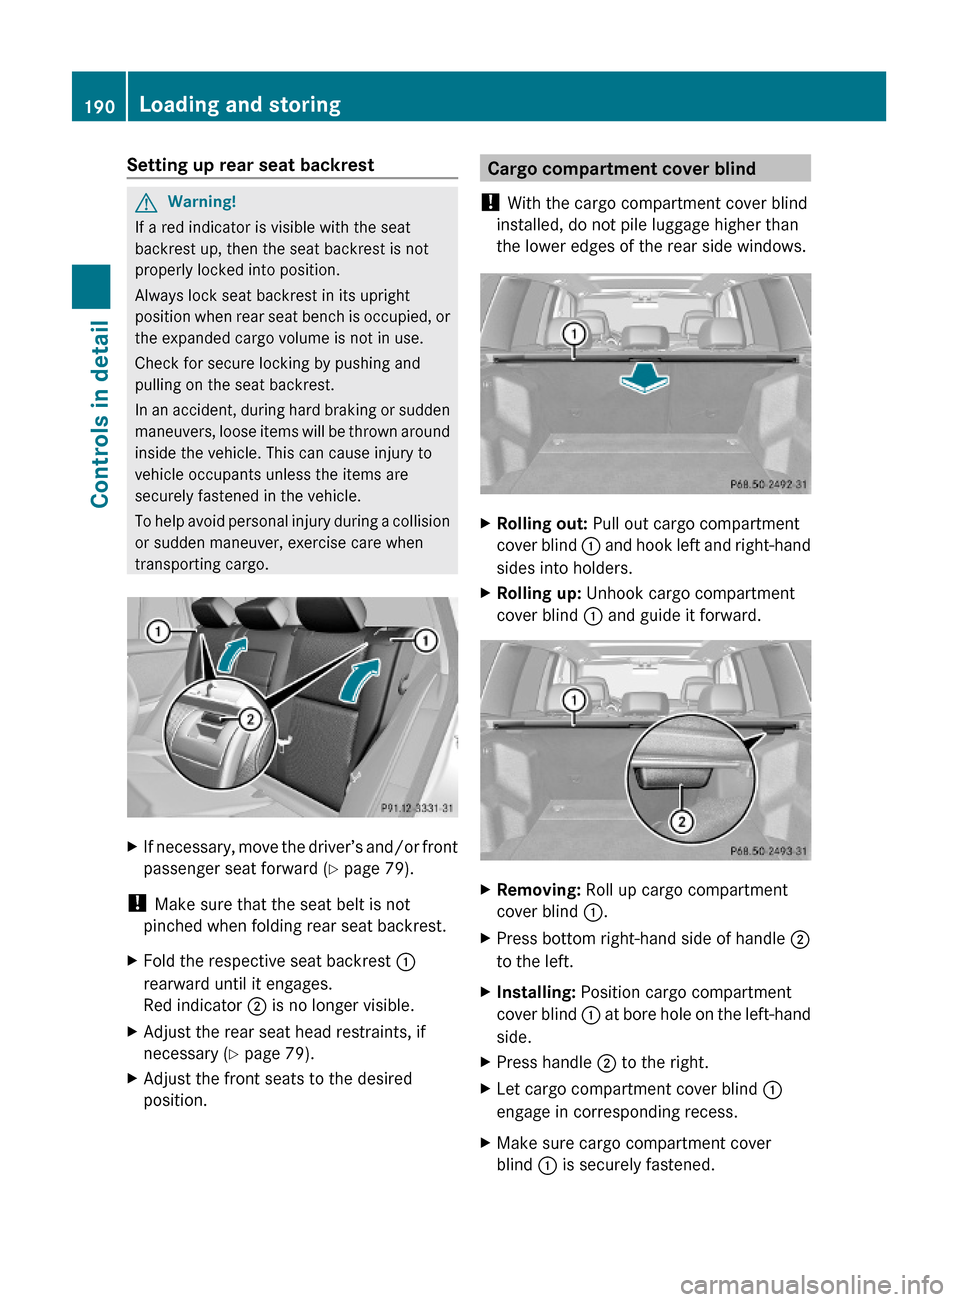
Setting up rear seat backrestGWarning!
If a red indicator is visible with the seat
backrest up, then the seat backrest is not
properly locked into position.
Always lock seat backrest in its upright
position when rear seat bench is occupied, or
the expanded cargo volume is not in use.
Check for secure locking by pushing and
pulling on the seat backrest.
In an accident, during hard braking or sudden
maneuvers, loose items will be thrown around
inside the vehicle. This can cause injury to
vehicle occupants unless the items are
securely fastened in the vehicle.
To help avoid personal injury during a collision
or sudden maneuver, exercise care when
transporting cargo.
XIf necessary, move the driver’s and/or front
passenger seat forward (Y page 79).
! Make sure that the seat belt is not
pinched when folding rear seat backrest.
XFold the respective seat backrest :
rearward until it engages.
Red indicator ; is no longer visible.
XAdjust the rear seat head restraints, if
necessary (Y page 79).
XAdjust the front seats to the desired
position.Cargo compartment cover blind
! With the cargo compartment cover blind
installed, do not pile luggage higher than
the lower edges of the rear side windows.
XRolling out: Pull out cargo compartment
cover blind : and hook left and right-hand
sides into holders.
XRolling up: Unhook cargo compartment
cover blind : and guide it forward.
XRemoving: Roll up cargo compartment
cover blind :.
XPress bottom right-hand side of handle ;
to the left.
XInstalling: Position cargo compartment
cover blind : at bore hole on the left-hand
side.
XPress handle ; to the right.XLet cargo compartment cover blind :
engage in corresponding recess.
XMake sure cargo compartment cover
blind : is securely fastened.
190Loading and storingControls in detail
X204_AKB; 3; 23, en-USd2ureepe,Version: 2.11.8.12009-07-16T19:16:58+02:00 - Seite 190