2010 MERCEDES-BENZ GL550 lock
[x] Cancel search: lockPage 123 of 380

Switching LOW RANGE mode
Switching LOW RANGE mode on
(switching from HIGH RANGE to LOW
RANGE)
! The shifting procedure can only be
performed when the following conditions
are met:
RThe engine is running.
RThe automatic transmission is in neutral
position N.
RThe vehicle speed does not exceed
25 mph (40 km/h).
iThere is no reset to HIGH after the ignition
has been switched off.
XPress LOW RANGE switch :.
Indicator lamp ; flashes.
If the system senses that all conditions are
met, it will switch from HIGH RANGE to
LOW RANGE. A chime sounds and LOW
RANGE indicator = appears in the
multifunction display.
Indicator lamp ; on LOW RANGE
switch : comes on continuously,
indicating that the LOW RANGE mode has
been activated.
iYou can cancel the procedure by pressing
the LOW RANGE switch again while the
indicator lamp is flashing.
Switching LOW RANGE mode off
(switching from LOW RANGE to HIGH
RANGE)
! The shifting procedure can only be
performed when the following conditions
are met:
RThe engine is running.
RThe automatic transmission is in neutral
position N.
RThe vehicle speed does not exceed
43 mph (70 km/h).
iThere is no reset to LOW after the ignition
has been switched off.
XPress LOW RANGE switch :.
Indicator lamp ; flashes.
If the system senses that all conditions are
met, it will switch from LOW RANGE to
HIGH RANGE. A chime sounds and LOW
RANGE indicator = disappears from the
multifunction display.
Indicator lamp ; on LOW RANGE
switch : goes out, indicating that the LOW
RANGE mode has been deactivated.
iYou can cancel the procedure by pressing
the LOW RANGE switch again while the
indicator lamp is flashing.
For messages in the multifunction display,
see the “Practical hints” section
(Y page 303).
Differential locks
Vehicles with enhanced off-road package are
equipped with automatic locks for the center
Differential locks121Controls in detailX164_AKB; 5; 31, en-USd2ureepe,Version: 2.11.8.12009-09-11T12:30:16+02:00 - Seite 121Z
Page 124 of 380
and rear axle differential to improve vehicle
traction.
The center differential compensates for
differences in wheel rotation between the
front and rear axle.
The rear axle differential compensates
differences between the rear wheels.
i At the front axles, the 4-ETS system
compensates for any traction problems.
For more information on off-road driving, see
“Off-road driving” ( Y page 262).
A few words about differentials and
differential locks
When a vehicle negotiates a turn, wheels on
the outside of the curve must travel farther
and rotate faster than the inside wheels. The
differential, the operation of a set of gears
that allows the powered wheels in a vehicle
to turn at different speeds, makes this
essential function possible.
The drawback is that the differential also
sends most of the engine’s power to the
wheel with the least load or strain on it. For
example, if one of a vehicle’s powered wheels
sits on a patch of snow and spins because
there is no traction, all of the engine’s power
will go to that wheel because the power will
take the path of least resistance. Meanwhile,
the opposite wheel, sitting on dry pavement
where it could get enough grip to start the
vehicle moving, sits idle because it receives
no power.
The 4-ETS addresses this problem and
provides for good control and steering ability
by automatically slowing the slipping wheel
and thus increasing the power to the other
non-slipping drive wheels to get the vehicle
moving. The ESP ®
and the 4-ETS in this
vehicle feature such intelligent limited-slip
differential technology, ideally suited for on-
road and light off-road driving. Transfer case
position LOW (Y page 120) also enhances off-
road driving capabilities.
More extreme off-road conditions may call for
another solution, engaging a differential lock
or preventing the differential from operating
altogether. This vehicle comes with two
differential locks: transfer case (center) and
rear. Each can be engaged simply by
operating the rotary switch located on the
center console ( Y page 123). When the
transfer case (center) differential is locked,
the combined (or average) speed of the front
wheels is identical to the combined rear
wheel speed. When the rear differential is
locked, both rear wheels turn at the same
speed, independent of the individual torque.
Please be aware that engaging the differential
locks will significantly reduce the steering
ability of the vehicle.
For your safety and the safety of others and
to prevent damage to the vehicle, the
differential locks must not be engaged when
driving on paved roads. It is important to
understand that during on-road/paved
driving, differentials are absolutely necessary
for providing the essential control and
steering ability of the vehicle. The differential
locks, therefore, must not be engaged when
driving on paved roads and should only be
used to the extent necessary to negotiate off-
road conditions which cannot be handled by
the systems (the 4-ETS, the ESP ®
, and the
transfer case in LOW RANGE mode) this
vehicle comes equipped with.
Switching differential locks
! If the differential locks are engaged,
accelerate gently when setting the vehicle
in motion.
Only operate the vehicle on a single axle
dynamometer if the axle not being driven is
jacked up or the associated propeller shaft
is disconnected.
Otherwise the transmission could be
damaged.
122Differential locksControls in detail
X164_AKB; 5; 31, en-USd2ureepe,Version: 2.11.8.12009-09-11T12:30:16+02:00 - Seite 122
Page 125 of 380
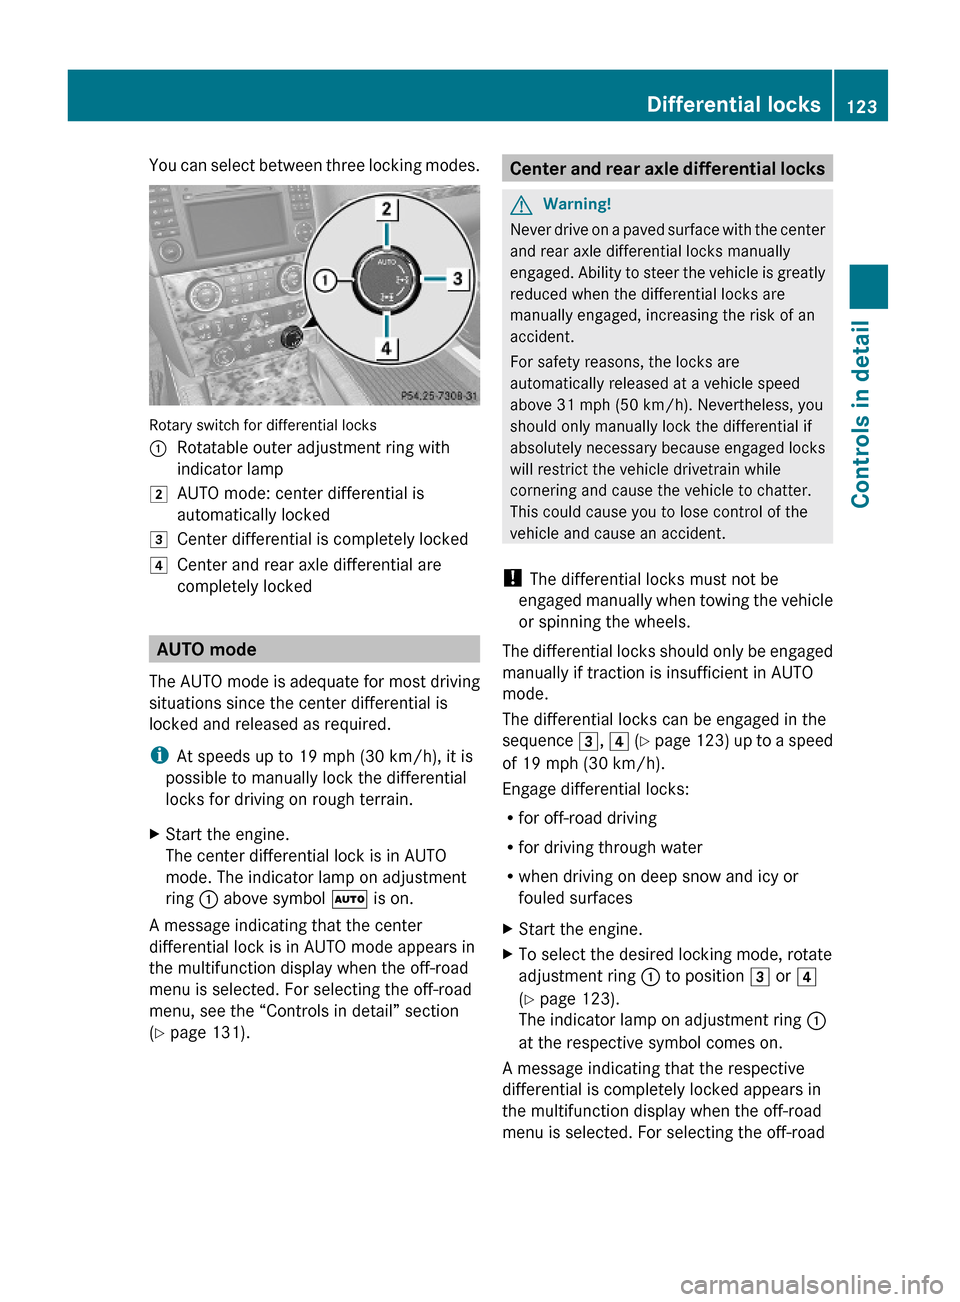
You can select between three locking modes.
Rotary switch for differential locks
:Rotatable outer adjustment ring with
indicator lamp
2AUTO mode: center differential is
automatically locked
3Center differential is completely locked4Center and rear axle differential are
completely locked
AUTO mode
The AUTO mode is adequate for most driving
situations since the center differential is
locked and released as required.
iAt speeds up to 19 mph (30 km/h), it is
possible to manually lock the differential
locks for driving on rough terrain.
XStart the engine.
The center differential lock is in AUTO
mode. The indicator lamp on adjustment
ring : above symbol à is on.
A message indicating that the center
differential lock is in AUTO mode appears in
the multifunction display when the off-road
menu is selected. For selecting the off-road
menu, see the “Controls in detail” section
(Y page 131).
Center and rear axle differential locksGWarning!
Never drive on a paved surface with the center
and rear axle differential locks manually
engaged. Ability to steer the vehicle is greatly
reduced when the differential locks are
manually engaged, increasing the risk of an
accident.
For safety reasons, the locks are
automatically released at a vehicle speed
above 31 mph (50 km/h). Nevertheless, you
should only manually lock the differential if
absolutely necessary because engaged locks
will restrict the vehicle drivetrain while
cornering and cause the vehicle to chatter.
This could cause you to lose control of the
vehicle and cause an accident.
! The differential locks must not be
engaged manually when towing the vehicle
or spinning the wheels.
The differential locks should only be engaged
manually if traction is insufficient in AUTO
mode.
The differential locks can be engaged in the
sequence 3, 4 (Y page 123) up to a speed
of 19 mph (30 km/h).
Engage differential locks:
Rfor off-road driving
Rfor driving through water
Rwhen driving on deep snow and icy or
fouled surfaces
XStart the engine.XTo select the desired locking mode, rotate
adjustment ring : to position 3 or 4
(Y page 123).
The indicator lamp on adjustment ring :
at the respective symbol comes on.
A message indicating that the respective
differential is completely locked appears in
the multifunction display when the off-road
menu is selected. For selecting the off-road
Differential locks123Controls in detailX164_AKB; 5; 31, en-USd2ureepe,Version: 2.11.8.12009-09-11T12:30:16+02:00 - Seite 123Z
Page 126 of 380
menu, see the “Controls in detail” section
(Y page 131).
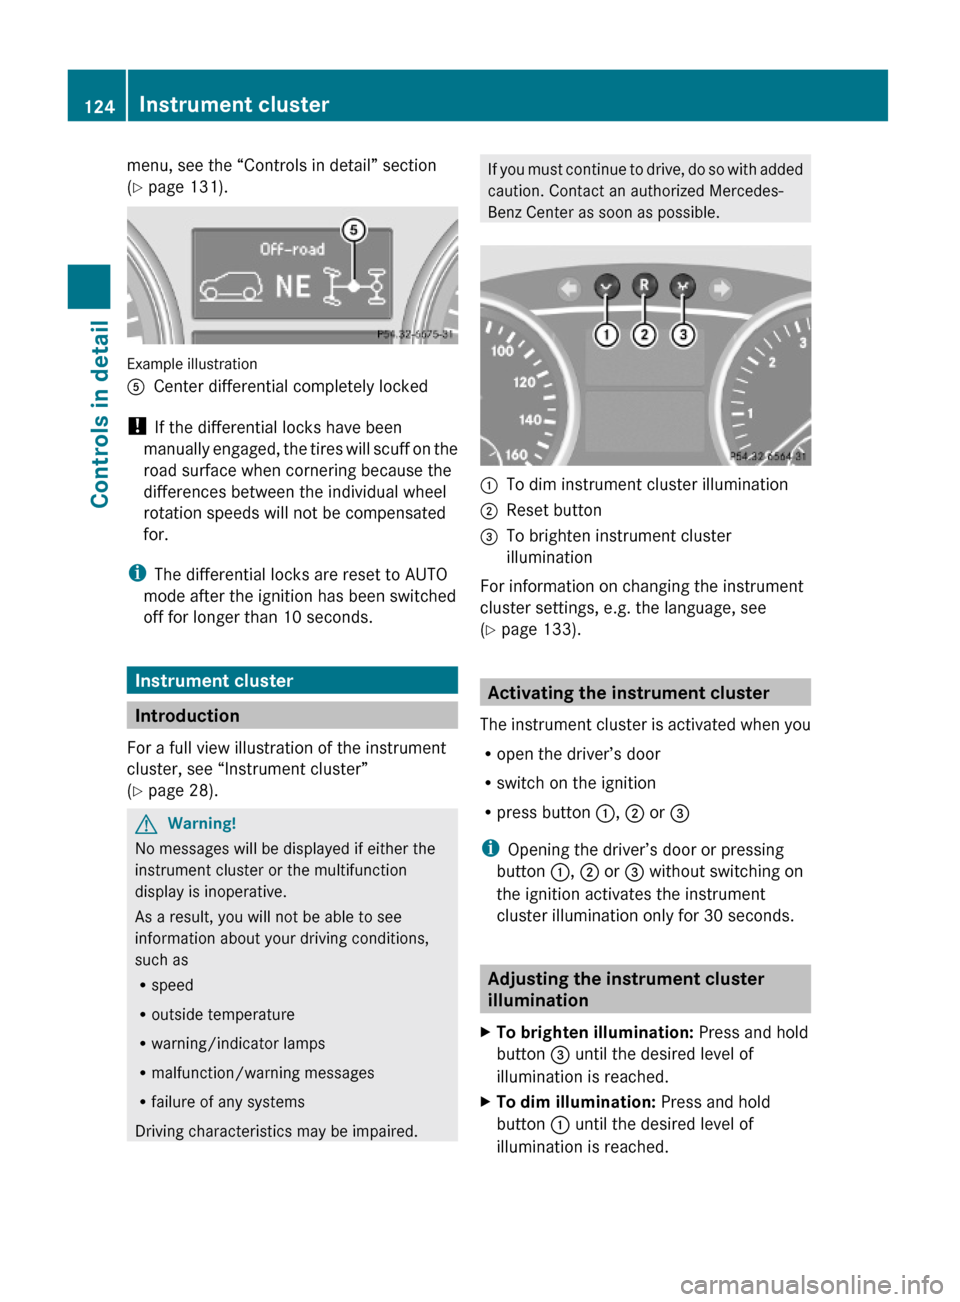
Example illustration
ACenter differential completely locked
! If the differential locks have been
manually engaged, the tires will scuff on the
road surface when cornering because the
differences between the individual wheel
rotation speeds will not be compensated
for.
iThe differential locks are reset to AUTO
mode after the ignition has been switched
off for longer than 10 seconds.
Instrument cluster
Introduction
For a full view illustration of the instrument
cluster, see “Instrument cluster”
(Y page 28).
GWarning!
No messages will be displayed if either the
instrument cluster or the multifunction
display is inoperative.
As a result, you will not be able to see
information about your driving conditions,
such as
Rspeed
Routside temperature
Rwarning/indicator lamps
Rmalfunction/warning messages
Rfailure of any systems
Driving characteristics may be impaired.
If you must continue to drive, do so with added
caution. Contact an authorized Mercedes-
Benz Center as soon as possible.
:To dim instrument cluster illumination;Reset button =To brighten instrument cluster
illumination
For information on changing the instrument
cluster settings, e.g. the language, see
(Y page 133).
Activating the instrument cluster
The instrument cluster is activated when you
Ropen the driver’s door
Rswitch on the ignition
Rpress button :, ; or =
iOpening the driver’s door or pressing
button :, ; or = without switching on
the ignition activates the instrument
cluster illumination only for 30 seconds.
Adjusting the instrument cluster
illumination
XTo brighten illumination: Press and hold
button = until the desired level of
illumination is reached.
XTo dim illumination: Press and hold
button : until the desired level of
illumination is reached.
124Instrument clusterControls in detail
X164_AKB; 5; 31, en-USd2ureepe,Version: 2.11.8.12009-09-11T12:30:16+02:00 - Seite 124
Page 133 of 380
Please refer to separate COMAND system
operating instructions for instructions on how
to activate the route guidance system.
Off-road menu
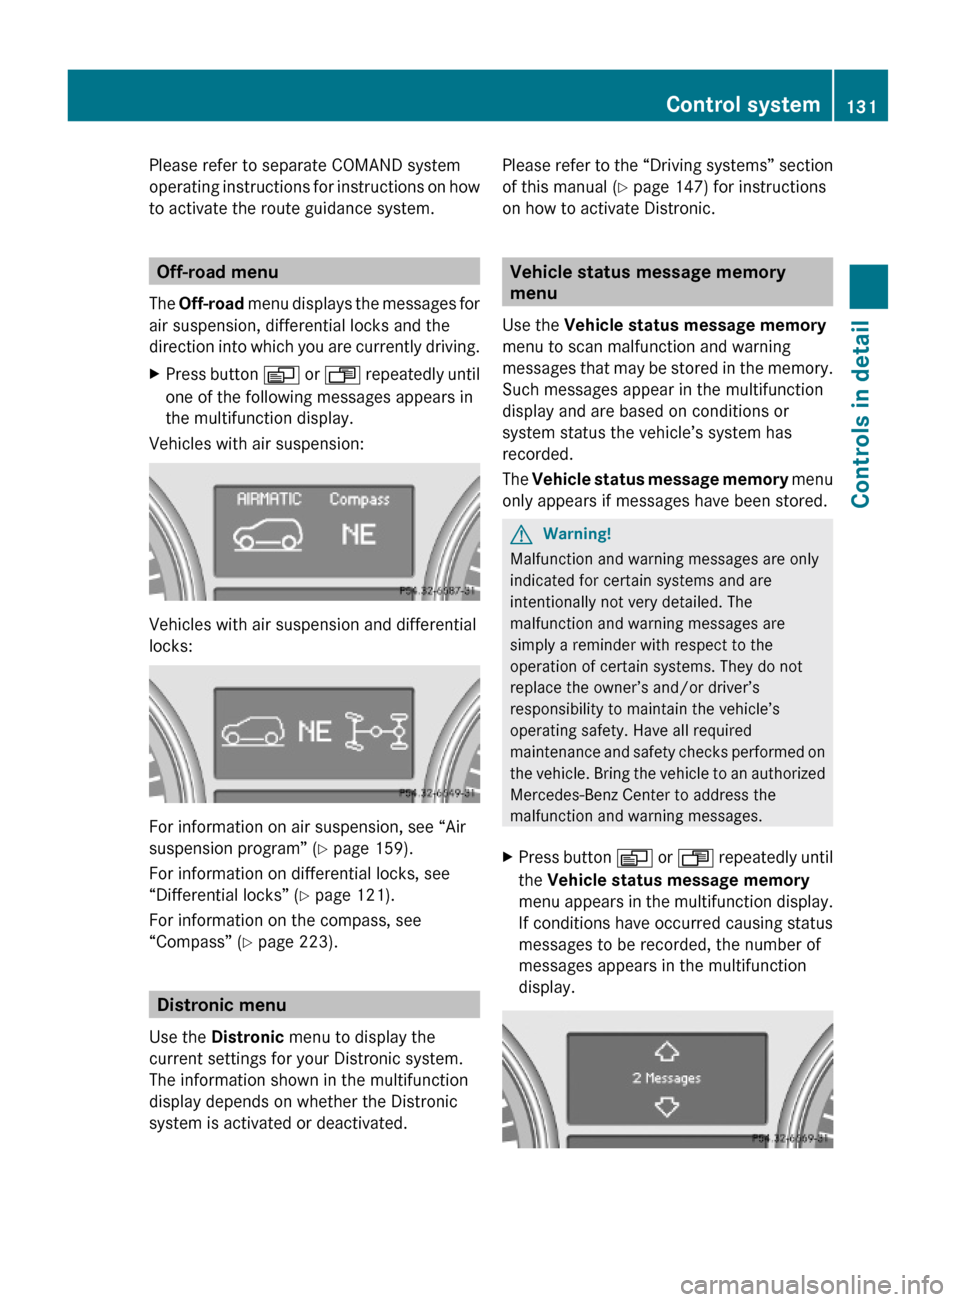
The Off-road menu displays the messages for
air suspension, differential locks and the
direction into which you are currently driving.
XPress button V or U repeatedly until
one of the following messages appears in
the multifunction display.
Vehicles with air suspension:
Vehicles with air suspension and differential
locks:
For information on air suspension, see “Air
suspension program” (Y page 159).
For information on differential locks, see
“Differential locks” (Y page 121).
For information on the compass, see
“Compass” (Y page 223).
Distronic menu
Use the Distronic menu to display the
current settings for your Distronic system.
The information shown in the multifunction
display depends on whether the Distronic
system is activated or deactivated.
Please refer to the “Driving systems” section
of this manual (Y page 147) for instructions
on how to activate Distronic.
Vehicle status message memory
menu
Use the Vehicle status message memory
menu to scan malfunction and warning
messages that may be stored in the memory.
Such messages appear in the multifunction
display and are based on conditions or
system status the vehicle’s system has
recorded.
The Vehicle status message memory menu
only appears if messages have been stored.
GWarning!
Malfunction and warning messages are only
indicated for certain systems and are
intentionally not very detailed. The
malfunction and warning messages are
simply a reminder with respect to the
operation of certain systems. They do not
replace the owner’s and/or driver’s
responsibility to maintain the vehicle’s
operating safety. Have all required
maintenance and safety checks performed on
the vehicle. Bring the vehicle to an authorized
Mercedes-Benz Center to address the
malfunction and warning messages.
XPress button V or U repeatedly until
the Vehicle status message memory
menu appears in the multifunction display.
If conditions have occurred causing status
messages to be recorded, the number of
messages appears in the multifunction
display.
Control system131Controls in detailX164_AKB; 5; 31, en-USd2ureepe,Version: 2.11.8.12009-09-11T12:30:16+02:00 - Seite 131Z
Page 135 of 380
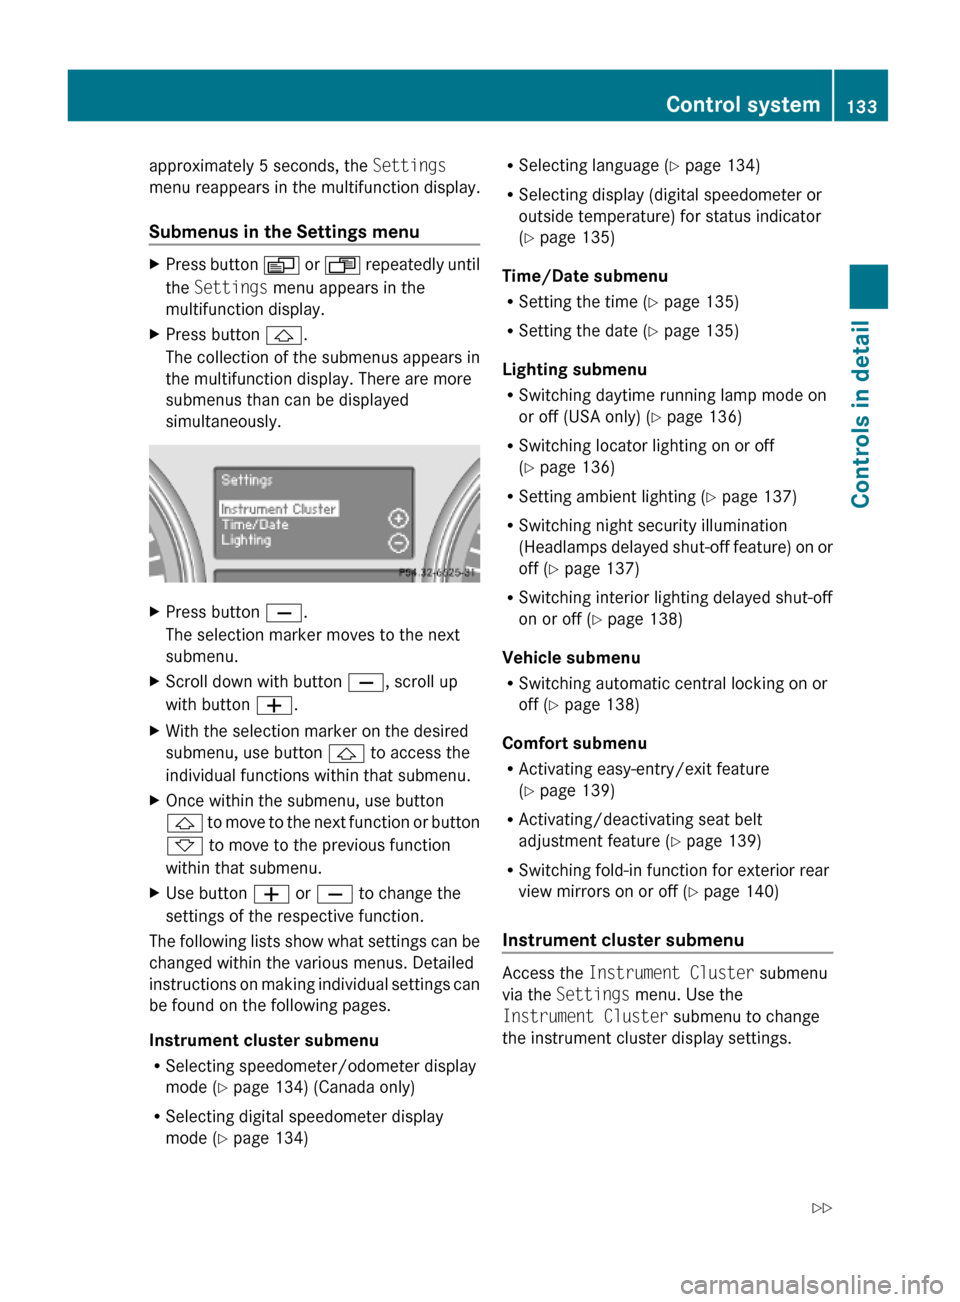
approximately 5 seconds, the Settings
menu reappears in the multifunction display.
Submenus in the Settings menu
XPress button V or U repeatedly until
the Settings menu appears in the
multifunction display.
XPress button &.
The collection of the submenus appears in
the multifunction display. There are more
submenus than can be displayed
simultaneously.
XPress button X.
The selection marker moves to the next
submenu.
XScroll down with button X, scroll up
with button W.
XWith the selection marker on the desired
submenu, use button & to access the
individual functions within that submenu.
XOnce within the submenu, use button
& to move to the next function or button
* to move to the previous function
within that submenu.
XUse button W or X to change the
settings of the respective function.
The following lists show what settings can be
changed within the various menus. Detailed
instructions on making individual settings can
be found on the following pages.
Instrument cluster submenu
RSelecting speedometer/odometer display
mode (Y page 134) (Canada only)
RSelecting digital speedometer display
mode (Y page 134)
RSelecting language (Y page 134)
RSelecting display (digital speedometer or
outside temperature) for status indicator
(Y page 135)
Time/Date submenu
RSetting the time (Y page 135)
RSetting the date (Y page 135)
Lighting submenu
RSwitching daytime running lamp mode on
or off (USA only) (Y page 136)
RSwitching locator lighting on or off
(Y page 136)
RSetting ambient lighting (Y page 137)
RSwitching night security illumination
(Headlamps delayed shut-off feature) on or
off (Y page 137)
RSwitching interior lighting delayed shut-off
on or off (Y page 138)
Vehicle submenu
RSwitching automatic central locking on or
off (Y page 138)
Comfort submenu
RActivating easy-entry/exit feature
(Y page 139)
RActivating/deactivating seat belt
adjustment feature (Y page 139)
RSwitching fold-in function for exterior rear
view mirrors on or off (Y page 140)
Instrument cluster submenu
Access the Instrument Cluster submenu
via the Settings menu. Use the
Instrument Cluster submenu to change
the instrument cluster display settings.
Control system133Controls in detailX164_AKB; 5; 31, en-USd2ureepe,Version: 2.11.8.12009-09-11T12:30:16+02:00 - Seite 133Z
Page 137 of 380
Selecting display (digital speedometer or
outside temperature) for status indicator
XPress button V or U repeatedly until
the Settings menu appears in the
multifunction display.
XPress button &.XMove the selection marker with button
W or X to the Instrument
Cluster submenu.
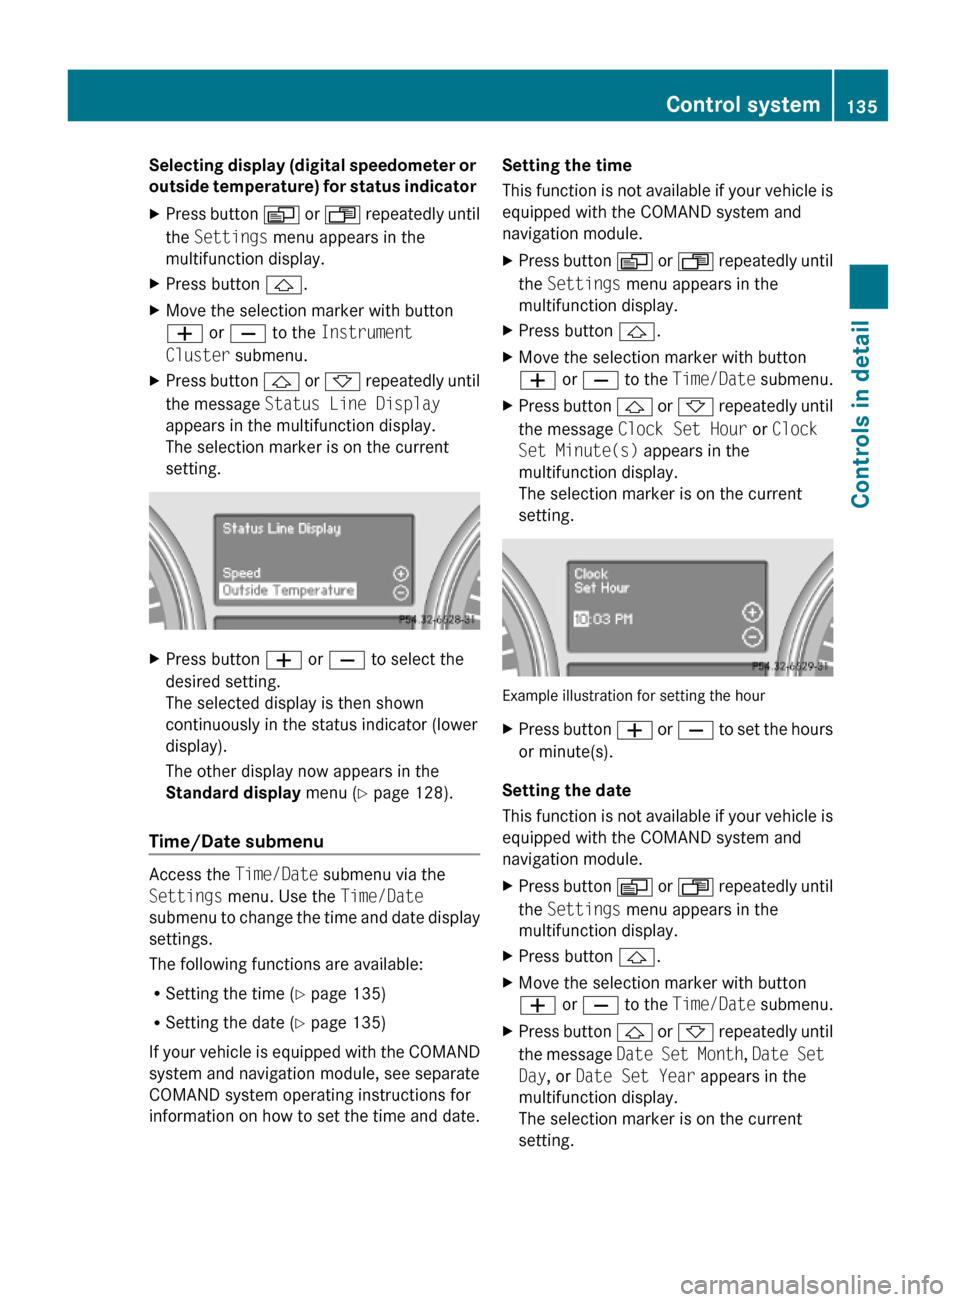
XPress button & or * repeatedly until
the message Status Line Display
appears in the multifunction display.
The selection marker is on the current
setting.
XPress button W or X to select the
desired setting.
The selected display is then shown
continuously in the status indicator (lower
display).
The other display now appears in the
Standard display menu (Y page 128).
Time/Date submenu
Access the Time/Date submenu via the
Settings menu. Use the Time/Date
submenu to change the time and date display
settings.
The following functions are available:
RSetting the time (Y page 135)
RSetting the date (Y page 135)
If your vehicle is equipped with the COMAND
system and navigation module, see separate
COMAND system operating instructions for
information on how to set the time and date.
Setting the time
This function is not available if your vehicle is
equipped with the COMAND system and
navigation module.
XPress button V or U repeatedly until
the Settings menu appears in the
multifunction display.
XPress button &.XMove the selection marker with button
W or X to the Time/Date submenu.
XPress button & or * repeatedly until
the message Clock Set Hour or Clock
Set Minute(s) appears in the
multifunction display.
The selection marker is on the current
setting.
Example illustration for setting the hour
XPress button W or X to set the hours
or minute(s).
Setting the date
This function is not available if your vehicle is
equipped with the COMAND system and
navigation module.
XPress button V or U repeatedly until
the Settings menu appears in the
multifunction display.
XPress button &.XMove the selection marker with button
W or X to the Time/Date submenu.
XPress button & or * repeatedly until
the message Date Set Month, Date Set
Day, or Date Set Year appears in the
multifunction display.
The selection marker is on the current
setting.
Control system135Controls in detailX164_AKB; 5; 31, en-USd2ureepe,Version: 2.11.8.12009-09-11T12:30:16+02:00 - Seite 135Z
Page 138 of 380
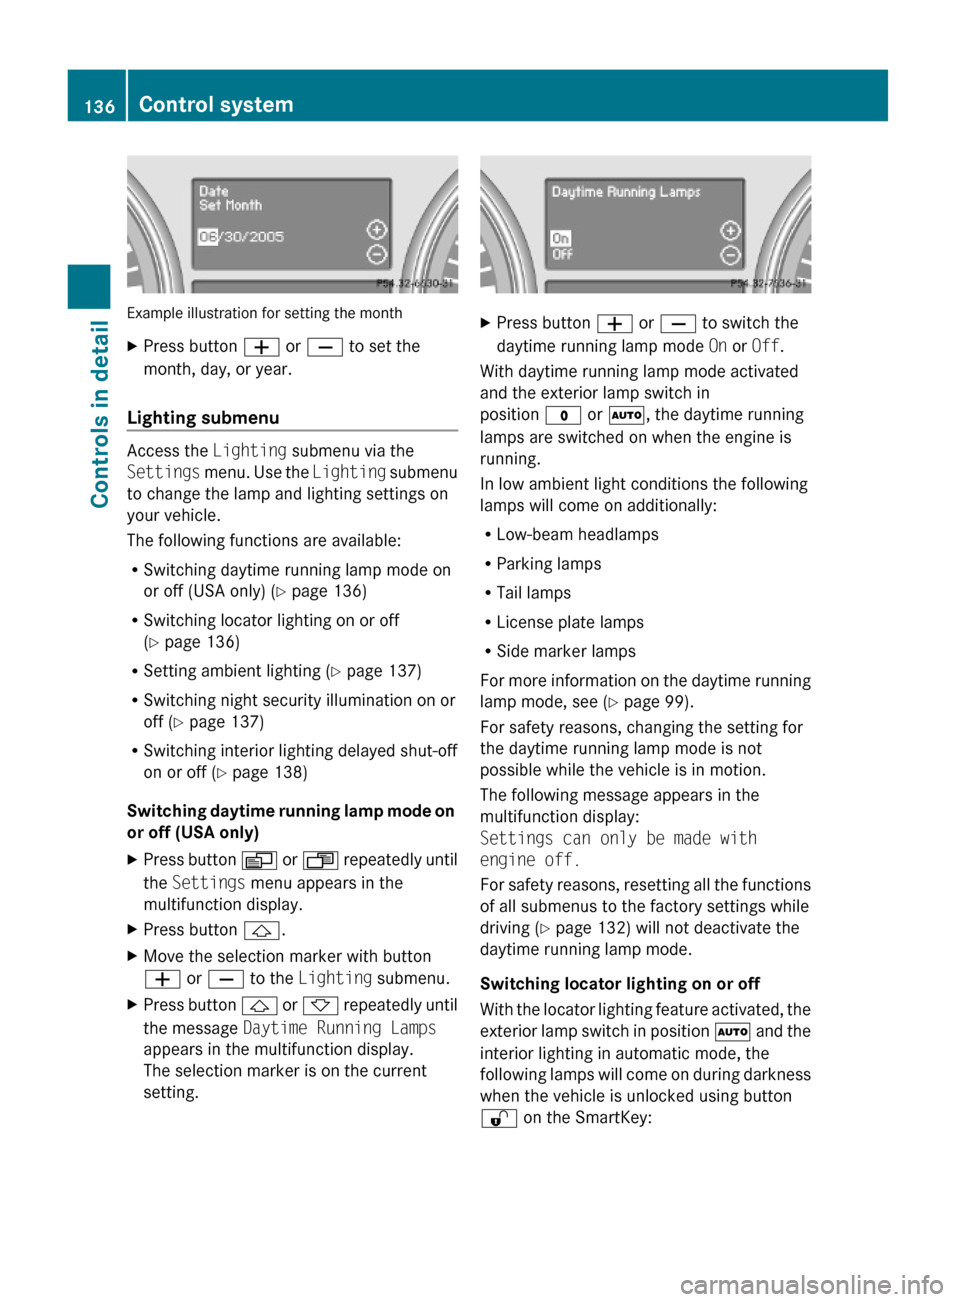
Example illustration for setting the month
XPress button W or X to set the
month, day, or year.
Lighting submenu
Access the Lighting submenu via the
Settings menu. Use the Lighting submenu
to change the lamp and lighting settings on
your vehicle.
The following functions are available:
RSwitching daytime running lamp mode on
or off (USA only) (Y page 136)
RSwitching locator lighting on or off
(Y page 136)
RSetting ambient lighting (Y page 137)
RSwitching night security illumination on or
off (Y page 137)
RSwitching interior lighting delayed shut-off
on or off (Y page 138)
Switching daytime running lamp mode on
or off (USA only)
XPress button V or U repeatedly until
the Settings menu appears in the
multifunction display.
XPress button &.XMove the selection marker with button
W or X to the Lighting submenu.
XPress button & or * repeatedly until
the message Daytime Running Lamps
appears in the multifunction display.
The selection marker is on the current
setting.
XPress button W or X to switch the
daytime running lamp mode On or Off.
With daytime running lamp mode activated
and the exterior lamp switch in
position $ or Ã, the daytime running
lamps are switched on when the engine is
running.
In low ambient light conditions the following
lamps will come on additionally:
RLow-beam headlamps
RParking lamps
RTail lamps
RLicense plate lamps
RSide marker lamps
For more information on the daytime running
lamp mode, see (Y page 99).
For safety reasons, changing the setting for
the daytime running lamp mode is not
possible while the vehicle is in motion.
The following message appears in the
multifunction display:
Settings can only be made with
engine off.
For safety reasons, resetting all the functions
of all submenus to the factory settings while
driving (Y page 132) will not deactivate the
daytime running lamp mode.
Switching locator lighting on or off
With the locator lighting feature activated, the
exterior lamp switch in position à and the
interior lighting in automatic mode, the
following lamps will come on during darkness
when the vehicle is unlocked using button
% on the SmartKey:
136Control systemControls in detail
X164_AKB; 5; 31, en-USd2ureepe,Version: 2.11.8.12009-09-11T12:30:16+02:00 - Seite 136