2010 MERCEDES-BENZ GL550 child lock
[x] Cancel search: child lockPage 117 of 380
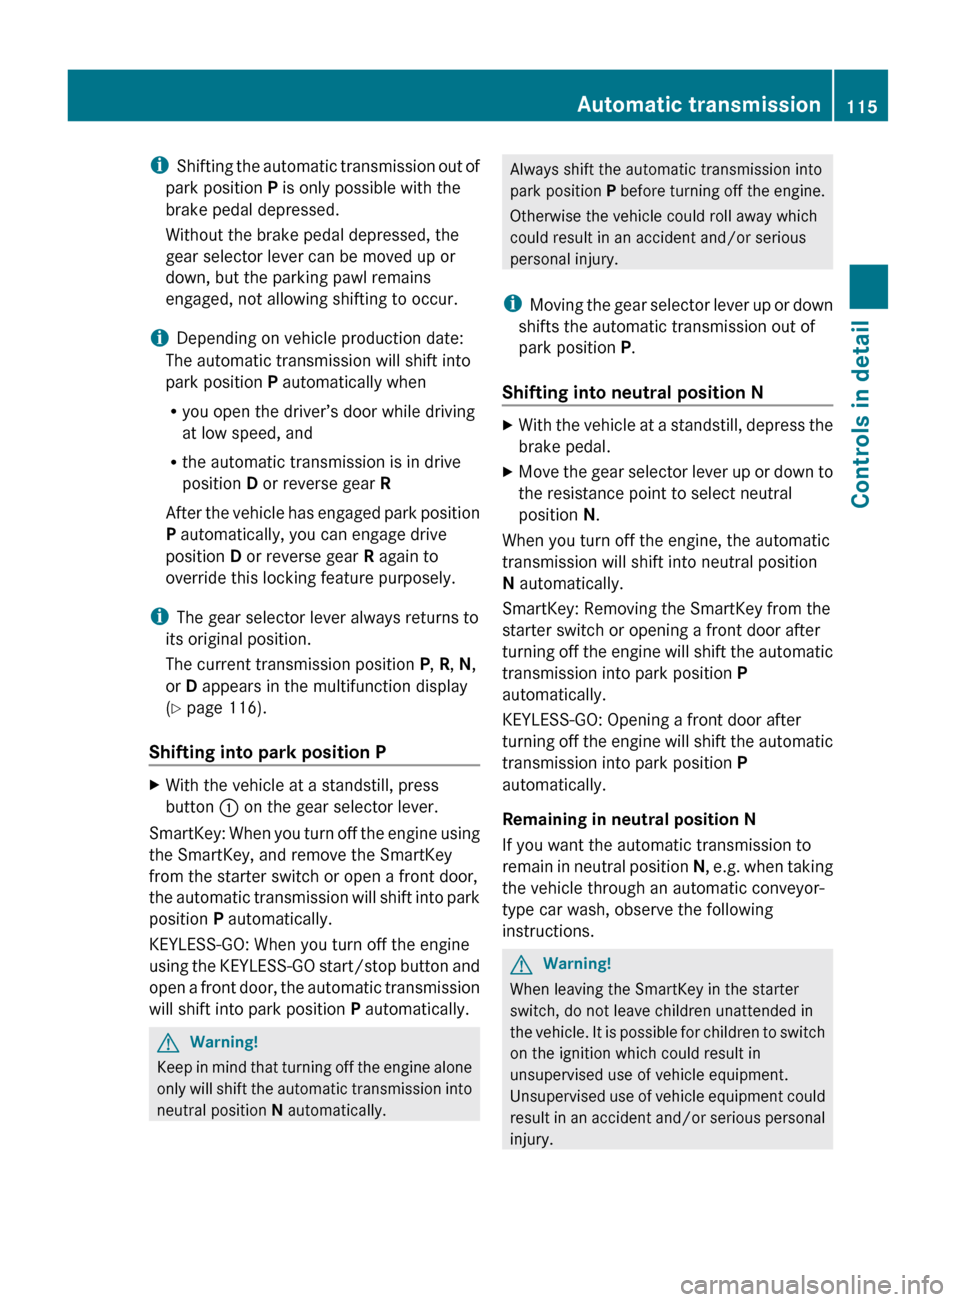
iShifting the automatic transmission out of
park position P is only possible with the
brake pedal depressed.
Without the brake pedal depressed, the
gear selector lever can be moved up or
down, but the parking pawl remains
engaged, not allowing shifting to occur.
i Depending on vehicle production date:
The automatic transmission will shift into
park position P automatically when
R you open the driver’s door while driving
at low speed, and
R the automatic transmission is in drive
position D or reverse gear R
After the vehicle has engaged park position
P automatically, you can engage drive
position D or reverse gear R again to
override this locking feature purposely.
i The gear selector lever always returns to
its original position.
The current transmission position P, R , N ,
or D appears in the multifunction display
( Y page 116).
Shifting into park position PXWith the vehicle at a standstill, press
button : on the gear selector lever.
SmartKey: When you turn off the engine using
the SmartKey, and remove the SmartKey
from the starter switch or open a front door,
the automatic transmission will shift into park
position P automatically.
KEYLESS-GO: When you turn off the engine
using the KEYLESS-GO start/stop button and
open a front door, the automatic transmission
will shift into park position P automatically.
GWarning!
Keep in mind that turning off the engine alone
only will shift the automatic transmission into
neutral position N automatically.
Always shift the automatic transmission into
park position P before turning off the engine.
Otherwise the vehicle could roll away which
could result in an accident and/or serious
personal injury.
i Moving the gear selector lever up or down
shifts the automatic transmission out of
park position P.
Shifting into neutral position NXWith the vehicle at a standstill, depress the
brake pedal.XMove the gear selector lever up or down to
the resistance point to select neutral
position N.
When you turn off the engine, the automatic
transmission will shift into neutral position
N automatically.
SmartKey: Removing the SmartKey from the
starter switch or opening a front door after
turning off the engine will shift the automatic
transmission into park position P
automatically.
KEYLESS-GO: Opening a front door after
turning off the engine will shift the automatic
transmission into park position P
automatically.
Remaining in neutral position N
If you want the automatic transmission to
remain in neutral position N, e.g. when taking
the vehicle through an automatic conveyor-
type car wash, observe the following
instructions.
GWarning!
When leaving the SmartKey in the starter
switch, do not leave children unattended in
the vehicle. It is possible for children to switch
on the ignition which could result in
unsupervised use of vehicle equipment.
Unsupervised use of vehicle equipment could
result in an accident and/or serious personal
injury.
Automatic transmission115Controls in detailX164_AKB; 5; 31, en-USd2ureepe,Version: 2.11.8.12009-09-11T12:30:16+02:00 - Seite 115Z
Page 141 of 380
XMove the selection marker with button
W or X to the Vehicle submenu.
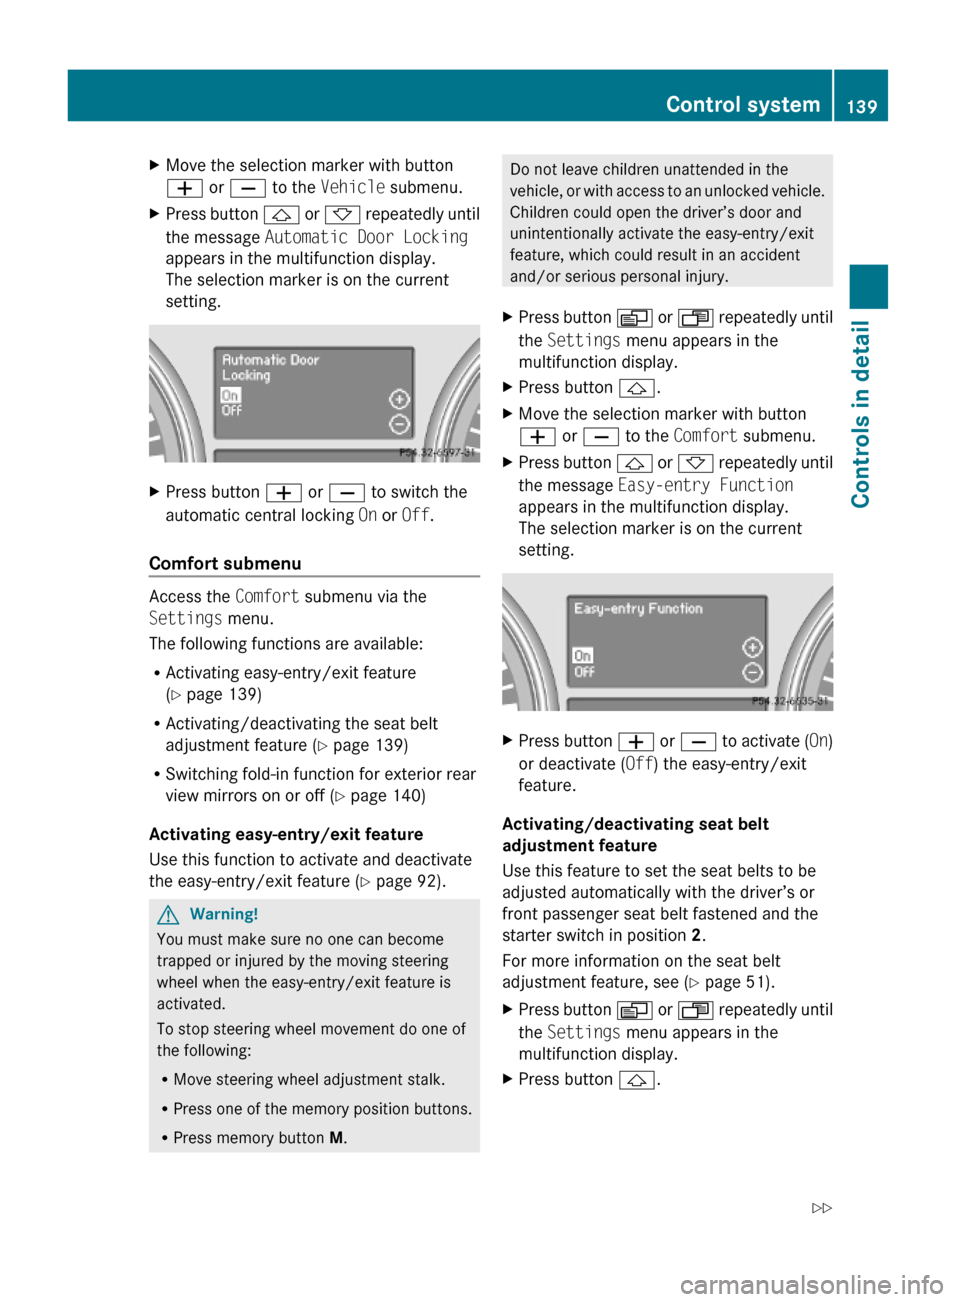
XPress button & or * repeatedly until
the message Automatic Door Locking
appears in the multifunction display.
The selection marker is on the current
setting.
XPress button W or X to switch the
automatic central locking On or Off.
Comfort submenu
Access the Comfort submenu via the
Settings menu.
The following functions are available:
RActivating easy-entry/exit feature
(Y page 139)
RActivating/deactivating the seat belt
adjustment feature (Y page 139)
RSwitching fold-in function for exterior rear
view mirrors on or off (Y page 140)
Activating easy-entry/exit feature
Use this function to activate and deactivate
the easy-entry/exit feature (Y page 92).
GWarning!
You must make sure no one can become
trapped or injured by the moving steering
wheel when the easy-entry/exit feature is
activated.
To stop steering wheel movement do one of
the following:
RMove steering wheel adjustment stalk.
RPress one of the memory position buttons.
RPress memory button M.
Do not leave children unattended in the
vehicle, or with access to an unlocked vehicle.
Children could open the driver’s door and
unintentionally activate the easy-entry/exit
feature, which could result in an accident
and/or serious personal injury.
XPress button V or U repeatedly until
the Settings menu appears in the
multifunction display.
XPress button &.XMove the selection marker with button
W or X to the Comfort submenu.
XPress button & or * repeatedly until
the message Easy-entry Function
appears in the multifunction display.
The selection marker is on the current
setting.
XPress button W or X to activate (On)
or deactivate (Off) the easy-entry/exit
feature.
Activating/deactivating seat belt
adjustment feature
Use this feature to set the seat belts to be
adjusted automatically with the driver’s or
front passenger seat belt fastened and the
starter switch in position 2.
For more information on the seat belt
adjustment feature, see (Y page 51).
XPress button V or U repeatedly until
the Settings menu appears in the
multifunction display.
XPress button &.Control system139Controls in detailX164_AKB; 5; 31, en-USd2ureepe,Version: 2.11.8.12009-09-11T12:30:16+02:00 - Seite 139Z
Page 277 of 380
damage not covered by the Mercedes-Benz
Limited Warranty.
Vehicle care
Cleaning and care of the vehicle
Notes
Regular and proper care will help to maintain
the value of your vehicle.
GWarning!
Many cleaning products can be hazardous.
Some are poisonous, others are flammable.
Always follow the instructions on the
particular container. Always open your
vehicle’s doors or windows when cleaning the
inside.
Never use fluids or solvents that are not
designed for cleaning your vehicle.
Always lock away cleaning products and keep
them out of reach of children.
! When cleaning the vehicle, do not use
scouring agents. Never apply strong force
and only use a soft, wet cloth or sponge.
Otherwise you may scratch or damage the
surface to be cleaned.
While in operation, even while parked, your
vehicle is subjected to varying external
influences which, if gone unchecked, can
attack the paintwork as well as the vehicle
underbody and cause lasting damage.
Such damage is caused not only by extreme
and varying climatic conditions, but also by:
R Air pollution
R Road salt
R Tar
R Gravel and stone chipping
To avoid paint damage, you should
immediately remove:
R Grease and oil
R Fuel
R
Coolant
R Brake fluid
R Bird droppings
R Insects
R Tree resins etc.
Frequent washing reduces and/or eliminates
the aggressiveness and potency of the above
adverse influences.
More frequent washings are necessary to
deal with unfavorable conditions:
R near the ocean
R in industrial areas (smoke, exhaust
emissions)
R during winter operation
You should check your vehicle from time to
time for stone chipping or other damage. Any
damage should be repaired as soon as
possible to prevent corrosion.
In doing so, do not neglect the underbody of
the vehicle. A prerequisite for a thorough
check is a washing of the underbody followed
by a thorough inspection. Damaged areas
need to be re-undercoated.
Your vehicle has been treated at the factory
with a wax-base rustproofing in the body
cavities which will last for the lifetime of the
vehicle. Post-production treatment is neither
necessary nor recommended by Mercedes-
Benz because of the possibility of
incompatibility between materials used in the
production process and others applied later.
We have selected vehicle-care products and
compiled recommendations which are
specially matched to our vehicles and which
always reflect the latest technology. You can
obtain Mercedes-Benz approved vehicle-care
products at an authorized Mercedes-Benz
Center.
Scratches, corrosive deposits, corrosion or
damage due to negligent or incorrect care
cannot always be removed or repaired with
the vehicle-care products recommendedVehicle care275OperationX164_AKB; 5; 31, en-USd2ureepe,Version: 2.11.8.12009-09-11T12:30:16+02:00 - Seite 275Z
Page 325 of 380
GWarning!
If the 42 indicator lamp
illuminates and remains illuminated with the
weight of a typical adult or someone larger
than a small individual on the front passenger
seat, do not have any passenger use the front
passenger seat until the system has been
repaired.
ProblemPossible causes/consequences and M SolutionsUSA only:
42
The front passenger
front air bag off
indicator lamp does not
illuminate and/or does
not remain illuminated
with the weight of a
typical 12-month-old
child in a standard child
restraint or less on the
front passenger seat.
The system is malfunctioning.XMake sure there is nothing between seat cushion and child seat
and check installation of the child seat.
XMake sure no objects applying supplemental weight onto the
seat are present.
XMake sure no objects which apply forces to the seat are present
(e.g. objects such as books, briefcases etc. lodged behind or
around the seat, head restraints pushing against roof etc.). The
system may recognize such forces as supplemental weight.
XIf the front passenger front air bag off indicator lamp remains
out, have the system checked as soon as possible at an
authorized Mercedes-Benz Center. Do not transport a child on
the front passenger seat until the system has been repaired.
XRead and observe messages in the multifunction display and
follow corrective steps (Y page 287).
GWarning!
If the 42 indicator lamp does not
illuminate or remains out with the weight of a
typical 12-month-old child in a standard child
restraint or less on the front passenger seat,
do not transport a child on the front
passenger seat until the system has been
repaired.
Unlocking/locking manually
Unlocking the vehicle
If you cannot unlock the vehicle with the
SmartKey or with KEYLESS-GO, unlock the
driver’s door using the mechanical key.
The anti-theft alarm system will trigger when
you
Runlocking the driver’s door with the
mechanical key
and
Ropen the driver’s door
To cancel the alarm, insert the SmartKey into
the starter switch.
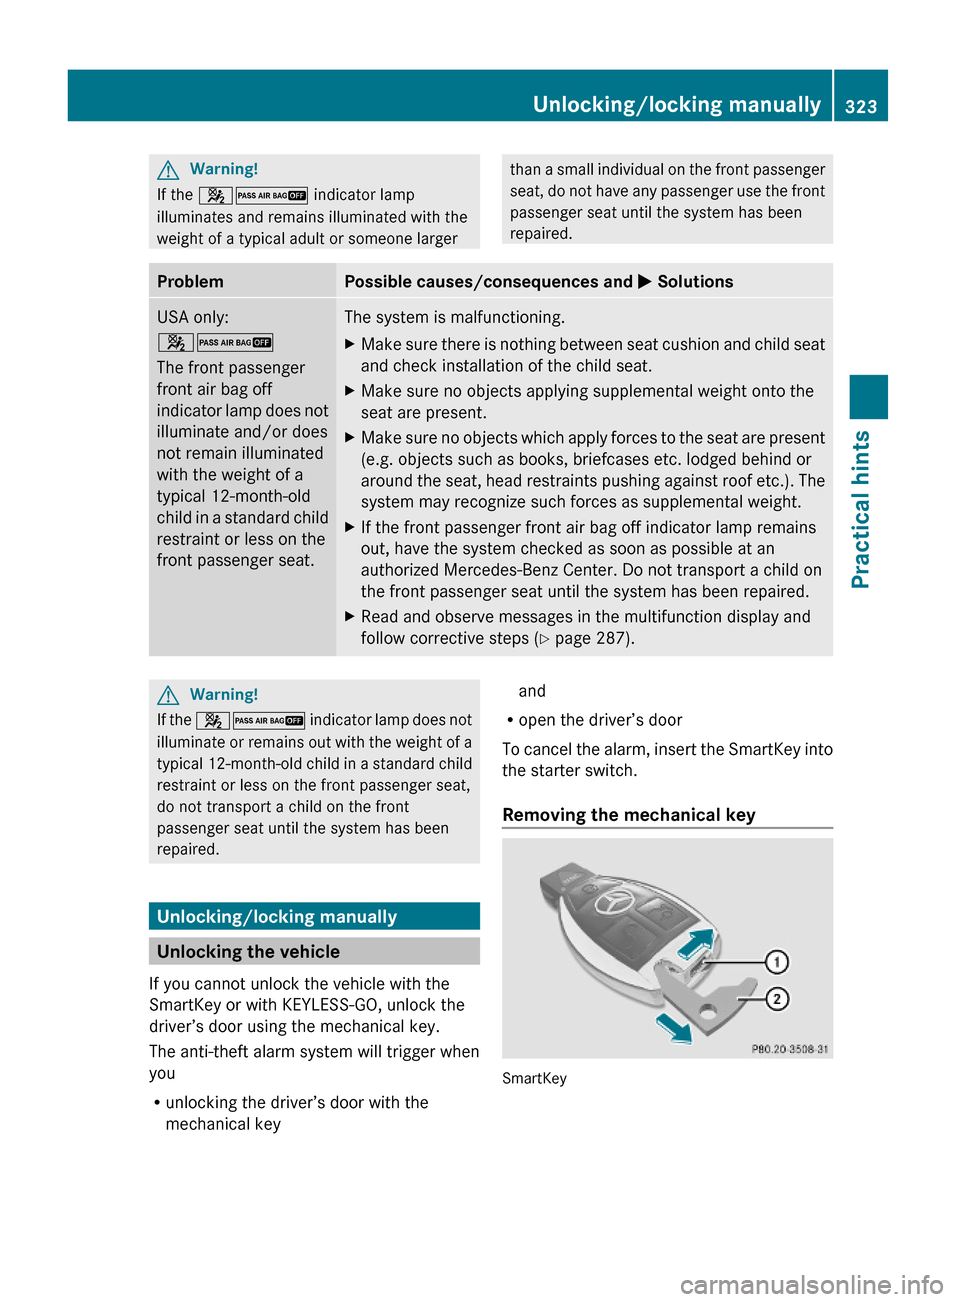
Removing the mechanical key
SmartKey
Unlocking/locking manually323Practical hintsX164_AKB; 5; 31, en-USd2ureepe,Version: 2.11.8.12009-09-11T12:30:16+02:00 - Seite 323Z
Page 328 of 380
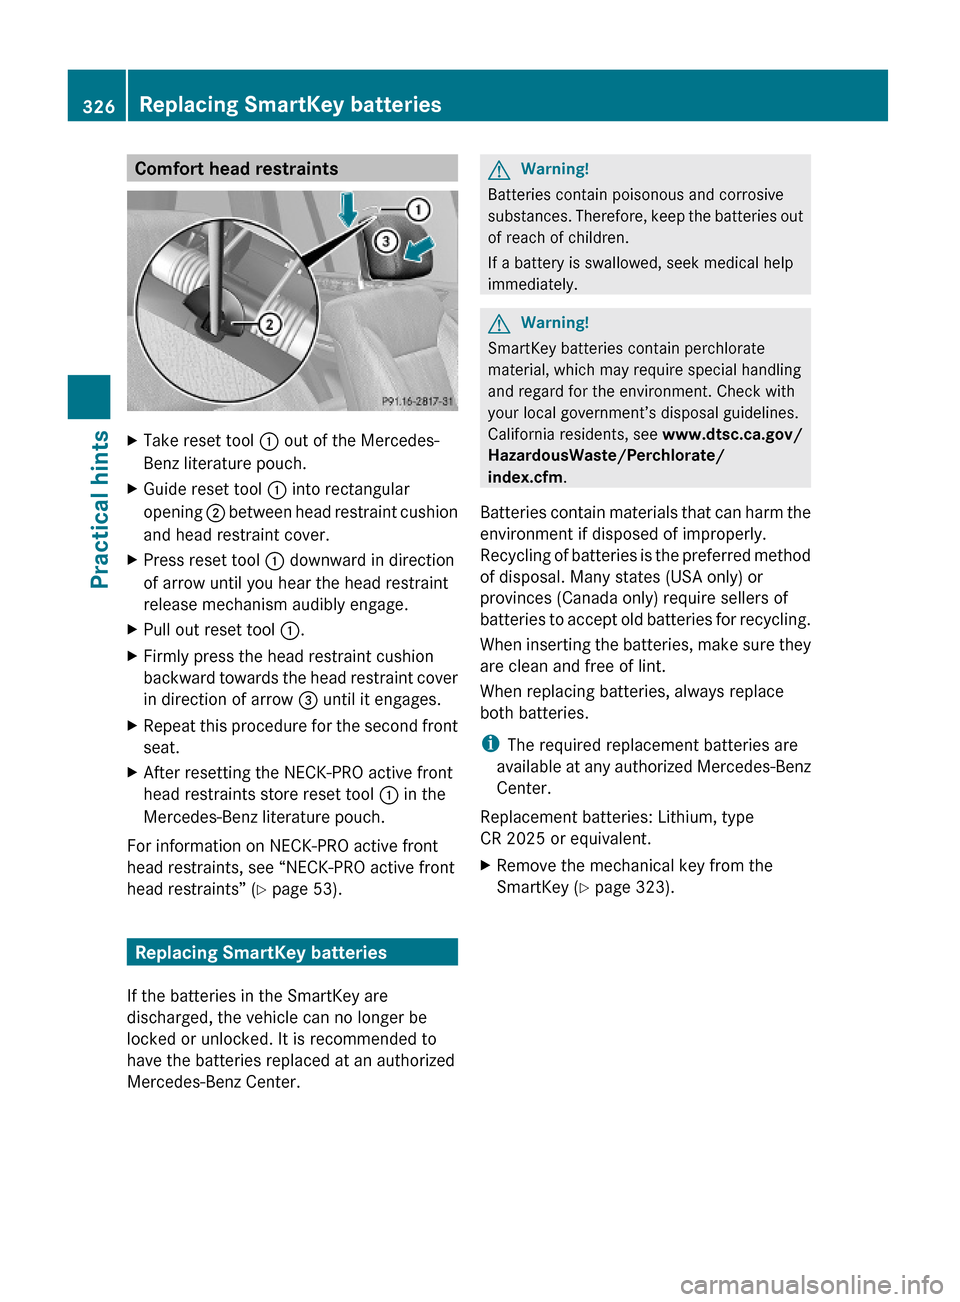
Comfort head restraintsXTake reset tool : out of the Mercedes-
Benz literature pouch.
XGuide reset tool : into rectangular
opening ; between head restraint cushion
and head restraint cover.
XPress reset tool : downward in direction
of arrow until you hear the head restraint
release mechanism audibly engage.
XPull out reset tool :.XFirmly press the head restraint cushion
backward towards the head restraint cover
in direction of arrow = until it engages.
XRepeat this procedure for the second front
seat.
XAfter resetting the NECK-PRO active front
head restraints store reset tool : in the
Mercedes-Benz literature pouch.
For information on NECK-PRO active front
head restraints, see “NECK-PRO active front
head restraints” (Y page 53).
Replacing SmartKey batteries
If the batteries in the SmartKey are
discharged, the vehicle can no longer be
locked or unlocked. It is recommended to
have the batteries replaced at an authorized
Mercedes-Benz Center.
GWarning!
Batteries contain poisonous and corrosive
substances. Therefore, keep the batteries out
of reach of children.
If a battery is swallowed, seek medical help
immediately.
GWarning!
SmartKey batteries contain perchlorate
material, which may require special handling
and regard for the environment. Check with
your local government’s disposal guidelines.
California residents, see www.dtsc.ca.gov/
HazardousWaste/Perchlorate/
index.cfm.
Batteries contain materials that can harm the
environment if disposed of improperly.
Recycling of batteries is the preferred method
of disposal. Many states (USA only) or
provinces (Canada only) require sellers of
batteries to accept old batteries for recycling.
When inserting the batteries, make sure they
are clean and free of lint.
When replacing batteries, always replace
both batteries.
iThe required replacement batteries are
available at any authorized Mercedes-Benz
Center.
Replacement batteries: Lithium, type
CR 2025 or equivalent.
XRemove the mechanical key from the
SmartKey (Y page 323).
326Replacing SmartKey batteriesPractical hints
X164_AKB; 5; 31, en-USd2ureepe,Version: 2.11.8.12009-09-11T12:30:16+02:00 - Seite 326
Page 349 of 380
Refilling with AdBlue® GWarning!
Make sure
RAdBlue® does not come into contact with
skin, eyes, or clothing
Rto keep AdBlue® out of the reach of children
If you and/or others have come into contact
with AdBlue®:
RIf AdBlue® has gotten into contact with
eyes, flush with plenty of water immediately
and seek medical help.
RClean affected skin immediately with plenty
of water.
RIf AdBlue® was swallowed, rinse mouth
immediately with plenty of water and drink
plenty of water. Consult a physician.
GWarning!
When opening the filler cap of the AdBlue®
tank ammonia gas vapors may escape. Refill
AdBlue® in a well ventilated area only.
Ammonia gas vapors have a pungent odor and
are particularly irritating for your skin,
mucous membranes, and eyes. Inhaling
ammonia gas vapors will cause burning eyes,
nose, and throat, as well as coughing and
watering eyes.
! Only use AdBlue® complying with
ISO 22241. Do not add additives to
AdBlue® and do not dilute AdBlue® with
water. Otherwise, the BlueTEC exhaust gas
aftertreatment system could be damaged.
Damage caused by using additives or
diluting with water are not covered by the
Mercedes-Benz Limited Warranty.
! Rinse surfaces that have come into
contact with AdBlue®, or remove AdBlue®
with a moist cloth and cold water
immediately. If AdBlue® has crystallized
already, use cold water and a sponge.
AdBlue® residues will crystallize and soil
the affected surfaces.
! AdBlue® is not a fuel additive and must
not be added to the diesel fuel tank. If
AdBlue® reaches the diesel fuel tank, the
engine could be damaged which is not
covered by the Mercedes-Benz Limited
Warranty.
For more information on AdBlue®, see
(Y page 373).
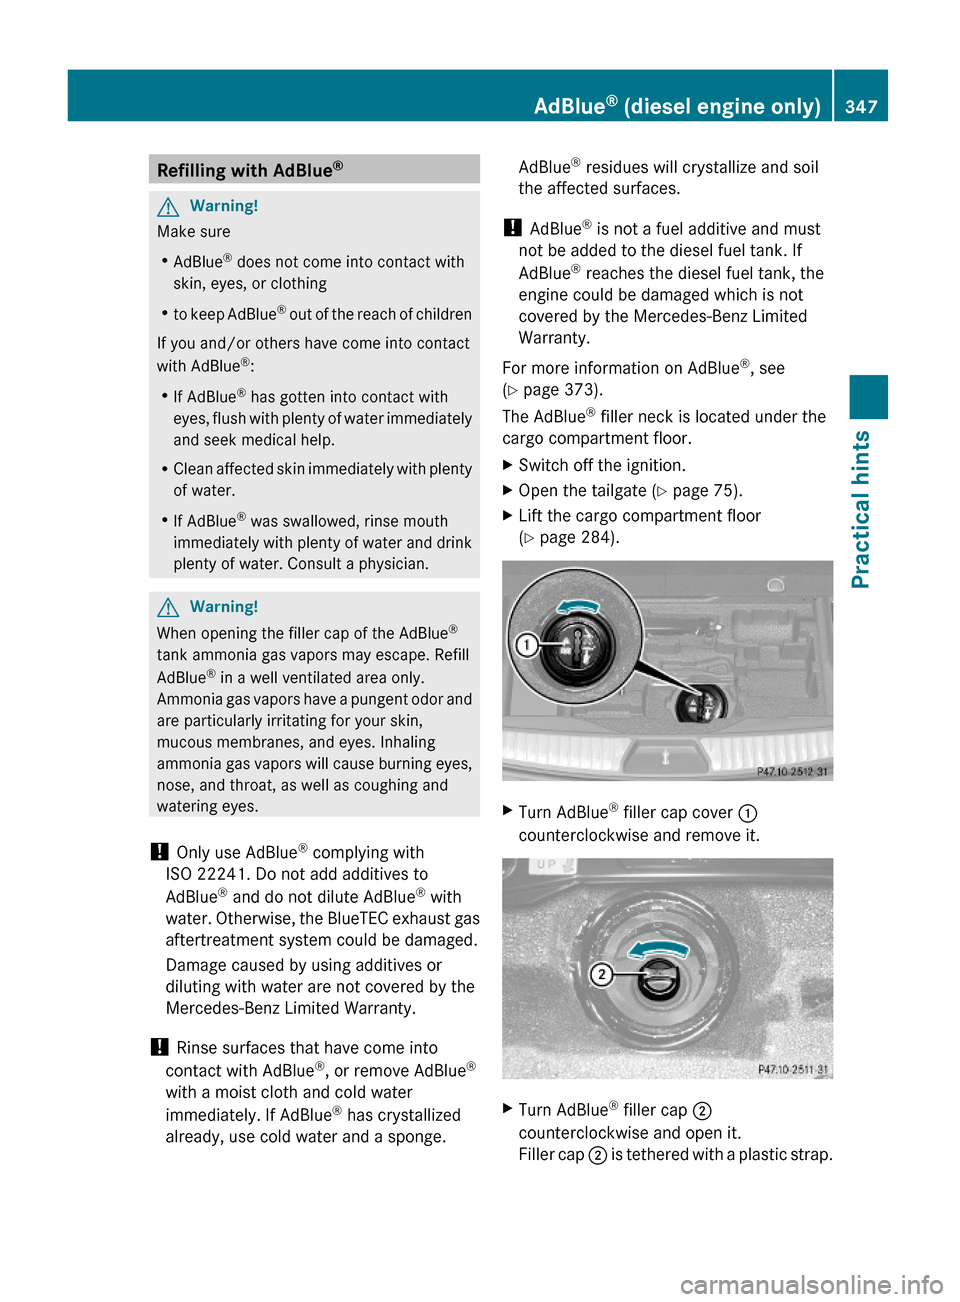
The AdBlue® filler neck is located under the
cargo compartment floor.
XSwitch off the ignition.XOpen the tailgate (Y page 75).XLift the cargo compartment floor
(Y page 284).
XTurn AdBlue® filler cap cover :
counterclockwise and remove it.
XTurn AdBlue® filler cap ;
counterclockwise and open it.
Filler cap ; is tethered with a plastic strap.
AdBlue® (diesel engine only)347Practical hintsX164_AKB; 5; 31, en-USd2ureepe,Version: 2.11.8.12009-09-11T12:30:16+02:00 - Seite 347Z