2010 MERCEDES-BENZ GL550 Tv System
[x] Cancel search: Tv SystemPage 115 of 380
(Canada only) in the instrument cluster
comes on.
Turning off the engine
GWarning!
Do not turn off the engine before the vehicle
has come to a complete stop. With the engine
not running, there is no power assistance for
the brake and steering systems. In this case,
it is important to keep in mind that a
considerably higher degree of effort is
necessary to brake and steer the vehicle.
i If the engine cannot be turned off as
described, see “Emergency engine
shutdown” ( Y page 357).
XShift the automatic transmission into park
position P.XEngage the parking brake.
i
Always engage the parking brake in
addition to shifting the automatic
transmission into park position P.
i Observe instructions if you want the
automatic transmission to remain in
neutral position N, see “Remaining in
neutral position N” ( Y page 115).
With SmartKey
XTurn the SmartKey in the starter switch to
position 0.XRemove the SmartKey from the starter
switch.
When you turn off the engine using the
SmartKey, and remove the SmartKey from
the starter switch or open a front door, the
automatic transmission will shift into park
position P automatically.
GWarning!
Keep in mind that turning off the engine alone
only will shift the automatic transmission into
neutral position N automatically.
Always shift the automatic transmission into
park position P before turning off the engine.
Otherwise the vehicle could roll away which
could result in an accident and/or serious
personal injury.
With KEYLESS-GO
XPress the KEYLESS-GO start/stop button.
With the driver’s door closed, the starter
switch is now in position 1. With the driver’s
door opened, the starter switch is set to
position 0, same as the SmartKey removed
from the starter switch ( Y page 80).
When you turn off the engine using the
KEYLESS-GO start/stop button and open a
front door, the automatic transmission will
shift into park position P automatically.
GWarning!
Keep in mind that turning off the engine alone
only will shift the automatic transmission into
neutral position N automatically.
Always shift the automatic transmission into
park position P before turning off the engine.
Otherwise the vehicle could roll away which
could result in an accident and/or serious
personal injury.
i In an emergency you can turn off the
engine while driving by pressing and
holding the KEYLESS-GO start/stop button
for approximately 3 seconds.
If you have started the engine with the
KEYLESS-GO start/stop button and cannot
turn it off as described above:
XRemove the KEYLESS-GO start/stop
button from the starter switch.XInsert the SmartKey into the starter switch.
The engine turns off. The starter switch is
in position 0 (Y page 80).Driving and parking113Controls in detailX164_AKB; 5; 31, en-USd2ureepe,Version: 2.11.8.12009-09-11T12:30:16+02:00 - Seite 113Z
Page 119 of 380
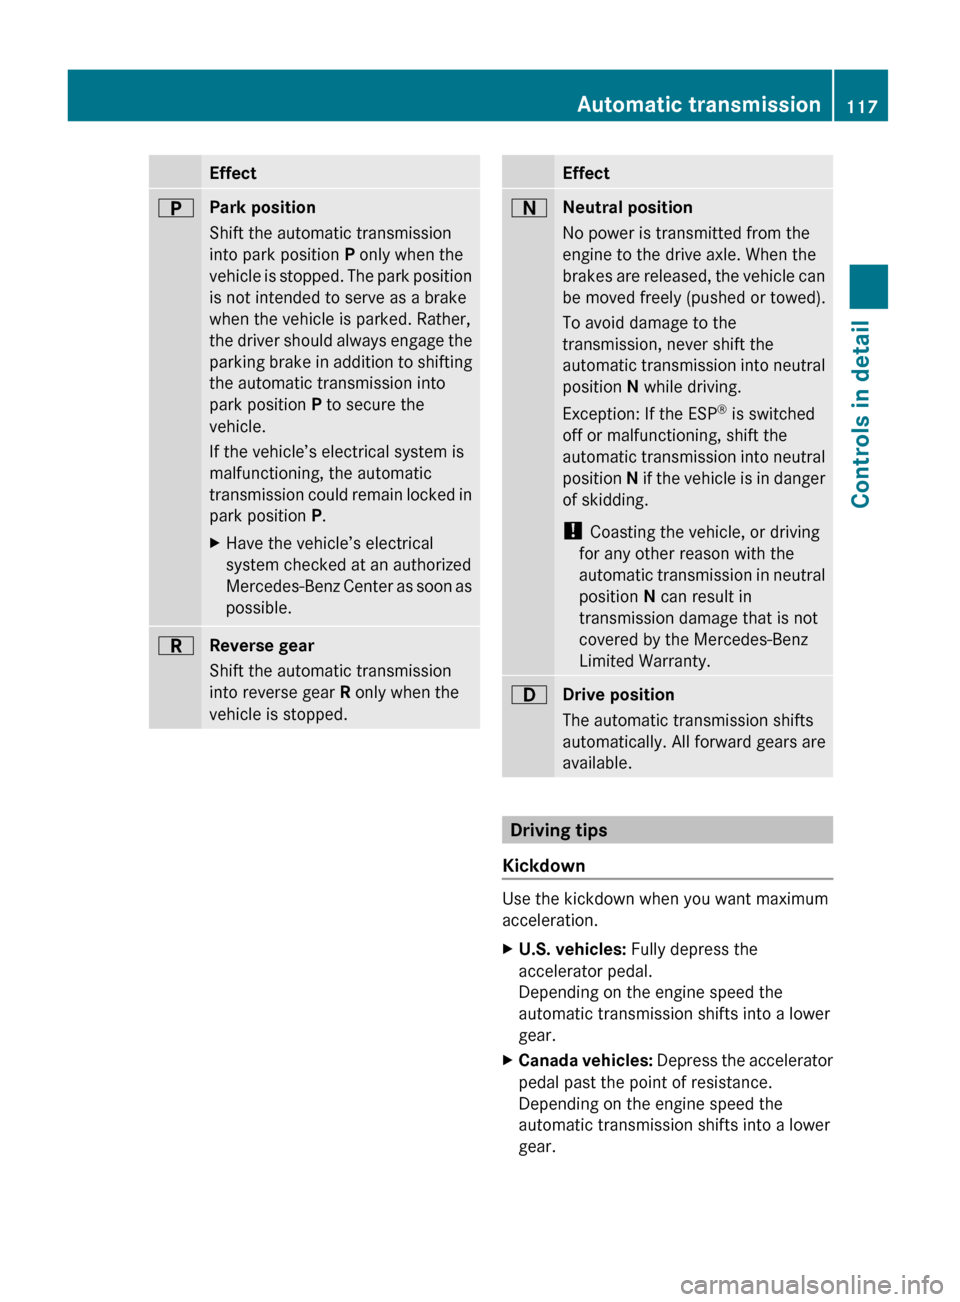
EffectBPark position
Shift the automatic transmission
into park position P only when the
vehicle is stopped. The park position
is not intended to serve as a brake
when the vehicle is parked. Rather,
the driver should always engage the
parking brake in addition to shifting
the automatic transmission into
park position P to secure the
vehicle.
If the vehicle’s electrical system is
malfunctioning, the automatic
transmission could remain locked in
park position P.XHave the vehicle’s electrical
system checked at an authorized
Mercedes-Benz Center as soon as
possible.CReverse gear
Shift the automatic transmission
into reverse gear R only when the
vehicle is stopped.EffectANeutral position
No power is transmitted from the
engine to the drive axle. When the
brakes are released, the vehicle can
be moved freely (pushed or towed).
To avoid damage to the
transmission, never shift the
automatic transmission into neutral
position N while driving.
Exception: If the ESP ®
is switched
off or malfunctioning, shift the
automatic transmission into neutral
position N if the vehicle is in danger
of skidding.
! Coasting the vehicle, or driving
for any other reason with the
automatic transmission in neutral
position N can result in
transmission damage that is not
covered by the Mercedes-Benz
Limited Warranty.7Drive position
The automatic transmission shifts
automatically. All forward gears are
available.
Driving tips
Kickdown
Use the kickdown when you want maximum
acceleration.
XU.S. vehicles: Fully depress the
accelerator pedal.
Depending on the engine speed the
automatic transmission shifts into a lower
gear.XCanada vehicles: Depress the accelerator
pedal past the point of resistance.
Depending on the engine speed the
automatic transmission shifts into a lower
gear.Automatic transmission117Controls in detailX164_AKB; 5; 31, en-USd2ureepe,Version: 2.11.8.12009-09-11T12:30:16+02:00 - Seite 117Z
Page 120 of 380

Rocking the vehicle
Rocking the vehicle by shifting the automatic
transmission directly between drive position
D and reverse gear R can help free a vehicle
stuck in mud or snow. The engine control
system of this vehicle electronically limits
directly shifting the automatic transmission
between drive position D and reverse gear R
to very low speeds, i.e. approximately 5 mph
(9 km/h). To shift the automatic transmission
directly between drive position D and reverse
gear R, move the gear selector lever up or
down past the resistance point.
Working on the vehicle
GWarning!
When working on the vehicle, engage the
parking brake and shift the automatic
transmission into park position P. Otherwise
the vehicle could roll away which could result
in an accident and/or serious personal injury.
Towing a trailer
XWhen you tow a trailer, shift into a lower
gear range manually if the automatic
transmission hunts between gears on
inclines.
A lower gear range and reduction of speed
reduces the potential to overload or to
overheat the engine.
For more information on trailer towing, see
“Trailer towing” (Y page 269).
Gear ranges
With the automatic transmission in drive
position D, you can limit or extend the gear
range, see “One-touch gearshifting”
(Y page 118).
The current gear range appears in the
multifunction display.:Gear range indicator Effect=With this selection you can use the
braking effect of the engine.
5Allows the use of the engine’s
braking effect when driving
Ron steep downgrades
Rin mountainous regions
Runder extreme operating
conditions
4For maximum use of the engine’s
braking effect on very steep or
lengthy downgrades.
One-touch gearshifting
With the automatic transmission in drive
position D, you can limit or extend the gear
range using the steering wheel gearshift
control.
Steering wheel gearshift control
118Automatic transmissionControls in detail
X164_AKB; 5; 31, en-USd2ureepe,Version: 2.11.8.12009-09-11T12:30:16+02:00 - Seite 118
Page 121 of 380
iYou cannot shift with the steering wheel
gearshift control when the automatic
transmission is in park position P, neutral
position N, or reverse gear R.
Limiting gear range GWarning!
On slippery road surfaces, never downshift in
order to obtain braking action. This could
result in drive wheel slip and reduced vehicle
control. Your vehicle’s ABS will not prevent
this type of loss of control.
XBriefly pull left gearshift control :.
The automatic transmission will shift into
the next lower gear as permitted by the
shift program. This action simultaneously
limits the gear range of the automatic
transmission.
i To avoid overrevving the engine when
downshifting, the automatic transmission
will not shift into a lower gear if the engine’s
maximum speed would be exceeded.
Extending gear range
XBriefly pull right gearshift control ;.
The automatic transmission will shift into
the next higher gear as permitted by the
shift program. This action simultaneously
extends the gear range of the automatic
transmission.
i If you press on the accelerator pedal
when the engine has reached the
revolution limit of the current gear range,
the automatic transmission will upshift
beyond any gear range limit selected.
Canceling gear range limit
XPull and hold right gearshift control ; until
the gear range indicator disappears from
the multifunction display.
The automatic transmission will shift from
the current gear range directly into drive
position D.Shifting into optimal gear range XPull and hold left gearshift control :.
The automatic transmission will select the
gear range suited for optimal acceleration
and deceleration automatically. This will
involve shifting down one or more gears.
Emergency operation (limp-home
mode)
If vehicle acceleration becomes less
responsive or sluggish or the automatic
transmission no longer shifts, the automatic
transmission is most likely operating in limp-
home (emergency operation) mode. In this
mode only second gear and reverse gear R
can be selected.
XStop the vehicle in a safe location.XShift the automatic transmission into park
position P.XTurn off the engine.XWait at least 10 seconds before restarting.XRestart the engine.XShift the automatic transmission into drive
position D (for second gear) or reverse gear
R .XHave the automatic transmission checked
at an authorized Mercedes-Benz Center as
soon as possible.
Transfer case
The vehicle is equipped with all-wheel drive
(4MATIC). Both the front and rear axles are
powered at all times when the vehicle is being
operated.
! Only conduct operational or performance
tests on a two-axle dynamometer. If such
tests are necessary, contact an authorized
Mercedes-Benz Center. You could
otherwise seriously damage the brake
system or the transfer case which is not
Transfer case119Controls in detailX164_AKB; 5; 31, en-USd2ureepe,Version: 2.11.8.12009-09-11T12:30:16+02:00 - Seite 119Z
Page 122 of 380
covered by the Mercedes-Benz Limited
Warranty.
! Because the ESP ®
operates
automatically, the engine and ignition must
be shut off (SmartKey in starter switch
position 0 or 1 or KEYLESS-GO start/stop
button in position 0 or 1) when the parking
brake is being tested on a brake test
dynamometer. Such testing should be no
longer than 10 seconds.
Active braking action through the ESP ®
may otherwise seriously damage the brake
system which is not covered by the
Mercedes-Benz Limited Warranty.
LOW RANGE mode
The LOW RANGE mode is available on
vehicles with enhanced off-road package.
In the following situations you should switch
to the LOW RANGE mode:
R during off-road driving
R before driving through water
R when towing up or down on steep gradients
With LOW RANGE selected, the engine’s
power delivery and the shifting behavior of
the automatic transmission are adjusted.
Furthermore, the ABS, the ESP ®
, and the
4-ETS functions especially adapted to off-
road travel are activated.
For more information on off-road driving, see
“Off-road driving” ( Y page 262).
For information on driving safety systems
during LOW RANGE mode, see “Driving safety
systems” ( Y page 61).
Gear ranges
There are two possible settings.
HIGH
RANGERoad position for all normal
driving situations.
(LOW RANGE mode off)LOW
RANGEOff-road position for
traveling on rough terrain.
(LOW RANGE mode on)
Also use the off-road
position when driving on-
road on steep gradients,
especially when towing a
trailer.
LOW RANGE acts by raising
the engine’s gear ratio. The
vehicle travels at roughly
third the speed compared to
when in HIGH RANGE
position, leading to an
increase in the engine’s
drive power.GWarning!
Always wait until the procedure of shifting
from HIGH RANGE to LOW RANGE – and from
LOW RANGE to HIGH RANGE – has been
entirely completed. During this procedure do
not turn off the engine or shift the automatic
transmission into another gear.
If you do not wait until the shifting procedure
has been entirely completed then it might not
be correctly performed. The transfer case
might be in neutral, thus interrupting the
transfer of power between the engine and the
drive axle.
The vehicle is then freely movable, even if a
gear has been selected, and could
unintentionally be set into motion –
particularly on up – or downhill grades. This
could lead to an accident and cause injury to
yourself and others.
Please observe related messages appearing
in the multifunction display.
120Transfer caseControls in detail
X164_AKB; 5; 31, en-USd2ureepe,Version: 2.11.8.12009-09-11T12:30:16+02:00 - Seite 120
Page 123 of 380

Switching LOW RANGE mode
Switching LOW RANGE mode on
(switching from HIGH RANGE to LOW
RANGE)
! The shifting procedure can only be
performed when the following conditions
are met:
RThe engine is running.
RThe automatic transmission is in neutral
position N.
RThe vehicle speed does not exceed
25 mph (40 km/h).
iThere is no reset to HIGH after the ignition
has been switched off.
XPress LOW RANGE switch :.
Indicator lamp ; flashes.
If the system senses that all conditions are
met, it will switch from HIGH RANGE to
LOW RANGE. A chime sounds and LOW
RANGE indicator = appears in the
multifunction display.
Indicator lamp ; on LOW RANGE
switch : comes on continuously,
indicating that the LOW RANGE mode has
been activated.
iYou can cancel the procedure by pressing
the LOW RANGE switch again while the
indicator lamp is flashing.
Switching LOW RANGE mode off
(switching from LOW RANGE to HIGH
RANGE)
! The shifting procedure can only be
performed when the following conditions
are met:
RThe engine is running.
RThe automatic transmission is in neutral
position N.
RThe vehicle speed does not exceed
43 mph (70 km/h).
iThere is no reset to LOW after the ignition
has been switched off.
XPress LOW RANGE switch :.
Indicator lamp ; flashes.
If the system senses that all conditions are
met, it will switch from LOW RANGE to
HIGH RANGE. A chime sounds and LOW
RANGE indicator = disappears from the
multifunction display.
Indicator lamp ; on LOW RANGE
switch : goes out, indicating that the LOW
RANGE mode has been deactivated.
iYou can cancel the procedure by pressing
the LOW RANGE switch again while the
indicator lamp is flashing.
For messages in the multifunction display,
see the “Practical hints” section
(Y page 303).
Differential locks
Vehicles with enhanced off-road package are
equipped with automatic locks for the center
Differential locks121Controls in detailX164_AKB; 5; 31, en-USd2ureepe,Version: 2.11.8.12009-09-11T12:30:16+02:00 - Seite 121Z
Page 124 of 380
and rear axle differential to improve vehicle
traction.
The center differential compensates for
differences in wheel rotation between the
front and rear axle.
The rear axle differential compensates
differences between the rear wheels.
i At the front axles, the 4-ETS system
compensates for any traction problems.
For more information on off-road driving, see
“Off-road driving” ( Y page 262).
A few words about differentials and
differential locks
When a vehicle negotiates a turn, wheels on
the outside of the curve must travel farther
and rotate faster than the inside wheels. The
differential, the operation of a set of gears
that allows the powered wheels in a vehicle
to turn at different speeds, makes this
essential function possible.
The drawback is that the differential also
sends most of the engine’s power to the
wheel with the least load or strain on it. For
example, if one of a vehicle’s powered wheels
sits on a patch of snow and spins because
there is no traction, all of the engine’s power
will go to that wheel because the power will
take the path of least resistance. Meanwhile,
the opposite wheel, sitting on dry pavement
where it could get enough grip to start the
vehicle moving, sits idle because it receives
no power.
The 4-ETS addresses this problem and
provides for good control and steering ability
by automatically slowing the slipping wheel
and thus increasing the power to the other
non-slipping drive wheels to get the vehicle
moving. The ESP ®
and the 4-ETS in this
vehicle feature such intelligent limited-slip
differential technology, ideally suited for on-
road and light off-road driving. Transfer case
position LOW (Y page 120) also enhances off-
road driving capabilities.
More extreme off-road conditions may call for
another solution, engaging a differential lock
or preventing the differential from operating
altogether. This vehicle comes with two
differential locks: transfer case (center) and
rear. Each can be engaged simply by
operating the rotary switch located on the
center console ( Y page 123). When the
transfer case (center) differential is locked,
the combined (or average) speed of the front
wheels is identical to the combined rear
wheel speed. When the rear differential is
locked, both rear wheels turn at the same
speed, independent of the individual torque.
Please be aware that engaging the differential
locks will significantly reduce the steering
ability of the vehicle.
For your safety and the safety of others and
to prevent damage to the vehicle, the
differential locks must not be engaged when
driving on paved roads. It is important to
understand that during on-road/paved
driving, differentials are absolutely necessary
for providing the essential control and
steering ability of the vehicle. The differential
locks, therefore, must not be engaged when
driving on paved roads and should only be
used to the extent necessary to negotiate off-
road conditions which cannot be handled by
the systems (the 4-ETS, the ESP ®
, and the
transfer case in LOW RANGE mode) this
vehicle comes equipped with.
Switching differential locks
! If the differential locks are engaged,
accelerate gently when setting the vehicle
in motion.
Only operate the vehicle on a single axle
dynamometer if the axle not being driven is
jacked up or the associated propeller shaft
is disconnected.
Otherwise the transmission could be
damaged.
122Differential locksControls in detail
X164_AKB; 5; 31, en-USd2ureepe,Version: 2.11.8.12009-09-11T12:30:16+02:00 - Seite 122
Page 126 of 380
menu, see the “Controls in detail” section
(Y page 131).
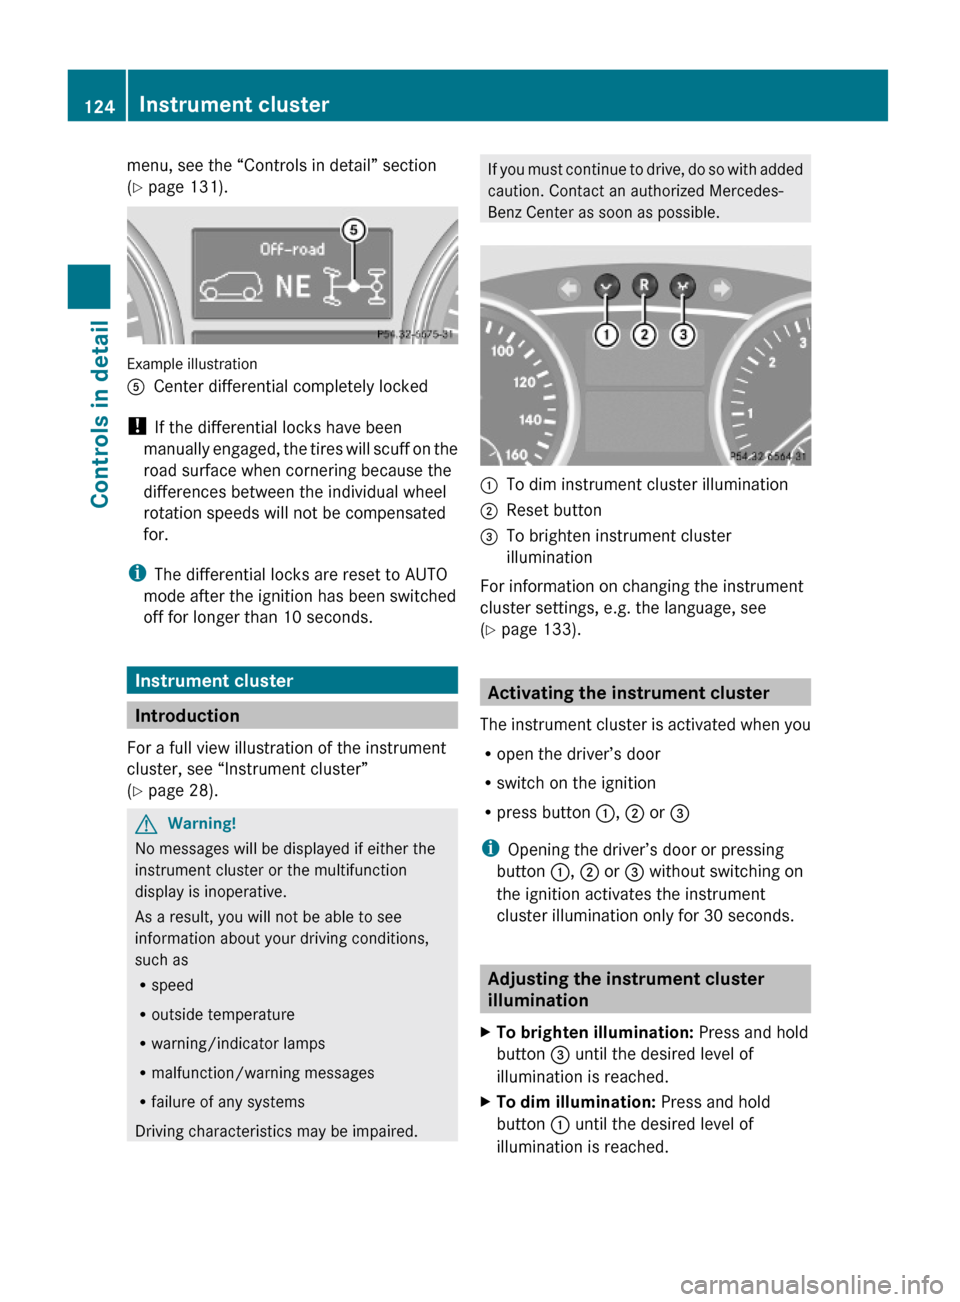
Example illustration
ACenter differential completely locked
! If the differential locks have been
manually engaged, the tires will scuff on the
road surface when cornering because the
differences between the individual wheel
rotation speeds will not be compensated
for.
iThe differential locks are reset to AUTO
mode after the ignition has been switched
off for longer than 10 seconds.
Instrument cluster
Introduction
For a full view illustration of the instrument
cluster, see “Instrument cluster”
(Y page 28).
GWarning!
No messages will be displayed if either the
instrument cluster or the multifunction
display is inoperative.
As a result, you will not be able to see
information about your driving conditions,
such as
Rspeed
Routside temperature
Rwarning/indicator lamps
Rmalfunction/warning messages
Rfailure of any systems
Driving characteristics may be impaired.
If you must continue to drive, do so with added
caution. Contact an authorized Mercedes-
Benz Center as soon as possible.
:To dim instrument cluster illumination;Reset button =To brighten instrument cluster
illumination
For information on changing the instrument
cluster settings, e.g. the language, see
(Y page 133).
Activating the instrument cluster
The instrument cluster is activated when you
Ropen the driver’s door
Rswitch on the ignition
Rpress button :, ; or =
iOpening the driver’s door or pressing
button :, ; or = without switching on
the ignition activates the instrument
cluster illumination only for 30 seconds.
Adjusting the instrument cluster
illumination
XTo brighten illumination: Press and hold
button = until the desired level of
illumination is reached.
XTo dim illumination: Press and hold
button : until the desired level of
illumination is reached.
124Instrument clusterControls in detail
X164_AKB; 5; 31, en-USd2ureepe,Version: 2.11.8.12009-09-11T12:30:16+02:00 - Seite 124