2010 MERCEDES-BENZ GL450 warning light
[x] Cancel search: warning lightPage 90 of 380
backrest could fold. The child seat would no
longer be properly supported or positioned to
provide its intended benefit.
Seat backrest tilt (second-row seats)
GWarning!
The seat belt only offers its intended
protection when the seat backrest is in a
nearly vertical position and the occupant is
sitting upright. Avoid sitting in positions that
prevent the seat belt from being properly
positioned against the body. You should
therefore adjust the seat backrest to a
position as upright as possible.
The seat backrest tilt can be set to five
different positions.
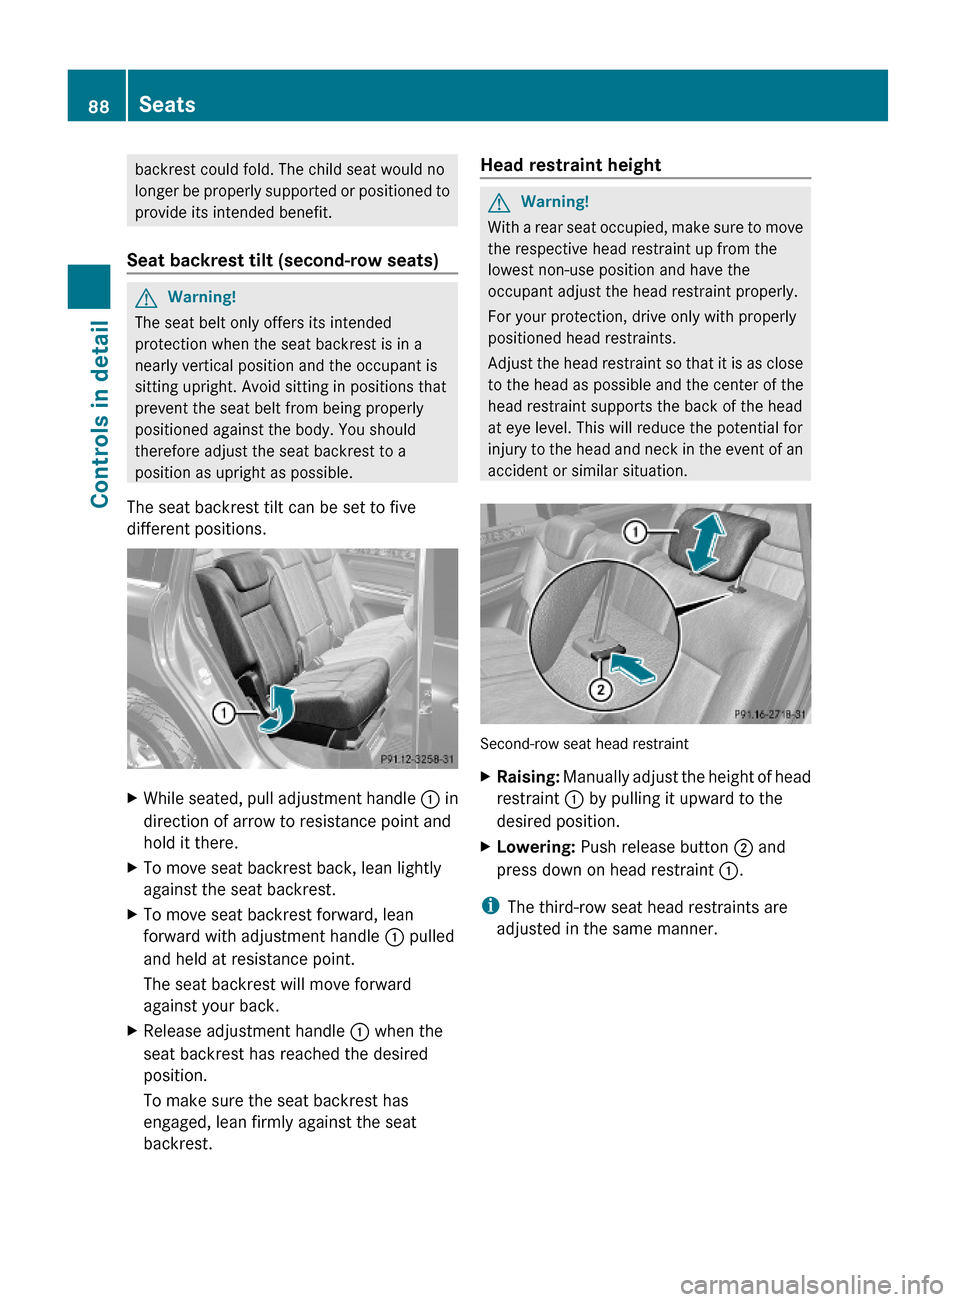
XWhile seated, pull adjustment handle : in
direction of arrow to resistance point and
hold it there.
XTo move seat backrest back, lean lightly
against the seat backrest.
XTo move seat backrest forward, lean
forward with adjustment handle : pulled
and held at resistance point.
The seat backrest will move forward
against your back.
XRelease adjustment handle : when the
seat backrest has reached the desired
position.
To make sure the seat backrest has
engaged, lean firmly against the seat
backrest.
Head restraint heightGWarning!
With a rear seat occupied, make sure to move
the respective head restraint up from the
lowest non-use position and have the
occupant adjust the head restraint properly.
For your protection, drive only with properly
positioned head restraints.
Adjust the head restraint so that it is as close
to the head as possible and the center of the
head restraint supports the back of the head
at eye level. This will reduce the potential for
injury to the head and neck in the event of an
accident or similar situation.
Second-row seat head restraint
XRaising: Manually adjust the height of head
restraint : by pulling it upward to the
desired position.
XLowering: Push release button ; and
press down on head restraint :.
iThe third-row seat head restraints are
adjusted in the same manner.
88SeatsControls in detail
X164_AKB; 5; 31, en-USd2ureepe,Version: 2.11.8.12009-09-11T12:30:16+02:00 - Seite 88
Page 93 of 380
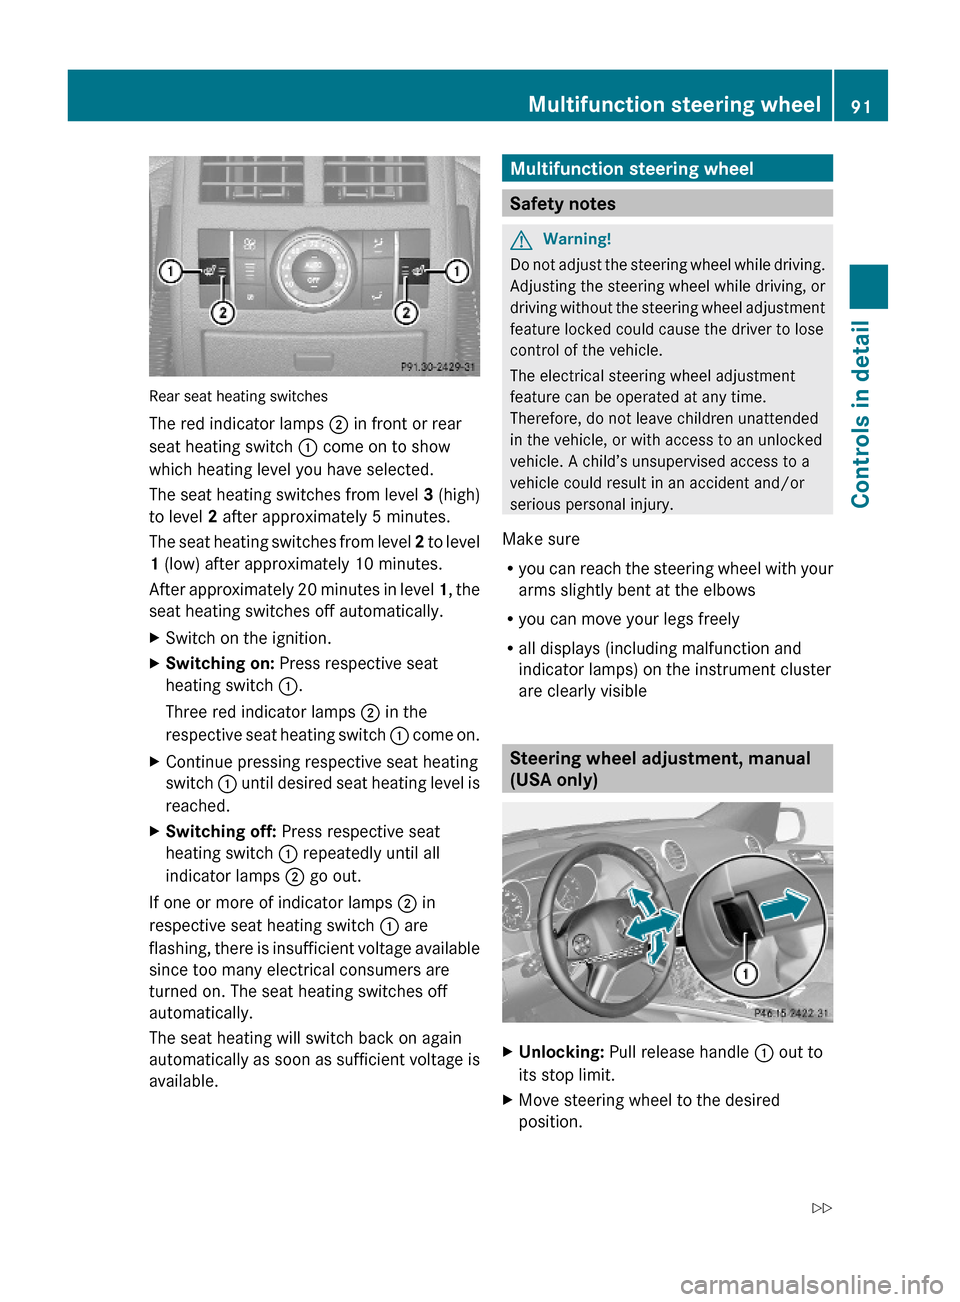
Rear seat heating switches
The red indicator lamps ; in front or rear
seat heating switch : come on to show
which heating level you have selected.
The seat heating switches from level 3 (high)
to level 2 after approximately 5 minutes.
The seat heating switches from level 2 to level
1 (low) after approximately 10 minutes.
After approximately 20 minutes in level 1, the
seat heating switches off automatically.
XSwitch on the ignition.XSwitching on: Press respective seat
heating switch :.
Three red indicator lamps ; in the
respective seat heating switch : come on.
XContinue pressing respective seat heating
switch : until desired seat heating level is
reached.
XSwitching off: Press respective seat
heating switch : repeatedly until all
indicator lamps ; go out.
If one or more of indicator lamps ; in
respective seat heating switch : are
flashing, there is insufficient voltage available
since too many electrical consumers are
turned on. The seat heating switches off
automatically.
The seat heating will switch back on again
automatically as soon as sufficient voltage is
available.
Multifunction steering wheel
Safety notes
GWarning!
Do not adjust the steering wheel while driving.
Adjusting the steering wheel while driving, or
driving without the steering wheel adjustment
feature locked could cause the driver to lose
control of the vehicle.
The electrical steering wheel adjustment
feature can be operated at any time.
Therefore, do not leave children unattended
in the vehicle, or with access to an unlocked
vehicle. A child’s unsupervised access to a
vehicle could result in an accident and/or
serious personal injury.
Make sure
Ryou can reach the steering wheel with your
arms slightly bent at the elbows
Ryou can move your legs freely
Rall displays (including malfunction and
indicator lamps) on the instrument cluster
are clearly visible
Steering wheel adjustment, manual
(USA only)
XUnlocking: Pull release handle : out to
its stop limit.
XMove steering wheel to the desired
position.
Multifunction steering wheel91Controls in detailX164_AKB; 5; 31, en-USd2ureepe,Version: 2.11.8.12009-09-11T12:30:16+02:00 - Seite 91Z
Page 96 of 380

Interior rear view mirror, antiglare
position
XTilt the mirror to the antiglare position by
moving lever : towards the windshield.
The interior rear view mirror is dimmed.
Exterior rear view mirrors
GWarning!
Exercise care when using the passenger-side
exterior rear view mirror. The mirror surface
is convex (outwardly curved surface for a
wider field of view). Objects in mirror are
closer than they appear. Check your interior
rear view mirror and glance over your
shoulder before changing lanes.
XSwitch on the ignition.XPress button : for the driver’s side
exterior rear view mirror or button = for
the passenger-side exterior rear view
mirror.
The indicator lamp in the respective button
comes on for approximately 15 seconds.
If you do not make adjustments to the
selected exterior rear view mirror within
15 seconds, the indicator lamp goes out.
You will then have to select the desired
exterior rear view mirror again before
adjustments can be made. Adjustments
can only be made with the indicator lamp
for the respective exterior rear view mirror
button illuminated.
XPress adjustment button ; up, down, left
or right according to the desired setting.
! If an exterior rear view mirror was forcibly
hit from the front, manually snap it back
into place.
! Vehicle with power-folding exterior rear
view mirrors:
If an exterior rear view mirror housing is
forcibly pushed forward (hit from the rear)
or forcibly pushed rearward (hit from front),
press fold button to fold mirrors in, then
press fold button again to fold mirrors out.
Do not force mirrors by hand as this may
damage the adjustment mechanism.
The mirror housing is then properly
positioned and you can adjust the mirror in
the usual manner.
iAt low ambient temperatures, the exterior
rear view mirrors will be heated
automatically.
Auto-dimming rear view mirrors
The exterior rear view mirror on the driver’s
side and the interior rear view mirror will
respond automatically to glare when the
ignition is switched on and incoming light
from headlamps falls on the sensor in the
interior rear view mirror.
94MirrorsControls in detail
X164_AKB; 5; 31, en-USd2ureepe,Version: 2.11.8.12009-09-11T12:30:16+02:00 - Seite 94
Page 97 of 380
The rear view mirrors will not react if the
automatic transmission is set to reverse gear
R or the interior lighting is switched on.
GWarning!
The auto-dimming function does not react if
incoming light is not aimed directly at sensors
in the interior rear view mirror.
The interior rear view mirror and the exterior
rear view mirror on the driver’s side do not
react, for example, when transporting cargo
which covers the rear window.
Light hitting the mirror(s) at certain angles
(incident light) could blind you. As a result,
you may not be able to observe traffic
conditions and could cause an accident.
Exterior rear view mirror parking
position
For more convenient parking, you can set the
passenger-side exterior rear view mirror so
that you can see the rear wheel and the road
curb.
Setting and storing the parking position
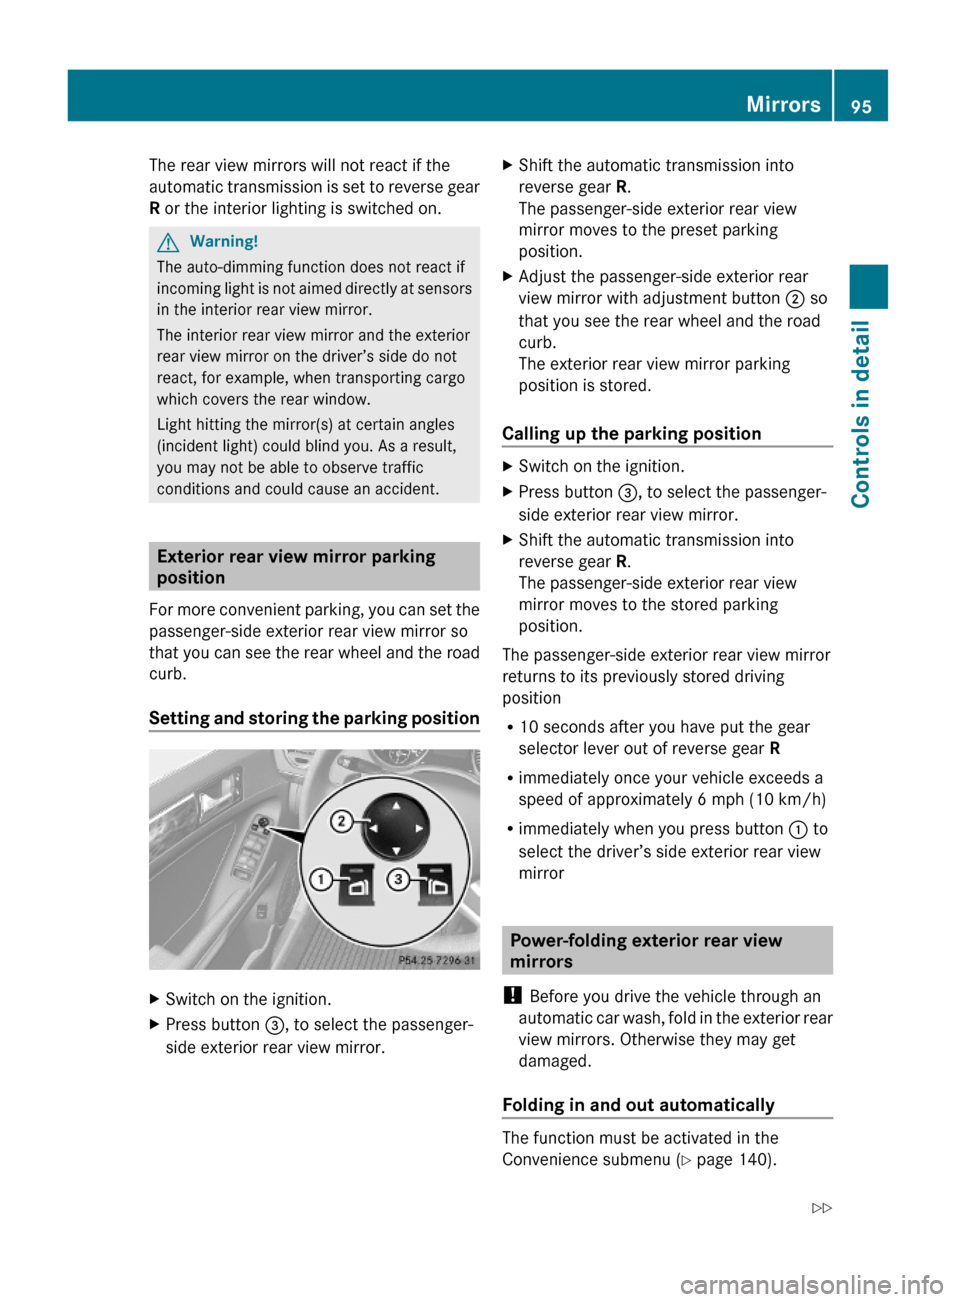
XSwitch on the ignition.XPress button =, to select the passenger-
side exterior rear view mirror.
XShift the automatic transmission into
reverse gear R.
The passenger-side exterior rear view
mirror moves to the preset parking
position.
XAdjust the passenger-side exterior rear
view mirror with adjustment button ; so
that you see the rear wheel and the road
curb.
The exterior rear view mirror parking
position is stored.
Calling up the parking position
XSwitch on the ignition.XPress button =, to select the passenger-
side exterior rear view mirror.
XShift the automatic transmission into
reverse gear R.
The passenger-side exterior rear view
mirror moves to the stored parking
position.
The passenger-side exterior rear view mirror
returns to its previously stored driving
position
R10 seconds after you have put the gear
selector lever out of reverse gear R
Rimmediately once your vehicle exceeds a
speed of approximately 6 mph (10 km/h)
Rimmediately when you press button : to
select the driver’s side exterior rear view
mirror
Power-folding exterior rear view
mirrors
! Before you drive the vehicle through an
automatic car wash, fold in the exterior rear
view mirrors. Otherwise they may get
damaged.
Folding in and out automatically
The function must be activated in the
Convenience submenu (Y page 140).
Mirrors95Controls in detailX164_AKB; 5; 31, en-USd2ureepe,Version: 2.11.8.12009-09-11T12:30:16+02:00 - Seite 95Z
Page 100 of 380
iThe exterior lamps (except standing
lamps or parking lamps) go out
automatically when you remove the
SmartKey from the starter switch or open
the driver’s door with the ignition switched
off.
When the parking lamps or the rear fog
lamp are switched on and you remove the
SmartKey from the starter switch and open
the driver’s door, an acoustic signal
sounds.
In addition the message Switch Off
Lights appears in the multifunction
display.
Switch off the parking lamps or the rear fog
lamp manually.
! Failure to switch off the parking lamps
when leaving the vehicle may result in a
discharged battery.
i Vehicles without front fog lamps: For
better detection of the vehicle, the LED
daytime running lamps are dimmed to
parking lamp level when the low-beam
headlamps are switched on.
Low-beam headlamps
The low-beam headlamps can be switched on
and off with the exterior lamp switch.
XSwitch on the ignition.XSwitching on: Turn the exterior lamp
switch to position L.
The following lamps come on:
R Low-beam headlamps
R Parking lamps 6
R Green indicator lamp L in the
instrument clusterXSwitching off: Turn the exterior lamp
switch to position $.Automatic headlamp mode GWarning!
If the exterior lamp switch is set to Ã, the
headlamps will not automatically come on
under foggy conditions.
To minimize risk to you and to others, activate
headlamps by turning exterior lamp switch to
L when driving or when traffic and/or
ambient lighting conditions require you to do
so.
In low ambient lighting conditions, only switch
from position à to L with the vehicle
at a standstill in a safe location. Switching
from à to L will briefly switch off the
headlamps. Doing so while driving in low
ambient lighting conditions may result in an
accident.
The automatic headlamp feature is only an aid
to the driver. The driver is responsible for the
operation of the vehicle’s lights at all times.
XSwitching on: Turn the exterior lamp
switch to position Ã.
When ambient light is low: When the
SmartKey is in starter switch position 1 or
when the KEYLESS-GO start/stop button has
been pressed once, the parking lamps 6
come
on automatically.
When the engine is running, the low-beam
headlamps come on additionally.
When ambient light is bright: When the
SmartKey is in starter switch position 1 or
when the KEYLESS-GO start/stop button has
been pressed once, all lamps are off.
When the engine is running, the daytime
running lamps 7
come on automatically.
When the low-beam headlamps are switched
on, the green indicator lamp L in the
instrument cluster comes on.
Once the low-beam headlamps are on, the
high-beam headlamps are also available.
6 When the parking lamps are on, the tail lamps, the license plate lamps, the side marker lamps, and the
instrument cluster illumination are also on.
7 USA only: The daytime running lamp mode must be activated via the control system.98LightingControls in detail
X164_AKB; 5; 31, en-USd2ureepe,Version: 2.11.8.12009-09-11T12:30:16+02:00 - Seite 98
Page 101 of 380
Daytime running lamp mode
In Canada, the daytime running lamp mode is
mandatory and therefore in a constant mode.
In the USA, the daytime running lamp mode
is deactivated by default.
XActivate the daytime running lamp mode
using the control system, see “Switching
daytime running lamp mode on or off (USA
only)” ( Y page 136).XTurn the exterior lamp switch to position
$ or à .
When the engine is running and the
ambient light is bright, the daytime running
lamps come on.
In low ambient lighting conditions, the
following lamps will come on additionally:
R Low-beam headlamps
R Parking lamps 6
R green indicator lamp L in the
instrument cluster
You can only switch on the high-beam
headlamps when the low-beam headlamps
are on.
The high-beam flasher is available at all times.
Canada only
When the engine is running, and you
R shift from a driving position to park
position P with the vehicle at a standstill or
the parking brake is engaged, daytime
running lamps or the low-beam headlamps
will go out with a delay of 3 minutes
R turn the exterior lamp switch to position
T , the daytime running lamps and the
parking lamps 6
come on in bright ambient
lighting conditions.
R turn the exterior lamp switch to position
L , the manual headlamp mode has
priority over the daytime running lamp
mode
The corresponding exterior lamps come on
( Y page 97).
USA only
When the engine is running, and you turn the
exterior lamp switch to position T or
L , the manual headlamp mode has
priority over the daytime running lamp mode.
The corresponding exterior lamps come on
( Y page 97).
Fog lamps
Fog lamps cannot be switched on with the
exterior lamp switch in position à or
$ .
GWarning!
In low ambient lighting or foggy conditions,
only switch from position à to L with
the vehicle at a standstill in a safe location.
Switching from à to L will briefly
switch off the headlamps. Doing so while
driving in low ambient lighting conditions may
result in an accident.
Front fog lamps will operate with the parking
lamps and/or the low-beam headlamps on.
The rear fog lamp can only be switched on
with the exterior lamp switch in position
L . Fog lamps should only be used in
conjunction with low-beam headlamps.
Consult your State or Province Motor Vehicle
Regulations regarding permissible lamp
operation.
XSwitch on the ignition.XTurn the exterior lamp switch to position
T or L (Y page 97).6
When the parking lamps are on, the tail lamps, the license plate lamps, the side marker lamps, and the
instrument cluster illumination are also on.Lighting99Controls in detailX164_AKB; 5; 31, en-USd2ureepe,Version: 2.11.8.12009-09-11T12:30:16+02:00 - Seite 99Z
Page 103 of 380
High-beam flasher XSwitching on: Pull the combination switch
briefly in direction of arrow =.
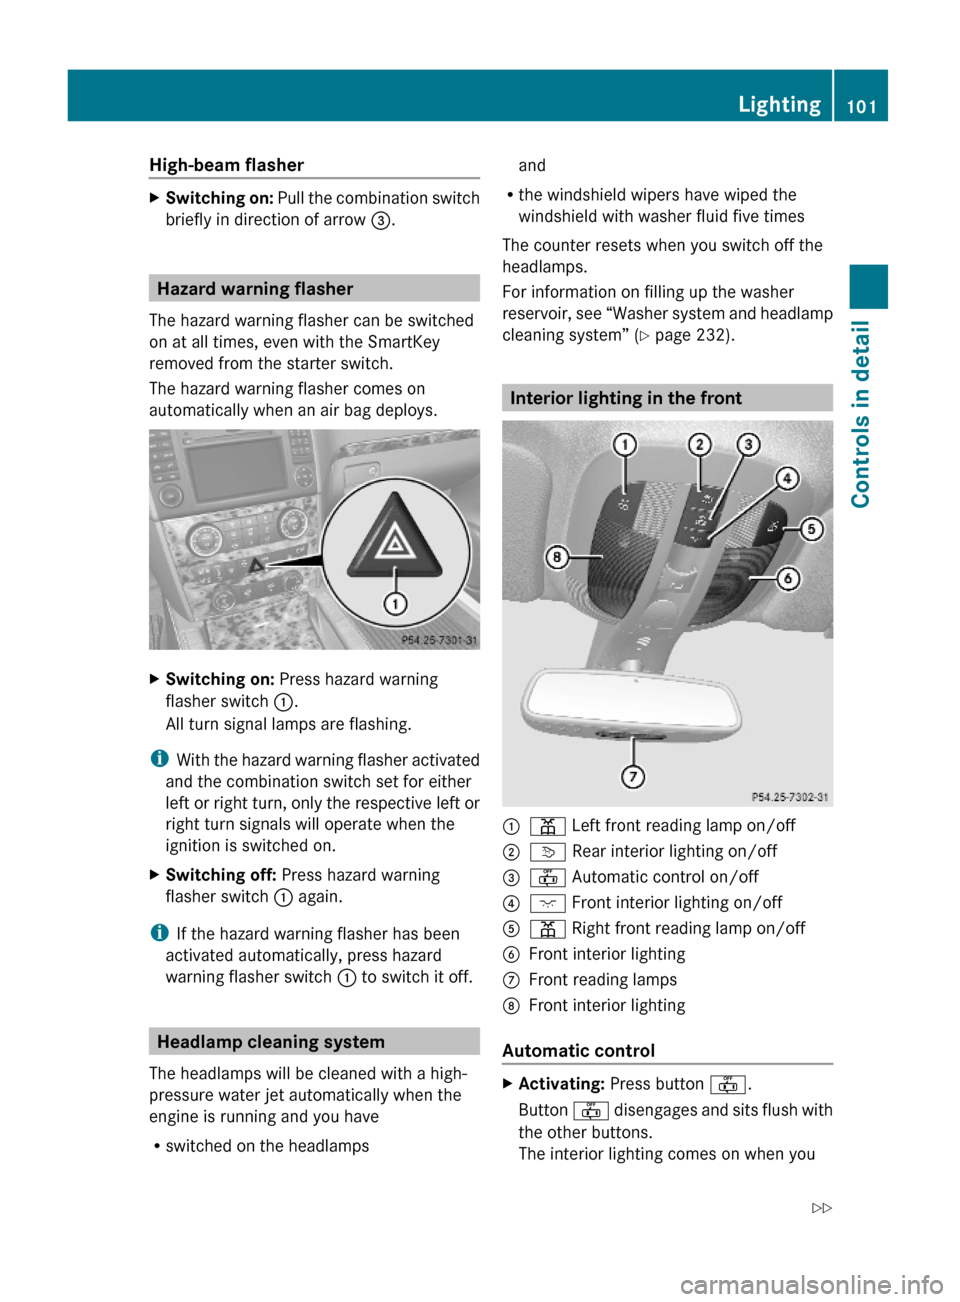
Hazard warning flasher
The hazard warning flasher can be switched
on at all times, even with the SmartKey
removed from the starter switch.
The hazard warning flasher comes on
automatically when an air bag deploys.
XSwitching on: Press hazard warning
flasher switch :.
All turn signal lamps are flashing.
iWith the hazard warning flasher activated
and the combination switch set for either
left or right turn, only the respective left or
right turn signals will operate when the
ignition is switched on.
XSwitching off: Press hazard warning
flasher switch : again.
iIf the hazard warning flasher has been
activated automatically, press hazard
warning flasher switch : to switch it off.
Headlamp cleaning system
The headlamps will be cleaned with a high-
pressure water jet automatically when the
engine is running and you have
Rswitched on the headlamps
and
Rthe windshield wipers have wiped the
windshield with washer fluid five times
The counter resets when you switch off the
headlamps.
For information on filling up the washer
reservoir, see “Washer system and headlamp
cleaning system” (Y page 232).
Interior lighting in the front
:p Left front reading lamp on/off;v Rear interior lighting on/off=~ Automatic control on/off?c Front interior lighting on/off Ap Right front reading lamp on/offBFront interior lightingCFront reading lamps DFront interior lighting
Automatic control
XActivating: Press button ~.
Button ~ disengages and sits flush with
the other buttons.
The interior lighting comes on when you
Lighting101Controls in detailX164_AKB; 5; 31, en-USd2ureepe,Version: 2.11.8.12009-09-11T12:30:16+02:00 - Seite 101Z
Page 104 of 380
Runlock the vehicle
Rremove the SmartKey from the starter
switch (Interior Lighting Delayed
Shut-off must be switched on
(Y page 138))
Ropen a door
Ropen the tailgate
The interior lighting goes out after a short
time.
iIf a door remains open, the interior lamps
go out automatically after approximately
5 minutes when the SmartKey is removed
or in starter switch position 0.
XDeactivating: Press button ~.
Button ~ engages.
Manual control
! An interior lamp switched on manually
does not go out automatically.
Leaving an interior lamp switched on for an
extended period of time with the engine
turned off could result in a discharged
battery.
XSwitching front interior lighting on/
off: Press switch c.
XSwitching rear interior lighting on/off:
Press switch v.
XSwitching front reading lamps on/off:
Press respective switch p.
Ambient lighting
The brightness of the ambient lighting C is
adjusted via the “Control system”
(Y page 137).
Emergency lighting
The interior lighting comes on automatically
if the vehicle is involved in an accident.
Switching off: XPress button ~.
or
XPress hazard warning flasher switch
(Y page 101).
or
XUnlock the vehicle with the SmartKey.
Interior lighting in the rear
! An interior lamp switched on manually
does not go out automatically.
Leaving an interior lamp switched on for an
extended period of time with the engine
turned off could result in a discharged
battery.
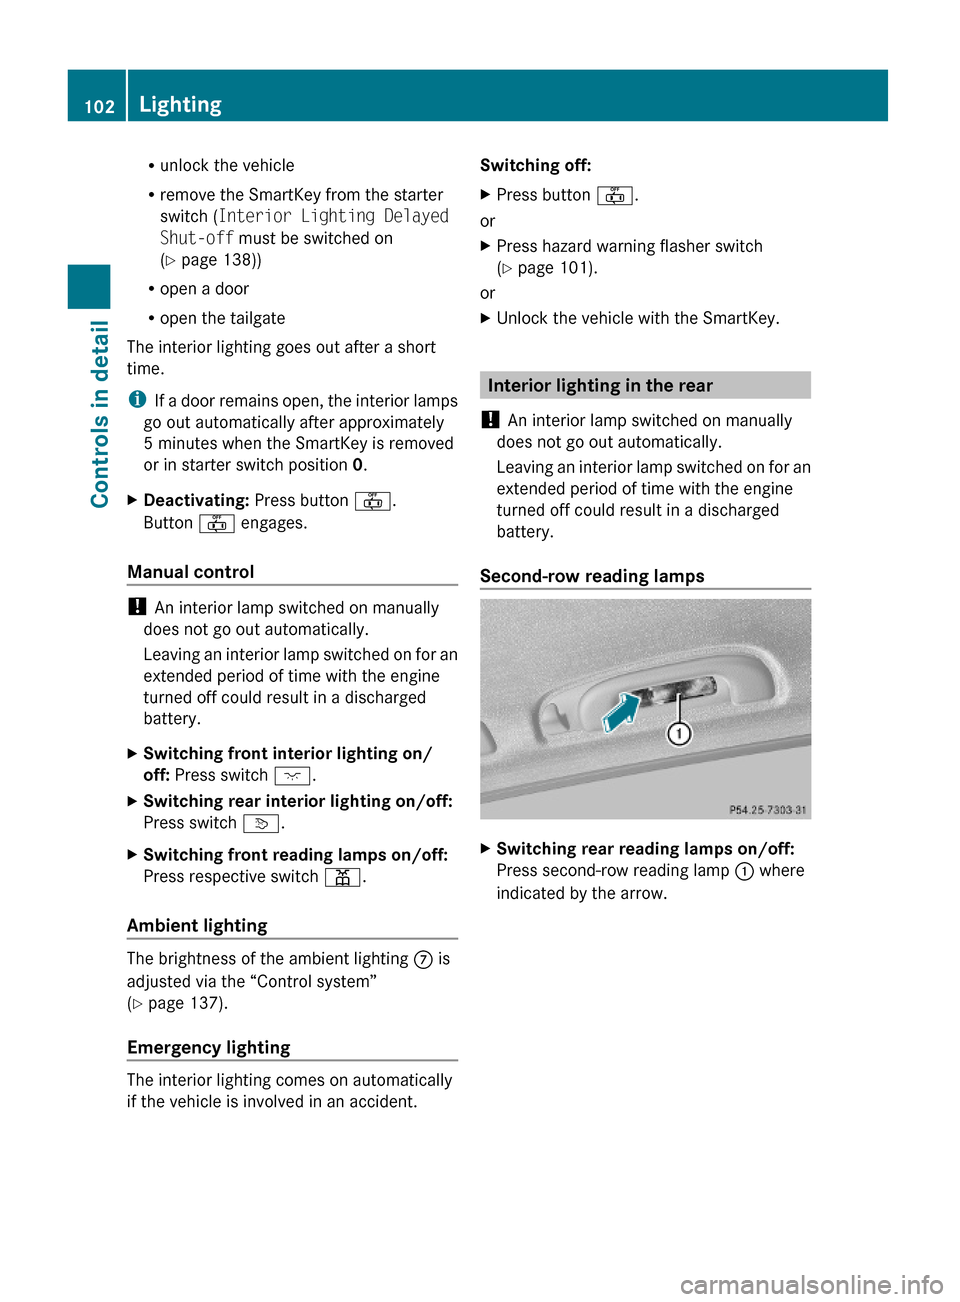
Second-row reading lamps
XSwitching rear reading lamps on/off:
Press second-row reading lamp : where
indicated by the arrow.
102LightingControls in detail
X164_AKB; 5; 31, en-USd2ureepe,Version: 2.11.8.12009-09-11T12:30:16+02:00 - Seite 102