2010 MERCEDES-BENZ GL450 steering wheel adjustment
[x] Cancel search: steering wheel adjustmentPage 85 of 380
Do not drive the vehicle without the seat head
restraints. Head restraints are intended to
help reduce injuries during an accident.
Seat adjustment
! When moving the seats, make sure there
are no items in the footwell or behind the
seats. Otherwise, you could damage the
seats and/or the items.
Power seats
! When the second-row seats are folded
forward, e.g. for cargo volume expansion,
the front seats may not be moved to the
rearmost position. Otherwise you could
damage the front and second-row seats.
! When adjusting the seat backrest tilt and
head restraint height, make sure the sun
visor is folded up. If the head restraint is in
the uppermost position, it could hit and
damage the sun visor.
iVehicles without memory function:
The seats can be adjusted within 5 minutes
after either front door has been opened.
The counter resets each time
Ryou open or close a front door
Ryou insert the SmartKey into the starter
switch
Ryou remove the SmartKey from the
starter switch
Ryou switch the ignition on or off
Just like in vehicles with memory function,
the power seats can be operated at any
time when the ignition is switched on.
iThe memory function (Y page 96) lets
you store the settings for the seat position
together with the settings for the steering
wheel (electrical) and exterior rear view
mirrors.
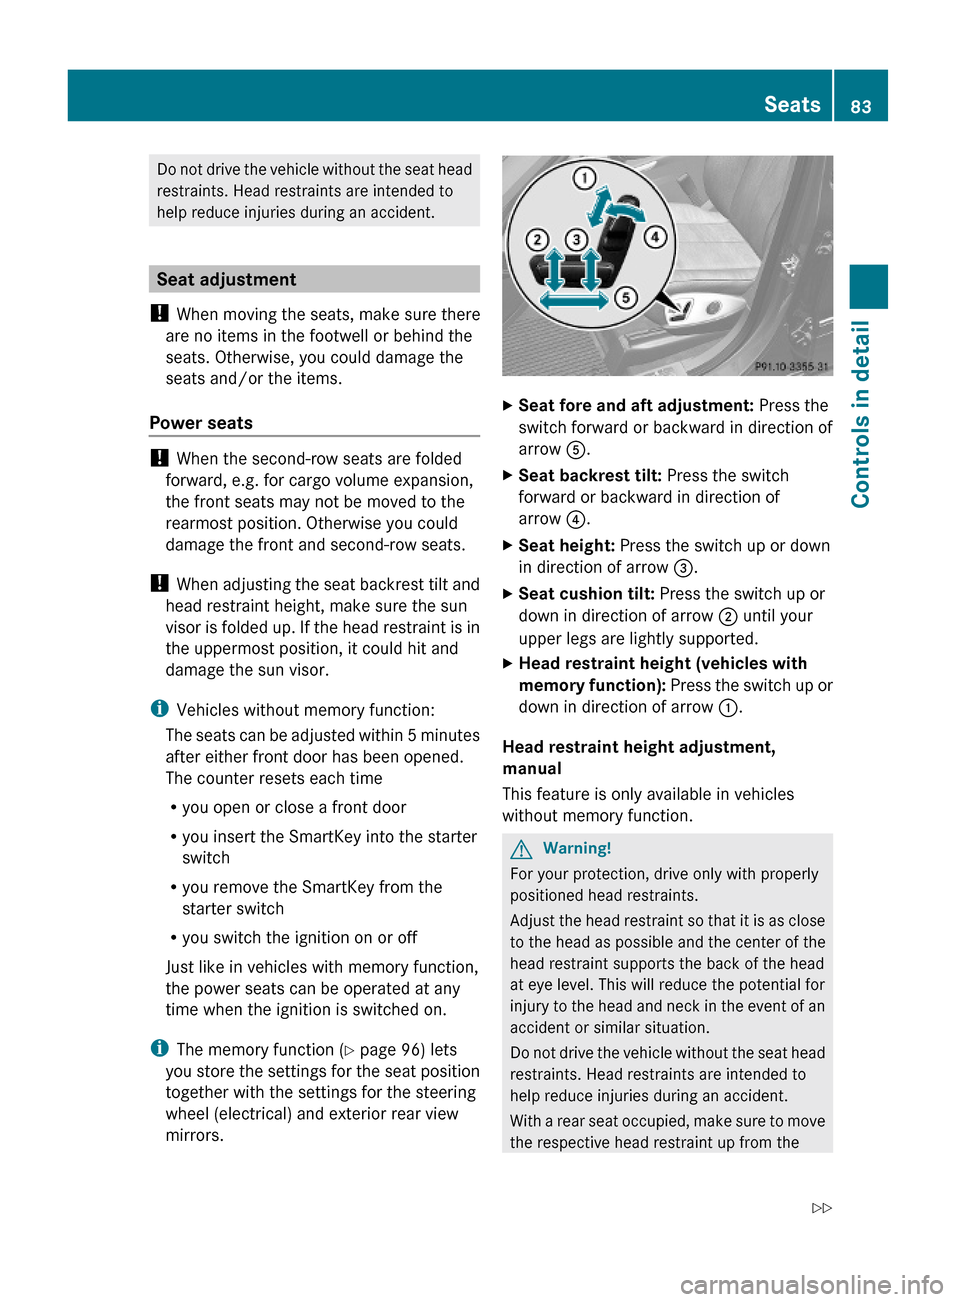
XSeat fore and aft adjustment: Press the
switch forward or backward in direction of
arrow A.
XSeat backrest tilt: Press the switch
forward or backward in direction of
arrow ?.
XSeat height: Press the switch up or down
in direction of arrow =.
XSeat cushion tilt: Press the switch up or
down in direction of arrow ; until your
upper legs are lightly supported.
XHead restraint height (vehicles with
memory function): Press the switch up or
down in direction of arrow :.
Head restraint height adjustment,
manual
This feature is only available in vehicles
without memory function.
GWarning!
For your protection, drive only with properly
positioned head restraints.
Adjust the head restraint so that it is as close
to the head as possible and the center of the
head restraint supports the back of the head
at eye level. This will reduce the potential for
injury to the head and neck in the event of an
accident or similar situation.
Do not drive the vehicle without the seat head
restraints. Head restraints are intended to
help reduce injuries during an accident.
With a rear seat occupied, make sure to move
the respective head restraint up from the
Seats83Controls in detailX164_AKB; 5; 31, en-USd2ureepe,Version: 2.11.8.12009-09-11T12:30:16+02:00 - Seite 83Z
Page 93 of 380
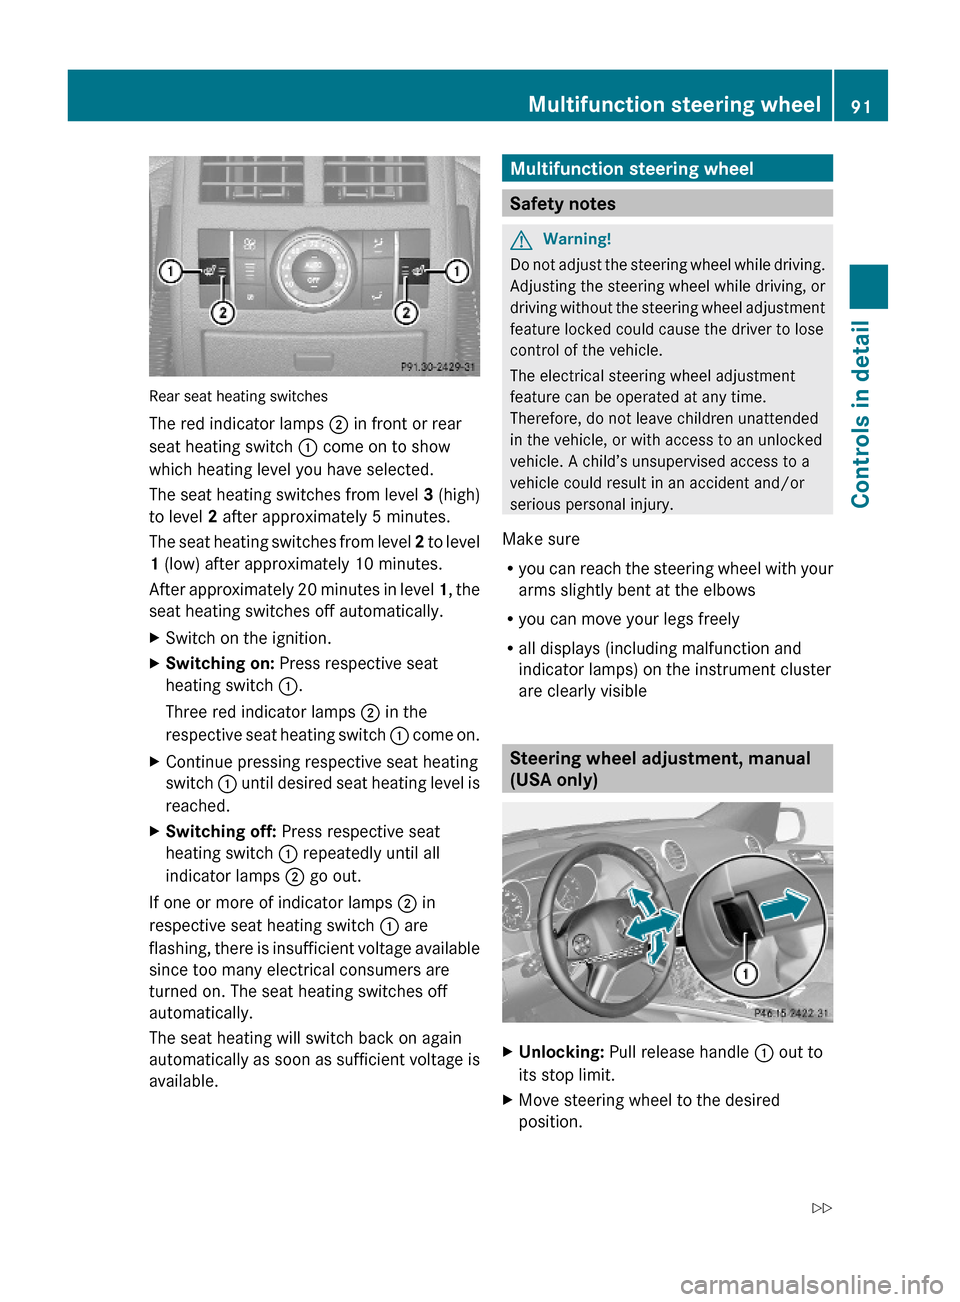
Rear seat heating switches
The red indicator lamps ; in front or rear
seat heating switch : come on to show
which heating level you have selected.
The seat heating switches from level 3 (high)
to level 2 after approximately 5 minutes.
The seat heating switches from level 2 to level
1 (low) after approximately 10 minutes.
After approximately 20 minutes in level 1, the
seat heating switches off automatically.
XSwitch on the ignition.XSwitching on: Press respective seat
heating switch :.
Three red indicator lamps ; in the
respective seat heating switch : come on.
XContinue pressing respective seat heating
switch : until desired seat heating level is
reached.
XSwitching off: Press respective seat
heating switch : repeatedly until all
indicator lamps ; go out.
If one or more of indicator lamps ; in
respective seat heating switch : are
flashing, there is insufficient voltage available
since too many electrical consumers are
turned on. The seat heating switches off
automatically.
The seat heating will switch back on again
automatically as soon as sufficient voltage is
available.
Multifunction steering wheel
Safety notes
GWarning!
Do not adjust the steering wheel while driving.
Adjusting the steering wheel while driving, or
driving without the steering wheel adjustment
feature locked could cause the driver to lose
control of the vehicle.
The electrical steering wheel adjustment
feature can be operated at any time.
Therefore, do not leave children unattended
in the vehicle, or with access to an unlocked
vehicle. A child’s unsupervised access to a
vehicle could result in an accident and/or
serious personal injury.
Make sure
Ryou can reach the steering wheel with your
arms slightly bent at the elbows
Ryou can move your legs freely
Rall displays (including malfunction and
indicator lamps) on the instrument cluster
are clearly visible
Steering wheel adjustment, manual
(USA only)
XUnlocking: Pull release handle : out to
its stop limit.
XMove steering wheel to the desired
position.
Multifunction steering wheel91Controls in detailX164_AKB; 5; 31, en-USd2ureepe,Version: 2.11.8.12009-09-11T12:30:16+02:00 - Seite 91Z
Page 94 of 380
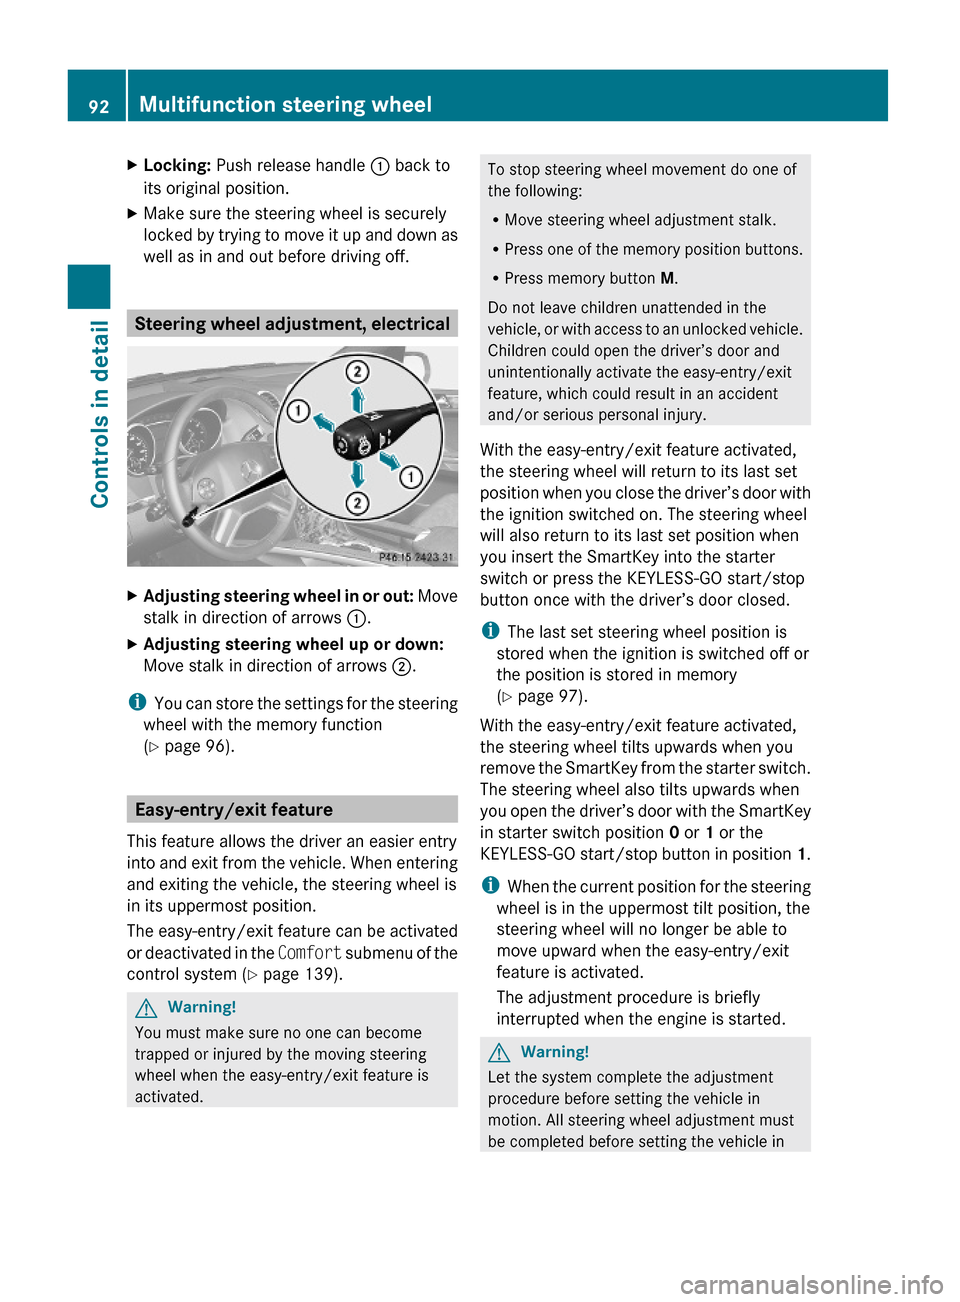
XLocking: Push release handle : back to
its original position.
XMake sure the steering wheel is securely
locked by trying to move it up and down as
well as in and out before driving off.
Steering wheel adjustment, electrical
XAdjusting steering wheel in or out: Move
stalk in direction of arrows :.
XAdjusting steering wheel up or down:
Move stalk in direction of arrows ;.
iYou can store the settings for the steering
wheel with the memory function
(Y page 96).
Easy-entry/exit feature
This feature allows the driver an easier entry
into and exit from the vehicle. When entering
and exiting the vehicle, the steering wheel is
in its uppermost position.
The easy-entry/exit feature can be activated
or deactivated in the Comfort submenu of the
control system (Y page 139).
GWarning!
You must make sure no one can become
trapped or injured by the moving steering
wheel when the easy-entry/exit feature is
activated.
To stop steering wheel movement do one of
the following:
RMove steering wheel adjustment stalk.
RPress one of the memory position buttons.
RPress memory button M.
Do not leave children unattended in the
vehicle, or with access to an unlocked vehicle.
Children could open the driver’s door and
unintentionally activate the easy-entry/exit
feature, which could result in an accident
and/or serious personal injury.
With the easy-entry/exit feature activated,
the steering wheel will return to its last set
position when you close the driver’s door with
the ignition switched on. The steering wheel
will also return to its last set position when
you insert the SmartKey into the starter
switch or press the KEYLESS-GO start/stop
button once with the driver’s door closed.
iThe last set steering wheel position is
stored when the ignition is switched off or
the position is stored in memory
(Y page 97).
With the easy-entry/exit feature activated,
the steering wheel tilts upwards when you
remove the SmartKey from the starter switch.
The steering wheel also tilts upwards when
you open the driver’s door with the SmartKey
in starter switch position 0 or 1 or the
KEYLESS-GO start/stop button in position 1.
iWhen the current position for the steering
wheel is in the uppermost tilt position, the
steering wheel will no longer be able to
move upward when the easy-entry/exit
feature is activated.
The adjustment procedure is briefly
interrupted when the engine is started.
GWarning!
Let the system complete the adjustment
procedure before setting the vehicle in
motion. All steering wheel adjustment must
be completed before setting the vehicle in
92Multifunction steering wheelControls in detail
X164_AKB; 5; 31, en-USd2ureepe,Version: 2.11.8.12009-09-11T12:30:16+02:00 - Seite 92
Page 98 of 380
The exterior rear view mirrors fold in
automatically as soon as the vehicle is locked
from the outside.
The exterior rear view mirrors fold out
automatically as soon as the vehicle is
unlocked and the driver’s or front passenger
door is subsequently opened.
Synchronizing
The power-folding rear view mirrors may have
to be synchronized after the vehicle battery
has been disconnected or discharged. If the
exterior rear view mirrors do not fold properly
upon locking or unlocking the vehicle, do the
following:
XMake sure the power-folding function in the
control system is activated (Y page 140).
XWhen the power-folding function is
activated and the exterior rear view
mirrors still do not fold properly: Fold
each exterior rear view mirror in completely
(Y page 96).
XFold each exterior rear view mirror out
completely (Y page 96).
When the exterior rear view mirrors fold
properly upon locking the vehicle, the exterior
mirrors are synchronized. Otherwise repeat
the above steps.
Folding in and out manually
The exterior rear view mirrors can vibrate if
they are not folded out completely.
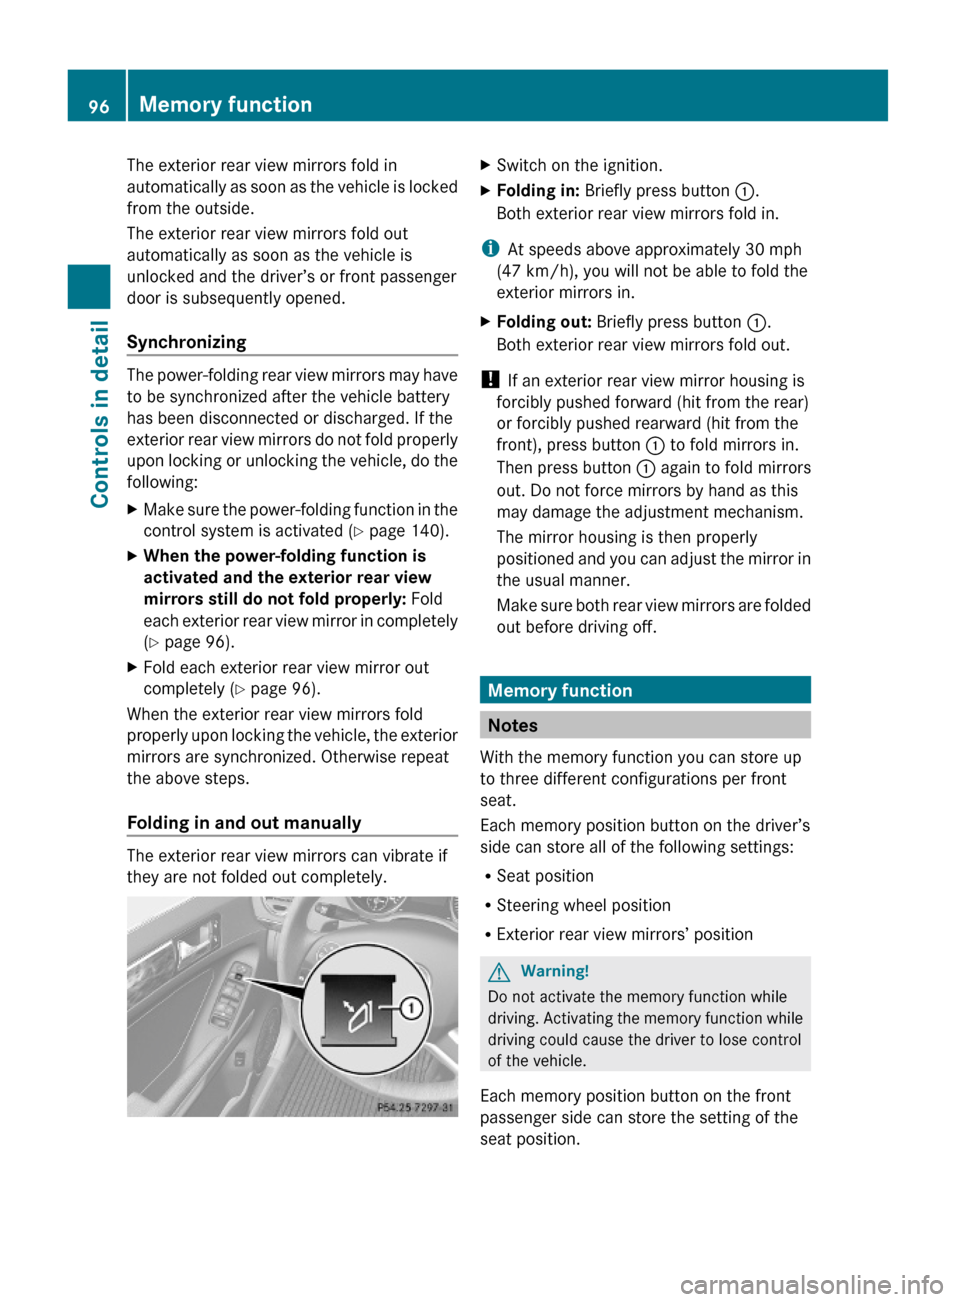
XSwitch on the ignition.XFolding in: Briefly press button :.
Both exterior rear view mirrors fold in.
iAt speeds above approximately 30 mph
(47 km/h), you will not be able to fold the
exterior mirrors in.
XFolding out: Briefly press button :.
Both exterior rear view mirrors fold out.
! If an exterior rear view mirror housing is
forcibly pushed forward (hit from the rear)
or forcibly pushed rearward (hit from the
front), press button : to fold mirrors in.
Then press button : again to fold mirrors
out. Do not force mirrors by hand as this
may damage the adjustment mechanism.
The mirror housing is then properly
positioned and you can adjust the mirror in
the usual manner.
Make sure both rear view mirrors are folded
out before driving off.
Memory function
Notes
With the memory function you can store up
to three different configurations per front
seat.
Each memory position button on the driver’s
side can store all of the following settings:
RSeat position
RSteering wheel position
RExterior rear view mirrors’ position
GWarning!
Do not activate the memory function while
driving. Activating the memory function while
driving could cause the driver to lose control
of the vehicle.
Each memory position button on the front
passenger side can store the setting of the
seat position.
96Memory functionControls in detail
X164_AKB; 5; 31, en-USd2ureepe,Version: 2.11.8.12009-09-11T12:30:16+02:00 - Seite 96
Page 141 of 380
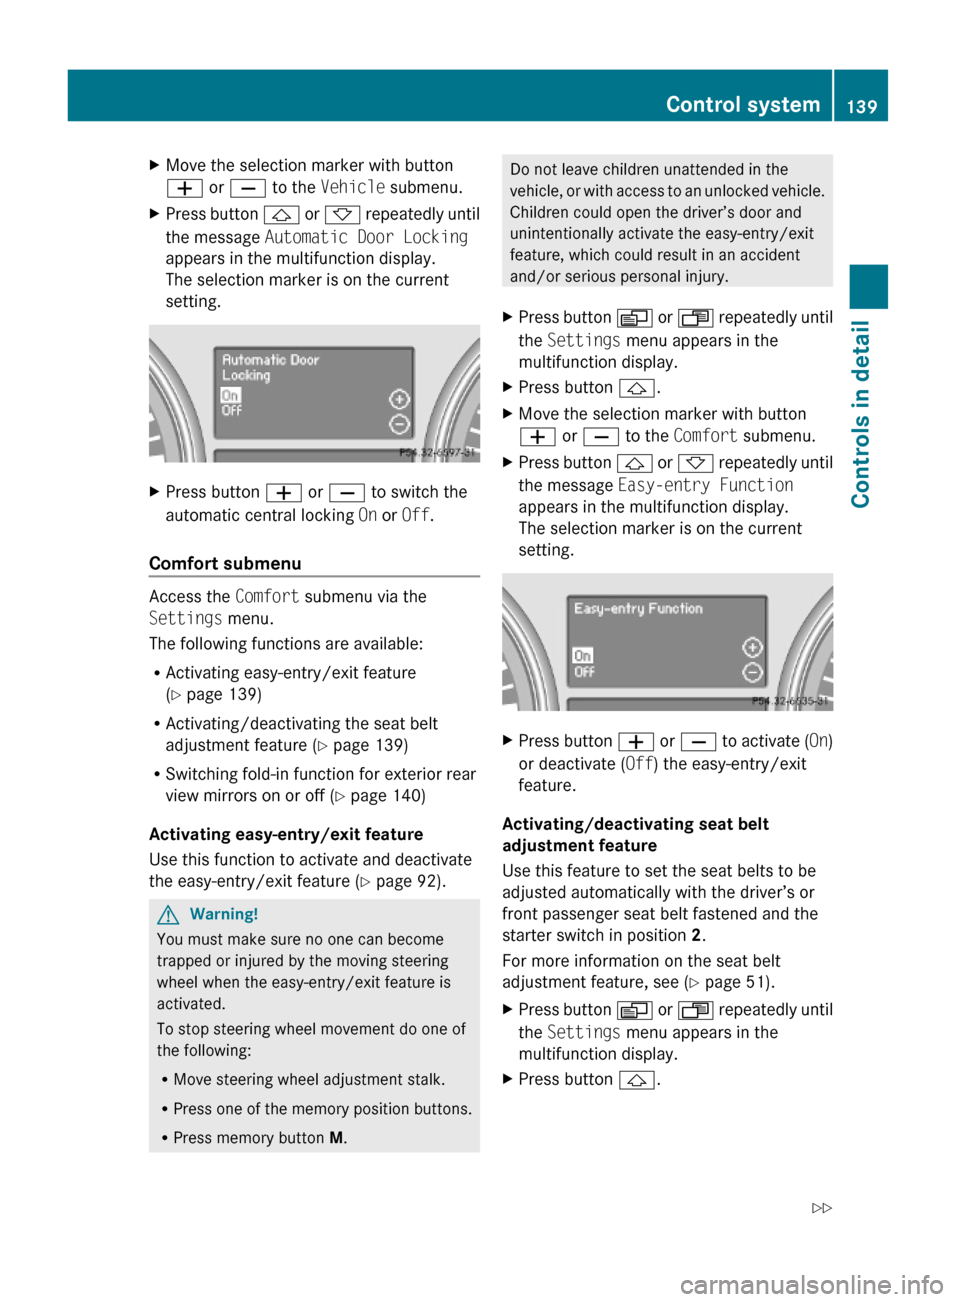
XMove the selection marker with button
W or X to the Vehicle submenu.
XPress button & or * repeatedly until
the message Automatic Door Locking
appears in the multifunction display.
The selection marker is on the current
setting.
XPress button W or X to switch the
automatic central locking On or Off.
Comfort submenu
Access the Comfort submenu via the
Settings menu.
The following functions are available:
RActivating easy-entry/exit feature
(Y page 139)
RActivating/deactivating the seat belt
adjustment feature (Y page 139)
RSwitching fold-in function for exterior rear
view mirrors on or off (Y page 140)
Activating easy-entry/exit feature
Use this function to activate and deactivate
the easy-entry/exit feature (Y page 92).
GWarning!
You must make sure no one can become
trapped or injured by the moving steering
wheel when the easy-entry/exit feature is
activated.
To stop steering wheel movement do one of
the following:
RMove steering wheel adjustment stalk.
RPress one of the memory position buttons.
RPress memory button M.
Do not leave children unattended in the
vehicle, or with access to an unlocked vehicle.
Children could open the driver’s door and
unintentionally activate the easy-entry/exit
feature, which could result in an accident
and/or serious personal injury.
XPress button V or U repeatedly until
the Settings menu appears in the
multifunction display.
XPress button &.XMove the selection marker with button
W or X to the Comfort submenu.
XPress button & or * repeatedly until
the message Easy-entry Function
appears in the multifunction display.
The selection marker is on the current
setting.
XPress button W or X to activate (On)
or deactivate (Off) the easy-entry/exit
feature.
Activating/deactivating seat belt
adjustment feature
Use this feature to set the seat belts to be
adjusted automatically with the driver’s or
front passenger seat belt fastened and the
starter switch in position 2.
For more information on the seat belt
adjustment feature, see (Y page 51).
XPress button V or U repeatedly until
the Settings menu appears in the
multifunction display.
XPress button &.Control system139Controls in detailX164_AKB; 5; 31, en-USd2ureepe,Version: 2.11.8.12009-09-11T12:30:16+02:00 - Seite 139Z
Page 164 of 380
damage to the vehicle underbody. Always
make sure the vehicle has sufficient ground
clearance before adjusting it to a lower
level.
XStart the engine.
When indicator lamp ; is on:
XPress vehicle level control switch :.
Indicator lamp ; flashes. The vehicle
adjusts to the highway level.
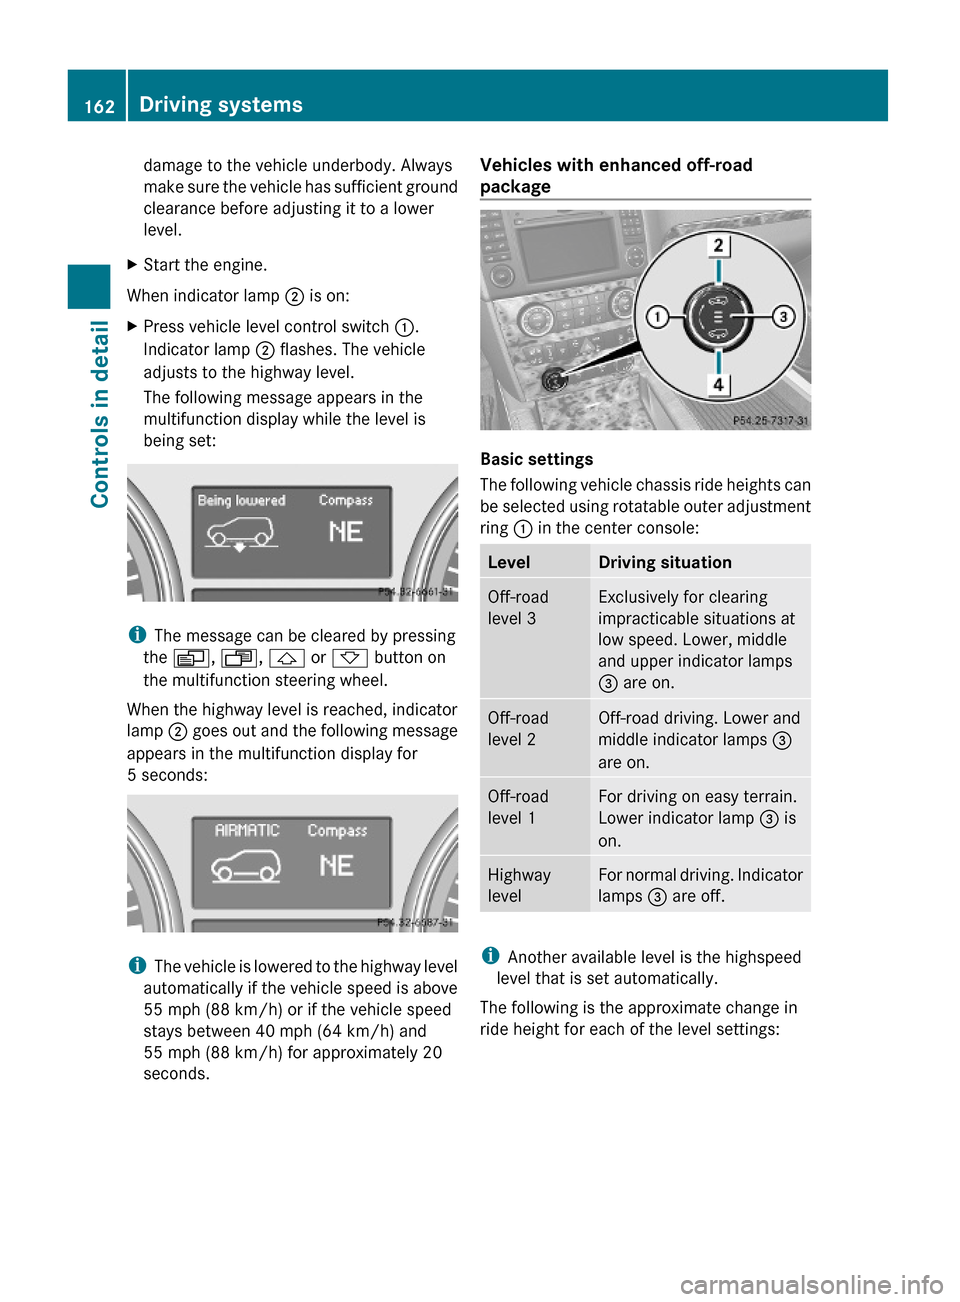
The following message appears in the
multifunction display while the level is
being set:
iThe message can be cleared by pressing
the V, U, & or * button on
the multifunction steering wheel.
When the highway level is reached, indicator
lamp ; goes out and the following message
appears in the multifunction display for
5 seconds:
iThe vehicle is lowered to the highway level
automatically if the vehicle speed is above
55 mph (88 km/h) or if the vehicle speed
stays between 40 mph (64 km/h) and
55 mph (88 km/h) for approximately 20
seconds.
Vehicles with enhanced off-road
package
Basic settings
The following vehicle chassis ride heights can
be selected using rotatable outer adjustment
ring : in the center console:
LevelDriving situationOff-road
level 3
Exclusively for clearing
impracticable situations at
low speed. Lower, middle
and upper indicator lamps
= are on.
Off-road
level 2
Off-road driving. Lower and
middle indicator lamps =
are on.
Off-road
level 1
For driving on easy terrain.
Lower indicator lamp = is
on.
Highway
level
For normal driving. Indicator
lamps = are off.
iAnother available level is the highspeed
level that is set automatically.
The following is the approximate change in
ride height for each of the level settings:
162Driving systemsControls in detail
X164_AKB; 5; 31, en-USd2ureepe,Version: 2.11.8.12009-09-11T12:30:16+02:00 - Seite 162
Page 217 of 380
The Tele Aid system consists of three types
of response:
R Automatic and manual emergency
R Roadside Assistance
R Information
To adjust the speaker volume during a Tele
Aid call do the following:XPress button W or X on the
multifunction steering wheel.
or
XUse the adjustment button on your
COMAND system.
Be sure to check “Owner’s Online” at
www.mbusa.com (USA only) for more
information and a description of all available
features.
System self-test
The system performs a self-test after you
have switched on the ignition.
GWarning!
A malfunction in the system has been
detected if any or all of the following
conditions occur:
R The indicator lamp in the SOS button does
not come on during the system self-test.
R The indicator lamp in Roadside Assistance
button º does not come on during the
system self-test.
R The indicator lamp in Information button
E does not come on during the system
self-test.
R The indicator lamp in the SOS button,
Roadside Assistance button º, or
Information button E remains
illuminated constantly in red after the
system self-test.
R The message Tele Aid Inoperative or
Tele Aid Not Activated appears in the
multifunction display after the system self-
test
If a malfunction is indicated as outlined above,
the system may not operate as expected. In
case of an emergency, help will have to be
summoned by other means.
Have the system checked at the nearest
Mercedes-Benz Center or contact the
Customer Assistance Center at
1-800-FOR-MERCedes (1-800-367-6372)
(USA only) or 1-888-923-8367 (Canada only)
as soon as possible.
Emergency calls
! In order to activate the Tele Aid system, a
subscriber agreement must be completed.
To ensure your system is activated and
operational, please press Information
button E to perform the acquaintance
call. Failure to complete either of these
steps may result in a system that is not
activated.
If you have any questions regarding
activation, please call the Customer
Assistance Center at
1-800-FOR-MERCedes (1-800-367-6372)
(USA only) or 1-888-923-8367 (Canada
only).
An emergency call is initiated automatically
following an accident in which the Emergency
Tensioning Devices (ETDs) or air bags have
deployed.
i An automatically initiated Tele Aid
emergency call cannot be canceled.
An emergency call can also be initiated
manually ( Y page 216).
Once the emergency call is in progress, the
indicator lamp in the SOS button will begin to
flash. The message Connecting Call
appears in the multifunction display and the
COMAND system is muted. When the
connection is established, the message
Call Connected appears in the
multifunction display.
All information relevant to the emergency,
such as the location of the vehicle
Useful features215Controls in detailX164_AKB; 5; 31, en-USd2ureepe,Version: 2.11.8.12009-09-11T12:30:16+02:00 - Seite 215Z