2010 MERCEDES-BENZ GL450 change time
[x] Cancel search: change timePage 138 of 380
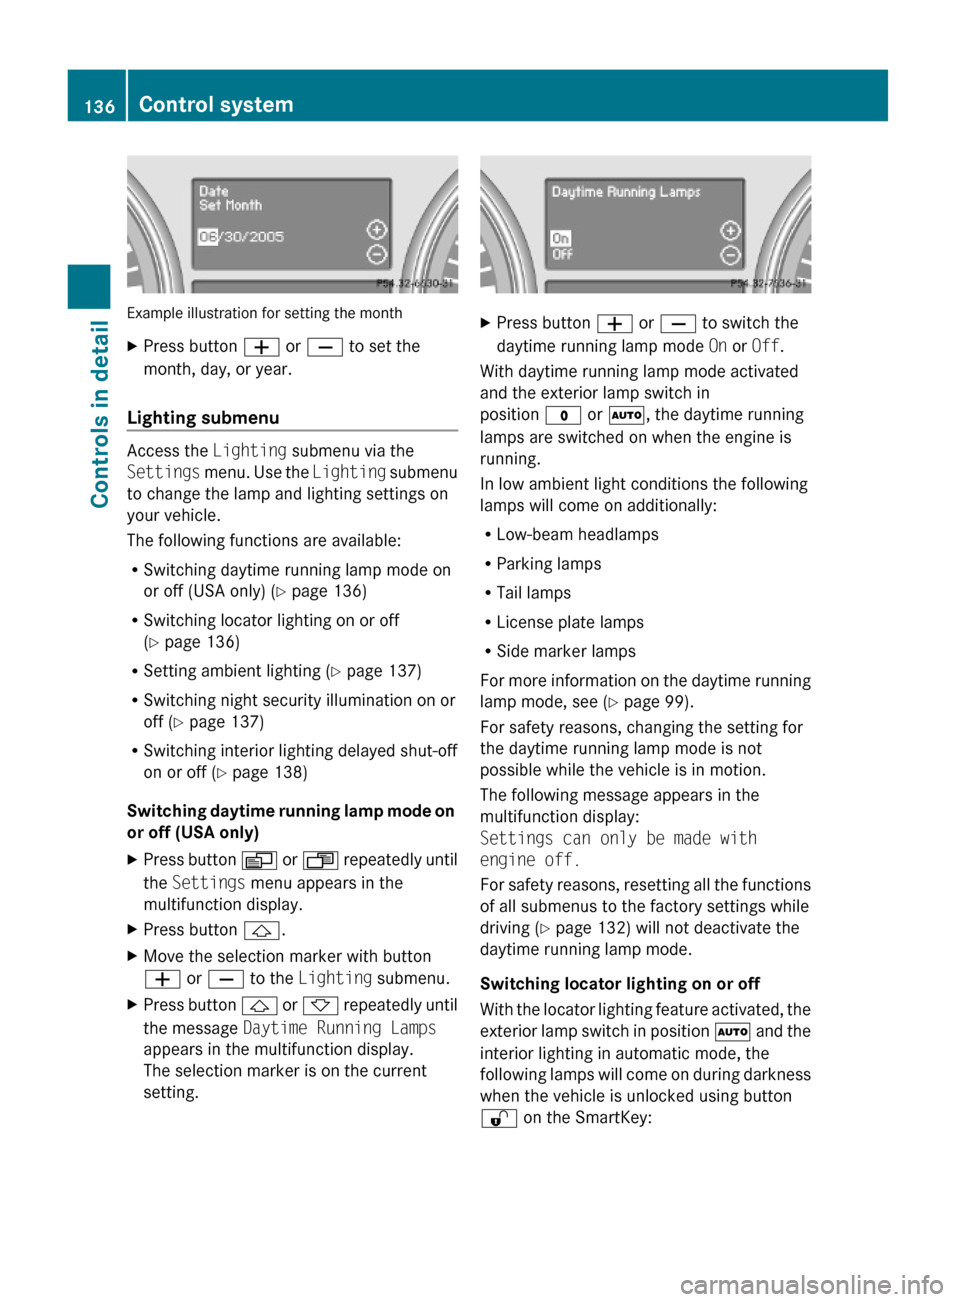
Example illustration for setting the month
XPress button W or X to set the
month, day, or year.
Lighting submenu
Access the Lighting submenu via the
Settings menu. Use the Lighting submenu
to change the lamp and lighting settings on
your vehicle.
The following functions are available:
RSwitching daytime running lamp mode on
or off (USA only) (Y page 136)
RSwitching locator lighting on or off
(Y page 136)
RSetting ambient lighting (Y page 137)
RSwitching night security illumination on or
off (Y page 137)
RSwitching interior lighting delayed shut-off
on or off (Y page 138)
Switching daytime running lamp mode on
or off (USA only)
XPress button V or U repeatedly until
the Settings menu appears in the
multifunction display.
XPress button &.XMove the selection marker with button
W or X to the Lighting submenu.
XPress button & or * repeatedly until
the message Daytime Running Lamps
appears in the multifunction display.
The selection marker is on the current
setting.
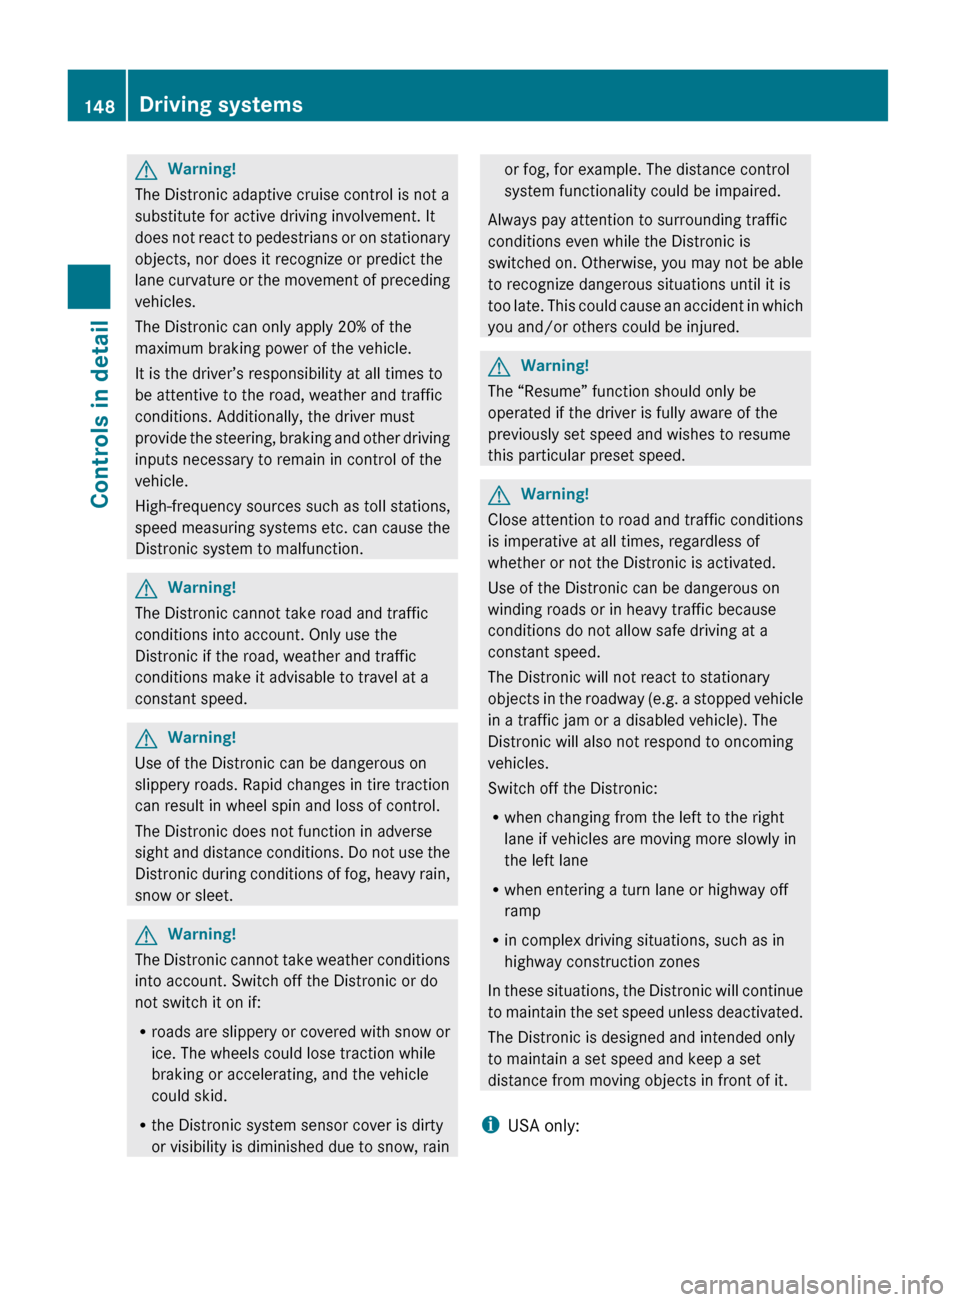
XPress button W or X to switch the
daytime running lamp mode On or Off.
With daytime running lamp mode activated
and the exterior lamp switch in
position $ or Ã, the daytime running
lamps are switched on when the engine is
running.
In low ambient light conditions the following
lamps will come on additionally:
RLow-beam headlamps
RParking lamps
RTail lamps
RLicense plate lamps
RSide marker lamps
For more information on the daytime running
lamp mode, see (Y page 99).
For safety reasons, changing the setting for
the daytime running lamp mode is not
possible while the vehicle is in motion.
The following message appears in the
multifunction display:
Settings can only be made with
engine off.
For safety reasons, resetting all the functions
of all submenus to the factory settings while
driving (Y page 132) will not deactivate the
daytime running lamp mode.
Switching locator lighting on or off
With the locator lighting feature activated, the
exterior lamp switch in position à and the
interior lighting in automatic mode, the
following lamps will come on during darkness
when the vehicle is unlocked using button
% on the SmartKey:
136Control systemControls in detail
X164_AKB; 5; 31, en-USd2ureepe,Version: 2.11.8.12009-09-11T12:30:16+02:00 - Seite 136
Page 150 of 380
GWarning!
The Distronic adaptive cruise control is not a
substitute for active driving involvement. It
does not react to pedestrians or on stationary
objects, nor does it recognize or predict the
lane curvature or the movement of preceding
vehicles.
The Distronic can only apply 20% of the
maximum braking power of the vehicle.
It is the driver’s responsibility at all times to
be attentive to the road, weather and traffic
conditions. Additionally, the driver must
provide the steering, braking and other driving
inputs necessary to remain in control of the
vehicle.
High-frequency sources such as toll stations,
speed measuring systems etc. can cause the
Distronic system to malfunction.
GWarning!
The Distronic cannot take road and traffic
conditions into account. Only use the
Distronic if the road, weather and traffic
conditions make it advisable to travel at a
constant speed.
GWarning!
Use of the Distronic can be dangerous on
slippery roads. Rapid changes in tire traction
can result in wheel spin and loss of control.
The Distronic does not function in adverse
sight and distance conditions. Do not use the
Distronic during conditions of fog, heavy rain,
snow or sleet.
GWarning!
The Distronic cannot take weather conditions
into account. Switch off the Distronic or do
not switch it on if:
R roads are slippery or covered with snow or
ice. The wheels could lose traction while
braking or accelerating, and the vehicle
could skid.
R the Distronic system sensor cover is dirty
or visibility is diminished due to snow, rain
or fog, for example. The distance control
system functionality could be impaired.
Always pay attention to surrounding traffic
conditions even while the Distronic is
switched on. Otherwise, you may not be able
to recognize dangerous situations until it is
too late. This could cause an accident in which
you and/or others could be injured.GWarning!
The “Resume” function should only be
operated if the driver is fully aware of the
previously set speed and wishes to resume
this particular preset speed.
GWarning!
Close attention to road and traffic conditions
is imperative at all times, regardless of
whether or not the Distronic is activated.
Use of the Distronic can be dangerous on
winding roads or in heavy traffic because
conditions do not allow safe driving at a
constant speed.
The Distronic will not react to stationary
objects in the roadway (e.g. a stopped vehicle
in a traffic jam or a disabled vehicle). The
Distronic will also not respond to oncoming
vehicles.
Switch off the Distronic:
R when changing from the left to the right
lane if vehicles are moving more slowly in
the left lane
R when entering a turn lane or highway off
ramp
R in complex driving situations, such as in
highway construction zones
In these situations, the Distronic will continue
to maintain the set speed unless deactivated.
The Distronic is designed and intended only
to maintain a set speed and keep a set
distance from moving objects in front of it.
i USA only:
148Driving systemsControls in detail
X164_AKB; 5; 31, en-USd2ureepe,Version: 2.11.8.12009-09-11T12:30:16+02:00 - Seite 148
Page 155 of 380
Rthe ESP® has switched off due to a
malfunction
Ryou shift the automatic transmission into
neutral position N while driving
The cruise control speed segments in the
speedometer dial goes out and an acoustic
warning will sound. Observe additional
messages in the multifunction display that
may appear.
GWarning!
Distronic switches off and releases the brakes
when the vehicle decelerates below the
minimum speed of 20 mph (30 km/h) by
operation of the system. At that time the
driver must apply the brakes in order to
reduce vehicle speed further or bring it to a
stop.
Depressing the accelerator pedal does not
deactivate the Distronic. After a brief
acceleration (e.g. for passing), the Distronic
will resume the last set speed.
Setting the following distance in
Distronic
You can set the specified following distance
for Distronic by varying the time setting
between 1.0 and 2.0 seconds. Using this time
setting and the current speed of your vehicle,
Distronic calculates and sets the required
following distance to the preceding vehicle.
The set distance will be shown in the
multifunction display.
GWarning!
It is up to the driver to exercise discretion to
select the appropriate setting given road
conditions, traffic, driver’s preferred driving
style and applicable laws and driving
recommendations for safe following distance.
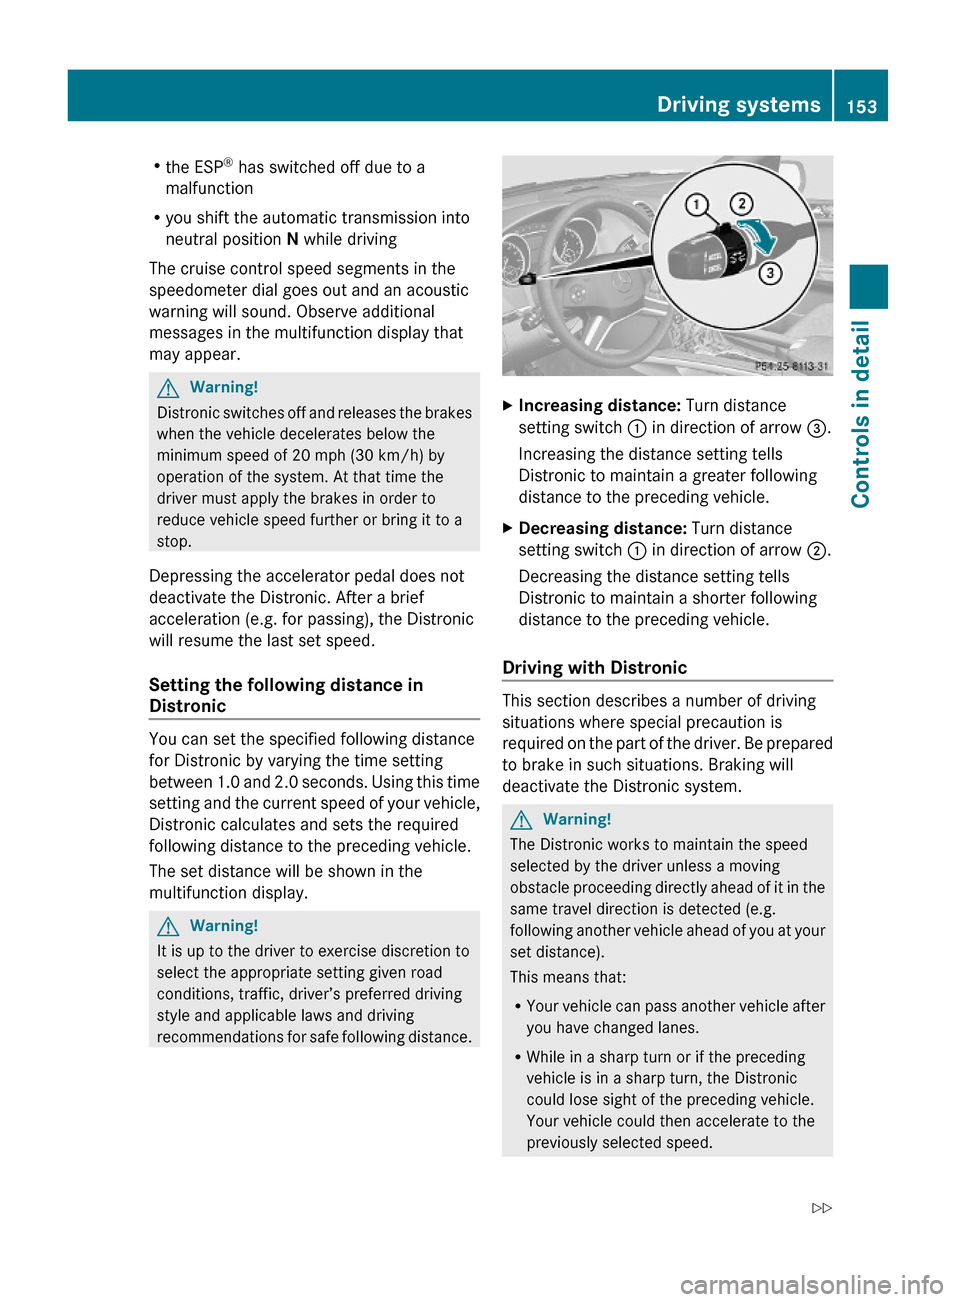
XIncreasing distance: Turn distance
setting switch : in direction of arrow =.
Increasing the distance setting tells
Distronic to maintain a greater following
distance to the preceding vehicle.
XDecreasing distance: Turn distance
setting switch : in direction of arrow ;.
Decreasing the distance setting tells
Distronic to maintain a shorter following
distance to the preceding vehicle.
Driving with Distronic
This section describes a number of driving
situations where special precaution is
required on the part of the driver. Be prepared
to brake in such situations. Braking will
deactivate the Distronic system.
GWarning!
The Distronic works to maintain the speed
selected by the driver unless a moving
obstacle proceeding directly ahead of it in the
same travel direction is detected (e.g.
following another vehicle ahead of you at your
set distance).
This means that:
RYour vehicle can pass another vehicle after
you have changed lanes.
RWhile in a sharp turn or if the preceding
vehicle is in a sharp turn, the Distronic
could lose sight of the preceding vehicle.
Your vehicle could then accelerate to the
previously selected speed.
Driving systems153Controls in detailX164_AKB; 5; 31, en-USd2ureepe,Version: 2.11.8.12009-09-11T12:30:16+02:00 - Seite 153Z
Page 158 of 380
The DSR is an aid for driving downhill. The
DSR regulates your vehicle’s speed when
driving downhill to the value set in the control
system (Y page 141). The steeper the
downhill gradient is, the greater the brake
application. On flat road surfaces, the DSR
brakes only slightly or not at all.
GWarning!
The Downhill Speed Regulation (DSR) is a
convenience system designed to assist the
driver during vehicle operation. The system
must be set to be appropriate for the
topographical and weather conditions
encountered which can change quickly. The
driver is and must remain at all times
responsible for the vehicle speed and for safe
brake operation.
Depending on the programmed speed, actual
vehicle speed and gradient, switching on the
DSR while driving can cause the vehicle to
slow down rapidly and you may hear a sound
which is caused by the activation of the
vehicle’s brake system through the DSR.
Sudden and unexpected deceleration can
result in loss of vehicle control, causing an
accident and/or serious personal injury to
you and others. Do not switch on the DSR in
a circumstance where rapid deceleration
could result in a loss of vehicle control.
The DSR regulates the vehicle’s speed in
automatic transmission positions D, or R.
iIn addition, make use of the engine’s
braking effect by shifting the automatic
transmission into a lower gear.
You can drive slower or faster than the set
speed at any time by braking the vehicle or
depressing the accelerator pedal.
iWhenever the DSR is switched on, the
DSR will use the programmed default
speed to regulate the vehicle’s speed. The
default speed programmed at the factory is
4 mph (Canada: 6 km/h). The default speed
can be reprogrammed using the control
system (Y page 141). The next time the
DSR is switched on, the DSR will use the
newly programmed default speed to
regulate the vehicle’s speed.
Once the DSR is switched on, you can
adjust the set speed using the cruise
control lever (Y page 145). Keep in mind
that adjusting the set speed using the
cruise control lever with the DSR switched
on will not change the programmed default
speed. If the DSR is switched off and then
switched on again, the DSR will use the
programmed default speed.
Depending on the road surface and level of
downhill grade, the DSR may not be able to
maintain the set speed. To maintain the set
speed, apply the brakes if necessary.
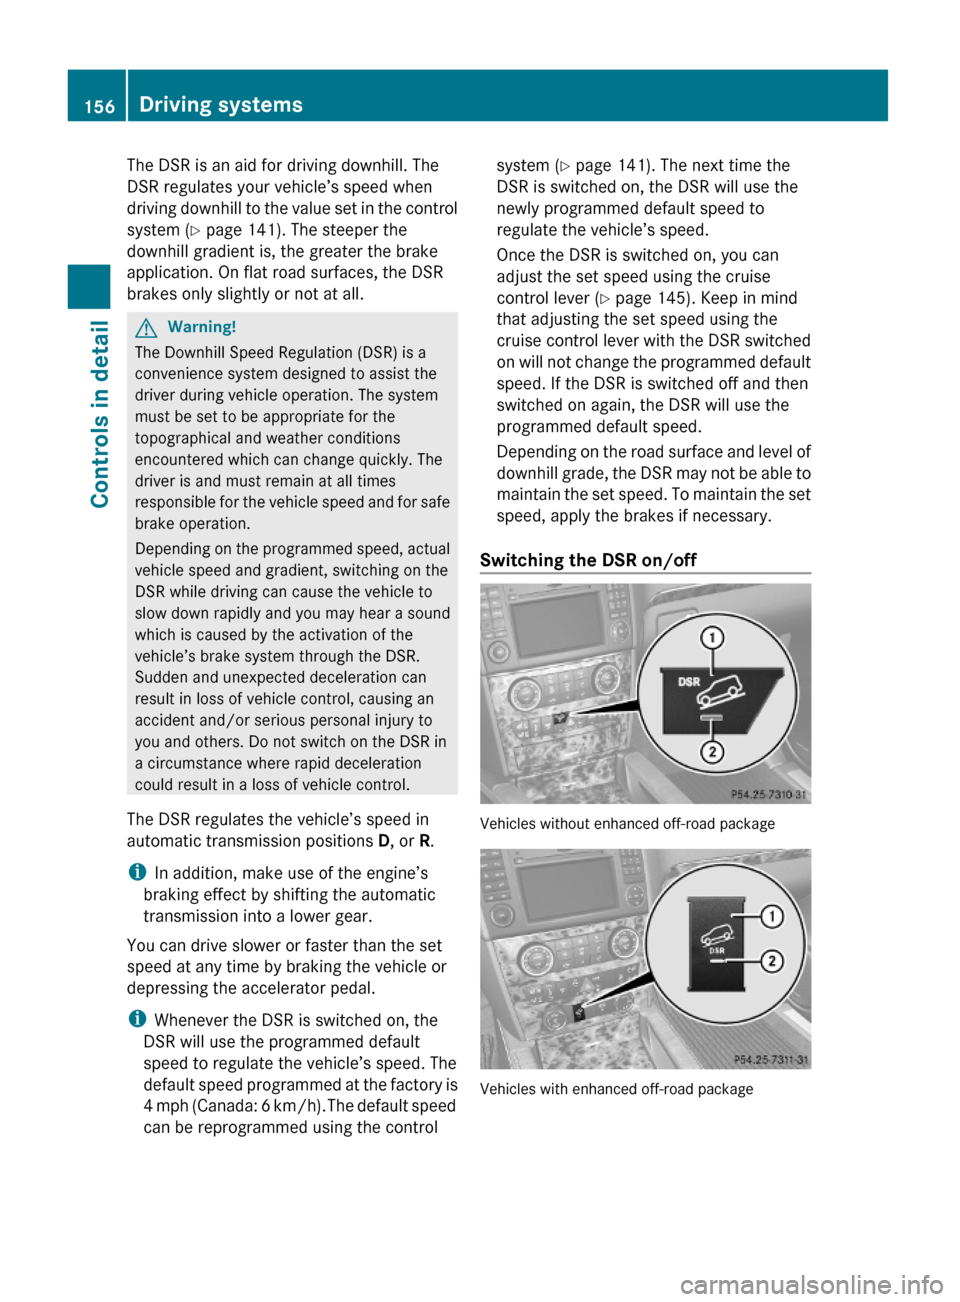
Switching the DSR on/off
Vehicles without enhanced off-road package
Vehicles with enhanced off-road package
156Driving systemsControls in detail
X164_AKB; 5; 31, en-USd2ureepe,Version: 2.11.8.12009-09-11T12:30:16+02:00 - Seite 156
Page 159 of 380
GWarning!
If the accelerator pedal is depressed while the
Downhill Speed Regulation (DSR) is activated,
the vehicle can drive faster than the
programmed set speed. You should therefore
drive downhill with particular caution as it
could otherwise lead to an accident and/or
serious injury to you or others. Keep in mind
that as soon as you remove your foot from the
accelerator pedal with the DSR switched on,
the DSR will start regulating the vehicle’s
speed including use of brakes if required.
Depending on the programmed set speed,
actual vehicle speed and gradient, the DSR
can cause the vehicle to slow down rapidly.
Sudden and unexpected deceleration can
result in loss of vehicle control, causing an
accident and/or serious personal injury to
you and others.
Switching on the DSR
The DSR can only be switched on if the vehicle
speed is below 20 mph (Canada: 30 km/h).
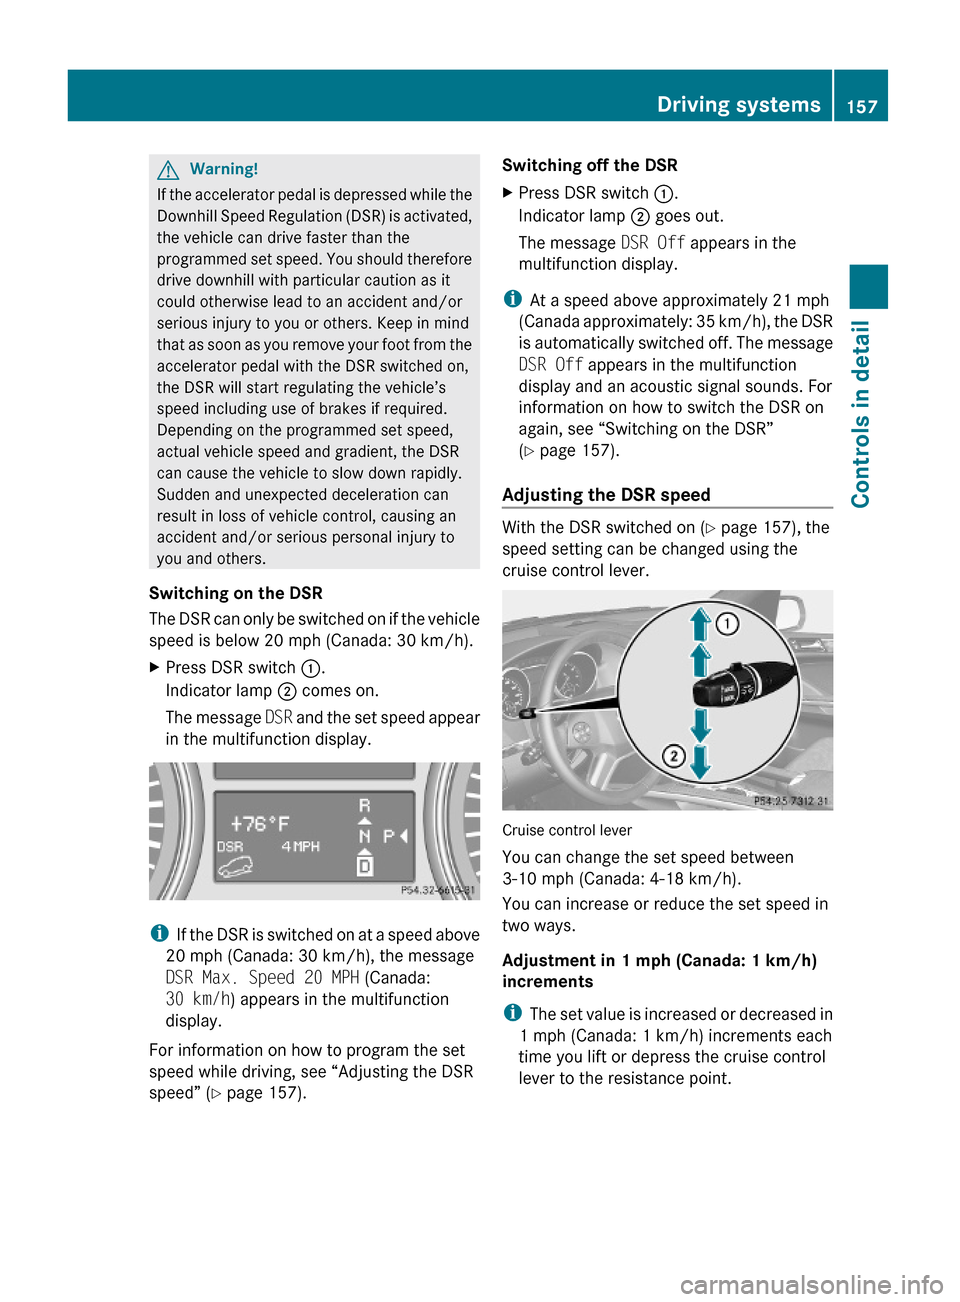
XPress DSR switch :.
Indicator lamp ; comes on.
The message DSR and the set speed appear
in the multifunction display.
iIf the DSR is switched on at a speed above
20 mph (Canada: 30 km/h), the message
DSR Max. Speed 20 MPH (Canada:
30 km/h) appears in the multifunction
display.
For information on how to program the set
speed while driving, see “Adjusting the DSR
speed” (Y page 157).
Switching off the DSRXPress DSR switch :.
Indicator lamp ; goes out.
The message DSR Off appears in the
multifunction display.
iAt a speed above approximately 21 mph
(Canada approximately: 35 km/h), the DSR
is automatically switched off. The message
DSR Off appears in the multifunction
display and an acoustic signal sounds. For
information on how to switch the DSR on
again, see “Switching on the DSR”
(Y page 157).
Adjusting the DSR speed
With the DSR switched on (Y page 157), the
speed setting can be changed using the
cruise control lever.
Cruise control lever
You can change the set speed between
3-10 mph (Canada: 4-18 km/h).
You can increase or reduce the set speed in
two ways.
Adjustment in 1 mph (Canada: 1 km/h)
increments
iThe set value is increased or decreased in
1 mph (Canada: 1 km/h) increments each
time you lift or depress the cruise control
lever to the resistance point.
Driving systems157Controls in detailX164_AKB; 5; 31, en-USd2ureepe,Version: 2.11.8.12009-09-11T12:30:16+02:00 - Seite 157Z
Page 160 of 380
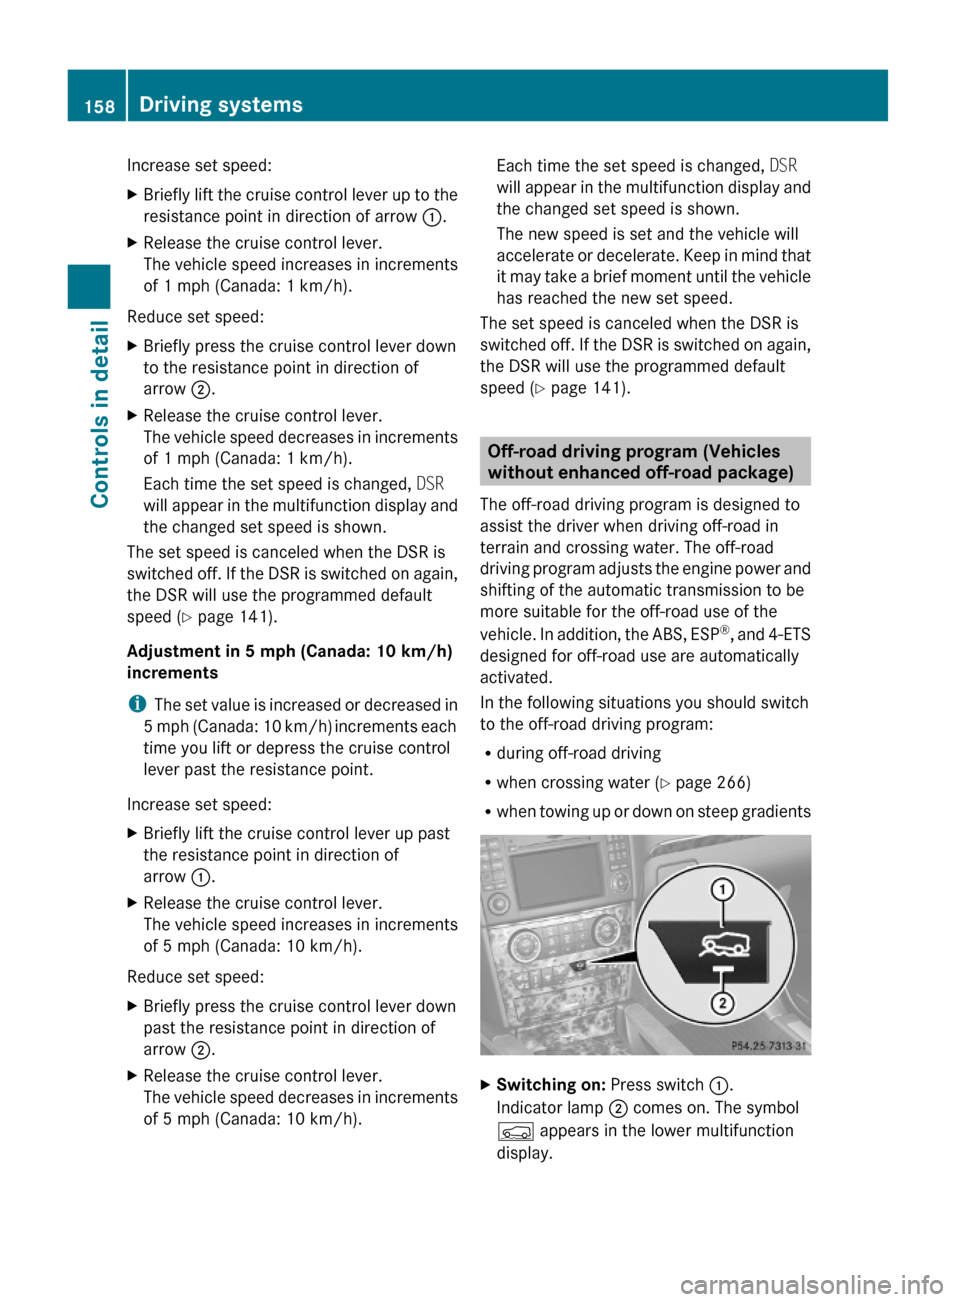
Increase set speed:XBriefly lift the cruise control lever up to the
resistance point in direction of arrow :.
XRelease the cruise control lever.
The vehicle speed increases in increments
of 1 mph (Canada: 1 km/h).
Reduce set speed:
XBriefly press the cruise control lever down
to the resistance point in direction of
arrow ;.
XRelease the cruise control lever.
The vehicle speed decreases in increments
of 1 mph (Canada: 1 km/h).
Each time the set speed is changed, DSR
will appear in the multifunction display and
the changed set speed is shown.
The set speed is canceled when the DSR is
switched off. If the DSR is switched on again,
the DSR will use the programmed default
speed (Y page 141).
Adjustment in 5 mph (Canada: 10 km/h)
increments
iThe set value is increased or decreased in
5 mph (Canada: 10 km/h) increments each
time you lift or depress the cruise control
lever past the resistance point.
Increase set speed:
XBriefly lift the cruise control lever up past
the resistance point in direction of
arrow :.
XRelease the cruise control lever.
The vehicle speed increases in increments
of 5 mph (Canada: 10 km/h).
Reduce set speed:
XBriefly press the cruise control lever down
past the resistance point in direction of
arrow ;.
XRelease the cruise control lever.
The vehicle speed decreases in increments
of 5 mph (Canada: 10 km/h).
Each time the set speed is changed, DSR
will appear in the multifunction display and
the changed set speed is shown.
The new speed is set and the vehicle will
accelerate or decelerate. Keep in mind that
it may take a brief moment until the vehicle
has reached the new set speed.
The set speed is canceled when the DSR is
switched off. If the DSR is switched on again,
the DSR will use the programmed default
speed (Y page 141).
Off-road driving program (Vehicles
without enhanced off-road package)
The off-road driving program is designed to
assist the driver when driving off-road in
terrain and crossing water. The off-road
driving program adjusts the engine power and
shifting of the automatic transmission to be
more suitable for the off-road use of the
vehicle. In addition, the ABS, ESP®, and 4-ETS
designed for off-road use are automatically
activated.
In the following situations you should switch
to the off-road driving program:
Rduring off-road driving
Rwhen crossing water (Y page 266)
Rwhen towing up or down on steep gradients
XSwitching on: Press switch :.
Indicator lamp ; comes on. The symbol
Ç appears in the lower multifunction
display.
158Driving systemsControls in detail
X164_AKB; 5; 31, en-USd2ureepe,Version: 2.11.8.12009-09-11T12:30:16+02:00 - Seite 158
Page 172 of 380
GWarning!
The rear view camera is only an aid and may
display obstacles
Rfrom a distorted perspective
Rinaccurately
Rmay not display obstacles at all
The rear view camera does not relieve you of
the responsibility to be cautious. Take care
and pay careful attention. The rear view
camera may not show objects which are
Rvery close to the rear bumper
Runder the rear bumper
Rabove the tailgate handle
You are responsible for safety at all times and
must continue to pay attention to the
immediate surroundings when parking and
maneuvering. This includes the area behind,
in front of, and beside the vehicle. Otherwise
you could endanger yourself and/or others.
GWarning!
The rear view camera either will not function
or will not function to its full capability if
Rthe tailgate is open
Rit is raining very hard, snowing or foggy
Rit is night or you are parking/maneuvering
your vehicle in an area where it is very dark
Rthe camera is exposed to a very bright white
light
Rthe immediate surroundings are
illuminated with fluorescent light (the
display may flicker)
Rthere is a sudden change in temperature,
e.g. if you drive into a heated garage from
the cold (lens condensation)
Rthe camera lens is dirty or covered
Rthe rear of your vehicle is damaged
In this case, have the position and setting
of the camera checked by a qualified
specialist workshop. Mercedes-Benz
recommends that you contact a Mercedes-
Benz Center for this purpose.
Do not use the rear view camera in these
situations. Otherwise you could injure
yourself or others and/or damage property
including your vehicle while parking/
maneuvering.
GWarning!
Use of rear view camera can be dangerous if
you are color-blind or have impaired color
vision.
Only use rear view camera if you can see and
distinguish all colored guidelines shown by
rear view camera on the COMAND system
display.
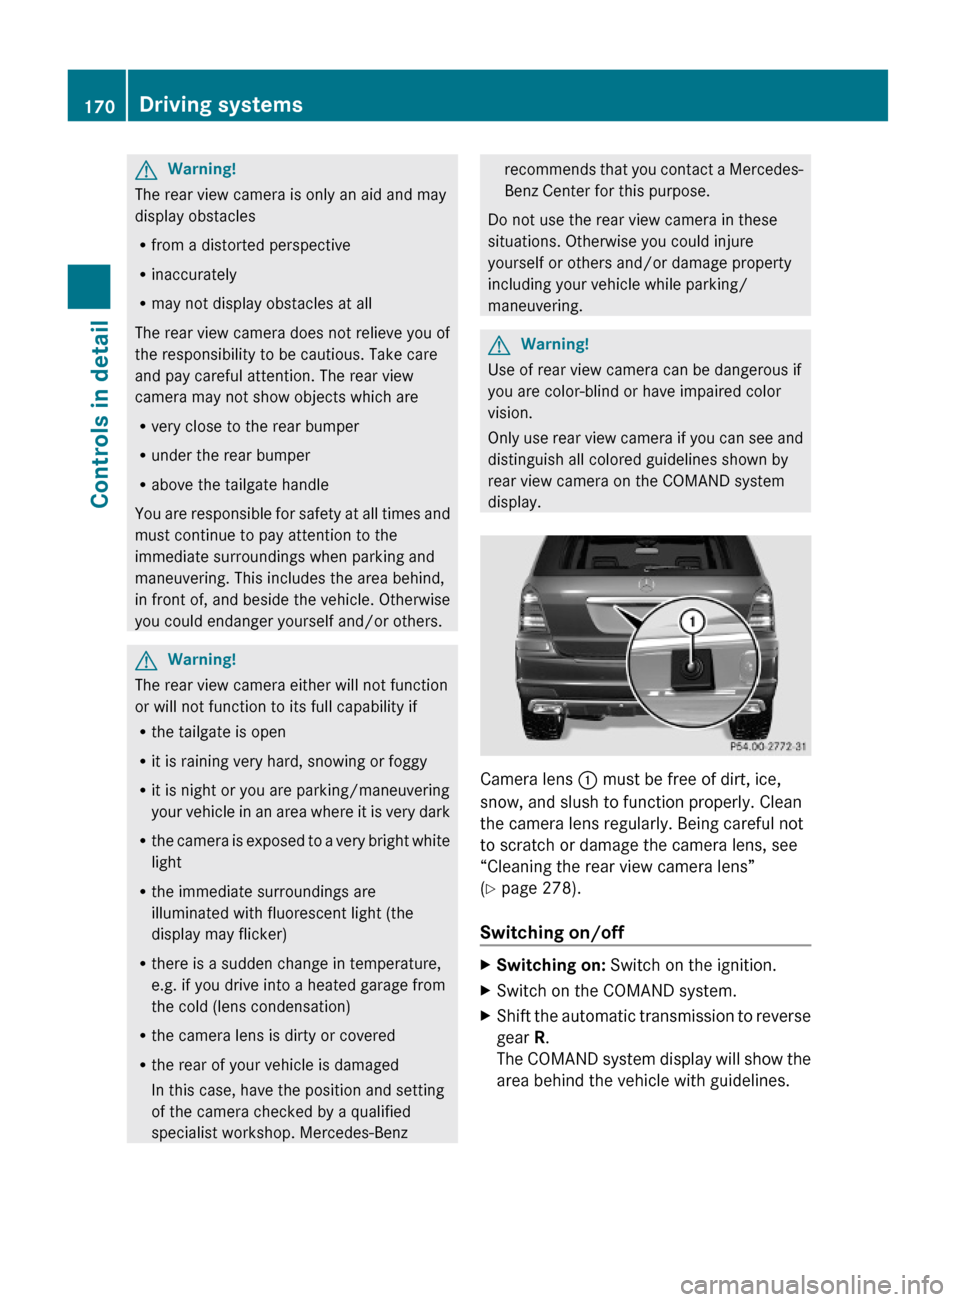
Camera lens : must be free of dirt, ice,
snow, and slush to function properly. Clean
the camera lens regularly. Being careful not
to scratch or damage the camera lens, see
“Cleaning the rear view camera lens”
(Y page 278).
Switching on/off
XSwitching on: Switch on the ignition.XSwitch on the COMAND system.XShift the automatic transmission to reverse
gear R.
The COMAND system display will show the
area behind the vehicle with guidelines.
170Driving systemsControls in detail
X164_AKB; 5; 31, en-USd2ureepe,Version: 2.11.8.12009-09-11T12:30:16+02:00 - Seite 170
Page 194 of 380
XSwitch on the ignition.XSwitching on: Press button ª on the
respective climate control panel.
The indicator lamp in the button comes on.XSwitching off: Press button ª again.
The rear window defroster switches off when
the battery voltage is too low. The indicator
lamp in button ª flashes. Too many
electrical consumers may be operating
simultaneously.
XSwitch off consumers that are currently not
needed if required.
Power tilt/sliding sunroof
Opening and closing
GObserve Safety notes, see page 55.GWarning!
When opening or closing the tilt/sliding
sunroof, make sure there is no danger of
anyone being harmed by the opening/closing
procedure.
The tilt/sliding sunroof is equipped with the
express operation and automatic reversal
function. If the movement of the tilt/sliding
sunroof is blocked during the closing
procedure, the tilt/sliding sunroof will stop
and open slightly.
The tilt/sliding sunroof operates differently
when the sunroof switch is pressed and held.
See the “Closing when the tilt/sliding sunroof
is blocked” section for details.
The opening/closing procedure of the tilt/
sliding sunroof can be immediately halted by
releasing the sunroof switch or, if the sunroof
switch was moved past the resistance point
and released, by moving the sunroof switch in
any direction.
GWarning!
The tilt/sliding sunroof is made out of glass.
In the event of an accident, the glass may
shatter. This may result in an opening in the
roof.
In a vehicle rollover, occupants not wearing
their seat belts or not wearing them properly
may be thrown out of the opening. Such an
opening also presents a potential for injury for
occupants wearing their seat belts properly as
entire body parts or portions of them may
protrude from the passenger compartment.
! To avoid damaging the seals, do not
transport any objects with sharp edges
which can stick out of the tilt/sliding
sunroof.
Do not open the tilt/sliding sunroof if there
is snow or ice on the roof, as this could
result in malfunctions.
If you cannot open or close the tilt/sliding
sunroof due to a malfunction contact
Roadside Assistance or an authorized
Mercedes-Benz Center.
! Please keep in mind that weather
conditions can sometimes change rapidly.
Make sure to close the tilt/sliding sunroof
when leaving the vehicle. If water enters
the vehicle interior, vehicle electronics
could be damaged which is not covered by
the Mercedes-Benz Limited Warranty.
i You can also open or close the tilt/sliding
sunroof using the SmartKey or the
KEYLESS-GO function, see “Summer
opening feature” ( Y page 107) and
“Convenience closing feature”
( Y page 107).
i After switching off the ignition or
removing the SmartKey from the starter
switch, you can operate the tilt/sliding
sunroof until you open the driver’s or front
passenger door. If no door was opened you
can operate the tilt/sliding sunroof for up
to 5 minutes.192Power tilt/sliding sunroofControls in detail
X164_AKB; 5; 31, en-USd2ureepe,Version: 2.11.8.12009-09-11T12:30:16+02:00 - Seite 192