2010 MERCEDES-BENZ GL450 Raised
[x] Cancel search: RaisedPage 266 of 380
Checklist before off-road driving
Engine oil level
RCheck the engine oil level (Y page 230).
Only with a proper oil level can the vehicle
obtain a trouble-free oil supply, even on
steep gradients.
! If the engine oil level warning lamp comes
on while driving, stop the vehicle in a safe
location or as soon at is safe to do so.
Check the engine oil level.
The engine oil level warnings should not be
ignored. Extended driving with the symbol
displayed could result in serious engine
damage that is not covered by the
Mercedes-Benz Limited Warranty.
Tires
RCheck the tread depth and maintain
specified tire inflation pressure. A placard
with the recommended tire inflation
pressures is located on the driver’s door B-
pillar (Y page 243).
RCheck tires for possible damage and
remove foreign objects.
RReplace missing valve caps.
Rims
RDented or bent rims can cause tire inflation
pressure loss and damage the tire beads.
For this reason, check and, if necessary,
change rims before driving off-road.
Vehicle tool kit
RCheck if the jack (Y page 286) is
functional.
RAlways take the vehicle tool kit, a strong
tow rope, a shovel and a small plank (to put
under the jack on sandy soil) with you.
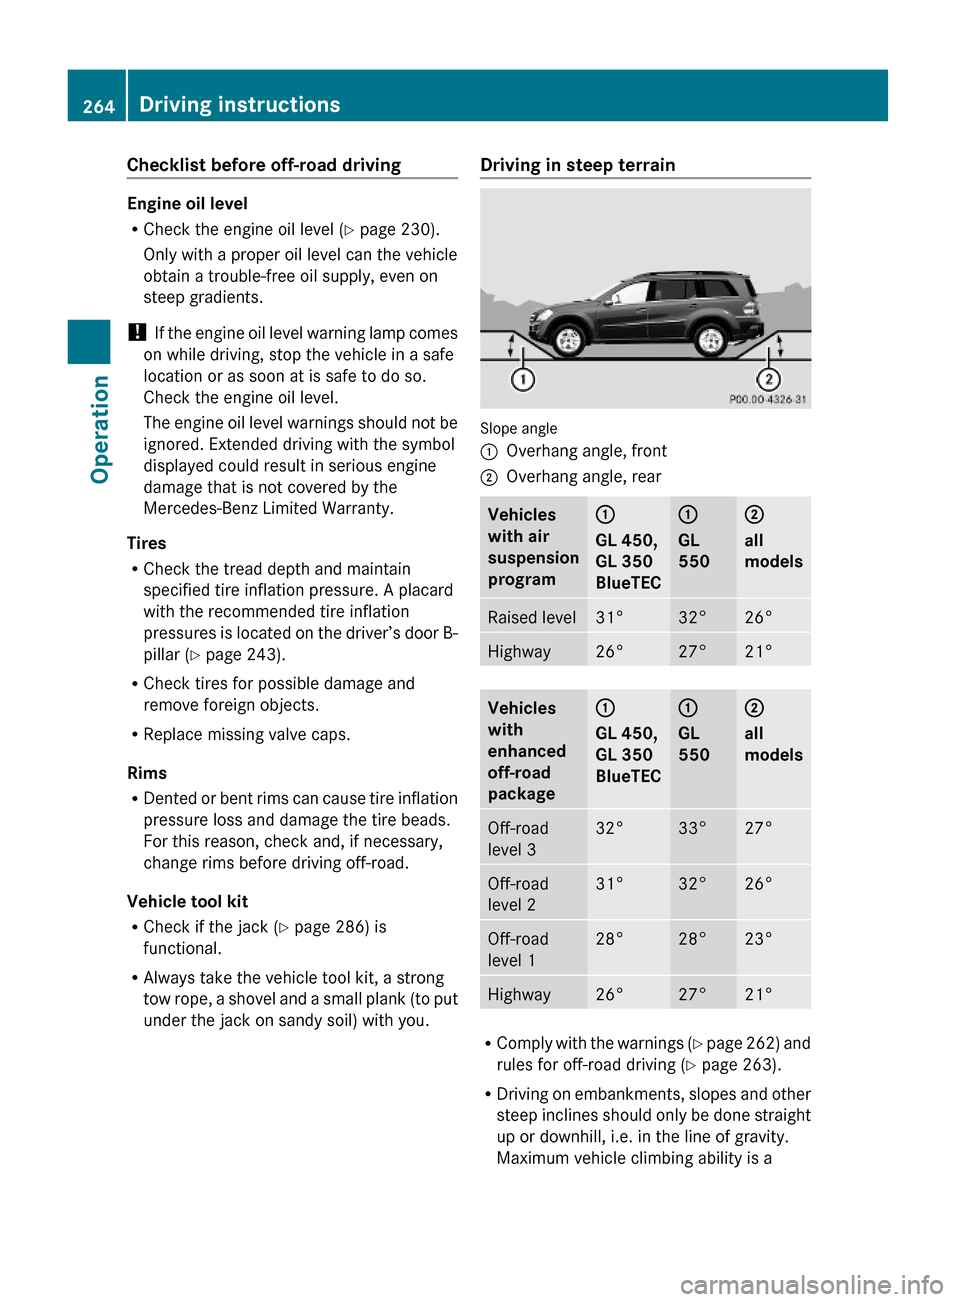
Driving in steep terrain
Slope angle
:Overhang angle, front;Overhang angle, rearVehicles
with air
suspension
program
:
GL 450,
GL 350
BlueTEC
:
GL
550
;
all
models
Raised level31°32°26°Highway26°27°21°Vehicles
with
enhanced
off-road
package
:
GL 450,
GL 350
BlueTEC
:
GL
550
;
all
models
Off-road
level 3
32°33°27°Off-road
level 2
31°32°26°Off-road
level 1
28°28°23°Highway26°27°21°
RComply with the warnings (Y page 262) and
rules for off-road driving (Y page 263).
RDriving on embankments, slopes and other
steep inclines should only be done straight
up or downhill, i.e. in the line of gravity.
Maximum vehicle climbing ability is a
264Driving instructionsOperation
X164_AKB; 5; 31, en-USd2ureepe,Version: 2.11.8.12009-09-11T12:30:16+02:00 - Seite 264
Page 268 of 380
iThe special Off-road ABS (Y page 63)
setting allows for precise and brief
(cyclical) blocking of the front wheels,
permitting them to dig into loose ground.
Remember that, when stopped, the front
wheels slide across a surface and thus lose
their ability to steer the vehicle.
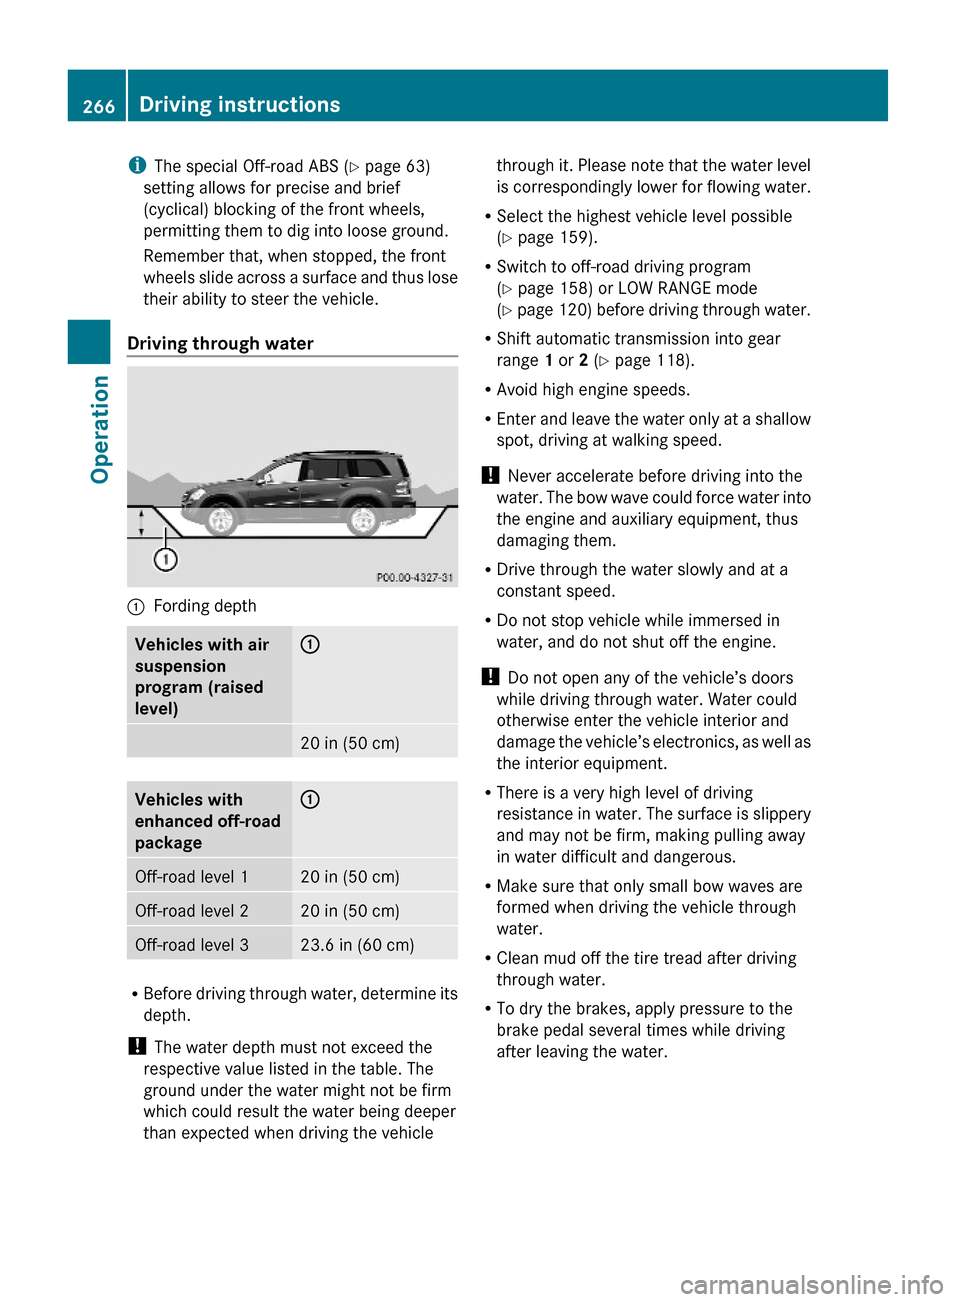
Driving through water
:Fording depthVehicles with air
suspension
program (raised
level)
:20 in (50 cm)Vehicles with
enhanced off-road
package
:Off-road level 120 in (50 cm)Off-road level 220 in (50 cm)Off-road level 323.6 in (60 cm)
RBefore driving through water, determine its
depth.
! The water depth must not exceed the
respective value listed in the table. The
ground under the water might not be firm
which could result the water being deeper
than expected when driving the vehicle
through it. Please note that the water level
is correspondingly lower for flowing water.
RSelect the highest vehicle level possible
(Y page 159).
RSwitch to off-road driving program
(Y page 158) or LOW RANGE mode
(Y page 120) before driving through water.
RShift automatic transmission into gear
range 1 or 2 (Y page 118).
RAvoid high engine speeds.
REnter and leave the water only at a shallow
spot, driving at walking speed.
! Never accelerate before driving into the
water. The bow wave could force water into
the engine and auxiliary equipment, thus
damaging them.
RDrive through the water slowly and at a
constant speed.
RDo not stop vehicle while immersed in
water, and do not shut off the engine.
! Do not open any of the vehicle’s doors
while driving through water. Water could
otherwise enter the vehicle interior and
damage the vehicle’s electronics, as well as
the interior equipment.
RThere is a very high level of driving
resistance in water. The surface is slippery
and may not be firm, making pulling away
in water difficult and dangerous.
RMake sure that only small bow waves are
formed when driving the vehicle through
water.
RClean mud off the tire tread after driving
through water.
RTo dry the brakes, apply pressure to the
brake pedal several times while driving
after leaving the water.
266Driving instructionsOperation
X164_AKB; 5; 31, en-USd2ureepe,Version: 2.11.8.12009-09-11T12:30:16+02:00 - Seite 266
Page 269 of 380
Crossing obstacles
! Obstacles can damage the vehicle
underbody or suspension components. If
possible use the assistance of a second
person outside the vehicle to scout the
path you intend to take and check for
adequate ground clearance when you cross
obstacles with your vehicle. The person
assisting you outside the vehicle should
always be a safe distance away from the
vehicle and positioned so that he or she
cannot get hurt in case of any unexpected
vehicle movement.
After off-road driving or crossing obstacles,
inspect vehicle for any damage, especially
vehicle underbody and suspension
components. Failure to do so can adversely
affect the vehicle’s future performance,
including increased chance of an accident.
When driving over tree stumps, big rocks and
other obstacles, observe the following rules:
RMake sure the off-road driving program
(Y page 158) or if equipped the
LOW RANGE mode (Y page 120) is
switched on.
RAvoid high engine speeds.
RShift automatic transmission into gear
range 1 (Y page 118).
RCheck the vehicle clearance before
crossing obstacles.
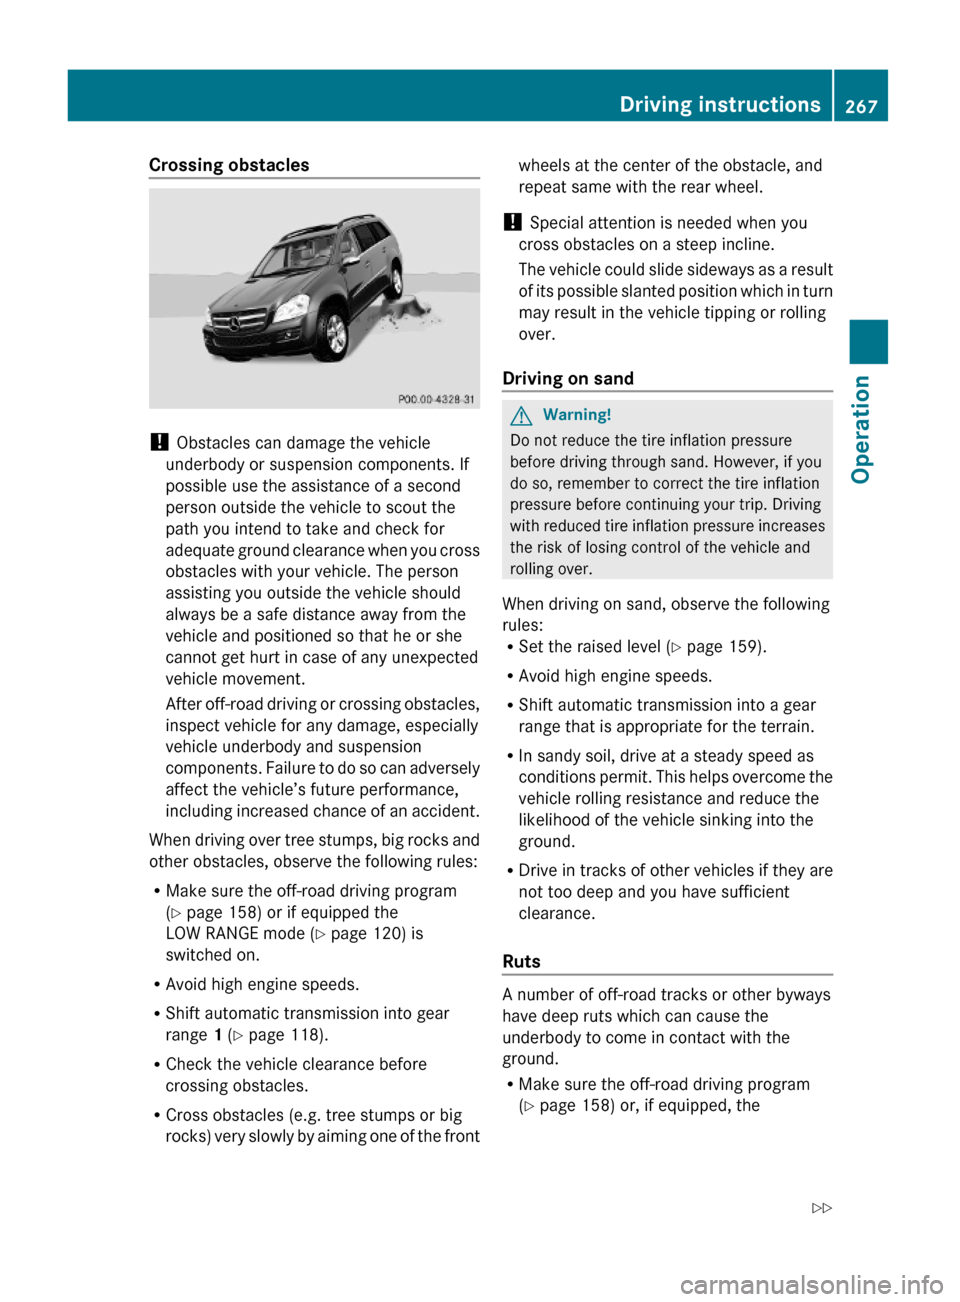
RCross obstacles (e.g. tree stumps or big
rocks) very slowly by aiming one of the front
wheels at the center of the obstacle, and
repeat same with the rear wheel.
! Special attention is needed when you
cross obstacles on a steep incline.
The vehicle could slide sideways as a result
of its possible slanted position which in turn
may result in the vehicle tipping or rolling
over.
Driving on sand
GWarning!
Do not reduce the tire inflation pressure
before driving through sand. However, if you
do so, remember to correct the tire inflation
pressure before continuing your trip. Driving
with reduced tire inflation pressure increases
the risk of losing control of the vehicle and
rolling over.
When driving on sand, observe the following
rules:RSet the raised level (Y page 159).
RAvoid high engine speeds.
RShift automatic transmission into a gear
range that is appropriate for the terrain.
RIn sandy soil, drive at a steady speed as
conditions permit. This helps overcome the
vehicle rolling resistance and reduce the
likelihood of the vehicle sinking into the
ground.
RDrive in tracks of other vehicles if they are
not too deep and you have sufficient
clearance.
Ruts
A number of off-road tracks or other byways
have deep ruts which can cause the
underbody to come in contact with the
ground.
RMake sure the off-road driving program
(Y page 158) or, if equipped, the
Driving instructions267OperationX164_AKB; 5; 31, en-USd2ureepe,Version: 2.11.8.12009-09-11T12:30:16+02:00 - Seite 267Z
Page 270 of 380
LOW RANGE mode (Y page 120) is
switched on.
R Set the raised level ( Y page 159).
! Check that the ruts are not too deep and
your vehicle’s clearance is sufficient.
Otherwise:
R your vehicle may be damaged
R the underbody of the vehicle may come
in contact with the ground and you may
get stuck
R Avoid high engine speeds.
R Shift automatic transmission into gear
range 1 (Y page 118).
R Drive next to the ruts rather than through
them if at all possible.
R If the ruts are too deep to drive in, drive with
one side of the vehicle on the grassy center
strip if the route permits.
Returning from off-road driving GWarning!
If you feel a sudden significant vibration or
ride disturbance, or you suspect that possible
damage to your vehicle has occurred, you
should turn on the hazard warning flashers,
carefully slow down, and drive with caution to
an area which is a safe distance from the road.
Inspect the tires and the vehicle underbody
for possible damage. If the vehicle or tires
appear unsafe, have the vehicle towed to the
nearest authorized Mercedes-Benz Center or
tire dealer for repairs.
Off-road driving increases strain on the
vehicle.
We recommend that you inspect the vehicle
for possible damage after each off-road trip.
Recognizing any damage and a subsequent
timely repair reduces the chance of a possible
breakdown or accident later on.
Proceed as follows:
R Switch off the off-road driving program
( Y page 158) or the LOW RANGE mode
( Y page 120).
R Switch off the DSR ( Y page 156).
R Set the differential locks to AUTO
( Y page 122).
R Lower the vehicle back to a level suitable
for road conditions, e.g. highway/high-
speed level ( Y page 159).
R Clean all exterior lamps and check for
possible damage.
R Clean the front and rear license plate.
R Remove excessive dirt from tires, wheels,
wheel housings, and underbody.
For instance, after driving in mud, clean the
radiator, chassis, engine, brakes, and
wheels from extreme dirt using a strong jet
of water.
R Check tires for possible damage.
R Inspect vehicle underbody, oil pan, brake
hoses, etc., as well as vehicle underbody
for possible damage.
R Check for brush or branches caught in the
underbody.
! Brush or branches could increase the
possibility of a fire, as well as cut fuel and/
or brake lines, puncture rubber bellows of
the axles or drive shafts.
R After continued operation in mud, sand,
water or other dirty conditions clean the
brake discs, wheels, brake pads and check
and clean axle joints.
R Conduct a brake test.268Driving instructionsOperation
X164_AKB; 5; 31, en-USd2ureepe,Version: 2.11.8.12009-09-11T12:30:16+02:00 - Seite 268
Page 274 of 380
vehicle and/or opens or closes doors or the
tailgate.
The vehicle’s level could change and you
could endanger yourself and/or others as a
result.
Make sure that you do not operate the ADS
button or the vehicle level control system
when coupling/decoupling the trailer.XMake sure the automatic transmission is in
park position P (Y page 115).XEngage the parking brake for the vehicle
( Y page 112).XStart the engine ( Y page 108).XClose all doors and the tailgate.XEngage the parking brake for the trailer.GWarning!
As soon as you disconnect the electrical
connection between the trailer and the
vehicle, the vehicle will lower. To help avoid
personal injury, make sure no one is near the
wheel housing or underneath the vehicle
before the electrical connection is
disconnected.
When you decouple the trailer, the vehicle is
temporarily raised because the springs are
relieved of load. Be especially careful during
this process, as you could otherwise injure
yourself and/or others. Make sure that any
persons remaining in the vehicle do not press
the switches for vehicle level control or the
ADS.
XDisconnect all electrical plug connectors.XDecouple the trailer.XMake sure that the trailer coupling is free
of load.XTurn off the engine ( Y page 113).
Driving abroad
If you plan to drive the vehicle outside the U.S.
or Canada, you should request dealer
network information for your destination from
any authorized Mercedes-Benz Center.
Control and operation of radio
transmitter
Safety notes
GWarning!
Please do not forget that your primary
responsibility is to drive the vehicle. A driver’s
attention to the road must always be his/her
primary focus when driving. For your safety
and the safety of others, we recommend that
you pull over to a safe location and stop
before placing or taking a telephone call.
If you choose to use the telephone 18
while
driving, please use the hands-free device and
only use the telephone when road, weather
and traffic conditions permit. Some
jurisdictions prohibit the driver from using a
mobile telephone while driving a vehicle.
Only operate the COMAND 18
(Cockpit
Management and Data System) if road,
weather and traffic conditions permit.
Otherwise, you may not be able to observe
traffic conditions and could endanger yourself
and others.
Bear in mind that at a speed of just 30 mph
(approximately 50 km/h), your vehicle is
covering a distance of 44 feet (approximately
14 m) every second.
Emission control
Certain systems of the engine serve to keep
the toxic components of the exhaust gases
within permissible limits required by law.
These systems will function properly only
when maintained strictly according to factory
specifications. Any adjustments on the
engine should, therefore, be carried out only
by qualified Mercedes-Benz Center
authorized technicians.
18 Observe all legal requirements.272Driving instructionsOperation
X164_AKB; 5; 31, en-USd2ureepe,Version: 2.11.8.12009-09-11T12:30:16+02:00 - Seite 272
Page 343 of 380
Lifting the vehicleGWarning!
When jacking up the vehicle, only use the jack
which has been specifically approved by
Mercedes-Benz for your vehicle.
The jack is designed exclusively for jacking up
the vehicle at the jack take-up brackets built
into both sides of the vehicle. Make sure the
jack arm is fully seated in the jack take-up
bracket. The jack must always be vertical
when in use, especially on inclines or
declines.
The jack is intended only for lifting the vehicle
briefly for wheel changes. It is not suited for
performing maintenance work under the
vehicle. To help avoid personal injury, use the
jack only to lift the vehicle during a wheel
change.
Never get beneath the vehicle while it is
supported by the jack. Keep hands and feet
away from the area under the lifted vehicle.
Always lower the vehicle onto sufficient
capacity jackstands before working under the
vehicle.
Always engage the parking brake firmly and
block the wheels with wheel chocks or other
sizeable objects before raising the vehicle
with the jack. Do not disengage the parking
brake while the vehicle is raised.
Make sure that the ground on which the
vehicle is standing and where you place the
jack is solid, level and not slippery. If
necessary, use a large underlay. On slippery
surfaces, such as tiled floors, you should use
a non-slip underlay, for example a rubber mat.
Do not use wooden blocks or similar objects
to support the jack. Otherwise the jack may
not be able to achieve its load-bearing
capacity if it is not at its full height.
Never start the engine when the vehicle is
raised.
Also observe the notes on the jack.
XPrevent the vehicle from rolling away by
blocking wheels with wheel chocks or other
sizeable objects.
When your vehicle is equipped with a wheel
chock, it is included with the vehicle tool kit
(Y page 284). For information on setting up
the collapsible wheel chock, see
(Y page 286).
GWarning!
Only jack up the vehicle on level ground or on
slight inclines/declines. Otherwise, the
vehicle could fall off the jack and injure you or
others.
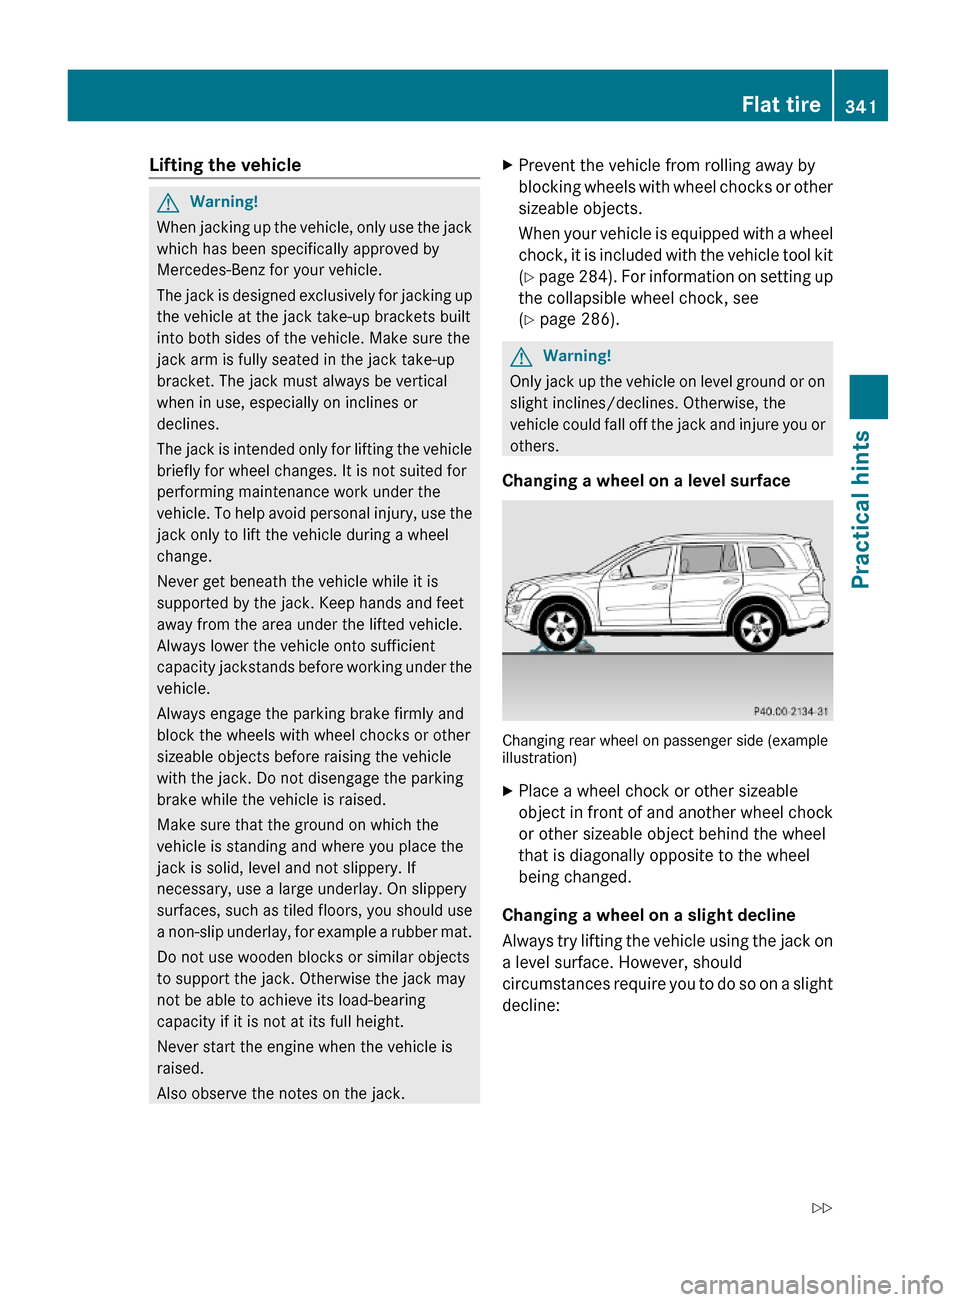
Changing a wheel on a level surface
Changing rear wheel on passenger side (exampleillustration)
XPlace a wheel chock or other sizeable
object in front of and another wheel chock
or other sizeable object behind the wheel
that is diagonally opposite to the wheel
being changed.
Changing a wheel on a slight decline
Always try lifting the vehicle using the jack on
a level surface. However, should
circumstances require you to do so on a slight
decline:
Flat tire341Practical hintsX164_AKB; 5; 31, en-USd2ureepe,Version: 2.11.8.12009-09-11T12:30:16+02:00 - Seite 341Z
Page 346 of 380
Do not tighten the wheel bolts when the
vehicle is raised. Otherwise the vehicle could
fall off the jack.
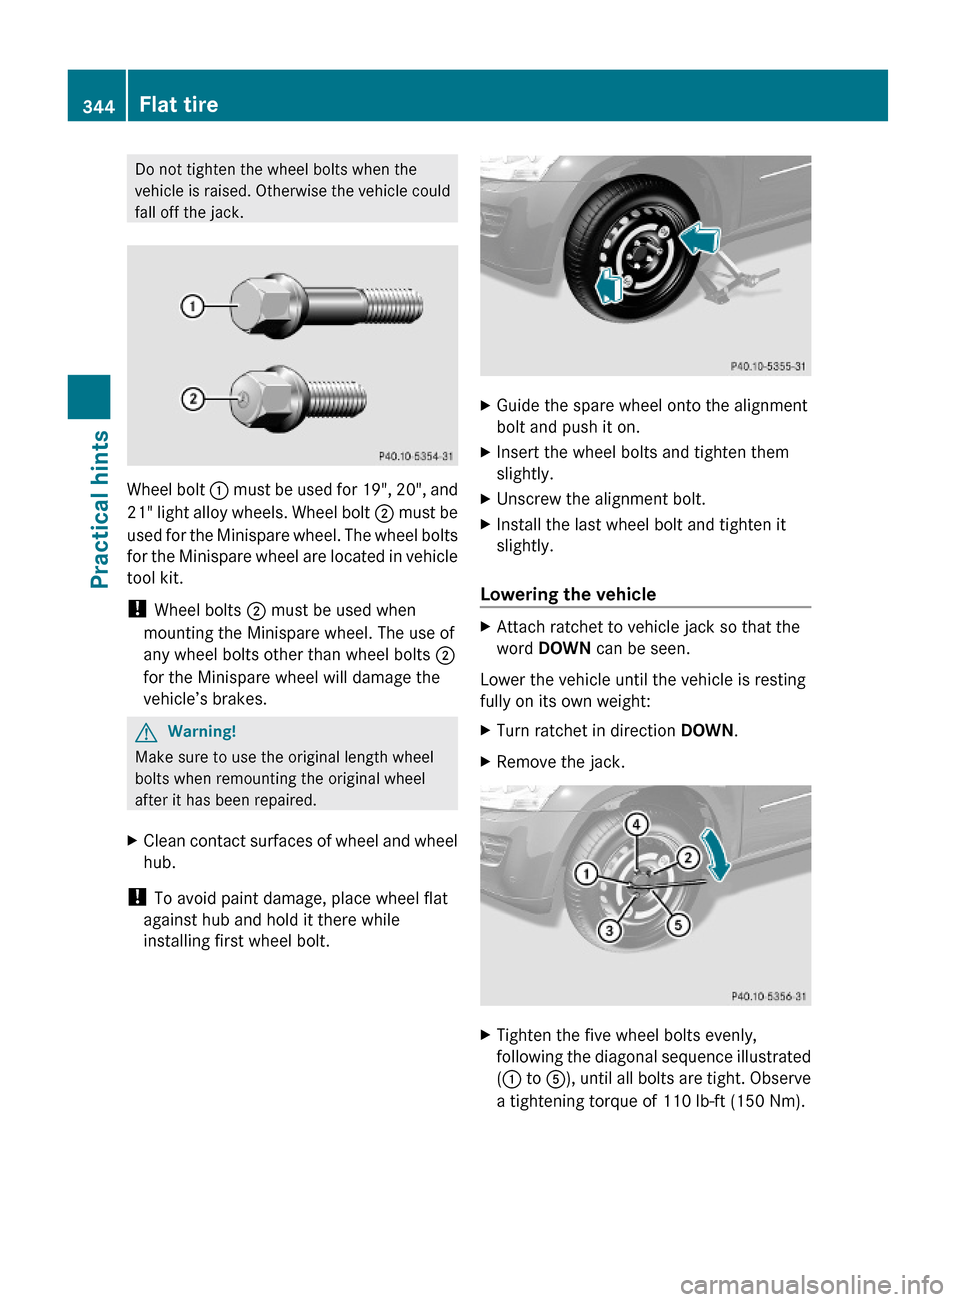
Wheel bolt : must be used for 19", 20", and
21" light alloy wheels. Wheel bolt ; must be
used for the Minispare wheel. The wheel bolts
for the Minispare wheel are located in vehicle
tool kit.
! Wheel bolts ; must be used when
mounting the Minispare wheel. The use of
any wheel bolts other than wheel bolts ;
for the Minispare wheel will damage the
vehicle’s brakes.
GWarning!
Make sure to use the original length wheel
bolts when remounting the original wheel
after it has been repaired.
XClean contact surfaces of wheel and wheel
hub.
! To avoid paint damage, place wheel flat
against hub and hold it there while
installing first wheel bolt.
XGuide the spare wheel onto the alignment
bolt and push it on.
XInsert the wheel bolts and tighten them
slightly.
XUnscrew the alignment bolt.XInstall the last wheel bolt and tighten it
slightly.
Lowering the vehicle
XAttach ratchet to vehicle jack so that the
word DOWN can be seen.
Lower the vehicle until the vehicle is resting
fully on its own weight:
XTurn ratchet in direction DOWN.XRemove the jack.XTighten the five wheel bolts evenly,
following the diagonal sequence illustrated
(: to A), until all bolts are tight. Observe
a tightening torque of 110 lb-ft (150 Nm).
344Flat tirePractical hints
X164_AKB; 5; 31, en-USd2ureepe,Version: 2.11.8.12009-09-11T12:30:16+02:00 - Seite 344
Page 355 of 380

may be towed with all wheels on the ground
only so far as necessary to have the vehicle
moved to a safe location where the
recommended towing methods can be
employed.
! Before towing the vehicle observe the
following instructions:
RDo not tow-start the vehicle. You could
otherwise seriously damage the
automatic transmission which is not
covered by the Mercedes-Benz Limited
Warranty.
RDo not tow with sling-type equipment.
Towing with sling-type equipment over
bumpy roads will damage radiator and
supports.
RTowing of the vehicle should only be
done using the properly installed towing
eye bolt. Never attach a tow cable, tow
rope or tow rod to the vehicle chassis,
frame or suspension parts.
! Do not tow with one axle raised. Doing so
could damage the transfer case, which is
not covered by the Mercedes-Benz Limited
Warranty. All wheels must be on or off the
ground. Observe instructions for towing the
vehicle with all wheels on the ground.
GWarning!
With the engine not running, there is no power
assistance for the brake and steering
systems. In this case, it is important to keep
in mind that a considerably higher degree of
effort is necessary to brake and steer the
vehicle. Adapt your driving accordingly.
! Avoid pulling the vehicle abruptly or
diagonally, since it could result in damage
to the chassis alignment.
! Do not use the towing eye bolt for
recovery, as this could damage the vehicle.
If in doubt, recover the vehicle with a crane.
iIf the battery is disconnected or
discharged
Rthe SmartKey will not turn in the starter
switch
Rthe automatic transmission will remain in
park position P
For more information see “Battery”
(Y page 348) or “Jump starting”
(Y page 350).
Installing towing eye bolt
Depending on whether you are towing a
vehicle or you are being towed, the towing eye
bolt can be screwed into threaded holes
which are located behind covers on each
bumper.
The towing eye bolt is supplied with the
vehicle tool kit, located in the cargo
compartment underneath the cargo
compartment floor (Y page 284).
XTake the towing eye bolt out of the space
underneath the cargo compartment floor.
Removing cover in front bumper
XPress mark on cover : as indicated by the
arrow.
XLift cover : off to reveal the threaded hole
for the towing eye bolt.
Towing the vehicle353Practical hintsX164_AKB; 5; 31, en-USd2ureepe,Version: 2.11.8.12009-09-11T12:30:16+02:00 - Seite 353Z