2010 MERCEDES-BENZ GL headlamp
[x] Cancel search: headlampPage 102 of 380
Vehicles with front fog lampsXSwitching on front fog lamps: Pull out the
exterior lamp switch to first stop.
The green indicator lamp N in the
exterior lamp switch comes on.
XSwitching on rear fog lamp: Pull out the
exterior lamp switch to second stop.
The rear fog lamp, the front fog lamps, the
green and the yellow indicator lamp R
in the exterior lamp switch come on.
XSwitching off front fog lamps/rear fog
lamp: Push in the exterior lamp switch to
its stop.
Vehicles without front fog lamps
XSwitching on rear fog lamp: Pull out the
exterior lamp switch to its stop.
The rear fog lamp and the yellow indicator
lamp R in the exterior lamp switch
come on.
XSwitching off rear fog lamp: Push in the
exterior lamp switch to its stop.
Locator lighting and night security
illumination
Locator lighting and night security
illumination are described in the “Control
system” section, see “Switching locator
lighting on or off” (Y page 136) and
“Switching night security illumination
(Headlamps delayed shut-off feature) on or
off” (Y page 137).
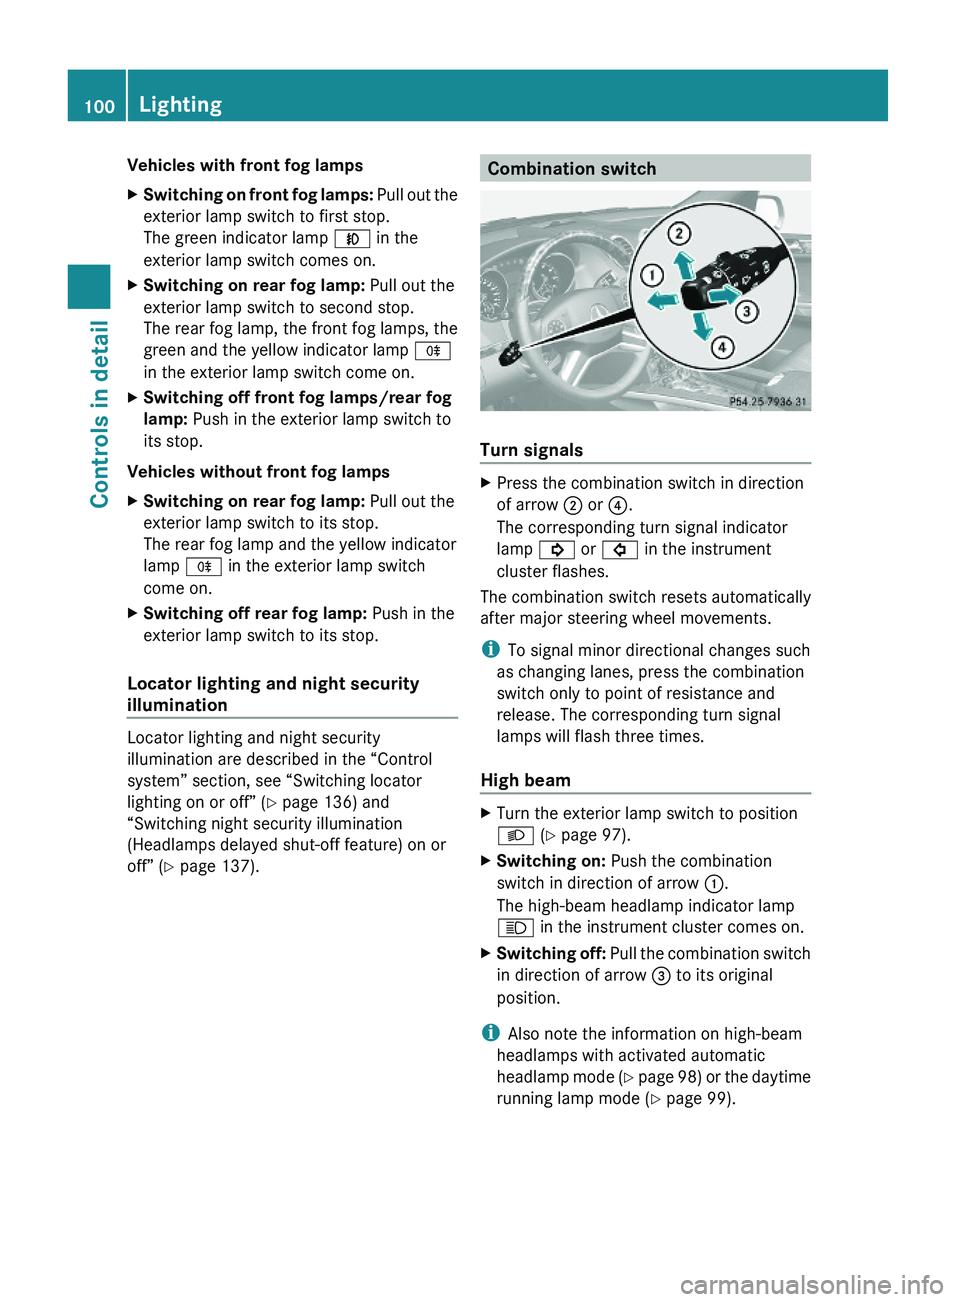
Combination switch
Turn signals
XPress the combination switch in direction
of arrow ; or ?.
The corresponding turn signal indicator
lamp ! or # in the instrument
cluster flashes.
The combination switch resets automatically
after major steering wheel movements.
iTo signal minor directional changes such
as changing lanes, press the combination
switch only to point of resistance and
release. The corresponding turn signal
lamps will flash three times.
High beam
XTurn the exterior lamp switch to position
L (Y page 97).
XSwitching on: Push the combination
switch in direction of arrow :.
The high-beam headlamp indicator lamp
K in the instrument cluster comes on.
XSwitching off: Pull the combination switch
in direction of arrow = to its original
position.
iAlso note the information on high-beam
headlamps with activated automatic
headlamp mode (Y page 98) or the daytime
running lamp mode (Y page 99).
100LightingControls in detail
X164_AKB; 5; 31, en-USd2ureepe,Version: 2.11.8.12009-09-11T12:30:16+02:00 - Seite 100
Page 103 of 380
High-beam flasher XSwitching on: Pull the combination switch
briefly in direction of arrow =.
Hazard warning flasher
The hazard warning flasher can be switched
on at all times, even with the SmartKey
removed from the starter switch.
The hazard warning flasher comes on
automatically when an air bag deploys.
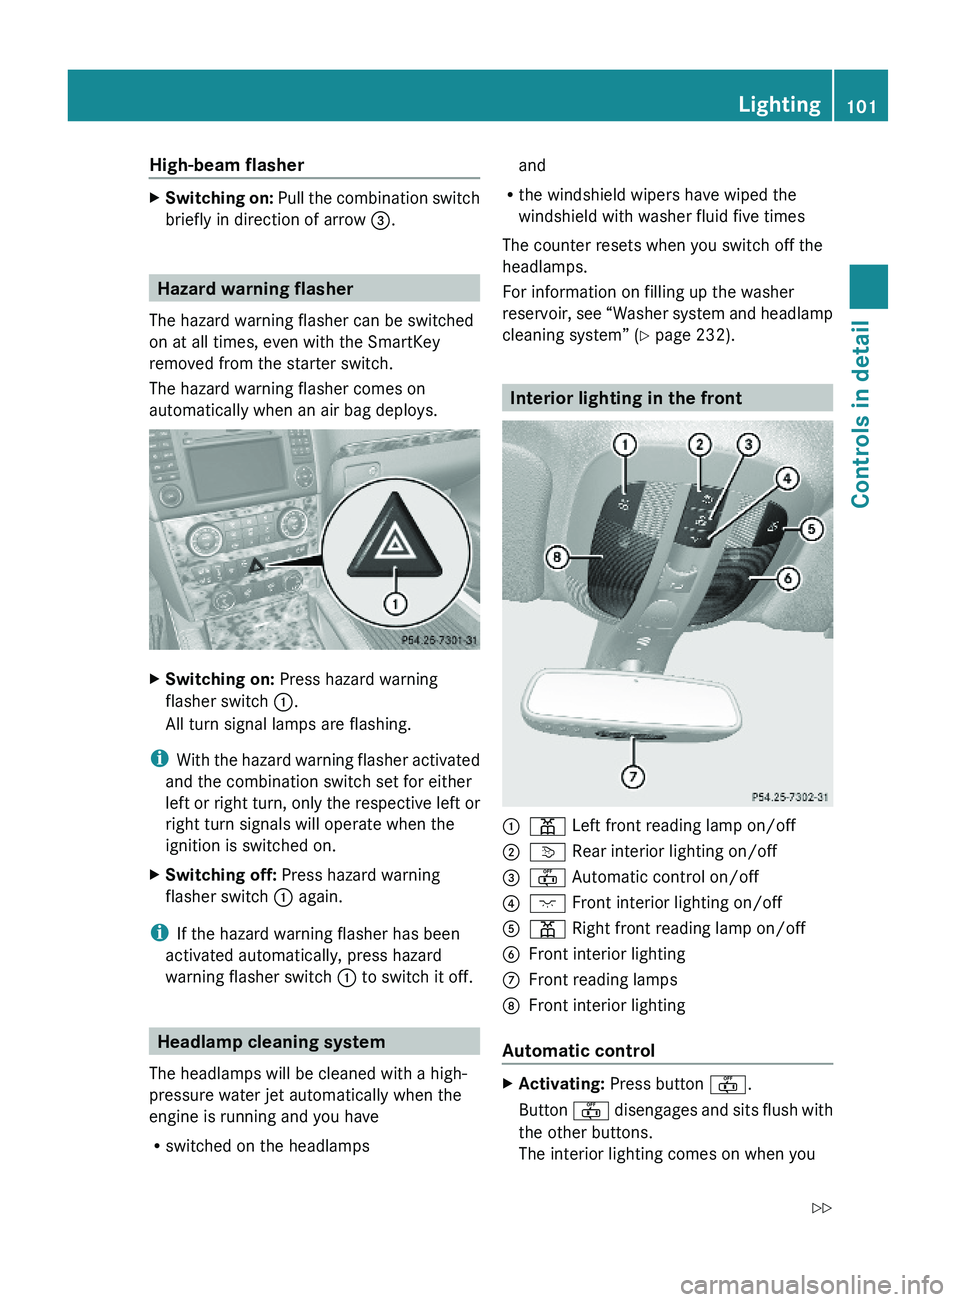
XSwitching on: Press hazard warning
flasher switch :.
All turn signal lamps are flashing.
iWith the hazard warning flasher activated
and the combination switch set for either
left or right turn, only the respective left or
right turn signals will operate when the
ignition is switched on.
XSwitching off: Press hazard warning
flasher switch : again.
iIf the hazard warning flasher has been
activated automatically, press hazard
warning flasher switch : to switch it off.
Headlamp cleaning system
The headlamps will be cleaned with a high-
pressure water jet automatically when the
engine is running and you have
Rswitched on the headlamps
and
Rthe windshield wipers have wiped the
windshield with washer fluid five times
The counter resets when you switch off the
headlamps.
For information on filling up the washer
reservoir, see “Washer system and headlamp
cleaning system” (Y page 232).
Interior lighting in the front
:p Left front reading lamp on/off;v Rear interior lighting on/off=~ Automatic control on/off?c Front interior lighting on/off Ap Right front reading lamp on/offBFront interior lightingCFront reading lamps DFront interior lighting
Automatic control
XActivating: Press button ~.
Button ~ disengages and sits flush with
the other buttons.
The interior lighting comes on when you
Lighting101Controls in detailX164_AKB; 5; 31, en-USd2ureepe,Version: 2.11.8.12009-09-11T12:30:16+02:00 - Seite 101Z
Page 106 of 380
! If you have set intermittent wiping, dirt on
the surface of the rain sensor or optical
effects may cause the windshield wipers to
wipe in an undesired fashion. This could
then damage the windshield wiper blades
or scratch the windshield. You should
therefore switch off the windshield wipers
when weather conditions are dry.
XTurn the combination switch to position
Ä or Å.
After the initial wipe, pauses between
wipes are controlled by the rain sensor
automatically.
Intermittent wiping is interrupted when the
vehicle is at a standstill and a front door is
opened. This protects persons getting into or
out of the vehicle from being sprayed.
Intermittent wiping will be continued when all
doors are closed andRthe automatic transmission is in drive
position D or reverse gear R
or
Rthe wiper setting is changed using the
combination switch
Single wipe
XPress the combination switch briefly in
direction of arrow B to the resistance
point.
The windshield wipers wipe one time
without washer fluid.
Wiping with washer fluid
XPress the combination switch in direction
of arrow B past the resistance point.
The windshield wipers operate with washer
fluid.
iTo prevent smears on the windshield or
noisy/chattering wiper blades, wipe with
washer fluid every now and then even when
it is raining.
For information on filling up the washer
reservoir, see “Washer system and headlamp
cleaning system” (Y page 232).
For information on cleaning the headlamps
with washer fluid, see “Headlamp cleaning
system” (Y page 101).
Rear window wiper/washer
XObserve notes on page (Y page 103).
The rear window wiper engages automatically
when the automatic transmission is shifted
into reverse gear R with the windshield wipers
switched on.
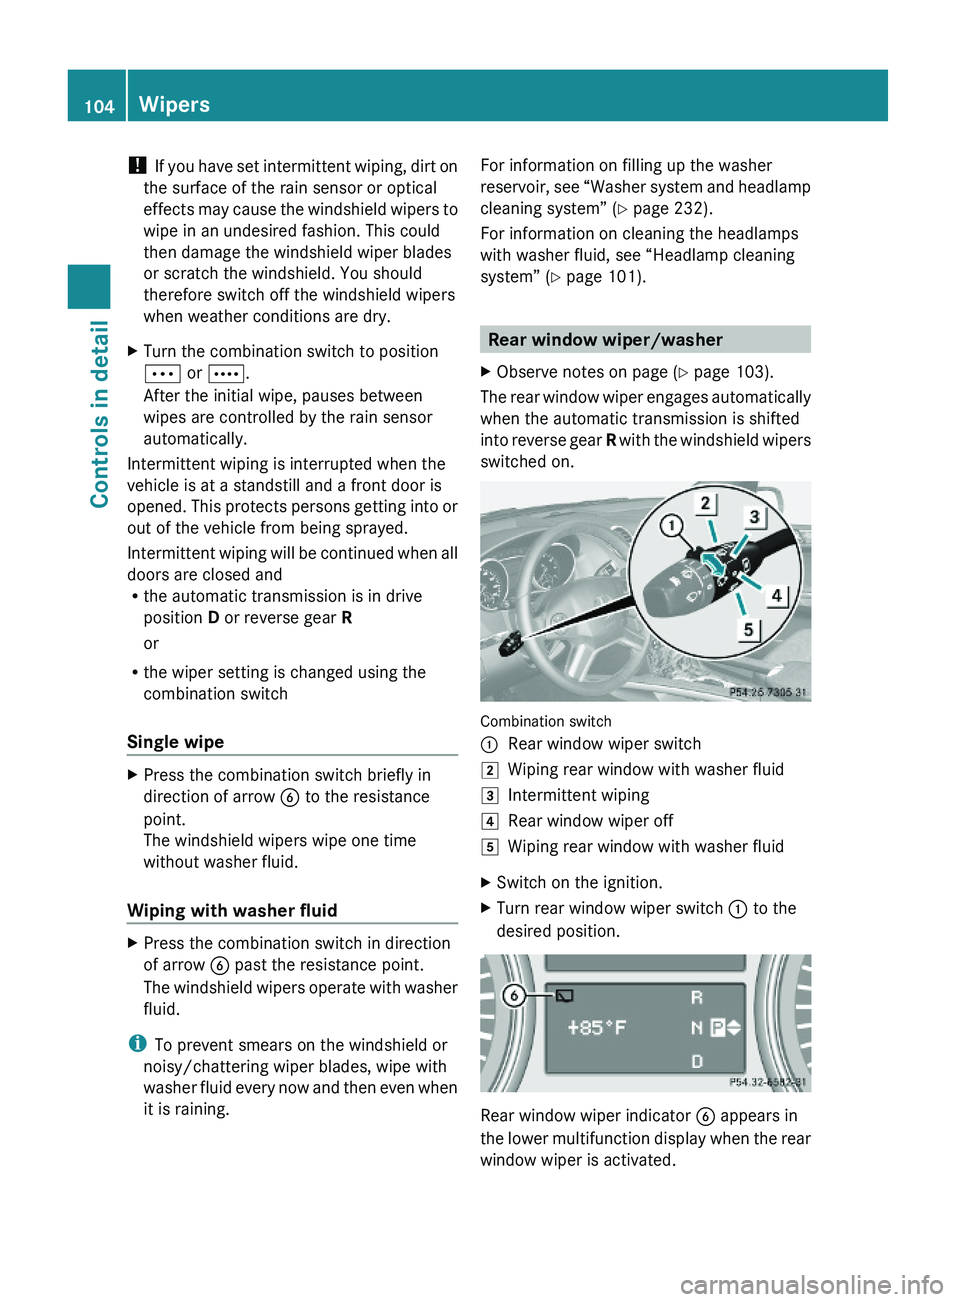
Combination switch
:Rear window wiper switch2Wiping rear window with washer fluid3Intermittent wiping4Rear window wiper off5Wiping rear window with washer fluidXSwitch on the ignition.XTurn rear window wiper switch : to the
desired position.
Rear window wiper indicator B appears in
the lower multifunction display when the rear
window wiper is activated.
104WipersControls in detail
X164_AKB; 5; 31, en-USd2ureepe,Version: 2.11.8.12009-09-11T12:30:16+02:00 - Seite 104
Page 107 of 380
For information on filling up the washer
reservoir, see “Washer system and headlamp
cleaning system” ( Y page 232).
Problems with wipers
! If anything blocks the wipers (leaves,
snow, etc.), switch them off immediately.
For safety reasons, do the following before
attempting to remove any blockage:
R Stop the vehicle in a safe location.
R Remove the SmartKey from the starter
switch.
or
R Turn off the engine by pressing the
KEYLESS-GO start/stop button and
open the driver’s door (with the driver’s
door open, starter switch is in position
0 , same as with SmartKey removed from
starter switch).
R Engage the parking brake.
R Remove blockage.
R Turn the wipers on again.
If the windshield wipers fail to function at
all with the combination switch in position
Ä or Å ,
R set the combination switch to the next
higher wiper speed
R have the windshield wipers checked at
the nearest authorized Mercedes-Benz
Center
Power windows
Opening and closing
The door windows and the hinged quarter
windows are opened and closed electrically.
The switches for all door windows and the
hinged quarter windows are located on the
driver’s door control panel. The switches for
the respective door windows are located on
the front passenger door and the rear doors.
The hinged quarter windows can be operated
from the driver’s seat only.
i Operating the rear door windows from
the rear is not possible when you activate
the override switch ( Y page 60).GObserve Safety notes, see page 55.GWarning!
When opening or closing the windows, make
sure there is no danger of anyone being
harmed by the opening/closing procedure.
The door windows are equipped with the
express operation and automatic reversal
function. If in express operation mode a door
window encounters an obstruction that
blocks its path, the automatic reversal
function will stop the door window and open
it slightly.
The door windows operate differently when
the switch is pulled and held. See the “Closing
when a door window is blocked” section in
this chapter for details.
The closing of a door window can be
immediately halted by releasing the switch or,
if the switch was pulled past the resistance
point and released, by either pressing or
pulling the respective switch.
The closing of the hinged quarter windows can
be immediately halted by pressing or pulling
the switch.
If a window encounters an obstruction that
blocks its path in a circumstance where you
are closing the windows by pressing and
holding button & on the SmartKey or by
pressing and holding the lock button (vehicles
with KEYLESS-GO) on an outside door handle,
the automatic reversal function will not
operate.
Activate the override switch when children
are riding in the back seats of the vehicle. The
children may otherwise injure themselves,
e.g. by becoming trapped in the window
opening.
Power windows105Controls in detailX164_AKB; 5; 31, en-USd2ureepe,Version: 2.11.8.12009-09-11T12:30:16+02:00 - Seite 105Z
Page 134 of 380
XPress button & or *.
The stored messages will now be displayed
in the order in which they have occurred.
For malfunction and warning messages,
see “Vehicle status messages in the
multifunction display” (Y page 287).
iAfter you have scrolled through all
recorded status messages, the first
recorded message appears again.
Should the vehicle’s system record any
conditions while driving, the number of
messages will reappear in the multifunction
display when the SmartKey in the starter
switch is turned to position 0 or removed
from the starter switch. With KEYLESS-GO,
the number of messages will reappear when
you turn off the engine by pressing the
KEYLESS-GO start/stop button and open the
driver’s door.
Except for high-priority messages, the vehicle
status message memory will be cleared when
you switch off the ignition.
Settings menu
Introduction
In the Settings menu there are two
functions: The function To reset, press
reset button for 3 seconds, with which
you can reset all the settings to the original
factory settings and a collection of submenus
with which you can make individual settings
for your vehicle.
The following settings and submenus are
available in the Settings menu:
RResetting to factory settings
(Y page 132)
RSubmenus in the Settings menu
(Y page 133)
RInstrument cluster submenu
(Y page 133)
RTime/Date submenu (Y page 135)
RLighting submenu (Y page 136)
RVehicle submenu (Y page 138)
RComfort submenu (Y page 139)
Resetting to factory settings
You can reset the settings of all submenus to
the factory settings.
For safety reasons, the function Lamp
Circuit Headlamp in the Lighting
submenu cannot be reset while driving.
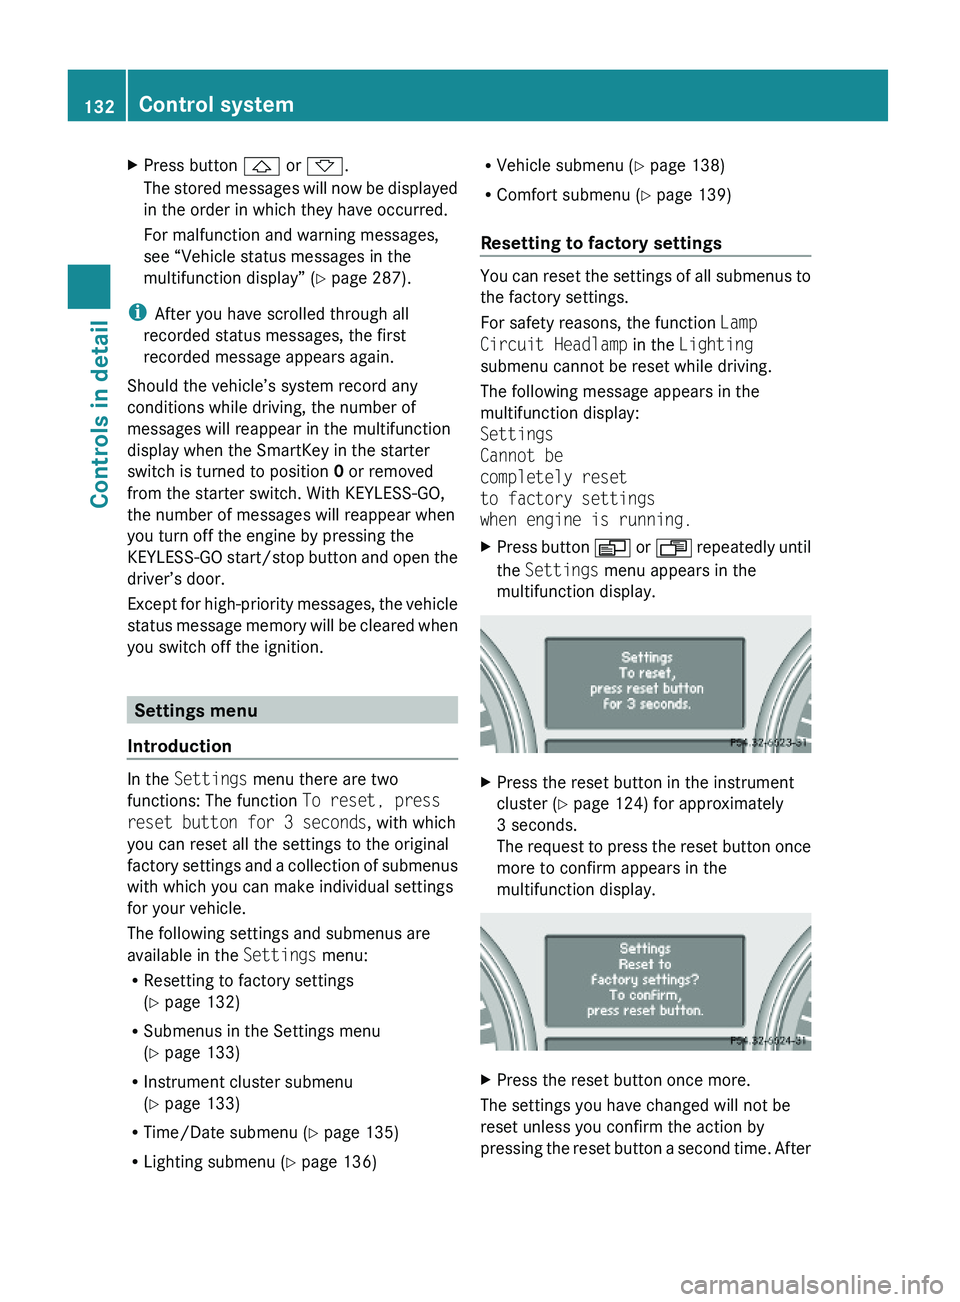
The following message appears in the
multifunction display:
Settings
Cannot be
completely reset
to factory settings
when engine is running.
XPress button V or U repeatedly until
the Settings menu appears in the
multifunction display.
XPress the reset button in the instrument
cluster (Y page 124) for approximately
3 seconds.
The request to press the reset button once
more to confirm appears in the
multifunction display.
XPress the reset button once more.
The settings you have changed will not be
reset unless you confirm the action by
pressing the reset button a second time. After
132Control systemControls in detail
X164_AKB; 5; 31, en-USd2ureepe,Version: 2.11.8.12009-09-11T12:30:16+02:00 - Seite 132
Page 135 of 380
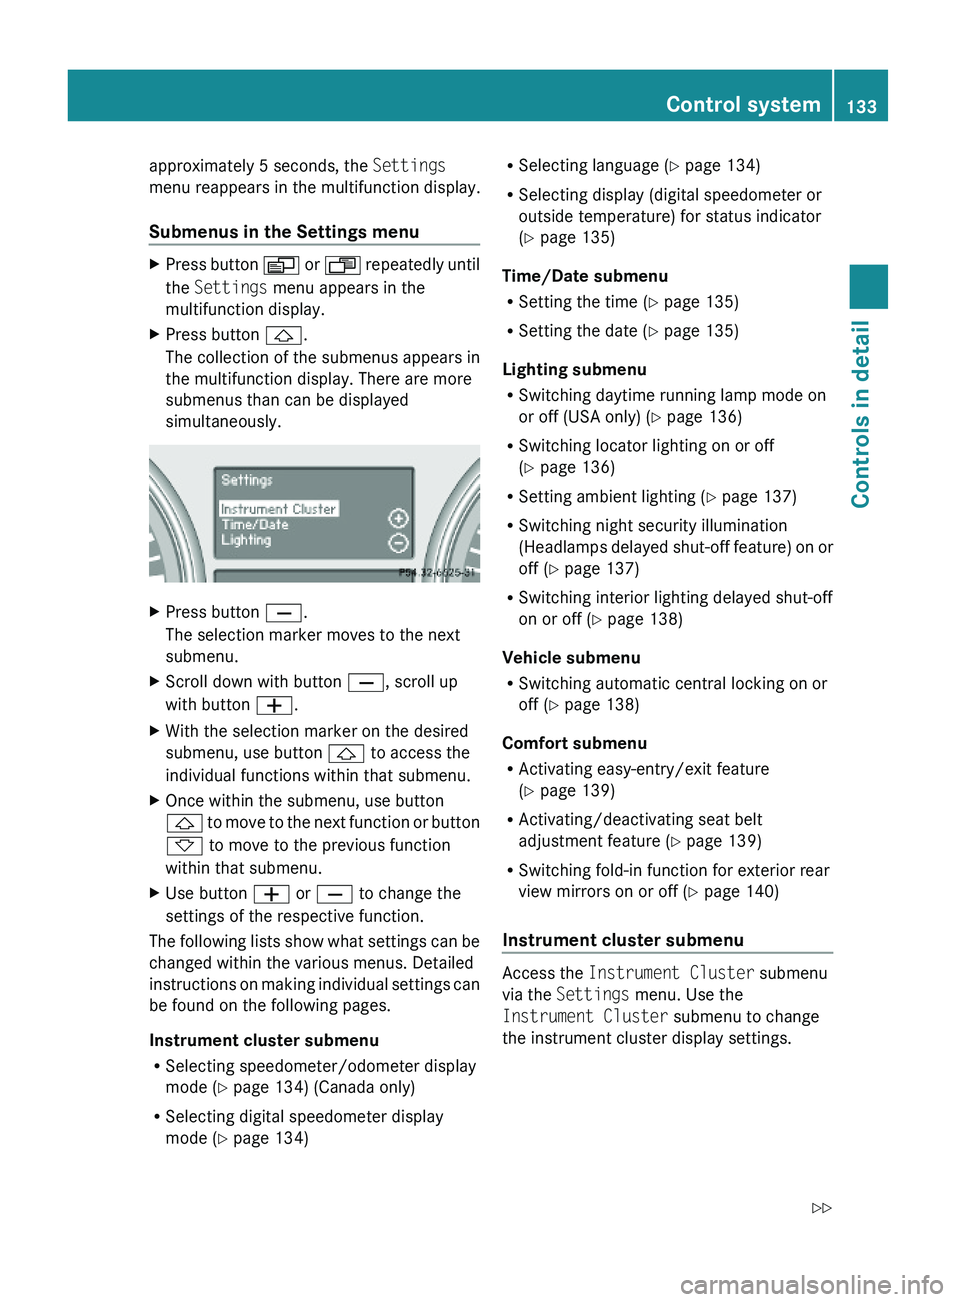
approximately 5 seconds, the Settings
menu reappears in the multifunction display.
Submenus in the Settings menu
XPress button V or U repeatedly until
the Settings menu appears in the
multifunction display.
XPress button &.
The collection of the submenus appears in
the multifunction display. There are more
submenus than can be displayed
simultaneously.
XPress button X.
The selection marker moves to the next
submenu.
XScroll down with button X, scroll up
with button W.
XWith the selection marker on the desired
submenu, use button & to access the
individual functions within that submenu.
XOnce within the submenu, use button
& to move to the next function or button
* to move to the previous function
within that submenu.
XUse button W or X to change the
settings of the respective function.
The following lists show what settings can be
changed within the various menus. Detailed
instructions on making individual settings can
be found on the following pages.
Instrument cluster submenu
RSelecting speedometer/odometer display
mode (Y page 134) (Canada only)
RSelecting digital speedometer display
mode (Y page 134)
RSelecting language (Y page 134)
RSelecting display (digital speedometer or
outside temperature) for status indicator
(Y page 135)
Time/Date submenu
RSetting the time (Y page 135)
RSetting the date (Y page 135)
Lighting submenu
RSwitching daytime running lamp mode on
or off (USA only) (Y page 136)
RSwitching locator lighting on or off
(Y page 136)
RSetting ambient lighting (Y page 137)
RSwitching night security illumination
(Headlamps delayed shut-off feature) on or
off (Y page 137)
RSwitching interior lighting delayed shut-off
on or off (Y page 138)
Vehicle submenu
RSwitching automatic central locking on or
off (Y page 138)
Comfort submenu
RActivating easy-entry/exit feature
(Y page 139)
RActivating/deactivating seat belt
adjustment feature (Y page 139)
RSwitching fold-in function for exterior rear
view mirrors on or off (Y page 140)
Instrument cluster submenu
Access the Instrument Cluster submenu
via the Settings menu. Use the
Instrument Cluster submenu to change
the instrument cluster display settings.
Control system133Controls in detailX164_AKB; 5; 31, en-USd2ureepe,Version: 2.11.8.12009-09-11T12:30:16+02:00 - Seite 133Z
Page 138 of 380
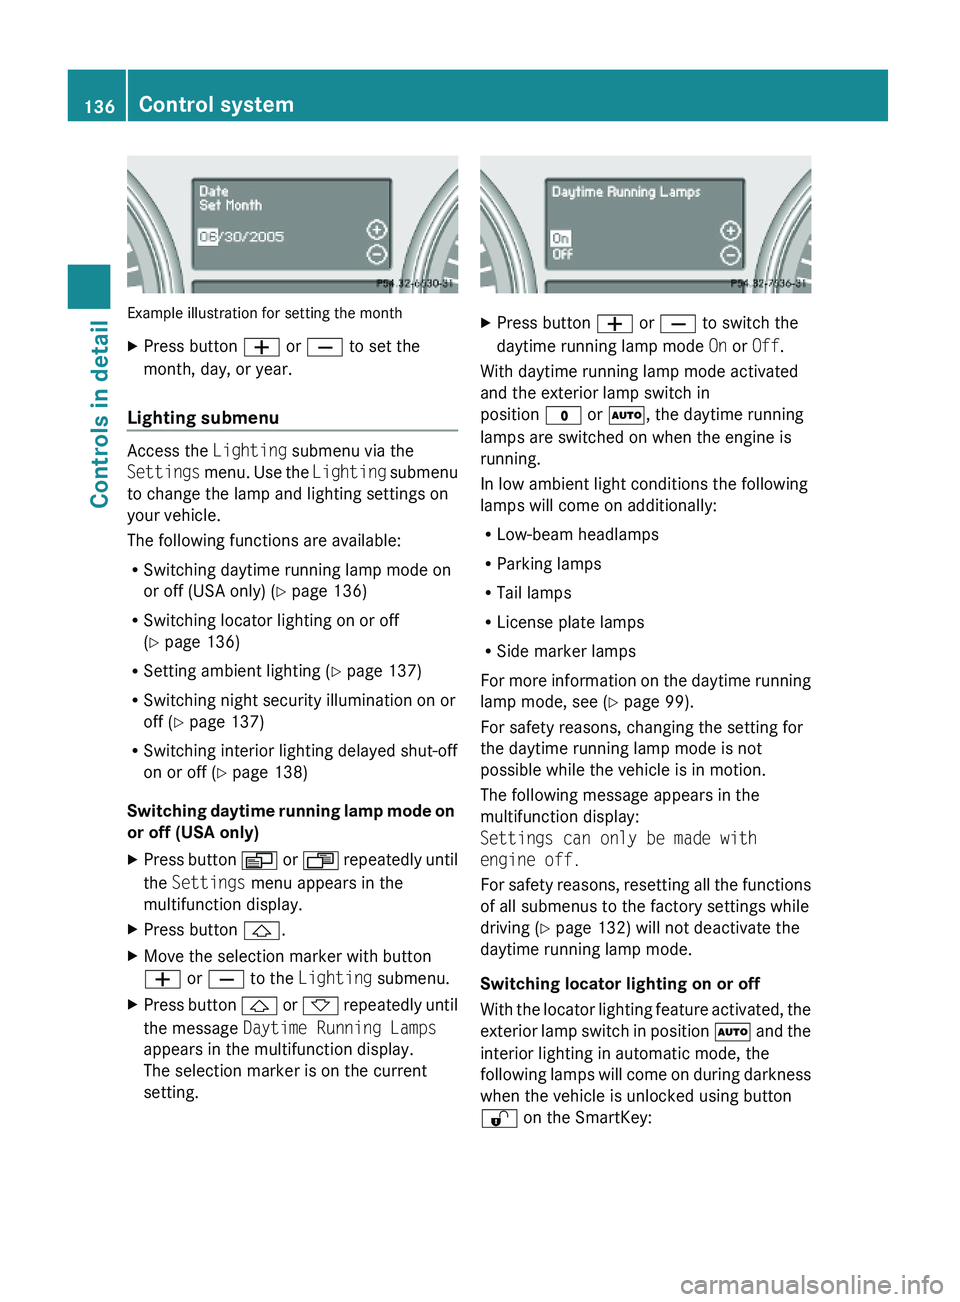
Example illustration for setting the month
XPress button W or X to set the
month, day, or year.
Lighting submenu
Access the Lighting submenu via the
Settings menu. Use the Lighting submenu
to change the lamp and lighting settings on
your vehicle.
The following functions are available:
RSwitching daytime running lamp mode on
or off (USA only) (Y page 136)
RSwitching locator lighting on or off
(Y page 136)
RSetting ambient lighting (Y page 137)
RSwitching night security illumination on or
off (Y page 137)
RSwitching interior lighting delayed shut-off
on or off (Y page 138)
Switching daytime running lamp mode on
or off (USA only)
XPress button V or U repeatedly until
the Settings menu appears in the
multifunction display.
XPress button &.XMove the selection marker with button
W or X to the Lighting submenu.
XPress button & or * repeatedly until
the message Daytime Running Lamps
appears in the multifunction display.
The selection marker is on the current
setting.
XPress button W or X to switch the
daytime running lamp mode On or Off.
With daytime running lamp mode activated
and the exterior lamp switch in
position $ or Ã, the daytime running
lamps are switched on when the engine is
running.
In low ambient light conditions the following
lamps will come on additionally:
RLow-beam headlamps
RParking lamps
RTail lamps
RLicense plate lamps
RSide marker lamps
For more information on the daytime running
lamp mode, see (Y page 99).
For safety reasons, changing the setting for
the daytime running lamp mode is not
possible while the vehicle is in motion.
The following message appears in the
multifunction display:
Settings can only be made with
engine off.
For safety reasons, resetting all the functions
of all submenus to the factory settings while
driving (Y page 132) will not deactivate the
daytime running lamp mode.
Switching locator lighting on or off
With the locator lighting feature activated, the
exterior lamp switch in position à and the
interior lighting in automatic mode, the
following lamps will come on during darkness
when the vehicle is unlocked using button
% on the SmartKey:
136Control systemControls in detail
X164_AKB; 5; 31, en-USd2ureepe,Version: 2.11.8.12009-09-11T12:30:16+02:00 - Seite 136
Page 139 of 380
RParking lamps
RTail lamps
RLicense plate lamps
RSide marker lamps
RFront fog lamps
The locator lighting goes out when the driver’s
door is opened.
If you do not open the driver’s door after
unlocking the vehicle with the SmartKey, the
lamps will go out automatically after
approximately 40 seconds.
XPress button V or U repeatedly until
the Settings menu appears in the
multifunction display.
XPress button &.XMove the selection marker with button
W or X to the Lighting submenu.
XPress button & or * repeatedly until
the message Surround Lighting
Function appears in the multifunction
display.
The selection marker is on the current
setting.
XPress button W or X to switch the
locator lighting function On or Off.
XTurn the exterior lamp switch to position
à when exiting the vehicle.
The locator lighting feature is activated.
Setting ambient lighting
Use this function to adjust the brightness of
the ambient lighting.
XPress button V or U repeatedly until
the Settings menu appears in the
multifunction display.
XPress button &.XMove the selection marker with button
W or X to the Lighting submenu.
XPress button & or * repeatedly until
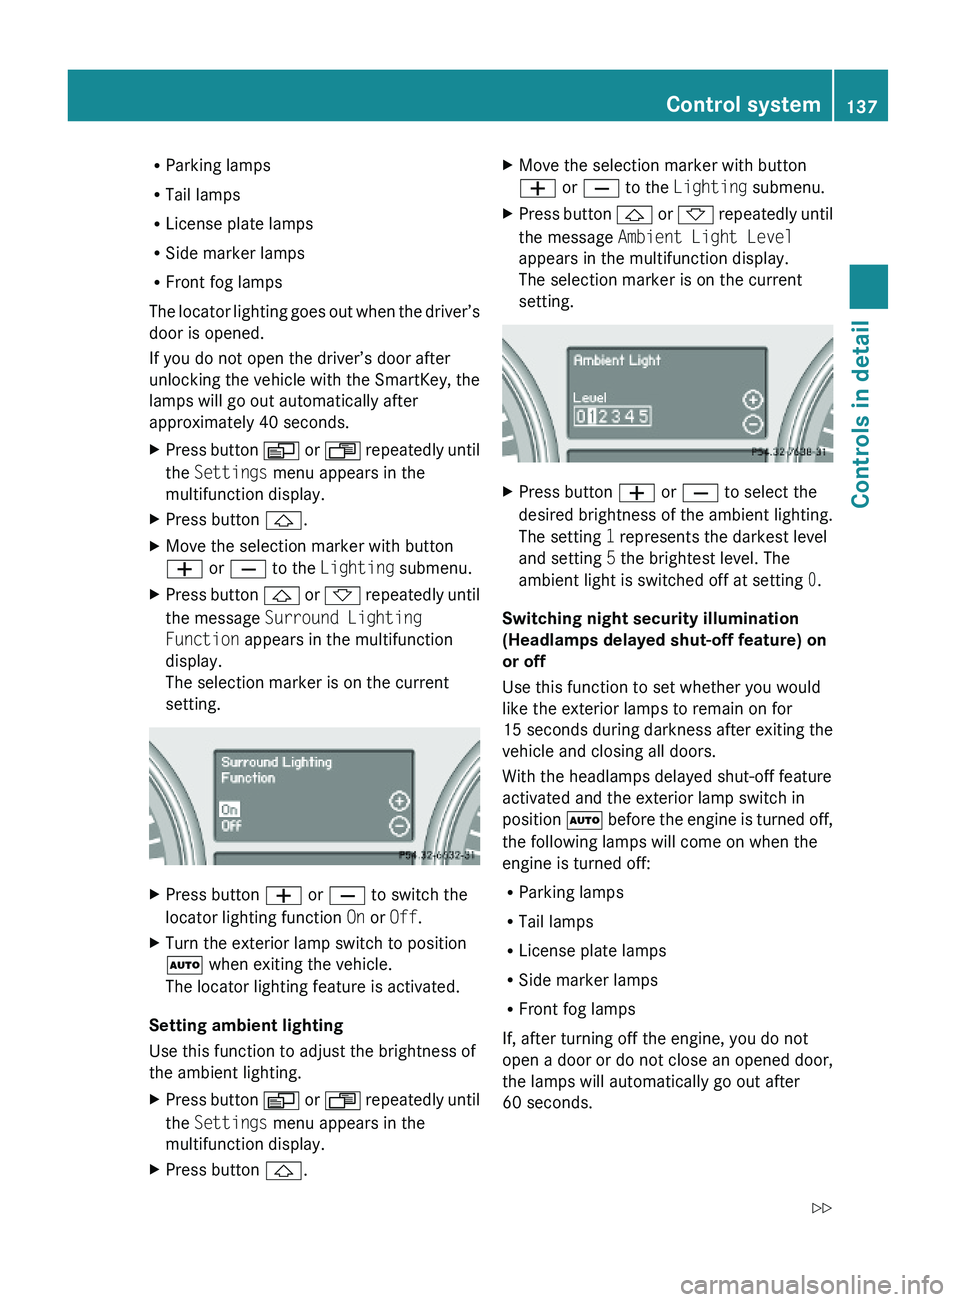
the message Ambient Light Level
appears in the multifunction display.
The selection marker is on the current
setting.
XPress button W or X to select the
desired brightness of the ambient lighting.
The setting 1 represents the darkest level
and setting 5 the brightest level. The
ambient light is switched off at setting 0.
Switching night security illumination
(Headlamps delayed shut-off feature) on
or off
Use this function to set whether you would
like the exterior lamps to remain on for
15 seconds during darkness after exiting the
vehicle and closing all doors.
With the headlamps delayed shut-off feature
activated and the exterior lamp switch in
position à before the engine is turned off,
the following lamps will come on when the
engine is turned off:
RParking lamps
RTail lamps
RLicense plate lamps
RSide marker lamps
RFront fog lamps
If, after turning off the engine, you do not
open a door or do not close an opened door,
the lamps will automatically go out after
60 seconds.
Control system137Controls in detailX164_AKB; 5; 31, en-USd2ureepe,Version: 2.11.8.12009-09-11T12:30:16+02:00 - Seite 137Z